Single Crochet Stitch Tutorial
This post may contain affiliate links. If you make a purchase through links on our site, we may earn a commission.
If you’re new in your crochet journey, one of the most important things to master is how to single crochet (SC). As a crochet designer, I use this versatile stitch in nearly all of my amigurumi patterns because of its tight, clean fabric.
In this updated beginner’s guide, I’ll walk you through exactly how to single crochet with clear step-by-step photos, written instructions, and my brand-new, comprehensive single crochet video tutorial. Whether you’re working in rows or learning to crochet in the round, you’ll find everything you need to start your project with confidence.
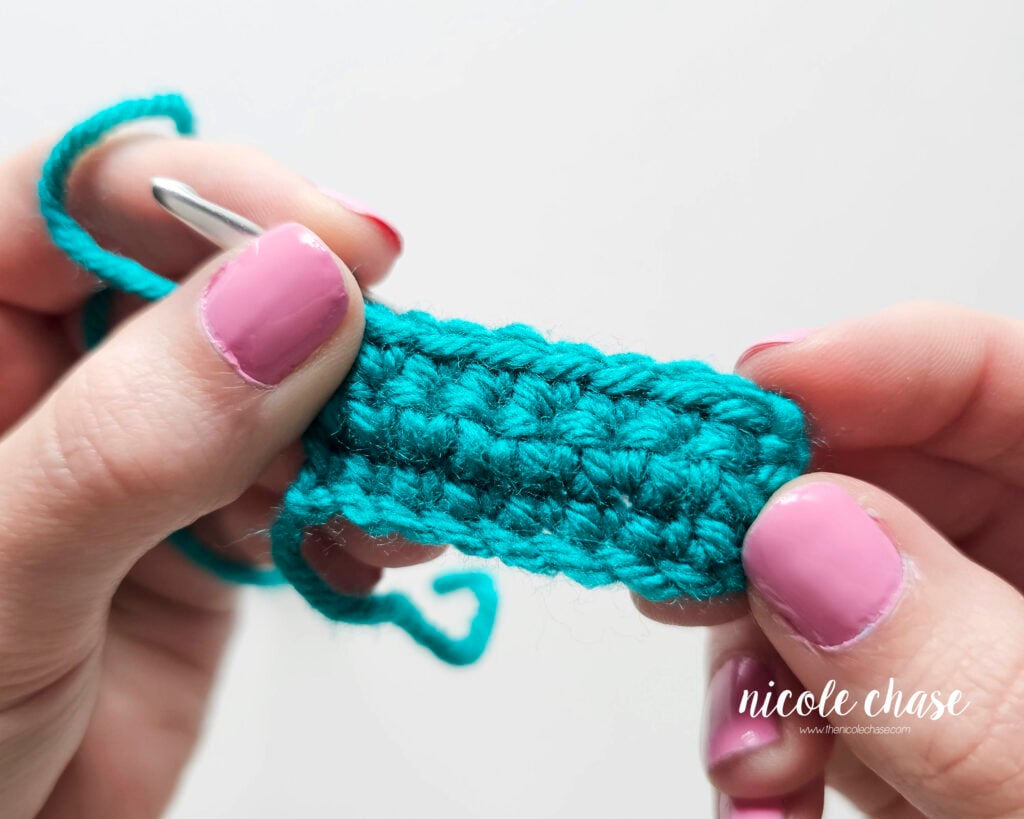
Table of Contents
If you’re just learning how to crochet and are interested in learning how to crochet your own plushies, be sure to check out my completely free course, Amigurumi for Beginners!
About the Single Crochet Stitch
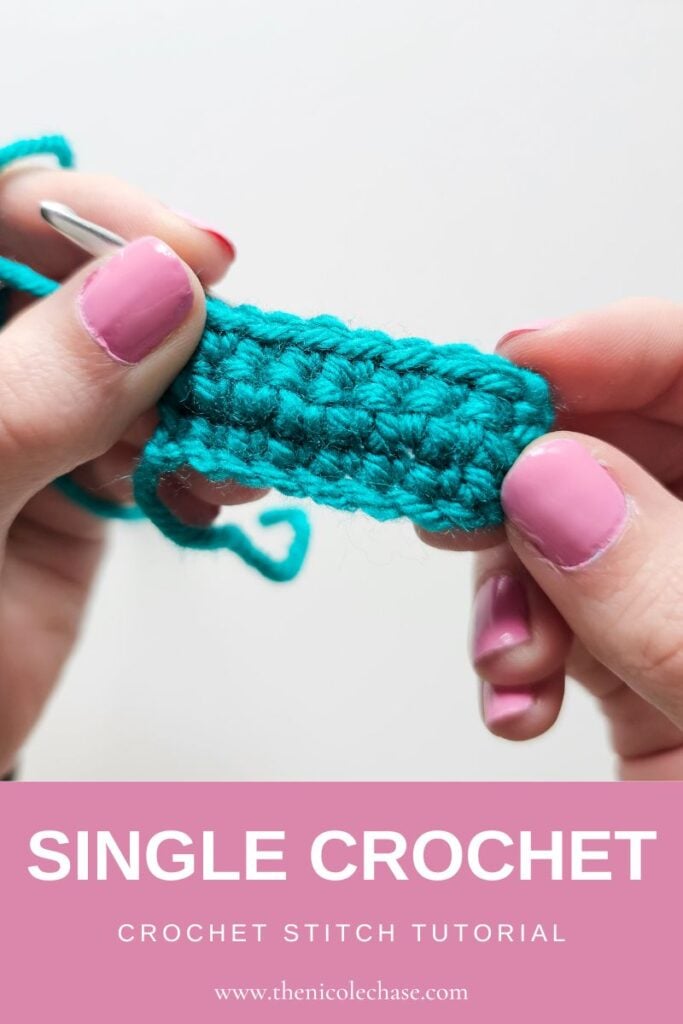
Don’t have time to practice right now? Pin this SC stitch tutorial to your crochet board for later!
What is a Single Crochet Stitch (SC)?
SC or sc is the standard crochet stitch abbreviation for single crochet. It is one of the most fundamental stitches, creating a dense, sturdy fabric with no gaps.
While it’s often one of the first stitches beginners learn, its versatility makes it a staple for experienced makers too. Because the single crochet stitch creates such a solid texture, it is the primary stitch used in amigurumi (crochet toys) to keep the stuffing from poking through; and it’s my personal favorite! Beyond plushies, you’ll see it used for durable garments, warm hats, and decorative borders.
Before You Start
You don’t need any special tools to learn the single crochet. You’ll just need the yarn and hook that you are using for your project.
How to Single Crochet (Step-by-Step)
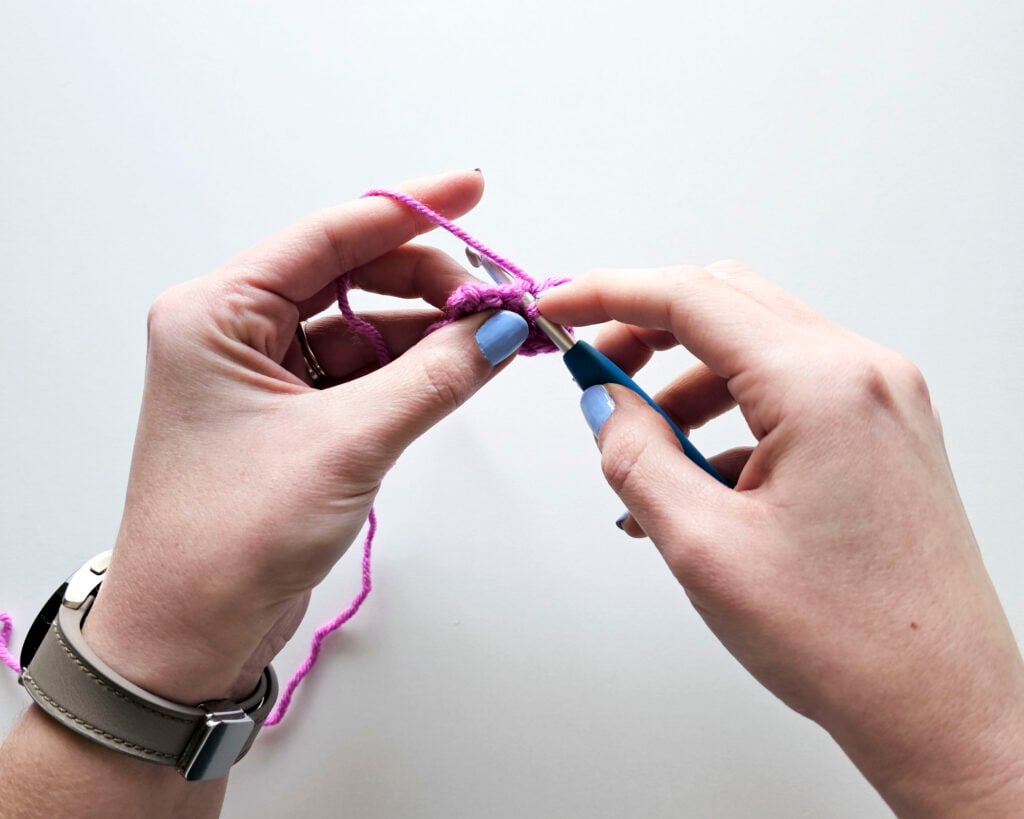
Learning how to do a single crochet stitch is a simple process. In this tutorial I am using worsted weight yarn and a 4.0mm crochet hook.
- First, you will insert your hook into the designated stitch.
- Then you will yarn over and draw up a loop (creating 2 loops on your hook).
- Next you will yarn over again and then pull your yarn through the first two loops on your hook.
This creates the single crochet stitch! You can see this in action in the step-by-step photos and comprehensive video tutorial below.
Expert Tip: Whether you are working in flat rows or a magic ring, the mechanical steps of the single crochet stitch remain the same! Below I’ve broken down how to apply this stitch to the two most common ways to start a project.
Single Crochet in Rows (Starting with a Foundation Chain)
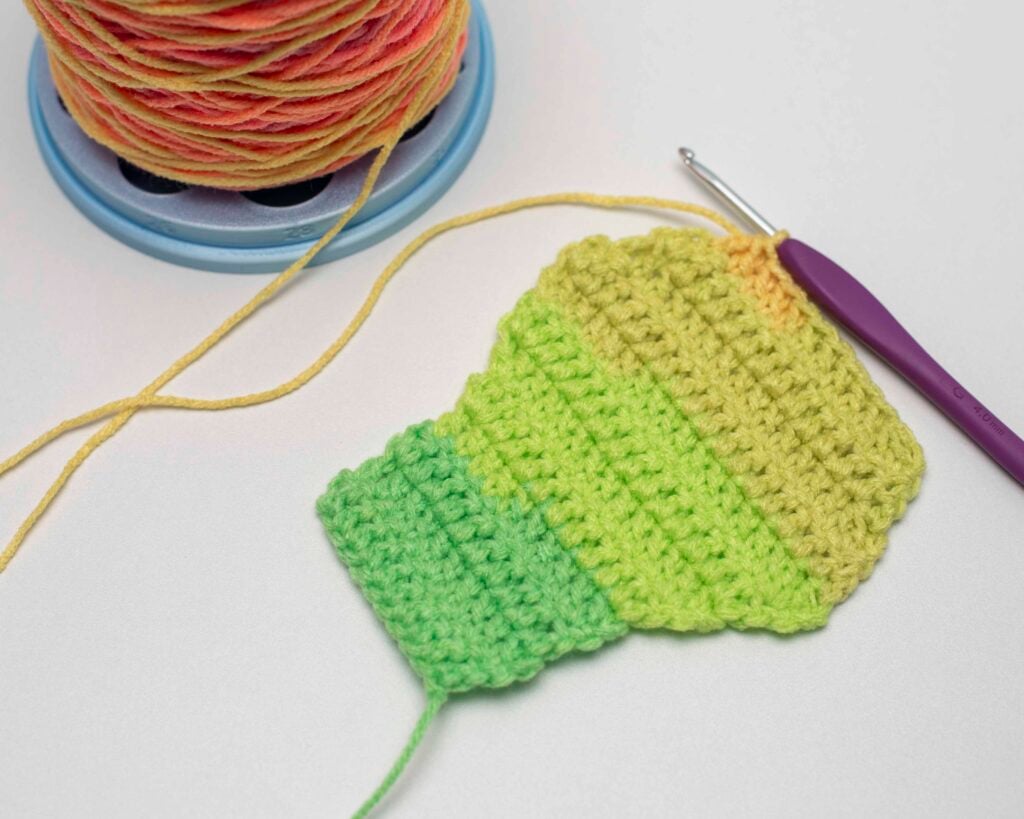
Working in rows is a common way to use the single crochet stitch, and is perfect for creating flat projects like washcloths, scarves, and blankets. If you are following a pattern that says to “work in rows”, it simply means that you will crochet across your chain, turn your work, and crochet back the other way.
Below, I’ll show you how to start your first row using a foundation chain and how to successfully transition to the second row. If you are looking to create a plushie or toy, you may want to skip down to the tutorial on how to single crochet in the round.
Step 1: Your Starting Chain
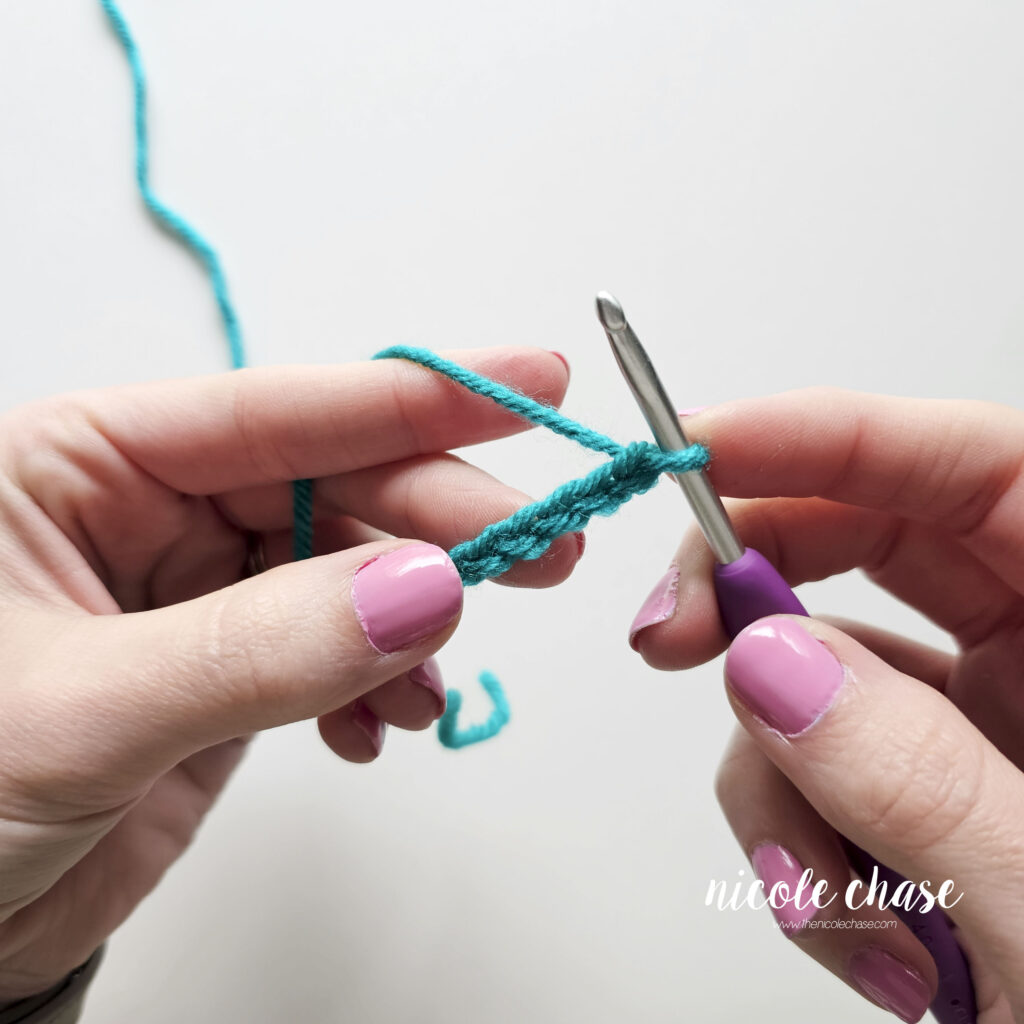
Before you begin, you will need a foundation chain. If you are brand new to crocheting, you can follow my guide on how to make a slip knot and chain, or watch my video below to get started.
Step 2: Completing the Single Crochet Stitch
To begin your first row of single crochet, skip the chain closest to your hook. Then insert your hook into the second chain from your hook.
1. Insert Your Hook: Insert your hook into the designated stitch, which in this case is the second chain from your hook.
Expert Tip: Skipping that first chain from your hook acts as your “turning chain”, which provides the height needed to start the row. When inserting the hook into a chain stitch, I prefer to go through the top loop only. Some people prefer to turn the chain over and insert the hook into the back bump of the chain.
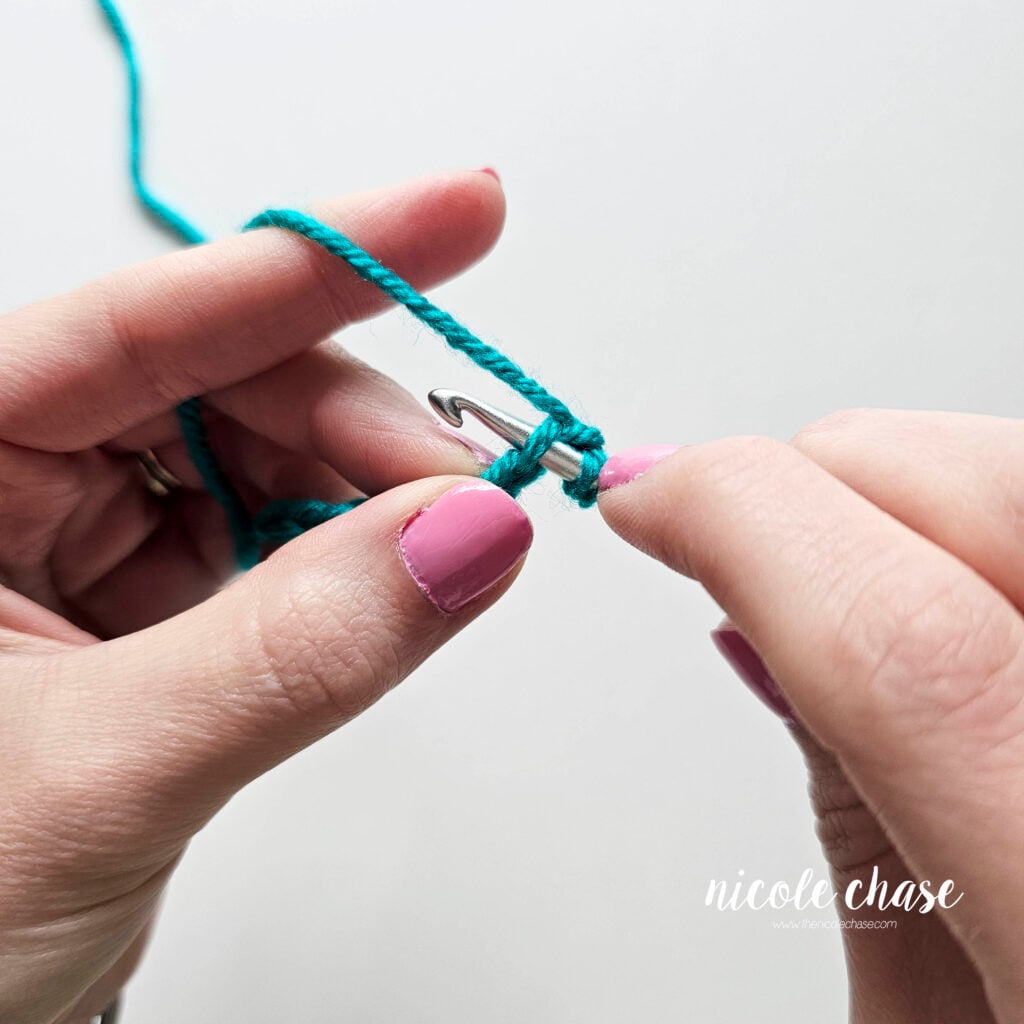
2. Yarn Over (YO): Wrap the yarn over the hook.
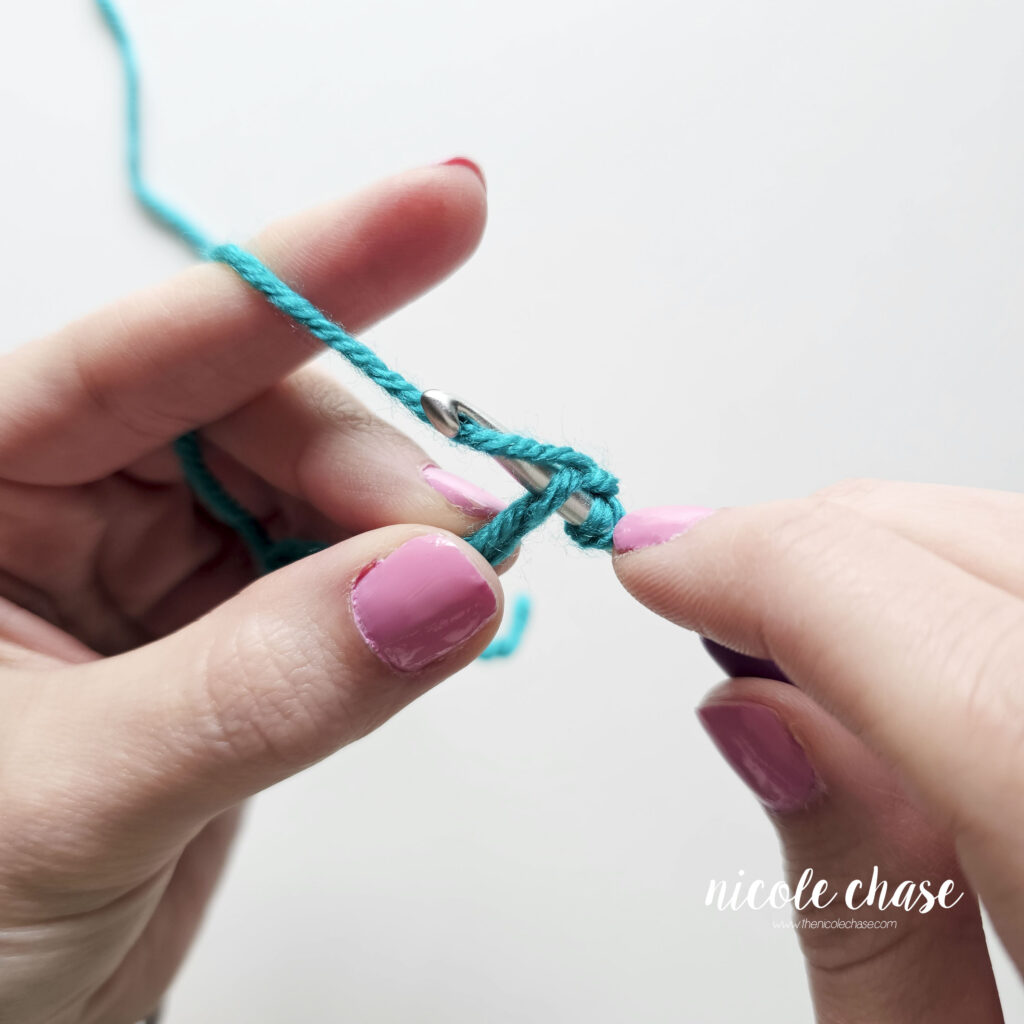
3. Draw up a Loop: Pull the hook through the chain. You should now have two loops on your hook.
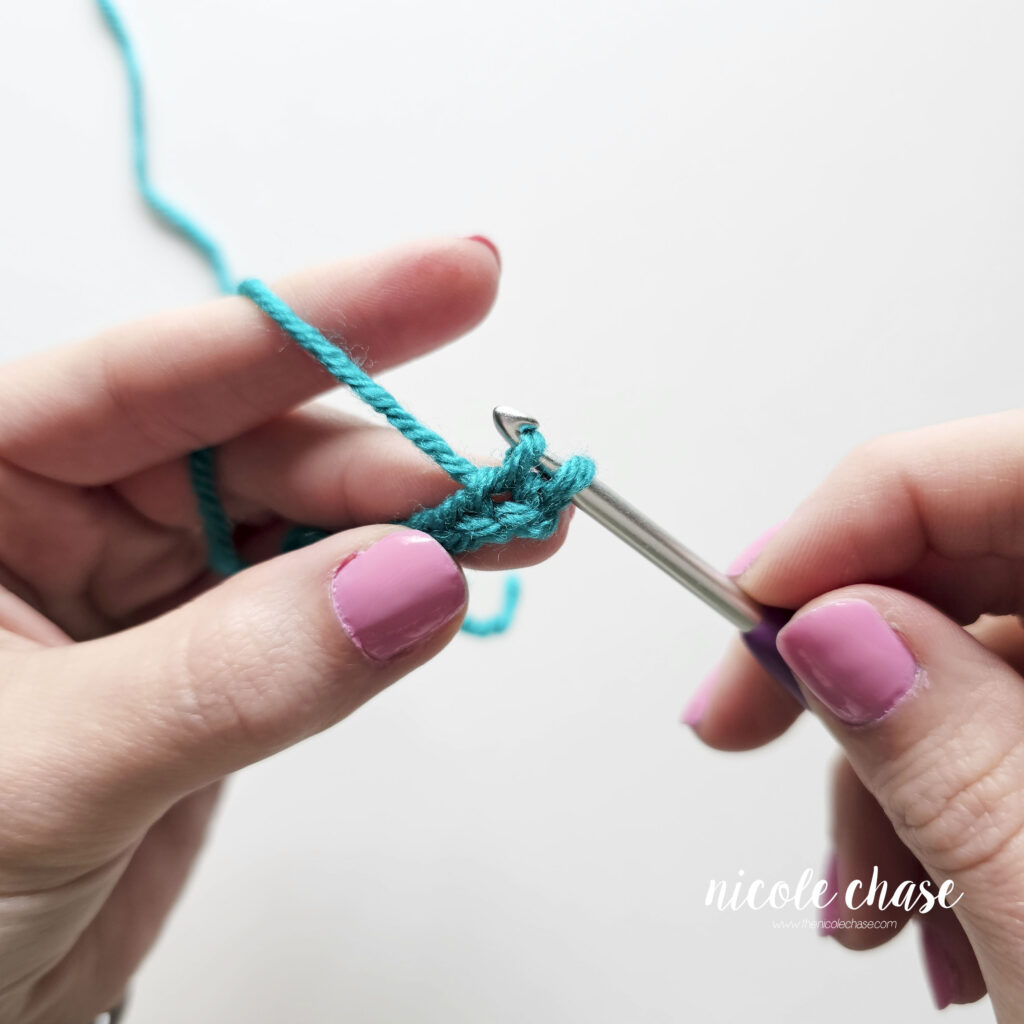
4. Yarn Over Again: Wrap the yarn over your hook once more.
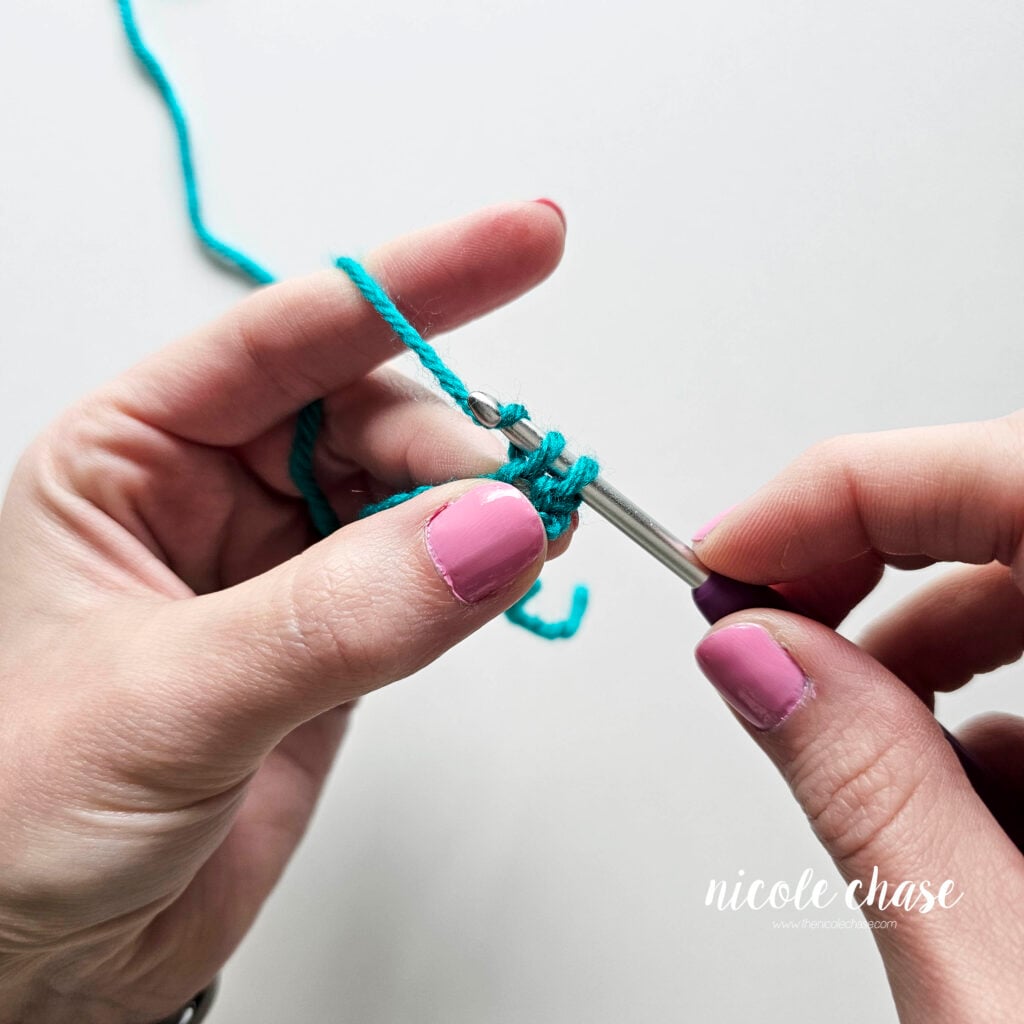
5. Pull Through Both Loops: Pull your hook through both loops on your hook.
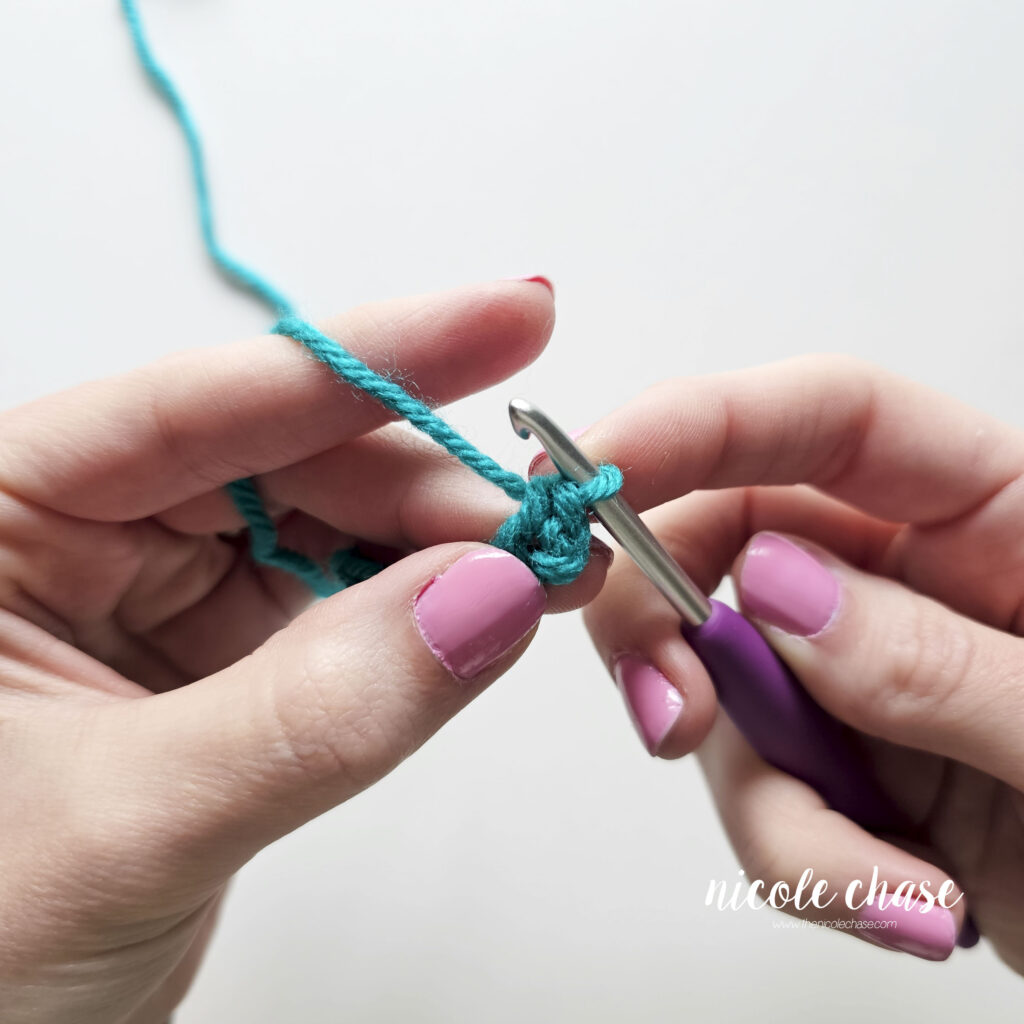
You have successfully completed your first single crochet!
Finishing Row 1
Once you’ve completed your first stitch, you will simply repeat that process in every remaining chain across your foundation.
To finish the row: Insert your hook into the next chain, yarn over, draw up a loop, yarn over, and pull through both loops. Continue this until you reach the very last chain.
Expert Tip: If your first row looks a bit “curly”, don’t worry! This is very common with the single crochet stitch. It usually straightens itself out as you add more rows, or you can block your finished project later to flatten it out.
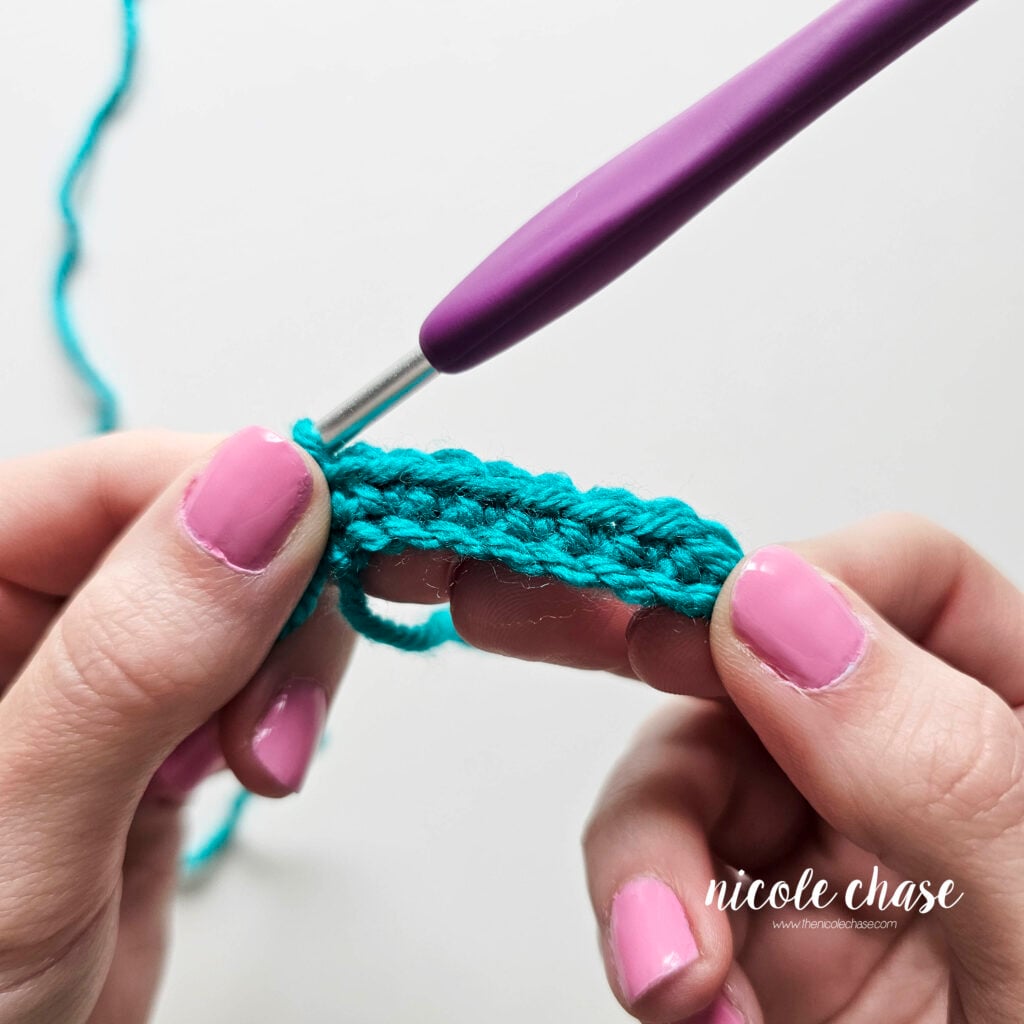
Step 3: Turning Your Work and Starting Row 2
Now that you have a finished row, you need to “turn” your work to begin the next one. This transition is what allows you to build height in your project.
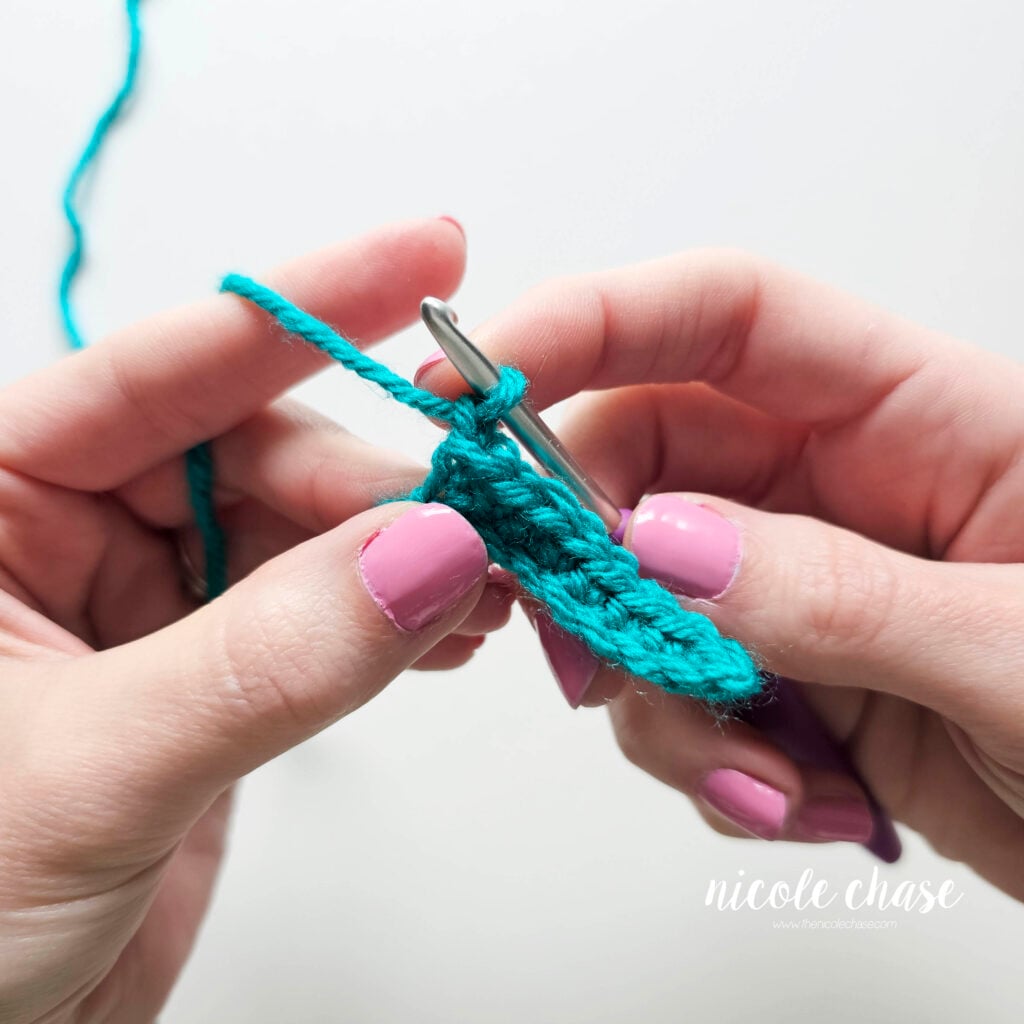
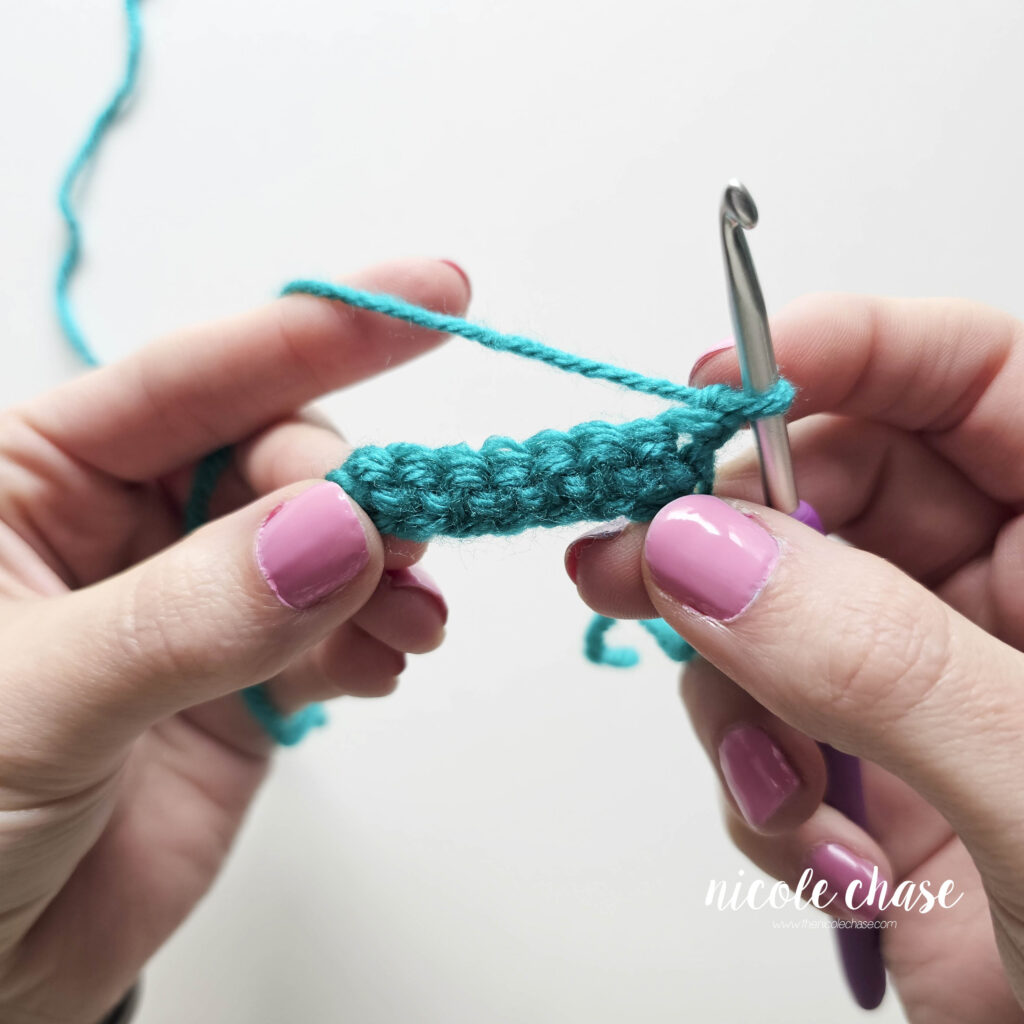
- Chain 1 (ch 1): At the end of your row, yarn over and pull through the loop on your hook to create one chain stitch. This is called a turning chain.
- Turn Your Work: Flip your piece over so that the hook is once again on the right-hand side.
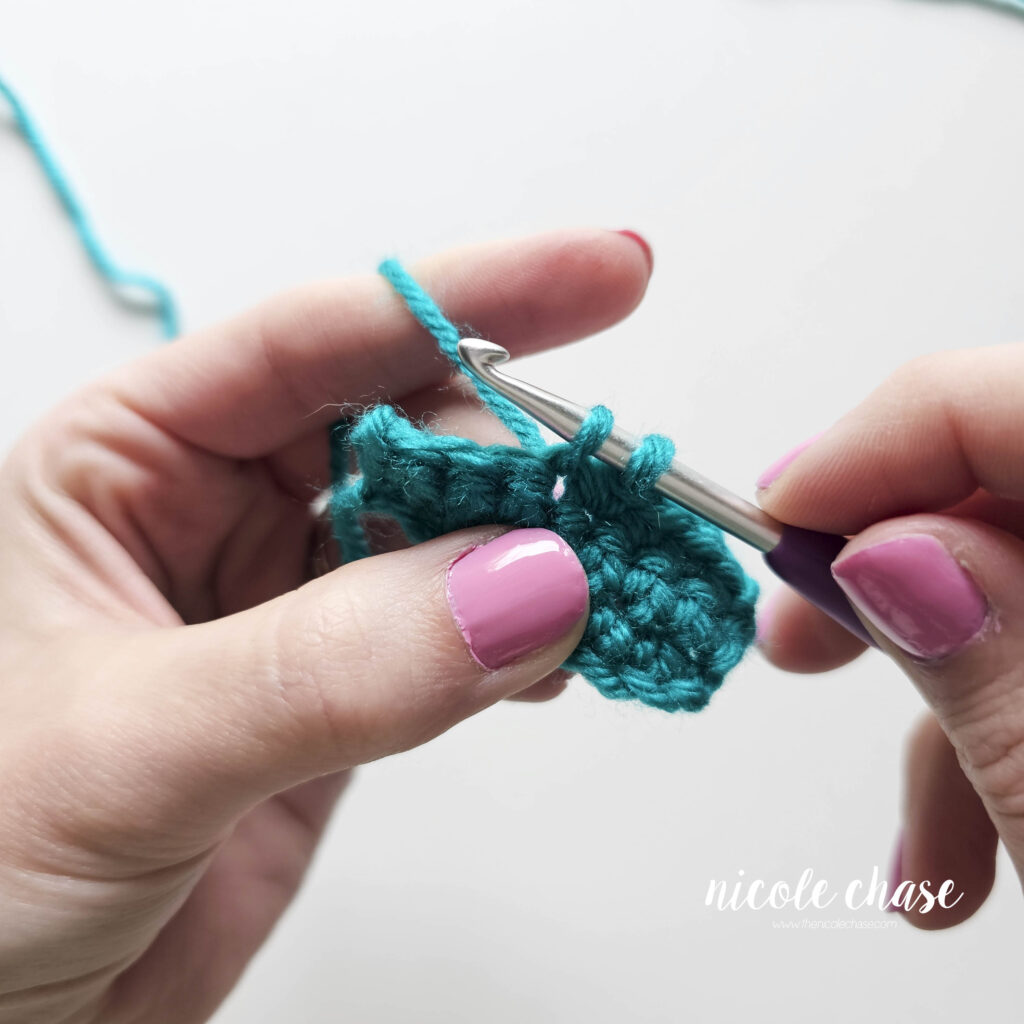
- Start the Next Row: Insert your hook into the very last single crochet stitch you made in the previous row.
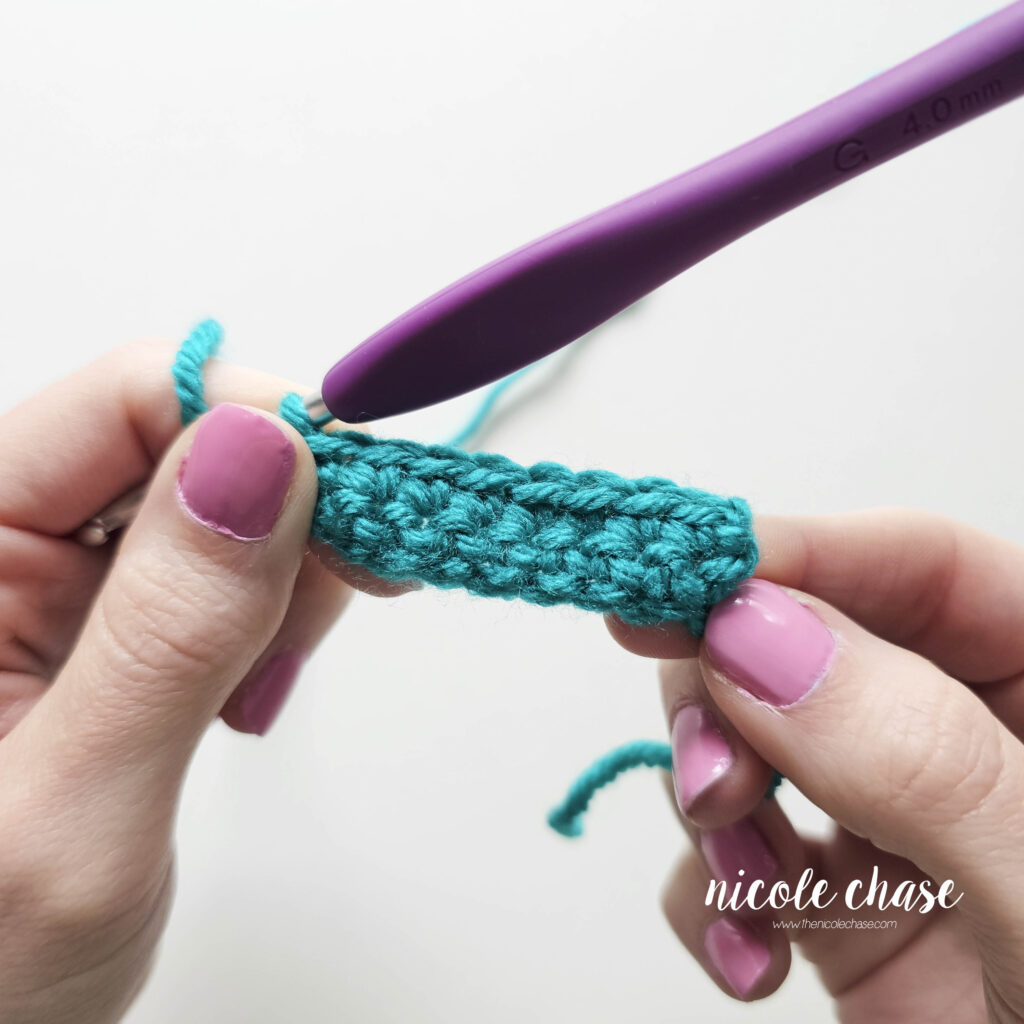
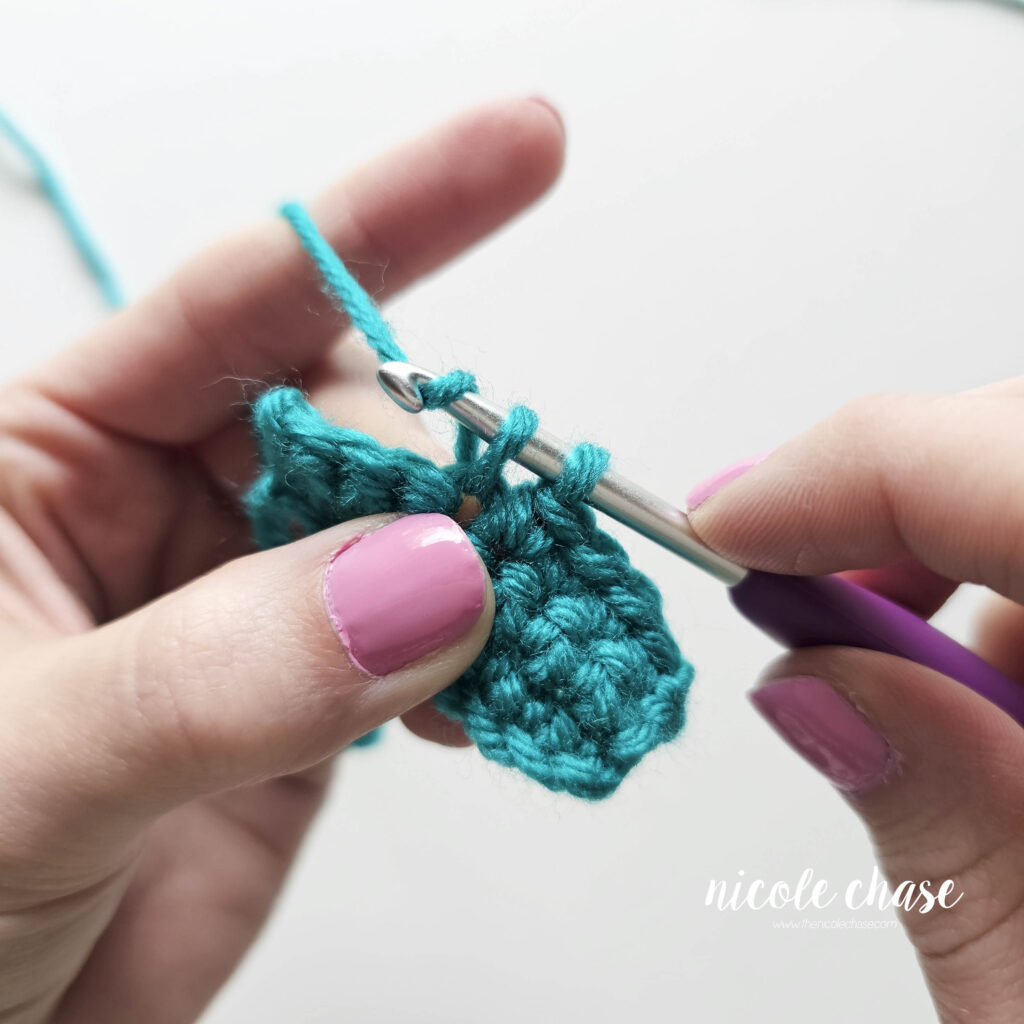
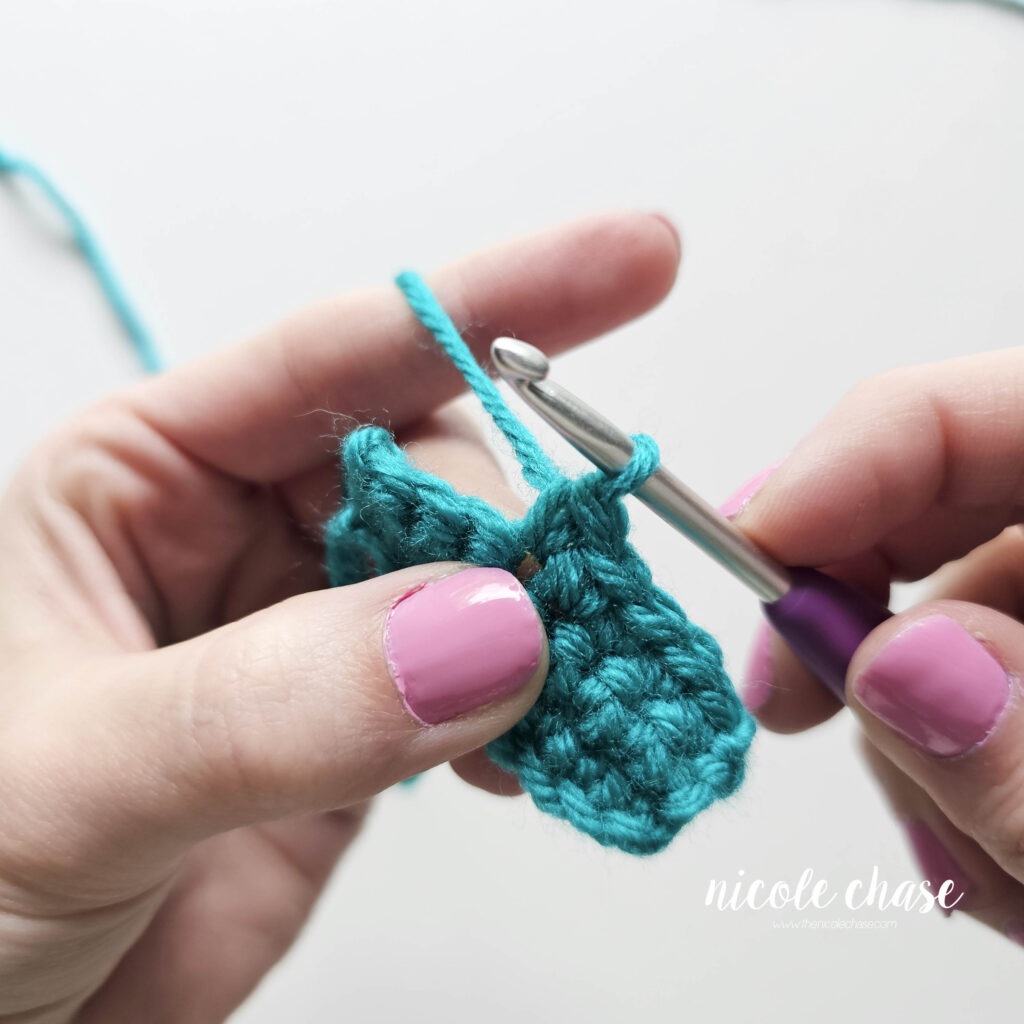
- Continue Across: Unlike the foundation chain, you will now be inserting your hook under the two top loops of the stitch below. Work one single crochet into each stitch across the row.
Where to Insert Your Hook for Single Crochet
Once you move past the chain, you will be working your single crochet (SC) into the stitches of the previous row. It is important to insert your hook correctly.
The “V” Shape:
Look at the top of your row. Each stitch looks like a small “V”. You should insert your hook under both loops of that “V” (the front loop and the back loop).
Note: If you only go through the front loop or the back loop, it will change the loop and texture of your project and make it more stretchy. For a standard single crochet, always go under both!
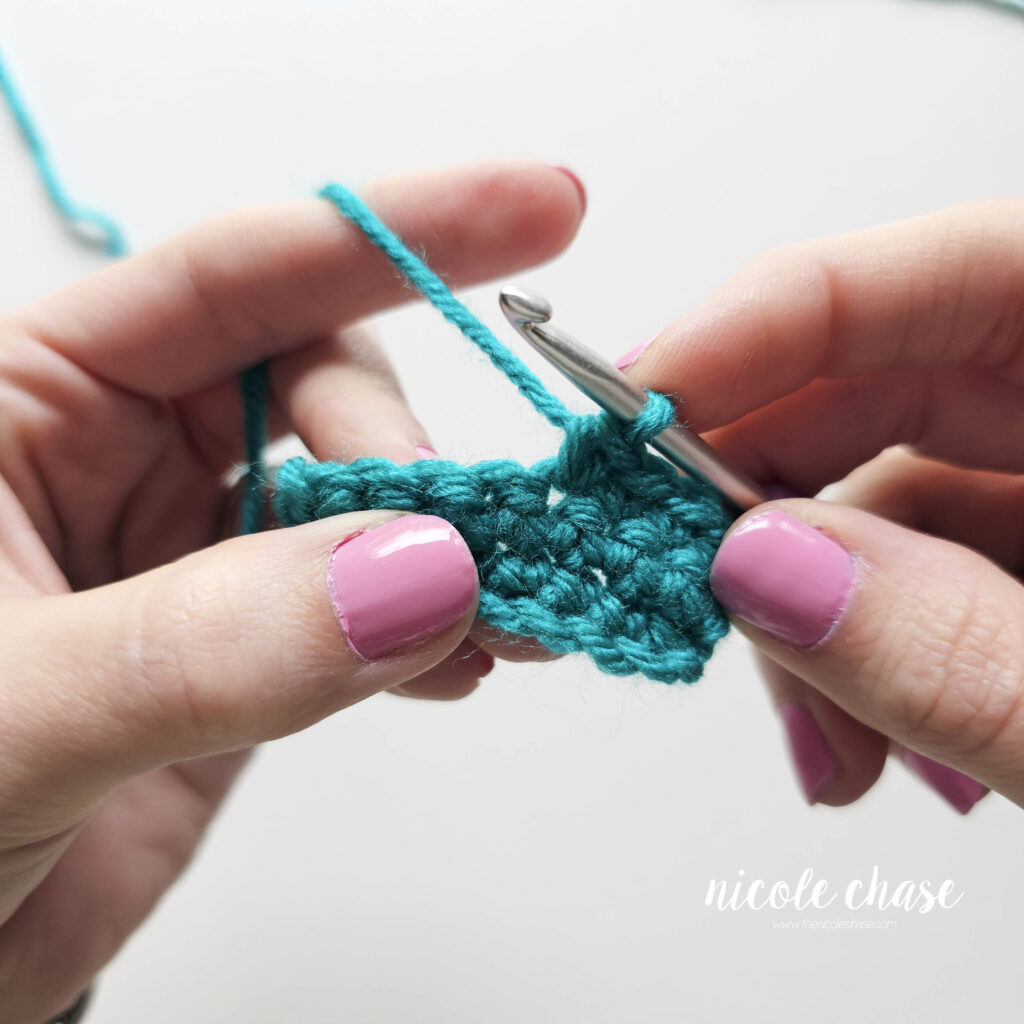
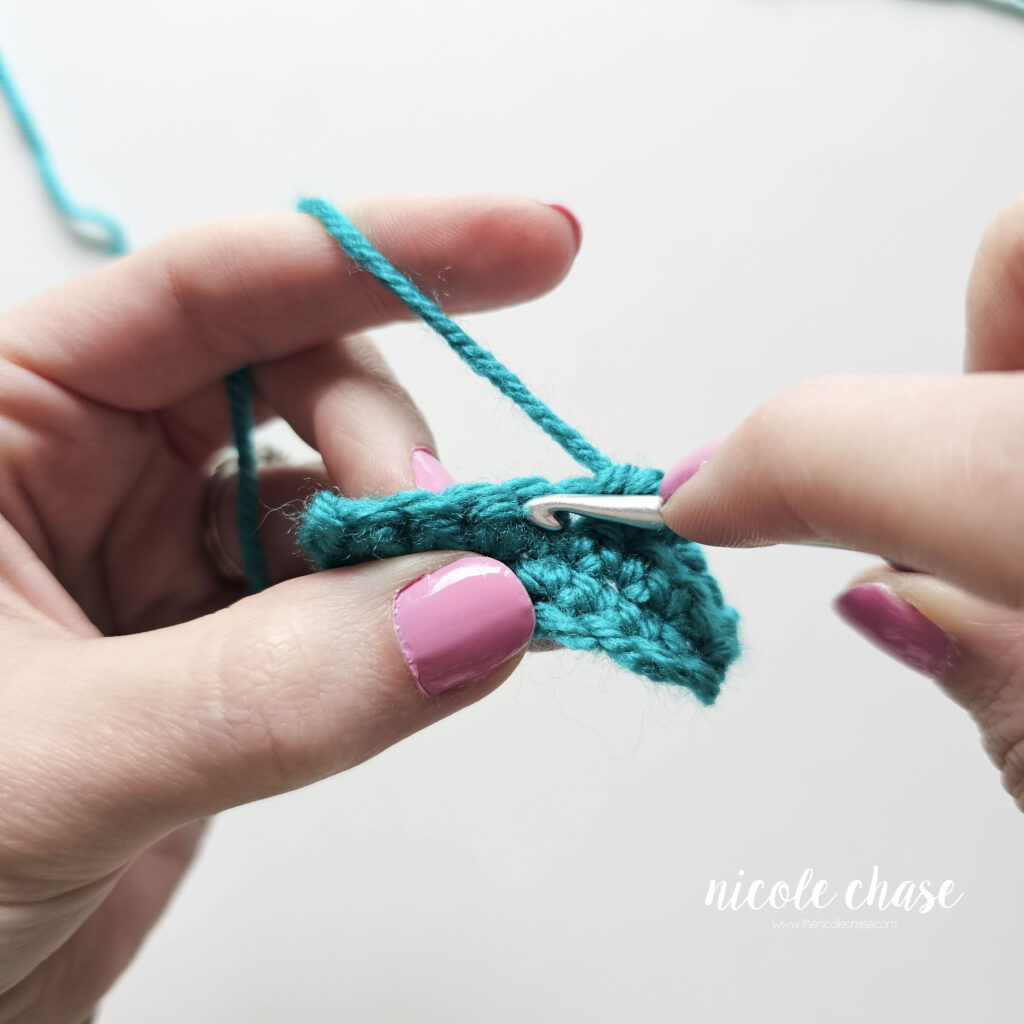
As you continue your project, you will work each new single crochet (SC) into the stitches of the row below it. The mechanical steps remain exactly the same.
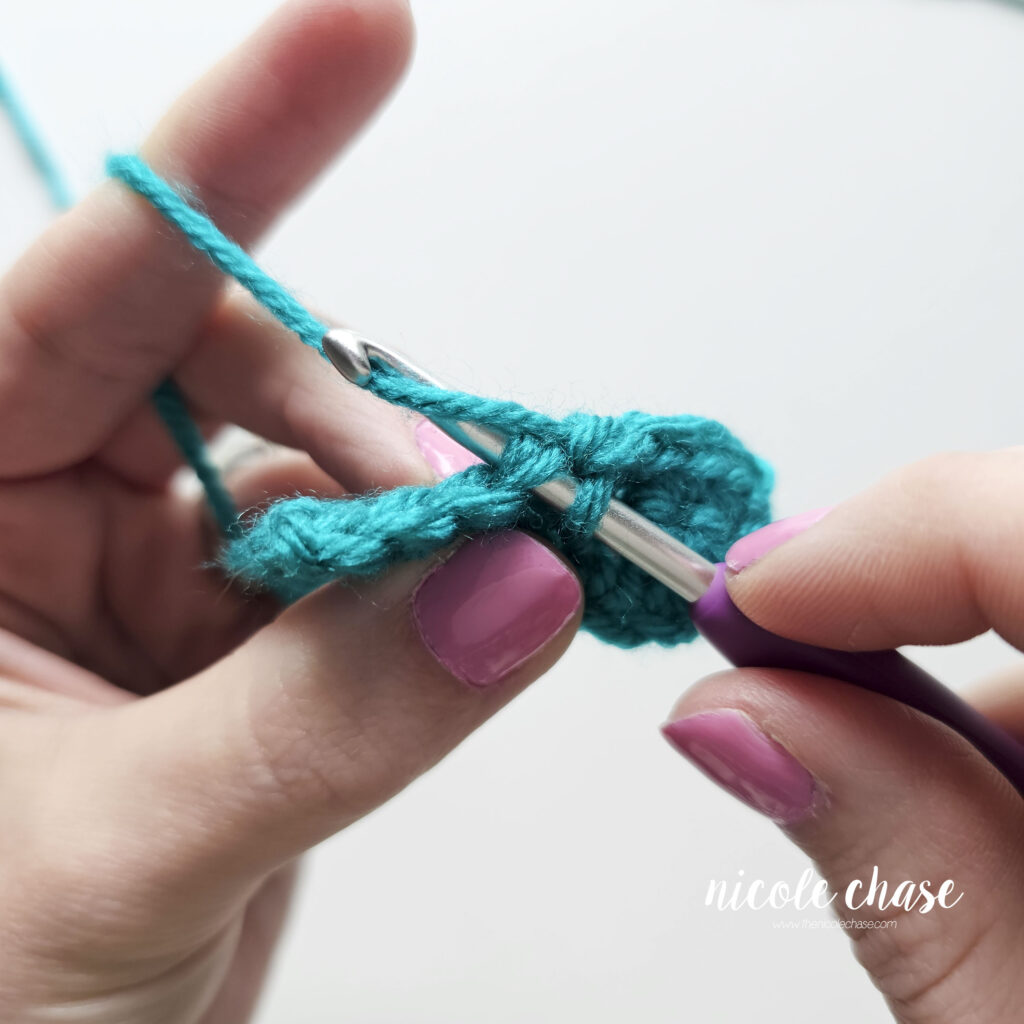
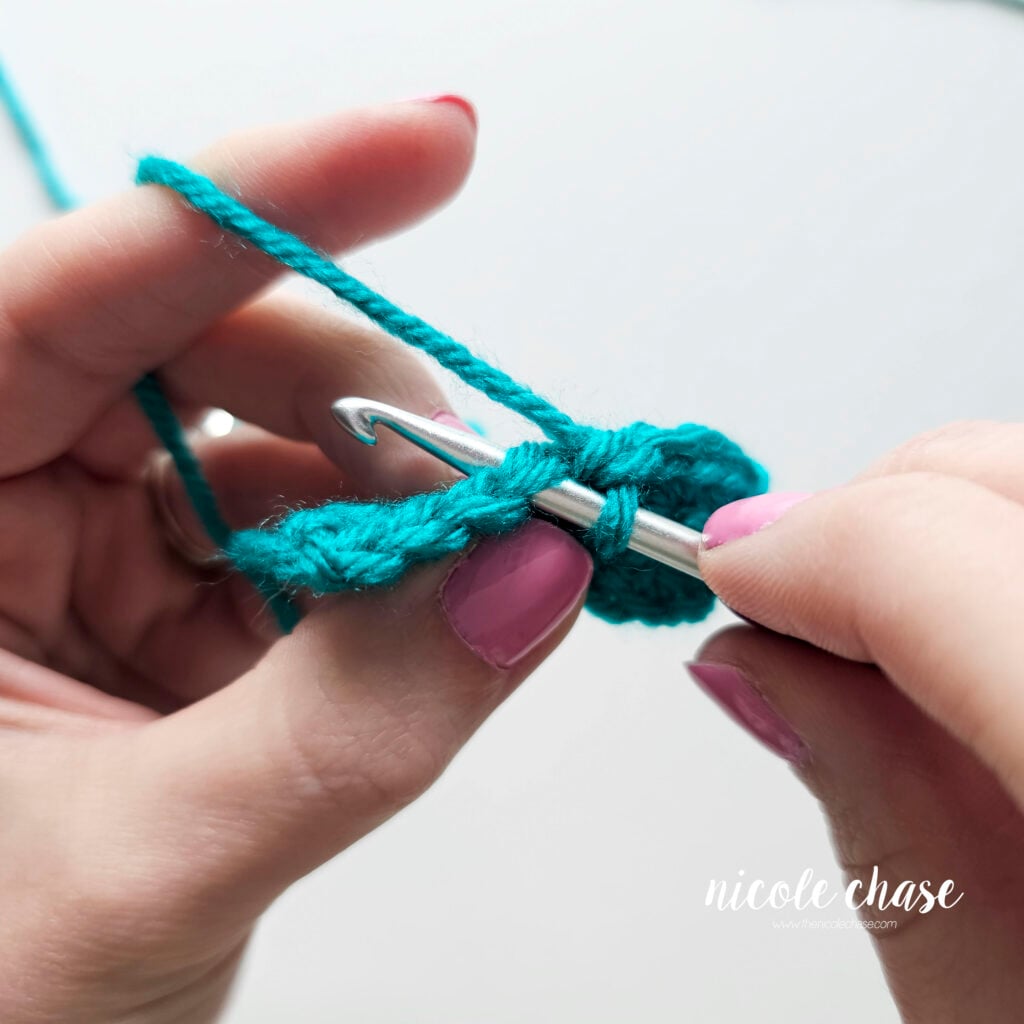
Once you’ve mastered working in rows, you’ve unlocked the ability to make a huge variety of projects. If you’re ready to take your skills further and start making 3D shapes or plushies, let’s look at how to use this same stitch in a circle.
Single Crochet in the Round (Starting with a Magic Ring)
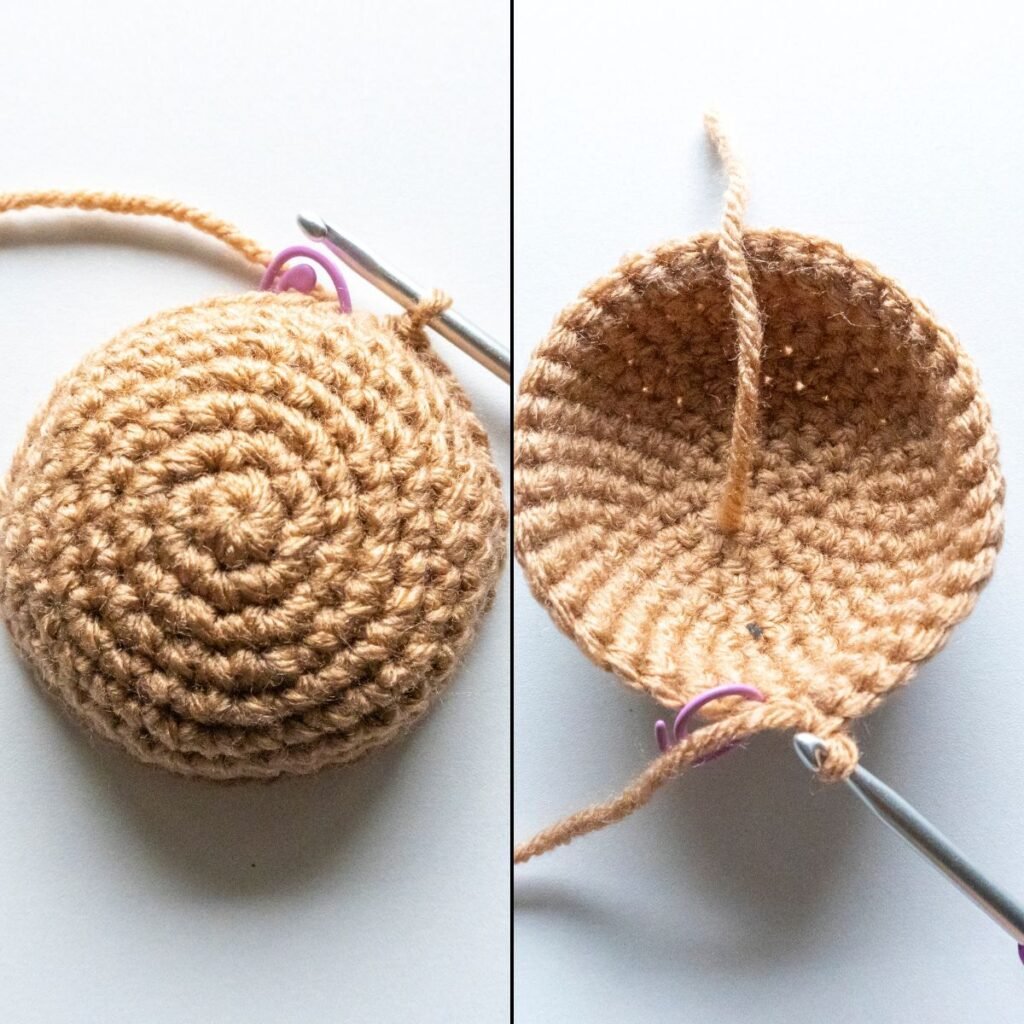
Working in the round allows you to create circular and 3D shapes. There are two primary ways to do this: continuous rounds (working in a spiral) and joined rounds (slip stitching to the first stitch to close the circle).
While my guide on how to crochet in the round covers those methods in detail, almost all circular projects, especially amigurumi patterns, begin with a magic ring. Here is how you work your single crochet stitches into that ring.
Step 1: The Magic Ring
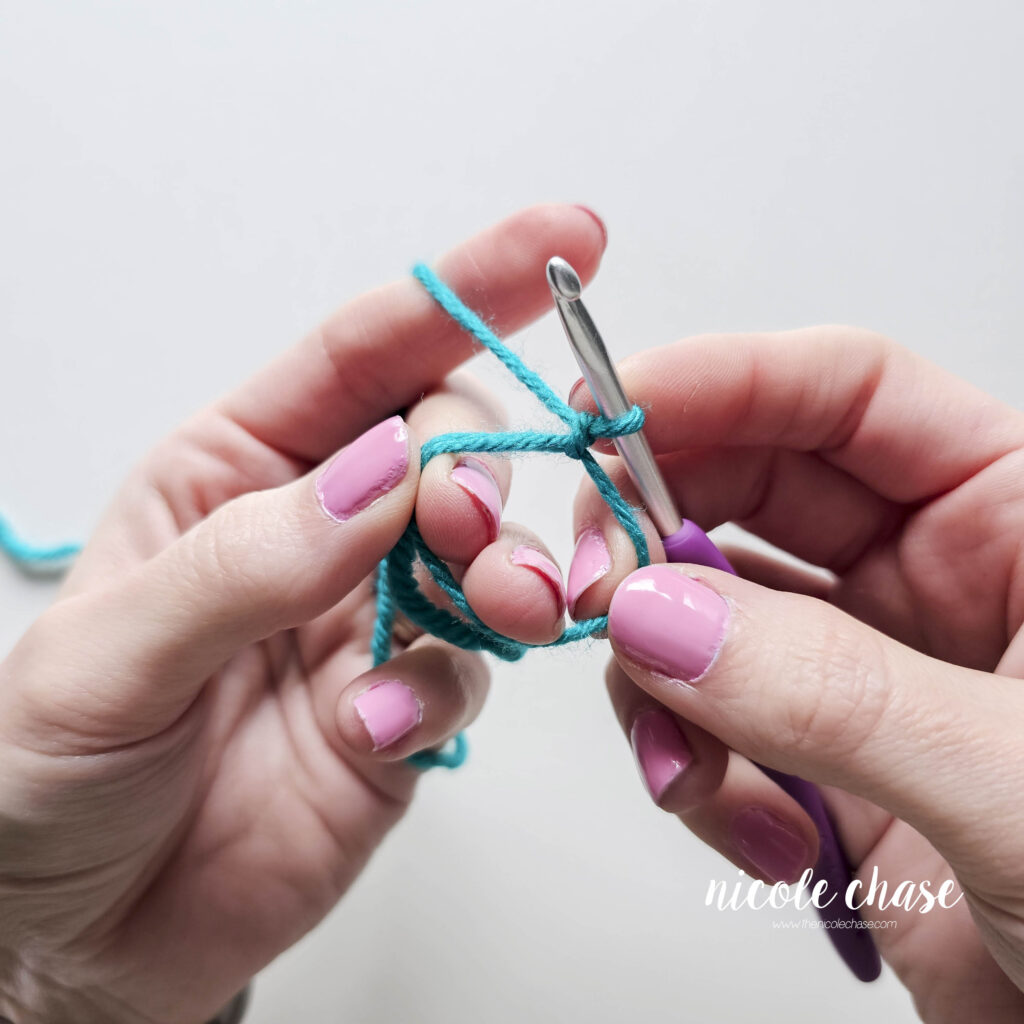
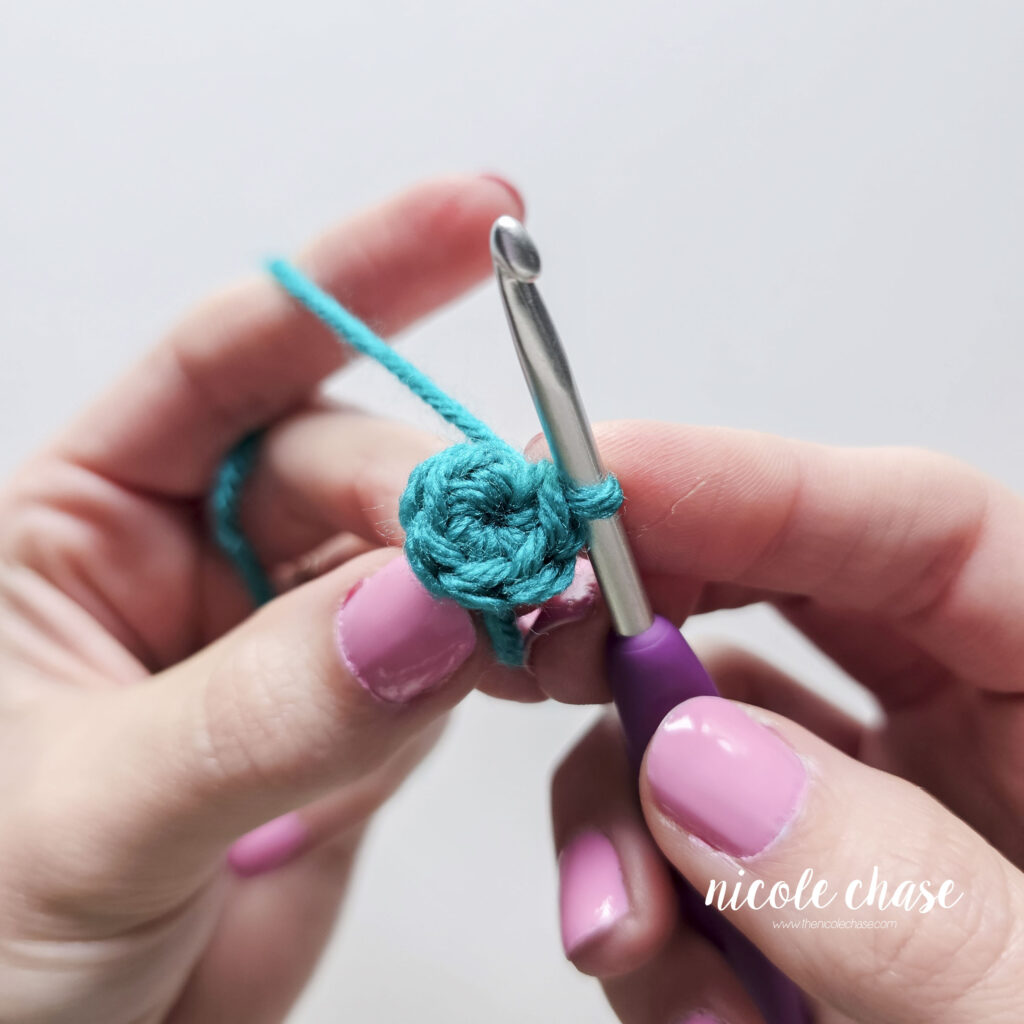
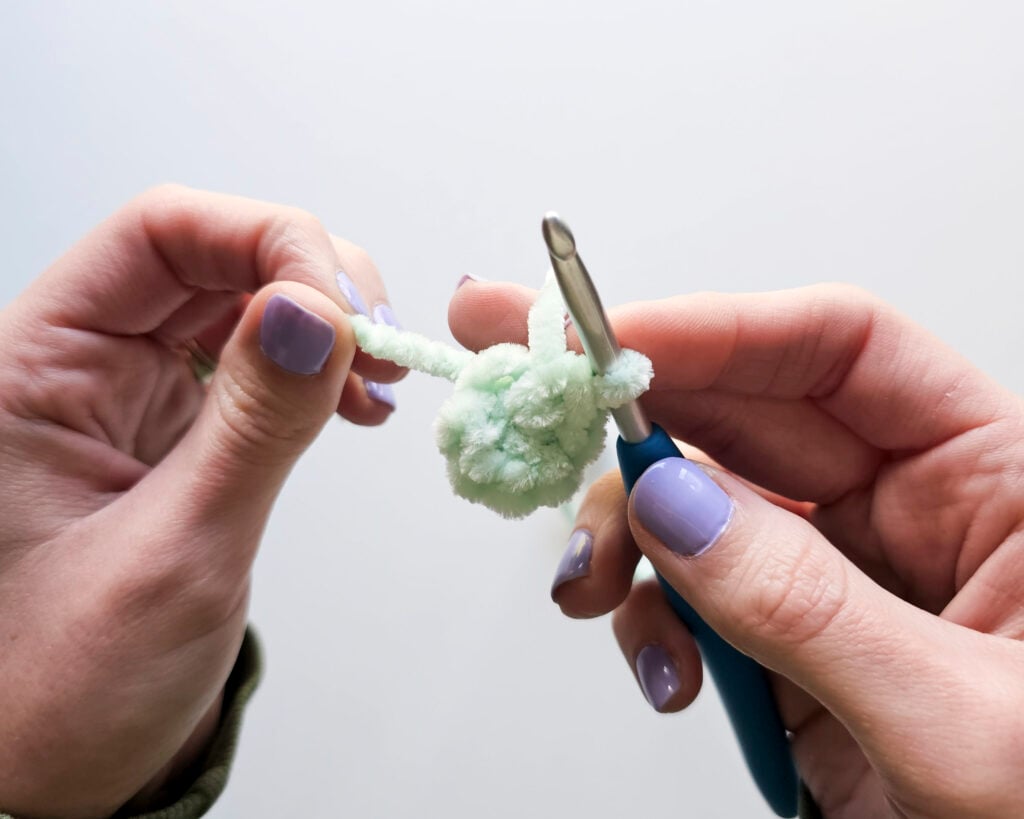
To begin crocheting in the round, you will start with a magic ring (also called a magic circle) instead of a chain. If you’ve never made one before, I have a detailed magic ring photo and video tutorial to help you master this step, or check out the video below.
Once your ring is formed, you will work your single crochet (SC) stitches directly into the center of the circle, crocheting over both the ring loop and the yarn tail.
Expert Tip: Working over that yarn tail is what allows you to pull the ring tight later! If you miss the tail, the circle won’t close properly, which is a common mistake for beginners.
Step 2: Working the Single Crochet Stitch into the Ring
Once your magic ring is ready, follow these steps to finish the stitch. The mechanics of the stitch are exactly the same as when you worked in rows. Your first round of single crochet stitches will be worked inside the center of the magic ring.
- Insert Your Hook: Insert your hook into the middle of the magic ring.
- Yarn Over (YO): Wrap the yarn over the hook.
- Draw up a Loop: Pull the hook through the chain. You should now have two loops on your hook.
- Yarn Over Again: Wrap the yarn over your hook once more.
- Pull Through Both Loops: Pull your hook through both loops on your hook.
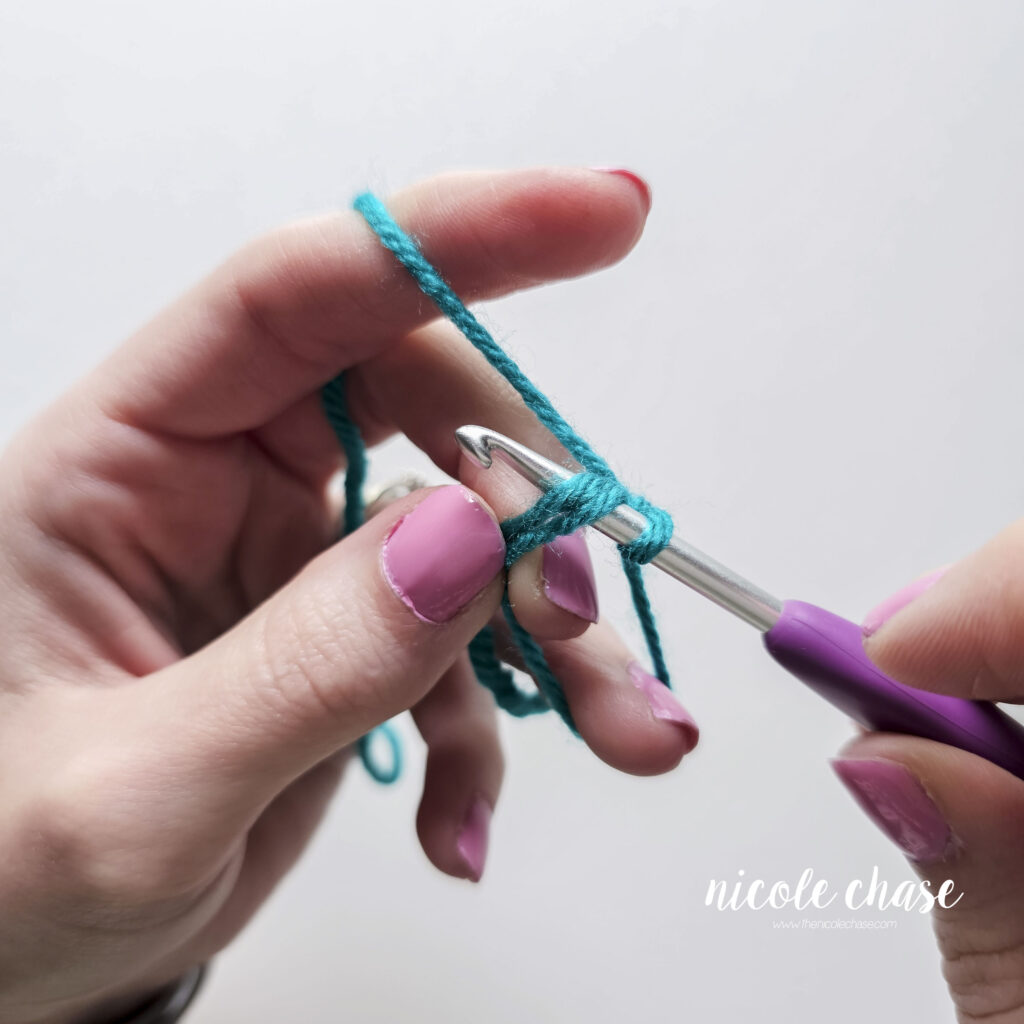
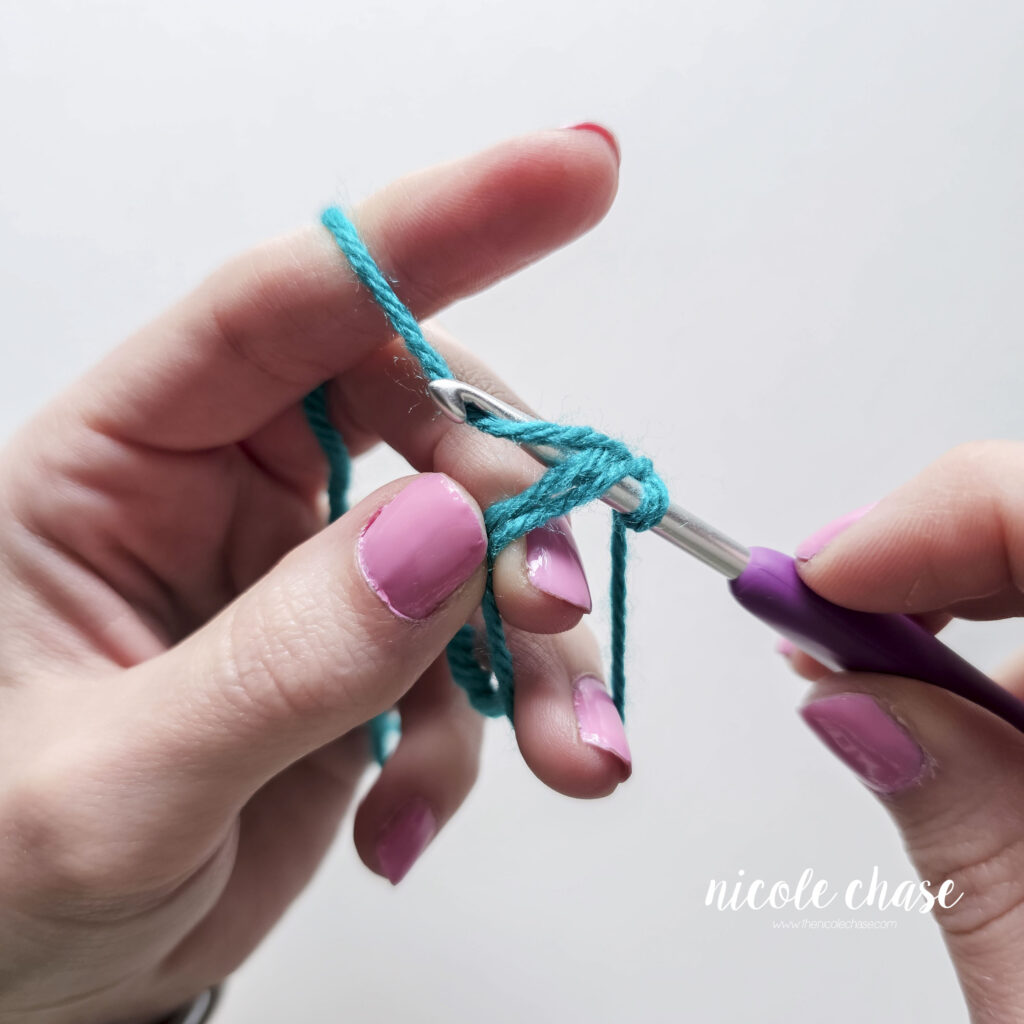
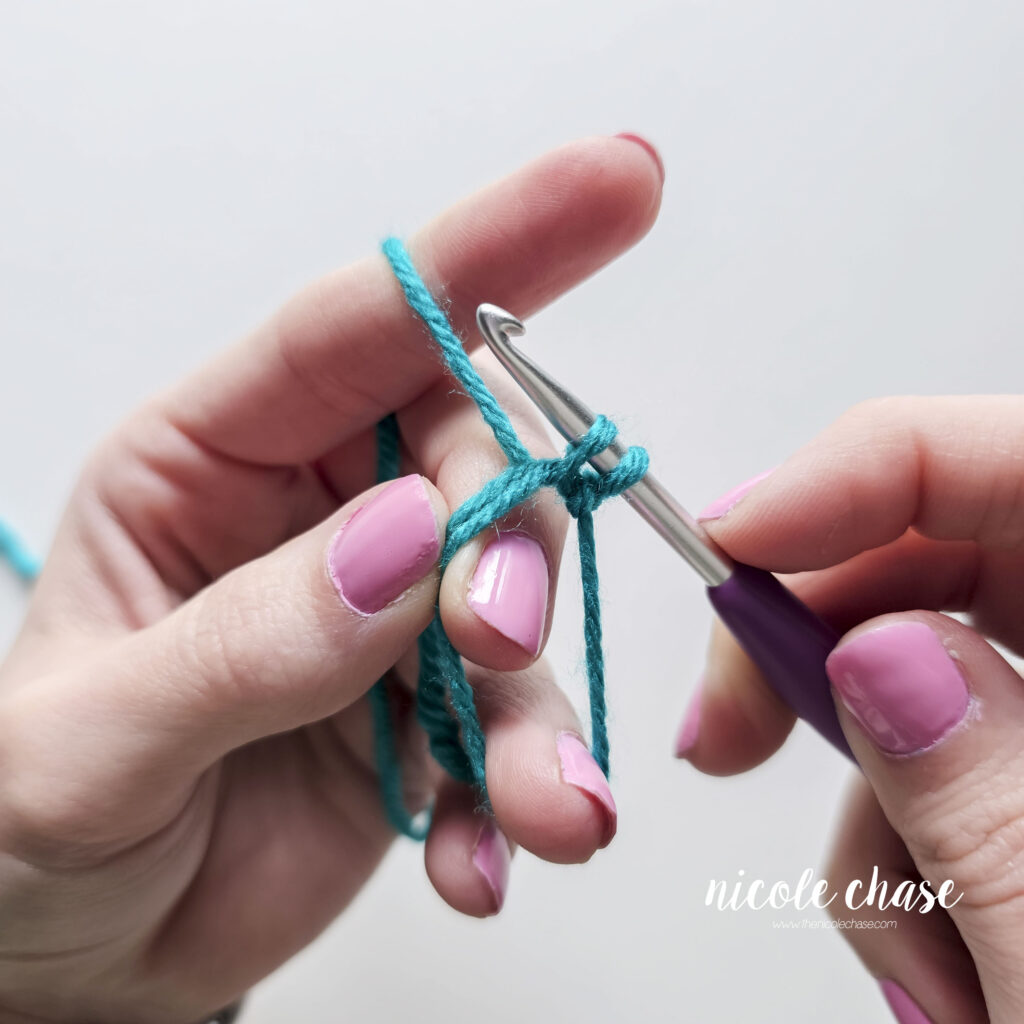
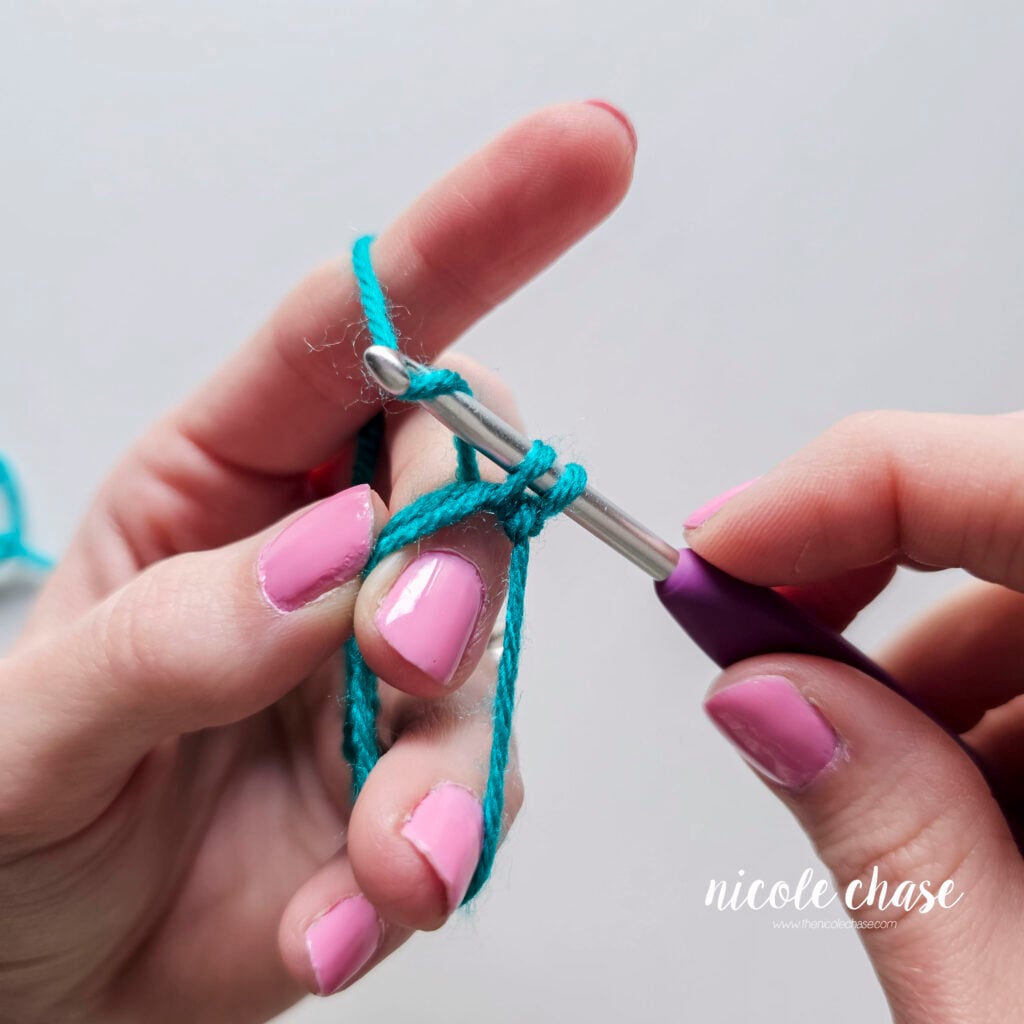
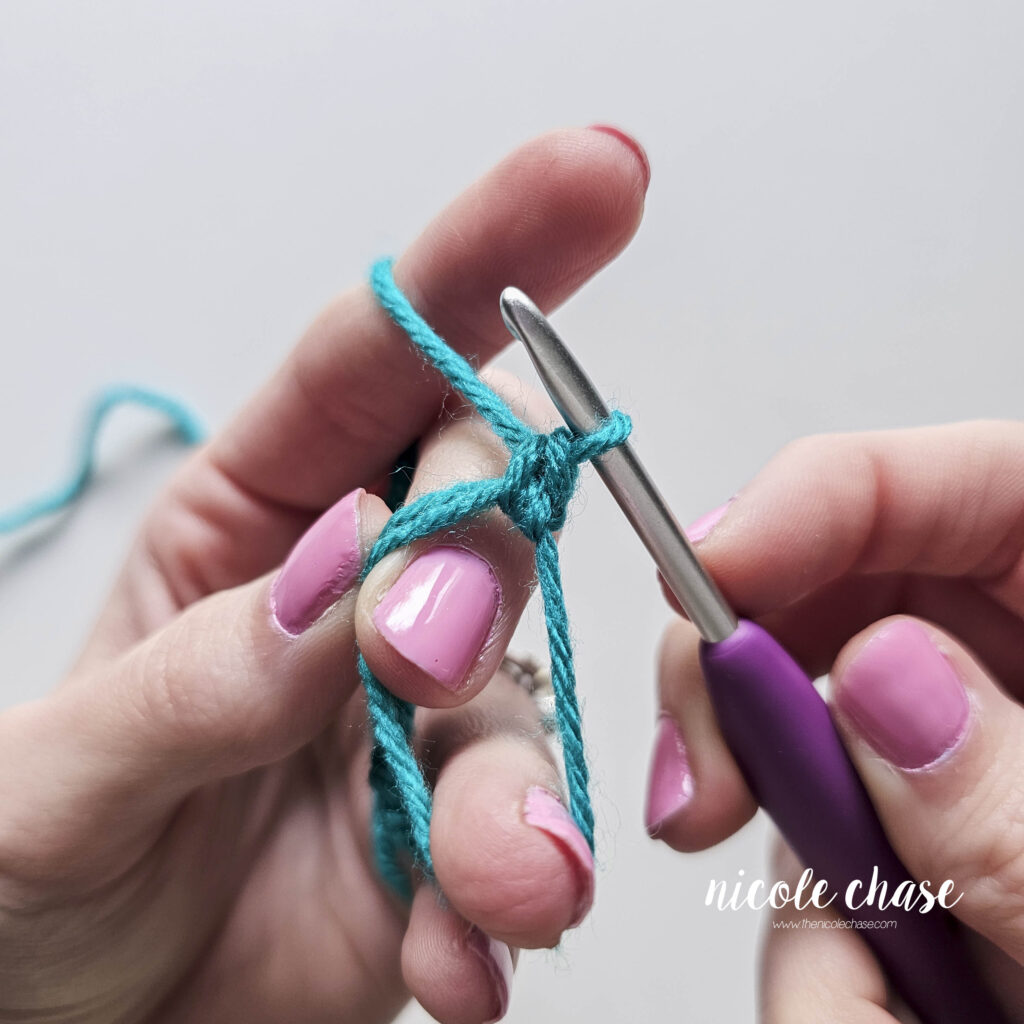
You have successfully worked your first single crochet in a magic ring!
Finishing Round 1
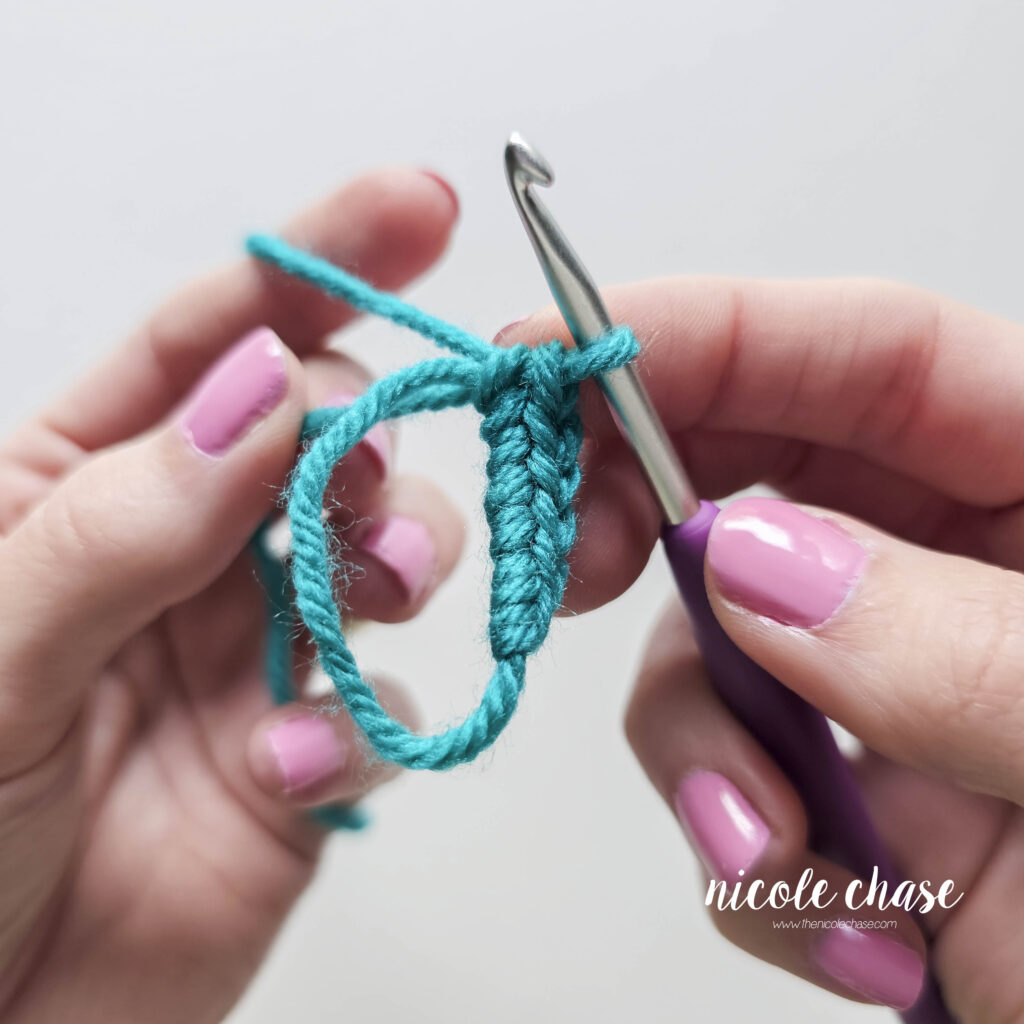
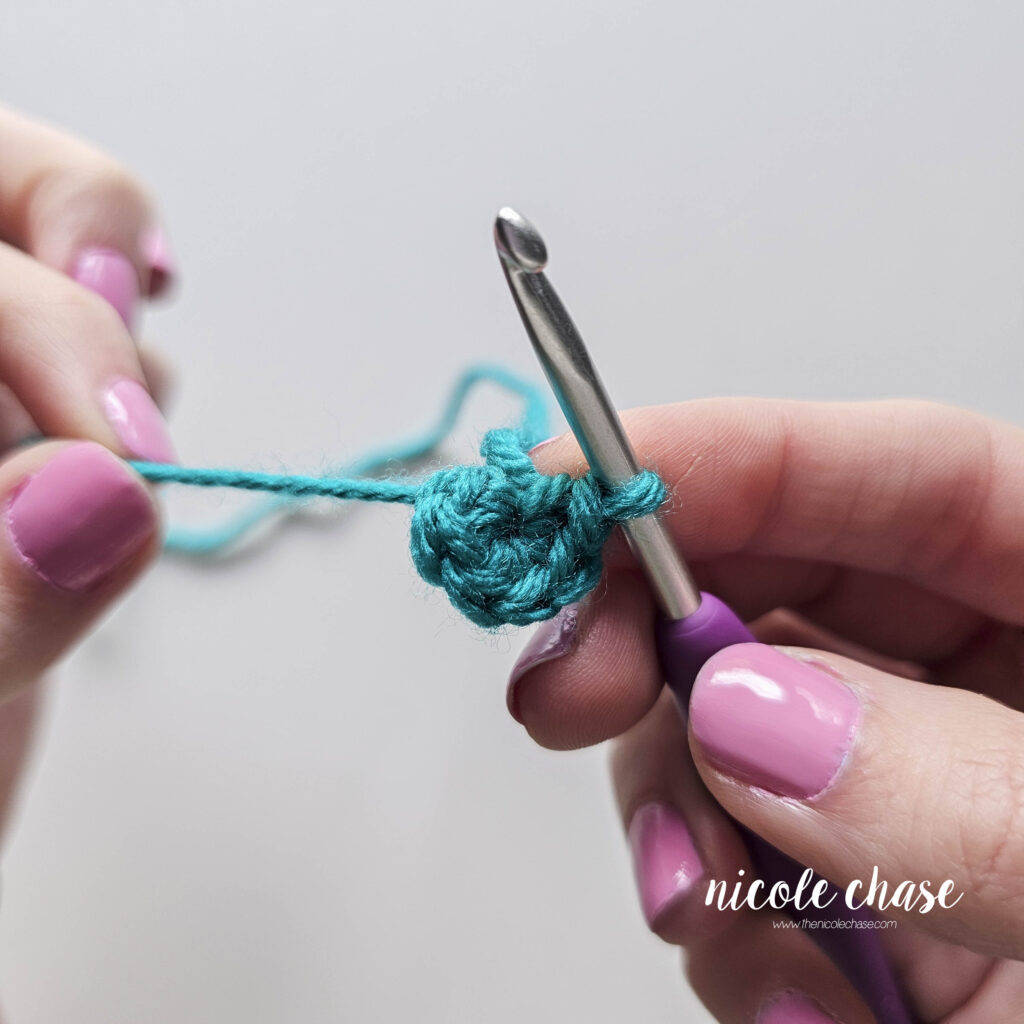
Once you have worked the required number of stitches into your ring, simply pull the yarn tail to cinch the center closed.
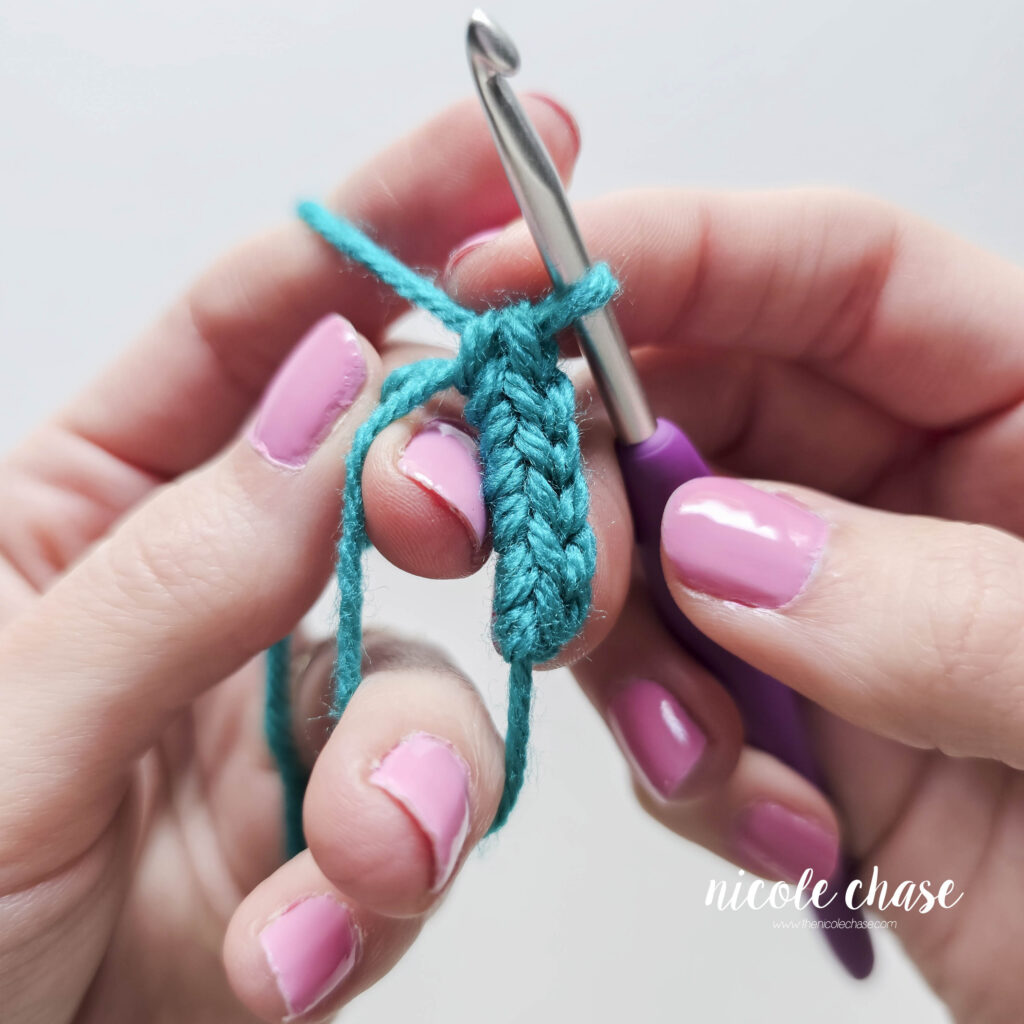
The Result: Unlike a chain joined into a circle, the magic ring leaves absolutely no hole in the center. This is the gold standard for amigurumi single crochet because it keeps your stuffing security inside your project.
Single Crochet Video Tutorial
If you’re a visual learner, I’ve created a comprehensive single crochet video tutorial that covers everything we just walked through. In this video, I demonstrate exactly how to single crochet in rows, as well as how to single crochet in rounds.
This video is also available on YouTube. Watch this video: How to Single Crochet for Beginners on YouTube.
Increasing and Decreasing with Single Crochet
Now that you’ve mastered the basic single crochet stitch, the next step in your journey is to learn shaping with single crochet.
- How to Increase and Decrease in Single Crochet: This comprehensive tutorial shows you how to add stitches to grow your project (increase) and how to join stitches together to make it narrower (decrease).
- How to Make an Invisible Decrease: If you are making plushies, this is a must-know technique! The invisible decrease is a specialized way to narrow your work without leaving the small gaps or bumps that a standard decrease can sometimes create.
Single Crochet Troubleshooting
Even though it is a simple stitch, it’s common to run into hiccups when you’re first starting out. Here are my best tips as a designer for fixing the most frequent single crochet struggles.
How do I count my single crochet stitches?
To count your stitches, look at the top of your work and count the “V” shapes. Each “V” equals one single crochet. If you’re working in rows, remember that the turning chain usually doesn’t count as a stitch! If you’re working in rounds, try to always use a stitch marker so you can easily identify your rounds.
Which is the right side of single crochet?
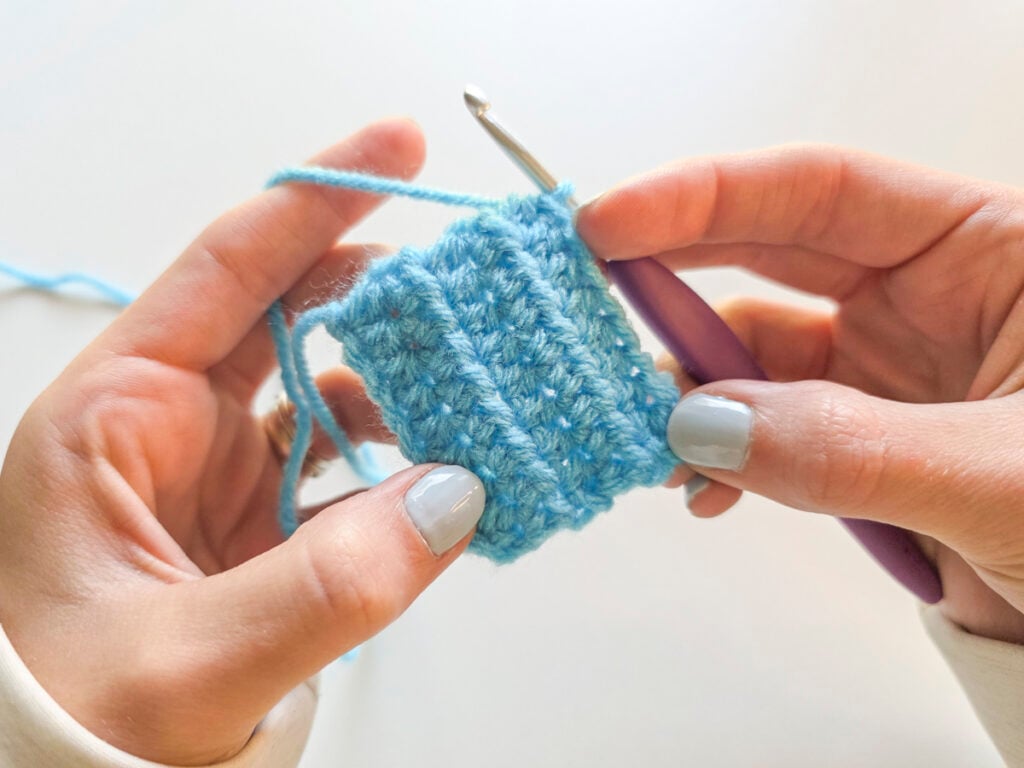
The Right Side (RS) of a single crochet stitch has a clean “V” shapes, while the Wrong Side (WS) has more prominent horizontal bars. In amigurumi, you want the “V” shapes facing the outside. You can read about this more in my post on crochet right side vs. wrong side.
Why is my crochet project shrinking or growing?
This usually happens if you accidentally skip the first or last stitch of a row. Since the ch 1 doesn’t count as a stitch in single crochet, you must work into the very first available stitch. I recommend using stitch markers in your first and last stitches to ensure your edges stay straight.
Can I use the single crochet for amigurumi?
Yes! The single crochet is the most common stitch used for amigurumi because it creates a dense, sturdy fabric that prevents stuffing from showing through.

Learn to Crochet Amigurumi
If you’re ready to continue your crochet journey and make your own cute plushies, check out my Amigurumi for Beginners course! I’ve designed this course to walk you through each step of the process, from your first stitch to your first finished plushie.
Learn How to Crochet Amigurumi!
Sign up for my free amigurumi for beginners course and learn everything you need to know to make your own crochet plush!
To see what is included, check out the course summary page!
What’s Next?
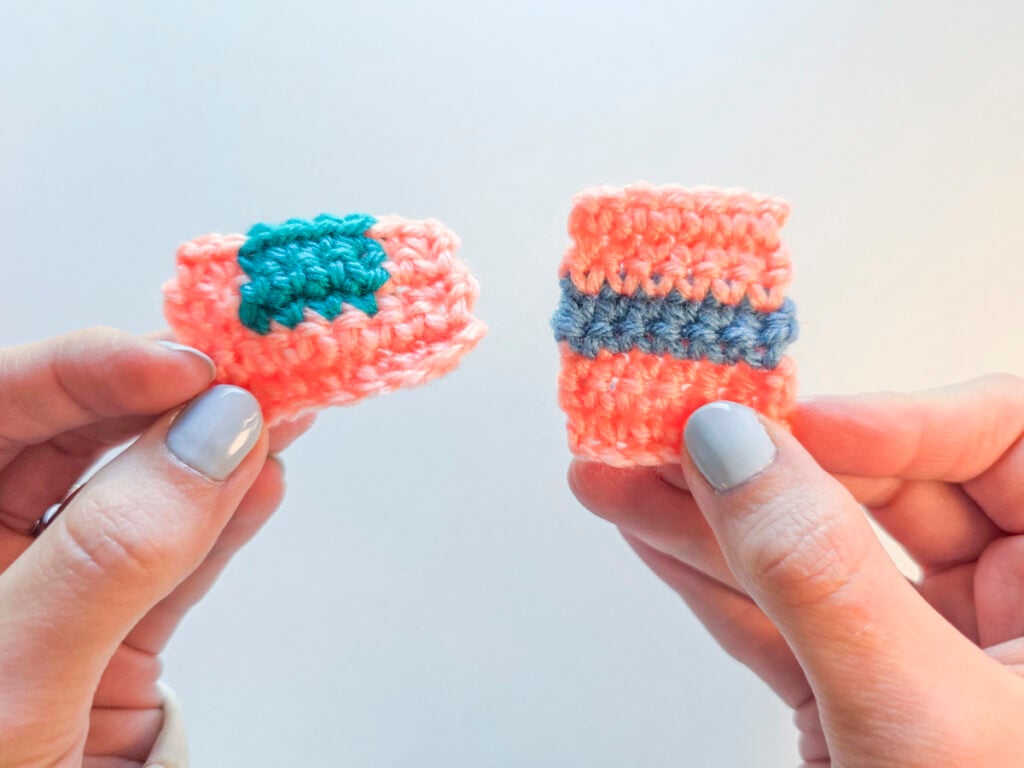
Now that you’ve mastered the single crochet stitch, you might want to check out some other important crochet stitches like the double crochet and slip stitch. If you’re most interested in amigurumi, this post includes all of the most important basic stitches. If you want to get started on using the SC stitch in a project, be sure to check out my collection of easy amigurumi crochet patterns, or my full amigurumi pattern collection!
I hope you enjoyed this post! Be sure to leave me a comment below to let me know what you think.
Want to see more from me? Be sure to subscribe to my email newsletter so that you never miss a post!
Follow along with me on Instagram for daily updates and a behind the scenes look at my designs.
I’d love to see what you make with this tutorial! Don’t forget to share your finished work with me: on social media by tagging me @thenicolechase, in your Ravelry projects, or post over in my Facebook group!
Thanks for stopping by! Happy crafting!
Nicole
PATTERN COPYRIGHT © 2026 NICOLE CHASE. ALL RIGHTS RESERVED.
PATTERN MAY NOT BE ALTERED, COPIED, REDISTRIBUTED OR SOLD AS YOUR OWN PATTERN.
YOU MAY SELL THE FINISHED PRODUCT ON A SMALL SCALE. PATTERN/DESIGN CREDIT GIVEN TO WWW.THENICOLECHASE.COM IS APPRECIATED. PERMISSION TO SELL DOES NOT INCLUDE MASS PRODUCTION. LARGE SCALE PRODUCTION IS PROHIBITED.
PHOTOGRAPHY COPYRIGHT © 2026 NICOLE CHASE. ALL RIGHTS RESERVED.
PHOTOS MAY NOT BE ALTERED, COPIED, REDISTRIBUTED OR SOLD AS YOUR OWN.
This post may contain affiliate links. If you make a purchase through links on our site, we may earn a commission.