Identifying Right Side vs. Wrong Side of Amigurumi
This post may contain affiliate links. If you make a purchase through links on our site, we may earn a commission.
Have you ever finished a crochet plushie only to wonder, “Why does my amigurumi piece look lumpy, fuzzy, or just… wrong?” You’re not alone! This common beginner frustration is usually due to a simple but critical error: the piece has been turned inside out without you realizing it. The key to that signature smooth, professional finish is mastering the visual difference between the crochet right side and the wrong side. In this ultimate guide, you’ll learn the signs to look for and how to fix it, to make sure your plushies look great every time!
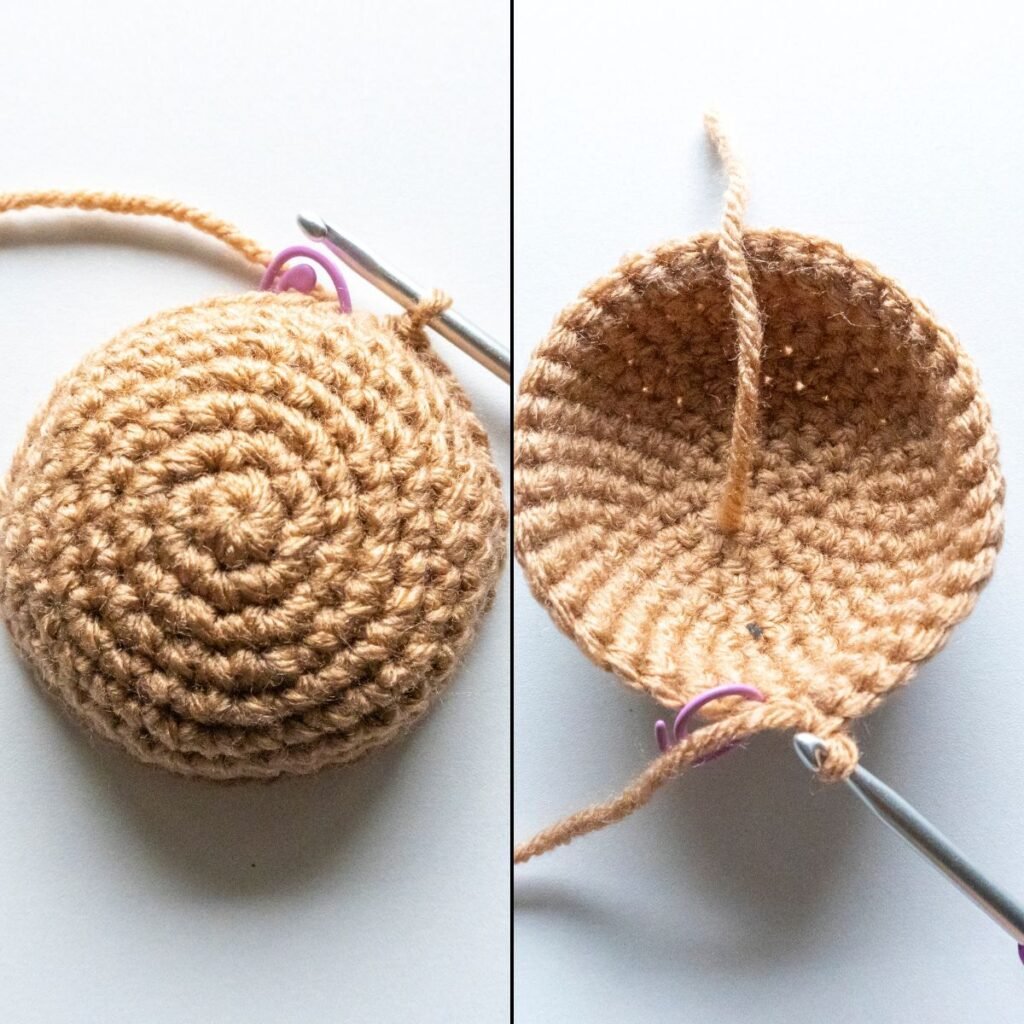
Table of Contents
The Difference: Right Side vs. Wrong Side
The texture of a crochet piece is often the key giveaway. When you work in a spiral, the front and back of your single crochet stitches look completely different. Understanding what the stitches look like on both sides is how you guarantee your amigurumi has that smooth, desired finish.
Identifying the Right Side (RS): The Smooth Texture
The right side (RS) is the part of your crochet piece that you want everyone to see. When crocheting in the round, the right side provides the tightest, cleanest finish.
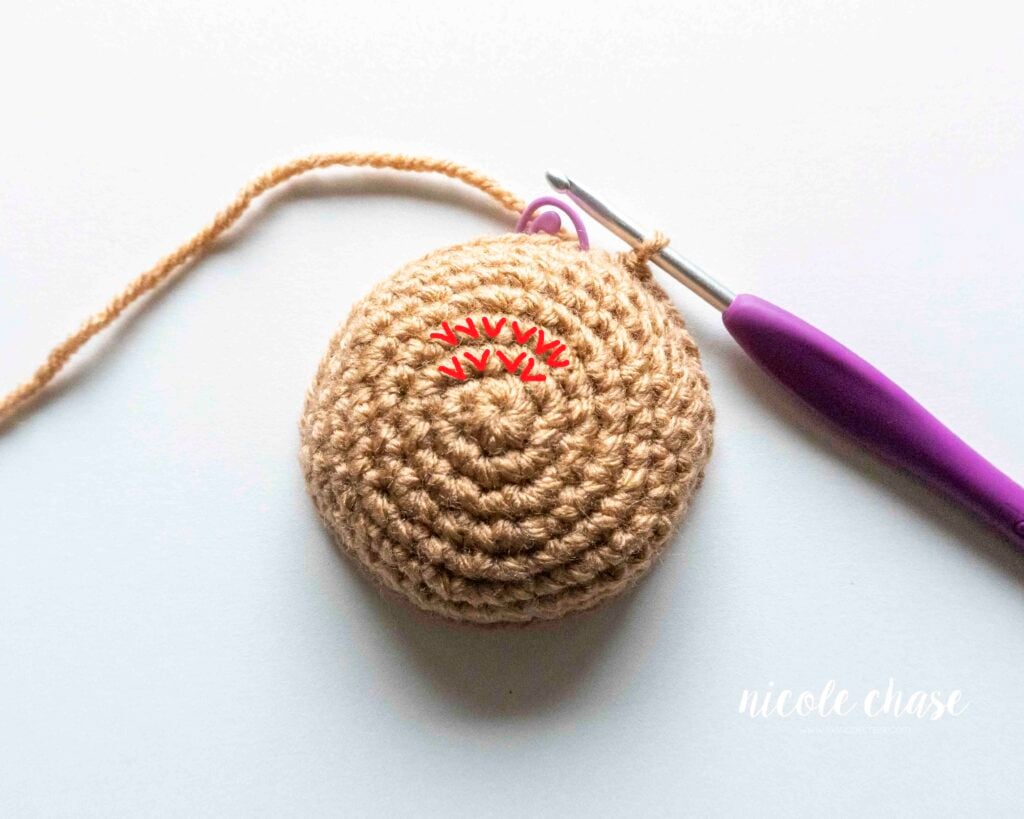
- What to Look For: The stitches look like prominent, neat layers of stacked “V” shapes.
- Appearance: This side is uniform, and gives the fabric a relatively smooth texture.
- Why it Matters: Techniques like the invisible decrease (inv dec) and seamless color changes are designed specifically to blend perfectly in this smooth crochet right side.
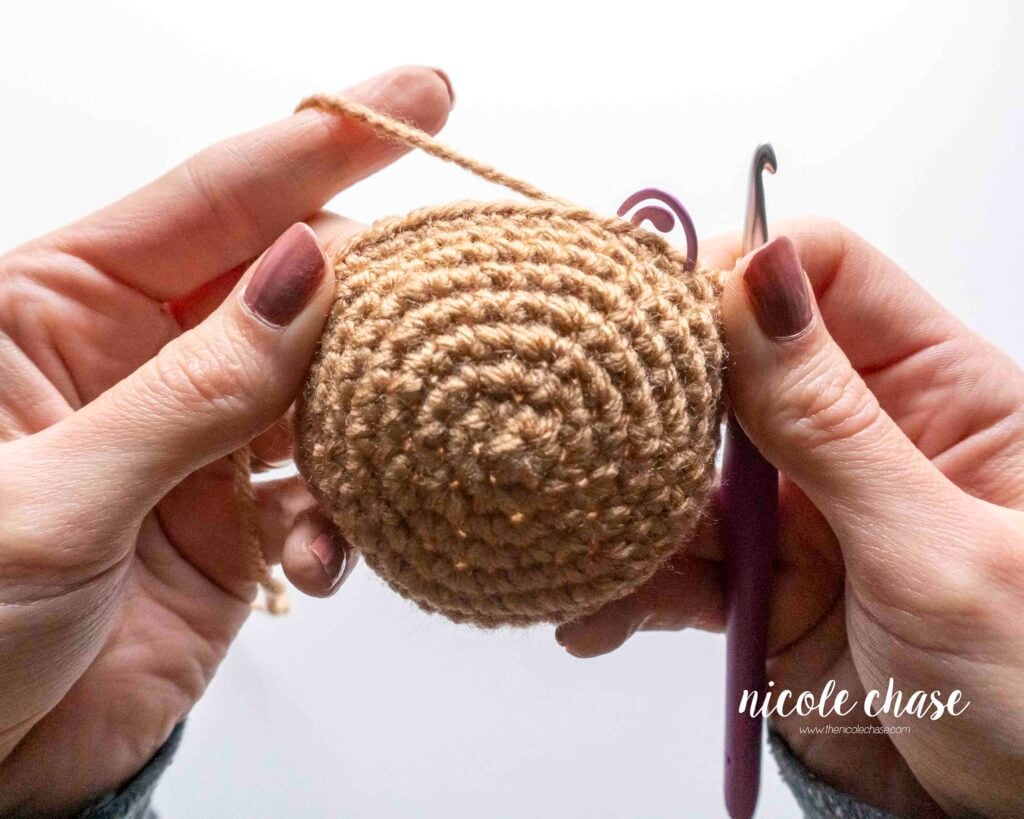
Identifying the Wrong Side (WS): The Bumpy Texture
The wrong side (WS) is the interior of your plushie, where the stuffing will go. It’s the side that creates that lumpy, textured look many beginners struggle with.
- What to Look For: Instead of clean V’s, you will see small, horizontal lines (sometimes called ridge bars) running across the center of the stitches.
- Appearance: These bars create a visible ridge, making the fabric look rougher, fuzzier, or “lumpy”.
- Why it Matters: If this side is facing out, the gaps between your stitches will be more noticeable, making your piece look less polished, and potentially letting stuffing peek through.


Finding the Right Side from the Start
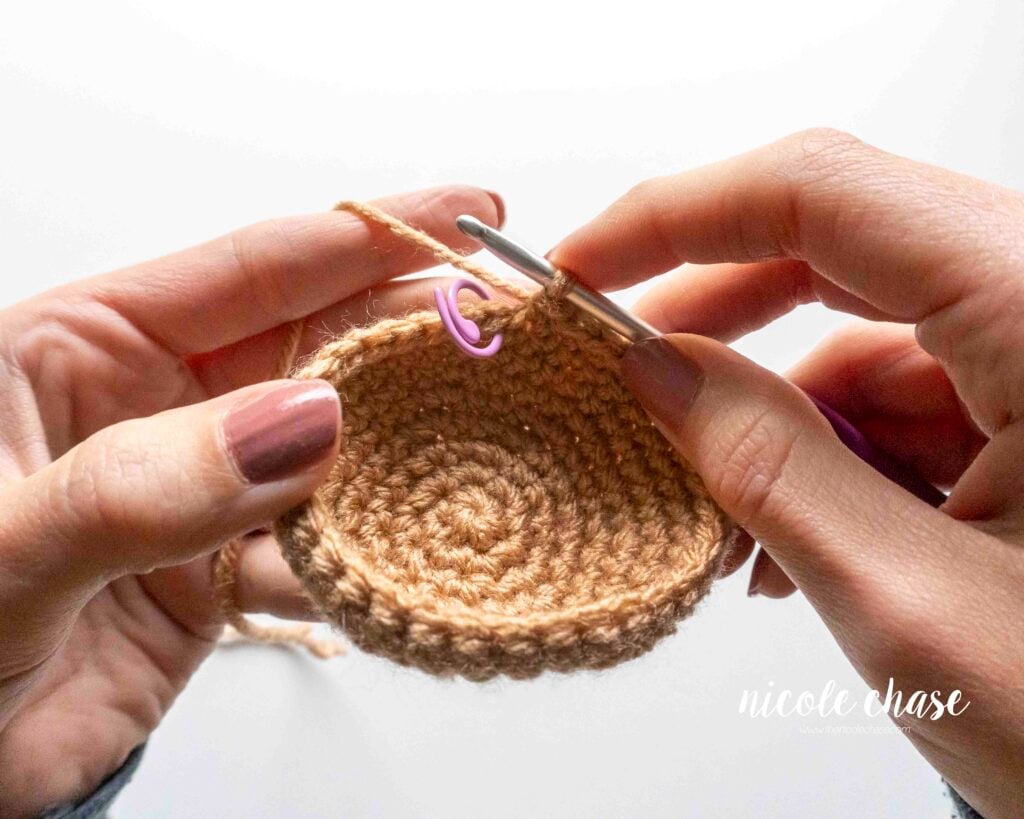
They key is to identify the crochet right and wrong side early on, usually after round 3 or round 4. It’s important to do this before the curve gets too deep, or the piece is closed. At this point, you’ll need to check which side is facing you and which side is facing away:
- If you see diagonal bars on the side facing you, rather than “V”s, you are seeing the wrong side (WS).
- If you see clean “V”s on the side facing you, you are seeing the right side (RS).
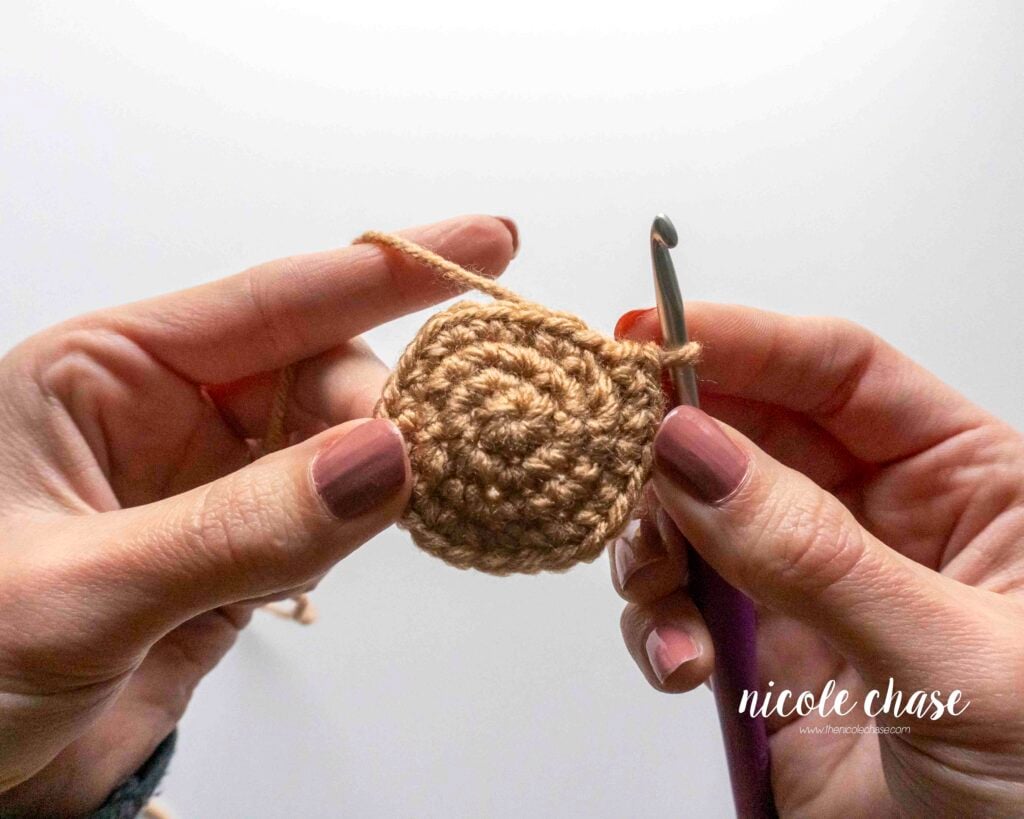
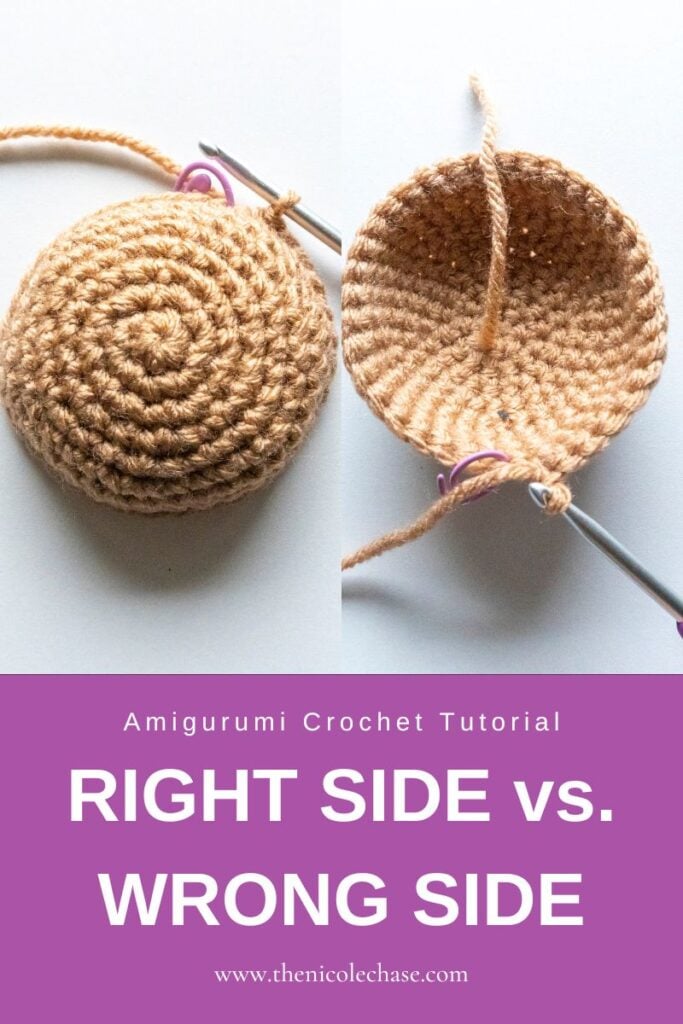
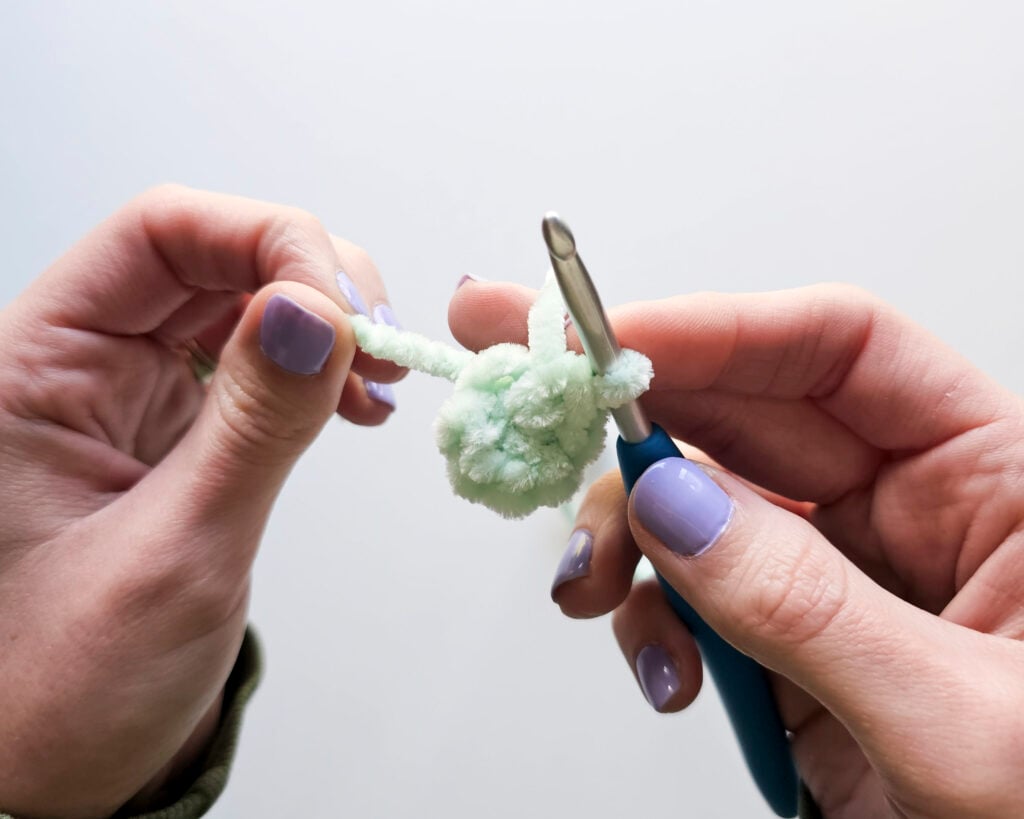
You don’t have to wait for the piece to start curling to check your work! Immediately after finishing your magic ring and first round of stitches, you can clearly identify the sides of your piece.
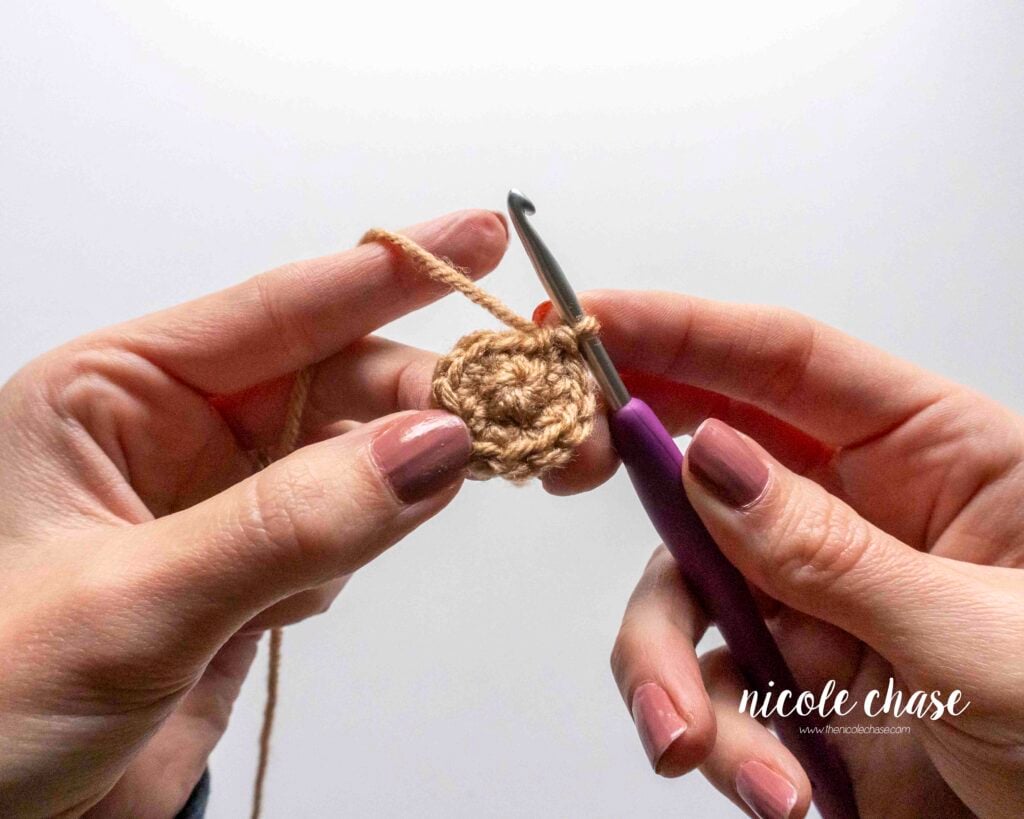
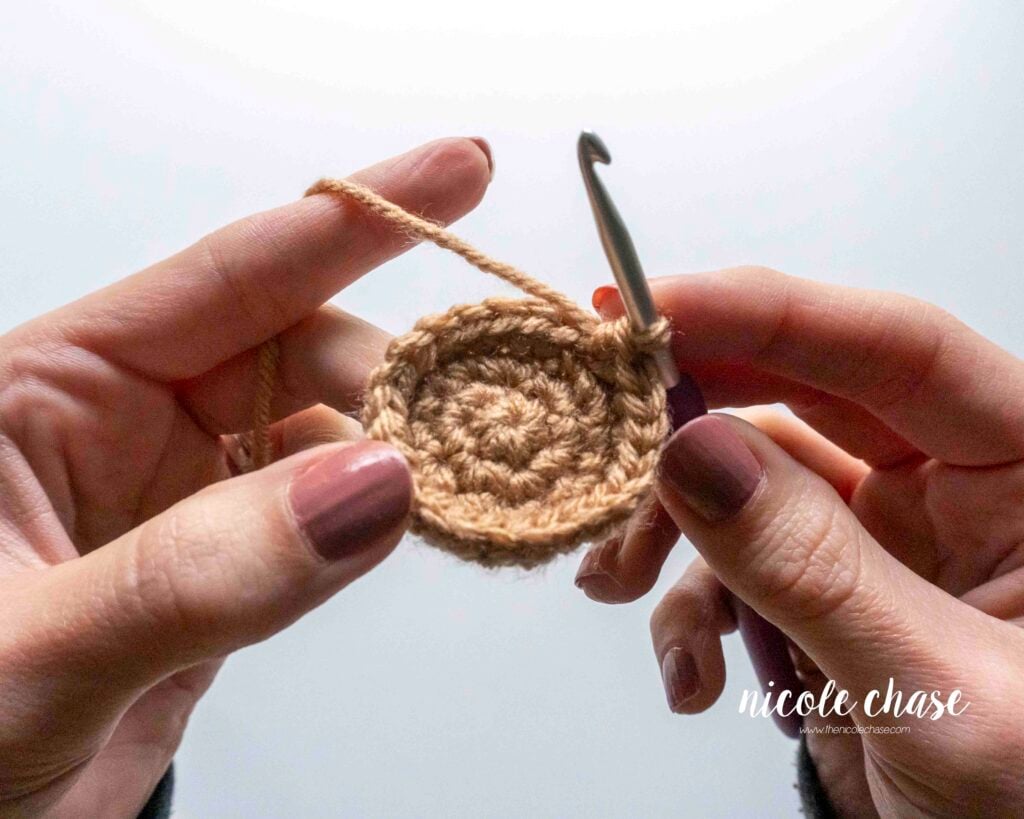
- Image 1 and 2 below show the right side (RS) of the single crochet stitch facing you after round 1 and round 2, respectively. Notice the uniform, smooth texture and the prominent “V” shapes. This side should be facing you as you work.
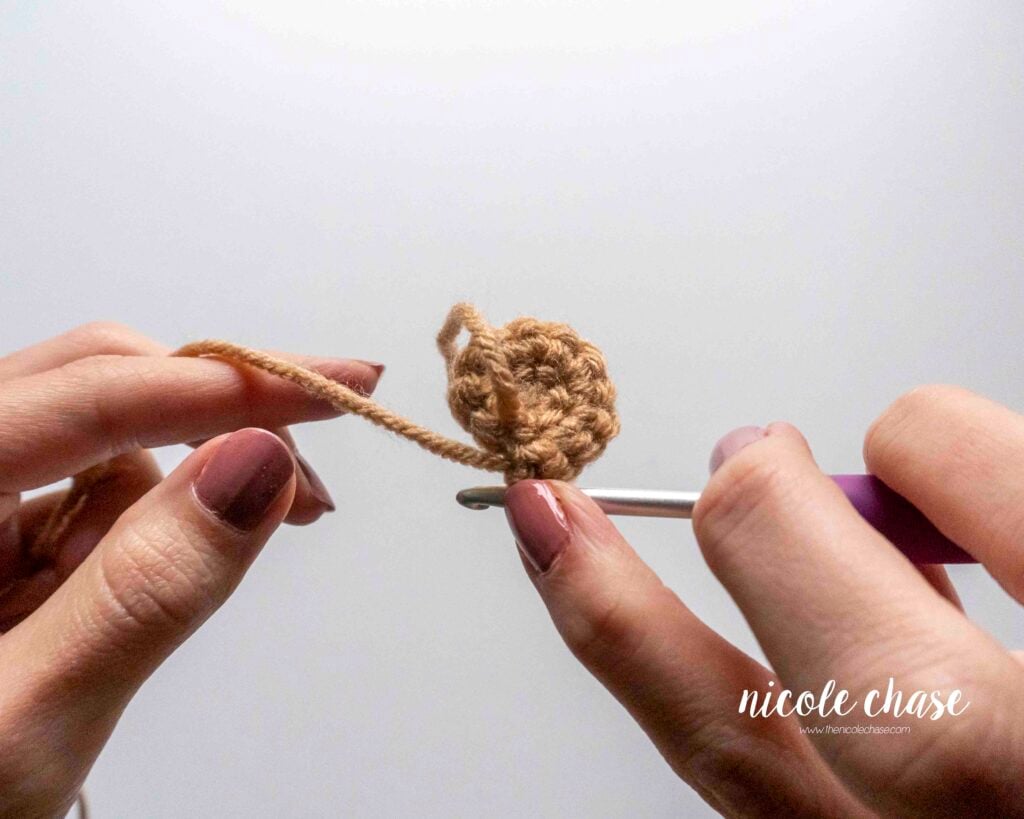
- Image 3 shows the wrong side (WS) of the fabric. Notice the rough texture with the diagonal dash bars. This side should be facing away from you, and when your shaping begins, it should be the inside of your piece.
Pro Tip: The Tail Clue
You can confirm which side is which by looking at the yarn tail from your magic ring. The tail typically rests naturally on the wrong side (the side that should be facing away from you). This is a great secondary clue to maintain the smooth right side facing out!
Your goal is to get the smooth right side facing you so that you can ensure they remain on the outside of the piece.
When and How to Flip Your Amigurumi
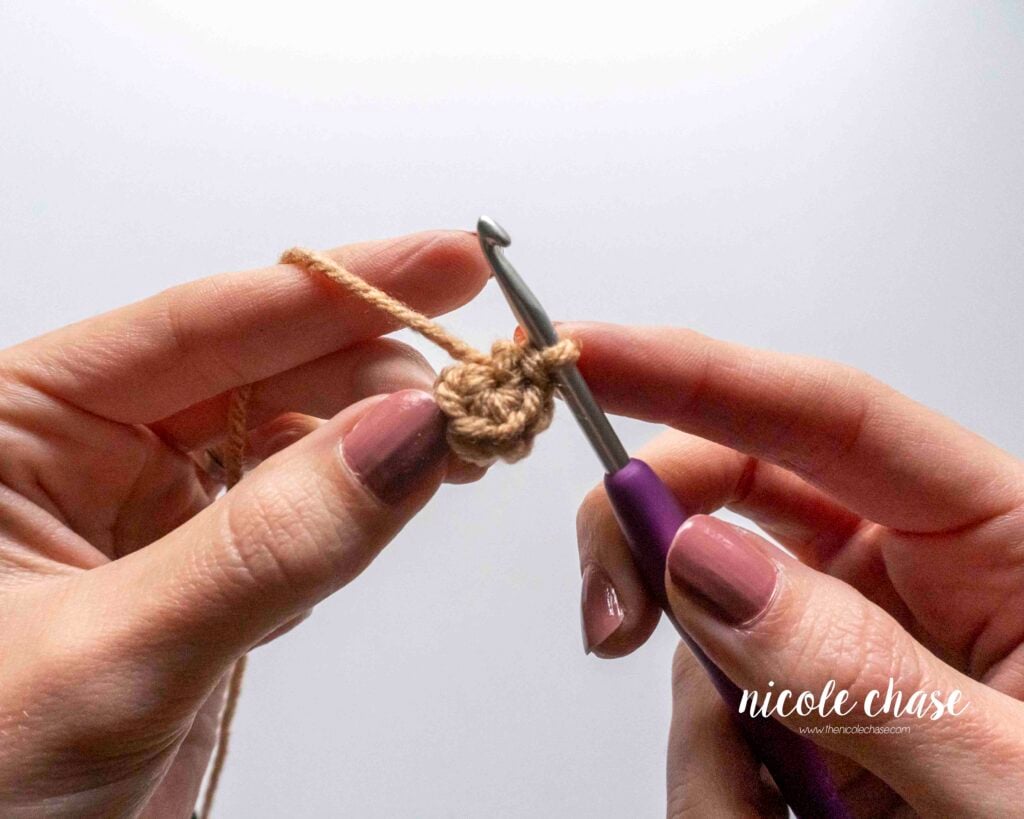
This fix is simple, but necessary: you must manually flip the piece right-side out. Flipping your work ensures the smooth texture stays on the exterior of your project.
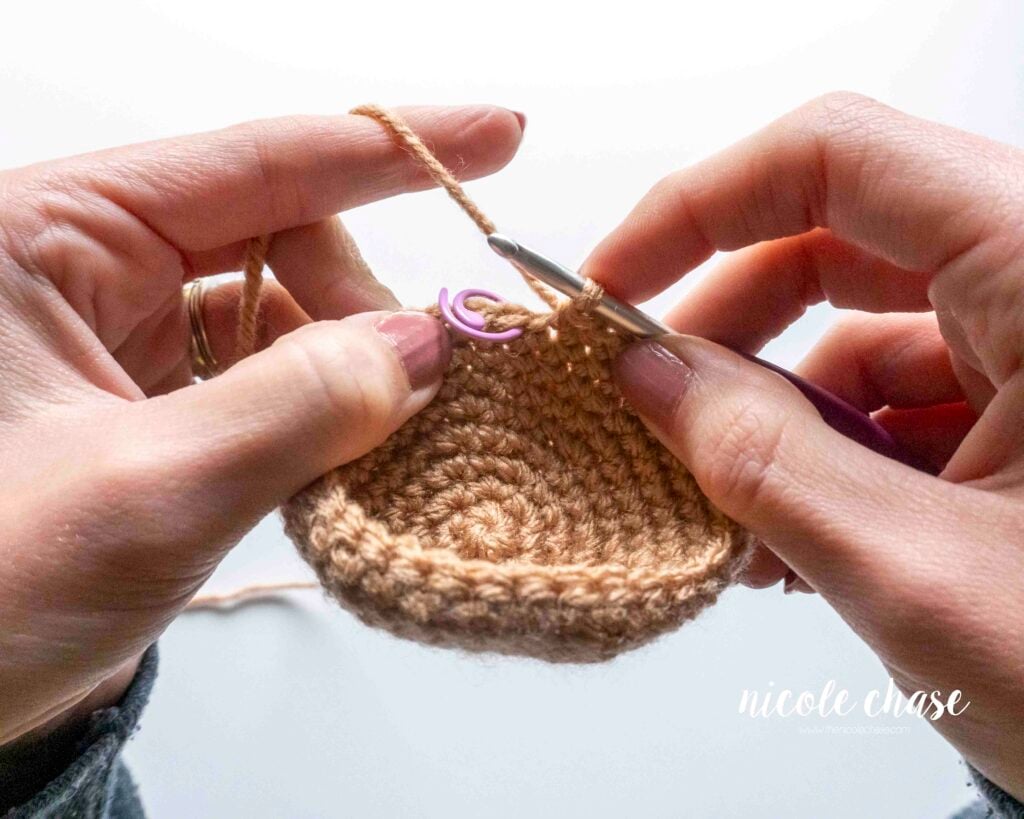
- Stop and Check: Pause your work after round 3 or 4. If you are beyond that point, it is important to catch before you close the piece, or begin any assembly.
- Locate the Right Side: Determine which side has the clean “V”s. This is the side you want facing out.
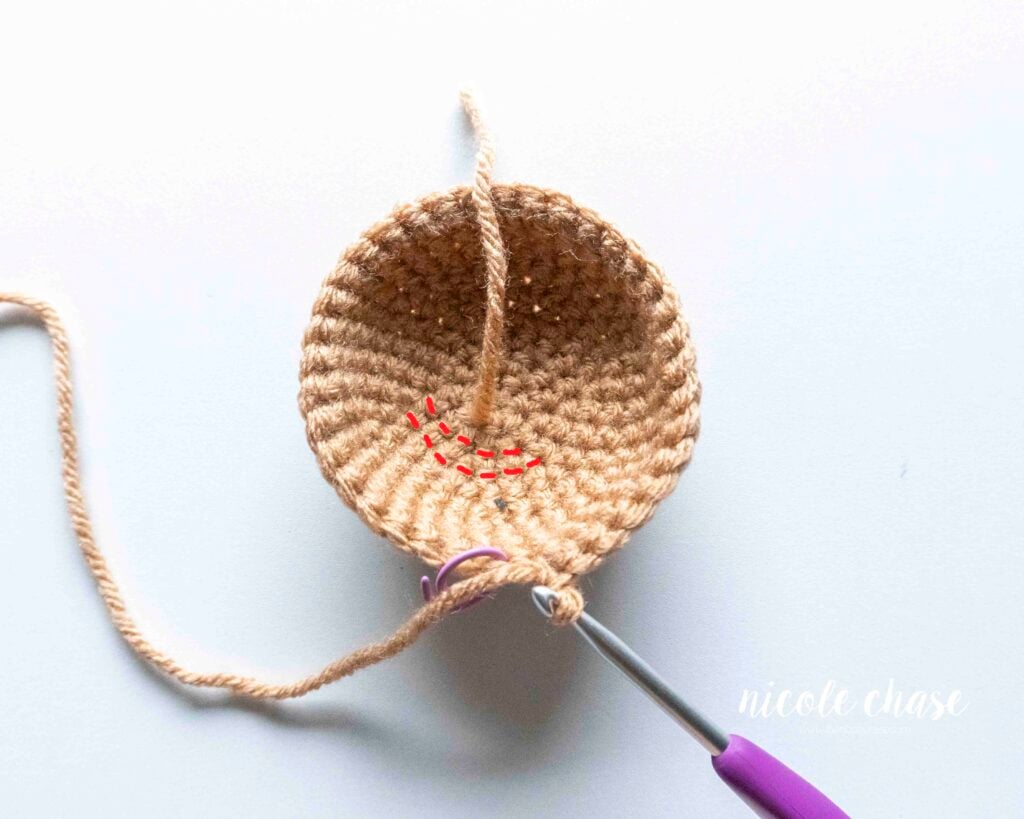
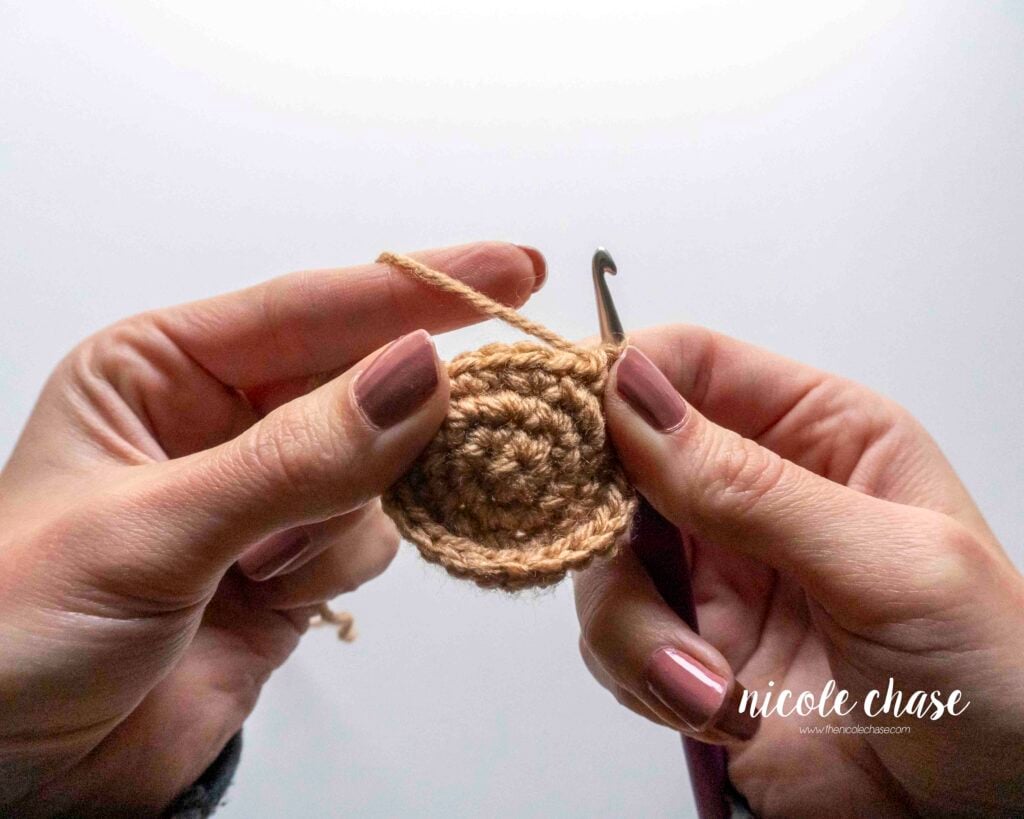
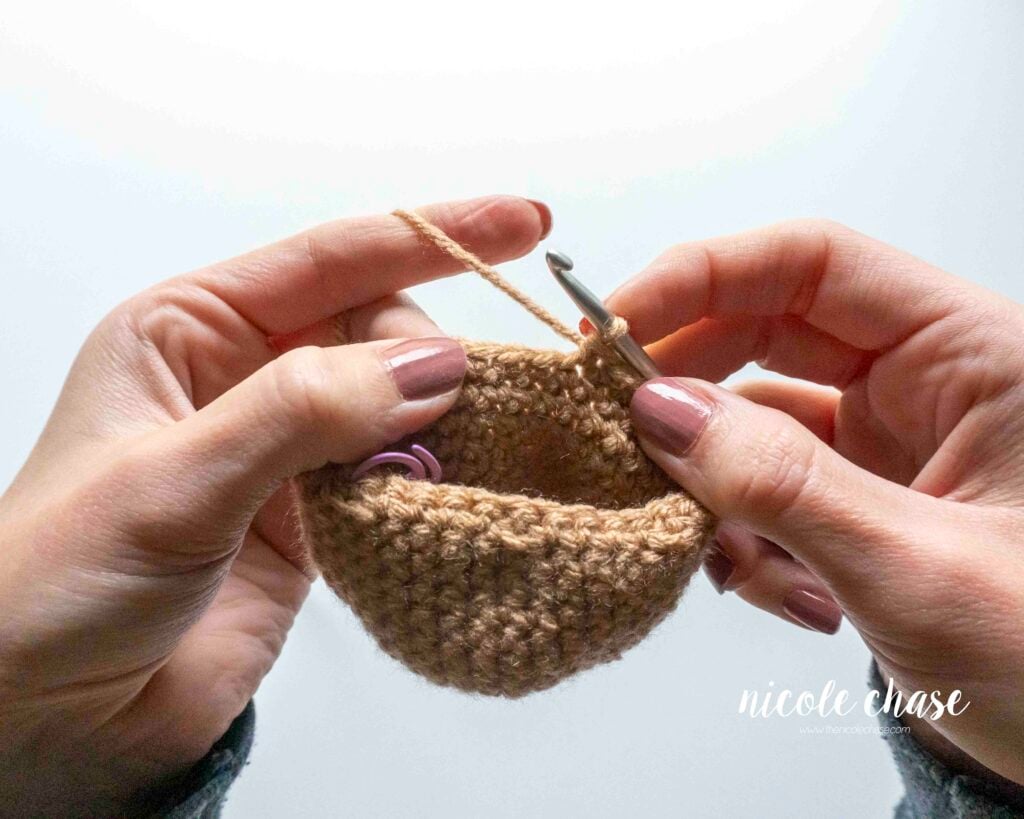
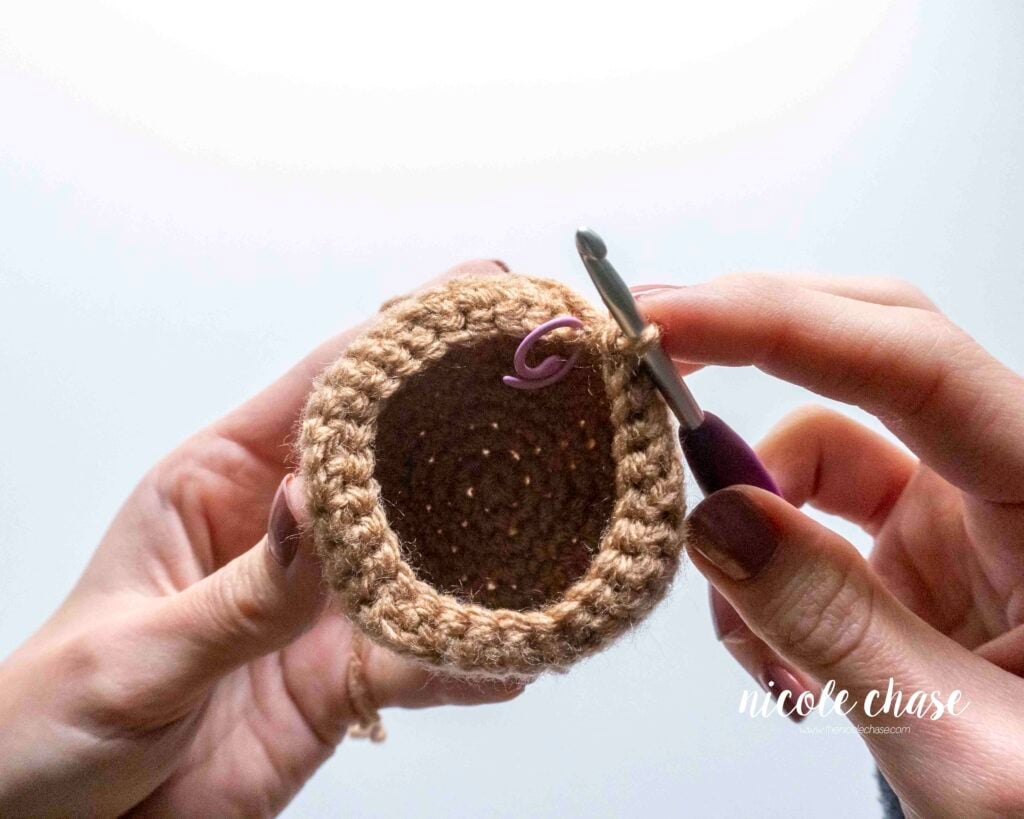
- In the image below, you can see that the piece is starting to curl inward, with the right side of the stitches on the interior. We need to flip the piece.
- Flip: Use your thumb and index finger to gently push the bottom of the cup outward so the smooth right side (RS) is now on the outside, facing you.
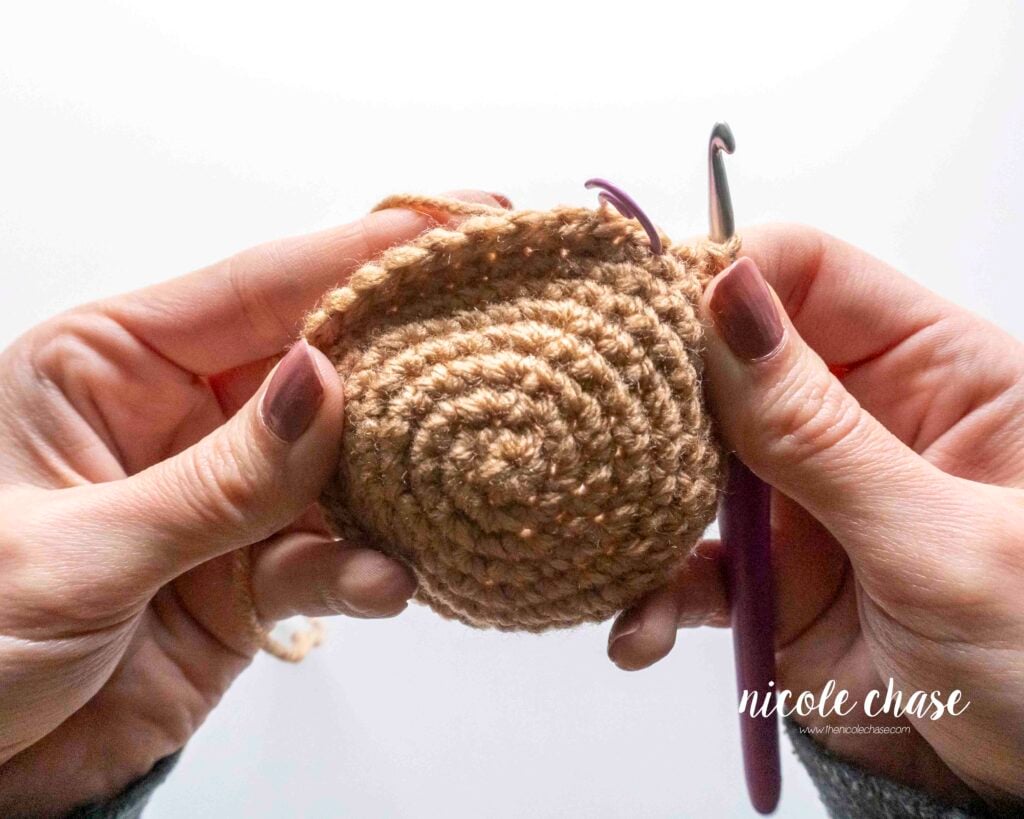
- After the flip, the smooth right side should now be on the exterior of the cup (facing you).
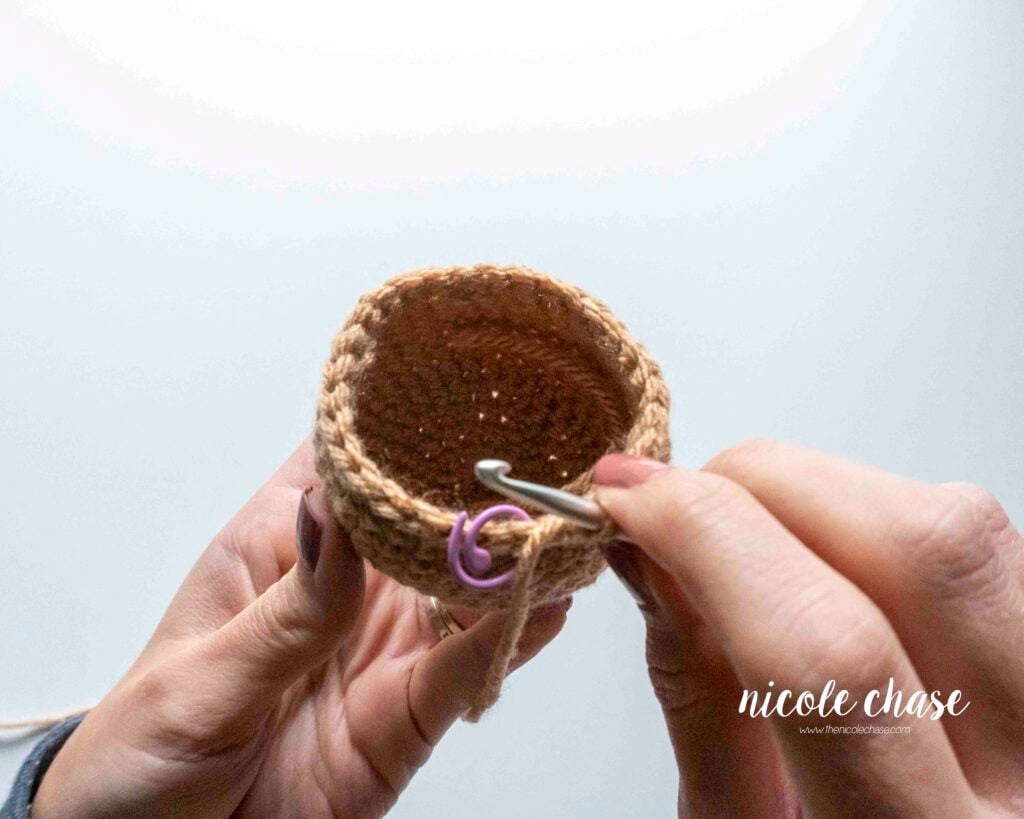
- If you look at the wrong side of your work, you will now see the interior of the newly flipped piece. Note how it is now curling in the opposite direction than we started, with the wrong side on the inside, and the right side on the outside.

Note: Once flipped, your piece will continue to curve correctly, maintaining the right side facing you for the rest of the piece!
If you’ve been crocheting for several rounds before realizing your piece is inside out, don’t panic! While it’s easiest to flip your work early, you can still do it later on, depending on the exact shaping of your project. See below.

What if I Realize I Crocheted on the Wrong Side?
It’s okay! Crocheting on the wrong side (WS) does not impact the actual shaping or stitch count of your amigurumi. Your piece is still structurally fine and created as the pattern intended.
Appearance is Key
The difference is purely aesthetic. The crochet wrong side provides a deliberately different texture. It’s fuzzier, more textured, and less refined than the smooth crochet right side. Remember, the wrong side is simply the term for the back side of the fabric; it doesn’t necessarily mean that the project is “wrong”.
Look at the comparison below:
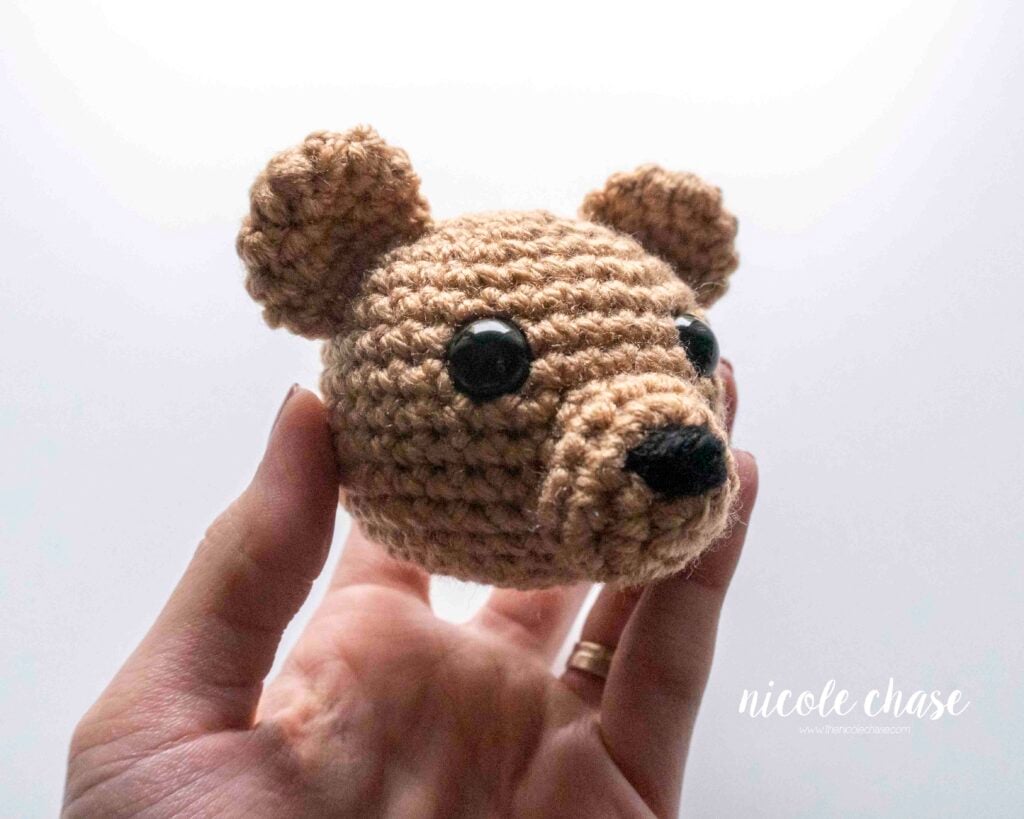
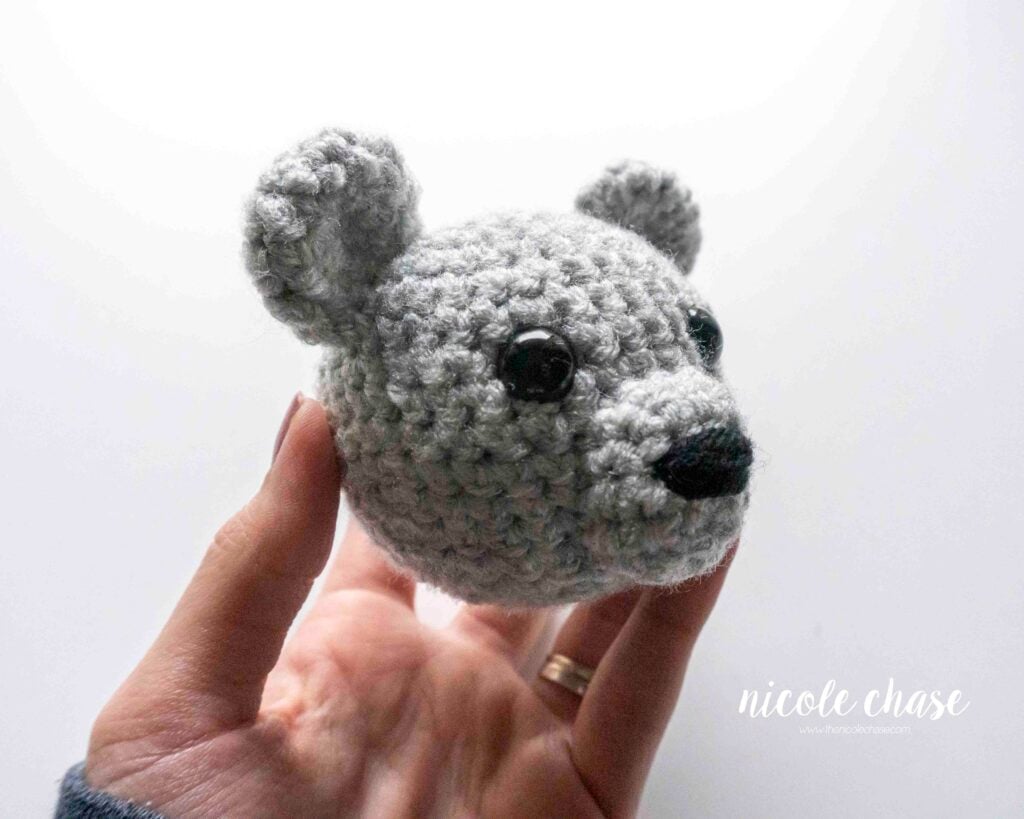
The Difference: The bear head on the left shows the right side (RS); it’s smooth, tight, and neat. The bear head on the right shows the wrong side (WS); it’s fuzzier, looser, and more textured.
- If you like the look: You can continue crocheting on the wrong side and embrace the unique, fuzzy texture! It’s a valid artistic choice.
- If you want the smooth finish: Even if you’re beyond the ideal flipping point for most pieces, you can still carefully turn the piece right-side out. It may be stiff, but it is manageable. Once flipped, continue crocheting as normal. This is the look most patterns intend.
Functionality: Difficult Decreasing
While crocheting on the wrong side doesn’t ruin the shape, it does create a hurdle later in the process: difficulty with decreasing.
When you start decreasing, especially with techniques like the invisible decrease, the lack of room inside the small, inverted cup makes the work difficult and cramped. The cramped space makes it easy to lose tension and struggle with the stitches.
The images below illustrate the difference in workspace:

Flipping Conclusion: Flipping your piece early guarantees that your hands have ample space to execute decreases correctly, maintaining uniform tension and ensuring a professional finish without unnecessary struggle.
Tips for Preventing an Inside Out Project
Use these rules to guarantee that your crochet right side is always facing you.
- The Stitch Marker Rule: You’re likely using a stitch marker anyway. Each time you reach the marker, just visually check the texture one last time before moving on to the next round. This gives you a reliable checkpoint.
- The Tail Clue: While not foolproof, the starting tail from your magic ring typically falls naturally to the wrong side (interior) of the piece. If you find your tail is sitting on the outside of your work, you are likely look at the wrong side.
- Touch It: The right side should feel tighter and smoother under your fingers, while the wrong side will feel rougher due to the diagonal bars.
What’s Next? Putting Your Skills into Practice
You now have the most crucial visual skill for making high-quality amigurumi. Remember the key takeaway: look for the neat “V”s, and flip your piece early! With this knowledge, you are ready to tackle any amigurumi pattern with confidence.
Mastering the Fundamentals
If you have questions about starting your amigurumi piece, or counting your rounds, start here: The Ultimate Guide to Crocheting in the Round: Everything You Need to Know.
Enroll in the FREE Course!
Turn your new knowledge into plushies! My Amigurumi for Beginners course is completely free and walks you step-by-step through every technique, pattern reading, and beginner projects.
Learn How to Crochet Amigurumi!
Sign up for my free amigurumi for beginners course and learn everything you need to know to make your own crochet plush!
To see what is included, check out the course summary page!

More Crochet Tutorials and Resources
Are you ready to refine your technique, tackle a new pattern, or learn how to change colors like a pro? Explore these related resources to keep advancing.
- The Ultimate Guide to Crocheting in the Round: Everything you need to know!
- Learn the invisible decrease (inv dec): The secret to seamless shaping!
- Try the seamless color change for amigurumi.
- Browse my full collection of amigurumi patterns.


I hope you enjoyed this post! Be sure to leave me a comment below to let me know what you think.
Want to see more from me? Be sure to subscribe to my email newsletter so that you never miss a post!
Follow along with me on Instagram for daily updates and a behind the scenes look at my designs.
I’d love to see what you make with this tutorial! Don’t forget to share your finished work with me: on social media by tagging me @thenicolechase, in your Ravelry projects, or post over in my Facebook group!
Thanks for stopping by! Happy crafting!
Nicole
PATTERN COPYRIGHT © 2026 NICOLE CHASE. ALL RIGHTS RESERVED.
PATTERN MAY NOT BE ALTERED, COPIED, REDISTRIBUTED OR SOLD AS YOUR OWN PATTERN.
YOU MAY SELL THE FINISHED PRODUCT ON A SMALL SCALE. PATTERN/DESIGN CREDIT GIVEN TO WWW.THENICOLECHASE.COM IS APPRECIATED. PERMISSION TO SELL DOES NOT INCLUDE MASS PRODUCTION. LARGE SCALE PRODUCTION IS PROHIBITED.
PHOTOGRAPHY COPYRIGHT © 2026 NICOLE CHASE. ALL RIGHTS RESERVED.
PHOTOS MAY NOT BE ALTERED, COPIED, REDISTRIBUTED OR SOLD AS YOUR OWN.
This post may contain affiliate links. If you make a purchase through links on our site, we may earn a commission.