The Crochet Invisible Color Change: Seamless Amigurumi Tutorial
This post may contain affiliate links. If you make a purchase through links on our site, we may earn a commission.
Tired of that frustrating color jog when changing yarns in the round? You’re not alone! This crochet invisible color change tutorial is the ultimate guide to achieving a truly seamless color change in your amigurumi and other projects worked in the round. This post includes detailed, step-by-step photos and a video to make this essential technique easier than ever to master!
I use this seamless color change method in all of my amigurumi projects – it’s my favorite way to keep my colorwork clean. Check out all amigurumi patterns here.
Table of Contents
When to Use the Seamless Crochet Color Change
The seamless crochet color change (also known as the invisible color change) is best used when working in continuous rounds for amigurumi. When using continuous rounds, there is no join between rounds, and the color change in traditional methods creates a noticeable “jog” or “step”. This technique is specifically designed for the single crochet stitch and is the absolute best way to make color changes between rounds virtually undetectable in your finished pieces, especially for amigurumi arms, legs, and heads that require multiple colors.
Watch the Crochet Invisible Color Change Video Tutorial
In this crochet video tutorial I will demonstrate how to change colors in amigurumi using the crochet invisible color change method.
This video is also available on YouTube. Watch this video: Seamless Color Changes for Amigurumi on YouTube.
How to Change Colors Seamlessly: The Invisible Method
There are a few different methods to make an crochet invisible color change, but the technique below is my absolute favorite for amigurumi because it creates the most seamless line. Follow the steps below:
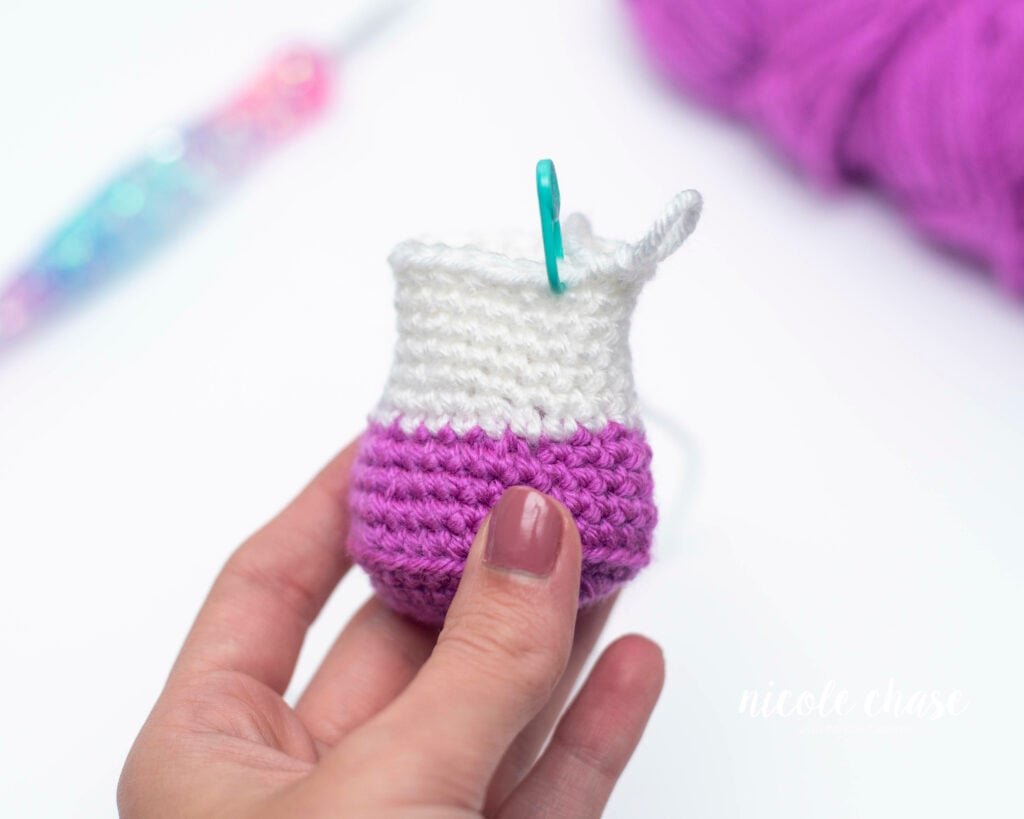
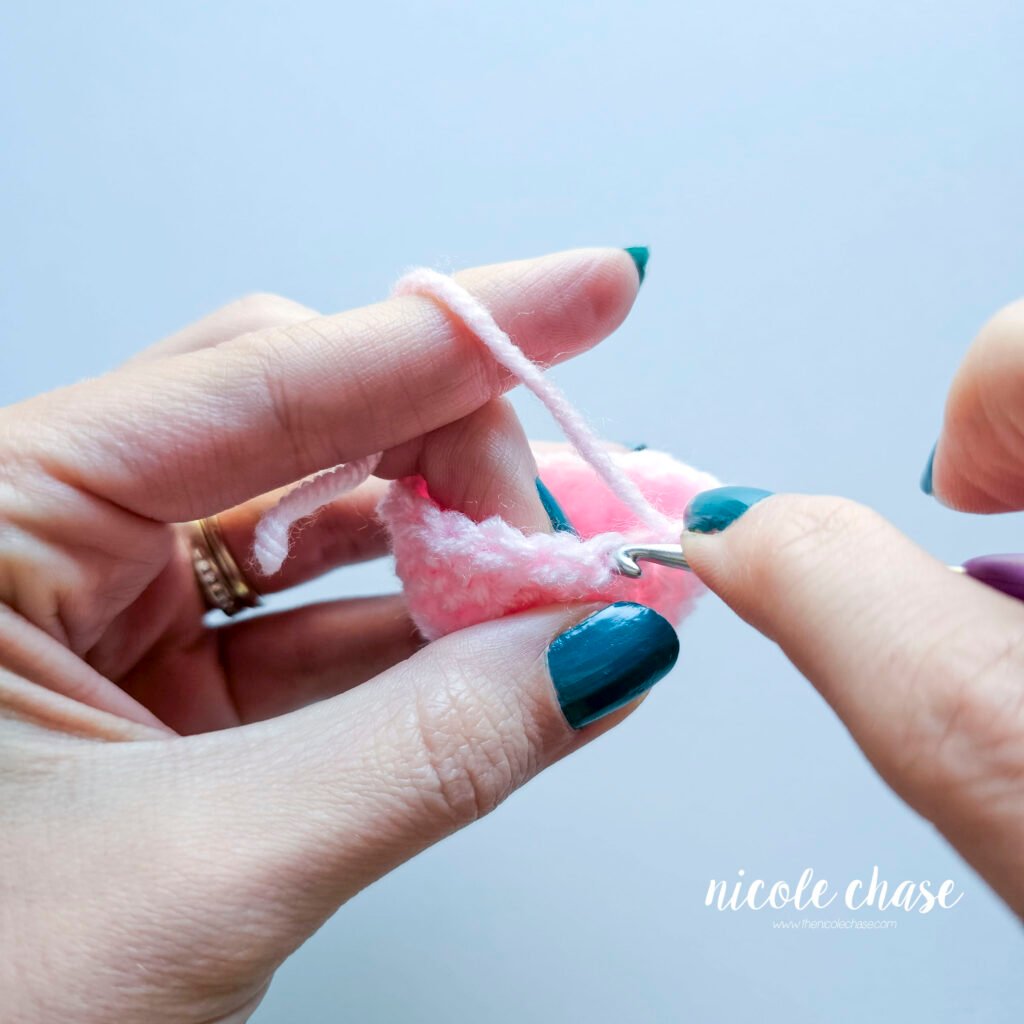
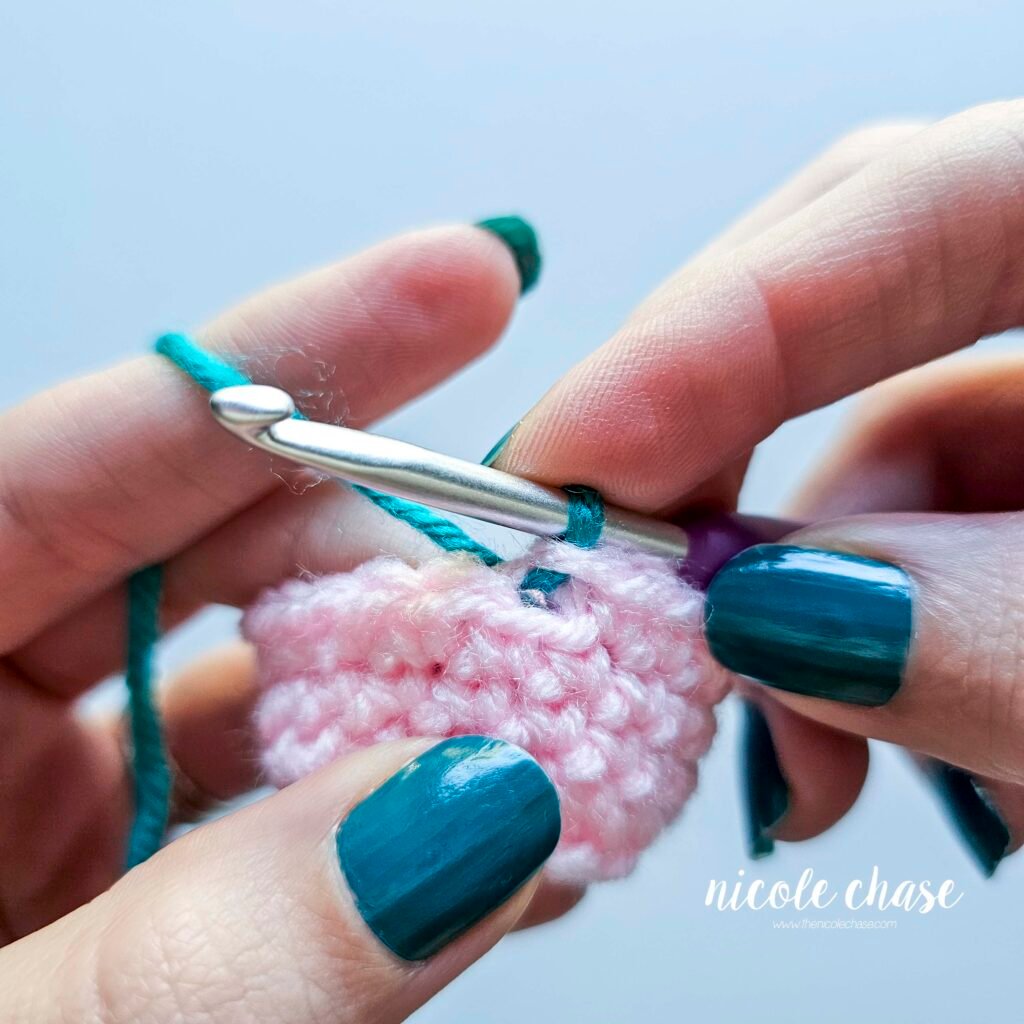
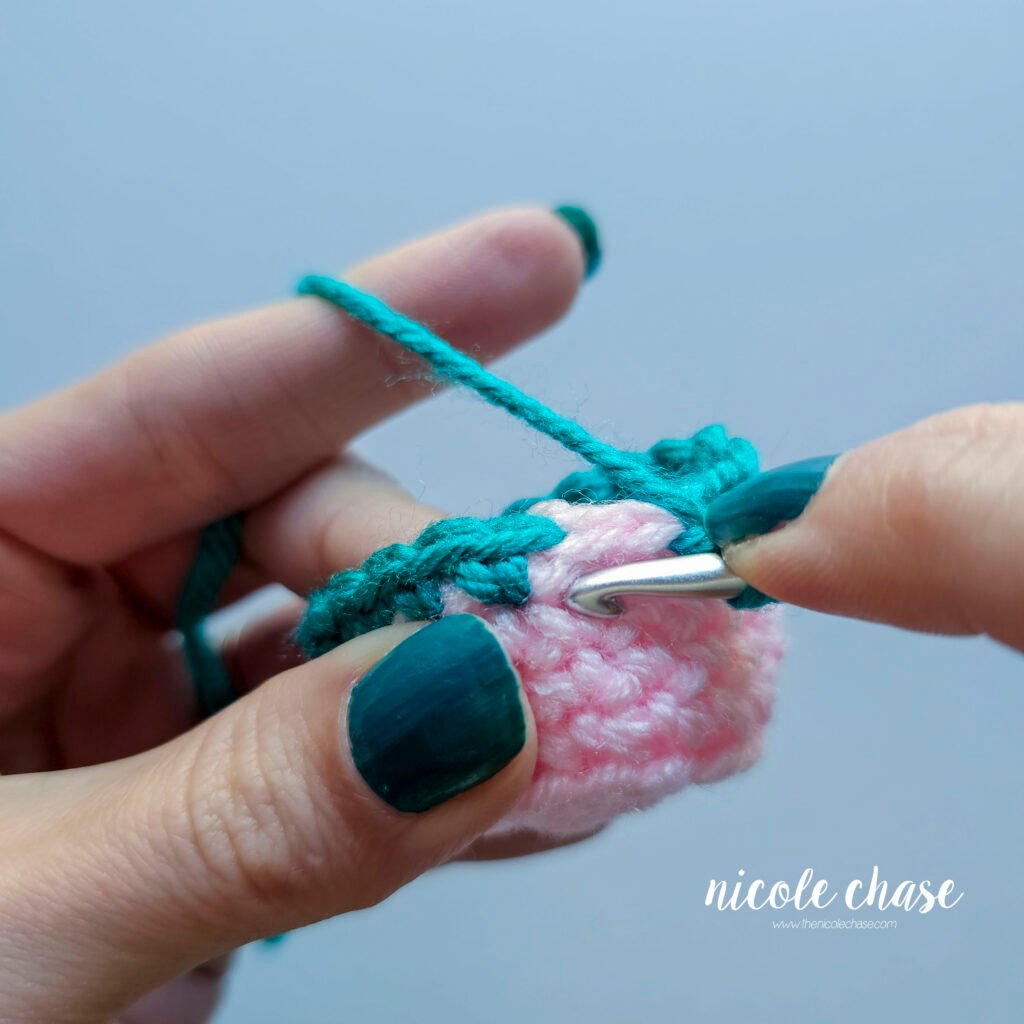
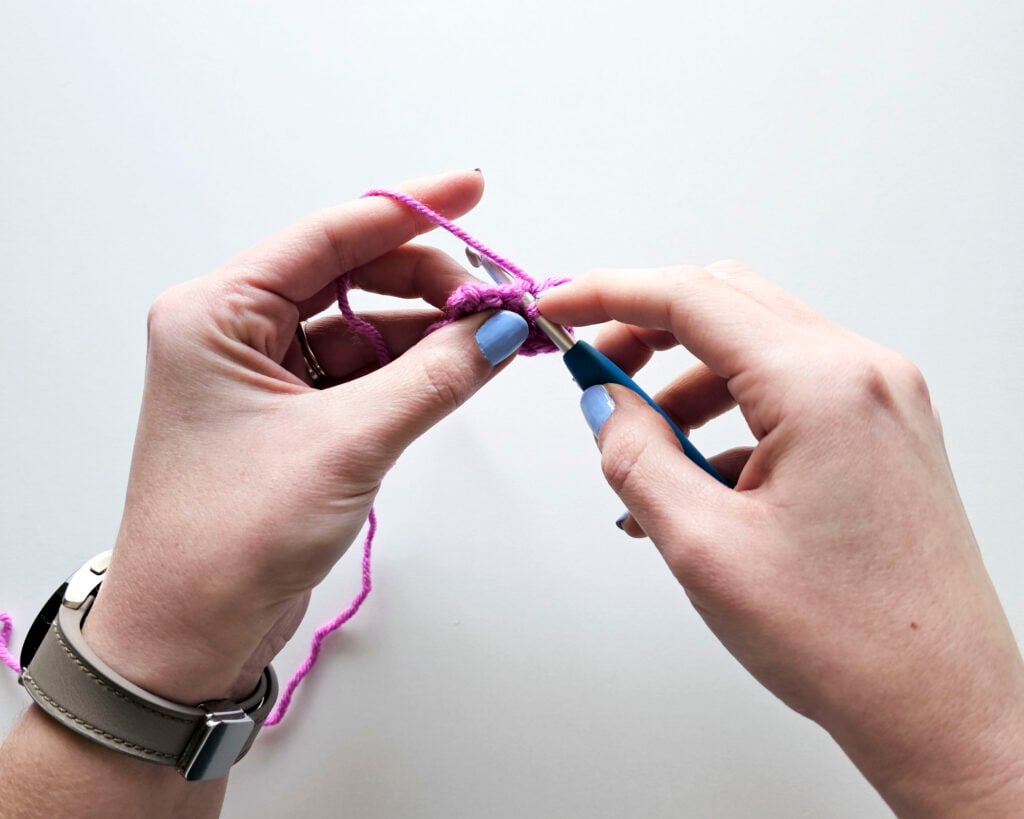
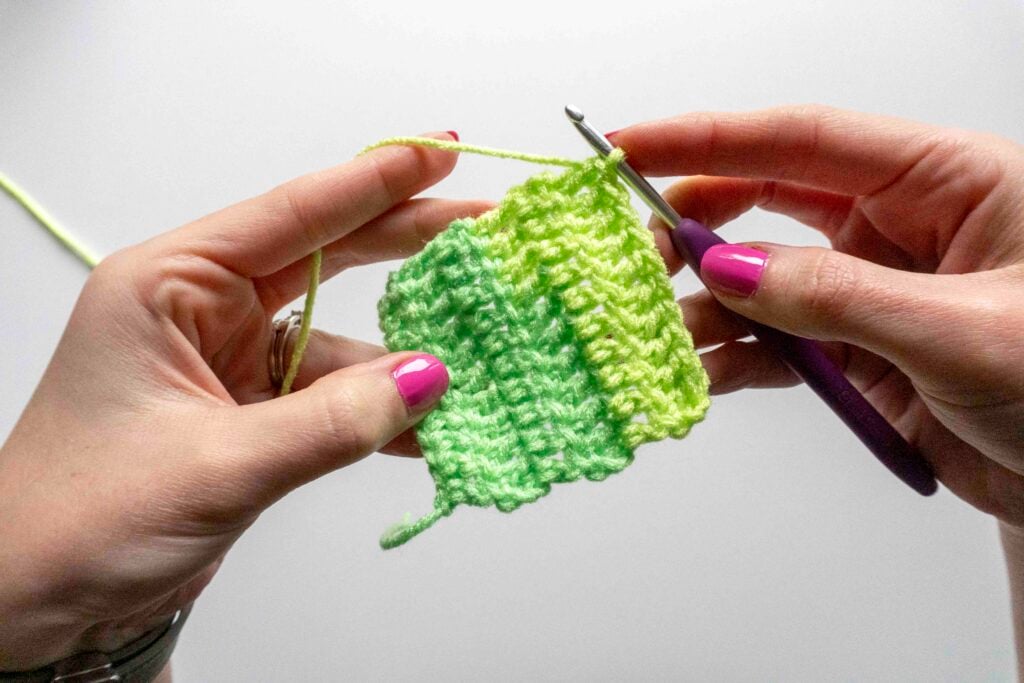
Step 1: Secure the New Color (The Back Loop Start)
- Start by cutting your original yarn color. While still using your first color, insert your hook into the back loop only of the first stitch where you would be starting your new color.
- Pull up a loop with your new color and secure your yarn. When making amigurumi, I recommend securing the yarn with a knot that will be hidden inside the piece.
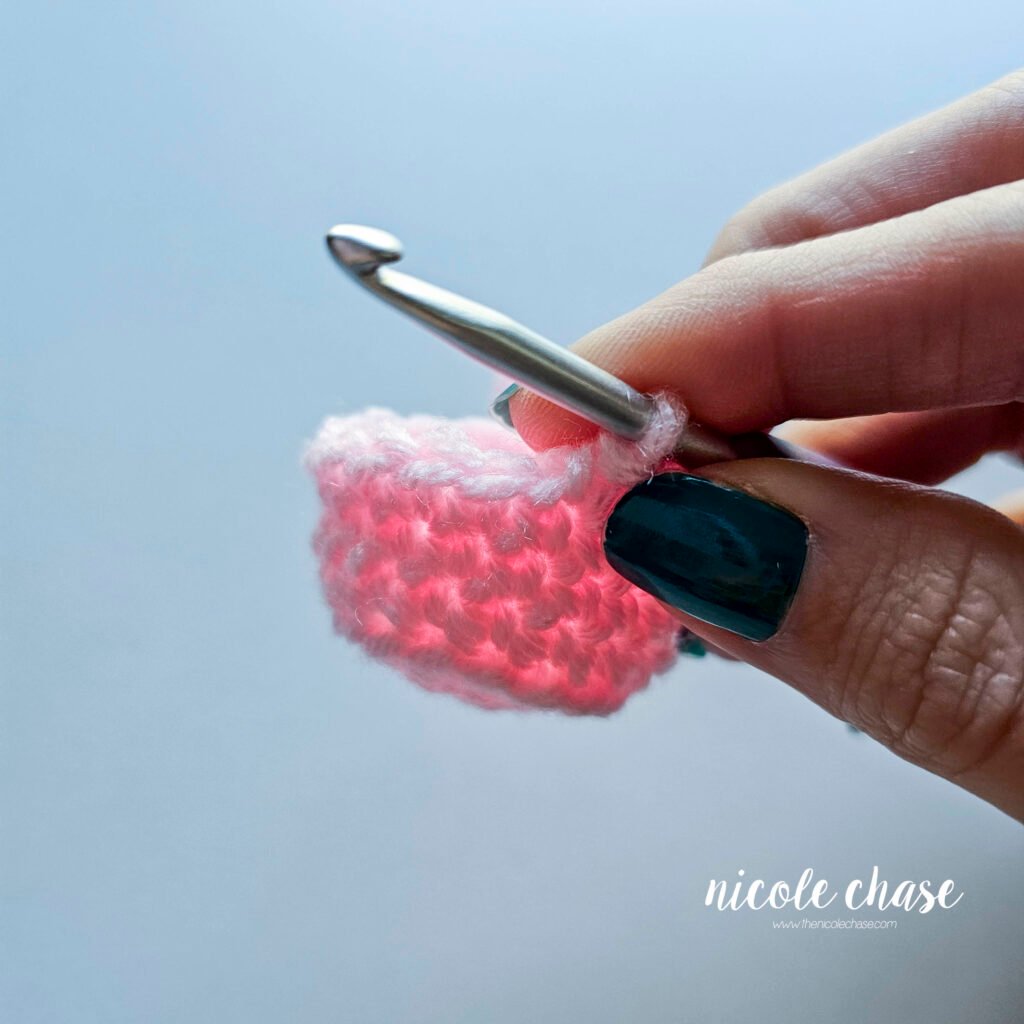
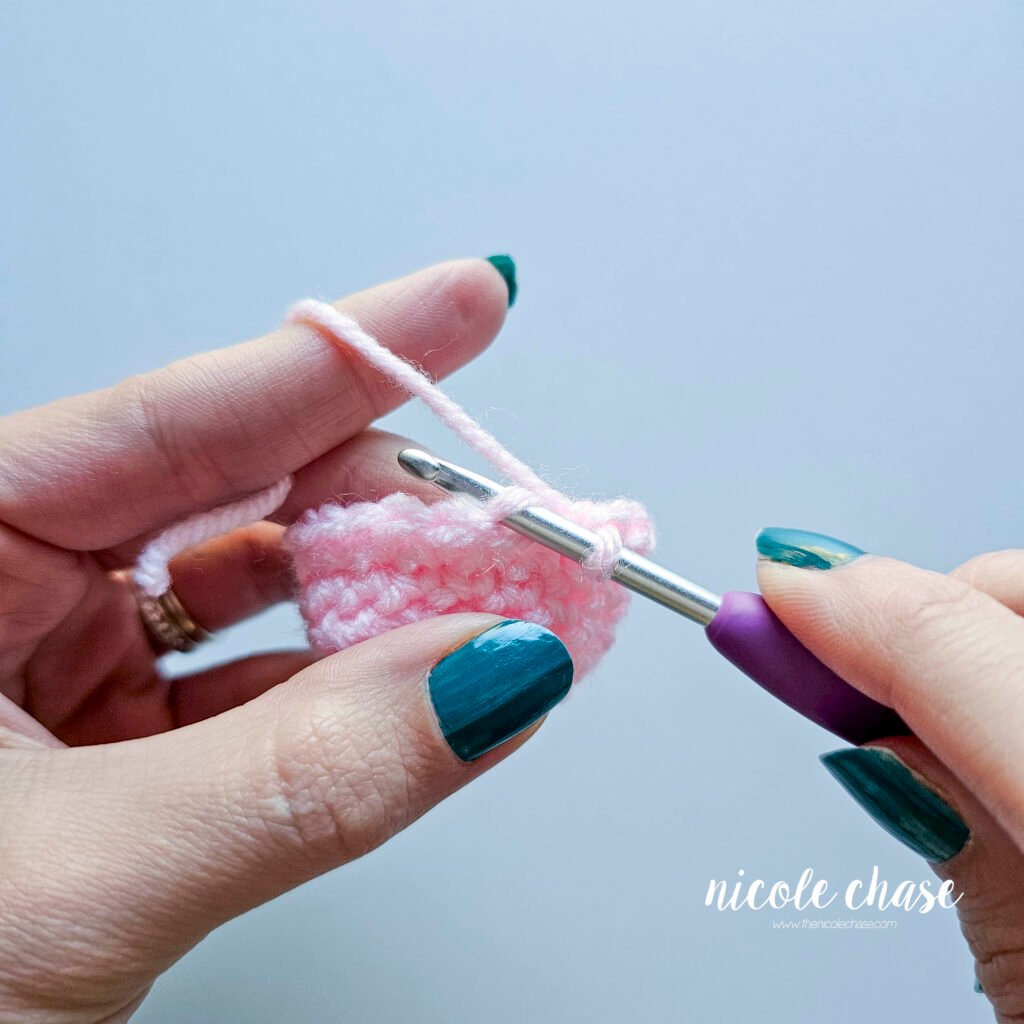

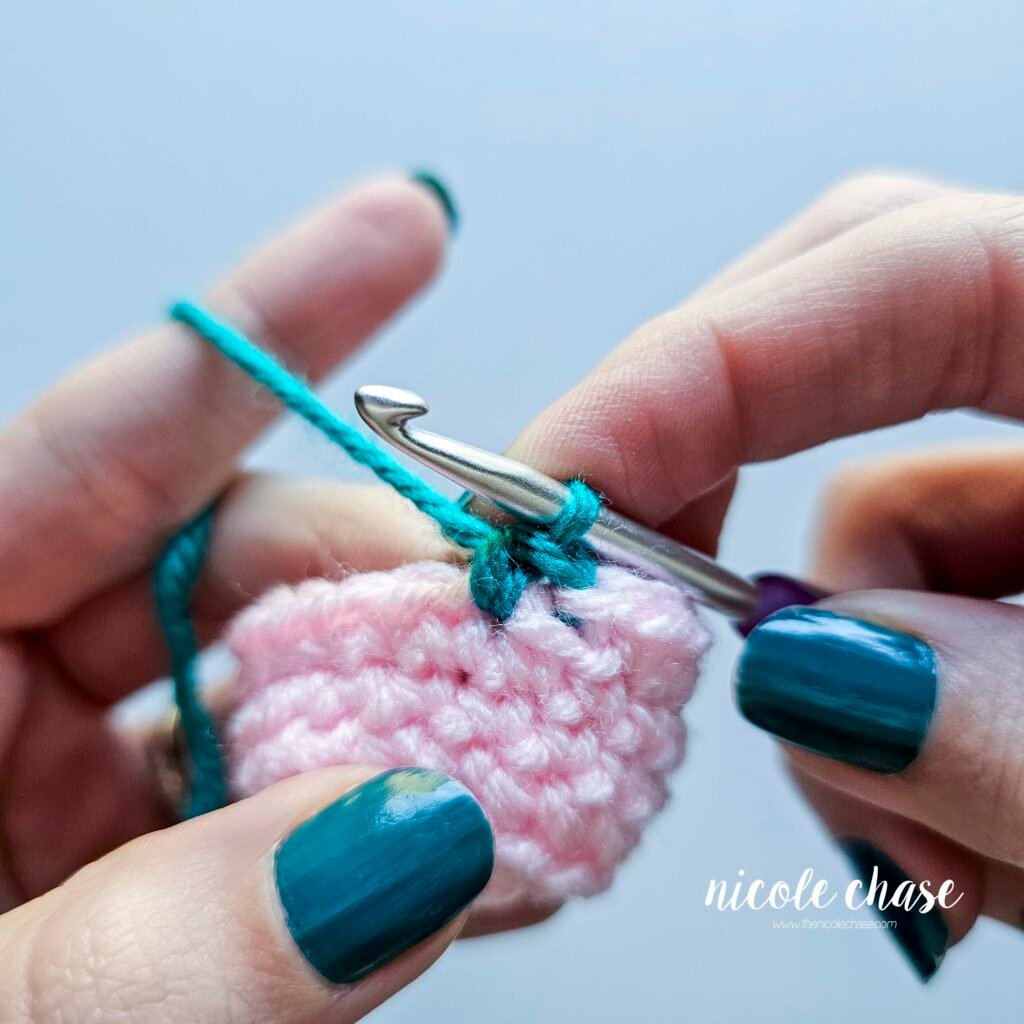
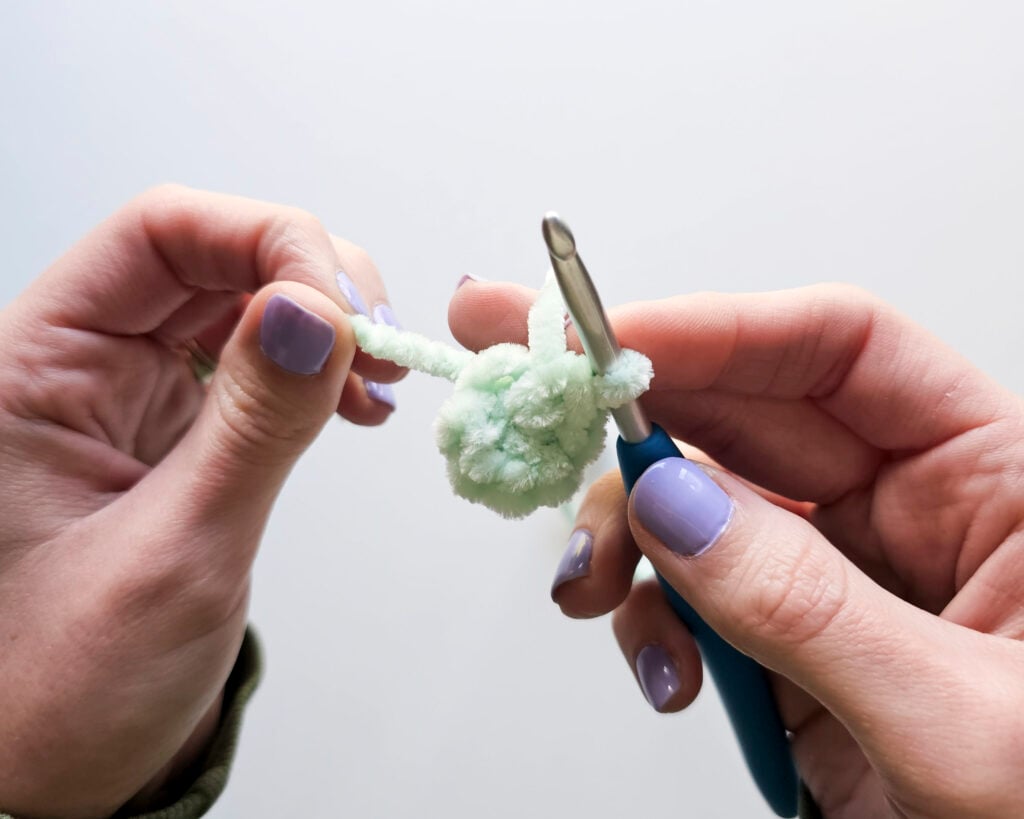
Step 2: Begin the New Round (Working the SC)
- Start your single crochet in the next stitch after the one you just worked into, and continue single crocheting around like normal.
- Continue crocheting the new color until your reach the stitch where the color change started.
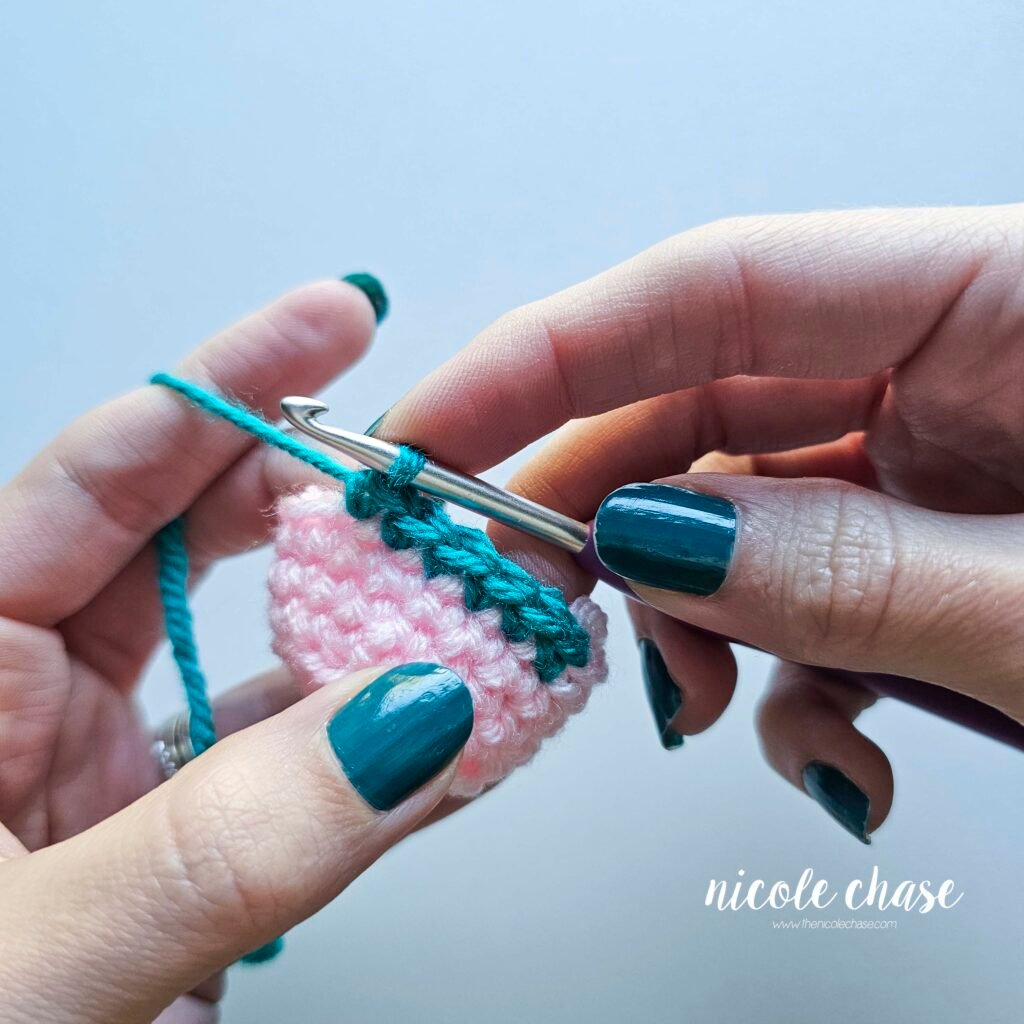

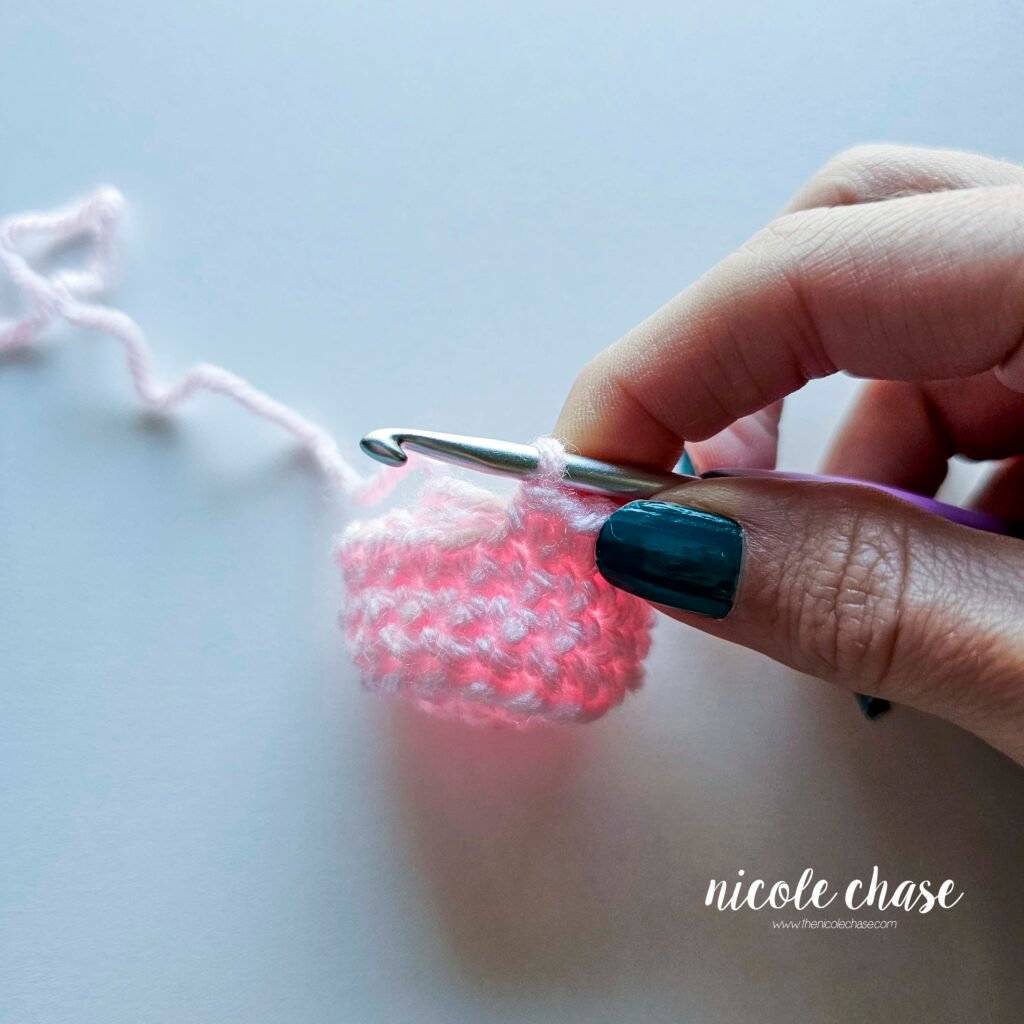
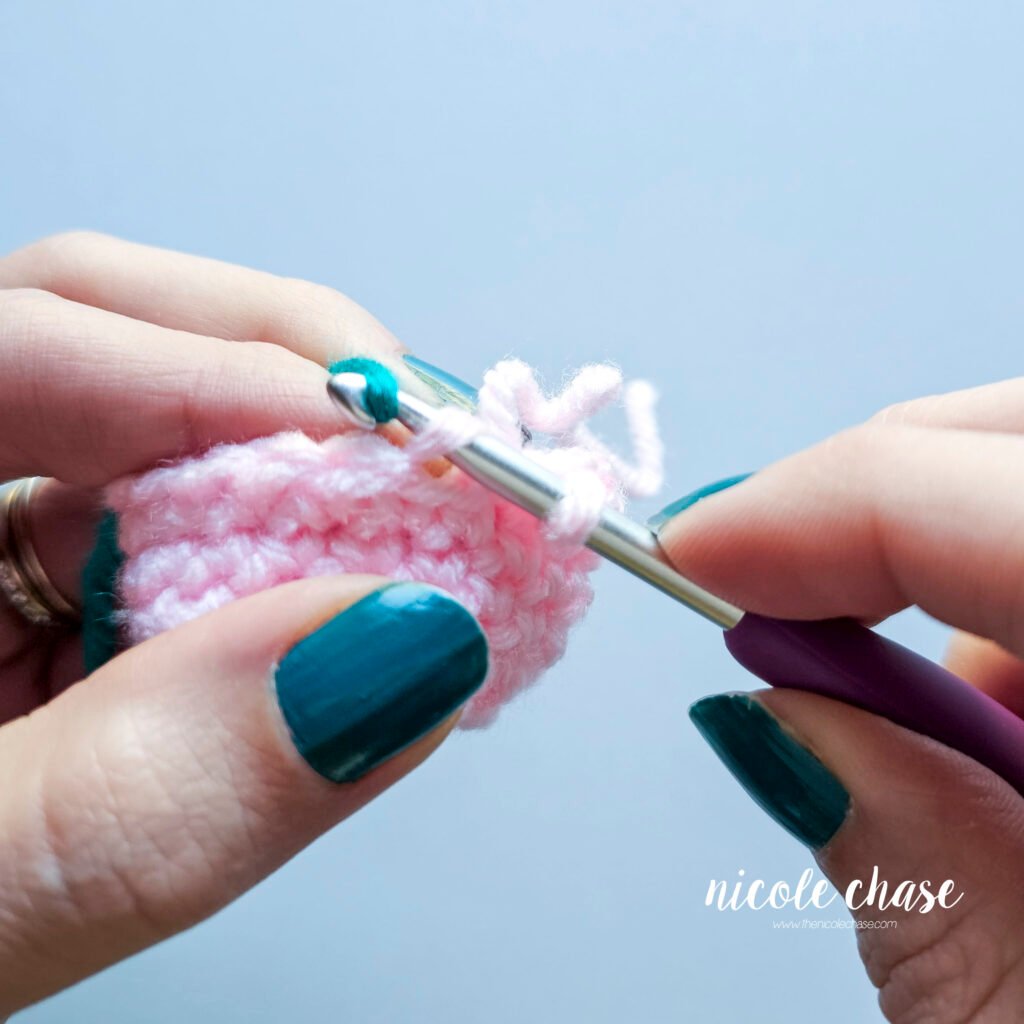
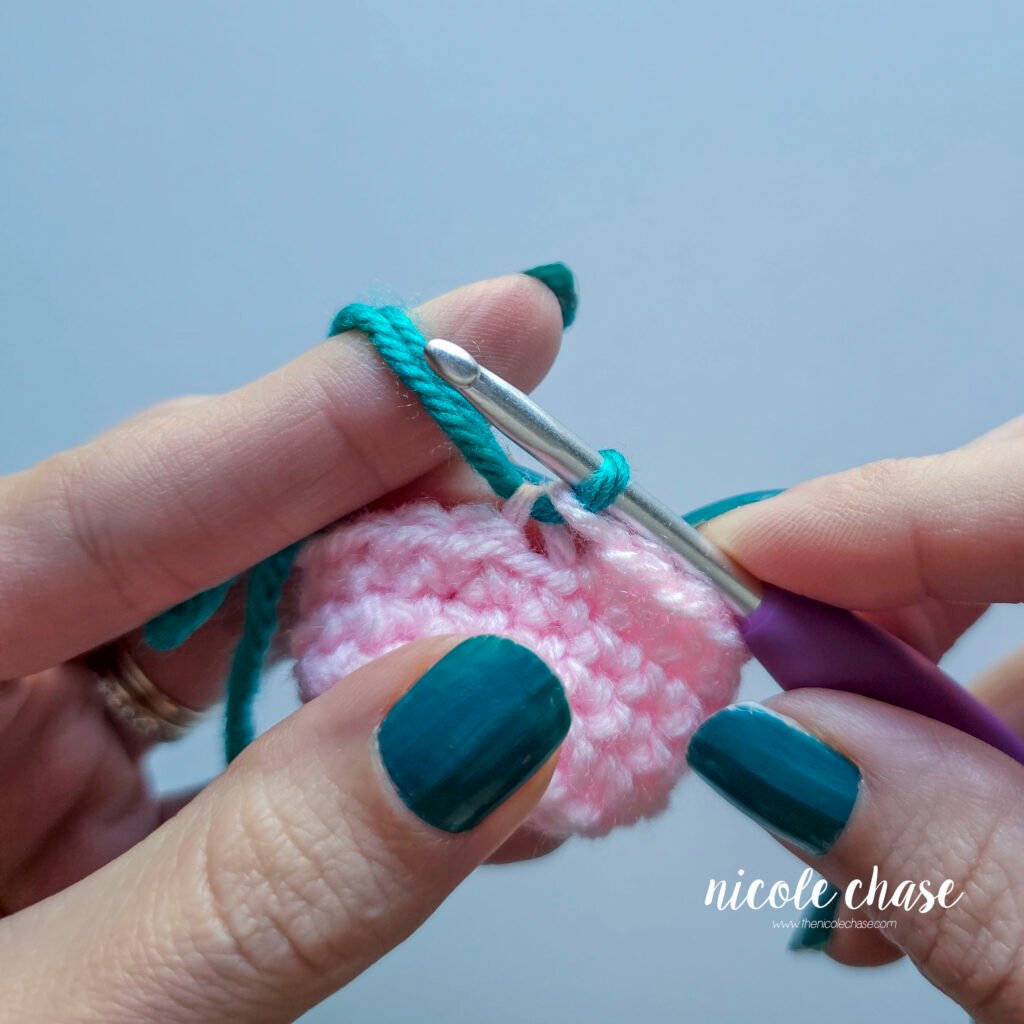
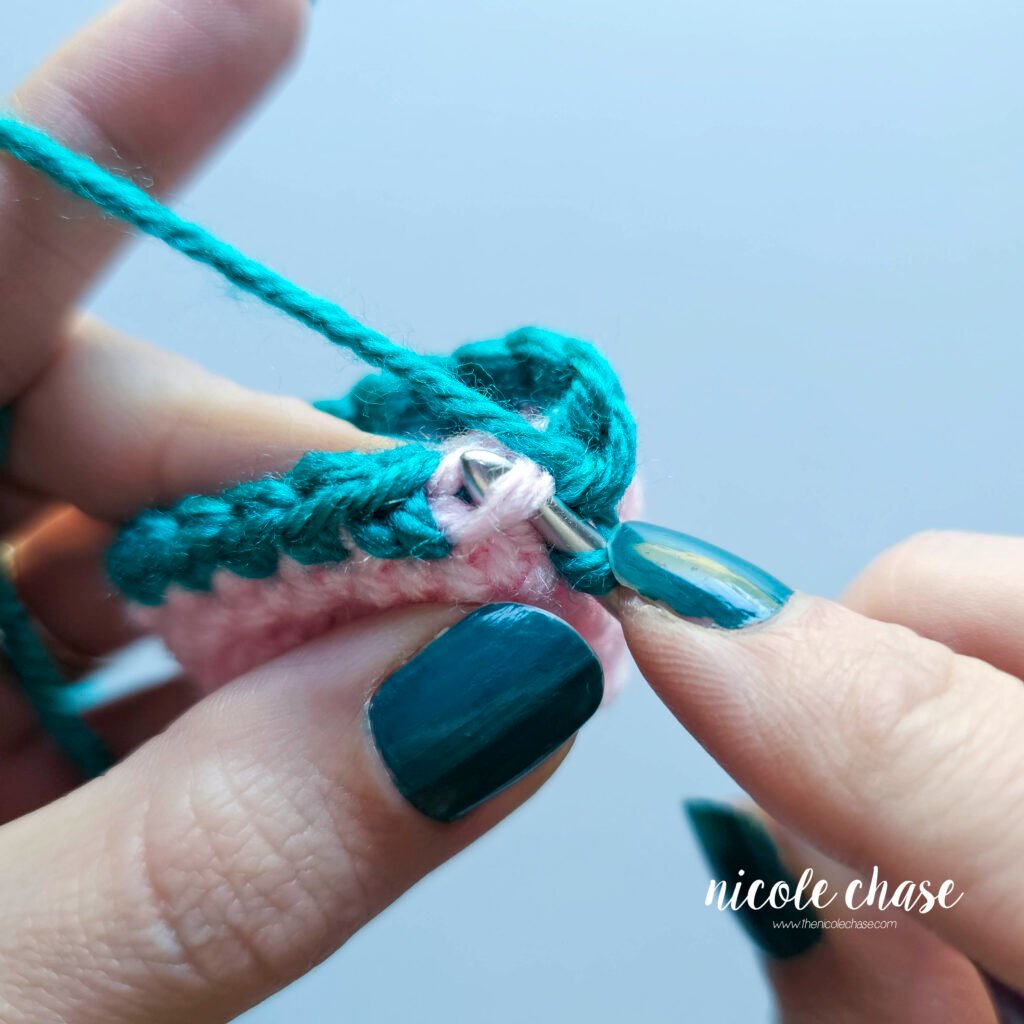
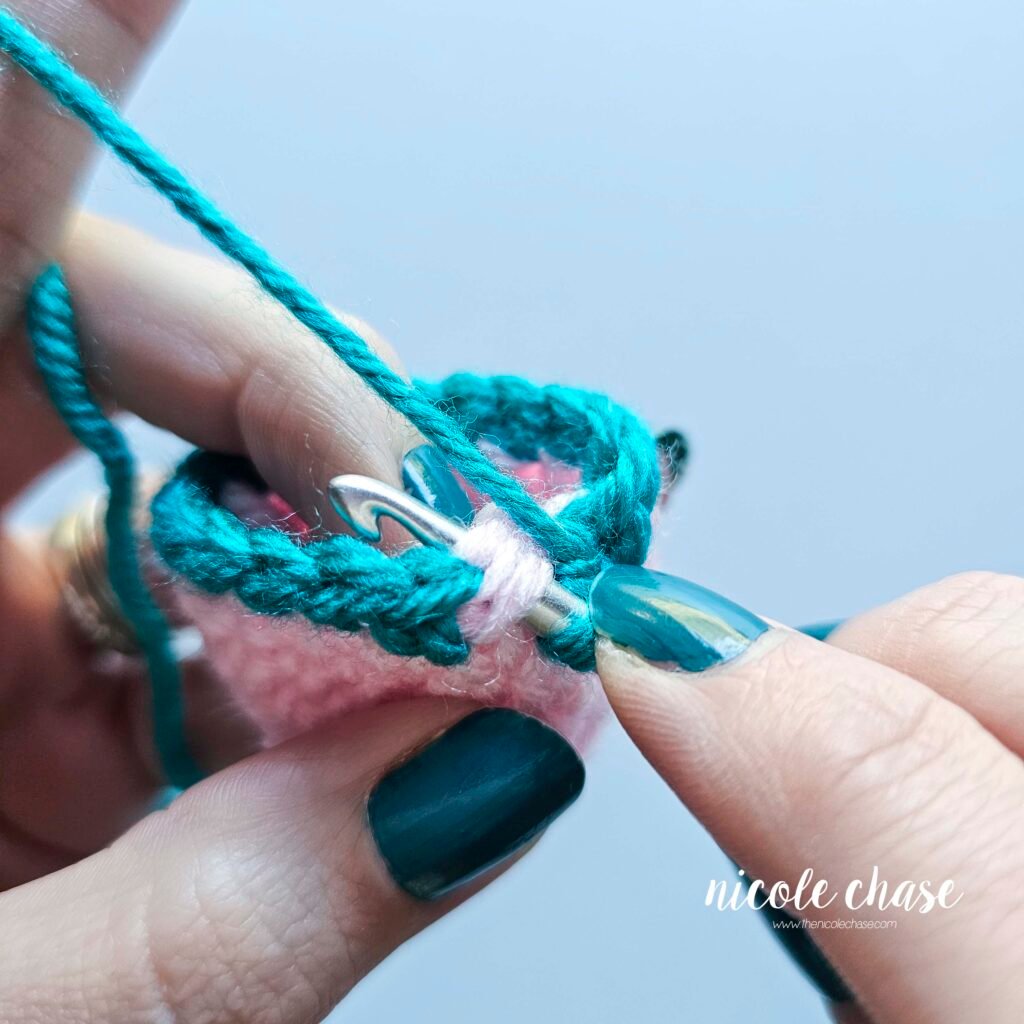
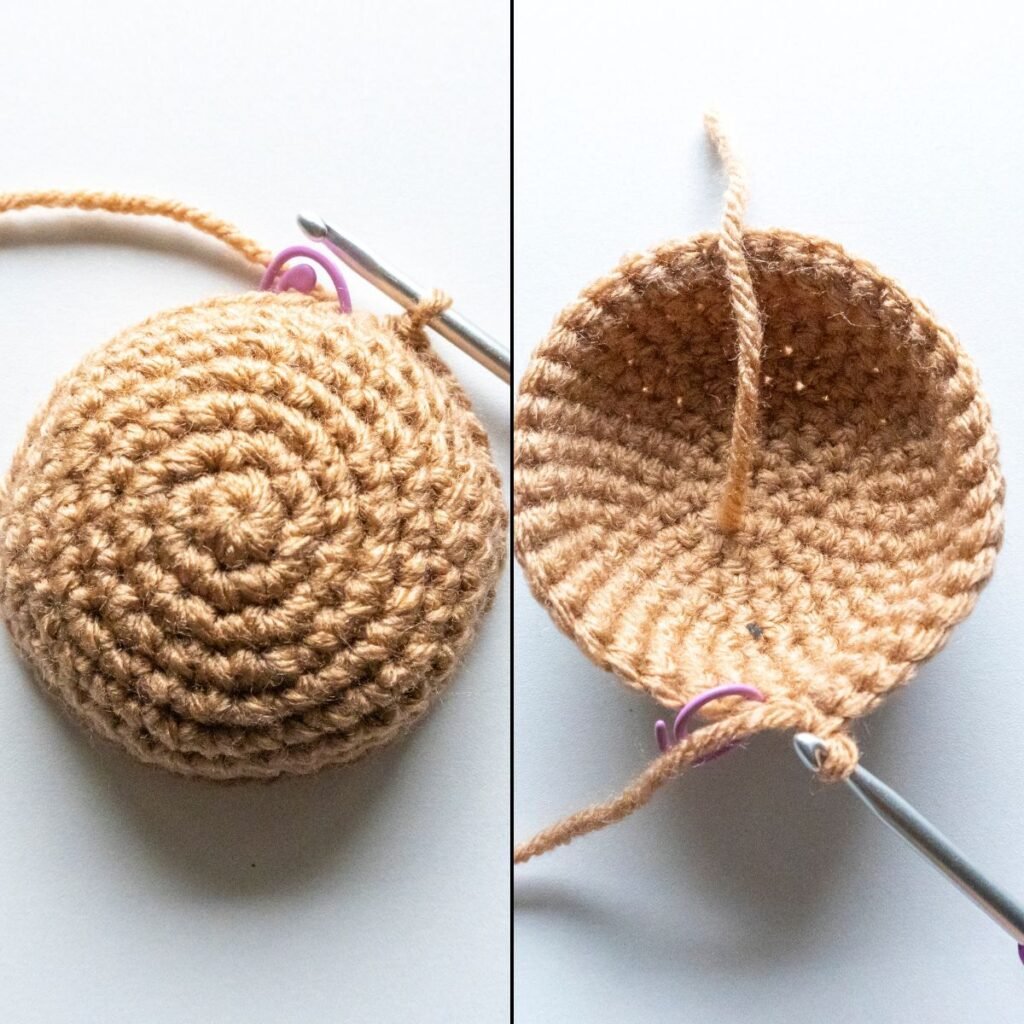
Step 3: Completing the Seamless Transition (The Front Loop Finish)
- When you make it back around to that first stitch (the one where you pulled up your new color in the back loop), you need to work your final single crochet differently.
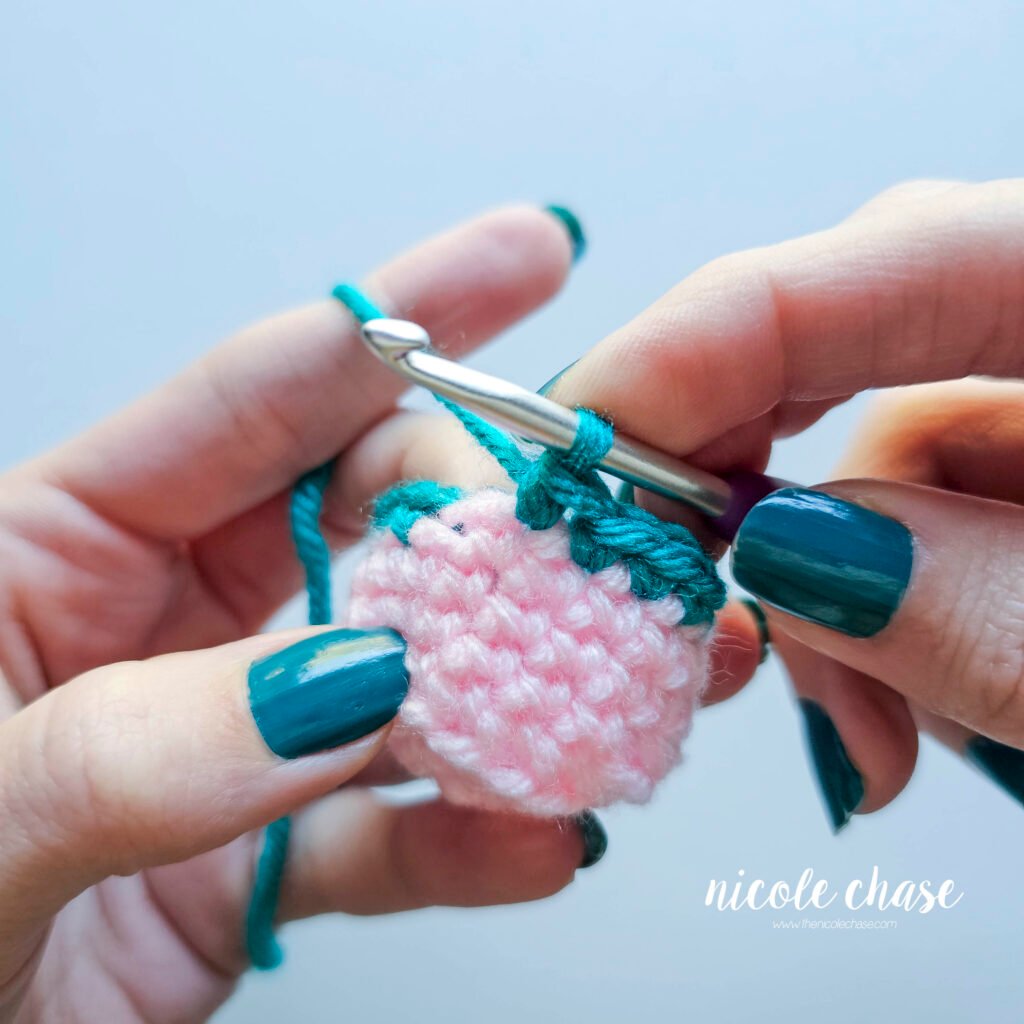
- Work your single crochet through the front loop that was left unworked, as well as the other loops left from your color change.
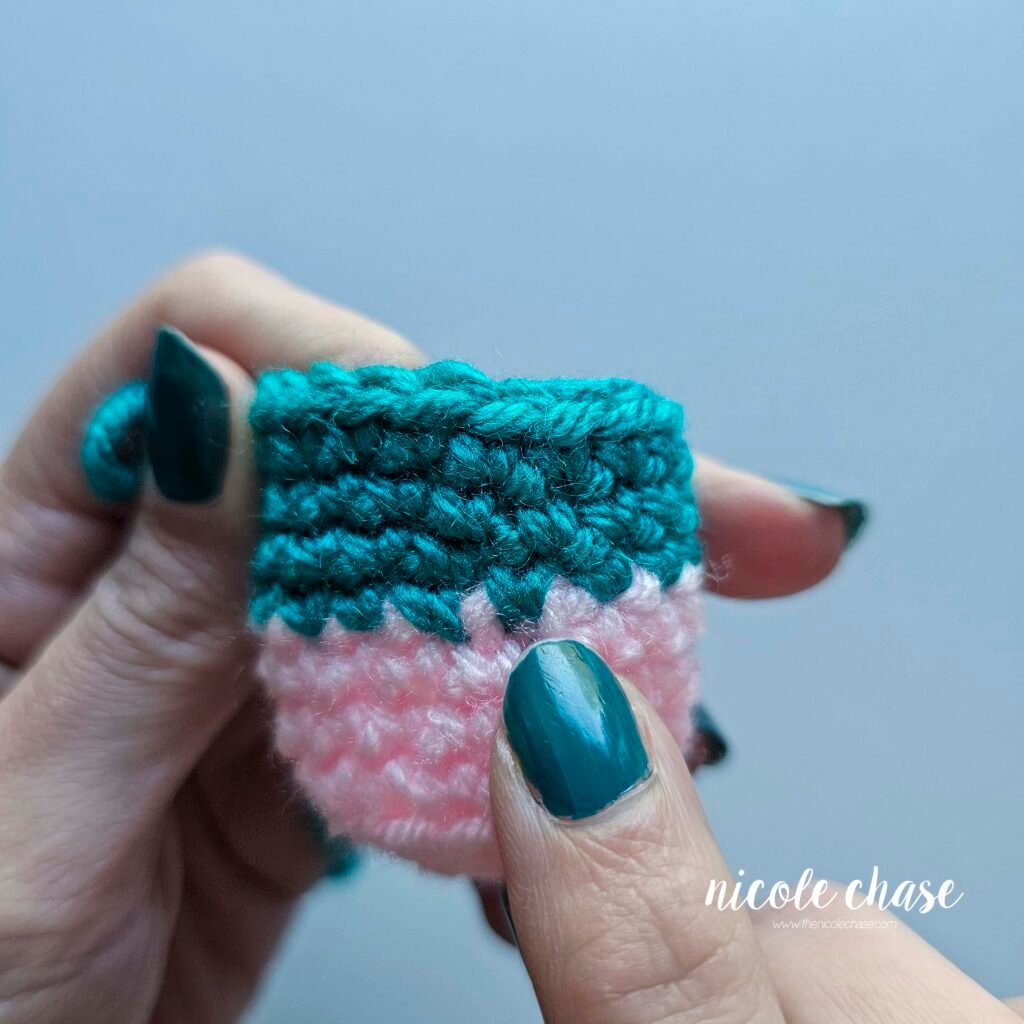
- Continue crochet around like normal! The seamless color change is complete, and you should no longer have a noticeable jog.

Don’t lose this essential trick! Pin the invisible crochet color change tutorial for later.

Frequently Asked Questions (FAQ)
Why is my crochet color change still visible?
Don’t forget to work into the correct loop on the final stitch of the transition! Make sure you are going through the front loop that was left unworked, as well as the other loops from the initial color change setup. Additionally, it often takes a few more rounds of the new color for the stitches to settle and stack, naturally hiding any slight imperfect.
Can I use the invisible color change for rows instead of rounds?
Generally, no. The crochet invisible color change technique is specifically designed for continuous rounds (like those used in amigurumi) where you do not join and turn. Its purpose is to eliminate the diagonal “jog” or spiral that naturally occurs when changing colors in a continuous circular spiral.
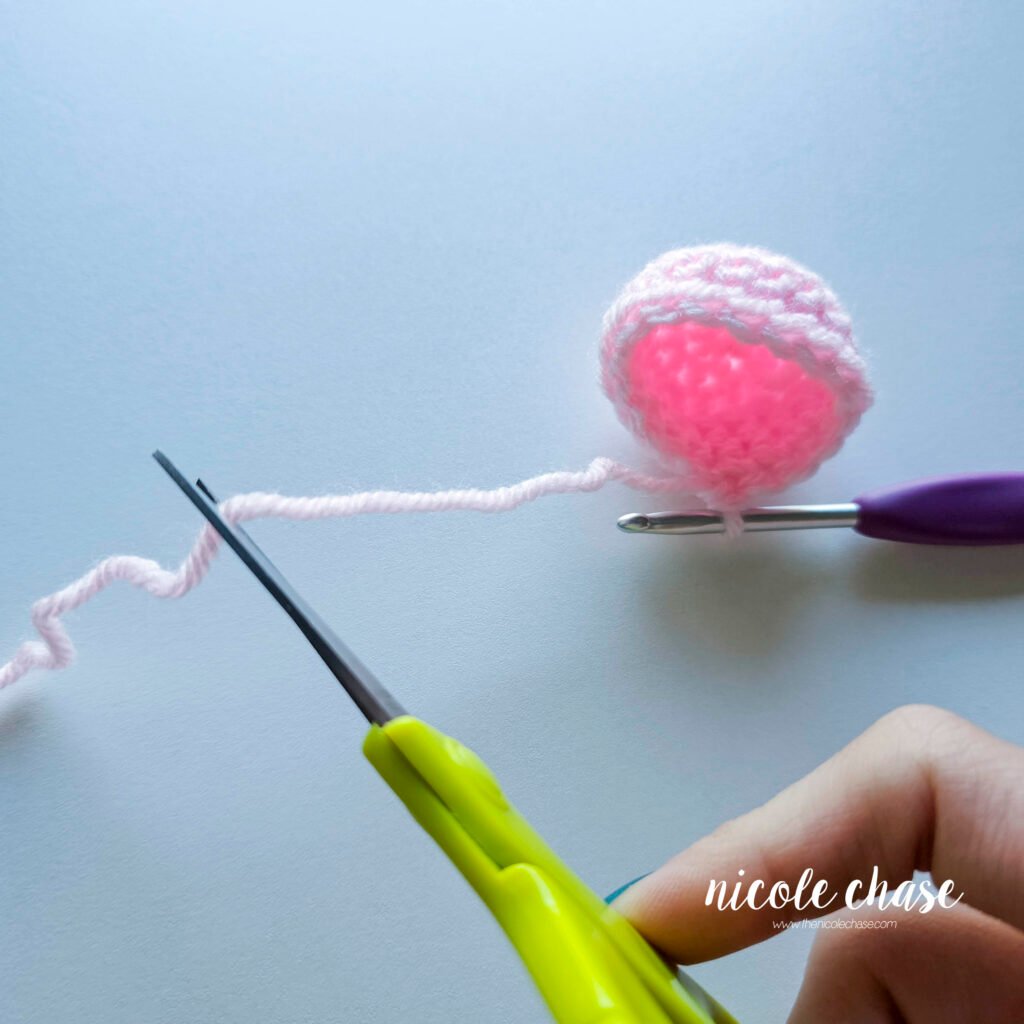
What is the best way to secure yarn tails after an invisible color change?
Once you have completed the color change, tie a small, secure knot using the old and new color tails right where the color change started. Trim the yarn tails, leaving about a 1-2 inch length. Finally, when you are stuffing the amigurumi, ensure that the tails are pushed securely inside.
More Amigurumi Tips and Crochet Tutorials
Now that you’ve mastered the seamless crochet color change, elevate your amigurumi game with these other essential guides and pattern tutorials:
- Amigurumi Tips and Tricks: If you’re looking for more general amigurumi tips and tricks, be sure to check out my comprehensive guide.
- Fix Amigurumi Head Wobble: If you struggle with the stability of the head pieces of your projects, don’t miss these detailed tips on amigurumi head wobble.
- Related Patterns: Ready to put your new skill to the test? Check out some of my favorite amigurumi designs that use the invisible color change method.


First published August 2022.
I hope you enjoyed this post! Be sure to leave me a comment below to let me know what you think.
Want to see more from me? Be sure to subscribe to my email newsletter so that you never miss a post!
Follow along with me on Instagram for daily updates and a behind the scenes look at my designs.
I’d love to see what you make with this tutorial! Don’t forget to share your finished work with me: on social media by tagging me @thenicolechase, in your Ravelry projects, or post over in my Facebook group!
Thanks for stopping by! Happy crafting!
Nicole
PATTERN COPYRIGHT © 2026 NICOLE CHASE. ALL RIGHTS RESERVED.
PATTERN MAY NOT BE ALTERED, COPIED, REDISTRIBUTED OR SOLD AS YOUR OWN PATTERN.
YOU MAY SELL THE FINISHED PRODUCT ON A SMALL SCALE. PATTERN/DESIGN CREDIT GIVEN TO WWW.THENICOLECHASE.COM IS APPRECIATED. PERMISSION TO SELL DOES NOT INCLUDE MASS PRODUCTION. LARGE SCALE PRODUCTION IS PROHIBITED.
PHOTOGRAPHY COPYRIGHT © 2026 NICOLE CHASE. ALL RIGHTS RESERVED.
PHOTOS MAY NOT BE ALTERED, COPIED, REDISTRIBUTED OR SOLD AS YOUR OWN.
This post may contain affiliate links. If you make a purchase through links on our site, we may earn a commission.
This is a game changer! Thank you!
I’m so glad to hear that!
Do I start the new color by going through that back loop in the last stitch of the round I’m working on or the first stitch of the new round? I am not sure how to work it into my stitch count and I don’t want to mess up my stitch count.
Hello! You can do it whichever way you prefer. I generally do it in the first st of the new round. I recommend using this for projects that don’t have any one-sided shaping or multiple color changes, because it will shift the stitch count with each color change.