Crocheting in the Round
This post may contain affiliate links. If you make a purchase through links on our site, we may earn a commission.
Ready to crochet perfect, professional-looking plushies but keep ending up with a lumpy, wonky piece? Crochet in the round is the essential, foundational technique for making beautiful amigurumi. In this beginner’s guide, we will walk through how to work in continuous rounds, master the art of counting rounds, and quickly identify the right side of your project. By the end, you’ll have the confidence to start any amigurumi pattern!

Table of Contents
Most crocheted projects are worked either from side-to-side in flat rows, or in the round to create a three-dimensional shape. Crocheting in the round is the essential, foundational technique for nearly all amigurumi (stuffed toys) you will make.
How to Crochet in Continuous Rounds (vs Joined Rounds)
When working crochet in the round there are often two primary techniques for moving to the next round in the pattern: joined rounds and continuous rounds.
Joined Rounds (The Seamed Method)
One technique for crocheting in the round is using joined rounds. Joined rounds are achieved by ending one round with a slip stitch, and then moving on to the next round. Each round will then typically start with a chain 1 before start your single crochet stitches.
In a crochet pattern, this may be written like this:
- R1: Begin with 6 SC in a magic ring, join with a sl st to beginning. (6 sts)
- R2: Ch 1, 2 SC in each st around, join with a sl st to beginning. (12 sts)
- R3: Ch 1, 2 SC in next st, 1 SC in next st, join with a sl st to beginning. (18 sts)
Notice that the above example starts each round with a ch 1 and ends with a slip stitch. This is a good way to identify that the rounds are joined.
Joined rounds will create a visible line or seam where your rounds are joined. This is generally not ideal for amigurumi projects where a seamless, smooth finish is key.
Continuous Rounds (The Seamless Amigurumi Method)
The preferred method for crocheting in the round when making amigurumi is to work in a continuous spiral. This means that there is no slip stitch at the end of your round. Instead, you will continue working your stitches around in a spiral.
In a crochet pattern, this may be written like this:
- R1: Begin with 6 SC in a magic ring. (6 sts)
- R2: 2 SC in each st around. (12 sts)
- R3: 2 SC in next st, 1 SC in next st. (18 sts)
Notice that the above example does not include a ch 1 or slip stitch, like the joined rounds above. The lack of a connecting slip stitch is precisely what allows you to continue crocheting in a spiral without creating a noticeable seam. This is a good indicator that the rounds are worked continuously. There may also be a note at the beginning of the pattern stating that it is worked in a continuous round, continuous spiral. The pattern may also recommend that you utilize a stitch marker to keep track of your crochet continuous rounds.
Crocheting in a continuous spiral is typically achieved by beginning with a magic ring or magic circle.
Can I Substitute Joined Rounds with Continuous Rounds?
Generally, yes! Especially when the pattern uses single crochet (SC), which is most common for amigurumi.
You may find instances where a joined round is necessary or preferred, often when working with color changes, complicated stitches, or when creating a flat shape. However, for most traditional amigurumi shapes, substituting for continuous rounds is perfectly acceptable and the preferred choice for a seamless look.
Starting the Round: The Magic Ring and Beginner-Friendly Alternative
The first step in any piece of amigurumi is establishing a tight, closed center. Without a good start, your stuffing might peak out, or your project could lose its shape. The best foundation for this is the magic ring, or the simpler ch 2 alternative to start the round.
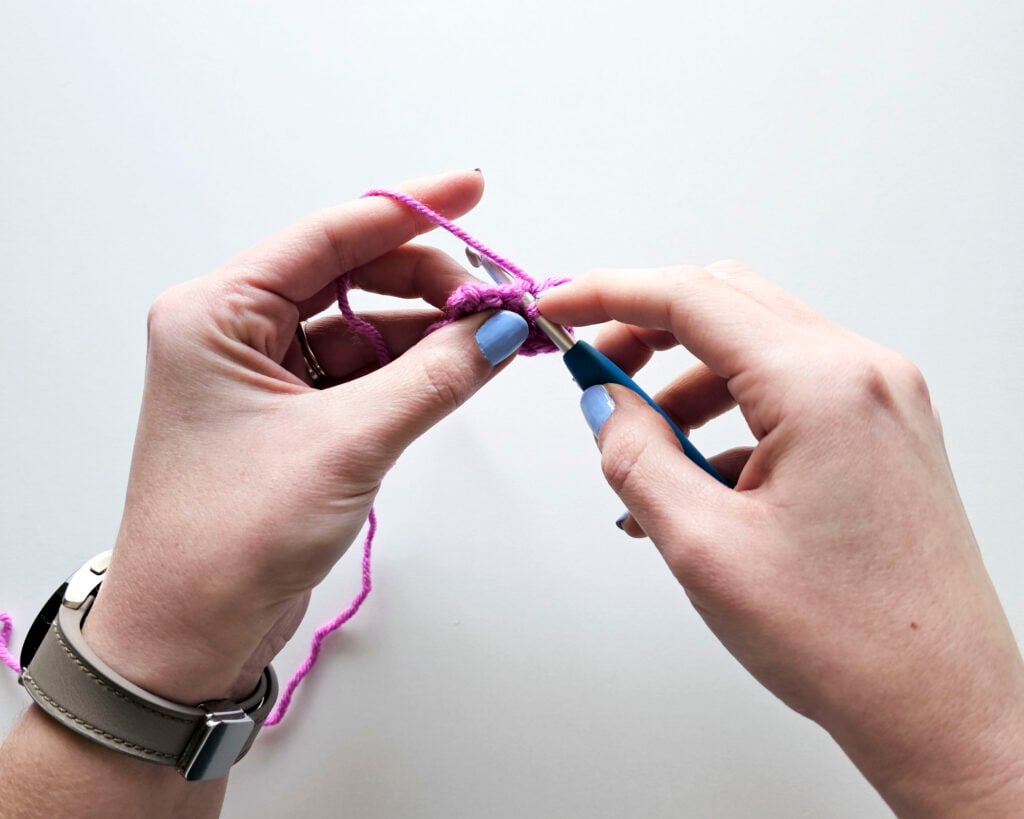
The Magic Ring: The Essential Amigurumi Start
To ensure your stuffed projects are perfectly closed, you must start with a tight center hole. The magic ring (also known as the magic circle) is the ultimate foundation for starting any amigurumi piece. This technique allows you to pull the tail of the yarn to cinch the center stitches completely shut, creating a truly seamless beginning.
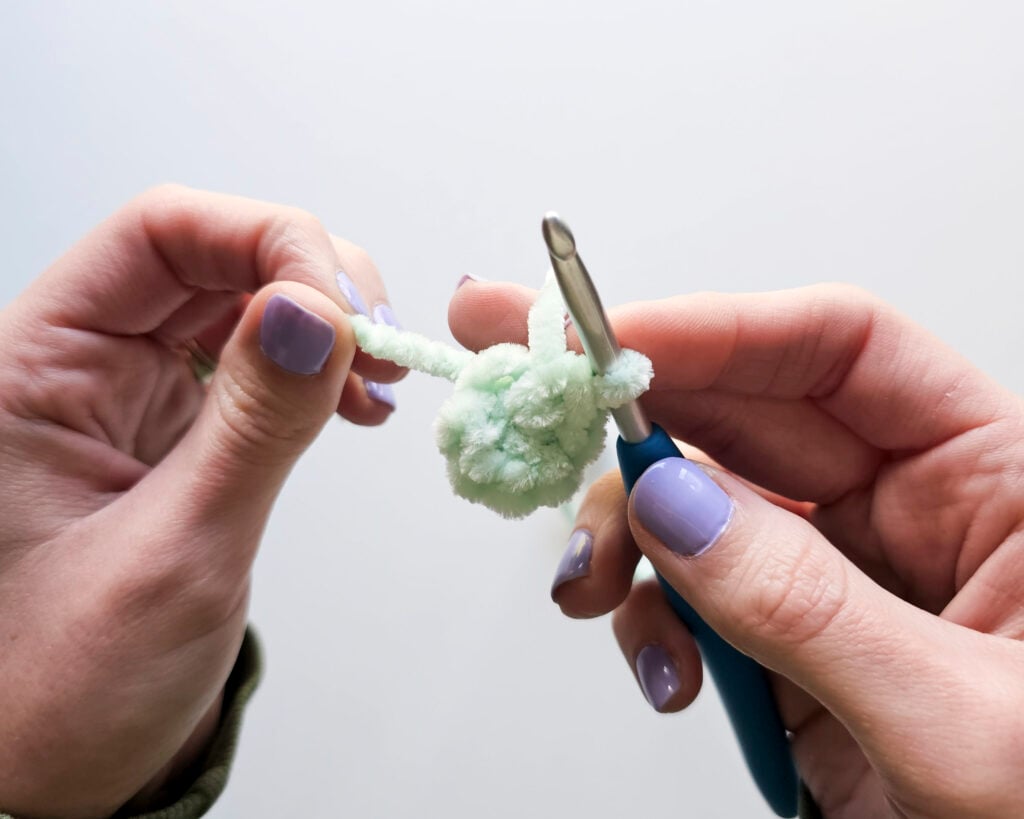
Magic Ring Alternative: When Frustration Hits
It’s common for beginners to struggle with the magic ring; it can feel complicated. Don’t let this stop you!
The chain 2 method is a highly recommended option if you are struggling, or if you are using a more difficult fiber like plush or velvet yarn that is prone to breakage when pulling the magic ring closed. It is a great starting point until you have mastered the magic ring.
Need a step-by-step tutorial on both methods? Get the complete instructions for both the magic ring and the chain 2 alternative.
Video Tutorial for Crocheting in the Round
Prefer to see the stitches in action? Watch this video for a quick visual guide on continuous rounds, counting, and the right side of amigurumi.
This video is also available on YouTube. Watch this video: Crocheting in the Round on YouTube.
Finding Your Place: How to Count Rounds and Stitches
One of the quickest ways to lose your confidence in a pattern is to lose your place. Because we work in a seamless spiral, keeping track of where one round ends and the next begins is a skill all amigurumi makers must master. This is achieved through two main methods: tracking with a tool like a stitch marker, and learning to read the stitches themselves.
The Essential Amigurumi Tool: The Stitch Marker
In order to prevent a seam in your amigurumi project, we work in a crochet continuous round, which means there won’t be any true ending (like a slip stitch) to your round. So how do you keep track of your progress? With stitch markers!
As you work, you will insert your stitch marker into the top two loops of the first single crochet stitch of the round. Then, as you move on to the next round, you will remove the marker, complete your first stitch of the new round, and immediately replace your stitch marker into the top two loops of that new stitch. You will continue this for the entirety of your project.
Stitch markers allow you to keep track of the beginning of your rounds so that you know when to begin the next, without having to count every single stitch.
Counting Your Stitches Correctly
It happens to the best of us: you miscount, miss a stitch, or add too many, and you need to go back and double-check your count.
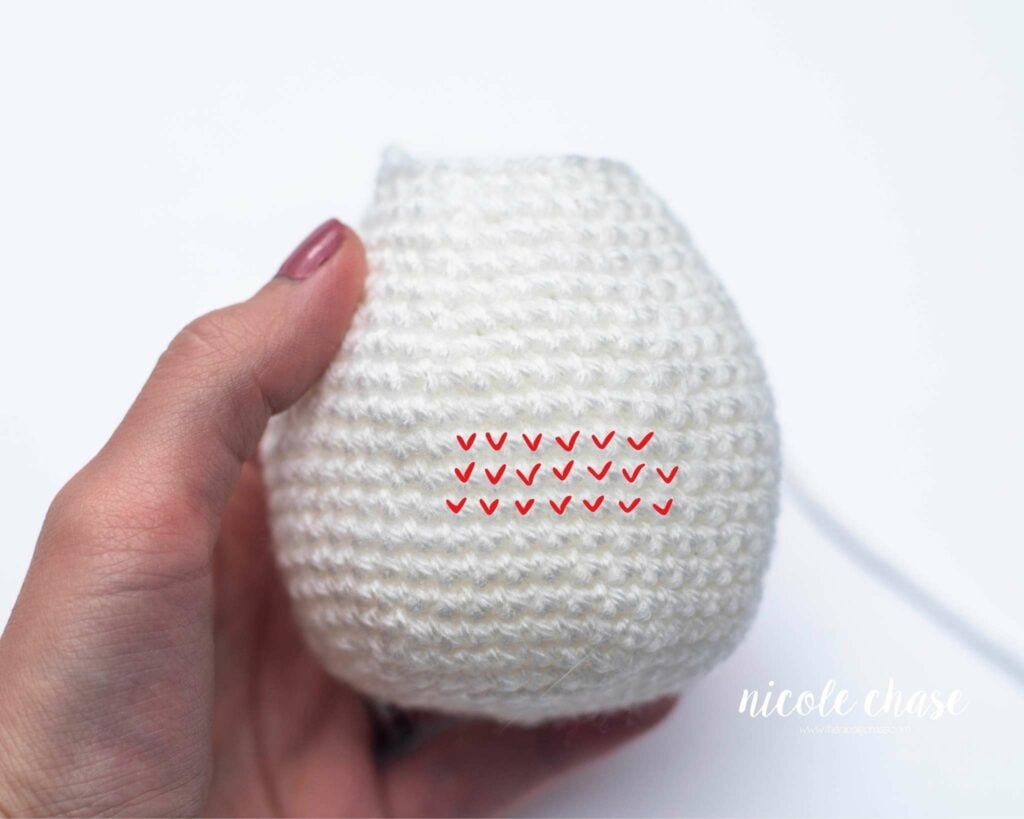
Understanding the “V” Shape: Each single crochet stitch will visually look like the letter “V”. Each “V” represents one single crochet stitch, even for an increase. In the image below, you can see where I’ve marked a patch of single crochet stitches in red.
If you are counting the stitches of the round you are currently working, you can count from the top of the stitches. The top of each stitch includes a front loop and a back loop, which together form the top two loops you work into. In the next image, I’ve identified four stitches, clearly showing their top loops in different colors (red, orange, green, and blue).

Counting the Rounds in a Continuous Spiral
When you are working in the round, each line of stitches is referred to as a round. You need to count your rounds to ensure you are on track with the pattern.
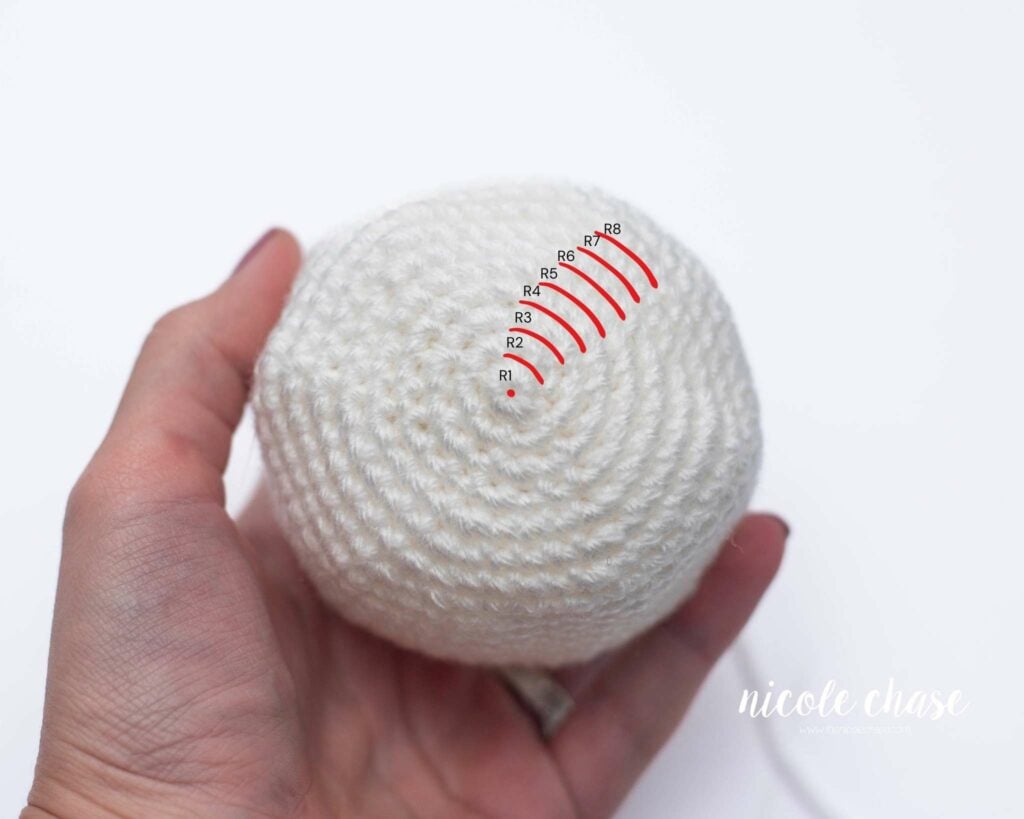
The Visual Method: After you’ve learned how to identify the single crochet stitches with the “V” shape, identifying the rounds is a lot easier. Each horizontal line of “V”s is one round.
If you start at the very center of your piece, you’ll find the magic ring. The first round are the stitches that were worked in the magic ring. Right above those stitches, you’ll find the next horizontal line of “V”s, which is your second round (R2), and so on.
Tracking Rounds with a Row Counter or Tally
When working for long periods, counting visually can become tedious or unreliable. A great way to prevent mistakes is to use a simple tracking tool:
- The row counter comes in handy when crocheting in the round. After you complete a round (when you reach your stitch marker), you can just tap the button on your counter so that you don’t lose track.
- Alternatively, you can keep track of your rounds with simple tally marks on a sheet of paper.
The Secret to Smooth Amigurumi: Identifying the Right Side
When crocheting in a continuous round, your single crochet stitches won’t look the same on each side of your fabric, so it’s critical to know which side should be facing out. The difference between these two sides is the key to achieving a professional, smooth finish.
Right Side vs. Wrong Side
The side that should be showing on the outside of your piece is called the right side, while the side that will be on the inside (where the stuffing goes) is called the wrong side.
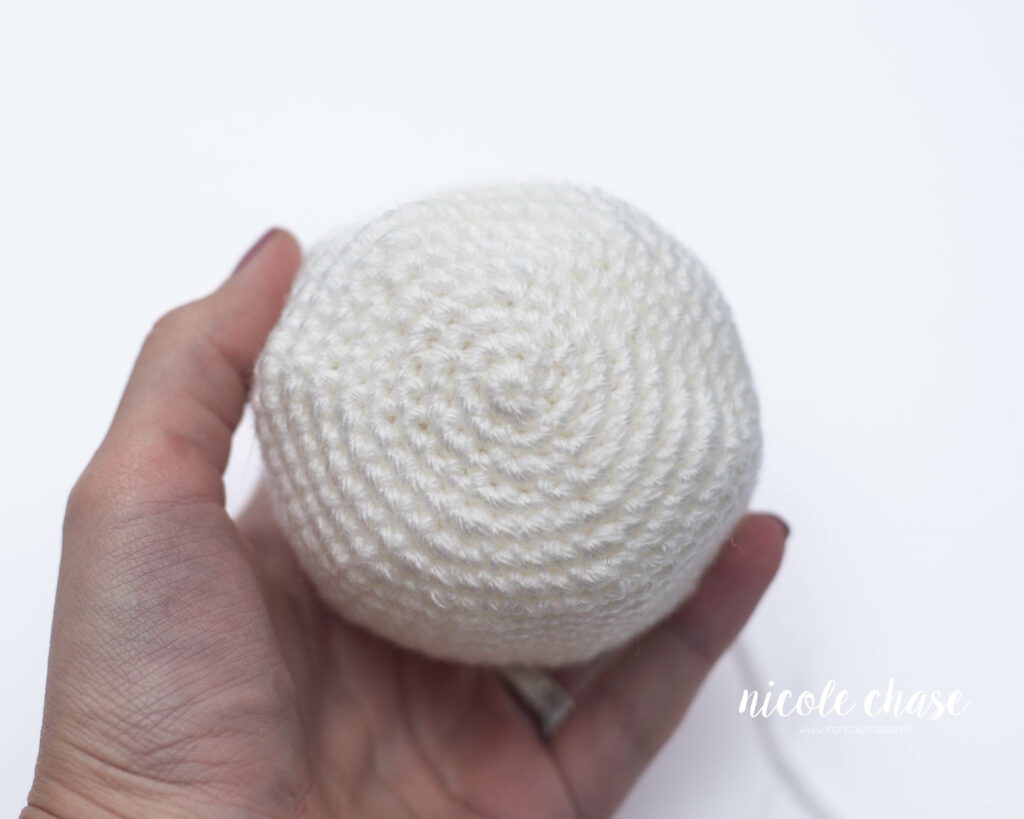
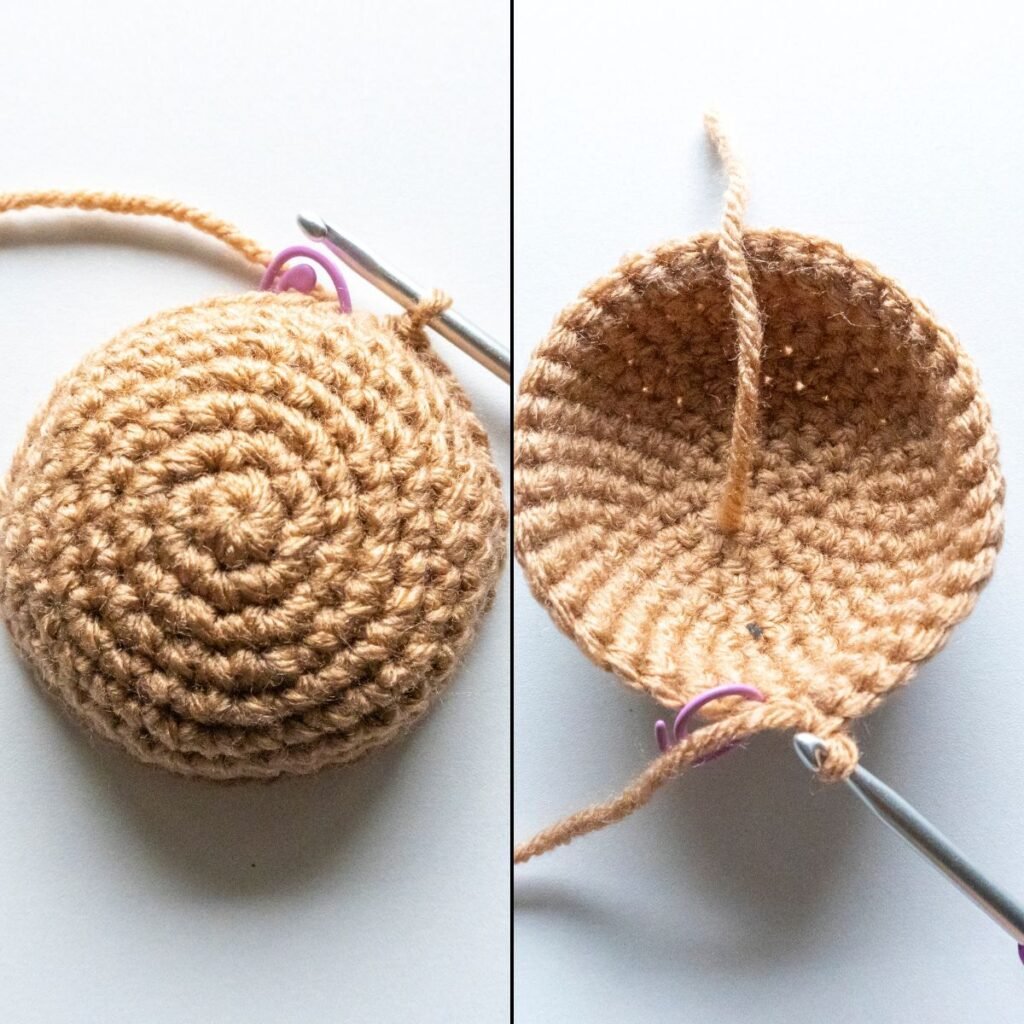
- The Right Side of your work is identified by the prominent spiral appearance, where the single crochet stitches look like clean, layered “V”s.
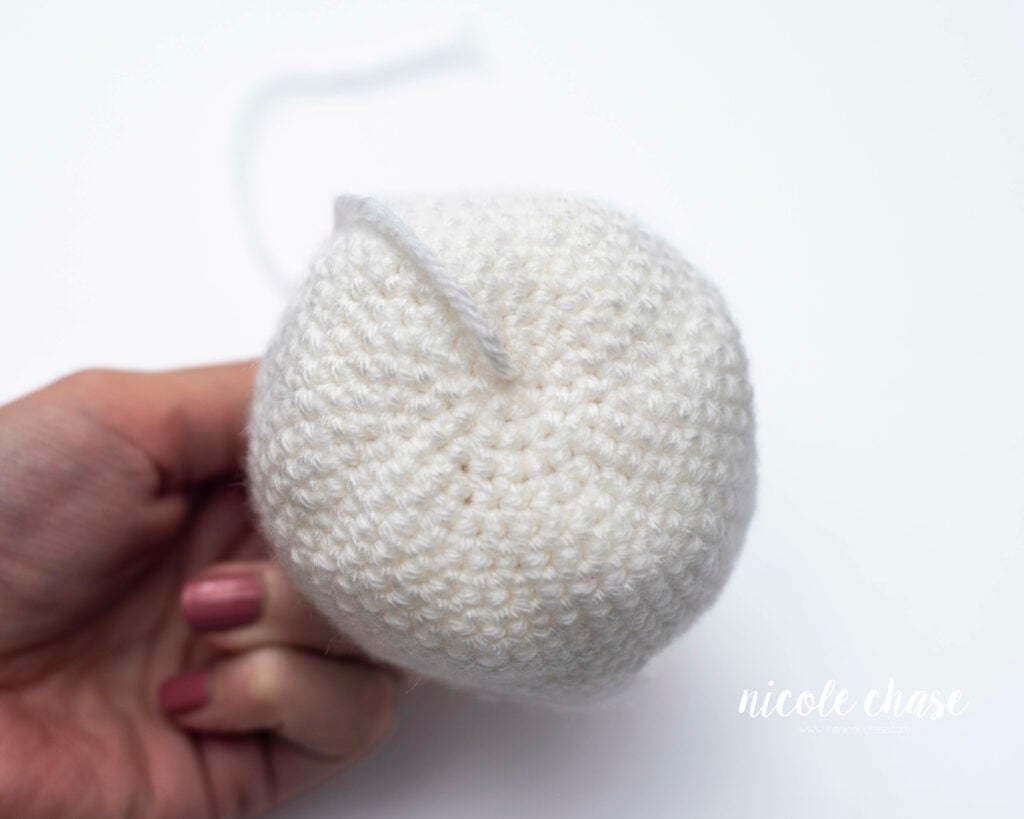
- The Wrong Side is easily identified by the horizontal diagonal bar that runs across the back of each stitch.
Crucial Tip: When working crochet continuous rounds, your piece will naturally want to curl into the wrong side (diagonal bars facing you). It is important to manually flip your work early on so that the right side (smooth “V”s) is facing you. Once flipped, the piece will generally maintain that curve and direction for the rest of the project.
Take a look at the difference:
Need More Detail?
If you are still struggling to see the difference, or want a full tutorial on why this understanding is crucial for your amigurumi, I created a deep-dive guide just for you!
See the full Right Side vs. Wrong Side Amigurumi Tutorial here.
Troubleshooting: What’s Wrong With My Crochet Circle?
The most common issues when crocheting in the round are circles that either wave outwards (ruffle) or curve inwards too quickly (cup). It is important to remember that your choice of yarn weight and hook size can also impact these results. Both problems indicate a simple imbalance in your increase rate, and they are easy to fix once you know the cause.
My Circle is Wavy or Ruffling
This is where the edges of your circle start to wave.
| CAUSE | SOLUTION |
| Too Many Increases | Reduce your increase rate. Your pattern is asking you to add stitches too quickly, causing the edges to flare out. |
| Tension is Too Tight | Use a larger hook size, or switch to a thinner yarn. Switching to a larger hook can instantly relax your stitches and let the piece lay flatter. |
| Misplaced Increases | Rip back (frog) and recount your stitches. Ensure your increases are placed as indicated in the pattern. |
My Circle is Cupping or Bowling
This is where your circle curves inward, forming a bowl or cup shape before you intend it to.
| CAUSE | SOLUTION |
| Not Enough Increases | Increase your increase rate. Your pattern is not adding enough stitches per round to create a flat circle. |
| Tension is Too Loose | Use a smaller hook size, or switch to a bulkier yarn. This will tighten up your stitches and encourage the piece to lay flatter, fighting the curve. |
| Missing Stitches | Rip back (frog) and recount. You may be missing the last increase in a round, or you may have accidentally skipped a stitch in a previous round. |
Mastering the fundamentals of crochet in the round, from choosing the right start to learning how to count and troubleshoot, is the key to unlocking seamless, professional-looking amigurumi. Don’t let a lost stitch discourage you! You now have the essential techniques and tips required to tackle any pattern with confidence. The only thing left to do is start creating!
Ready to Master Amigurumi? Enroll in the FREE Course!
You’ve tacked the core skill of crocheting in the round, now take the next step toward becoming a confident amigurumi artist!
My free Amigurumi for Beginners course is designed to take the guesswork out of starting your first project. In the course, you’ll get:
- Step-by-step tutorials on all the basic stitches and necessary technqiues.
- Guides on how to read a crochet pattern.
- Beginner projects to immediately practice your new skills.
Whether you’re struggling to understand patterns, or just need structured guidance, enroll today to fast-track your skills!
Learn How to Crochet Amigurumi!
Sign up for my free amigurumi for beginners course and learn everything you need to know to make your own crochet plush!
To see what is included, check out the course summary page!

More Crochet Tutorials and Resources
If you’re ready to build on these new skills, whether it’s learning the invisible decrease, tackling a new amigurumi pattern, or adding advanced details, I’ve got you covered. Explore these related tutorials and resources to continue advancing your craft.
- Learn the invisible decrease: the secret to seamless shaping!
- How to master a seamless color change in amigurumi
- Browse my full collection of amigurumi patterns


I hope you enjoyed this post! Be sure to leave me a comment below to let me know what you think.
Want to see more from me? Be sure to subscribe to my email newsletter so that you never miss a post!
Follow along with me on Instagram for daily updates and a behind the scenes look at my designs.
I’d love to see what you make with this tutorial! Don’t forget to share your finished work with me: on social media by tagging me @thenicolechase, in your Ravelry projects, or post over in my Facebook group!
Thanks for stopping by! Happy crafting!
Nicole
PATTERN COPYRIGHT © 2026 NICOLE CHASE. ALL RIGHTS RESERVED.
PATTERN MAY NOT BE ALTERED, COPIED, REDISTRIBUTED OR SOLD AS YOUR OWN PATTERN.
YOU MAY SELL THE FINISHED PRODUCT ON A SMALL SCALE. PATTERN/DESIGN CREDIT GIVEN TO WWW.THENICOLECHASE.COM IS APPRECIATED. PERMISSION TO SELL DOES NOT INCLUDE MASS PRODUCTION. LARGE SCALE PRODUCTION IS PROHIBITED.
PHOTOGRAPHY COPYRIGHT © 2026 NICOLE CHASE. ALL RIGHTS RESERVED.
PHOTOS MAY NOT BE ALTERED, COPIED, REDISTRIBUTED OR SOLD AS YOUR OWN.
This post may contain affiliate links. If you make a purchase through links on our site, we may earn a commission.
Thank you so much for free course you’re God sent
I’m so glad that it was helpful!