Slip Knot and Chain Crochet Tutorial
This post may contain affiliate links. If you make a purchase through links on our site, we may earn a commission.
Making a perfect crochet slip knot and learning how to crochet a chain stitch are the very first steps in any crochet journey. No matter what you’re making, getting your foundation right is so important!
In this tutorial, I’ll walk you through my favorite no-fail method for how to make a slip knot for crocheting, followed by a step-by-step crochet chain stitch for beginners. I’ve included a detailed photo tutorial and a video to help you master your tension from the very first stitch!
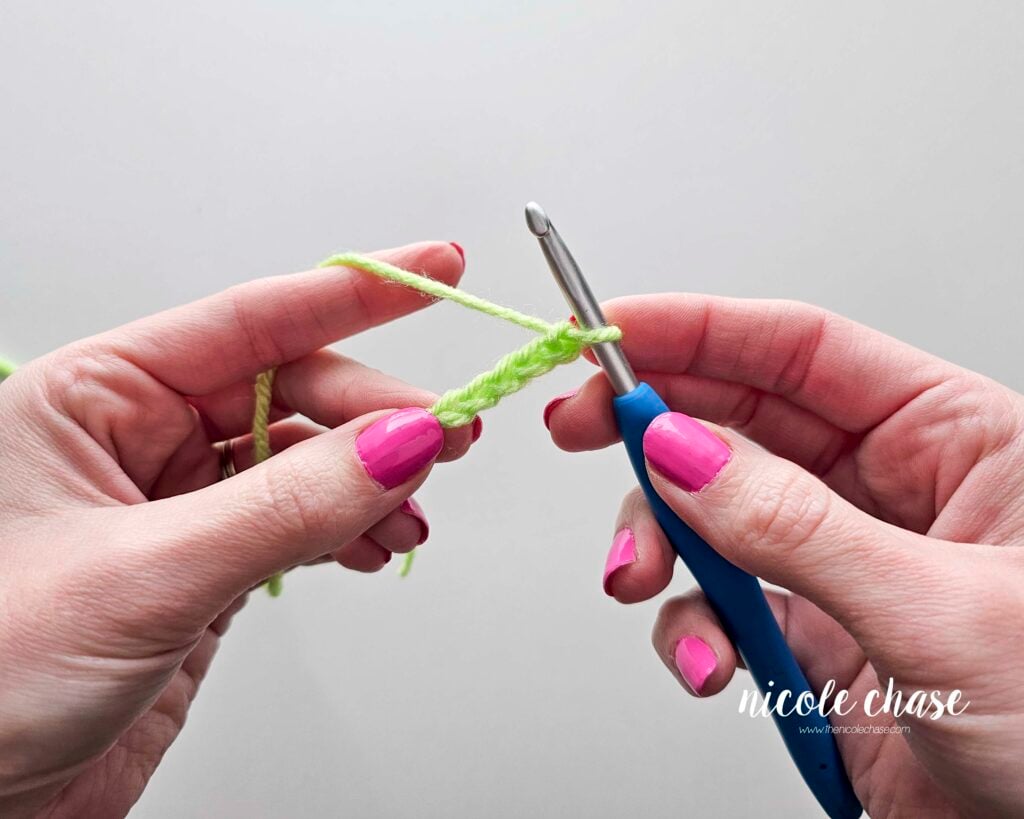
Table of Contents
Getting Started: The Crochet Slip Knot
Before you can start a crochet chain, you need to get your yarn onto your hook. In the world of crochet, most projects begin in one of two ways: with a magic ring (ideal for round amigurumi) or a slip knot.
What is a slip knot? It is a loop used to secure your yarn to the crochet hook. Unlike a standard knot, a slip knot is designed to slide up and down the yarn, allowing you to tighten it perfectly against your hook without it being permanent. This flexibility is what makes it a standard starting point for many beginner crochet projects.
How to Make a Slip Knot
While there are many ways to make a crochet slip knot, I use the finger-wrap method in this crochet slip knot tutorial.
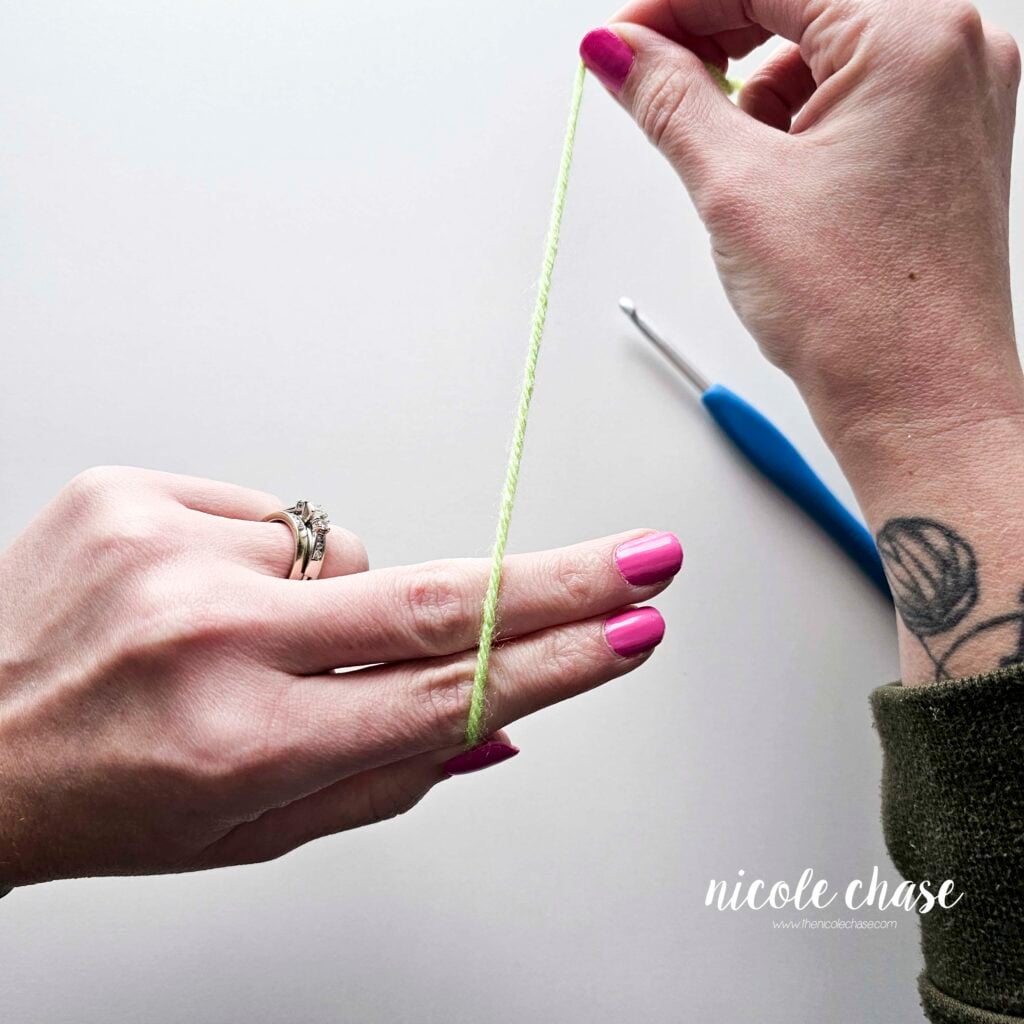
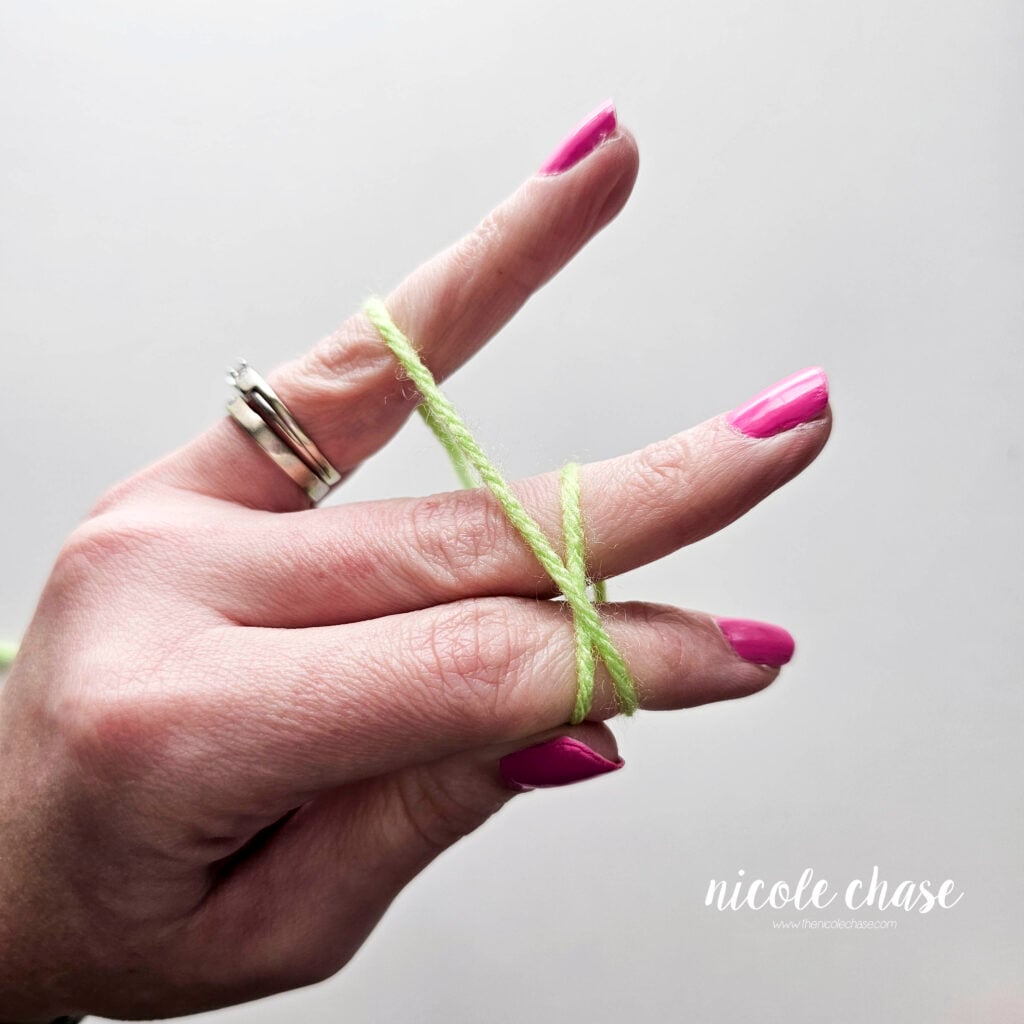
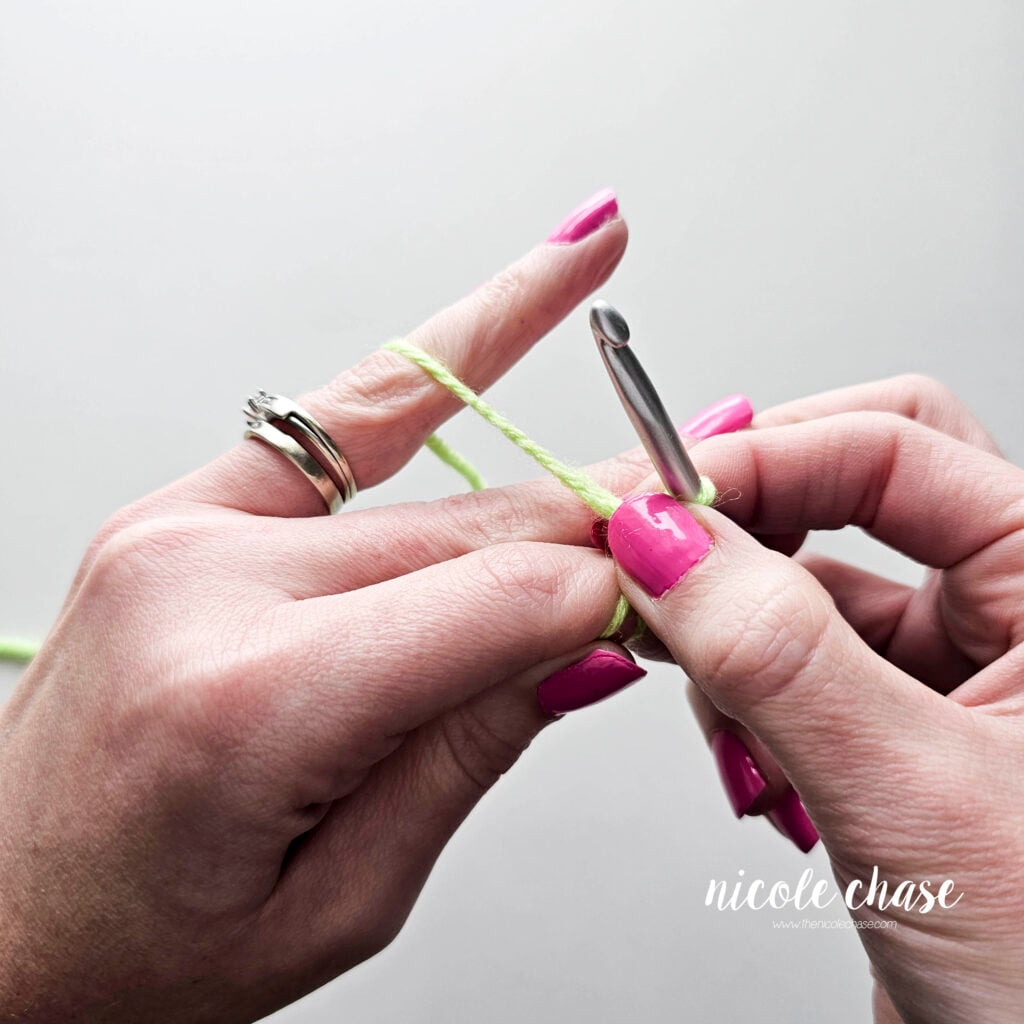
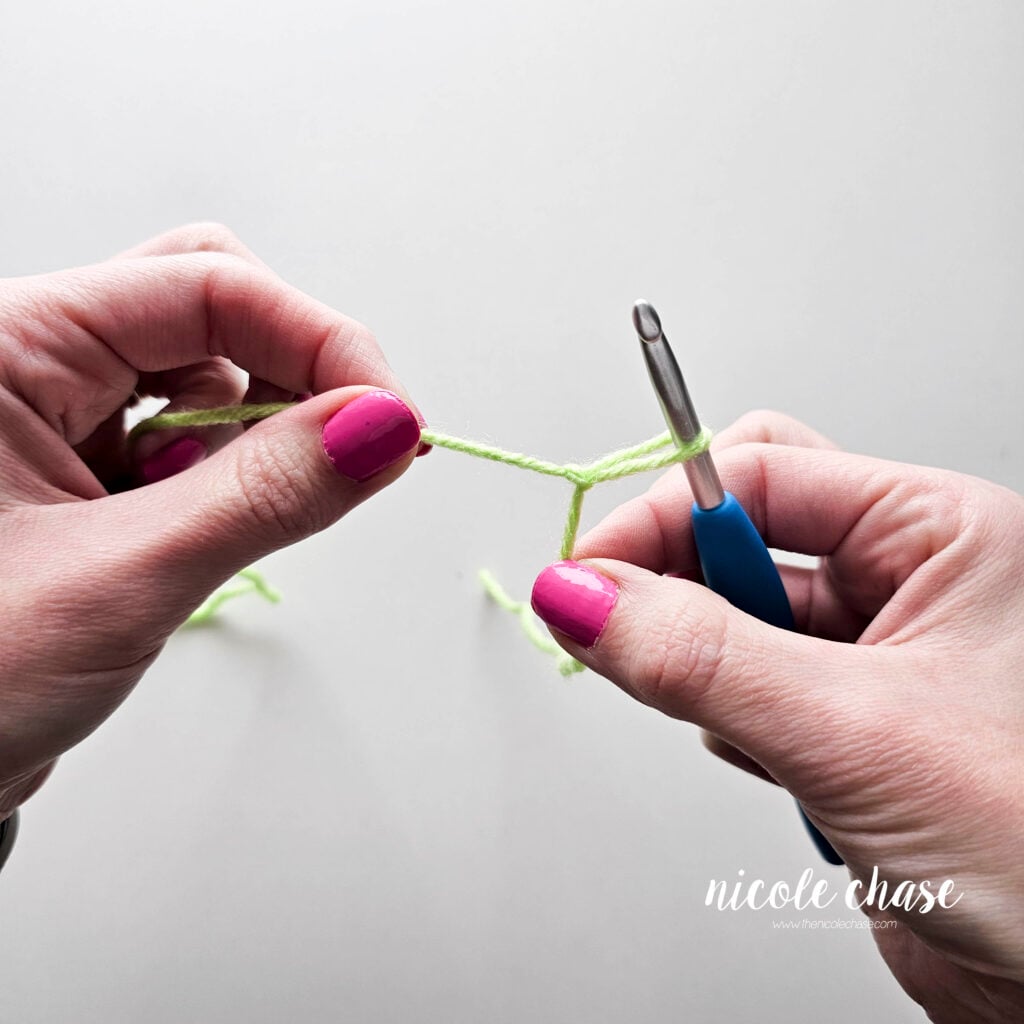
Step 1: Leaving about a 4-6 inch tail, wrap the working end of your yarn (the end attached to the skein) over your index and middle fingers, starting on the side closest to you and wrapping in the direction away from you.

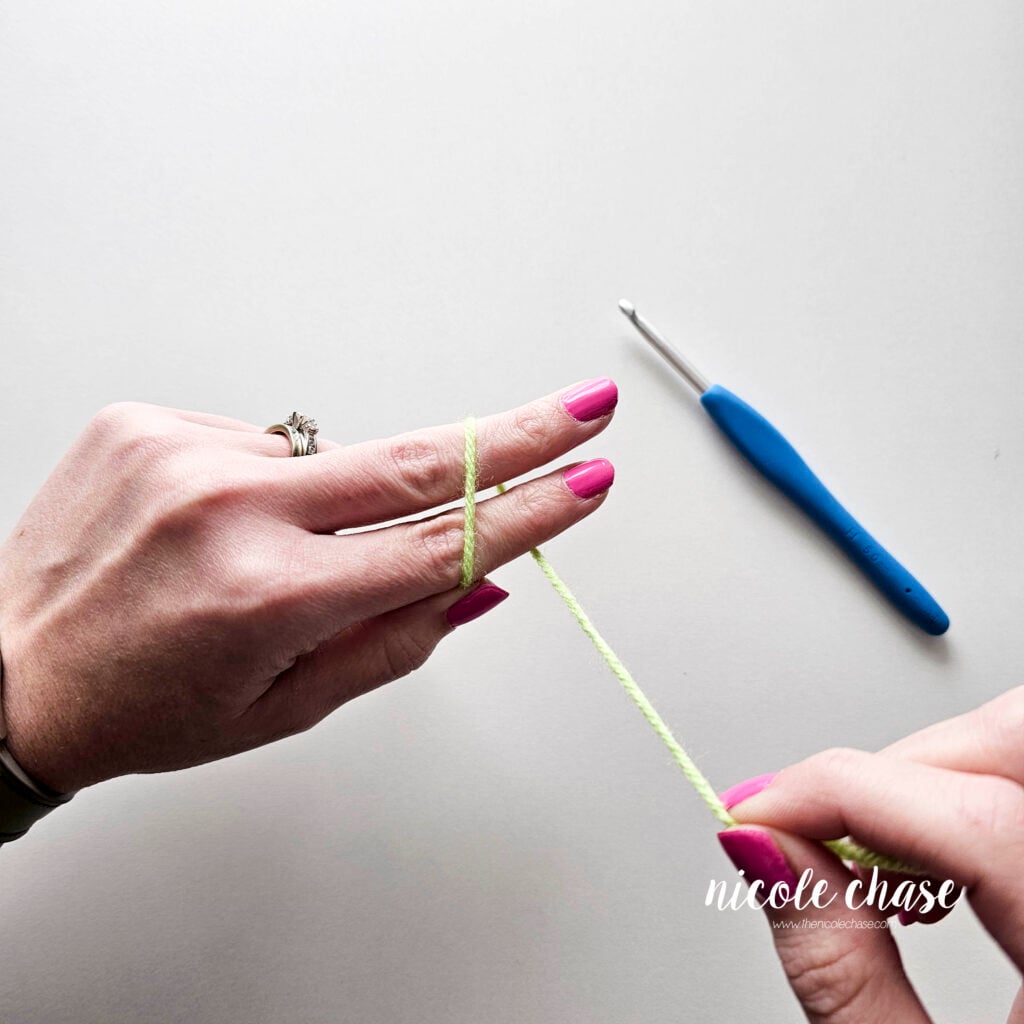
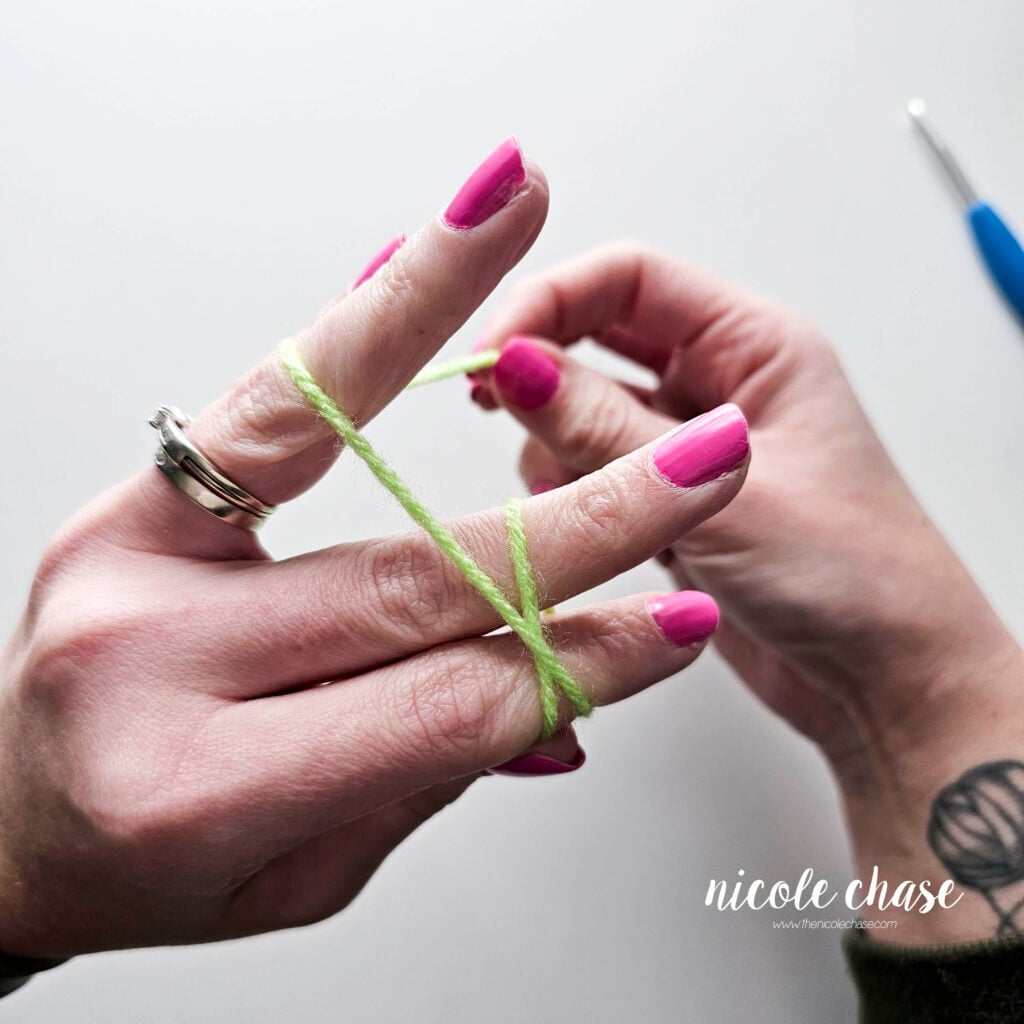
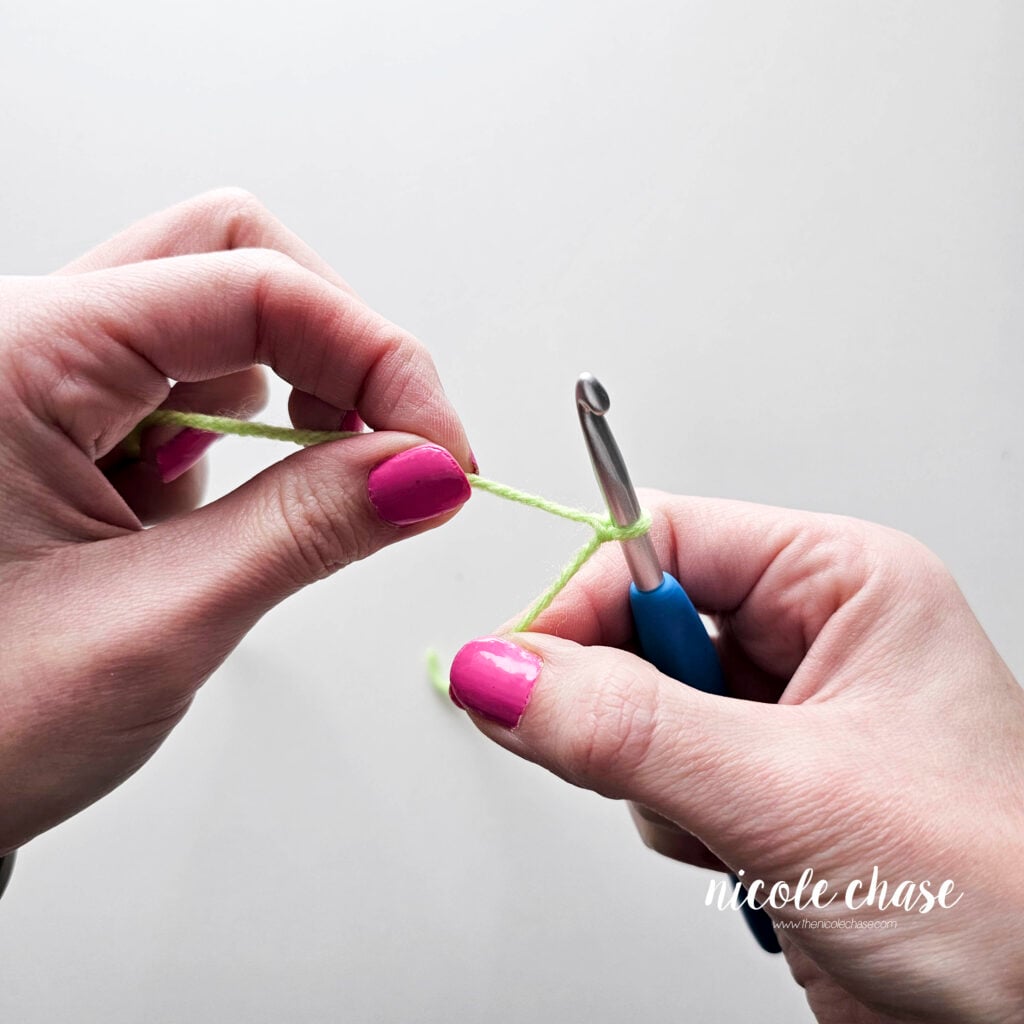
Step 2: Cross the working yarn over the first wrap to create an “X” shape on the top of your fingers. Hold the working yarn with your pinky and ring finger.

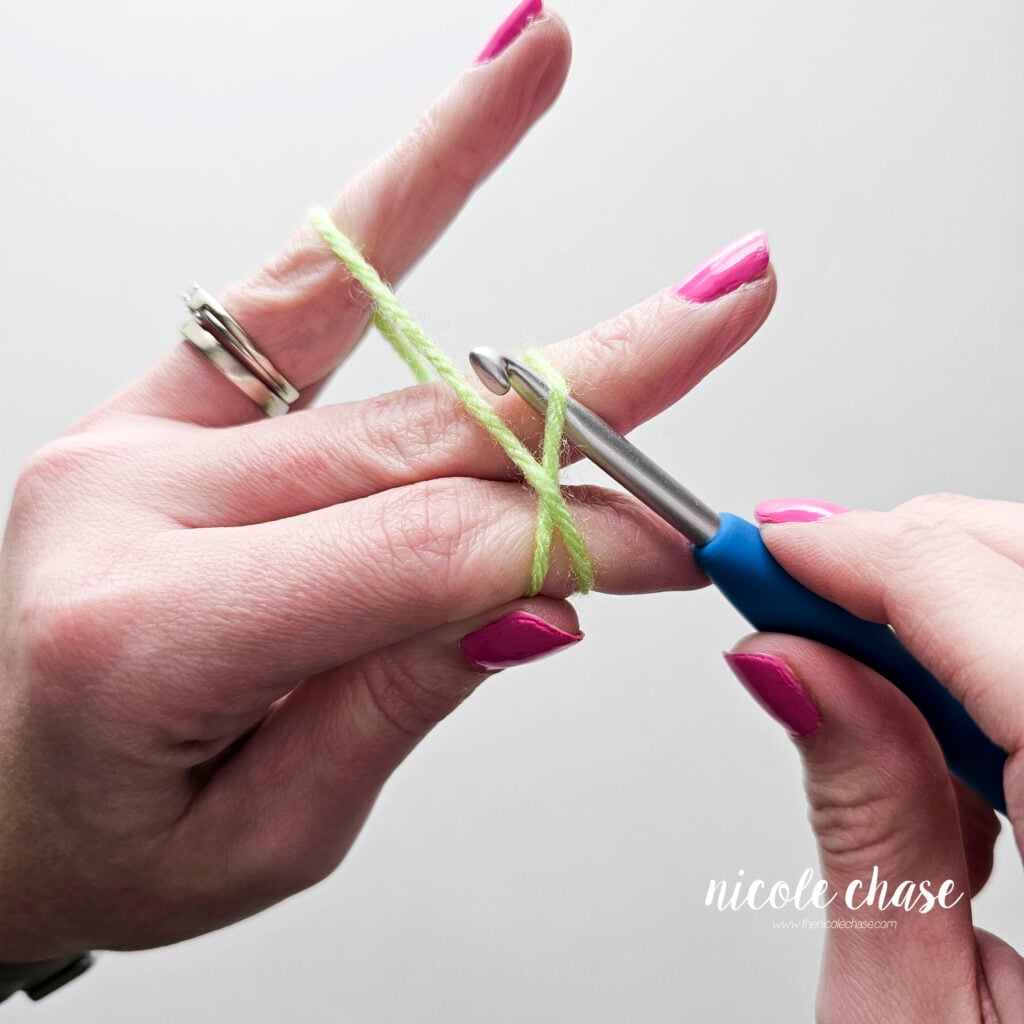
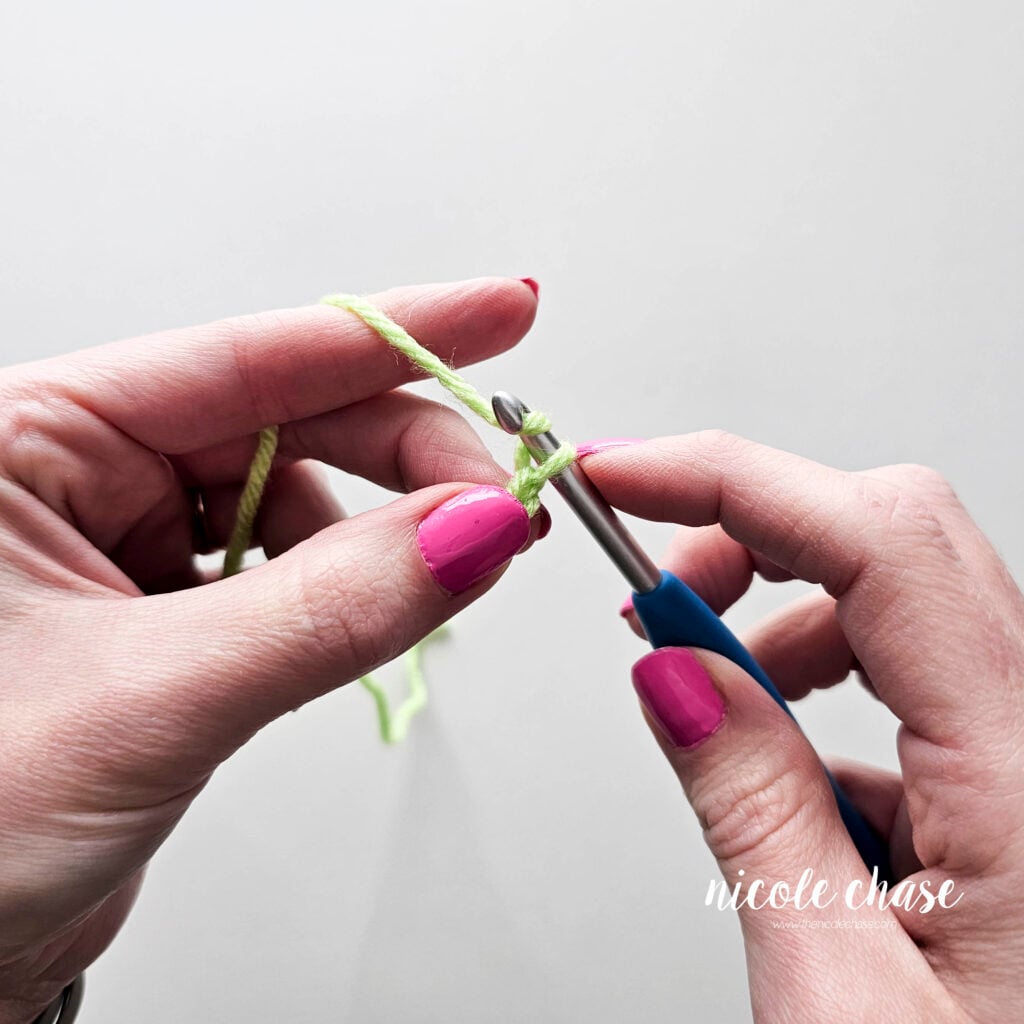
Step 3: Insert your crochet hook under the first (front) strand of the “X”. Grab the second (back) strand of yarn and pull it under the first, twisting your hook slightly as you go to create a loop on your hook.
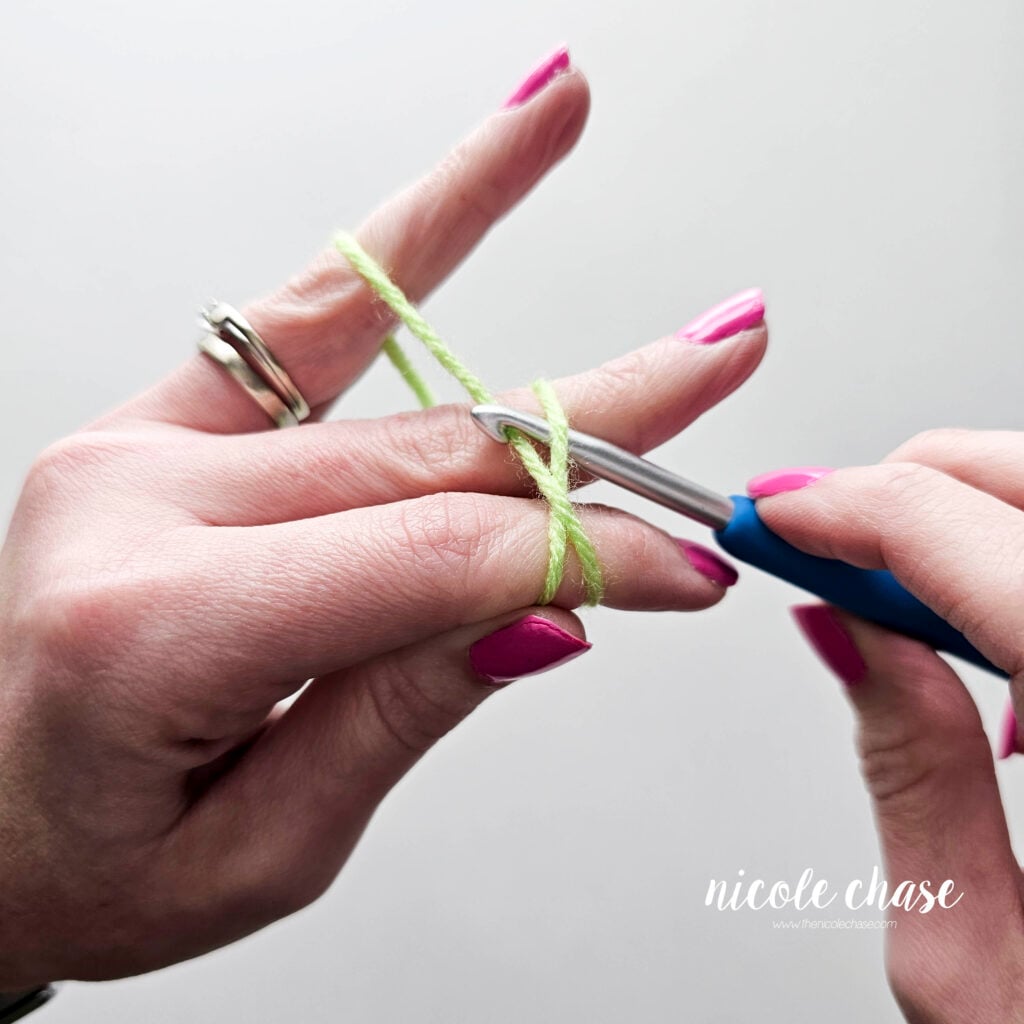

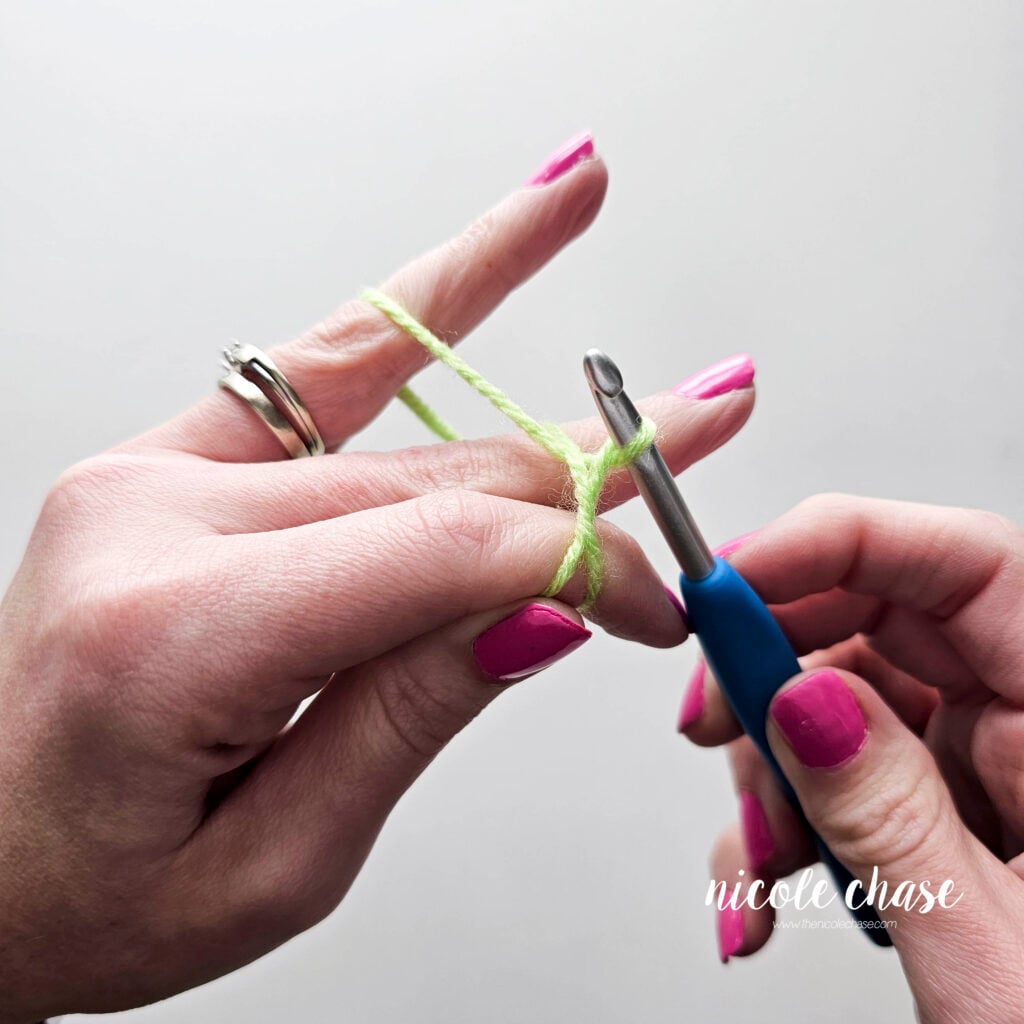
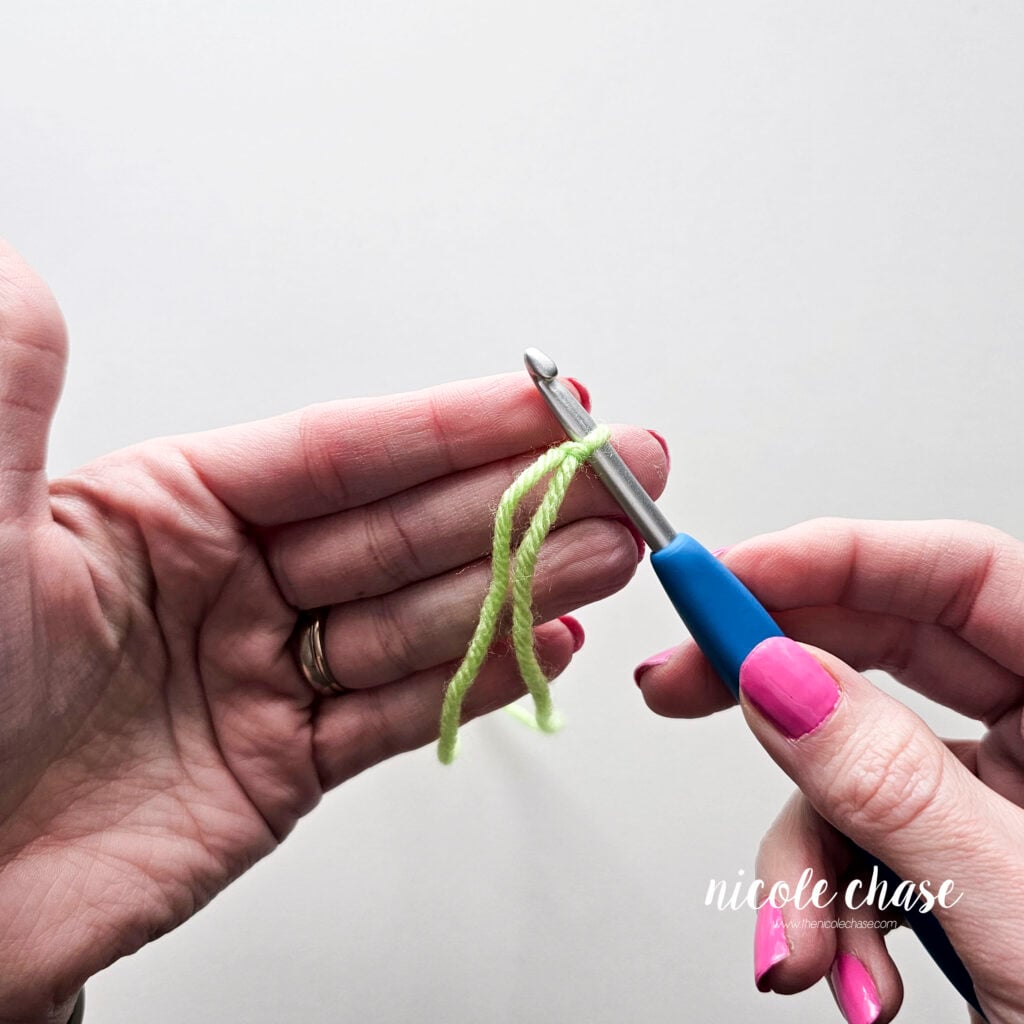
Step 4: Carefully slide your fingers out of the loops while holding the new loop on your hook. Pull both the yarn tail and the working yarn simultaneously to snug the knot up against the hook.
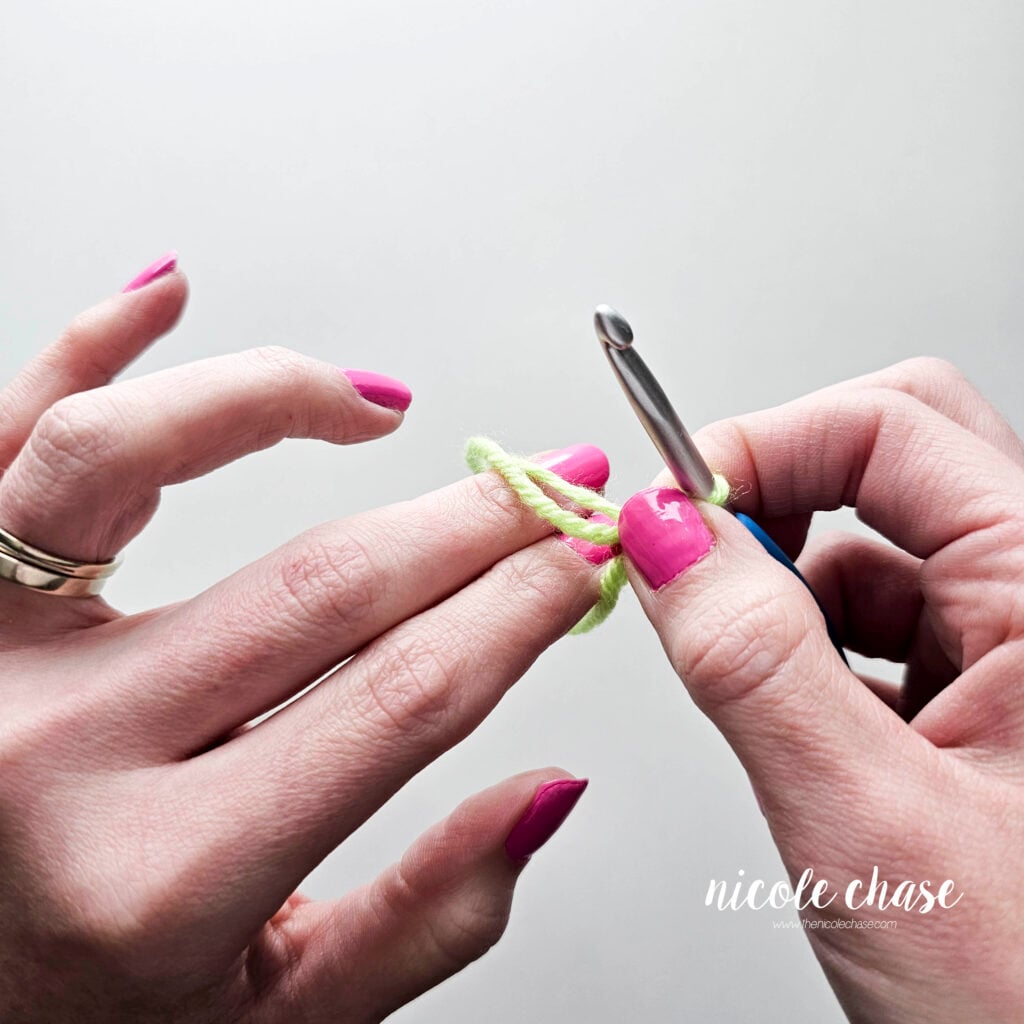

Nicole’s Tip: A common beginner mistake is pulling the slip knot so tight that you can’t slide your hook through it. Your slip knot should be snug enough that it doesn’t fall off, but loose enough that it can slide up and down the crochet hook with ease. If it feels stuck, simply pull the yarn tail to loosen it slightly before you start your chain.
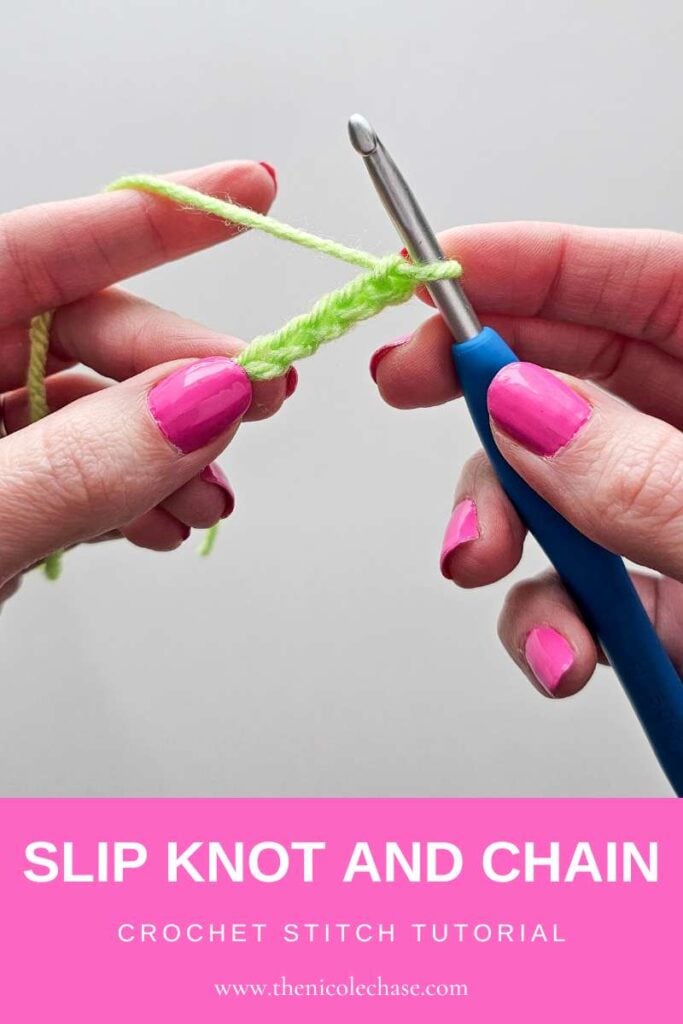
How to Crochet a Chain Stitch (ch)
Once your crochet slip knot is securely on your hook, the next step is to learn how to crochet a chain stitch.
What is a chain stitch? The chain stitch (abbreviated as ch in crochet patterns) is the simplest and most fundamental stitch. It often acts as the base that you will later work your other stitches into. Mastering the chain stitch is all about developing consistent tension; making sure every loop is roughly the same size so your project stays straight and even.
Step-by-Step Crocheting a Chain
While how to crochet a chain stitch might feel a bit awkward at first, it quickly becomes a repetitive, meditative motion. The key is to keep your hook and yarn moving smoothly together.
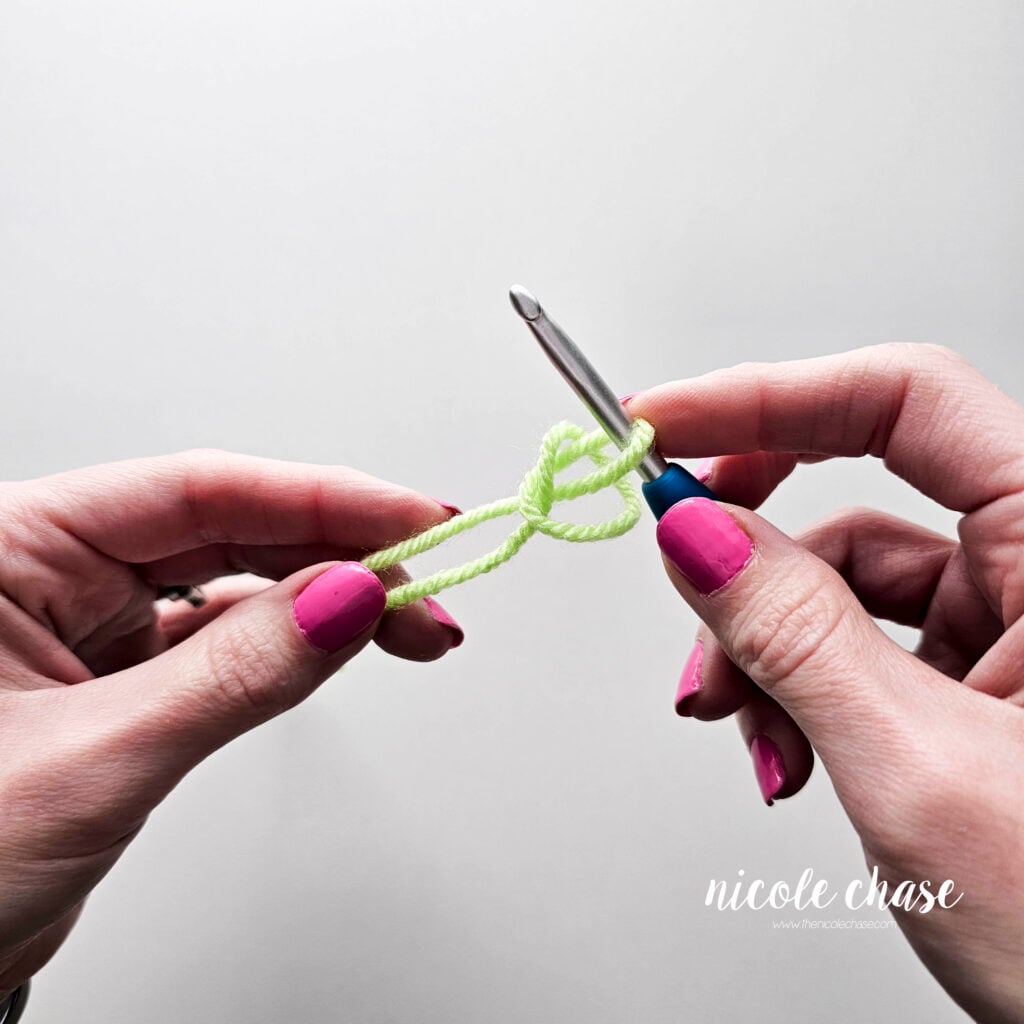
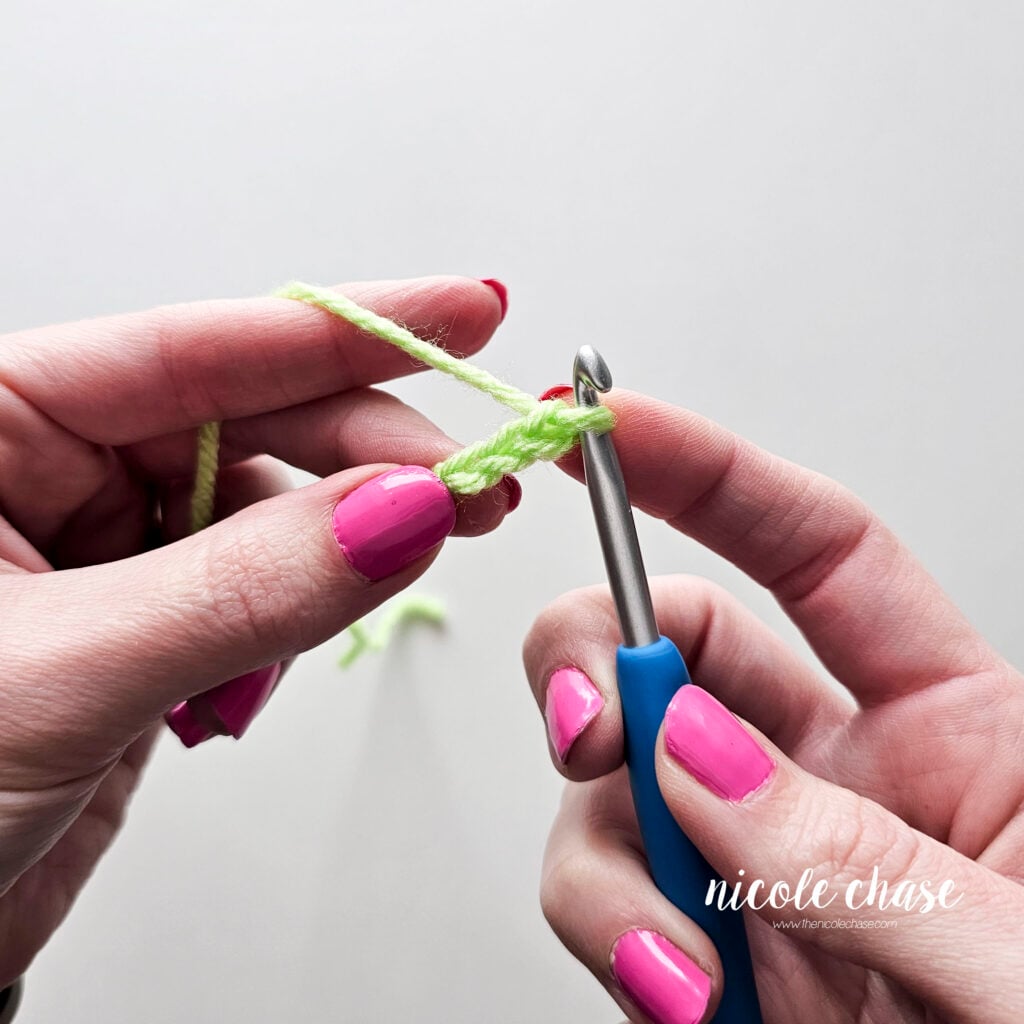
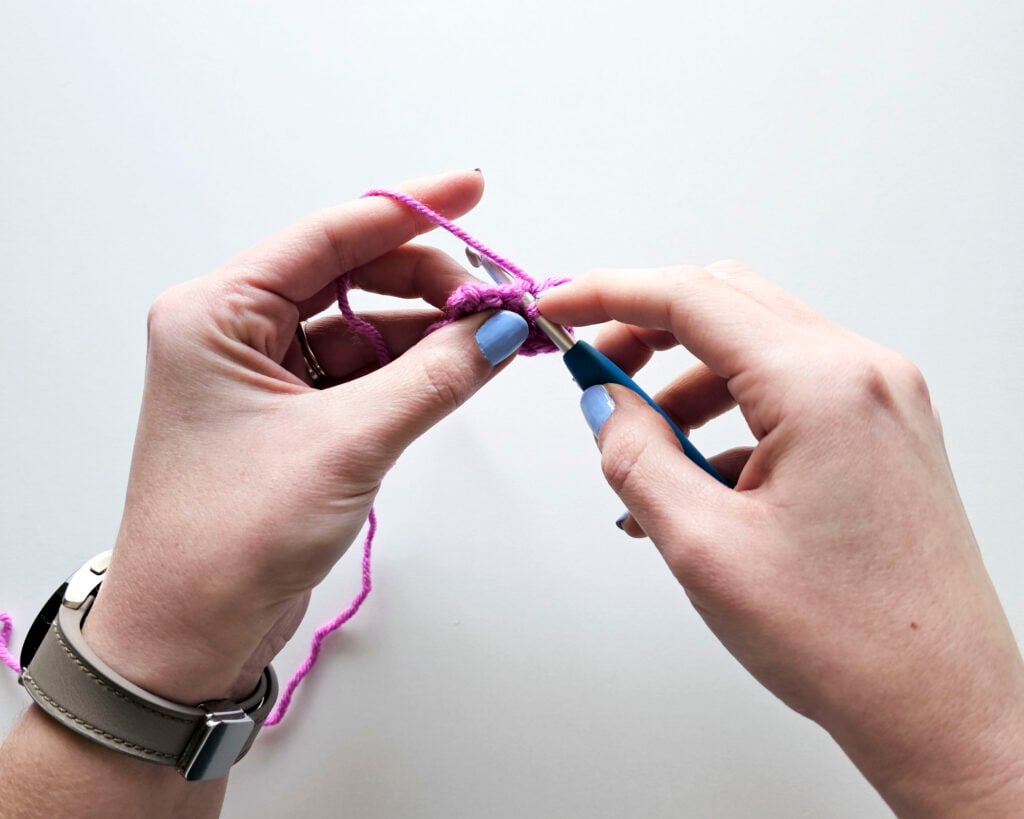
Step 1: Start a crochet chain by holding your crochet hook in your dominant hand and the yarn in your non-dominant hand. Wrap the working yarn (the end leading to the skein) over your hook from back to front. This movement is called a yarn over (yo).
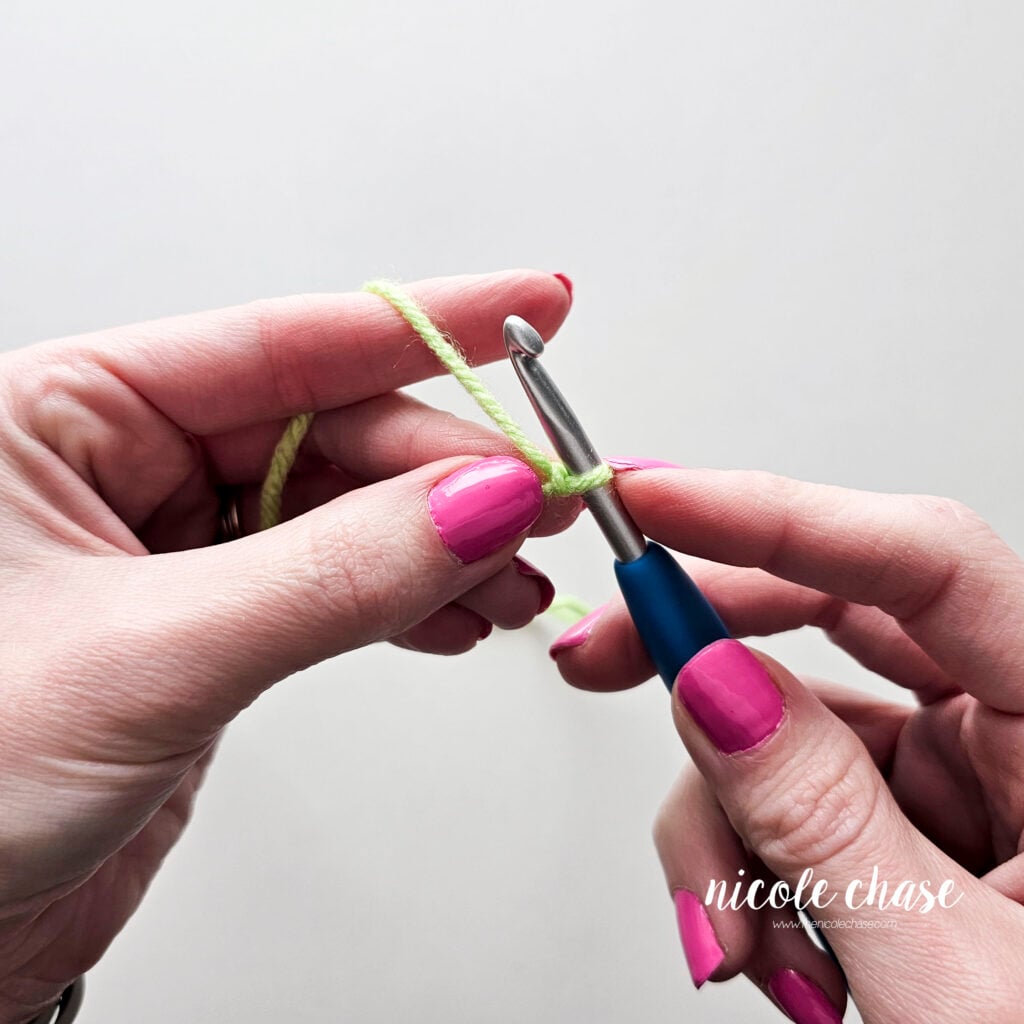
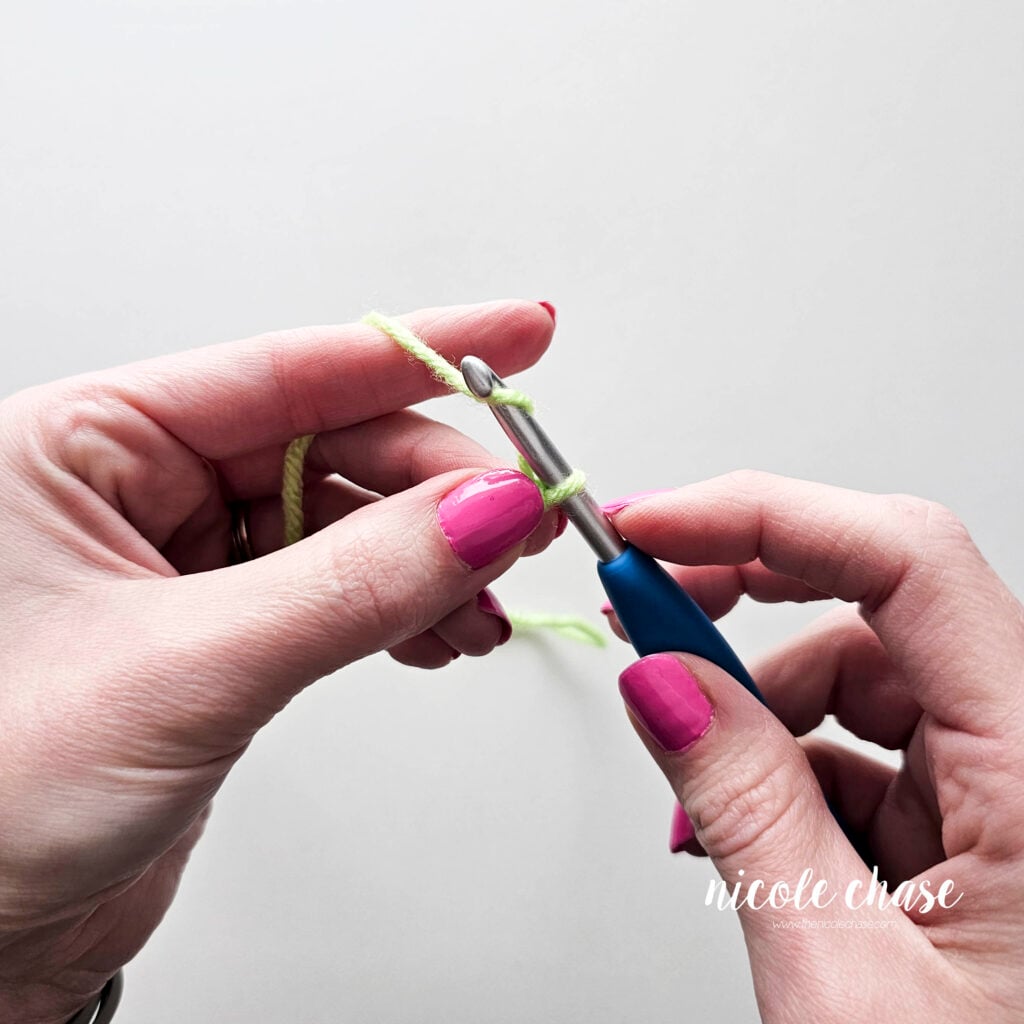
Step 2: Use the tip of your crochet hook to catch the yarn. Slowly pull the hook (and yarn) through the slip knot already on your hook. This completes your first chain stitch. You now have a new loop on your hook and one “V” shaped stitch hanging below it.
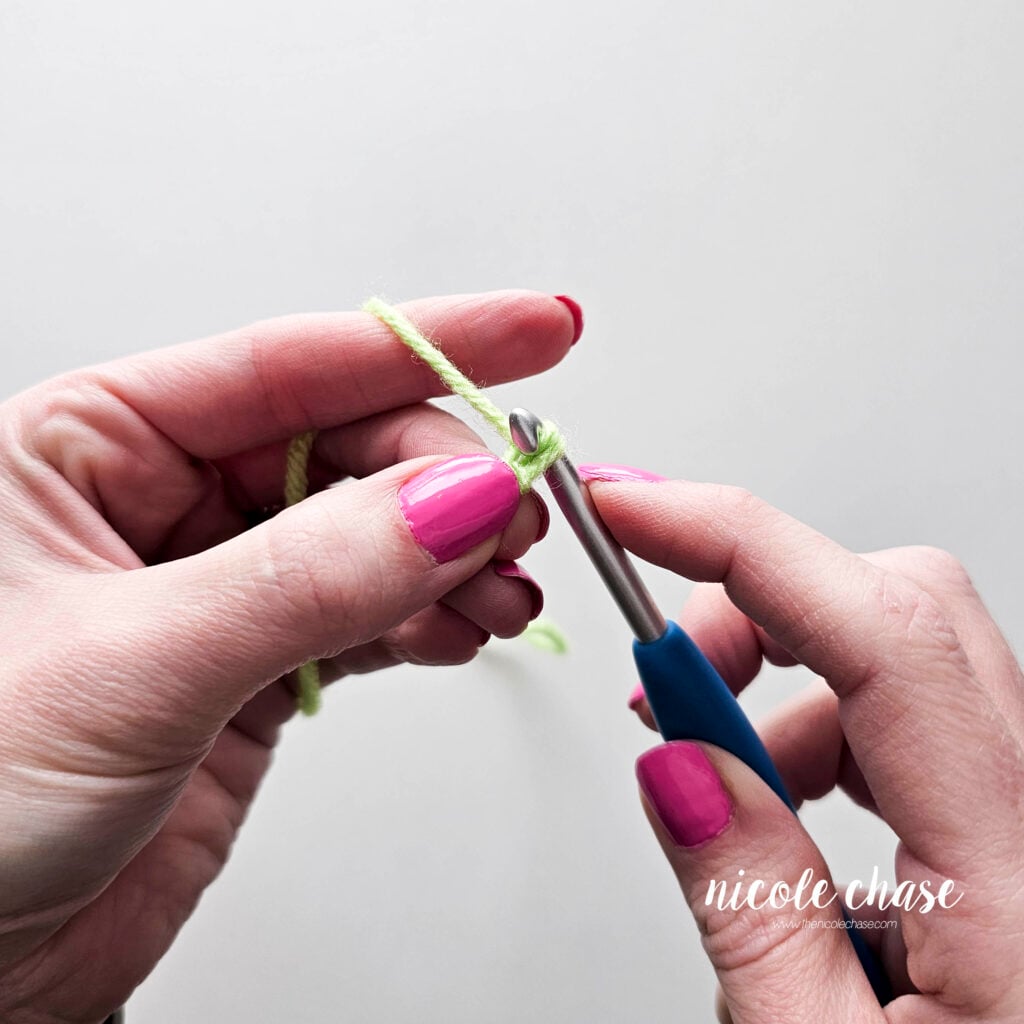
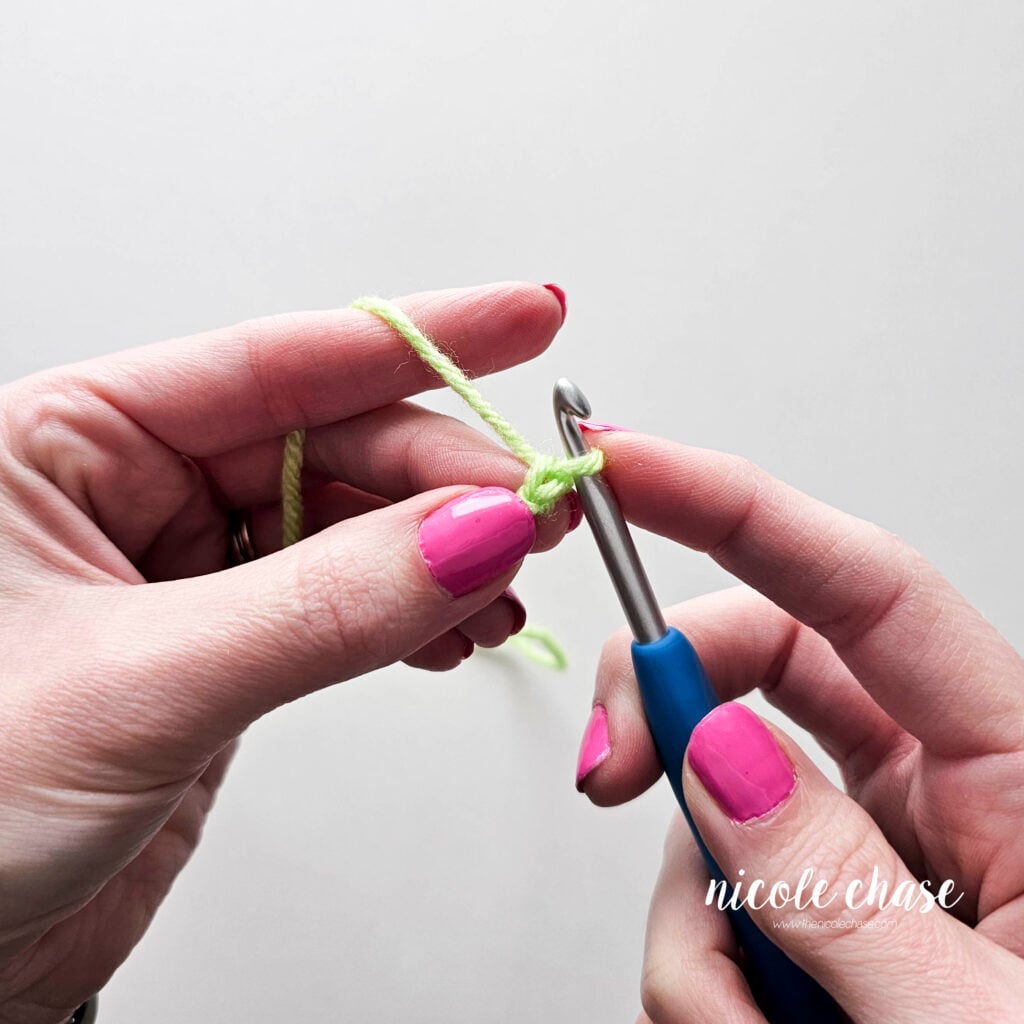
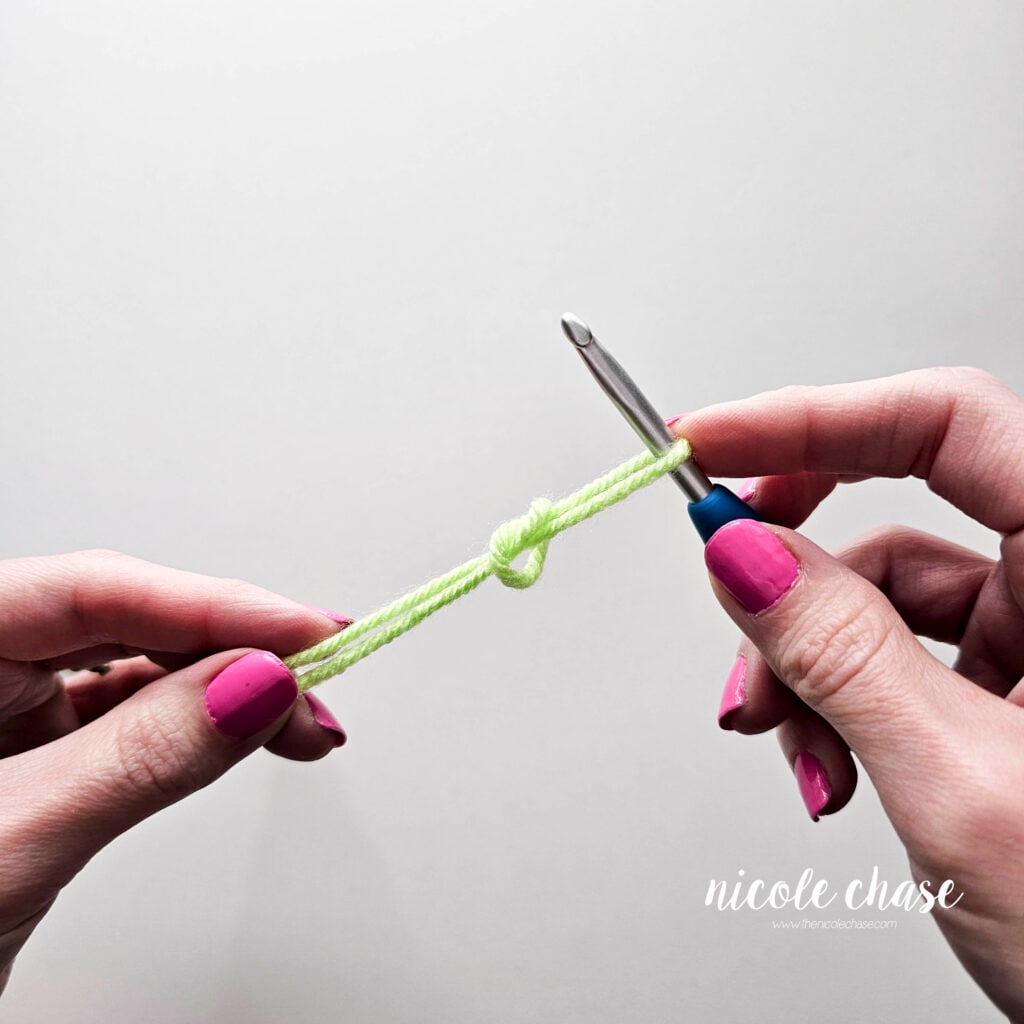
Step 3: Repeat the “yarn over and pull through” process, creating 1 chain each time, until you have the number of chains required by your pattern.

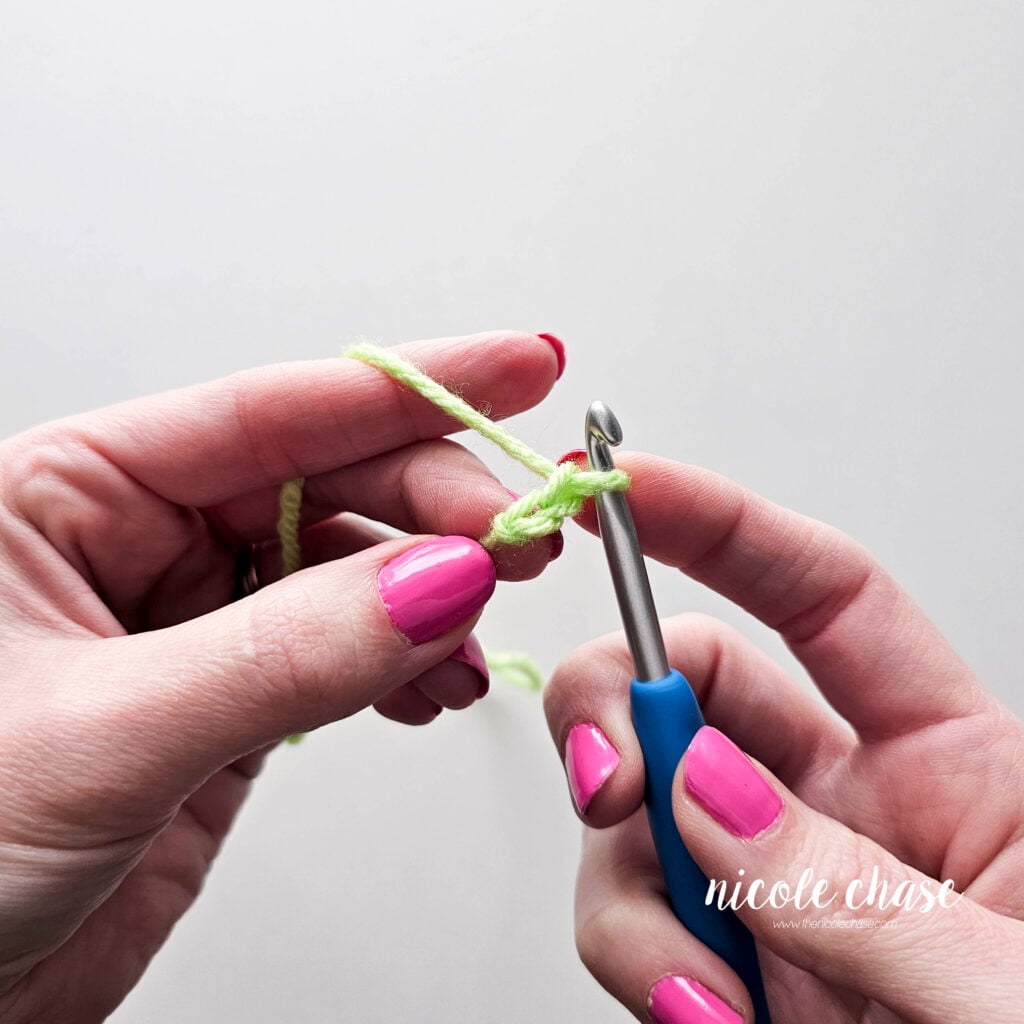
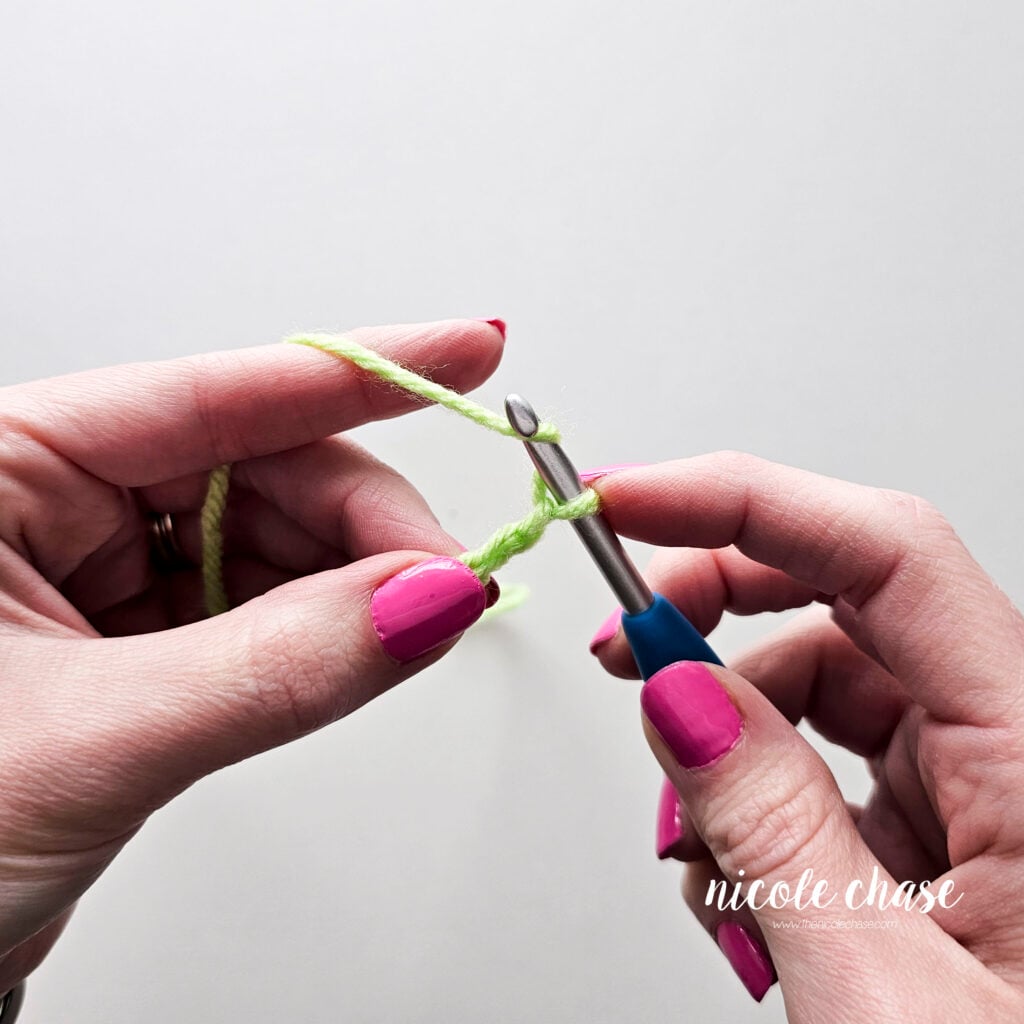


Nicole’s Tip: To keep your chains from twisting or getting too tight or loose, move your thumb and pointer finger up the chain every 2 to 3 stitches. By holding the chain just below the hook, you provide the necessary support to keep your tension even and your loops consistent.
Tips for the Perfect Crochet Chain
Mastering how to crochet a chain stitch is so important for every crocheter. Here are a few tips to help you get professional-looking results from the start.
- Size Matters: Aim to keep all of your chain stitches the same size. If some are small and tight while others are large and loose, the edge of your project will look uneven or wavy.
- Find Your Tension: Tension is simply how tight or loosely you hold the yarn as you work. Don’t worry if yours feels a bit stiff at first. Your crochet tension will naturally become more consistent the more you practice.
- The Power of Practice: When I first learned to crochet as a child, my grandma would have me make giant chains, unravel them, and do it all over again! It felt tedious then, but it’s truly the best way to build the muscle memory needed for perfect even stitches.
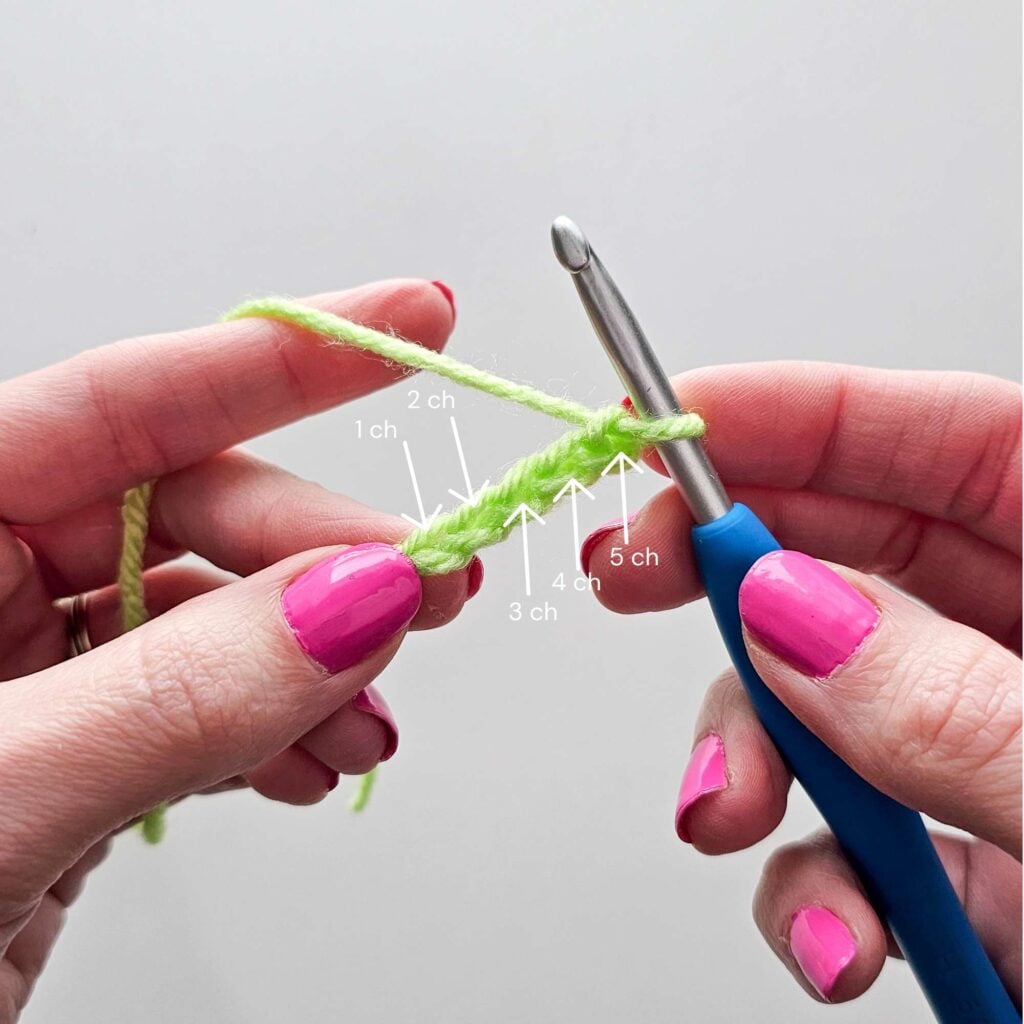
How to Count Crochet Chains
One of the most common questions I see from new crocheters is, “How do I know how many stitches I’ve made?” Identifying and counting those loops is so important.
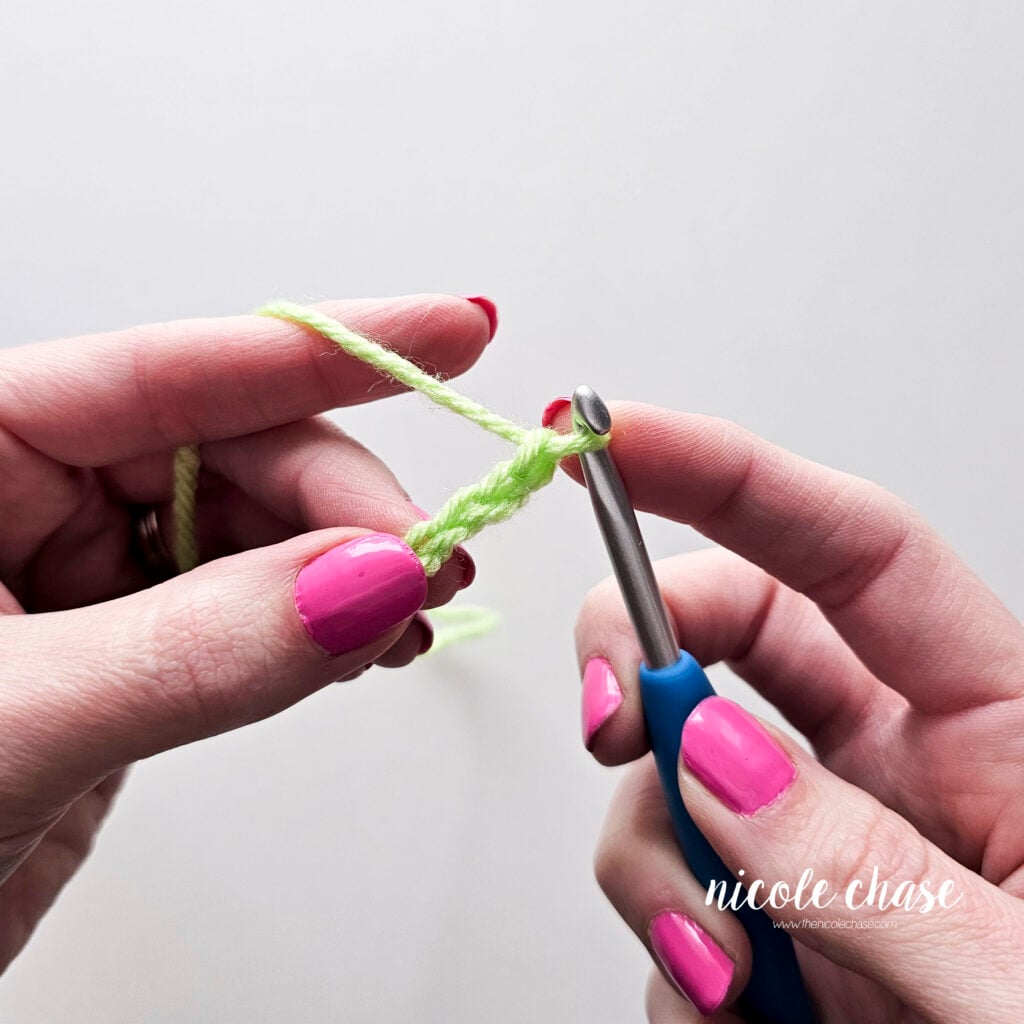
To count your chains, look for the “V” shape created by each stitch.
- Do not counter the loop that is currently on your crochet hook.
- Only count the completed “V” shapes between the slip knot and your hook.
Nicole’s Tip: If you are struggling to see the stitches, try using a lighter-colored yarn. Dark yarns like black or navy can make it very difficult to see the definition of the “V” when you are first learning!
Video Tutorial: Slip Knot and Chain
If you prefer to learn by watching, I’ve put together a step-by-step video tutorial. In this video, I’ll demonstrate my favorite way to make a crochet slip knot and how to create chain stitches.
Seeing the movement of the hook and yarn in real time can be incredibly helpful for getting the rhythm down!
This video is also available on YouTube. Watch this video: Slip Knot and Chain Crochet Tutorial on YouTube.

Frequently Asked Questions about the Slip Knot and Chain Stitch
How tight should a crochet slip knot be?
A slip knot should be snug enough to stay on the hook but loose enough to slide up and down the crochet hook with ease. If you can’t move the loop, it is too tight.
Does the loop on the hook count as a chain?
No, the loop currently on your hook is not counted as a stitch. You only count the completed “V” shapes that fall below the hook.
Is a slip knot the same as a magic ring?
No. A crochet slip knot is used to create a foundation chain for projects worked in rows or certain rounds. A magic ring is an adjustable loop used primarily for amigurumi to ensure there is no hole in the center of the work.
Why is my crochet chain twisting?
Twisting usually happens if your tension is too tight or if you aren’t moving your grip up the chain as you work. Try to keep your stitches relaxed and hold the chain just below the hook to keep it steady.
What do I do after I finish my chain stitches?
Once you have the required number of chains, you will typically turn your work and begin your first row of stitches by inserting your hook into the second or third chain from the hook.
What’s Next? Master These Basic Stitches
Now that you’ve mastered the crochet slip knot and chain stitches, you have the base for almost any project! Your next step is to learn the basic stitches that you will work into your chain. I recommend learning these stitches next to build your skills:
- Single Crochet (SC) Tutorial: This is the most common stitch used in amigurumi. It’s a short, tight stitch that creates a sturdy fabric.
- Double Crochet (DC) Tutorial: A taller, more flexible stitch that is perfect for blankets, scarves, and sweaters.
- Magic Ring Tutorial: If you want to start making toys and plushies, the magic ring is the method you’ll need for working in a round.
Ready to start a project? Check out my collection of free beginner amigurumi crochet patterns to put your new skills to the test!


I hope you enjoyed this post! Be sure to leave me a comment below to let me know what you think.
Want to see more from me? Be sure to subscribe to my email newsletter so that you never miss a post!
Follow along with me on Instagram for daily updates and a behind the scenes look at my designs.
I’d love to see what you make with this tutorial! Don’t forget to share your finished work with me: on social media by tagging me @thenicolechase, in your Ravelry projects, or post over in my Facebook group!
Thanks for stopping by! Happy crafting!
Nicole
PATTERN COPYRIGHT © 2026 NICOLE CHASE. ALL RIGHTS RESERVED.
PATTERN MAY NOT BE ALTERED, COPIED, REDISTRIBUTED OR SOLD AS YOUR OWN PATTERN.
YOU MAY SELL THE FINISHED PRODUCT ON A SMALL SCALE. PATTERN/DESIGN CREDIT GIVEN TO WWW.THENICOLECHASE.COM IS APPRECIATED. PERMISSION TO SELL DOES NOT INCLUDE MASS PRODUCTION. LARGE SCALE PRODUCTION IS PROHIBITED.
PHOTOGRAPHY COPYRIGHT © 2026 NICOLE CHASE. ALL RIGHTS RESERVED.
PHOTOS MAY NOT BE ALTERED, COPIED, REDISTRIBUTED OR SOLD AS YOUR OWN.
This post may contain affiliate links. If you make a purchase through links on our site, we may earn a commission.