Magic Ring Alternative Crochet Tutorial
This post may contain affiliate links. If you make a purchase through links on our site, we may earn a commission.
If you’ve ever struggled to get your magic ring to close, or had your yarn snap right as you were pulling it tight, you aren’t alone. Whether you are a beginner struggling to master getting the magic ring started, or an experienced maker tired of your plush chenille yarn snapping under tension, you need a reliable backup. That’s where this magic ring alternative comes in.
The chain 2 (ch 2) method is my favorite substitute for the magic ring. In my years of designing amigurumi patterns, I’ve found it is a simple technique that creates a secure center for amigurumi without the frustration of the broken yarn.
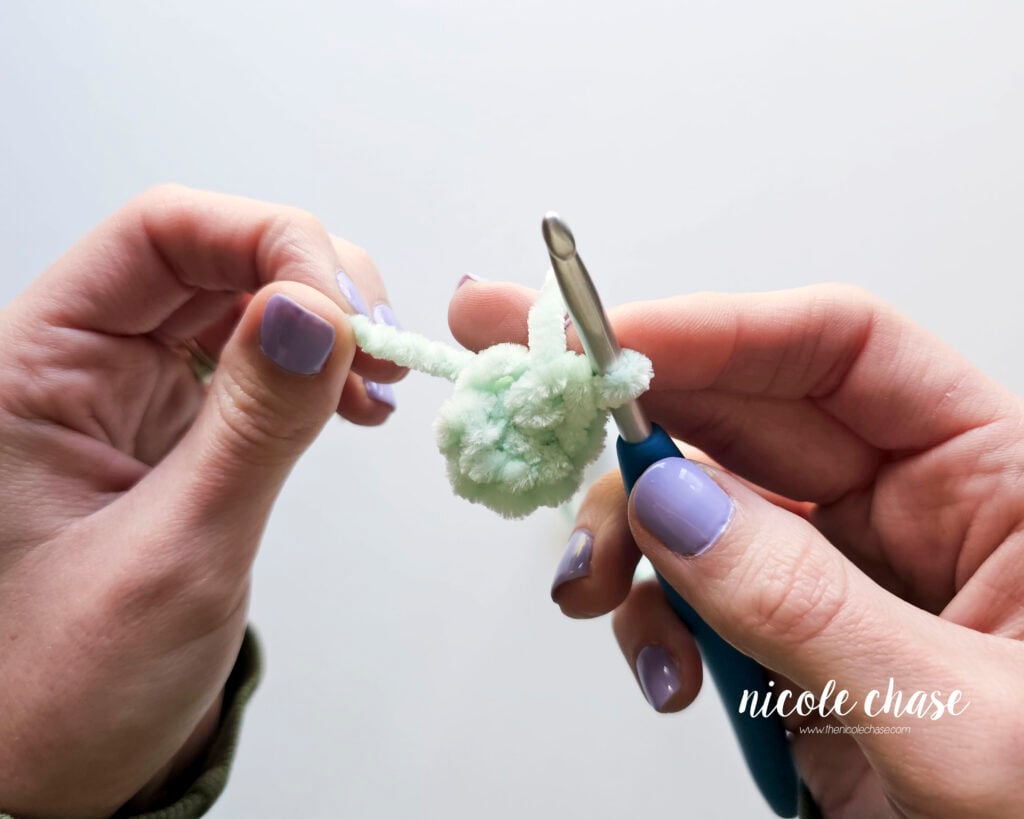
Table of Contents
Why Use the Ch 2 Method Instead of a Magic Ring?
While the magic ring is a fantastic tool for creating a seamless, adjustable start to your crochet projects, it isn’t always the right choice. I’ve found that the ch 2 method (also called the “chain 2 start”) is often a better fit in these specific scenarios:
1. Working with Plush or Chenille Yarns
The main reason that I reach for this method is plush yarns. Specialized yarns like velvet, blanket, or chenille have a thin strand underneath all of that fluff. When you try to pull a traditional magic ring closed with these fibers, the friction can cause the fluff to shed off, causing the yarn to get stuck, or even worse, snap entirely. The ch 2 method is much gentler on these delicate fibers.

2. Beginners Mastering the Basics
The magic ring can be tricky! If you are just starting your crochet journey and the finger-wrapping feels like a puzzle you can’t solve, don’t let it stop you from making your first amigurumi. The ch 2 method uses a standard slip knot that every beginner already knows, allowing you to get right into the first round of stitches without frustration.
3. Increased Security
Because the ch 2 method uses a standard slip knot, many crocheters find it feels more “secure”. While I personally am not afraid of knots in my crochet work, some only weave in their yarn tails. The slip knot at the base of the ch 2 method provides a little extra layer of structural stability.
How to Crochet the Ch 2 Magic Ring Alternative
This method is incredibly straightforward. It essentially turns your first chain stitch into the “ring” that holds your stitches. You can follow along with my video tutorial below, or use the step-by-step photos to master the technique.
Video Tutorial for Making the Ch 2 Magic Ring Alternative
Prefer to watch and learn? Follow along with this video tutorial where I demonstrate exactly how to start the ch 2 method and close the center for a gap-free finish.
This video is also available on YouTube. Watch this video: Magic Ring Alternative Crochet Tutorial on YouTube.
Step-by-Step Instructions
Follow these step-by-step photo walkthrough to show you exactly where to place your hook so that your yarn stays secure and, most importantly, doesn’t snap or break!
Step 1: Create a Slip Knot and Chain 2
Start by making a standard slip knot.


Work two chain stitches (ch 2).
Note: Ensure your first chain isn’t too tight; this is where your first round stitches will be worked!


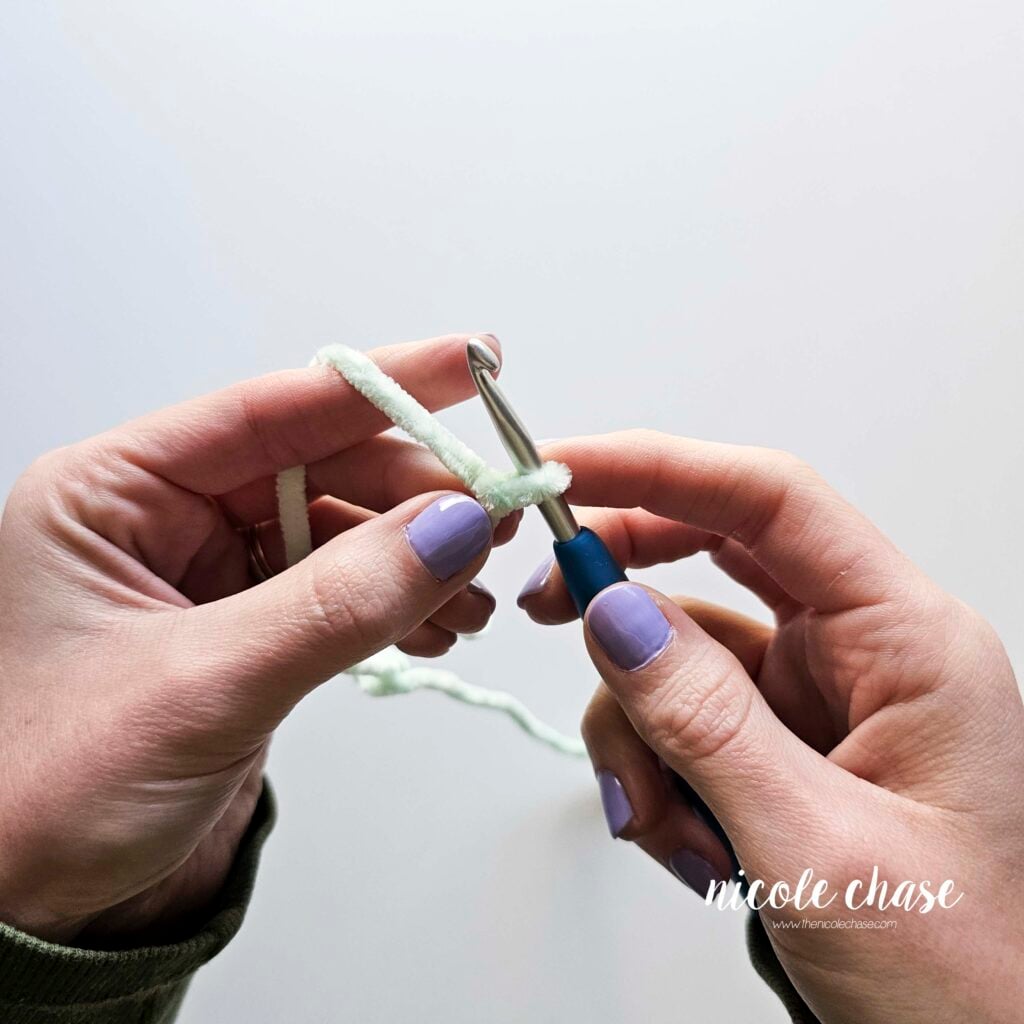
Step 2: Identify the Second Chain from Hook
Look at your two chains. The first chain you made (the one furthest from your hook) is where you will be working all of your R1 stitches.
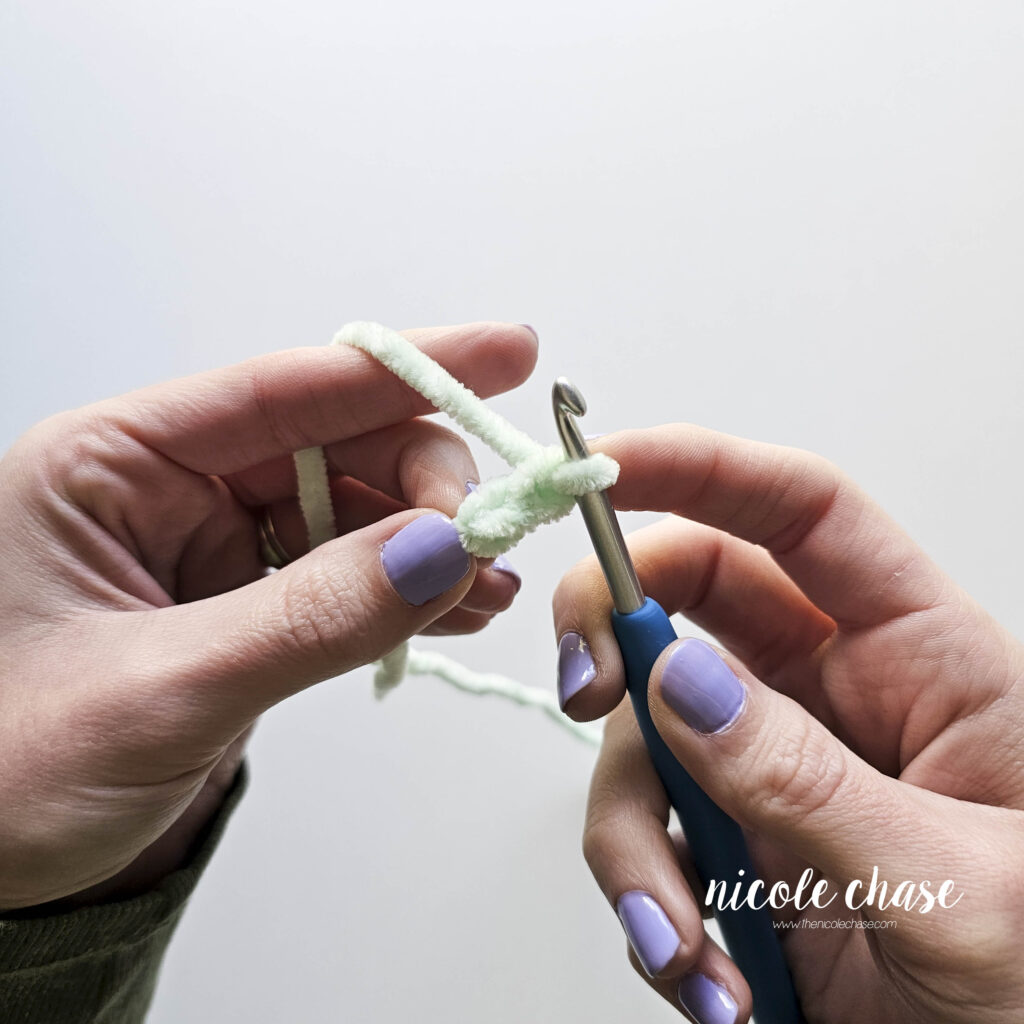
Step 3: Work Your Stitches into the Second Chain
Insert your hook into the center of that second chain from your hook. Work the number of single crochet (SC) stitches required by your pattern (often, 6 sts for amigurumi).


Step 4: Pull the Tail to Close
One of the best parts of this method is that it is already quite secure, and you could move on to R2 now. However, when doing the ch 2 method, you will likely have a small gap in the center of your stitches. Gently tug on the starting yarn tail to bring your stitches tightly together, just like you would with a magic ring.


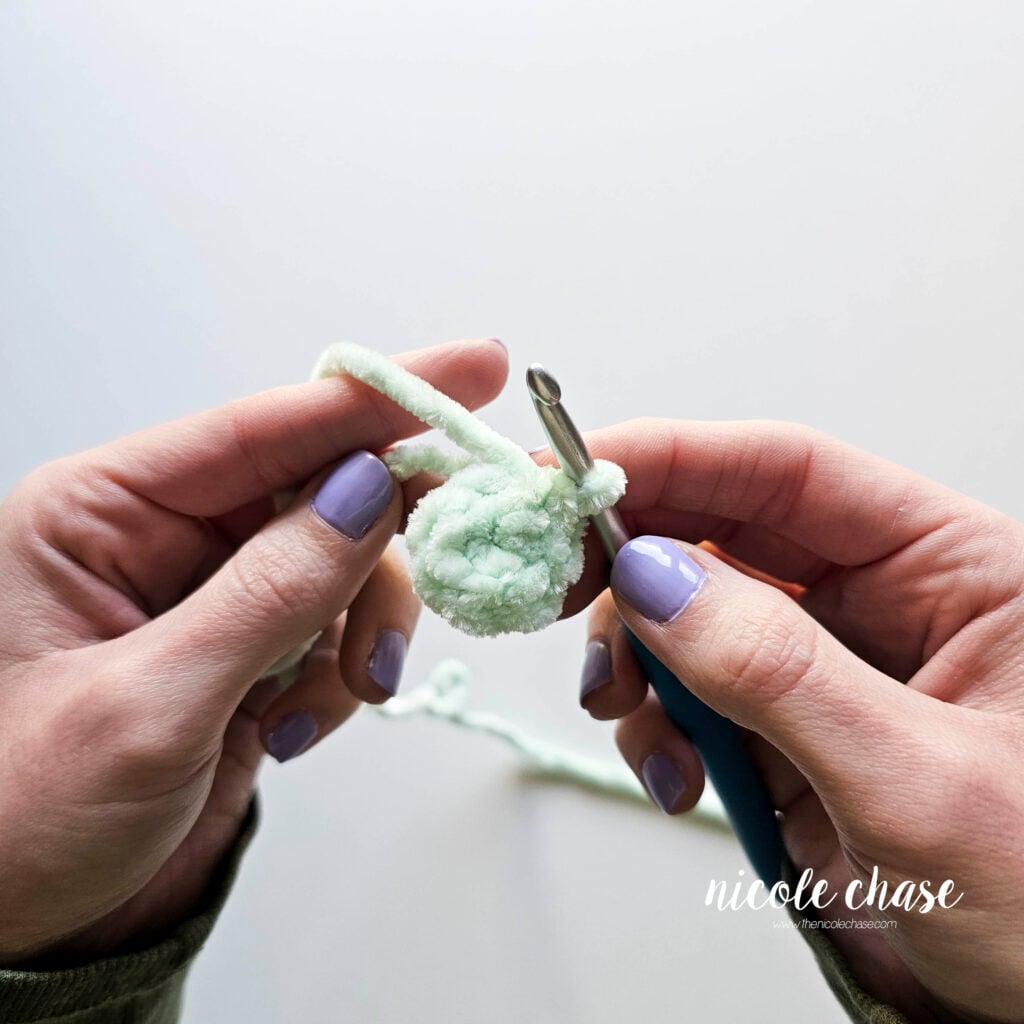
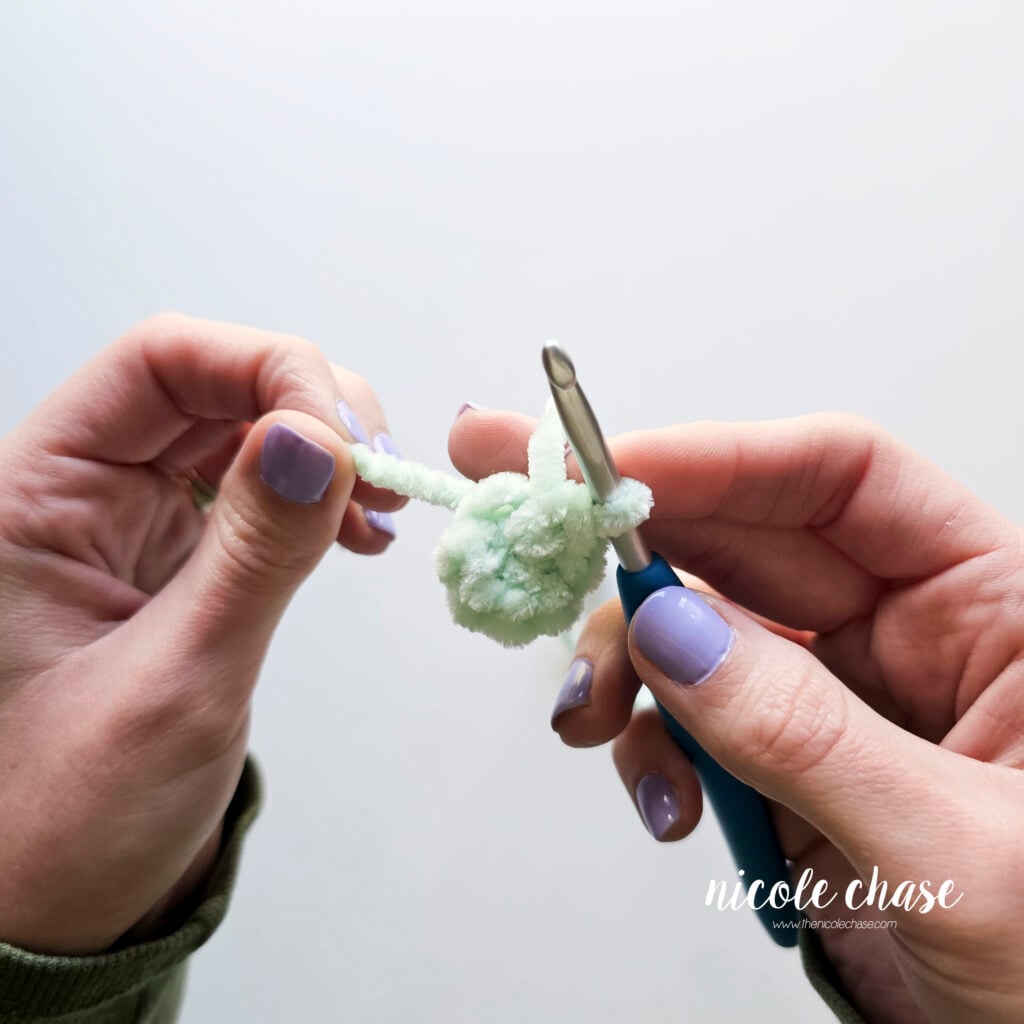
Using the Chain 2 Method with Plush Yarn
If you are working with chenille or velvet yarn, you might find that pulling a magic ring closed is a bit more difficult and sometimes your yarn will snap! Here is a quick visual guide showing the same chain 2 method as shown above, but using plush yarn.
Tips for the Perfect Magic Ring Alternative
To make sure your Ch 2 method looks just as professional as a traditional magic ring, keep these expert tips in mind:
- Don’t Over-Tighten Your First Chain: Since you are working your stitches into that very first chain stitch, make sure that you don’t make it too tight. Remember, you need to be able to fit your hook comfortably multiple times, for each stitch of your first round.
- Use the Tail to Close the Gap: While the ch 2 method is naturally secure, you might still see a small hole in the center of your first round. Pulling your yarn tail will close up that hole.
- Securing Your Ends: Don’t be afraid to secure your piece with a knot. In amigurumi, the knot will be hidden inside and is an extra layer of protection so that your piece doesn’t unravel.
- Counting Your Stitches: Since all of your stitches are crowded into one tiny chain, it can be easy to lose track. Use a stitch marker in the first stitch of your round so you know exactly where you started!
Should You Still Learn the Magic Ring?
The ch 2 method seems easier when you’re starting out, and you might be wondering: is the magic ring still worth learning?
In my opinion, yes! While the ch 2 method is a great alternative, the magic ring is still the preferred way to start your amigurumi projects. Here’s why:
- The No-Gap Finish: The magic ring allows you to pull the center of your R1 stitches completely closed, leaving absolutely no hole. While the ch 2 method gets very close, the magic ring is unmatched.
- Adjustability: Because the ring is loose until you pull it tight, it’s much easier to fit your stitches into the center without it feeling crowded.
- Professional Growth: Once it clicks, it becomes second nature and will speed up your project starts!
My Advice… Don’t Give Up!
If you’re a beginner and the magic ring feels impossible right now, use the ch 2 method so you can keep enjoying the craft. Don’t let a difficult technique stop you from making things!
However, keep practicing the magic ring. One day, it will “click”, and until then, you have this reliable alternative in your tool kit.
If you’re ready to give the magic ring/magic circle a try, you can find my full step-by-step magic ring tutorial here. I recommend practicing with a smooth acrylic yarn until the movement feels second nature.


Ready to Master Amigurumi?
If you’re tired of feeling frustrated by complicated techniques and want to start making cute, professional-looking crochet animals with confidence, check out my Amigurumi for Beginners course!
I’ve designed this course to take the guesswork out of crochet. We’ll go beyond the magic ring and cover everything from choosing your hook to seamless color changes, ensuring your first projects are a total success. Click here to learn more and start your journey!
Learn How to Crochet Amigurumi!
Sign up for my free amigurumi for beginners course and learn everything you need to know to make your own crochet plush!
To see what is included, check out the course summary page!
More Crochet Tutorials
If you enjoyed this post, you might find these other crochet tutorials helpful for your next project:
- How to crochet a magic ring: The counterpart to this post when you’re ready to master the circle!
- How to change yarn colors seamlessly: Master the next big hurdle for amigurumi beginners.
- Choosing your hook size for amigurumi: Learn how to pick the perfect hook to go with your yarn.
- How to read crochet patterns for beginners: Move beyond video tutorials with this guide to help you decode any pattern.
I hope you enjoyed this post! Be sure to leave me a comment below to let me know what you think.
Want to see more from me? Be sure to subscribe to my email newsletter so that you never miss a post!
Follow along with me on Instagram for daily updates and a behind the scenes look at my designs.
I’d love to see what you make with this tutorial! Don’t forget to share your finished work with me: on social media by tagging me @thenicolechase, in your Ravelry projects, or post over in my Facebook group!
Thanks for stopping by! Happy crafting!
Nicole
PATTERN COPYRIGHT © 2026 NICOLE CHASE. ALL RIGHTS RESERVED.
PATTERN MAY NOT BE ALTERED, COPIED, REDISTRIBUTED OR SOLD AS YOUR OWN PATTERN.
YOU MAY SELL THE FINISHED PRODUCT ON A SMALL SCALE. PATTERN/DESIGN CREDIT GIVEN TO WWW.THENICOLECHASE.COM IS APPRECIATED. PERMISSION TO SELL DOES NOT INCLUDE MASS PRODUCTION. LARGE SCALE PRODUCTION IS PROHIBITED.
PHOTOGRAPHY COPYRIGHT © 2026 NICOLE CHASE. ALL RIGHTS RESERVED.
PHOTOS MAY NOT BE ALTERED, COPIED, REDISTRIBUTED OR SOLD AS YOUR OWN.
This post may contain affiliate links. If you make a purchase through links on our site, we may earn a commission.