Ollie the Otter – Free Crochet Pattern
This post may contain affiliate links. If you make a purchase through links on our site, we may earn a commission.
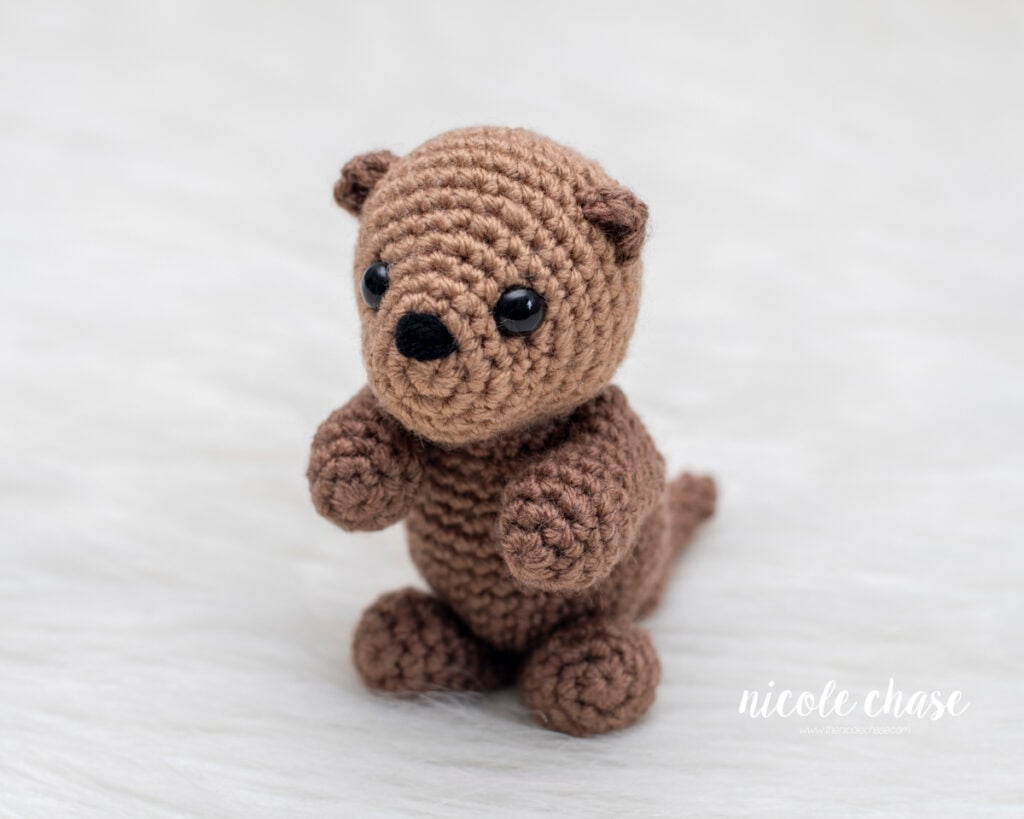
If you’ve been looking for the perfect free otter crochet pattern, I am so excited to finally introduce you to Ollie! This design has truly been a labor of love; it actually took me two full attempts and several rounds of trial and error before I finally got the shaping how I envisioned. I wanted to ensure that the proportions were just right for that classic sea otter look.
In this post I’m sharing my pattern along with my tips for clean assembly and stitches. Whether you’re an amigurumi regular or a new maker, this crochet otter is a rewarding project that is well worth the effort. Let’s grab our hooks and get started!
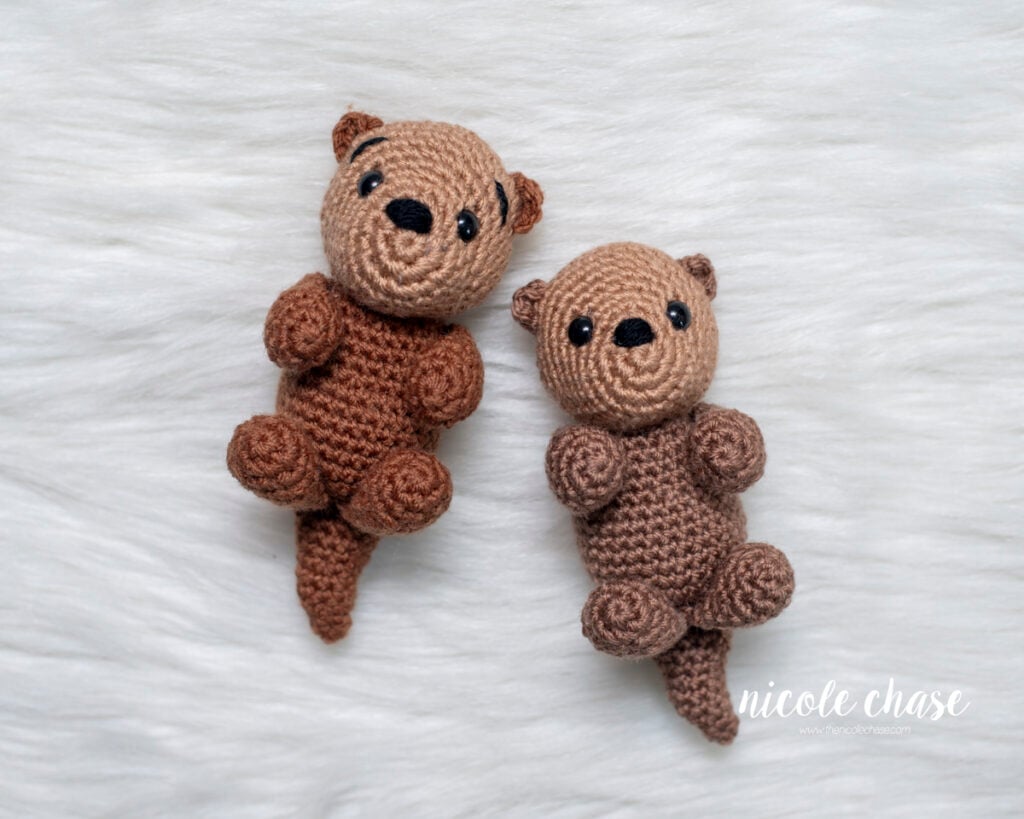
Table of Contents
I would classify this free otter crochet pattern as “advanced beginner”. It would be helpful to have had some experience with amigurumi before creating this project.
I hope you enjoy this free crochet pattern available here on my blog! An ad-free, formatted PDF version of this crochet pattern is also available for purchase here:
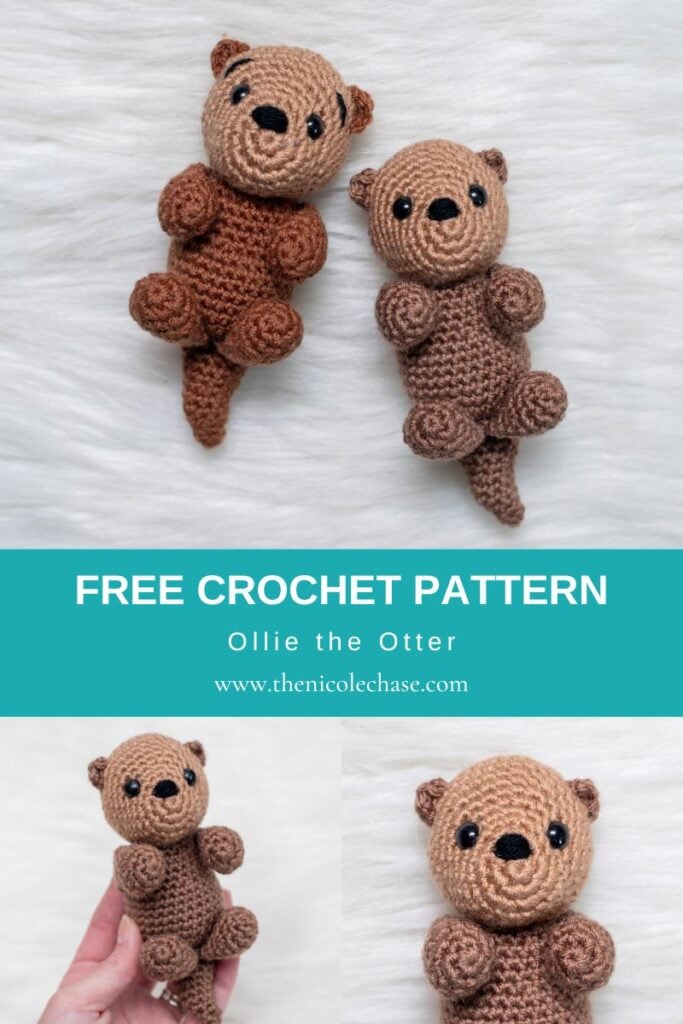
Love this free otter crochet pattern? Save it to Pinterest.
Save the cute amigurumi otter pattern for Ollie on Ravelry.
Free Crochet Pattern for Ollie the Otter
Pattern Specifics

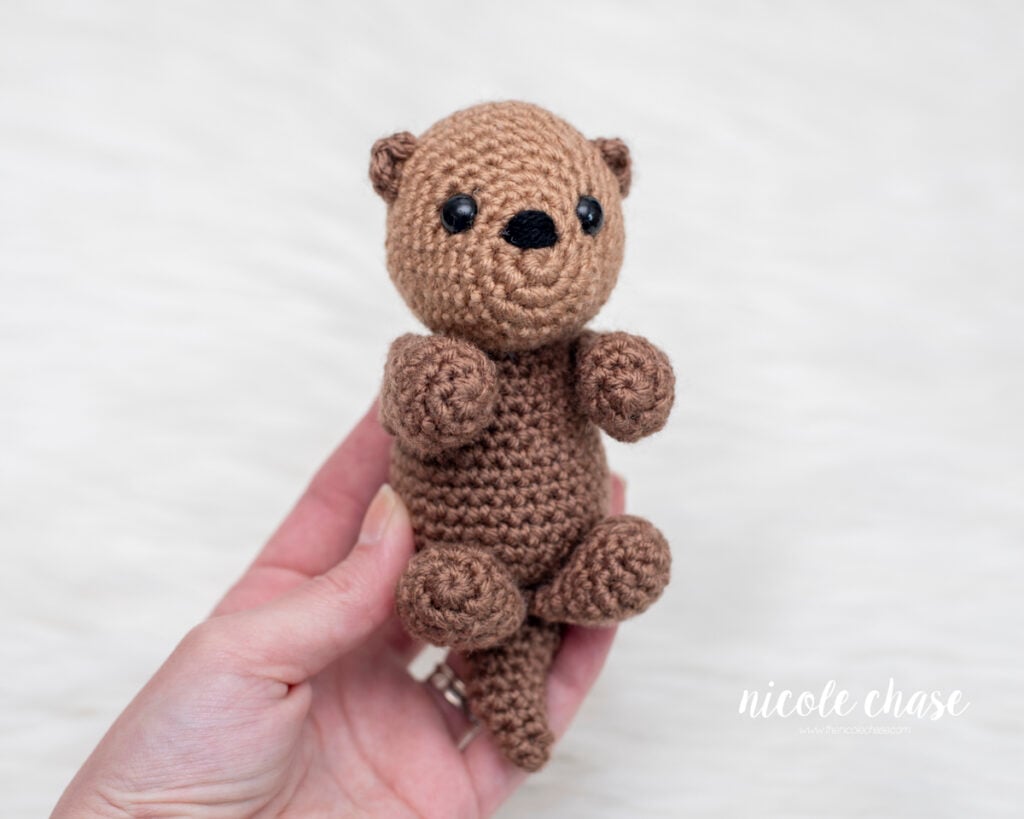
Measurements: Approximately 6” tall (sitting) or 8” tall (standing)
Gauge: Not necessary for this pattern; see notes
Hook Size: 4.0mm (G) crochet hook
Other Tools: tapestry needle, stitch markers, scissors
Yarn Weight: Medium (4) Worsted Weight
Yarn Used: WeCrochet/Knit Picks Brava Worsted
Yardage: color A (brown): 46 yds, color B (light brown): 13 yds, color C (black): 2 yds
Other Materials: poly-fil stuffing, 9mm safety eyes
Abbreviations
st = stitch
sl st = slip stitch
ch = chain
SC = single crochet
SC2tog = single crochet 2 stitches together (invisible decrease is recommended)
Special Stitches
SC2tog (using invisible decrease method): Insert hook into front loop of the first stitch. Insert hook into front loop of second stitch. Yarn over. Draw through the first two loops on hook. Yarn over. Draw through both loops on hook.
Notes
- Checking your gauge is not required for this pattern. Use a hook that is smaller than the size recommended for your yarn weight. This will ensure that your stuffing will not show through the stitches.
- All pieces, with the exception of the ears, are worked in the round. Use a stitch marker to indicate the beginning of each round.
- Invisible decreases are recommended. Please see “Special Stitches”.
- Safety eyes and noses pose a choking risk for babies; therefore, if making this toy for a baby, I recommend using yarn, felt, or embroidered details.
- Body, head, legs, arms, and tail require stuffing. Stuff each piece as you work to ensure the piece is completely filled. Do not add stuffing to the ears.
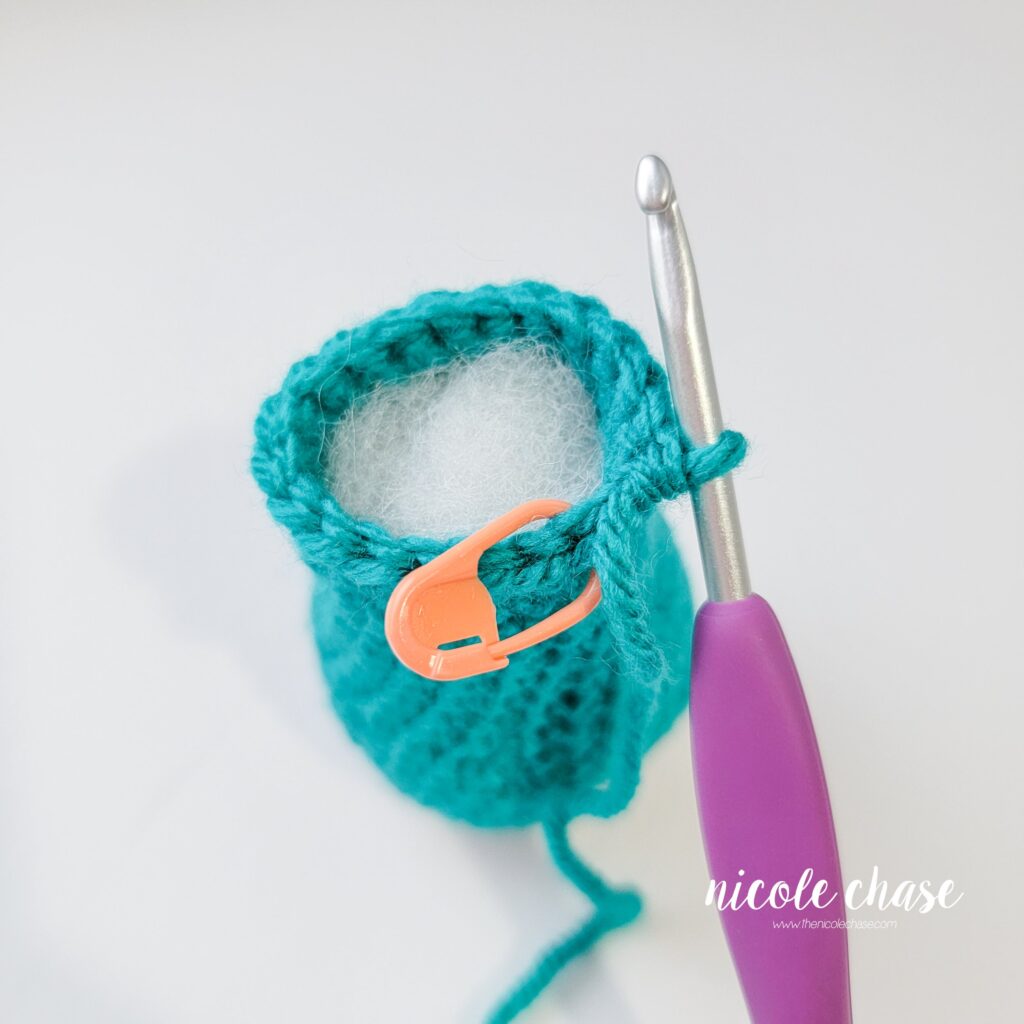
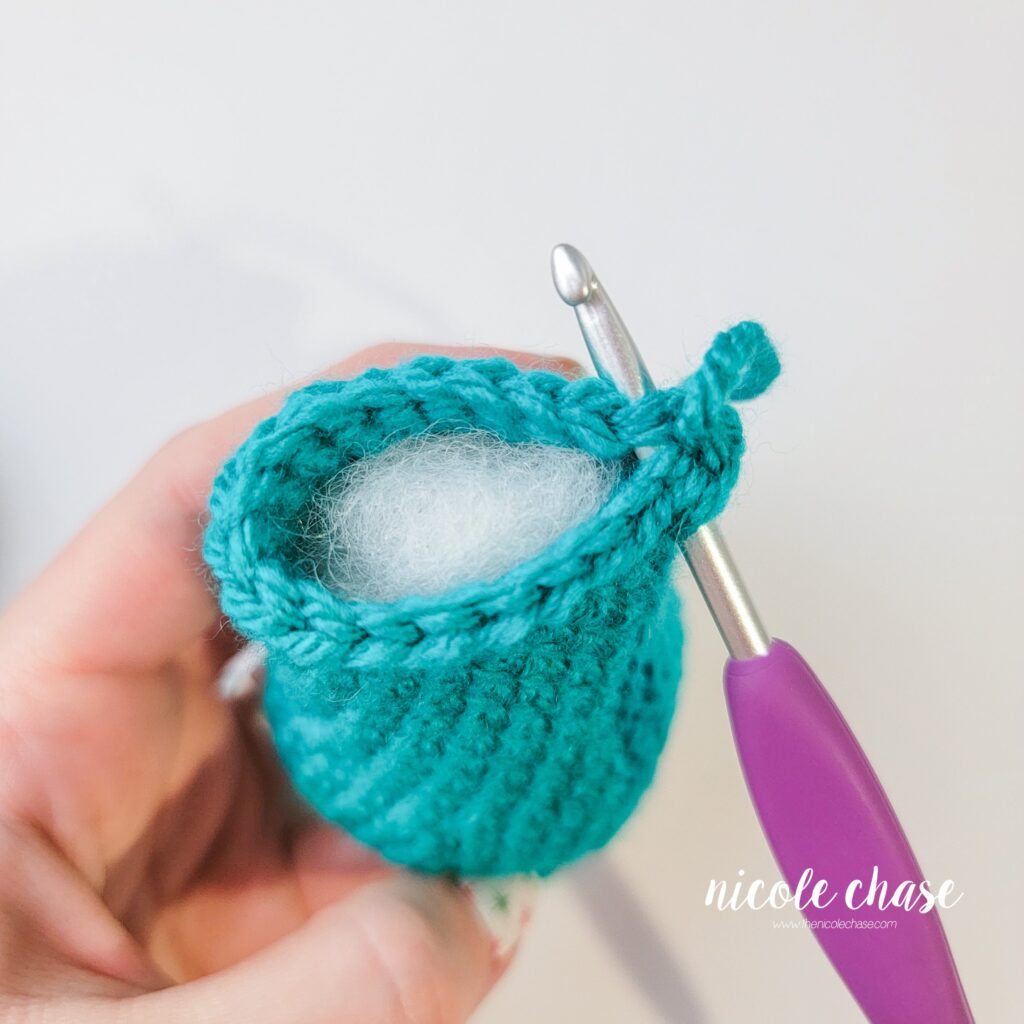
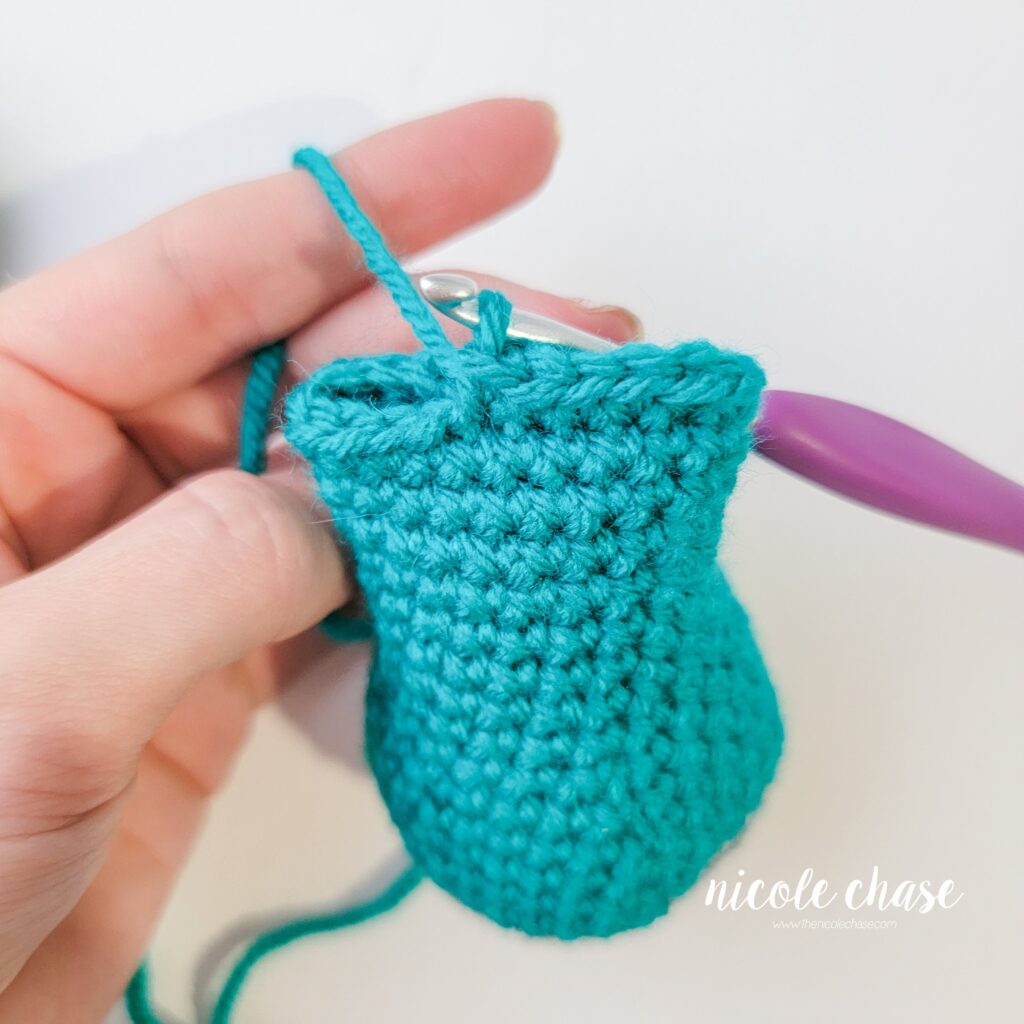
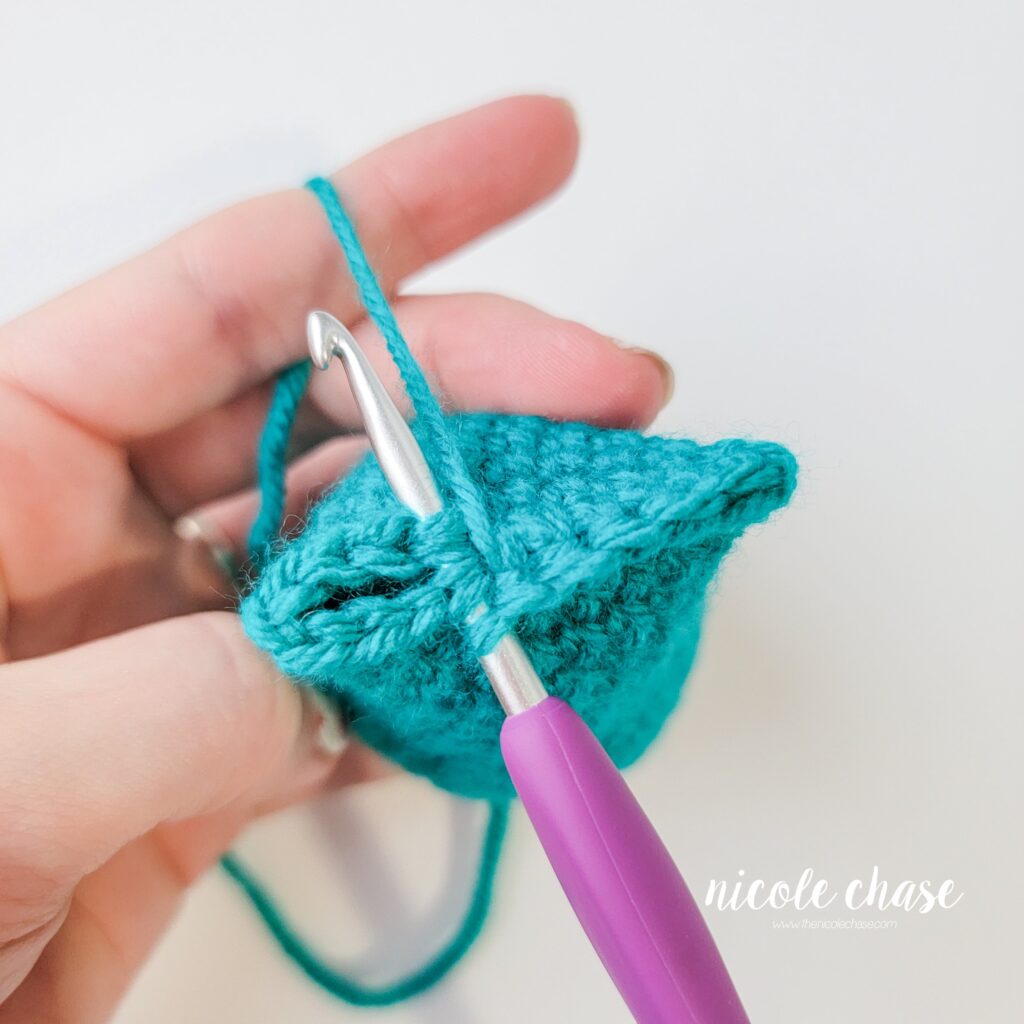
- See tutorial photos.
Pattern
Using 4.0mm (G) hook:
Body
Using color A (shown as brown):
R1: Begin with 6 SC in a magic ring. (6 sts)
R2: 2 SC in each st around. (12 sts)
R3: *2 SC in next st, 1 SC in next st. Repeat from * around. (18 sts)
R4: *2 SC in next st, 1 SC in each of the next 2 sts. Repeat from * around. (24 sts)
R5: *2 SC in next st, 1 SC in each of the next 3 sts. Repeat from * around. (30 sts)
R6-11: 1 SC in each st around. (30 sts)
R12: *SC2tog, 1 SC in each of the next 3 sts. Repeat from * around. (24 sts)
R13-15: 1 SC in each st around. (24 sts)
R16: *SC2tog, 1 SC in each of the next 2 sts. Repeat from * around. (18 sts)
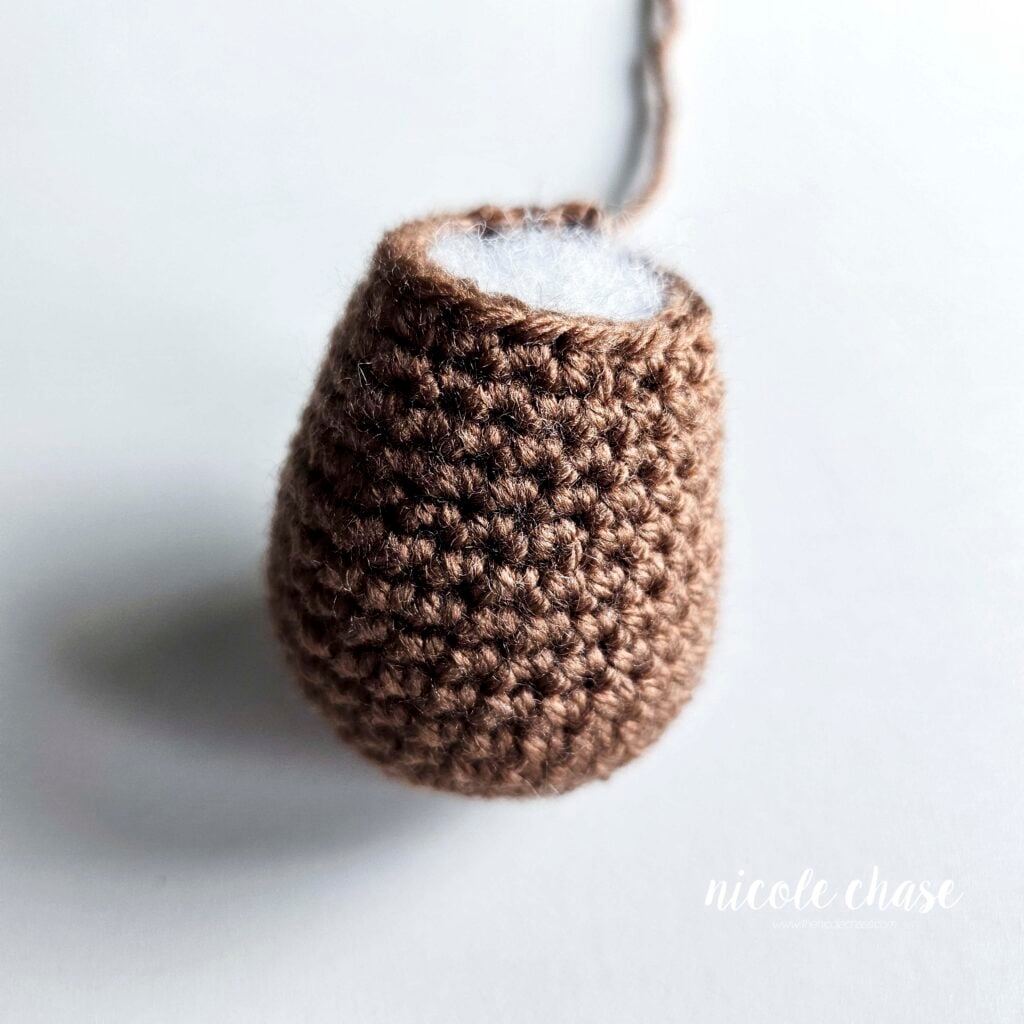
Cut yarn, leaving long strand for sewing. Fasten off.
Fill with stuffing.
Head
Using color B (shown as light brown):
R1: Begin with 6 SC in a magic ring. (6 sts)
R2: 2 SC in each st around. (12 sts)
R3: *2 SC in next st, 1 SC in next st. Repeat from * around. (18 sts)
R4: 1 SC in each st around. (18 sts)
R5: *2 SC in next st, 1 SC in each of the next 2 sts. Repeat from * an additional 2 times (3 repeats in total). 1 SC in each of the next 9 sts around. (21 sts)
R6: *2 SC in next st, 1 SC in each of the next 3 sts. Repeat from * an additional 2 times (3 repeats in total). 1 SC in each of the next 9 sts around. (24 sts)
R7: *2 SC in next st, 1 SC in each of the next 4 sts. Repeat from * an additional 2 times (3 repeats in total). 1 SC in each of the next 9 sts around. (27 sts)
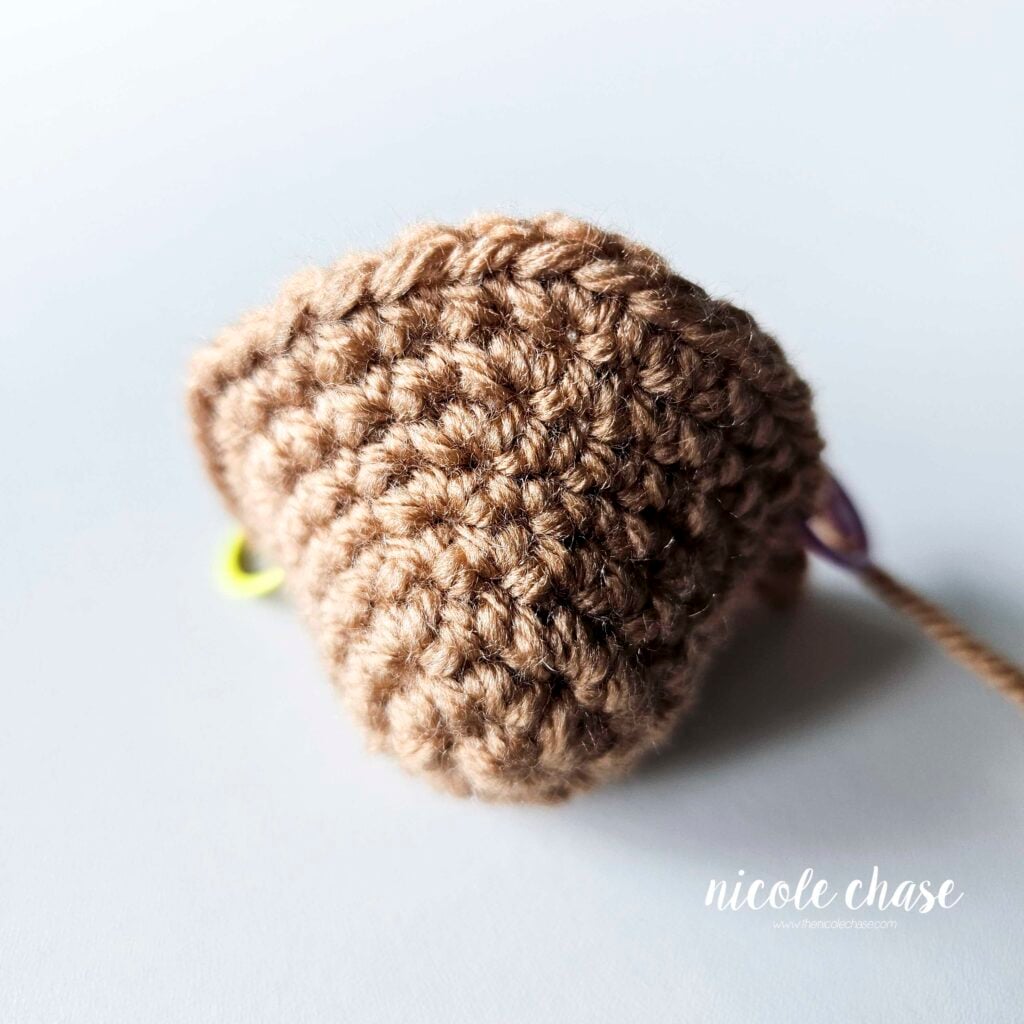
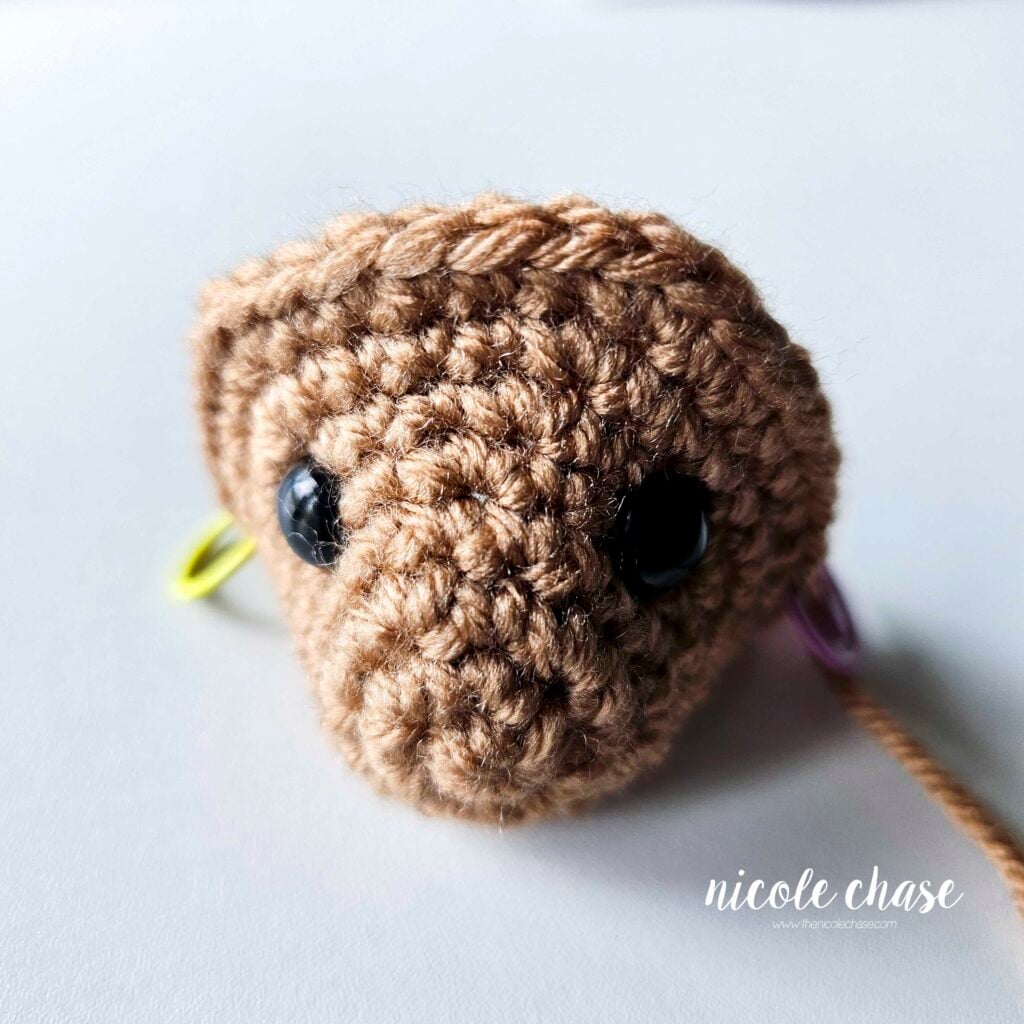
R8: *2 SC in next st, 1 SC in each of the next 5 sts. Repeat from * an additional 2 times (3 repeats in total). Add a st marker to the last worked st. 1 SC in each of the next 9 sts around. (30 sts)
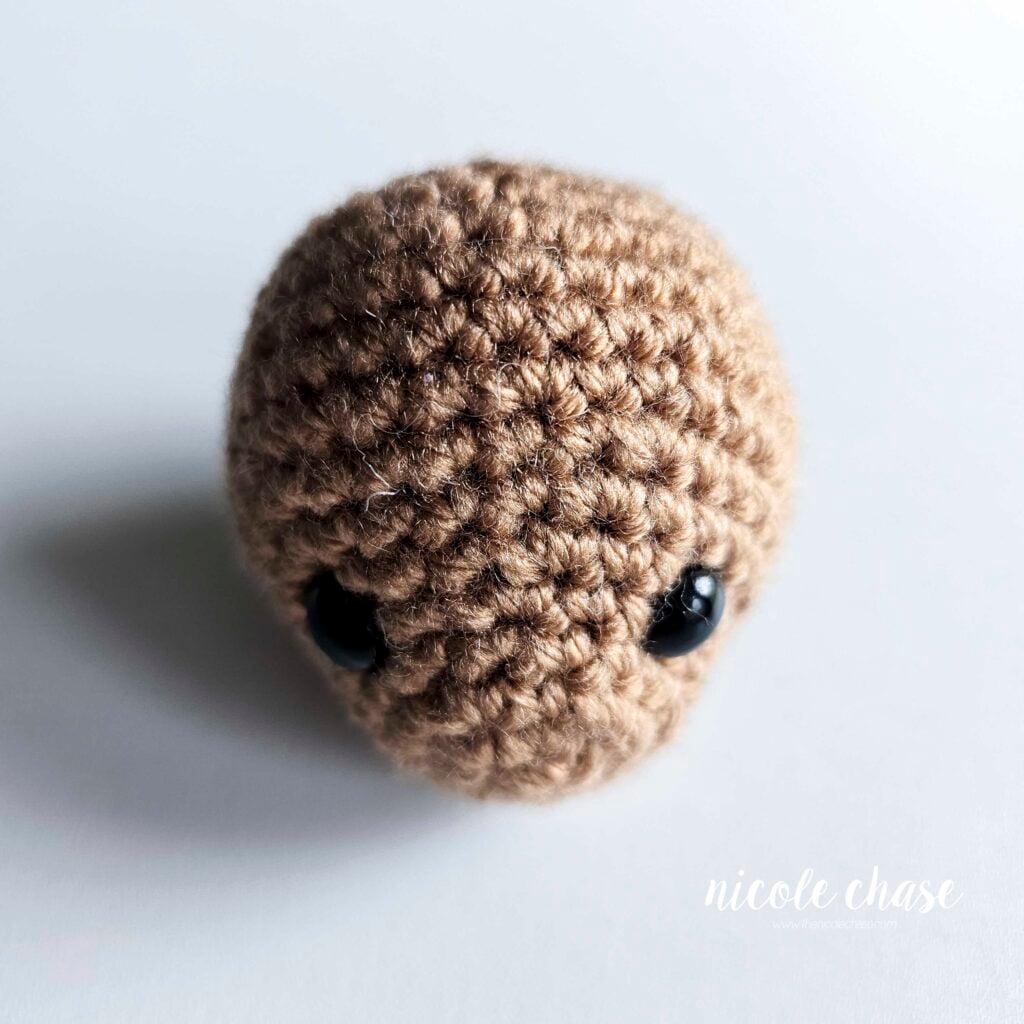
The added st marker, and the st marker at the beginning of this round helps to indicate the front sides of the face. The first sequence of sts between the first and second st markers indicate the top of the head. The second sequence of sts between the second and first st markers indicate the bottom of the head. If using safety eyes, insert eyes between R5 and R6 with 6 sts between. You can now remove your second st marker. See tutorial photos.
R9: *2 SC in next st, 1 SC in each of the next 4 sts. Repeat from * around. (36 sts)
R10-11: 1 SC in each st around. (36 sts)
R12: *SC2tog, 1 SC in each of the next 10 sts. Repeat from * around. (33 sts)
R13: *SC2tog, 1 SC in each of the next 9 sts. Repeat from * around. (30 sts)
R14: *SC2tog, 1 SC in each of the next 8 sts. Repeat from * around. (27 sts)
R15: *SC2tog, 1 SC in each of the next 7 sts. Repeat from * around. (24 sts)
R16: *SC2tog, 1 SC in each of the next 2 sts. Repeat from * around. (18 sts)
Fill head with stuffing.
R17: *SC2tog, 1 SC in next st. Repeat from * around. (12 sts)
R18: *SC2tog. Repeat from * around. (6 sts)
Cut yarn, weave yarn in and out of remaining sts. Pull tight to close. Tie off and weave in ends.
Ears (make 2)
Using color A (shown as brown):
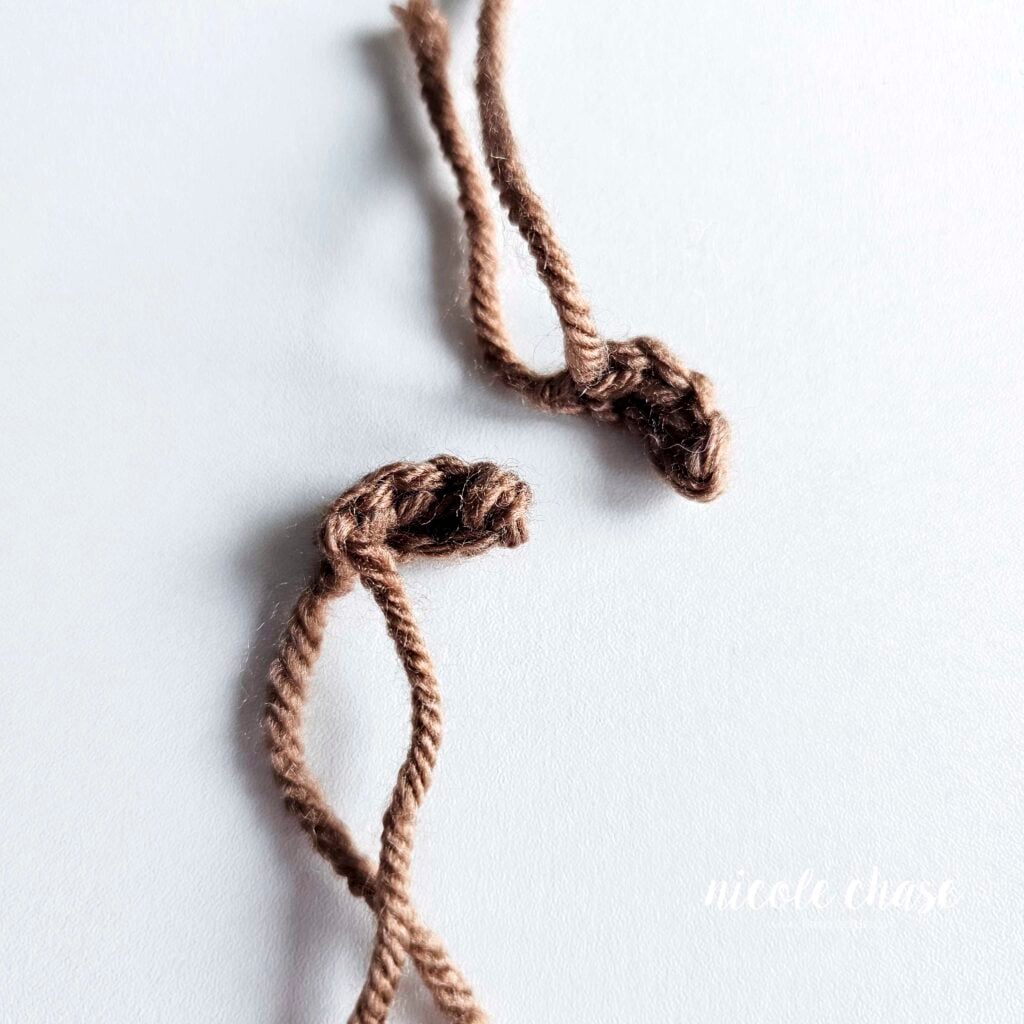
R1: Ch 5, sl st in second ch from hook, SC in each of the next 2 chs, sl st in the last ch.
Cut yarn, leaving long strand for sewing. Fasten off.
Arms (make 2)
Using color A (shown as brown):
R1: Begin with 6 SC in a magic ring. (6 sts)
R2: *2 SC in next st, 1 SC in next st. Repeat from * around. (9 sts)
R3: *2 SC in next st, 1 SC in each of the next 2 sts. Repeat from * around. (12 sts)
R4: *2 SC in next st, 1 SC in each of the next 3 sts. Repeat from * around. (15 sts)
R5: *SC2tog, 1 SC in each of the next 3 sts. Repeat from * around. (12 sts)
R6: *SC2tog, 1 SC in each of the next 2 sts. Repeat from * around. (9 sts)
R7-10: 1 SC in each st around. (9 sts)
Lightly fill the arms with stuffing.
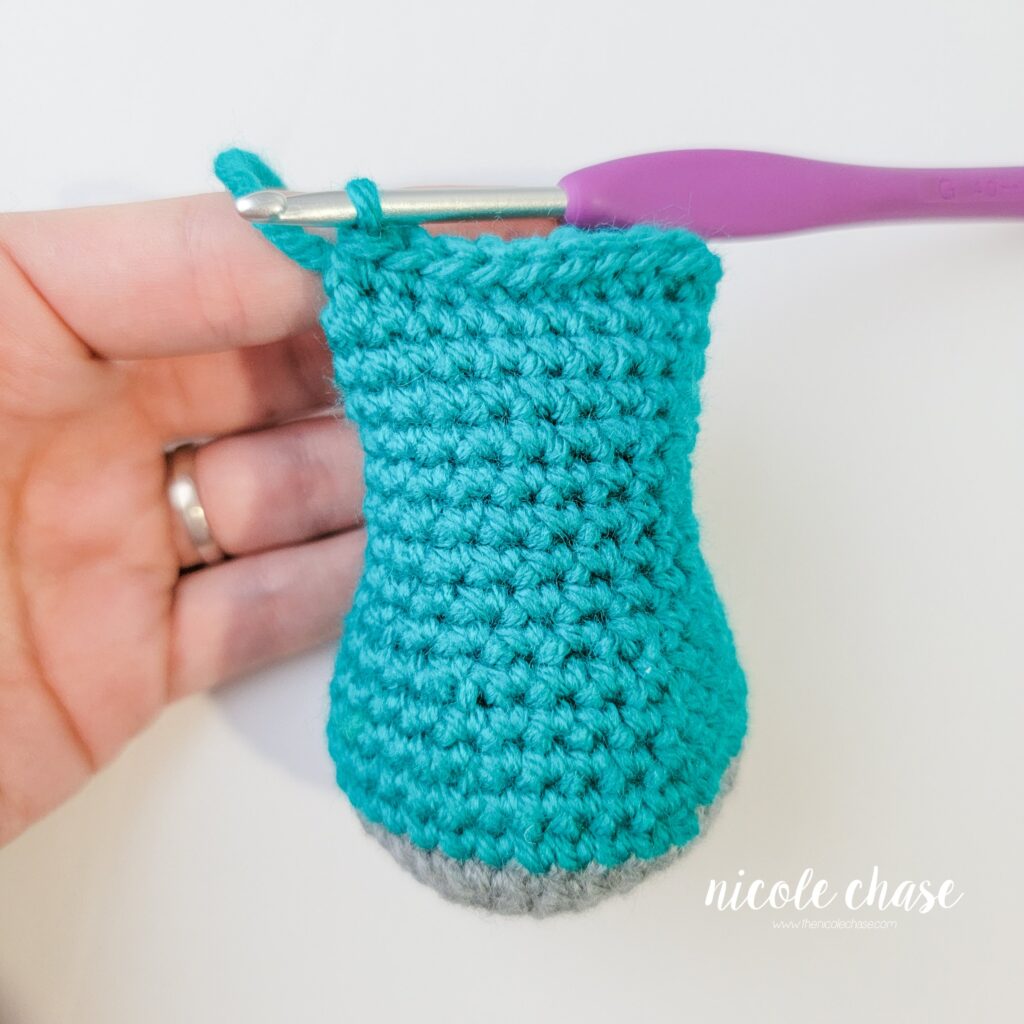
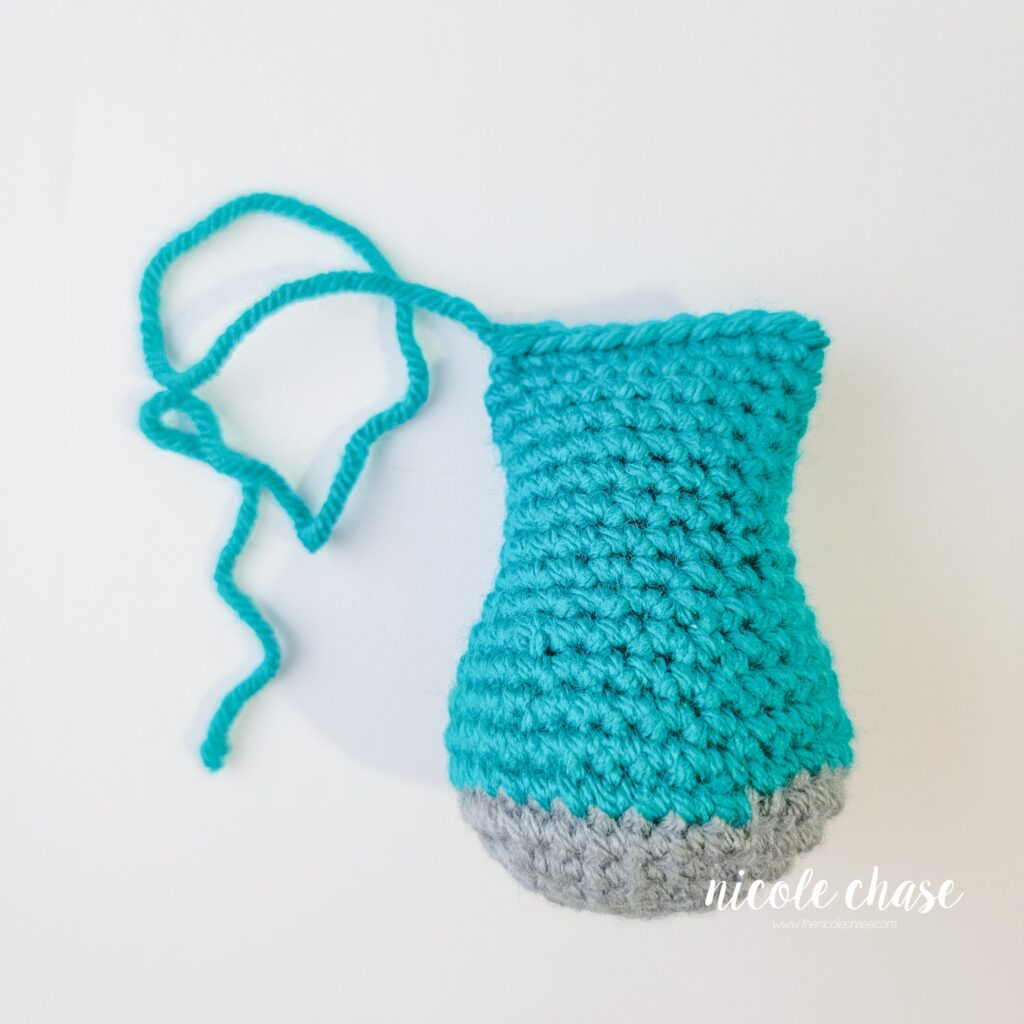
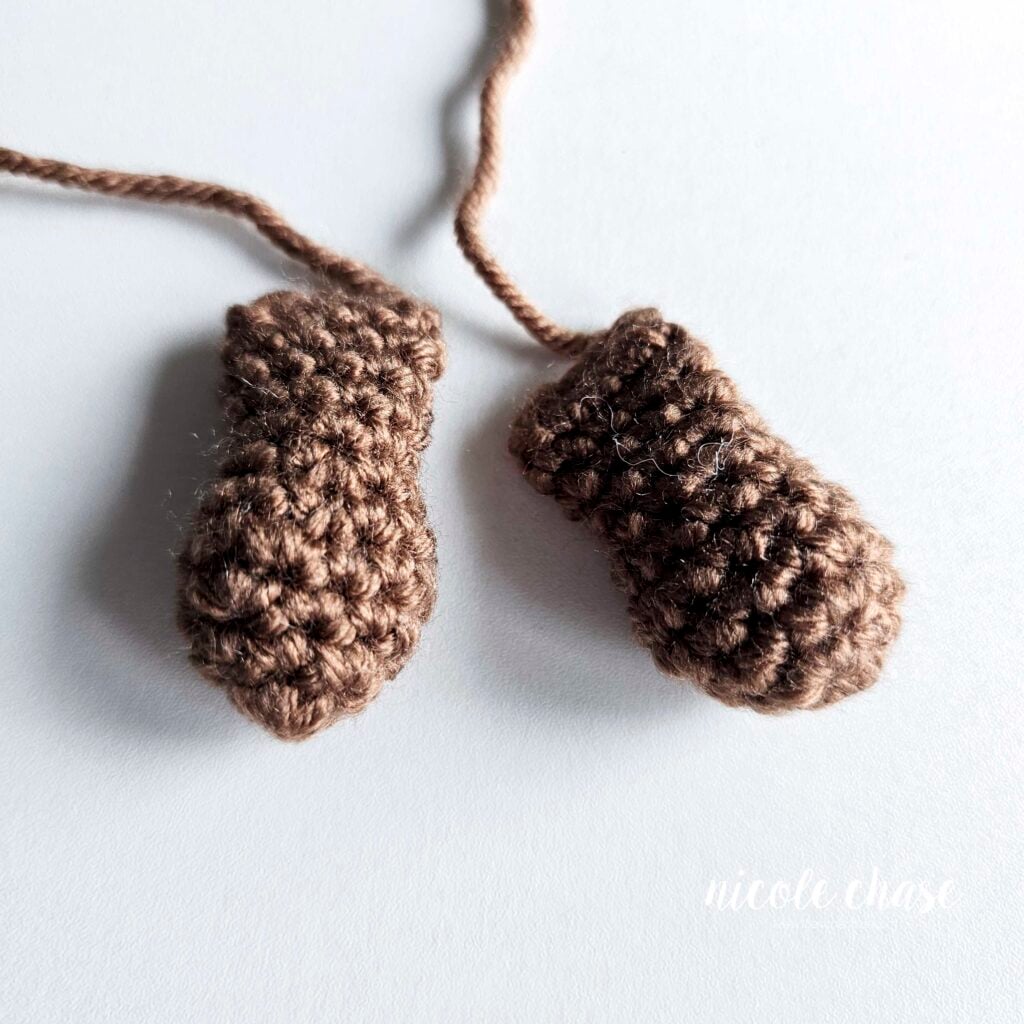
R11: Fold the arm closed. Skipping the last stitch of the prior round, working through both sides, 1 SC in each st across. See tutorial photos. (4 sts)
Cut yarn, leaving long strand for sewing. Fasten off.
Legs (make 2)
Using color A (shown as brown):
R1: Begin with 6 SC in a magic ring. (6 sts)
R2: *2 SC in next st, 1 SC in next st. Repeat from * around. (9 sts)
R3: *2 SC in next st, 1 SC in each of the next 2 sts. Repeat from * around. (12 sts)
R4: *2 SC in next st, 1 SC in each of the next 3 sts. Repeat from * around. (15 sts)
R5: *SC2tog, 1 SC in each of the next 3 sts. Repeat from * around. (12 sts)
R6-7: 1 SC in each st around. (12 sts)
R8: *SC2tog, 1 SC in each of the next 2 sts. Repeat from * around. (9 sts)
Lightly fill with stuffing.
R9: Fold the leg closed. Skipping the last stitch of the prior round, working through both sides, 1 SC in each st across. See tutorial photos. (4 sts)
Cut yarn, leaving long strand for sewing. Fasten off.
Tail
Using color A (shown as brown):
R1: Begin with 4 SC in a magic ring. (4 sts)
R2: 1 SC in each st around. (4 sts)
R3: *2 SC in next st, 1 SC in next st. Repeat from * around. (6 sts)
R4: *2 SC in next st, 1 SC in next st. Repeat from * around. (9 sts)
R5-6: 1 SC in each st around. (9 sts)
R7: 2 SC in next st, 1 SC in each of the next 3 sts, SC2tog, 1 SC in each of the next 3 sts. (9 sts)
R8: *2 SC in next st, 1 SC in each of the next 2 sts. Repeat from * around. (12 sts)
R9-11: 1 SC in each st around. (12 sts)
Fill with stuffing.
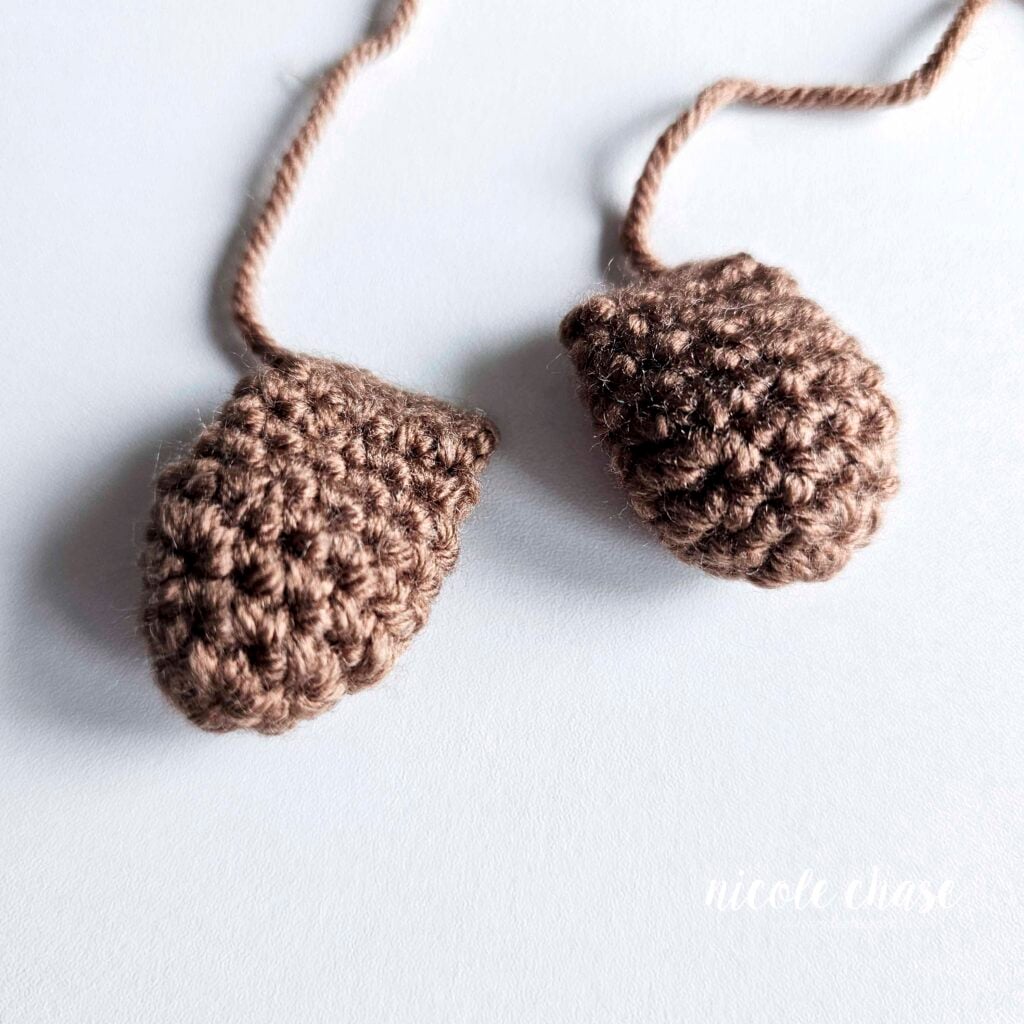
R12: Fold the tail closed. Working through both sides, 1 SC in each st across, leaving 1 unworked st on each side. See tutorial photos. (5 sts)
Cut yarn, leaving long strand for sewing. Fasten off.
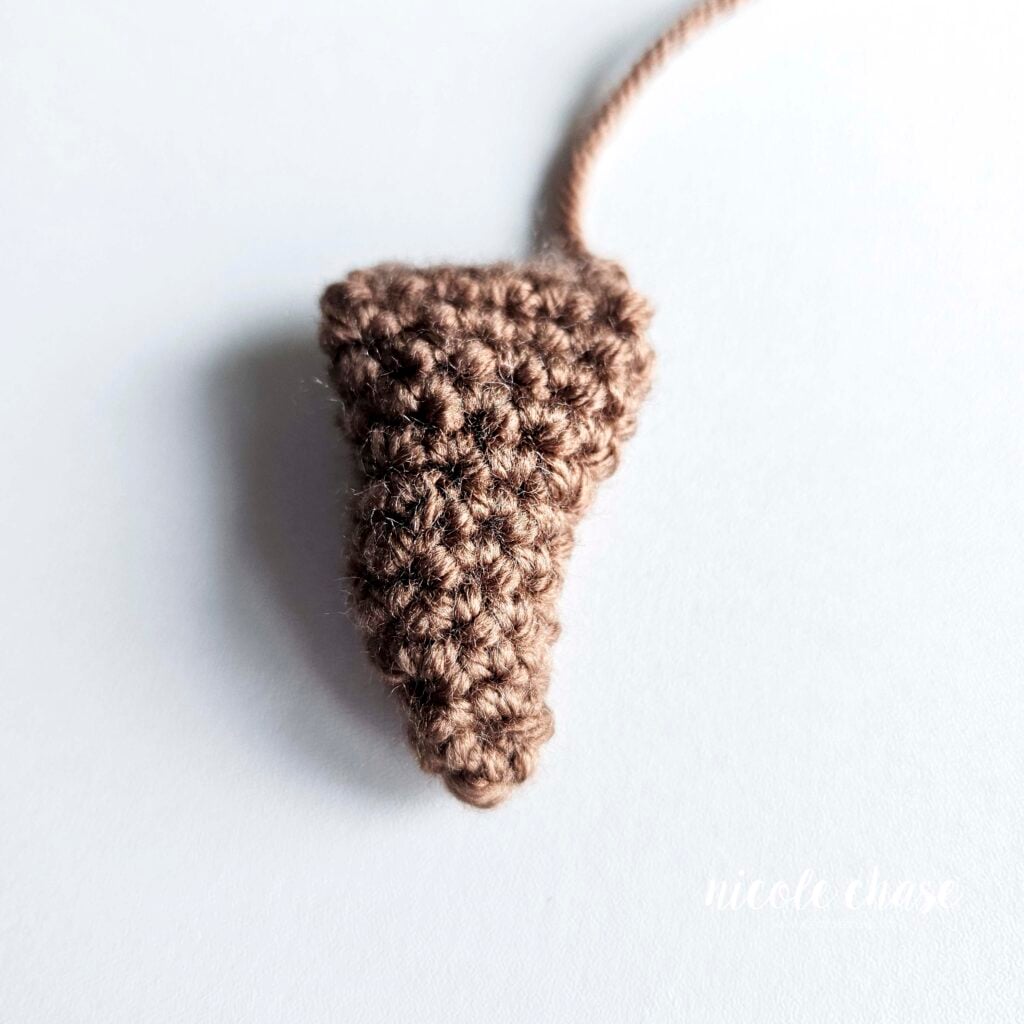
Assembly & Finishing
See tutorial photos.
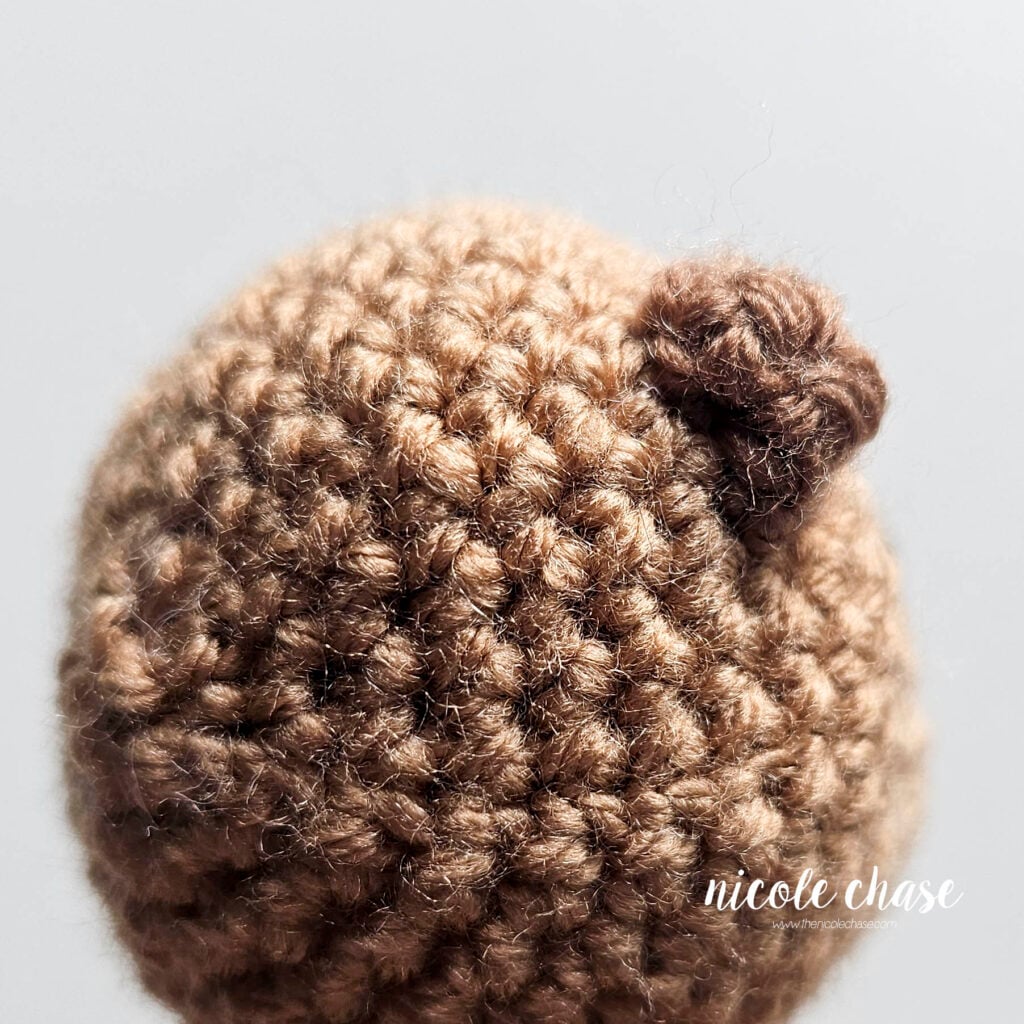
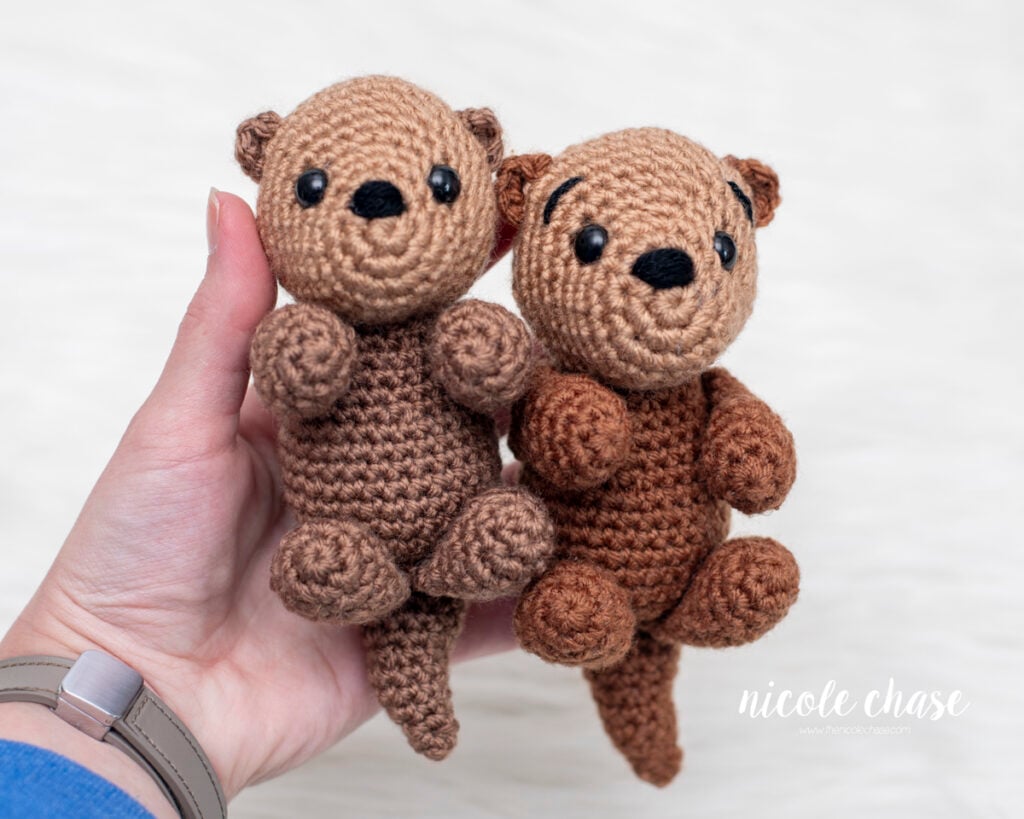
Attach ears to each side of the head between R11-12, leaving about 8 sts between each ear, in the shape of a C.
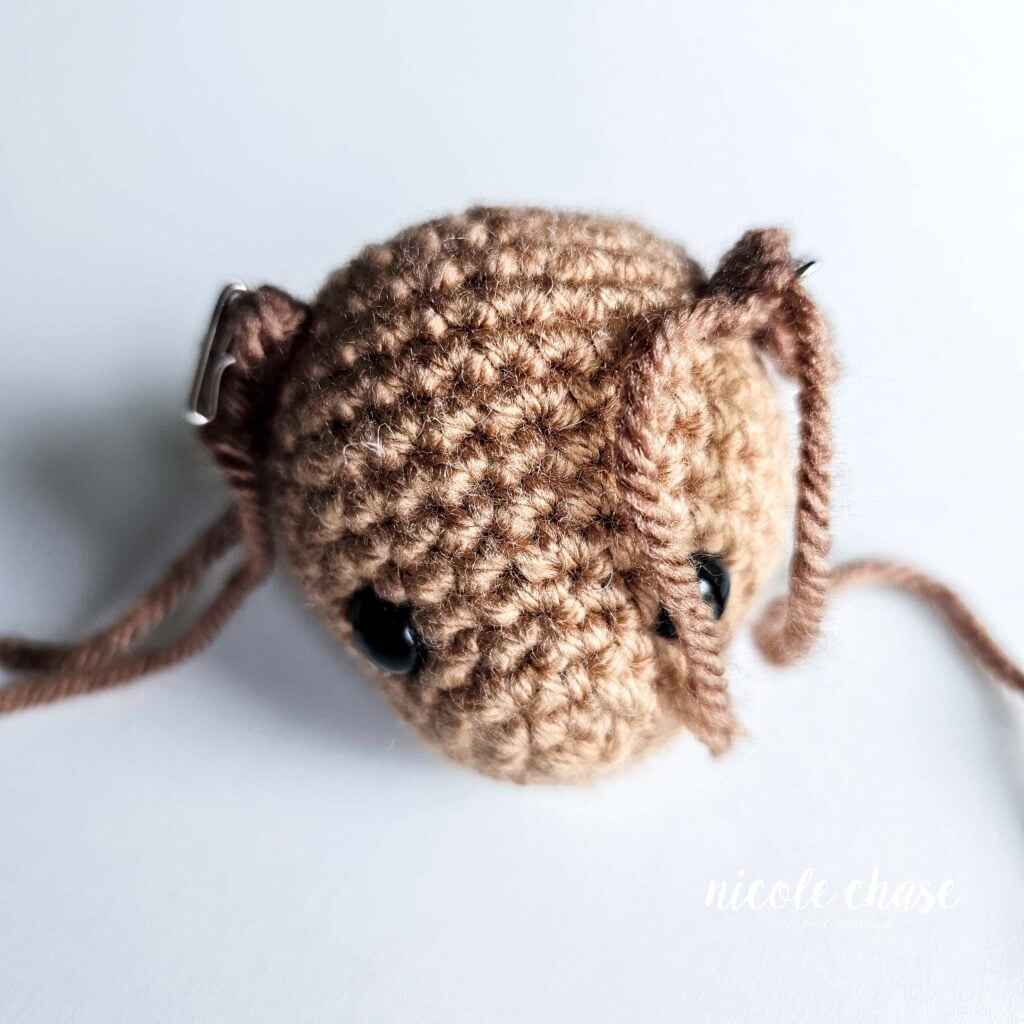
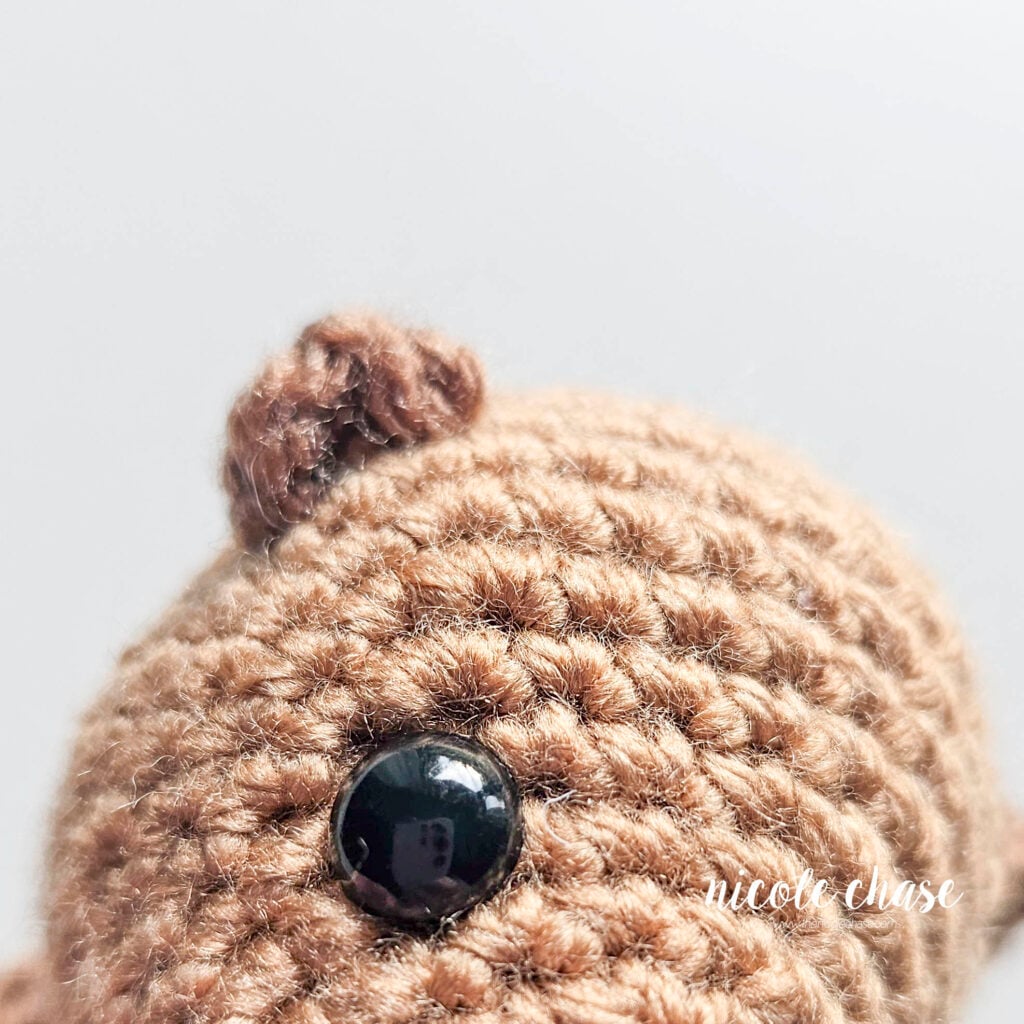
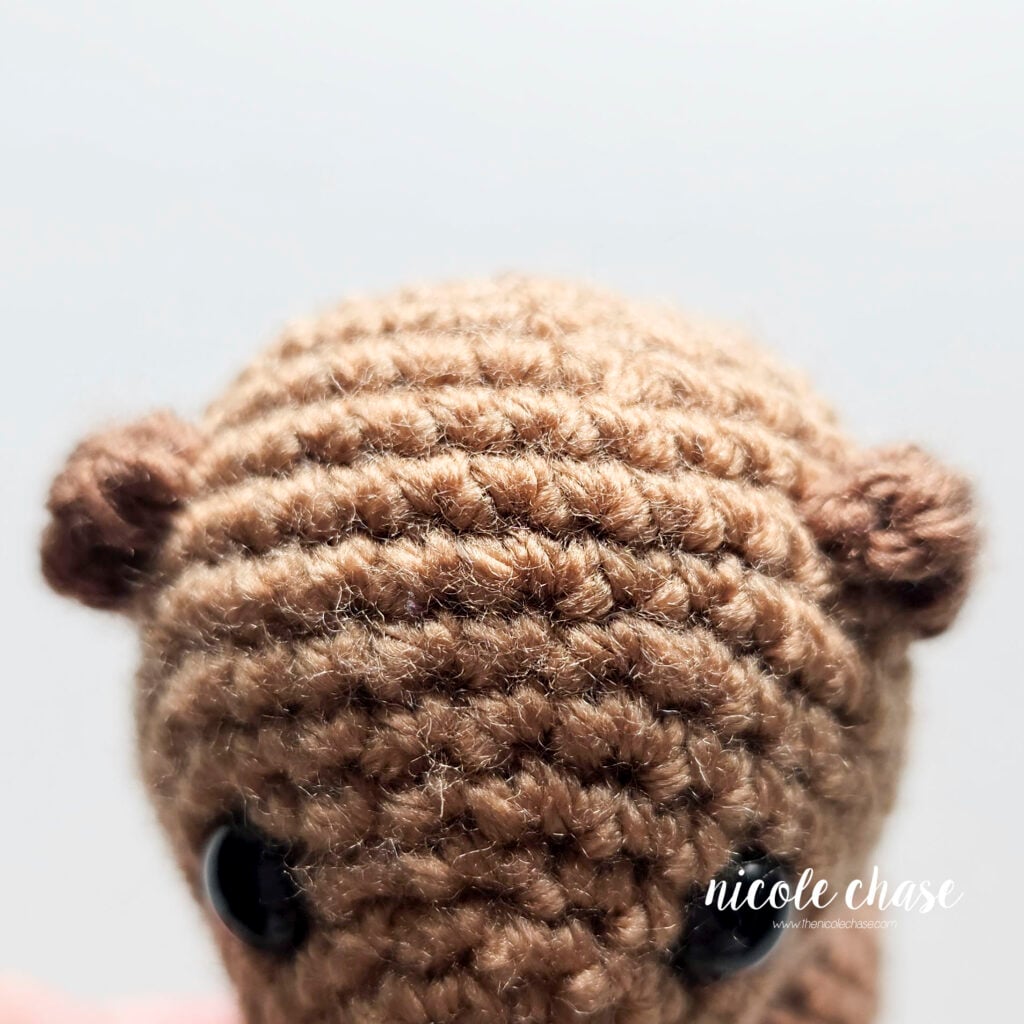
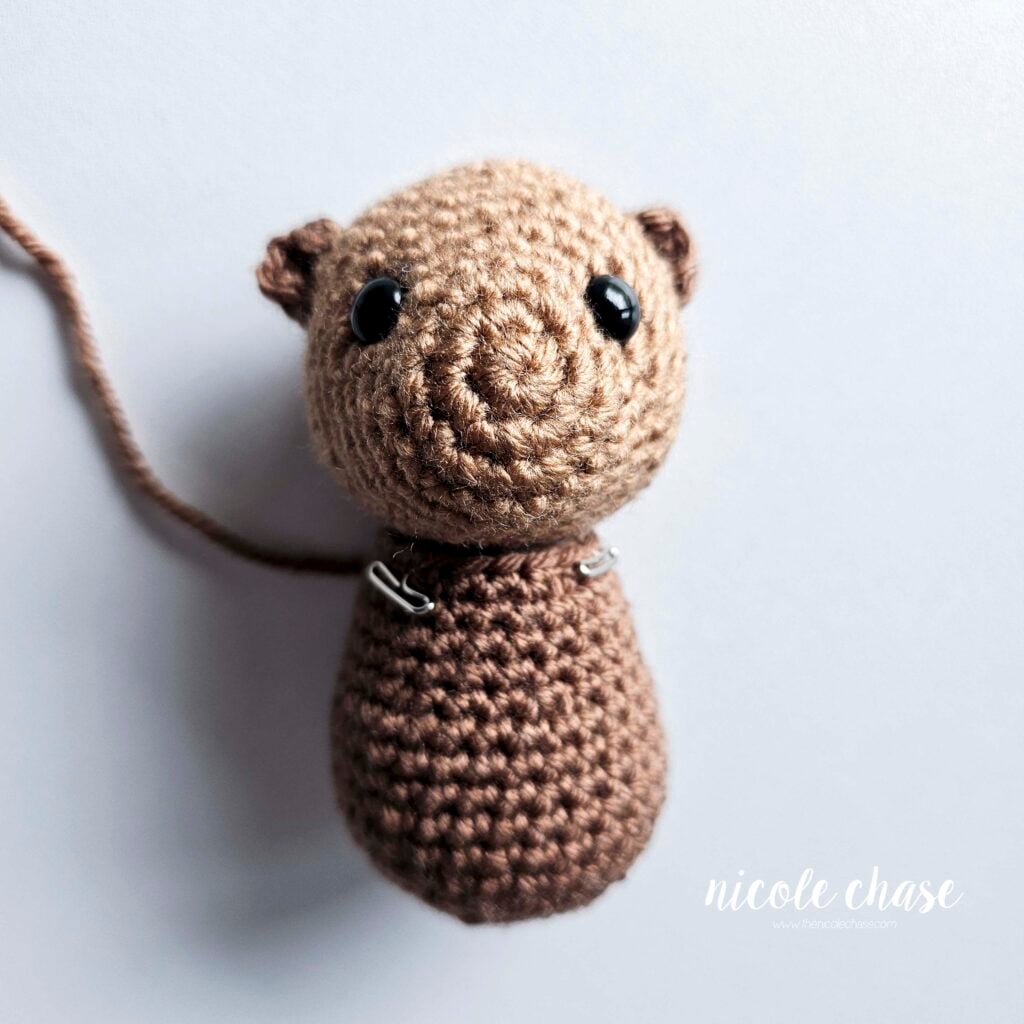
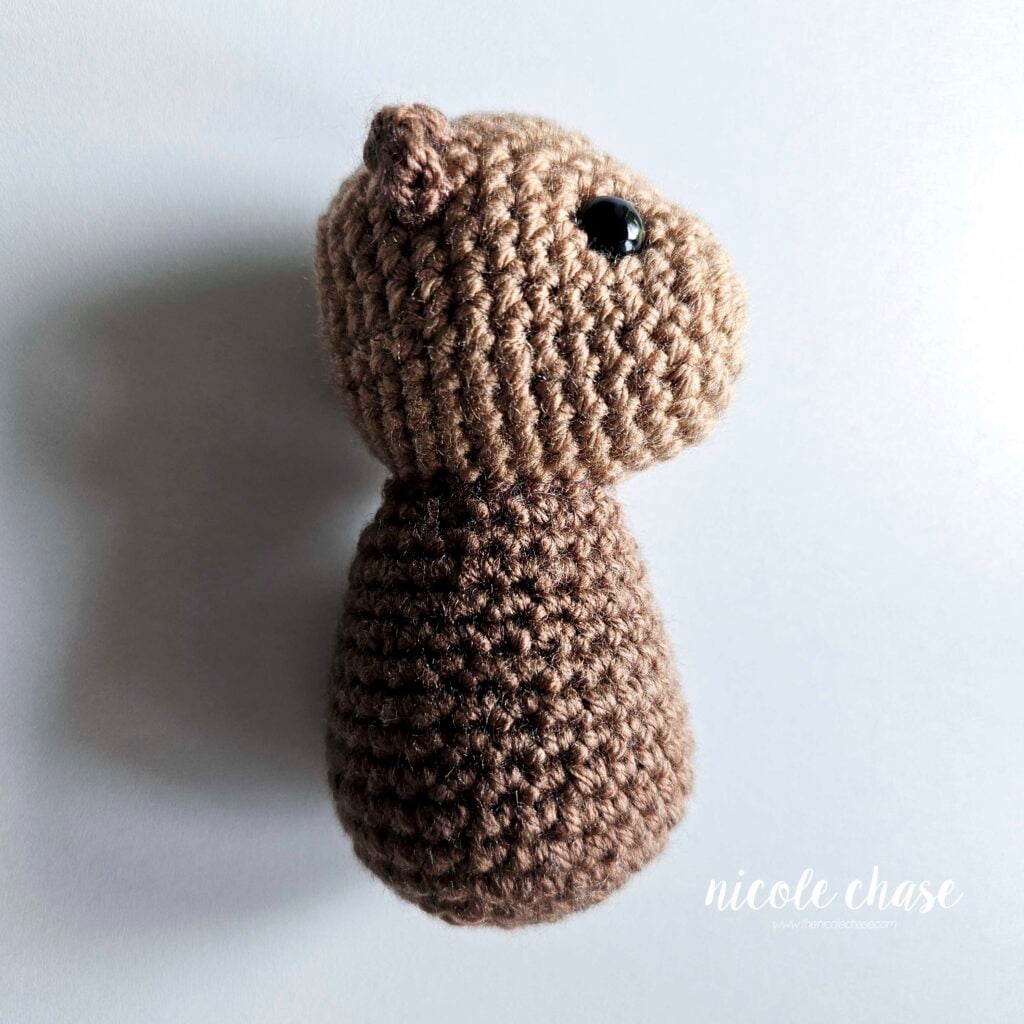
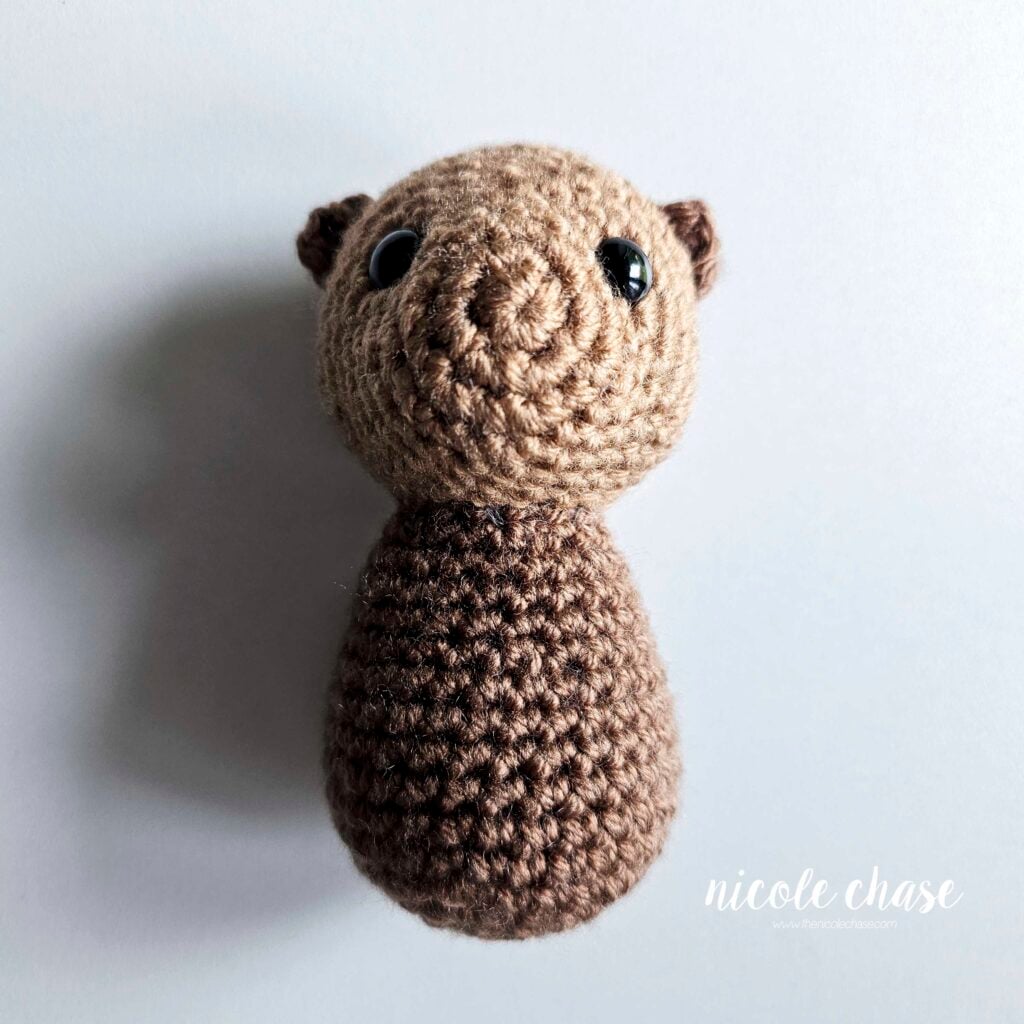
Attach head to body so that the nose is facing straight out; attaching body to approximately R8-13 of the bottom of the head.
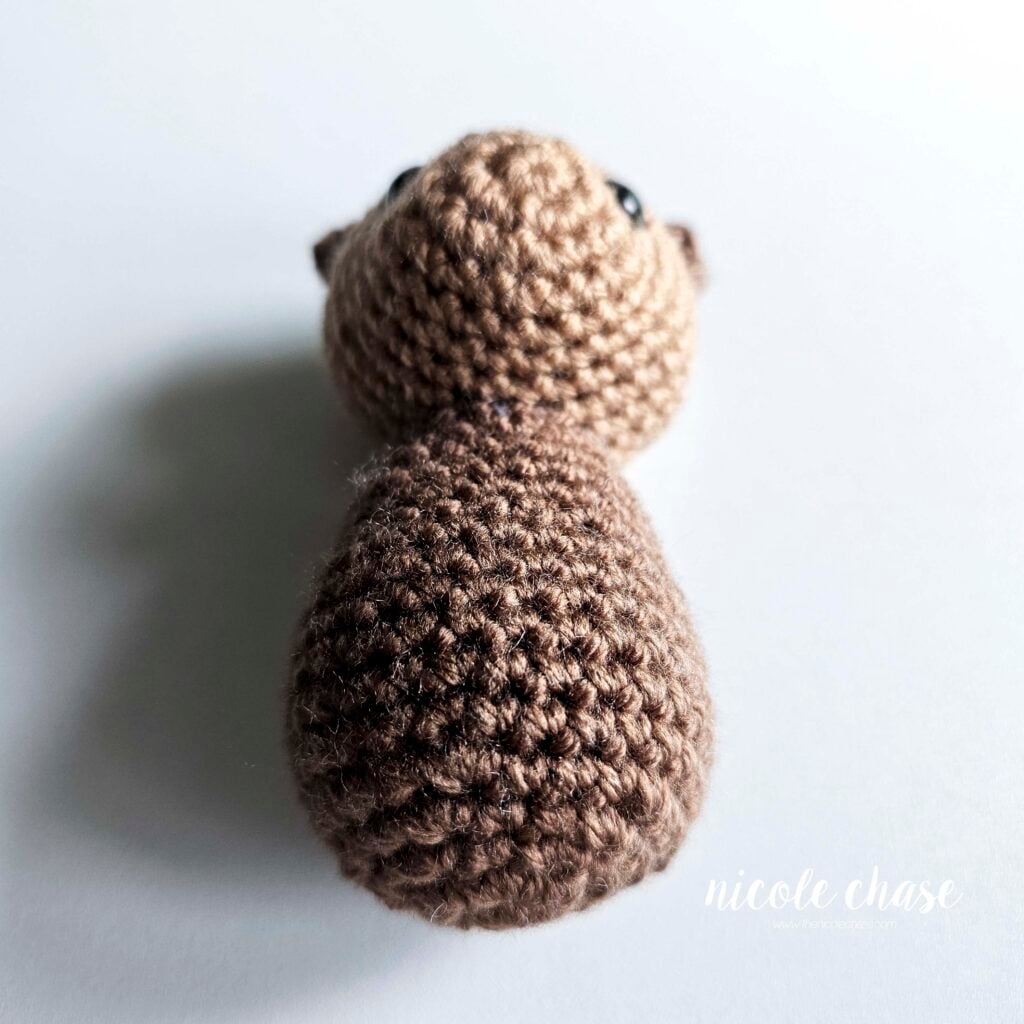
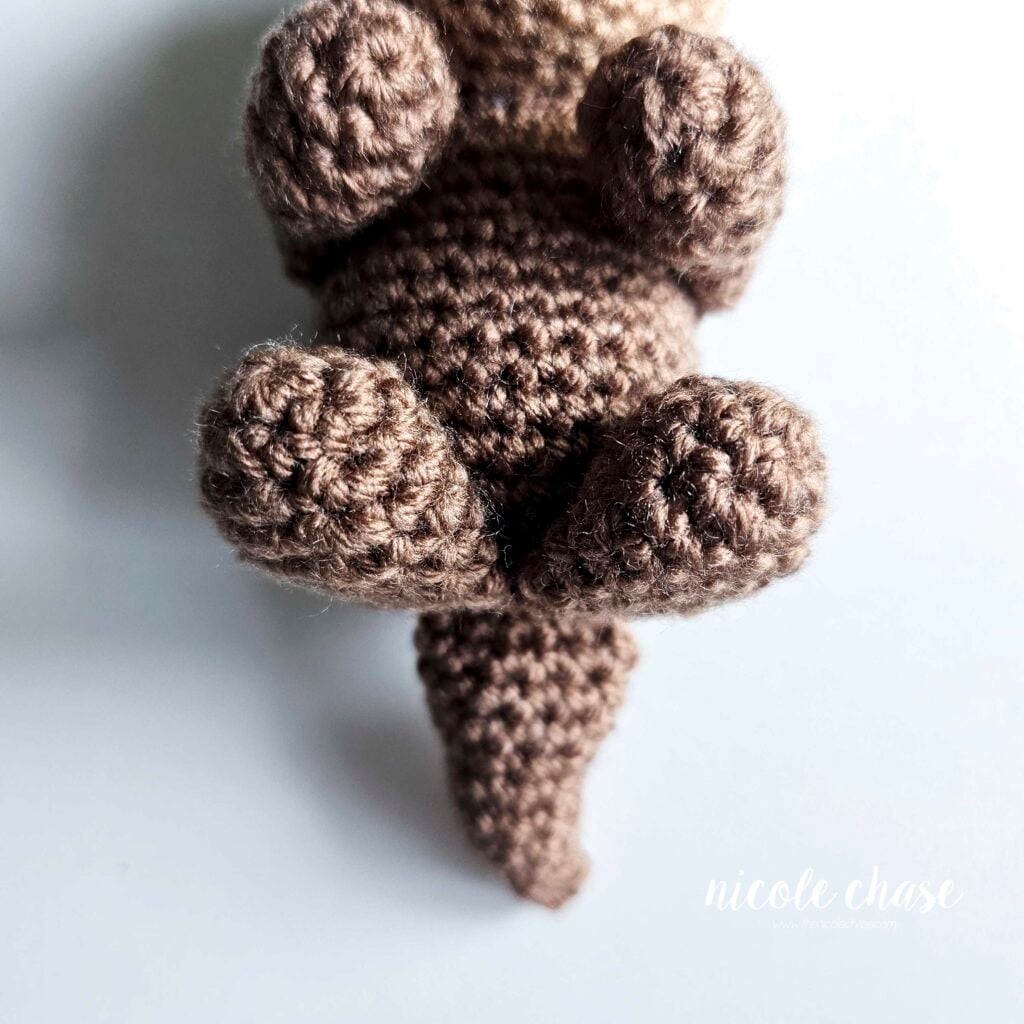
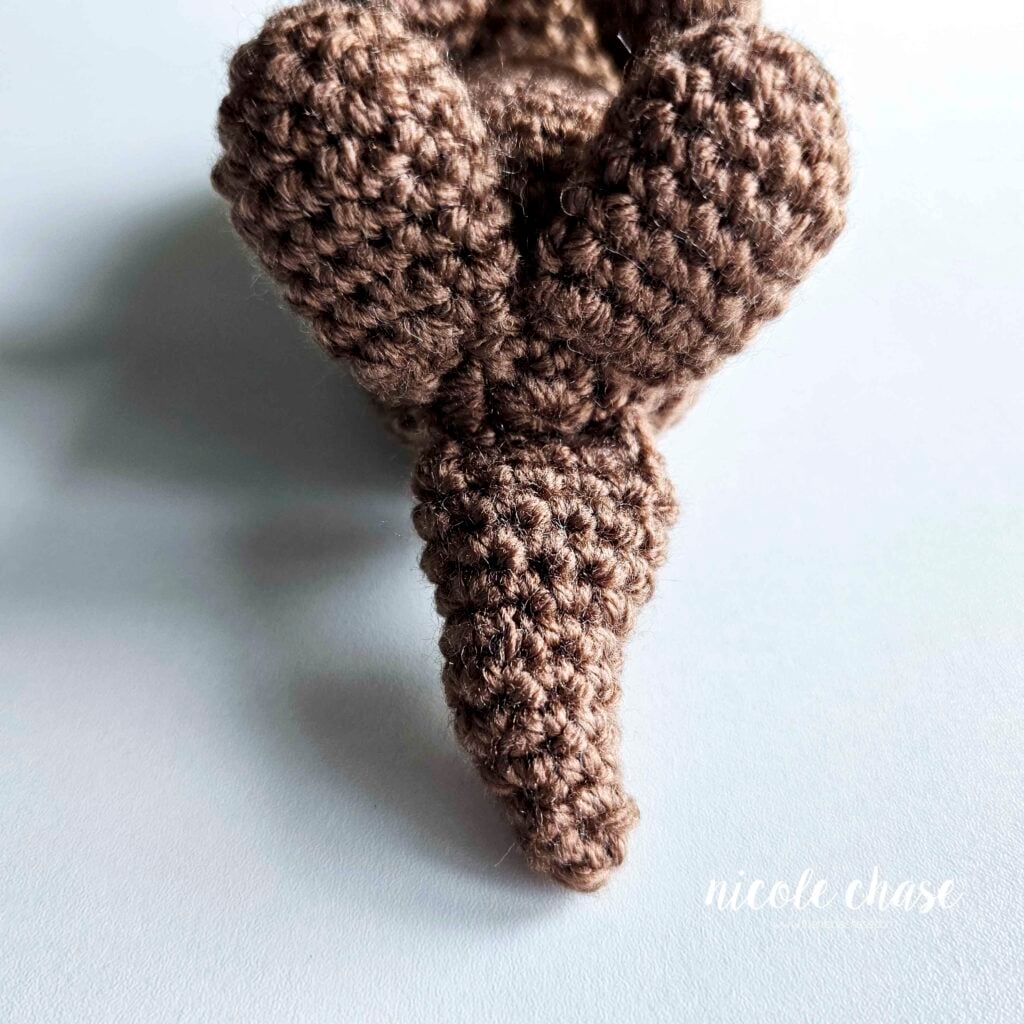
Attach the legs to the bottom of the body facing upward. The closed edge of the legs should be attached on the bottom of the body over R2-3, with the legs touching in the middle. Further secure the middle of the legs between R6-7 of the body so that they stay in an upward position.
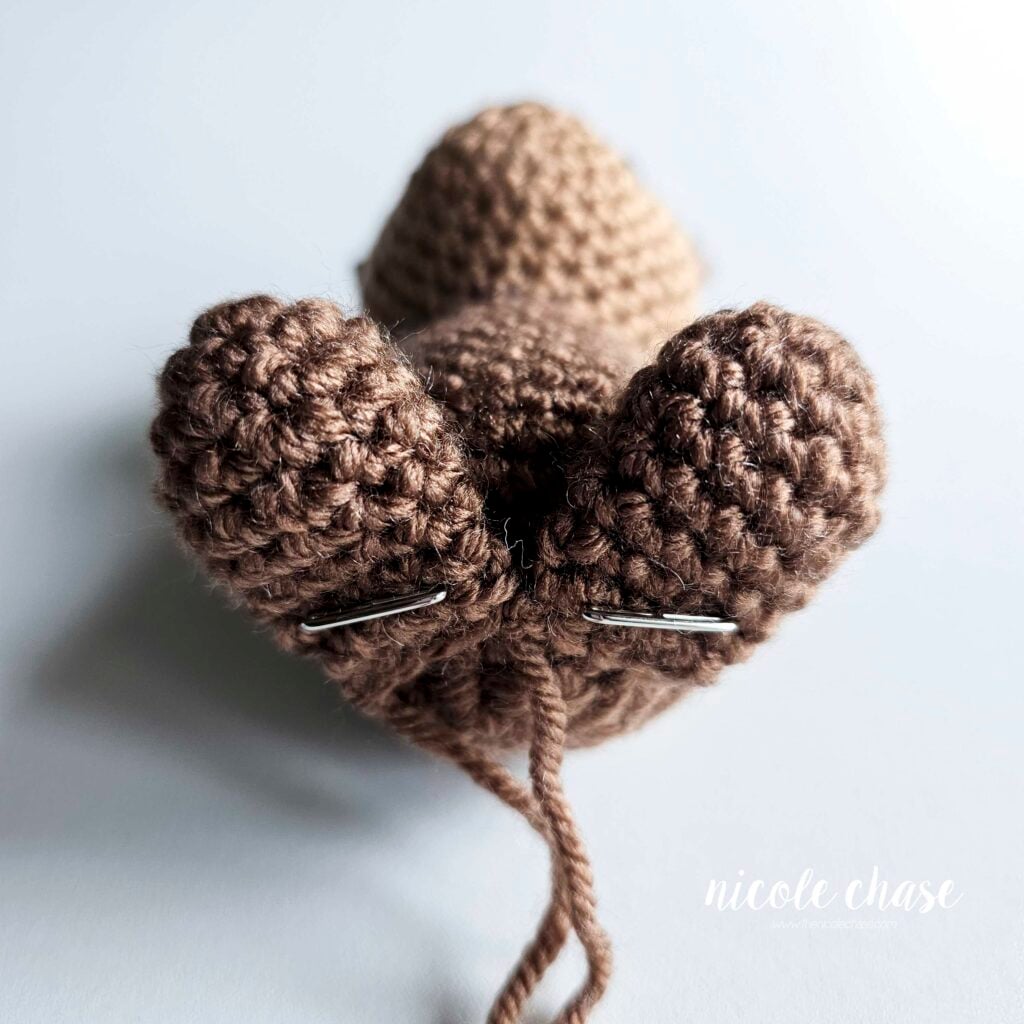
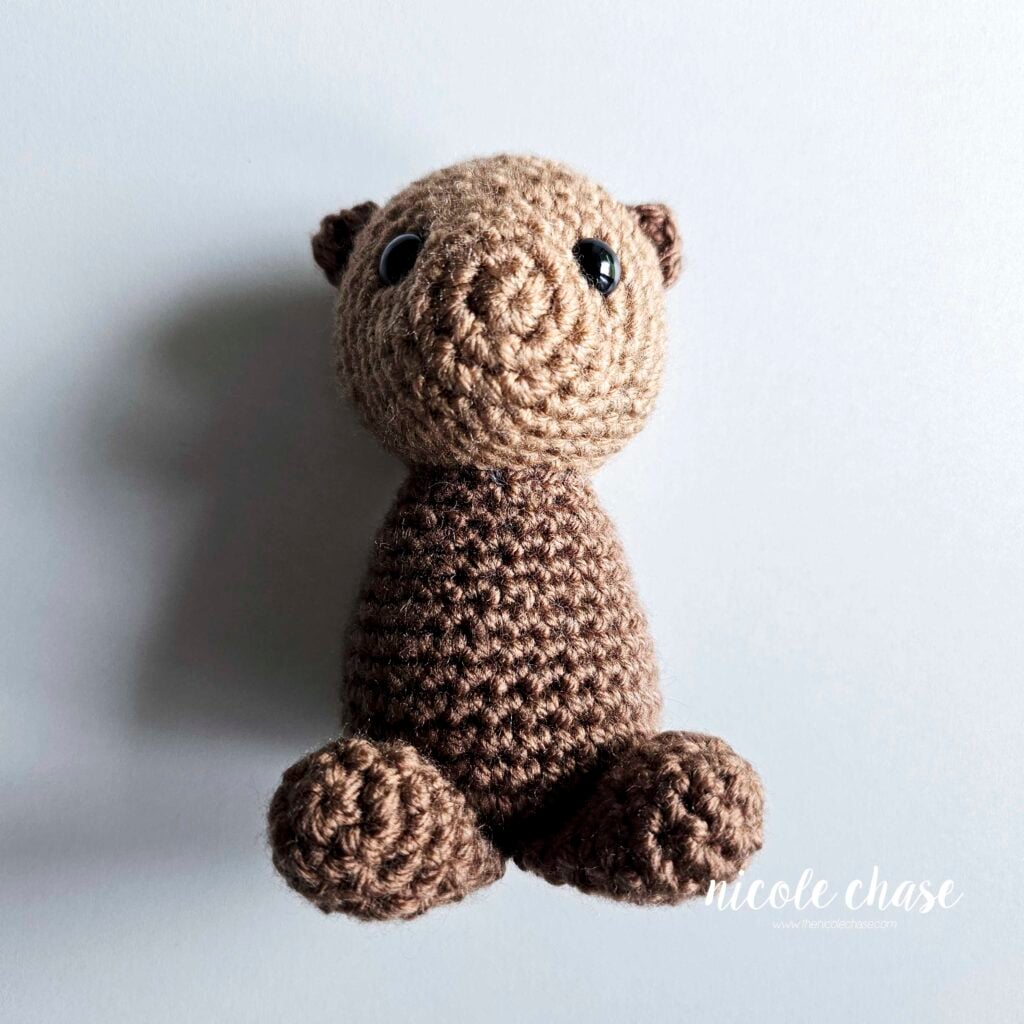
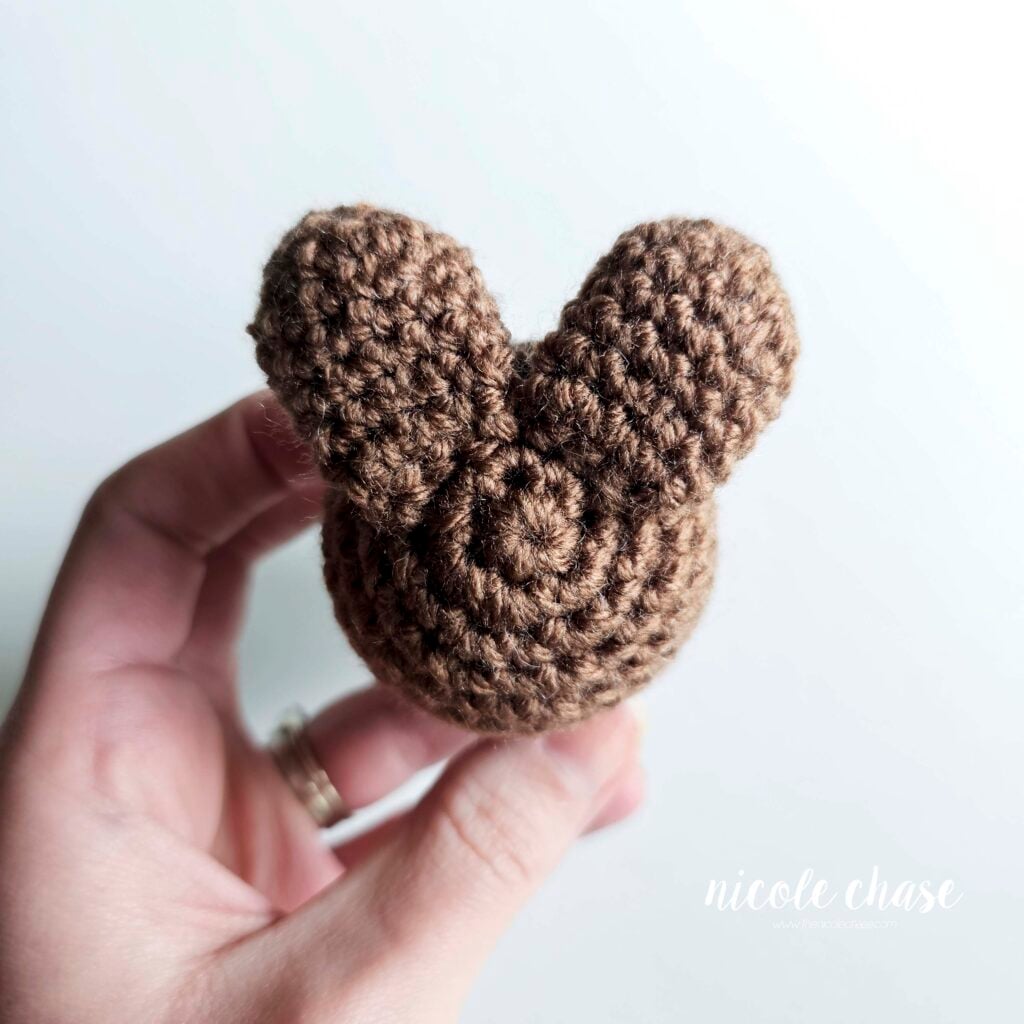
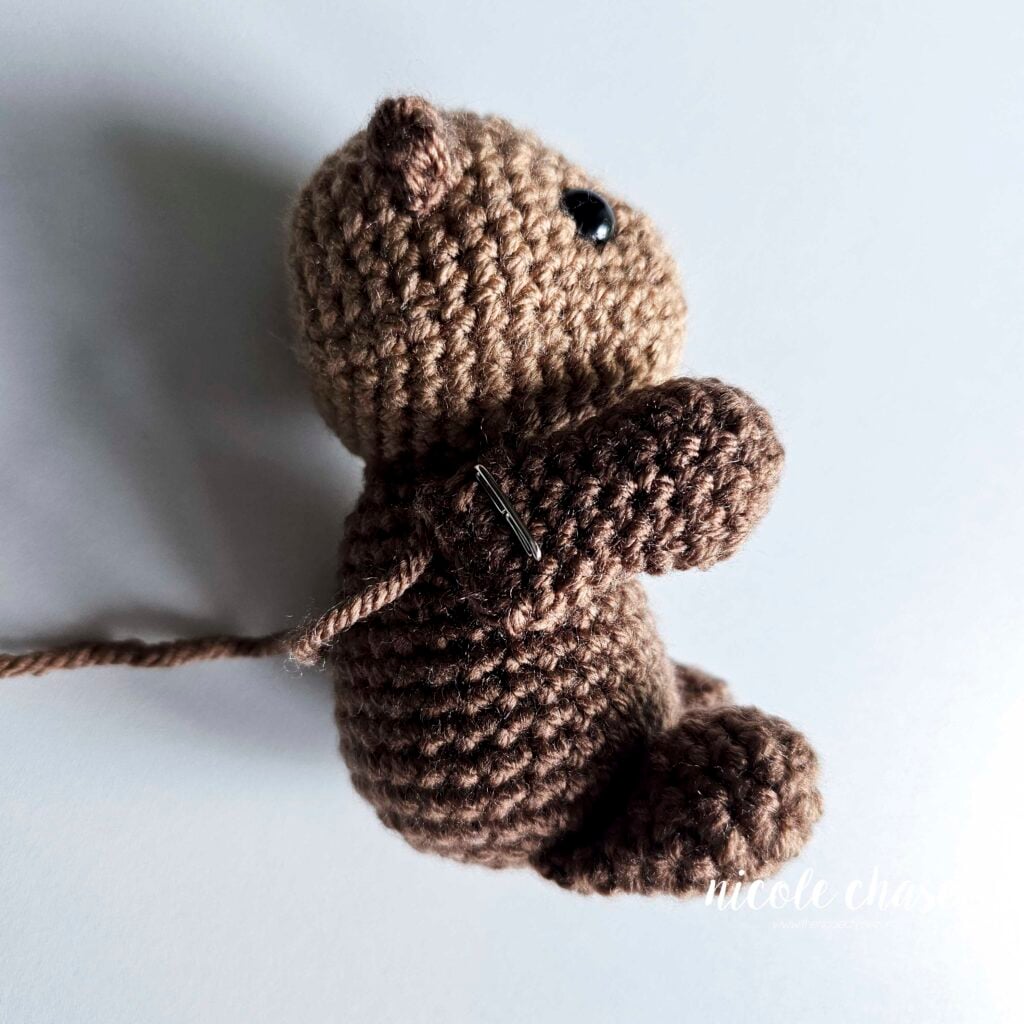
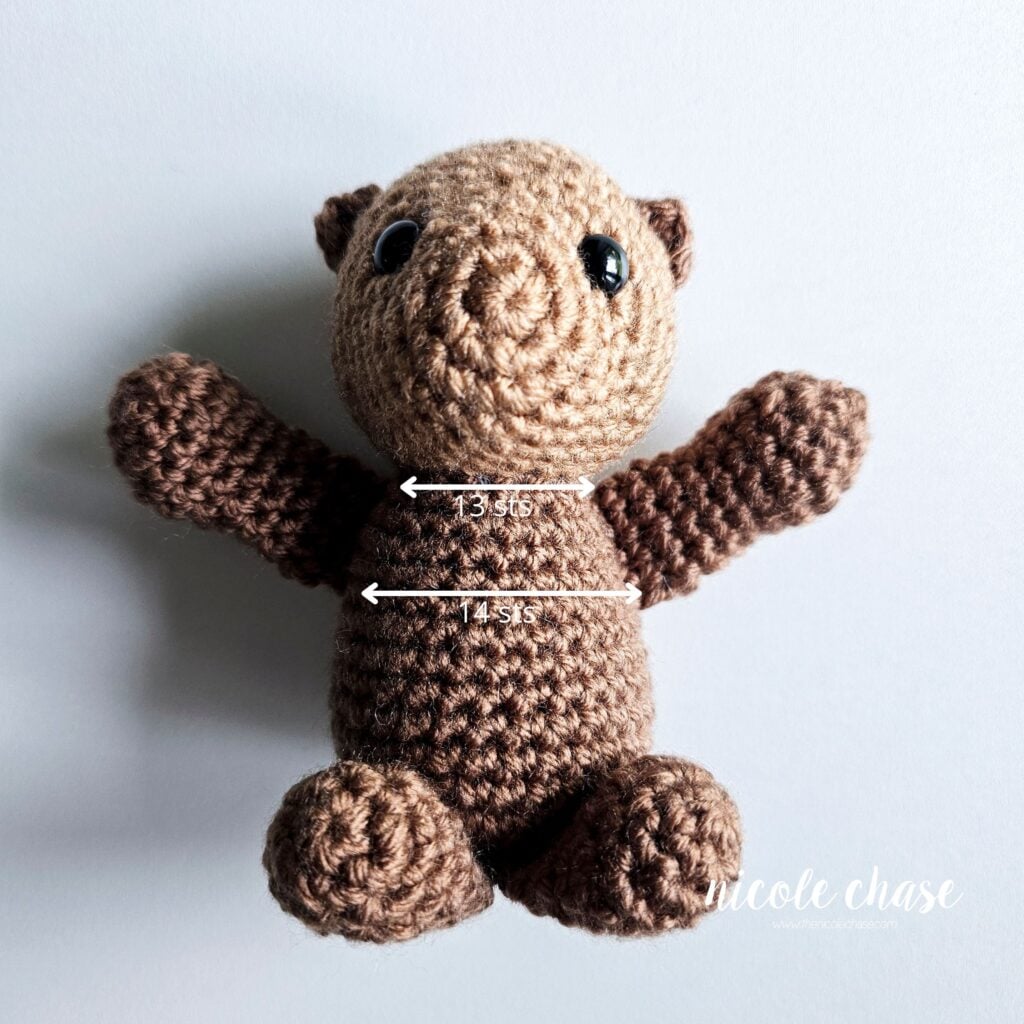
Attach arms over R11-15 on each side of the body. At the top of the arms, leave approximately 13 sts between each arm across the front of the body. At the bottom of the arms, leave approximately 14 sts between each arm across the front of the body.
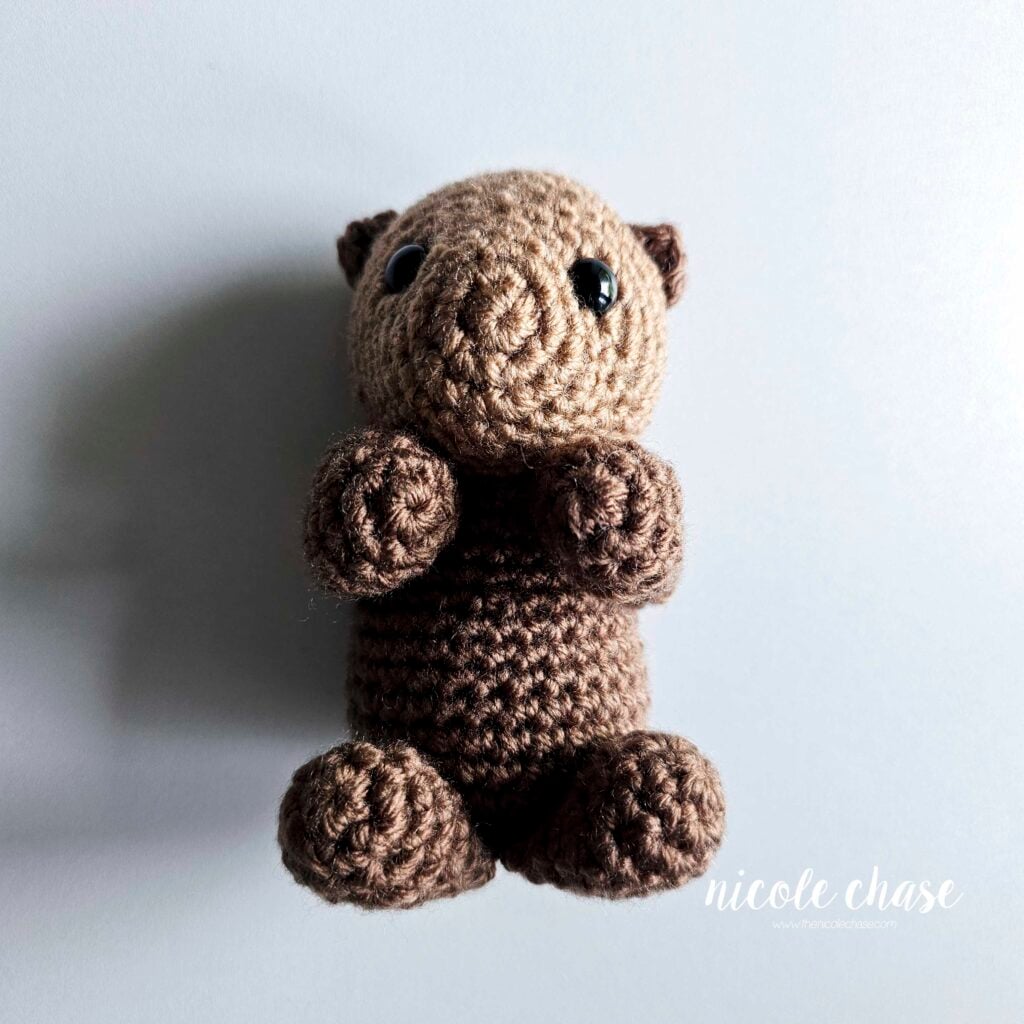
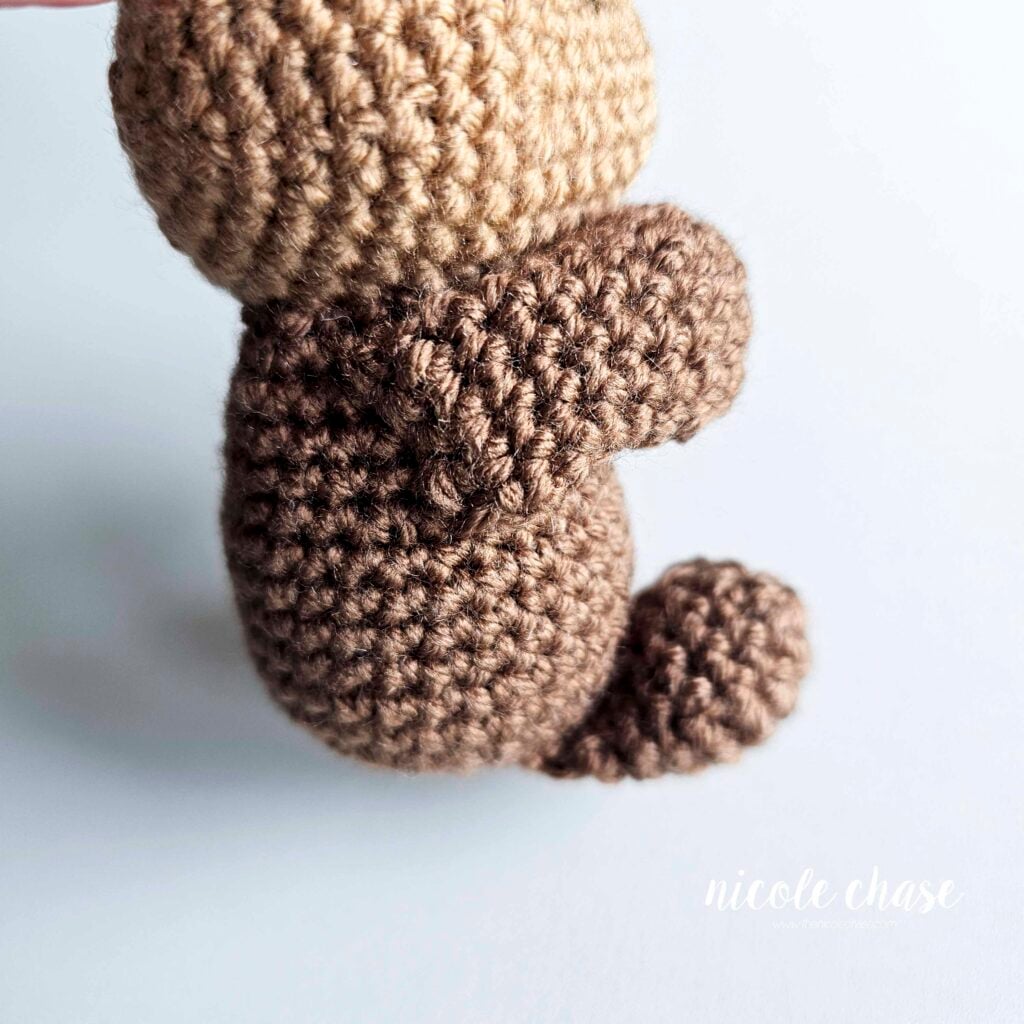
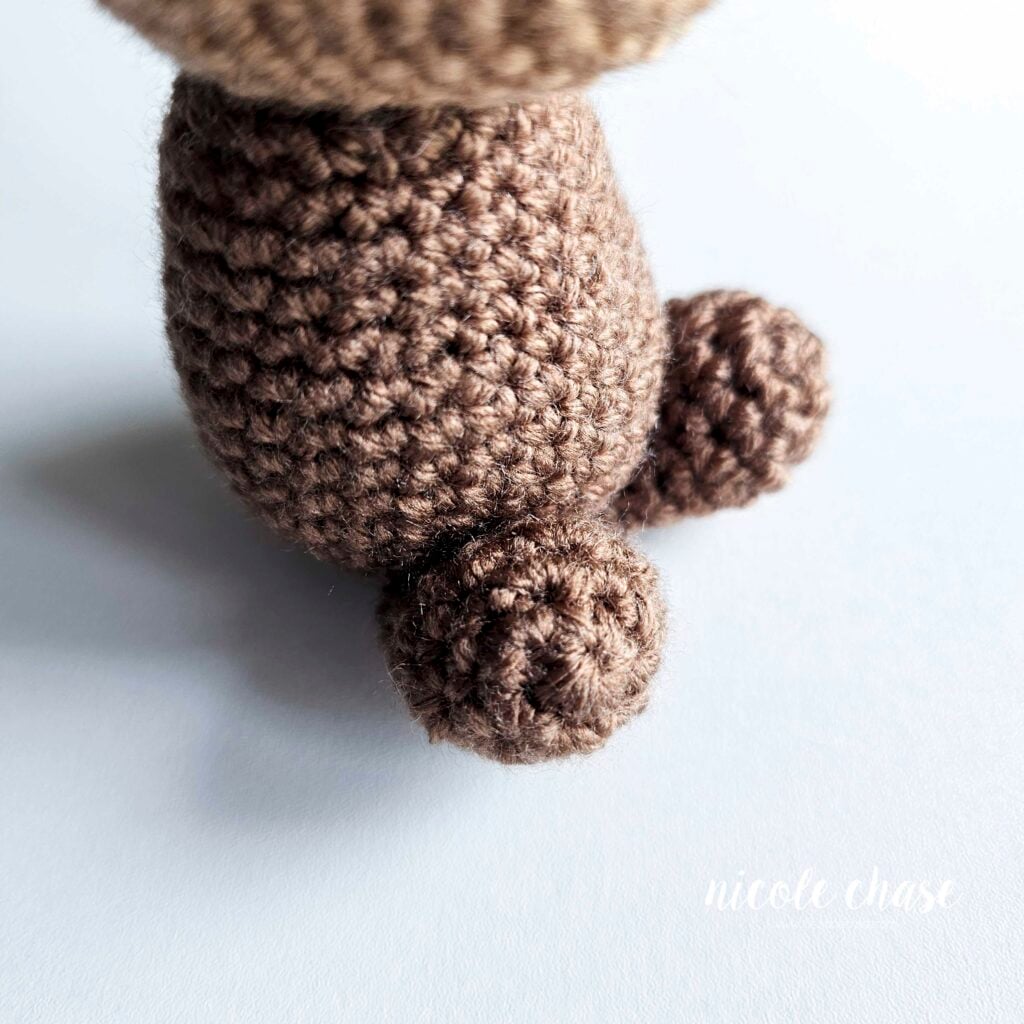
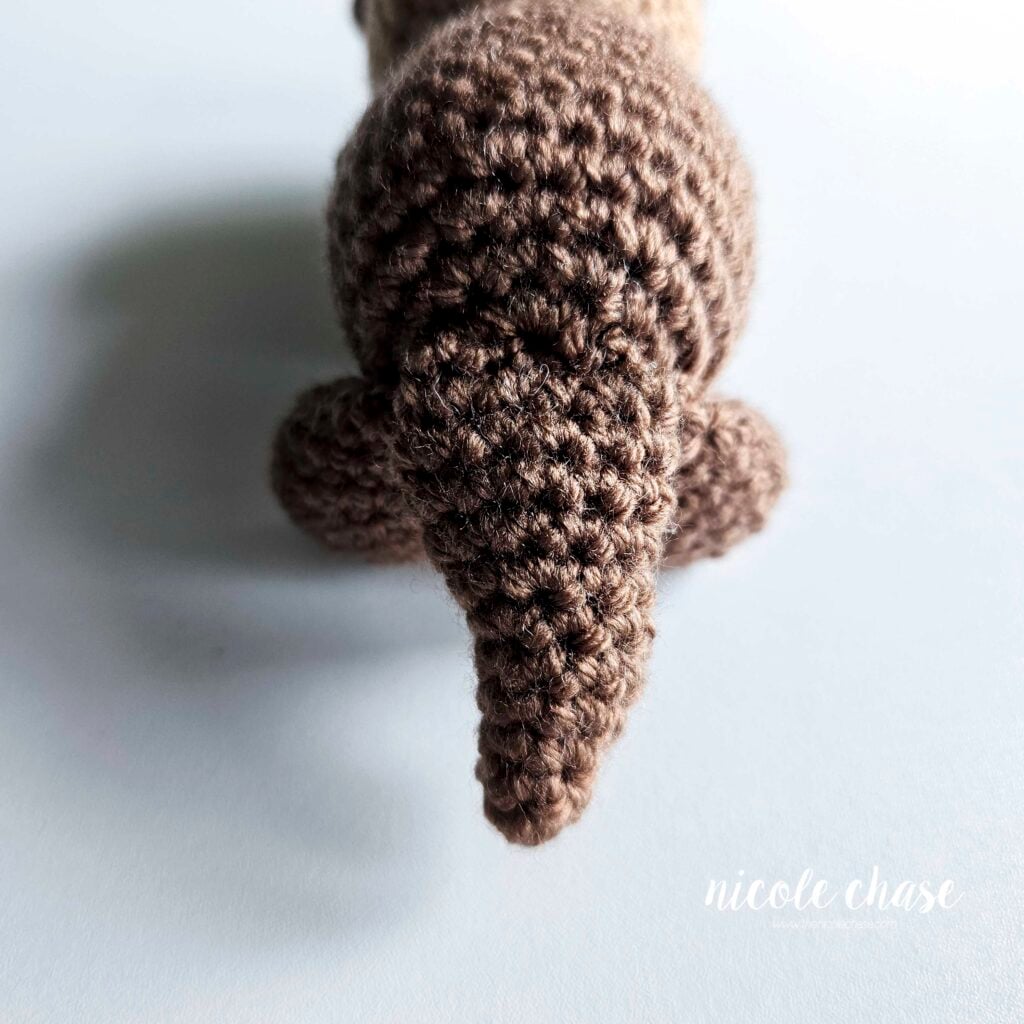
Attach tail to the center of the bottom of the body, about 2-3 sts below the legs.
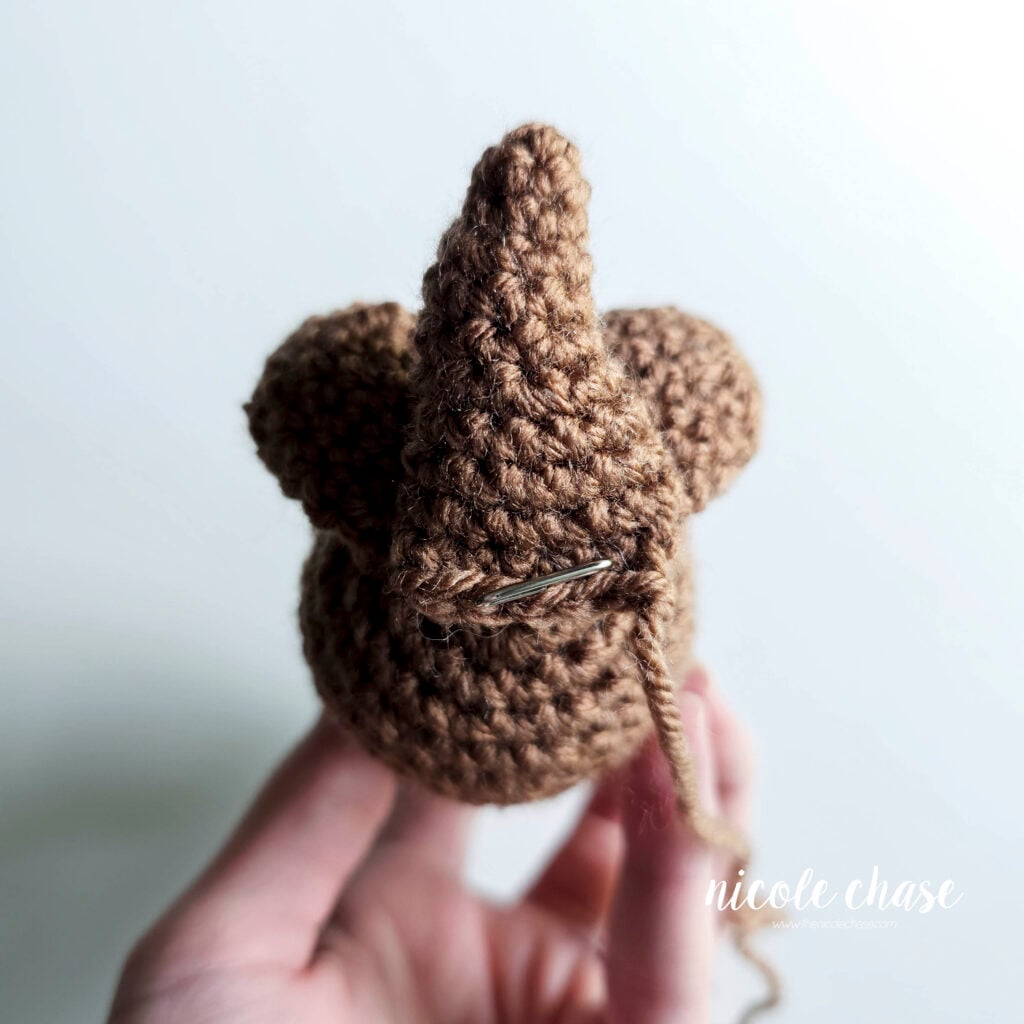
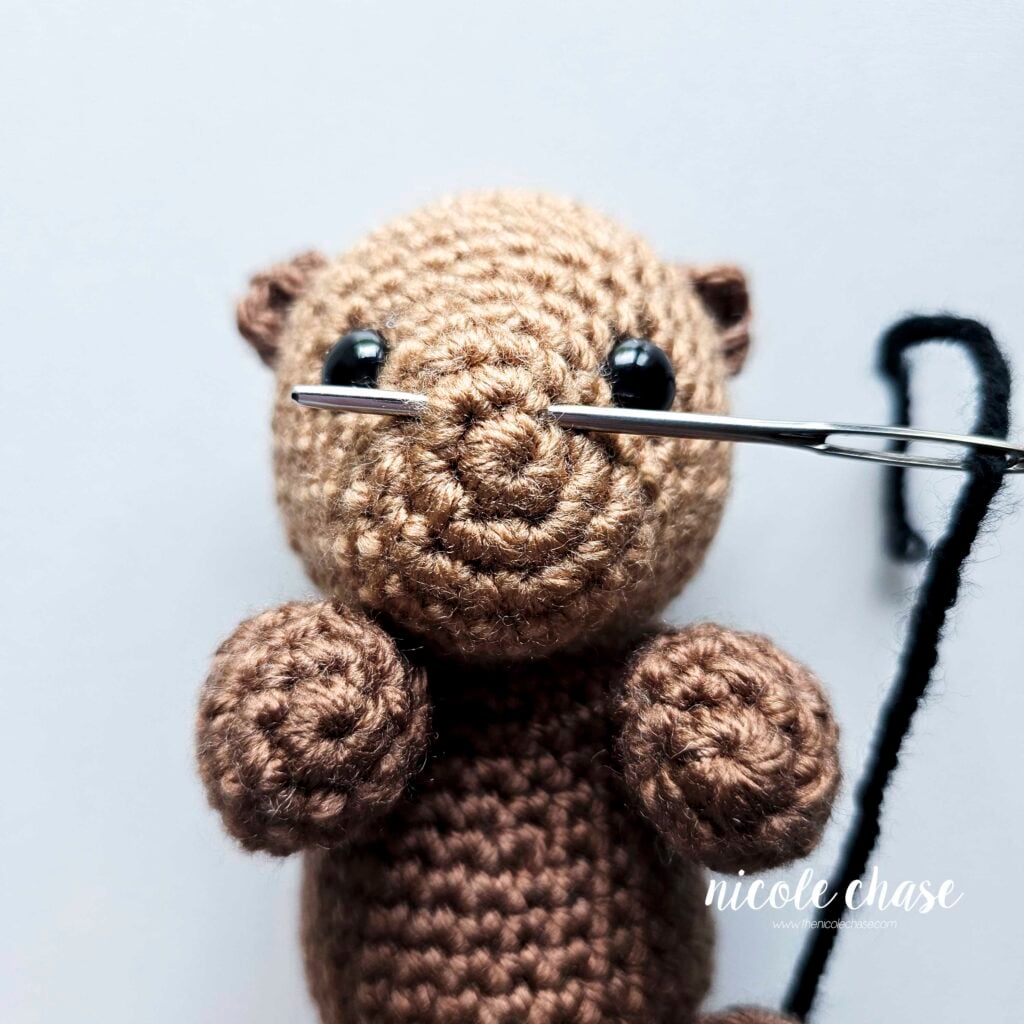
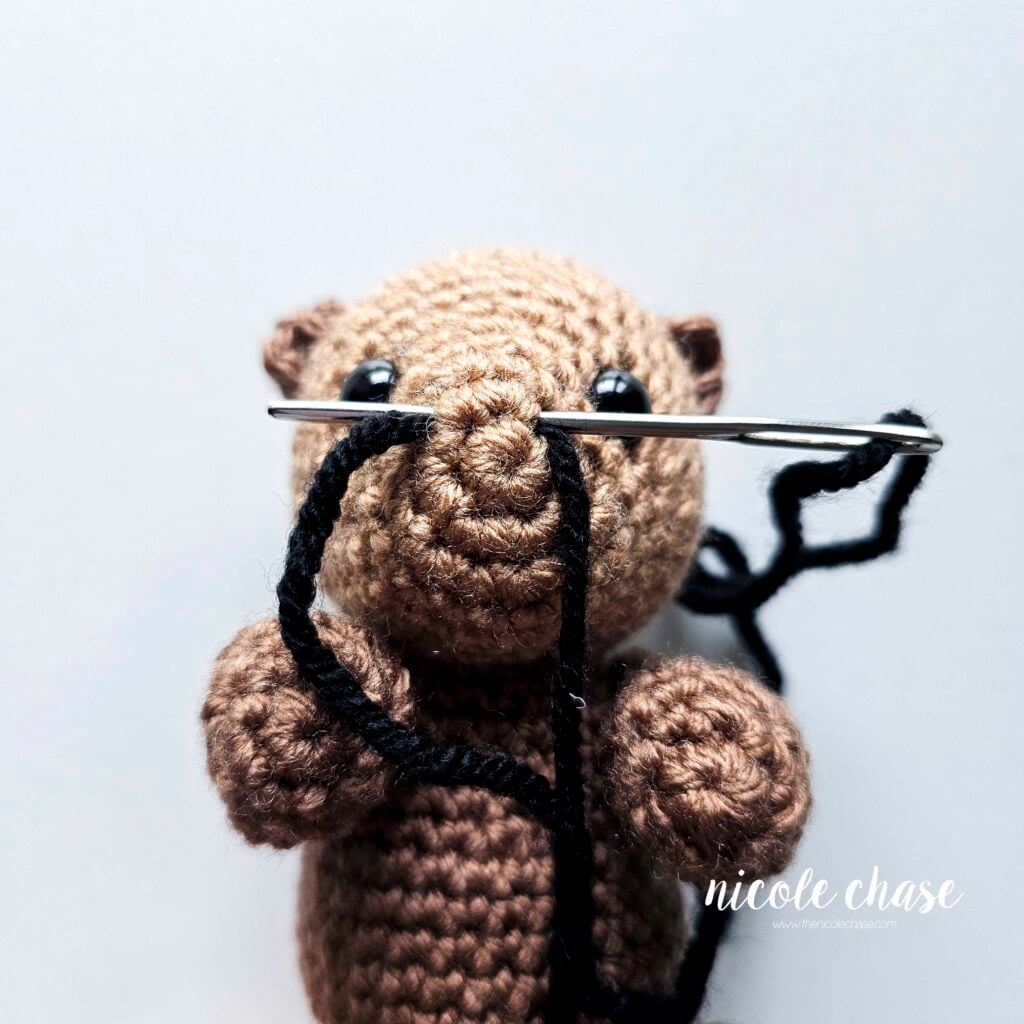
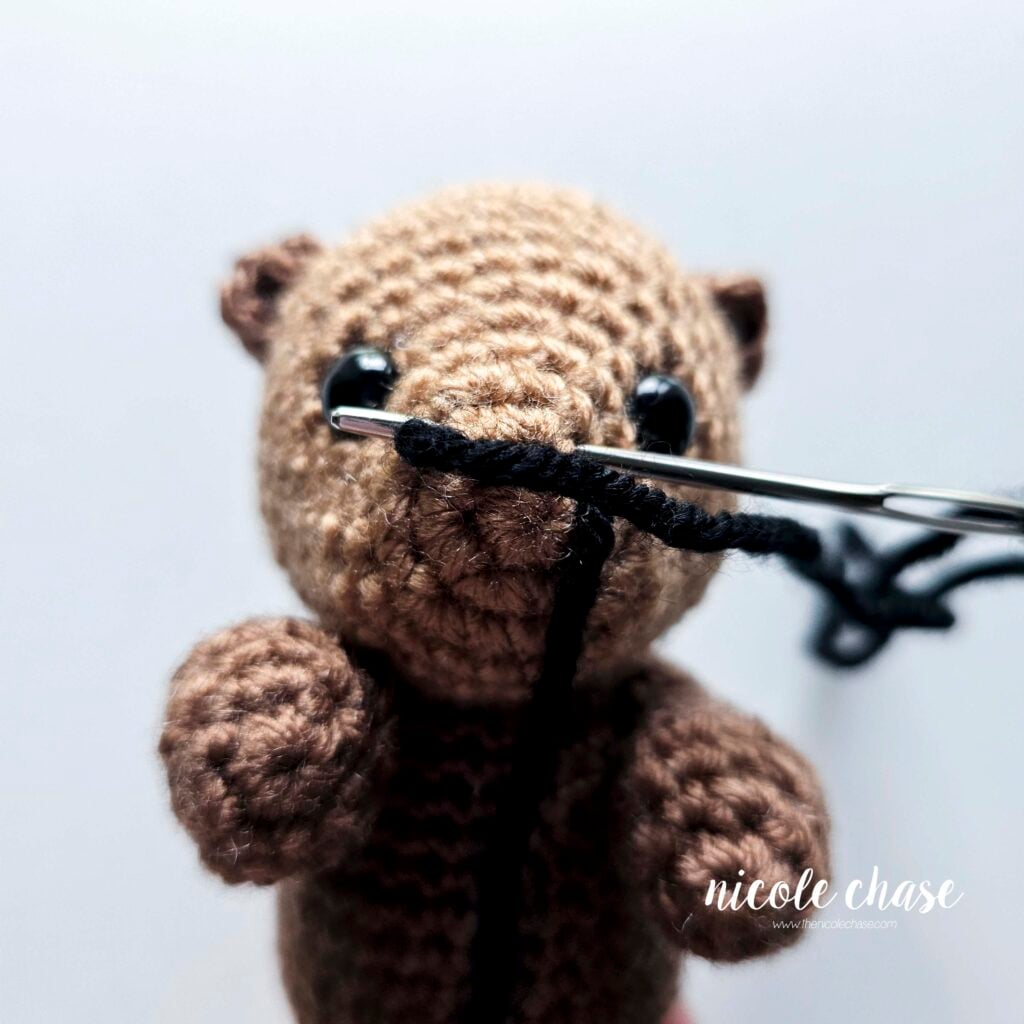
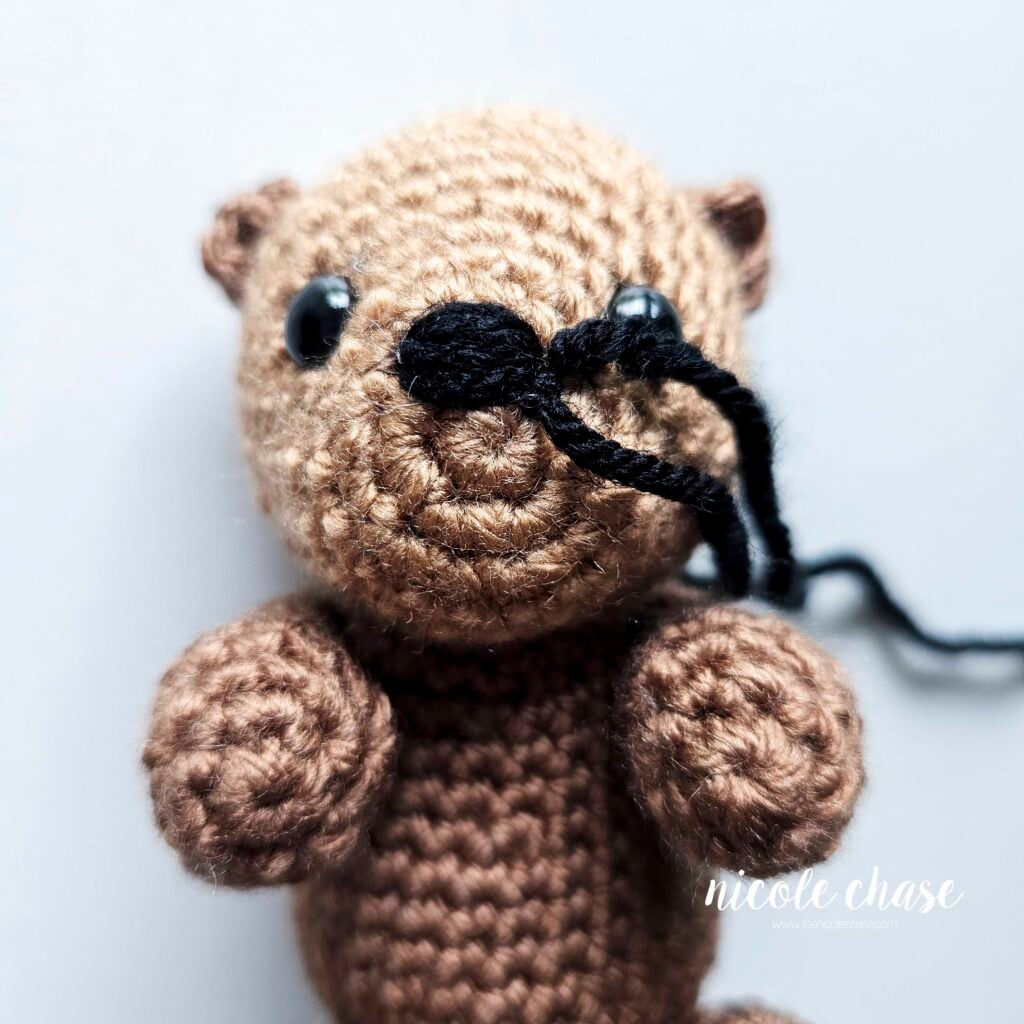
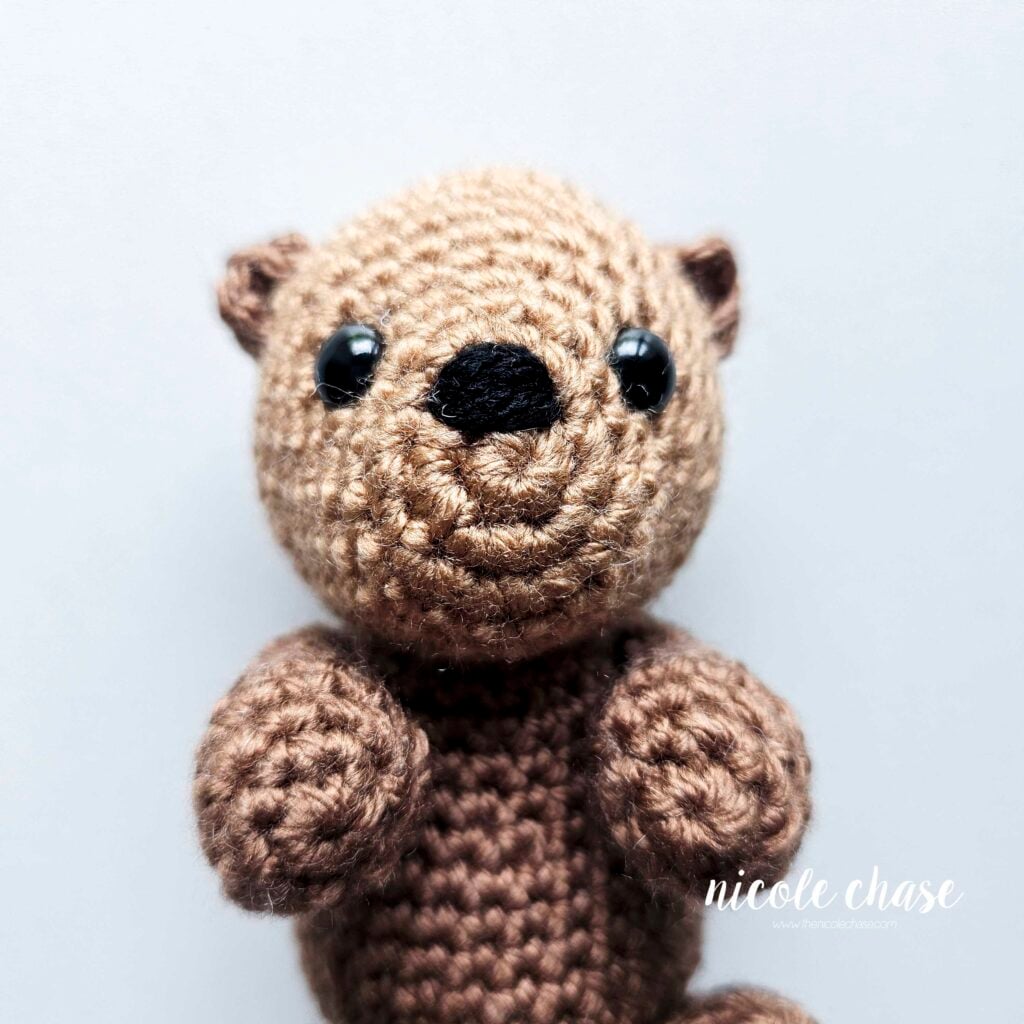
Using color C, shown as black, embroider a nose on R2 on the front of the face by wrapping the yarn around 3 sts about 3-5 times.
I hope you enjoyed making Ollie with this free otter crochet pattern! I would love to see your finished creations. Please tag me @thenicolechase on social media or share your project on Ravelry so I can see your beautiful work.

Ad-Free PDF Pattern for Ollie the Otter
Tips & Tricks for Crocheting Ollie
- Don’t Lose Your Place: Since this free otter crochet pattern is worked in a continuous spiral, it is easy to lose your round count. I always use a stitch marker in the first stitch of every round to ensure I don’t lose my place.
- Master Your Placement with Pins: Before you pick up your yarn needle, I highly recommend using pins to secure your crochet otter limbs in place. This allows you to step back and check symmetry before committing to a sewn placement.
- Level Up Your Skills: If you are new to making stuffed animals or want to refine your technique on this crochet otter, be sure to check out my comprehensive guide on amigurumi tips and tricks.
Customizing Your Otter Amigurumi
One of the best things about amigurumi is making the design your own! Here are a few ways you can customize your free otter crochet pattern:
- Go Big with Plush Yarn: If you want a jumbo, extra-huggable version of Ollie, try swapping the worsted weight yarn for a plush alternative like Parfait Chunky. Be sure that you adjust your hook size to suit your chosen yarn.
- Give Ollie Something to Hold: Otters are known for carrying their favorite things! You can easily personalize your plushie by stitching a small accessory between Ollie’s front paws. My small crochet heart pattern is the perfect size for Ollie to hold when made in the same kind of yarn, making it a sweet gift for Valentine’s Day.
- Create a Furry Texture: Since sea otters have such dense, fluffy fur, you can create a realistic texture by using a wire brush to gently brush out your stitches after assembly. This works best with acrylic yarn. It transforms the clean crochet stitches into a soft, fuzzy “coat”.
More Free Amigurumi Patterns to Explore
If you enjoyed making this amigurumi otter, you might like these other animal designs! Each of these patterns feature clear instructions and photos just like this otter.
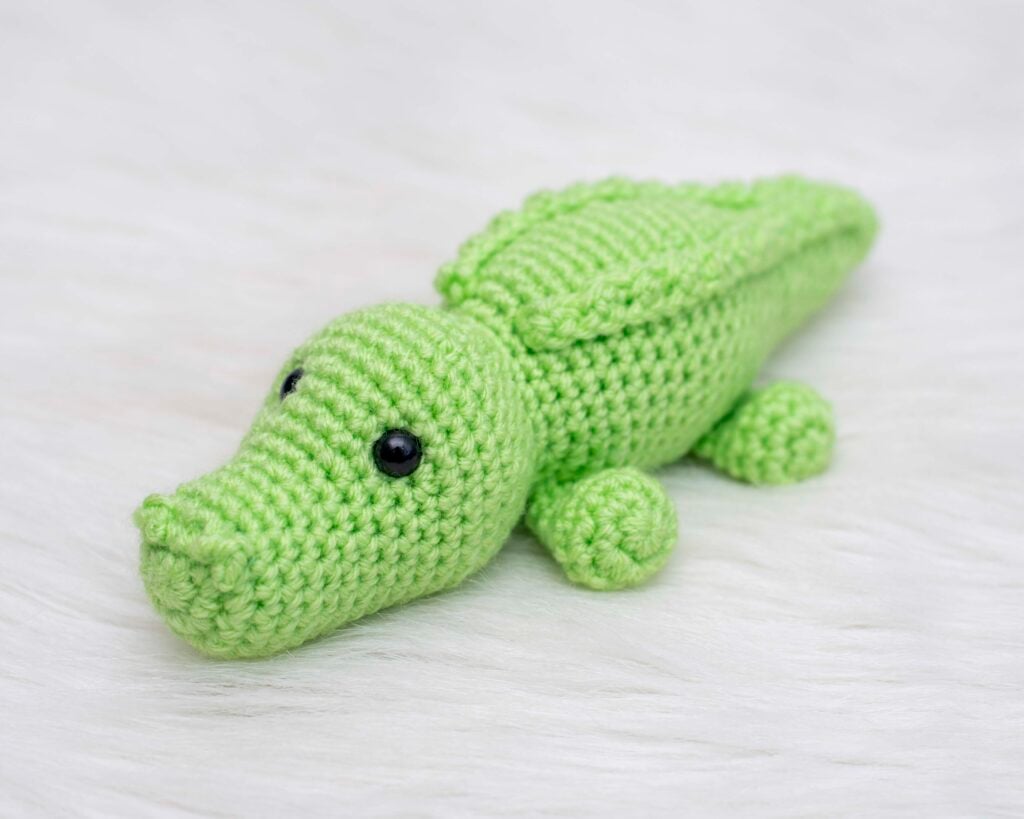
- For the reptile lovers: Dive into another project with my free alligator crochet pattern.
- Need a quick project? If you’re looking for something with no assembly, check out my no-sew frog amigurumi.
- Build your own backyard zoo: Find more wild friends in my curated zoo animal crochet collection.
- The ultimate library: Looking for something else? Browse my full collection of animal amigurumi patterns to find your next favorite design.
I hope you enjoyed this pattern! If you make it, leave me a comment below.
Want to see more from me? Be sure to subscribe to my email newsletter so that you never miss a pattern!
Follow along with me on Instagram for daily updates and a behind the scenes look at my designs.
I’d love to see what you make with this tutorial! Don’t forget to share your finished work with me: on social media by tagging me @thenicolechase, in your Ravelry projects, or post over in my Facebook group!
Thanks for stopping by! Happy crafting!
Nicole
PATTERN COPYRIGHT © 2026 NICOLE CHASE. ALL RIGHTS RESERVED.
PATTERN MAY NOT BE ALTERED, COPIED, REDISTRIBUTED OR SOLD AS YOUR OWN PATTERN.
YOU MAY SELL THE FINISHED PRODUCT ON A SMALL SCALE. PATTERN/DESIGN CREDIT GIVEN TO WWW.THENICOLECHASE.COM IS APPRECIATED. PERMISSION TO SELL DOES NOT INCLUDE MASS PRODUCTION. LARGE SCALE PRODUCTION IS PROHIBITED.
PHOTOGRAPHY COPYRIGHT © 2026 NICOLE CHASE. ALL RIGHTS RESERVED.
PHOTOS MAY NOT BE ALTERED, COPIED, REDISTRIBUTED OR SOLD AS YOUR OWN.
This post may contain affiliate links. If you make a purchase through links on our site, we may earn a commission.