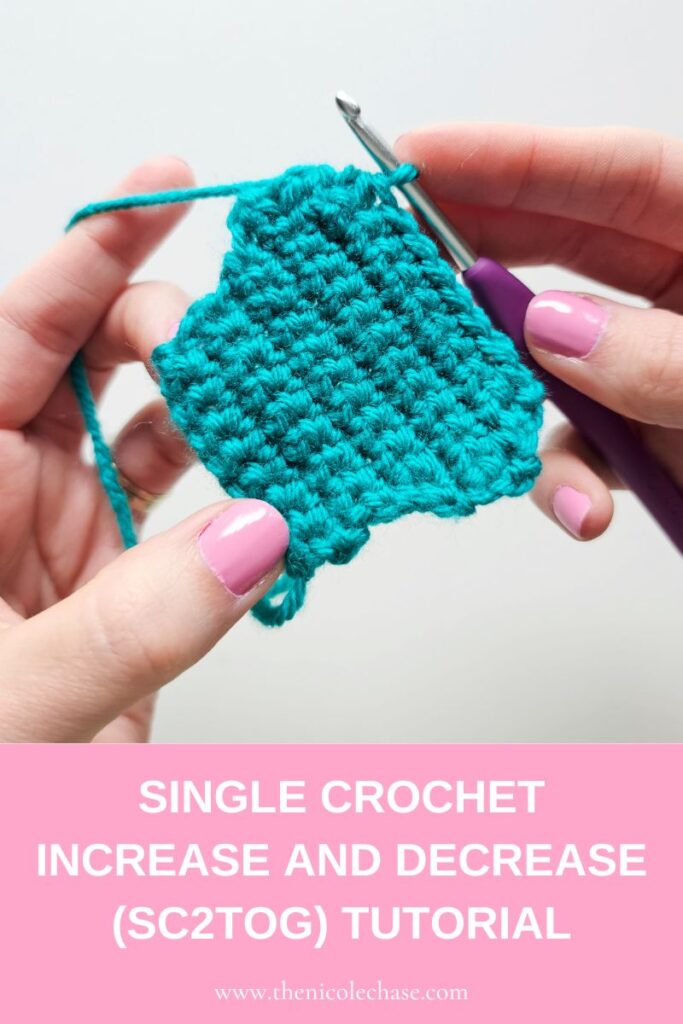
Single Crochet Increase and Decrease (SC2tog) Tutorial
This post may contain affiliate links. If you make a purchase through links on our site, we may earn a commission.
Do you want to learn how to change the shape of your crochet projects? Mastering single crochet increase and single crochet decreases is such an exciting step for a beginner! When you look at a written pattern, an increase can often be abbreviated as inc, while a standard decrease can be written as dec or SC2tog, which means single crochet two together. While “dec” is a general term for any decrease, “SC2tog” tells you the exact stitch you are using.
In this step-by-step tutorial, I’ll show you exactly how to increase in single crochet and how to decrease in single crochet, how these stitches alter your stitch counts, and how to read them so you can confidently tackle your next project. We will also look at how these stitches change the shape of your fabric.
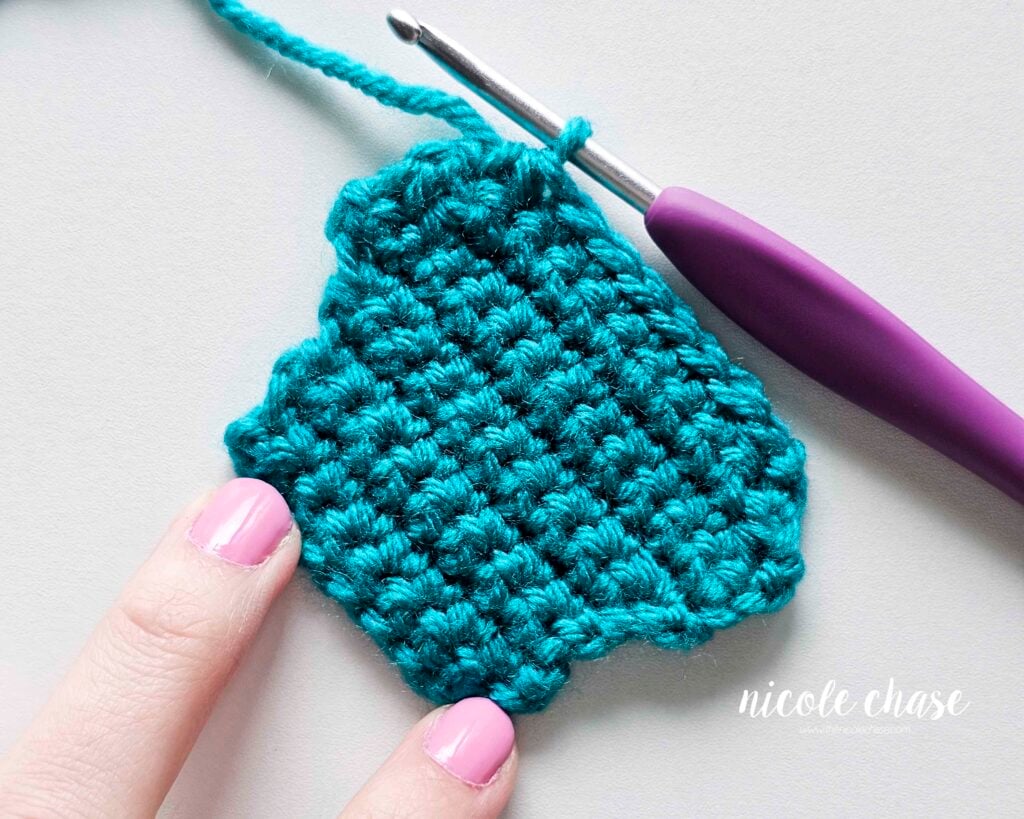
Table of Contents
Save this single crochet increase and decrease tutorial to your crochet board on Pinterest.
Understanding the Single Crochet Increase (SC Inc)
An increase is made when you work two stitches into the exact same space. Because you are putting two stitches where there would normally be only one, each single crochet increase adds exactly one stitch to your row or round’s total stitch count.
When reading a written crochet pattern, INC or inc is a common abbreviation for an increase stitch. However, because you can increase using many different stitch types, some patterns will write out the increase based on the specific stitch that you are using. For example:
- 2 SC (two single crochet stitches in one stitch)
- 2 HDC (two half double crochet stitches in one stitch)
- 2 DC (two double crochet stitches in one stitch)
Seeing “2 SC” is especially common in amigurumi patterns or complex designs that mix multiple stitch types in a single round. If you need a refresher, you can check out my full tutorial on the single crochet stitch.
What is a Crochet Increase Used for?
An increasing stitch is used to add more stitches to your project, which in turn expands the fabric and makes it larger. Increases are what enlarges the shape for a wide variety of projects, including hats, garments, blankets, and amigurumi toys!
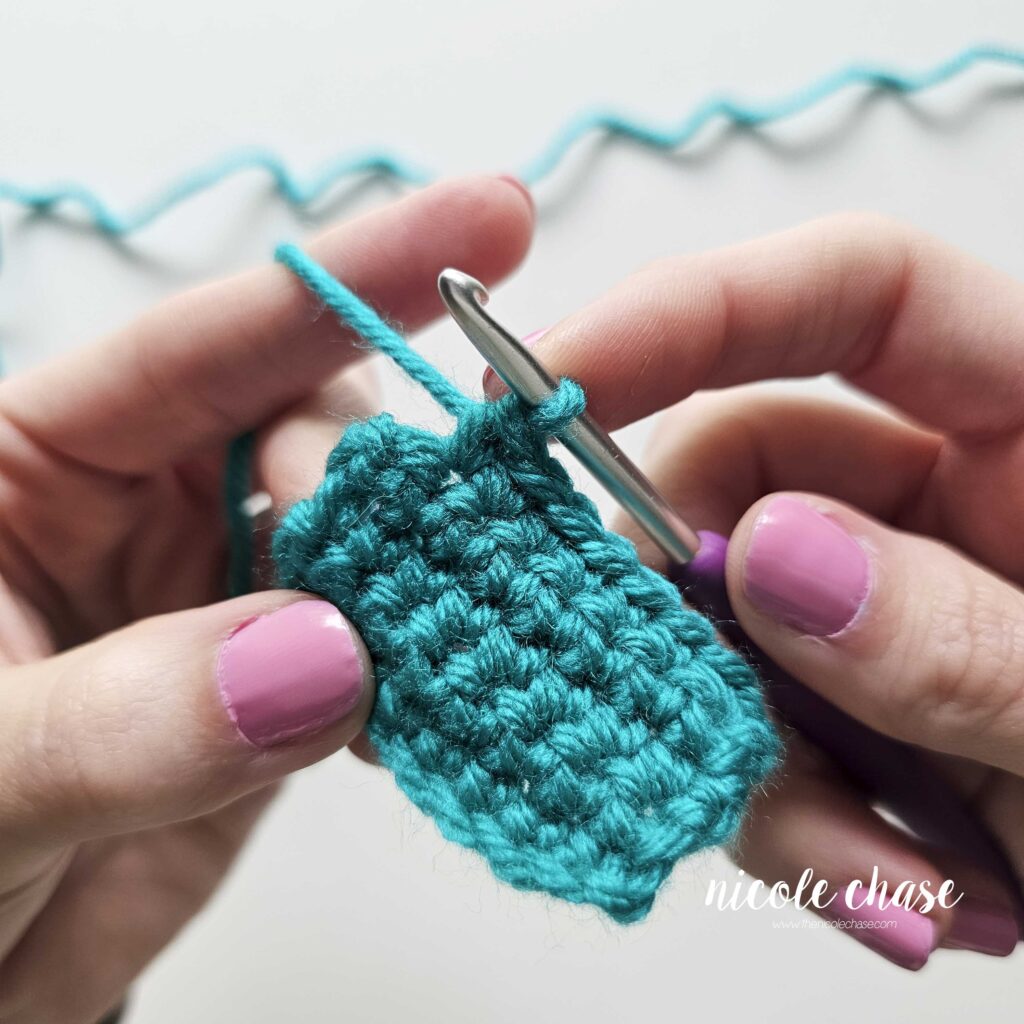
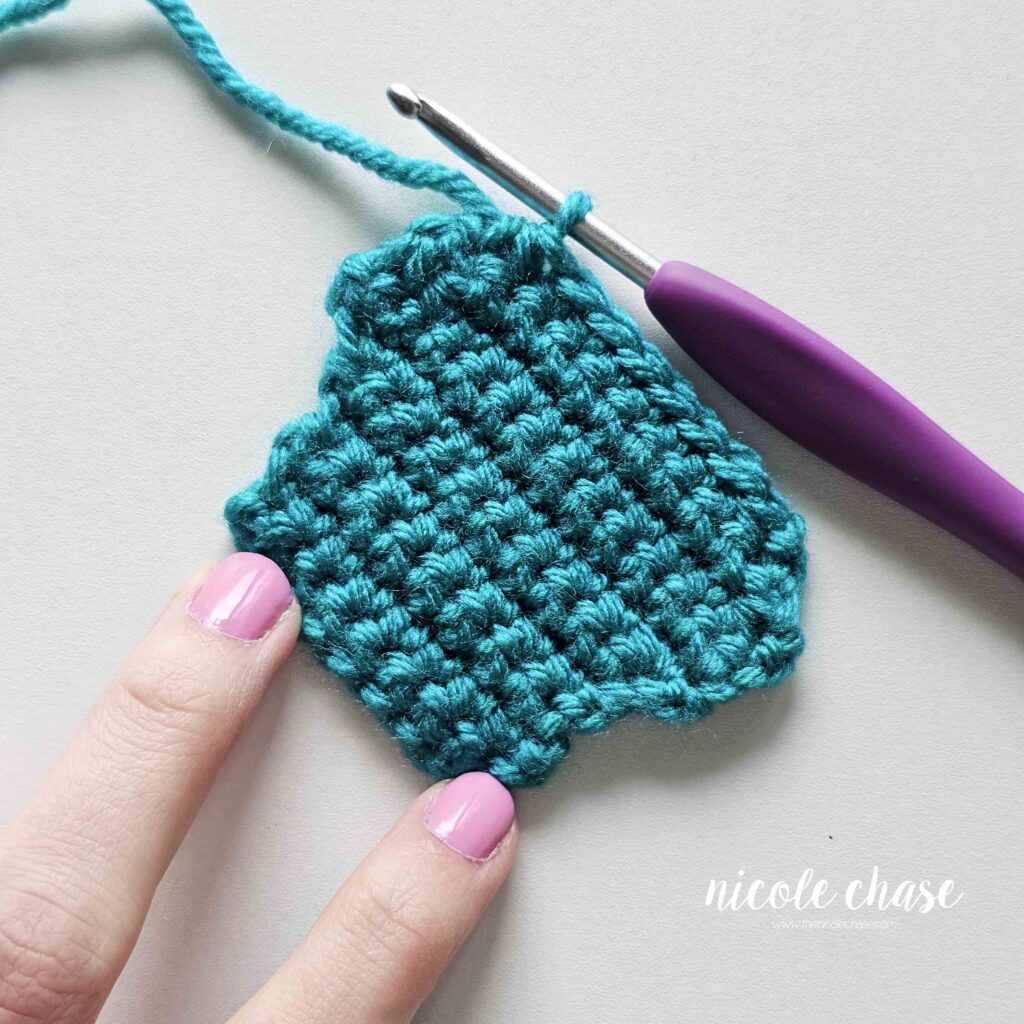
In the photo below, you can see how this shaping works in real time. I started out with a few straight rows of single crochet. Then, I worked several rows that included a single crochet increase at both the very beginning and the very end of the row. This consistent addition of stitches causes the sides of the piece to slowly and smoothly angle outward, making the fabric wider.
Step-by-Step: How to Single Crochet Increase
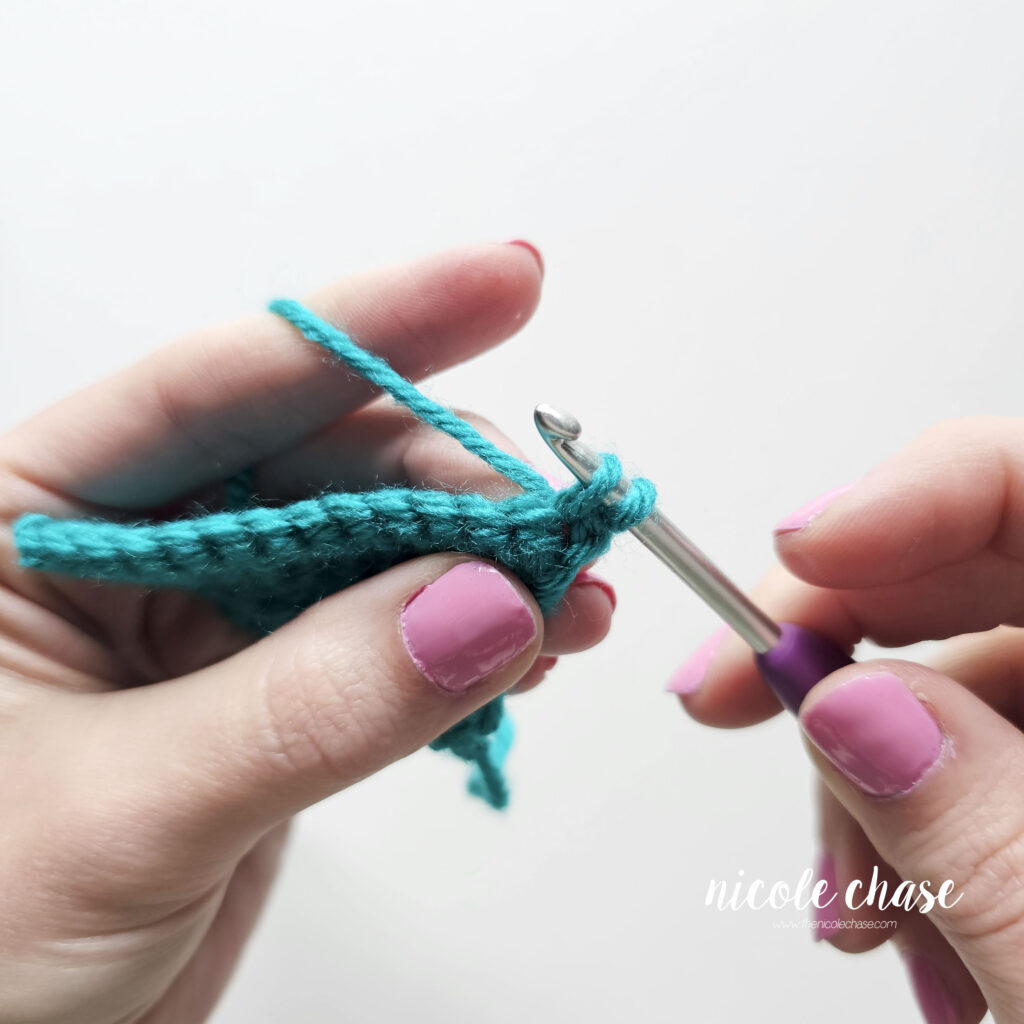
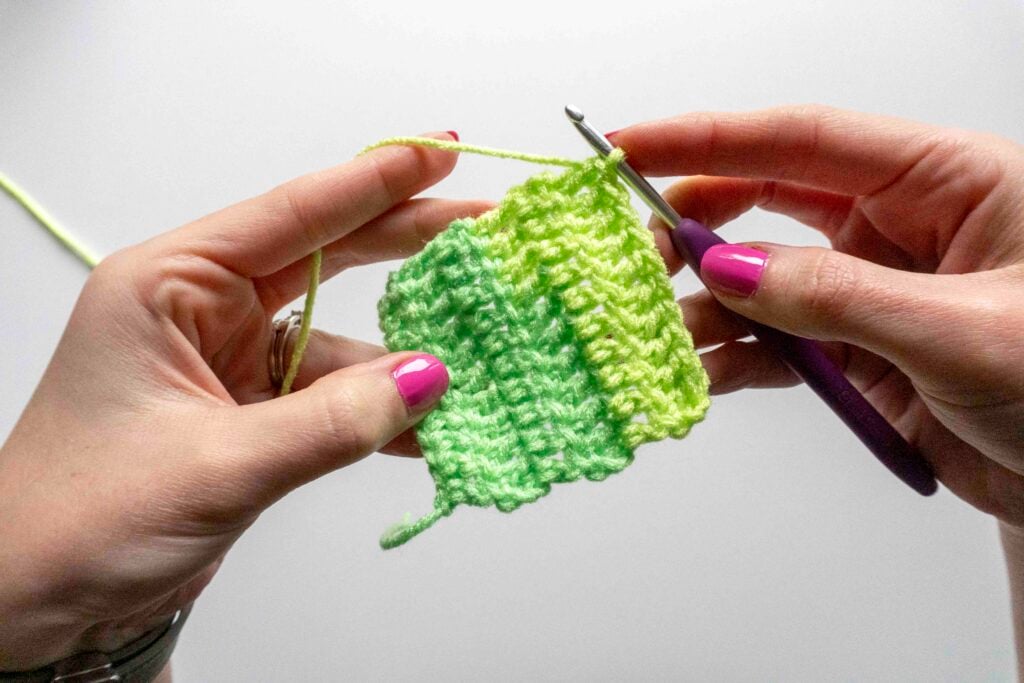
Since a single crochet stitch is just two standard SC stitches worked into the same space, this technique is simple. If you are comfortable with the basic SC stitch, you only need to focus on where the second stitch goes:
1. Work the First SC: Insert your hook into the designated stitch, yarn over, pull up a loop (2 loops on hook), yarn over, pull through both loops on your hook. This completes your first SC stitch.
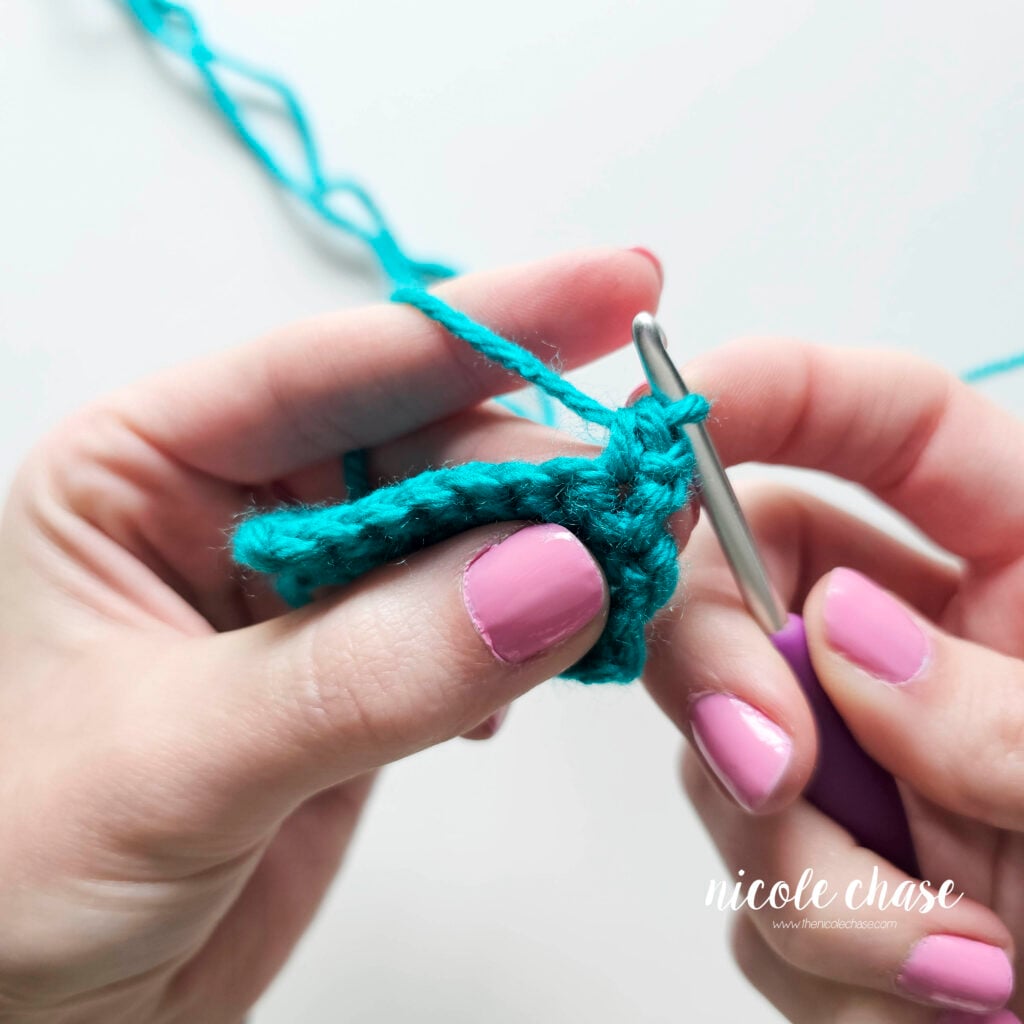
2. Work the Second SC in the Same Spot: Repeat the entire SC stitch process by inserting your hook into the exact same stitch where you just placed the first SC. This completes your second SC stitch (and your total increase).
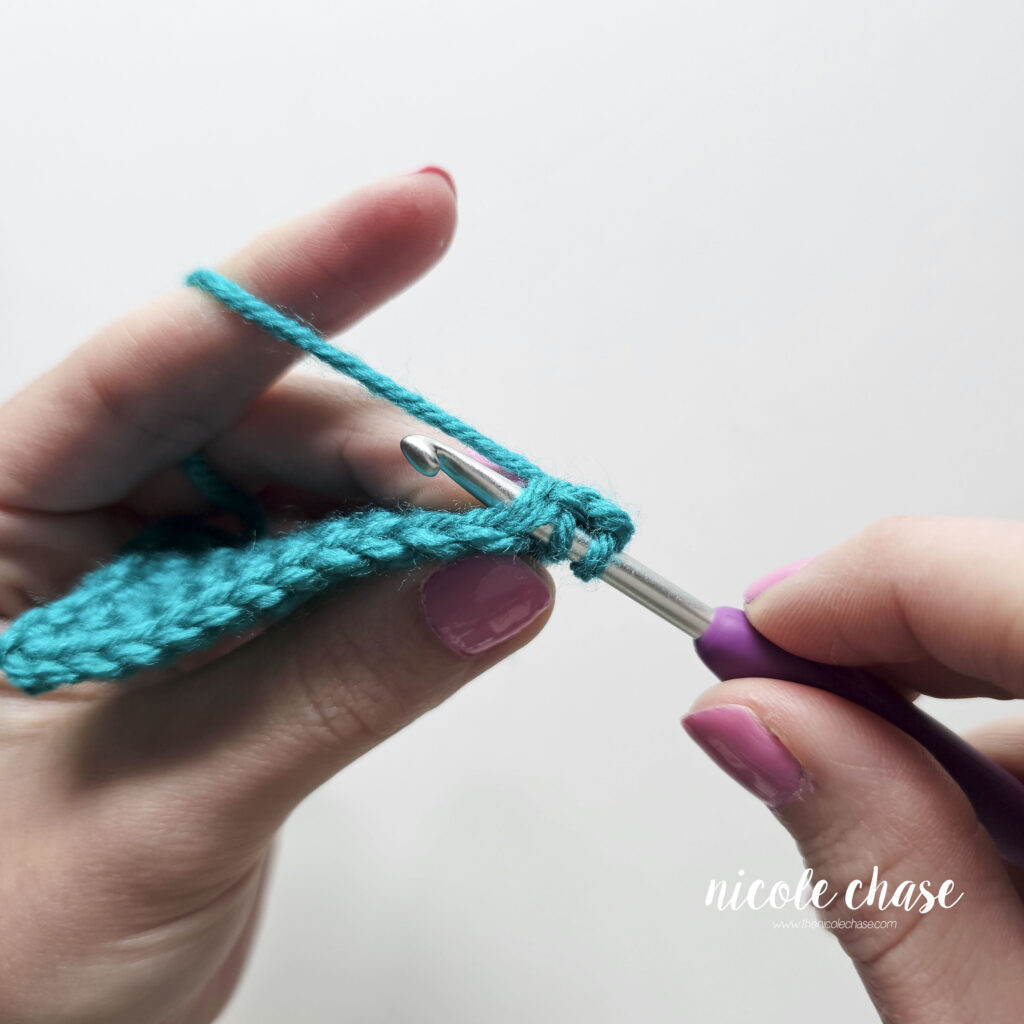
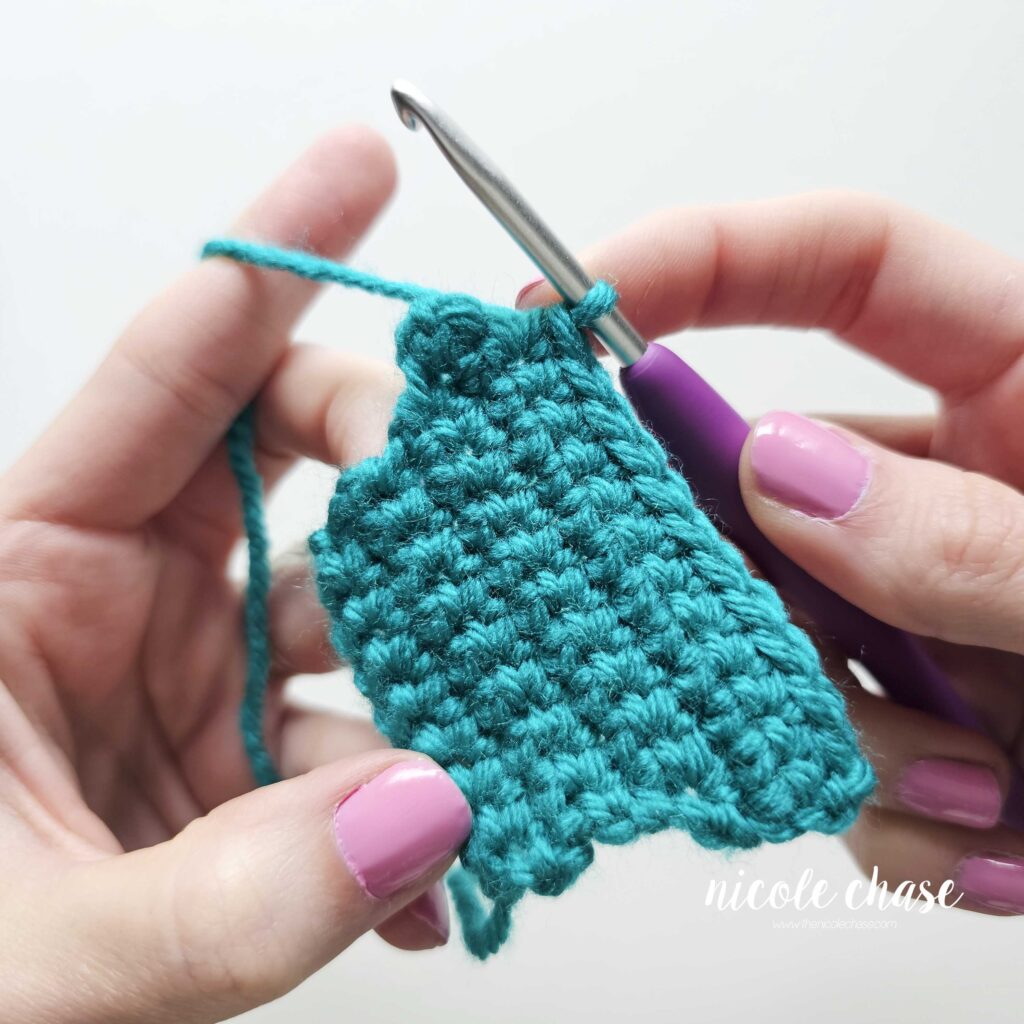
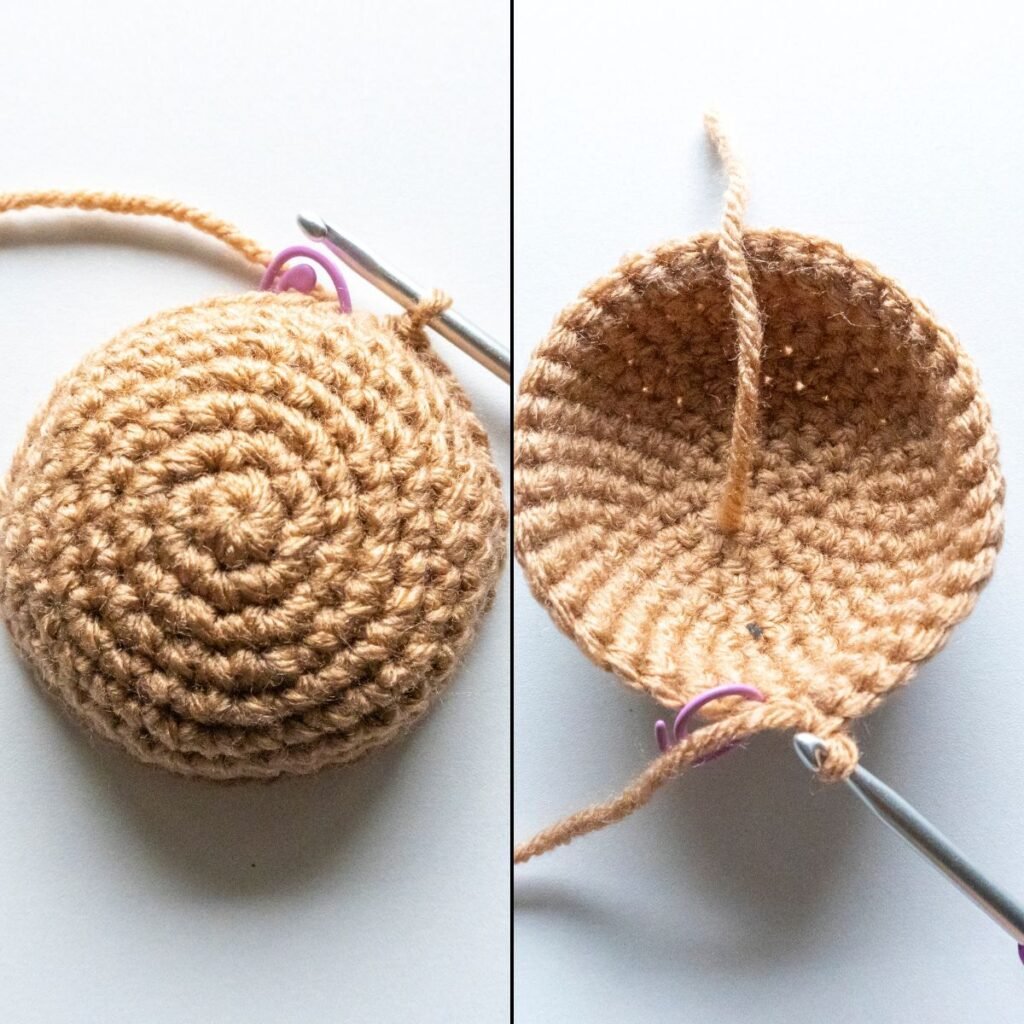
Here you can see the piece get wider, as each row starts and ends with a SC increase. I started out with 8 single crochet stitches and then after 3 rows, the piece slowly became wider. I ended with a stitch count of 14 single crochet stitches.


Mastering the Single Crochet Decrease (SC2tog)
A decrease is made when you work one stitch across a space where you would normally place two stitches. Because you are merging two stitch spaces together, each single crochet decrease reduces your row or round’s total stitch count by exactly one stitch.
What Does SC2tog?
When working a project with single crochet stitches, a decrease is most commonly referred to as SC2tog. This is the standard pattern abbreviation for single crochet two stitches together, which is simply the technical name for a standard single crochet decrease.
When reading a written crochet pattern, DEC or dec is a common abbreviation for a decrease stitch. However, because you can decrease using many different stitch types, some patterns will write out the increase based on the specific stitch that you are using. For example:
- SC2tog (single crochet two together)
- HDC2tog (half double crochet two together)
- DC2tog (double crochet two together)
Just like with increases, some designers use the general “dec” abbreviation if a project uses only one basic stitch, while other designers use specific terms like “SC2tog”. If you need to practice the single crochet stitch before merging them together, you can refer back to my full tutorial on the single crochet stitch.
What is a Crochet Decrease Used For?
A decreasing stitch is used to reduce the number of stitches in your work, which pulls the fabric inward and makes the project smaller. Decreases are essential for shaping curves, sloped edges, and close-fitting sections in garments, hats, and amigurumi.
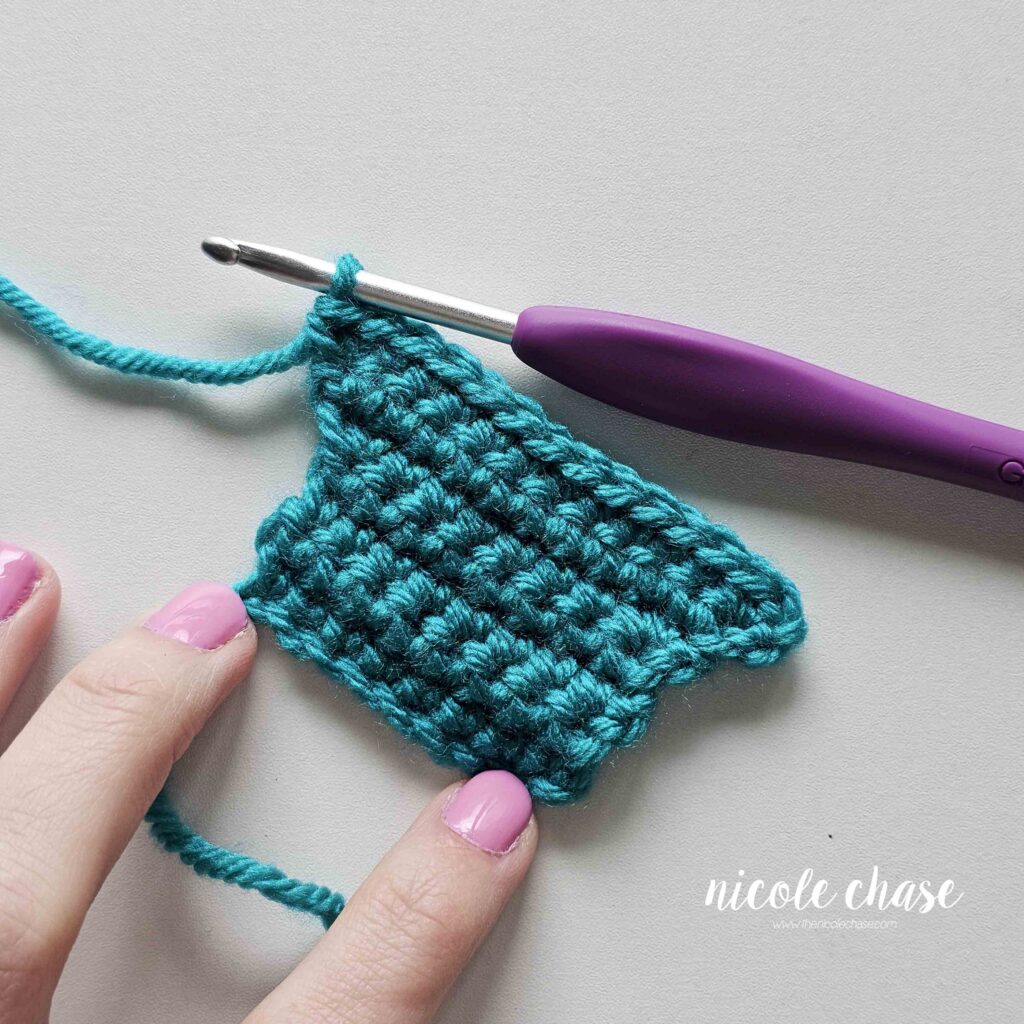
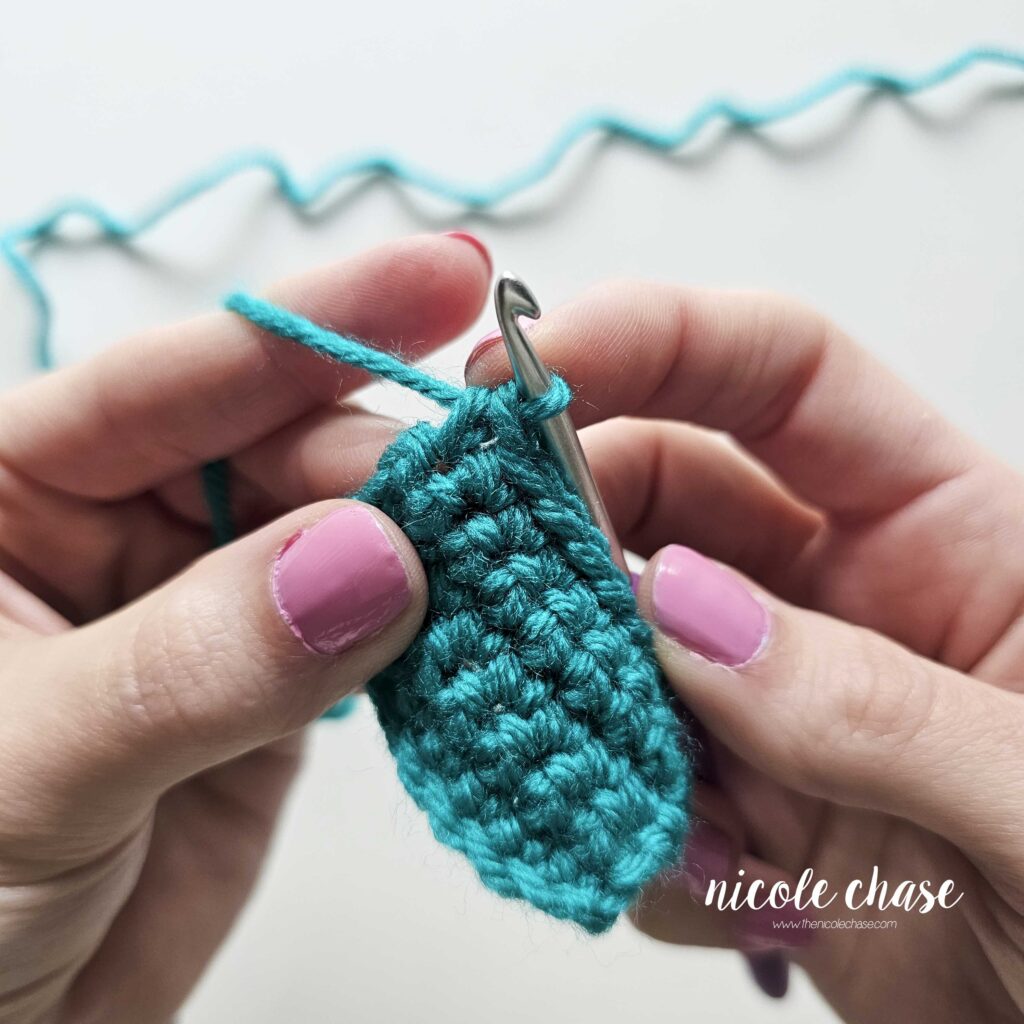
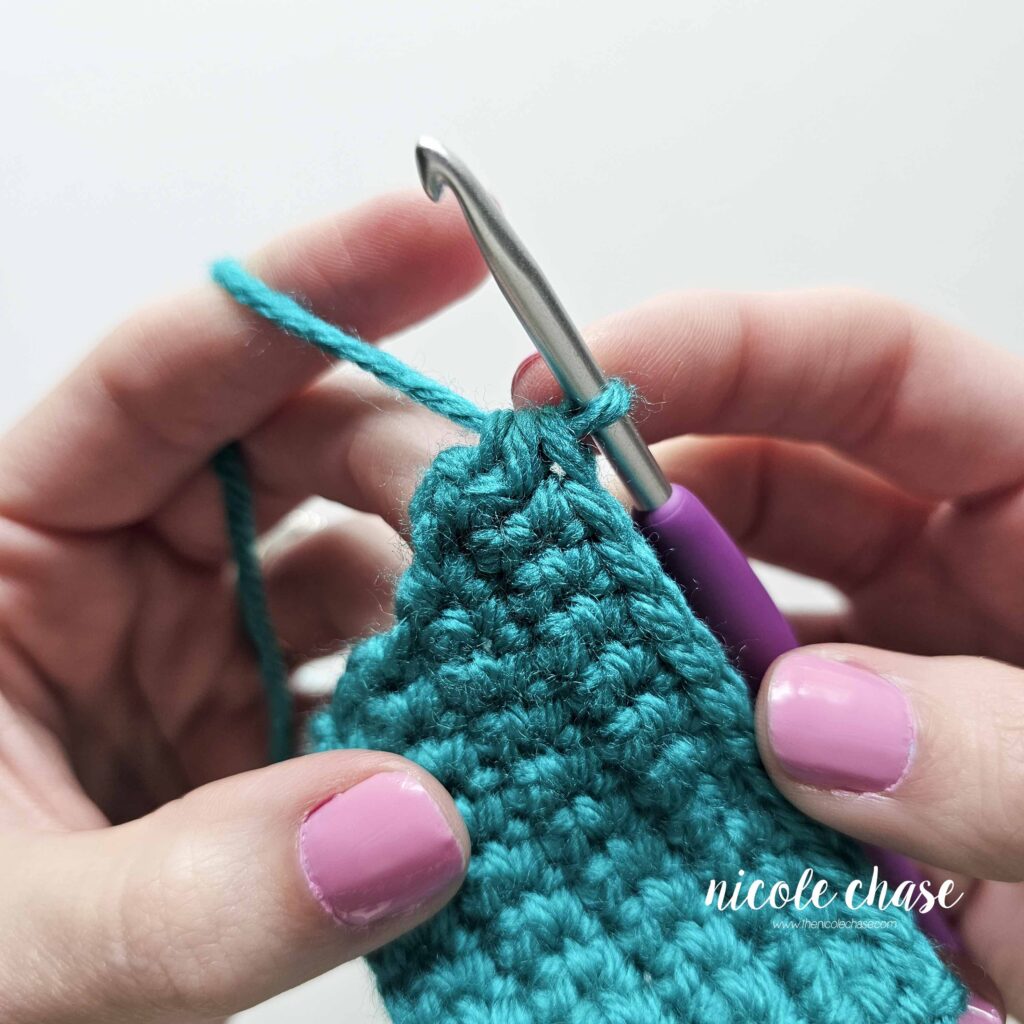
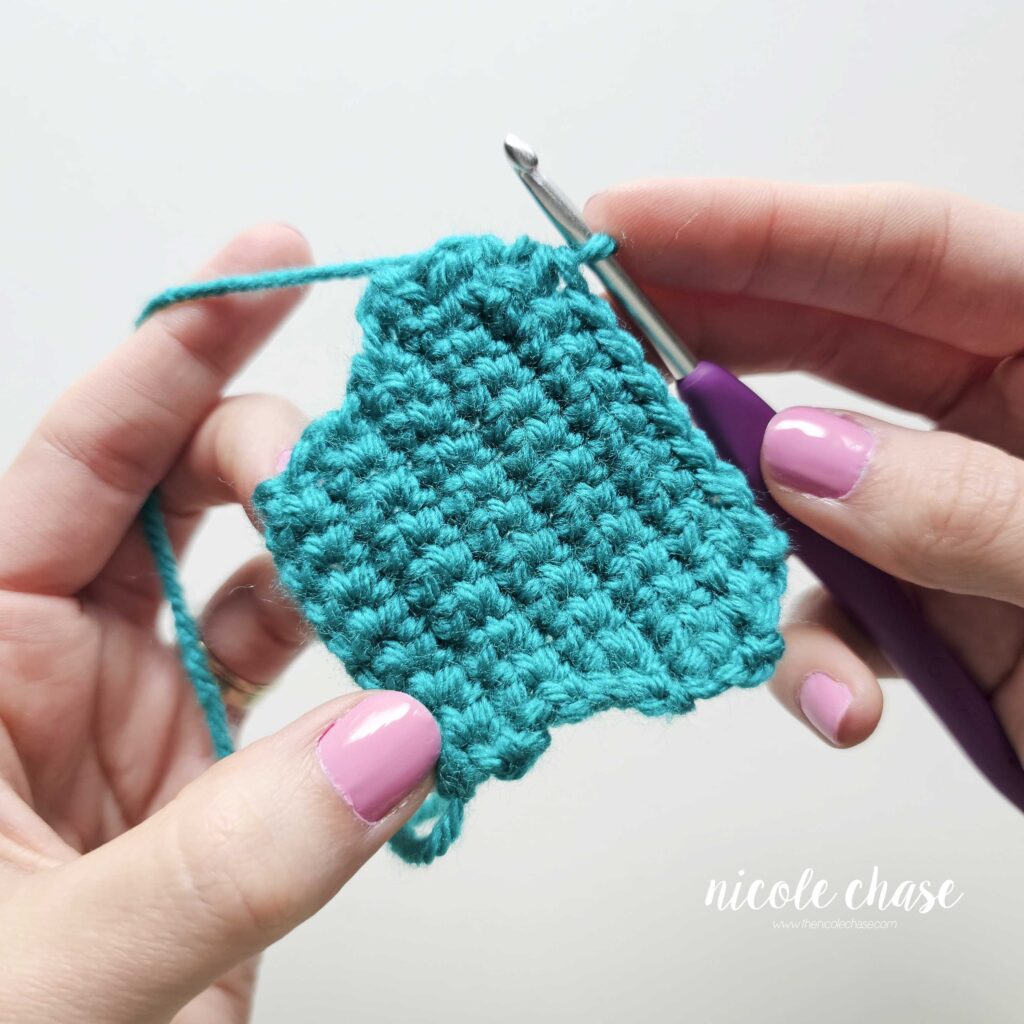
In the photo below, you can see this narrowing effect in action. After completing the increasing rows shown in the previous section, I worked a few rows that included a single crochet decrease at the beginning and the end of each row. Merging those edge stitches causes the fabric to taper inward, making the piece narrow back down.
Step-by-Step: How to SC2tog (Single Crochet 2 Together)
The SC2tog stitch is worked by crocheting the first part of a single crochet stitch over the first designated stitch, and then crocheting the second part of a single crochet stitch over the second designated stitch. Then, the two half-stitches are combined at the very end.
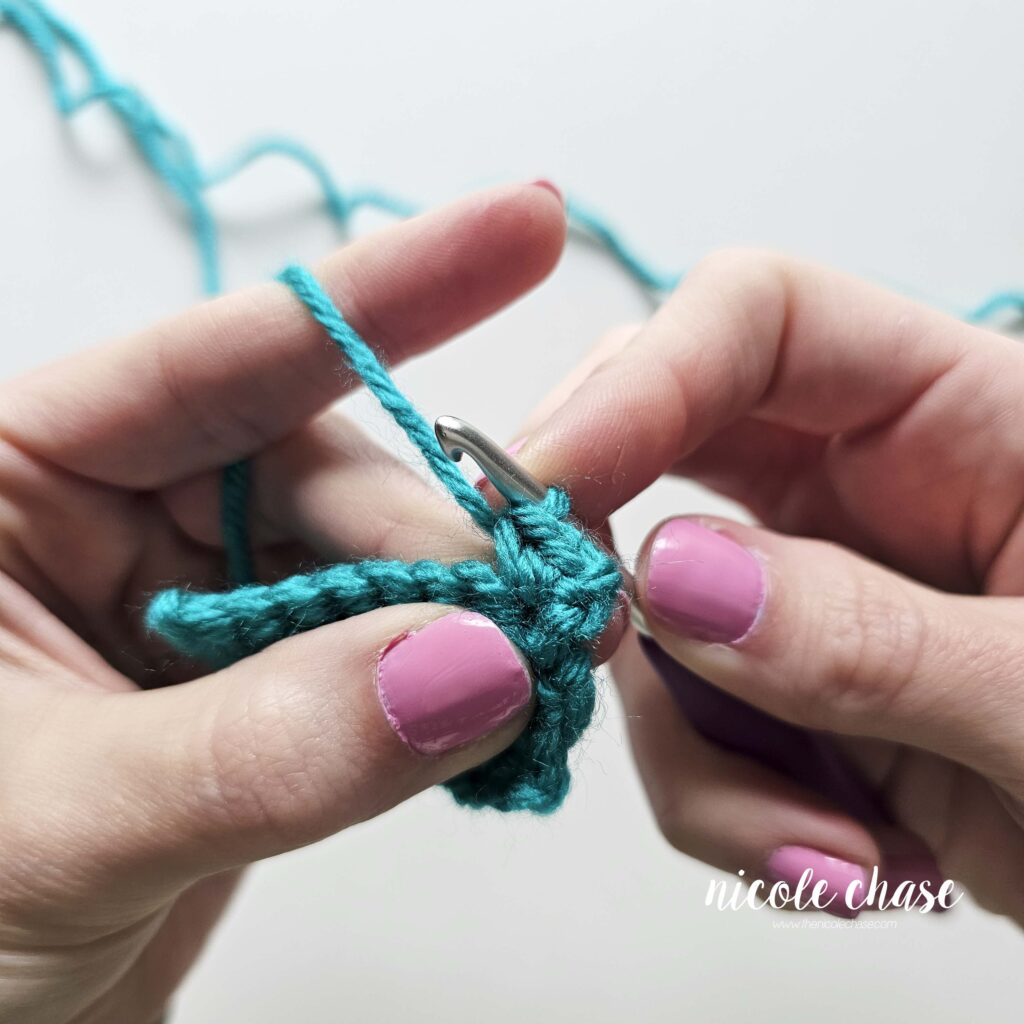
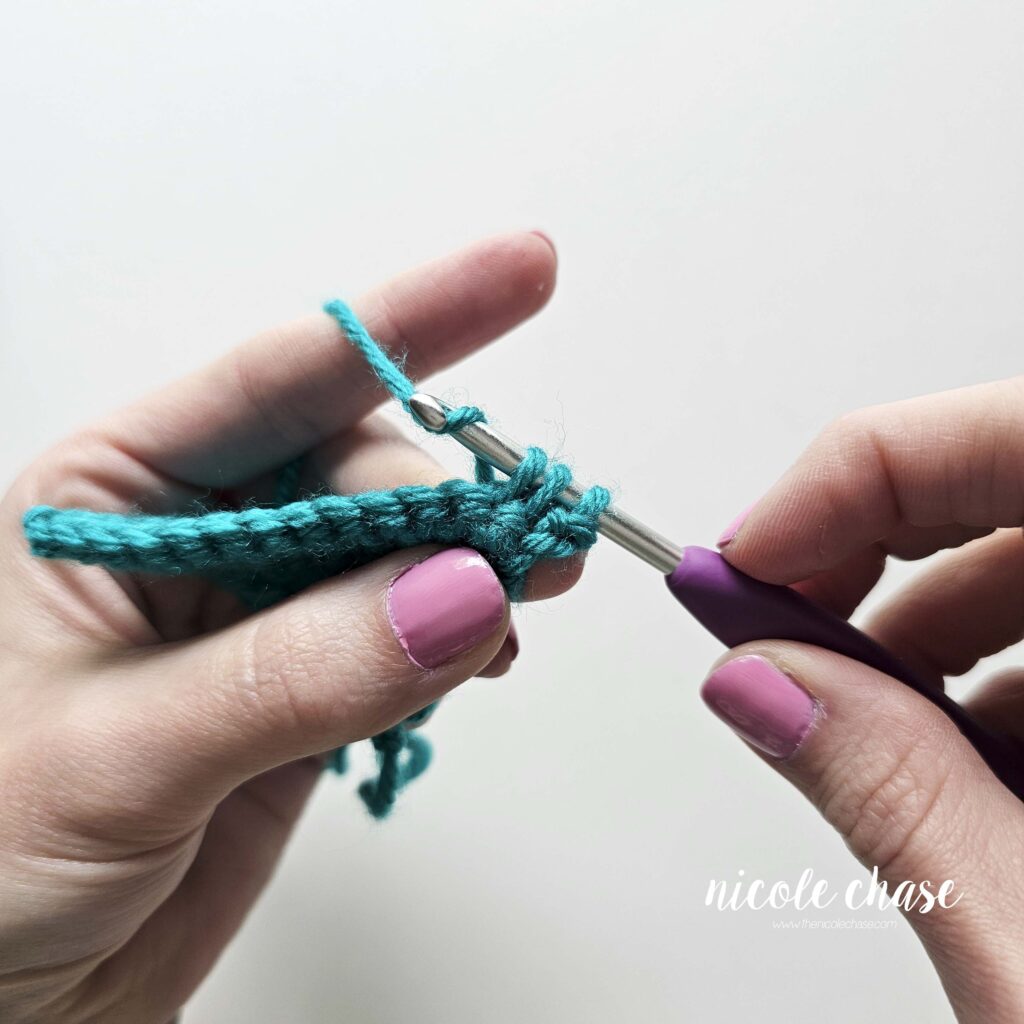
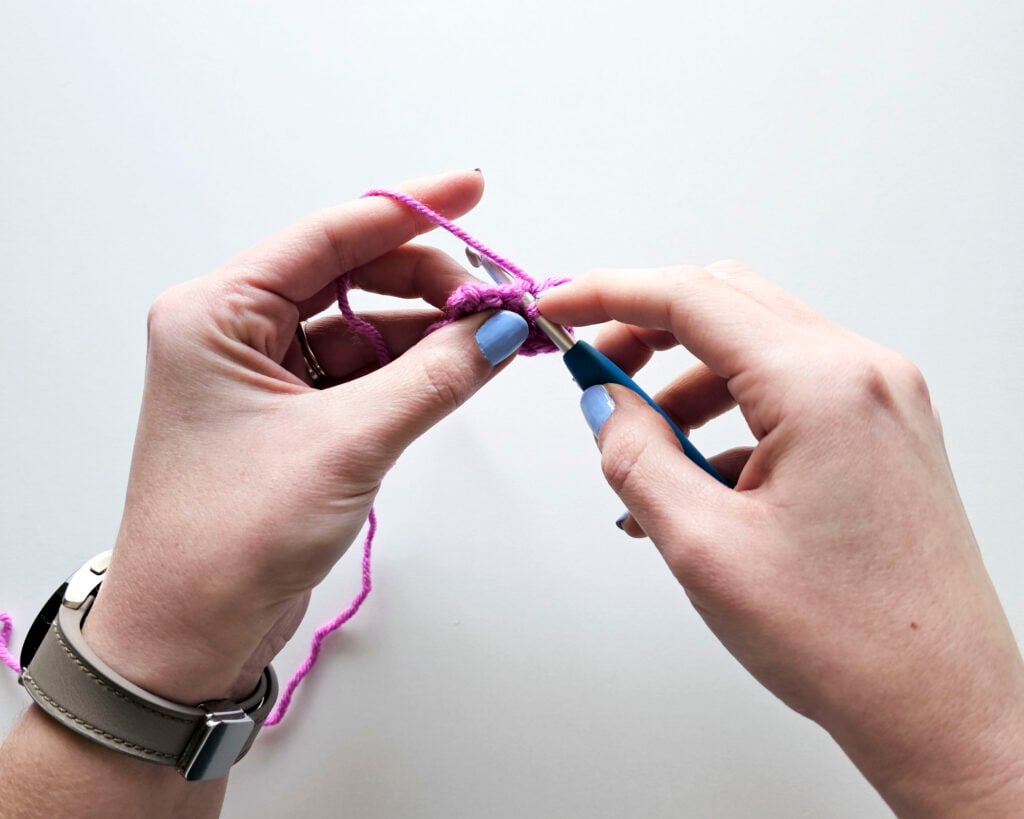
1. Start the First Stitch: Insert your hook into the first designated stitch, yarn over, and pull up a loop (you should have 2 loops on your hook). Do not complete the stitch.

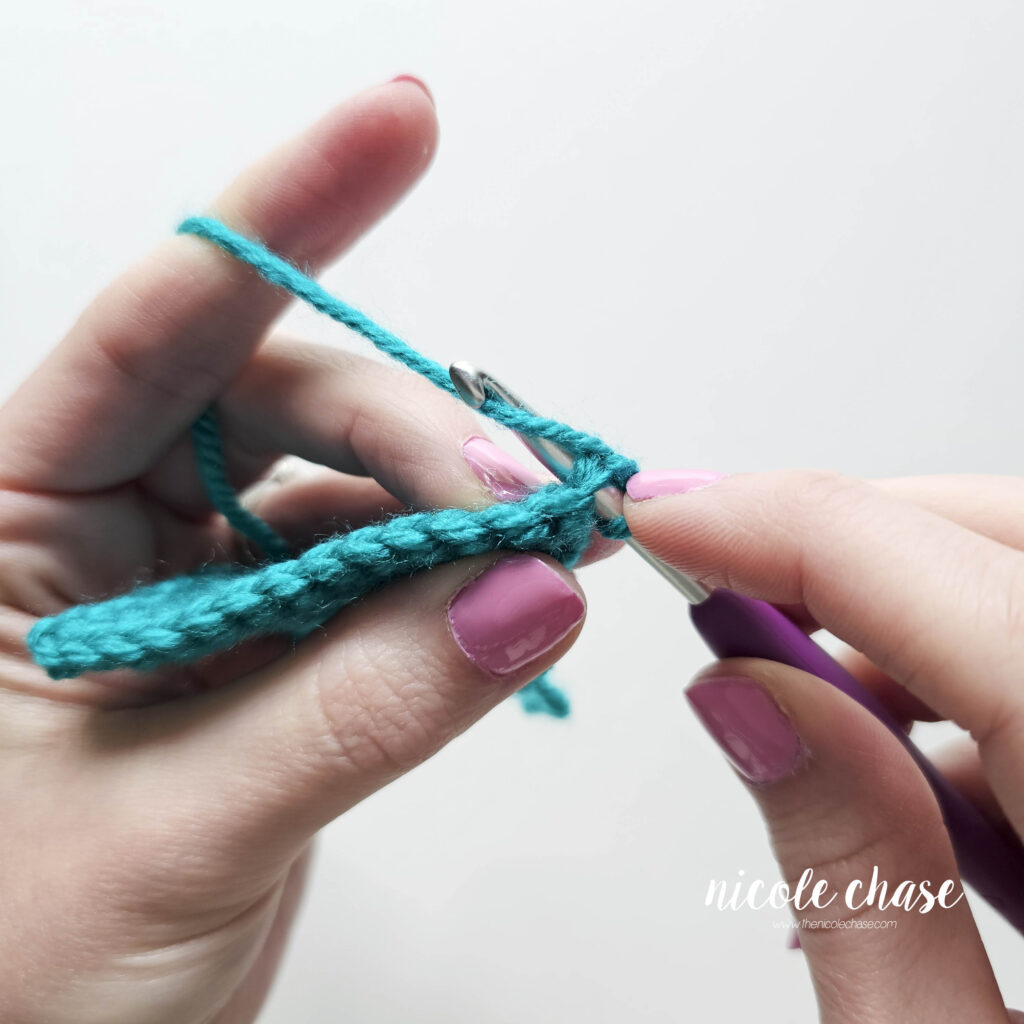
2. Start the Second Stitch: Insert your hook into the next designated stitch, yarn over, and pull up a loop (you should now have 3 loops on your hook).
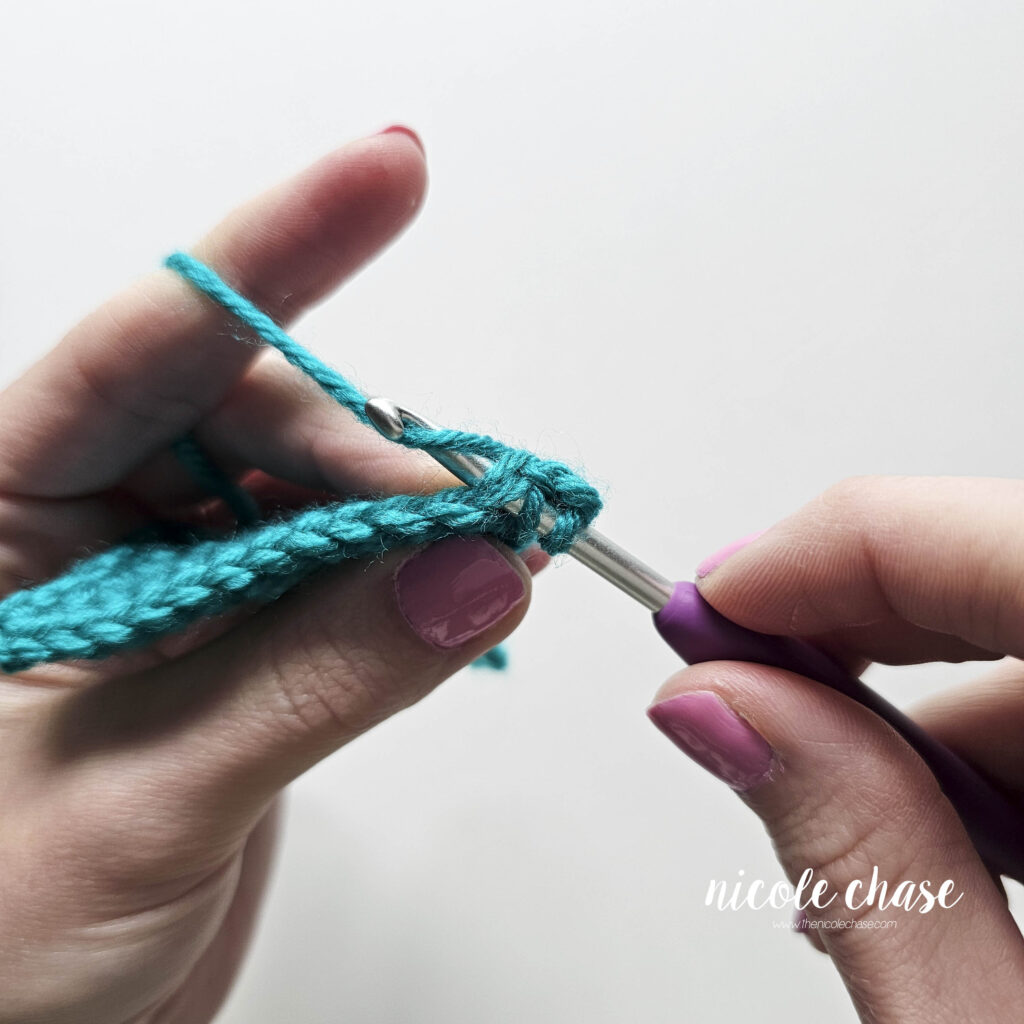
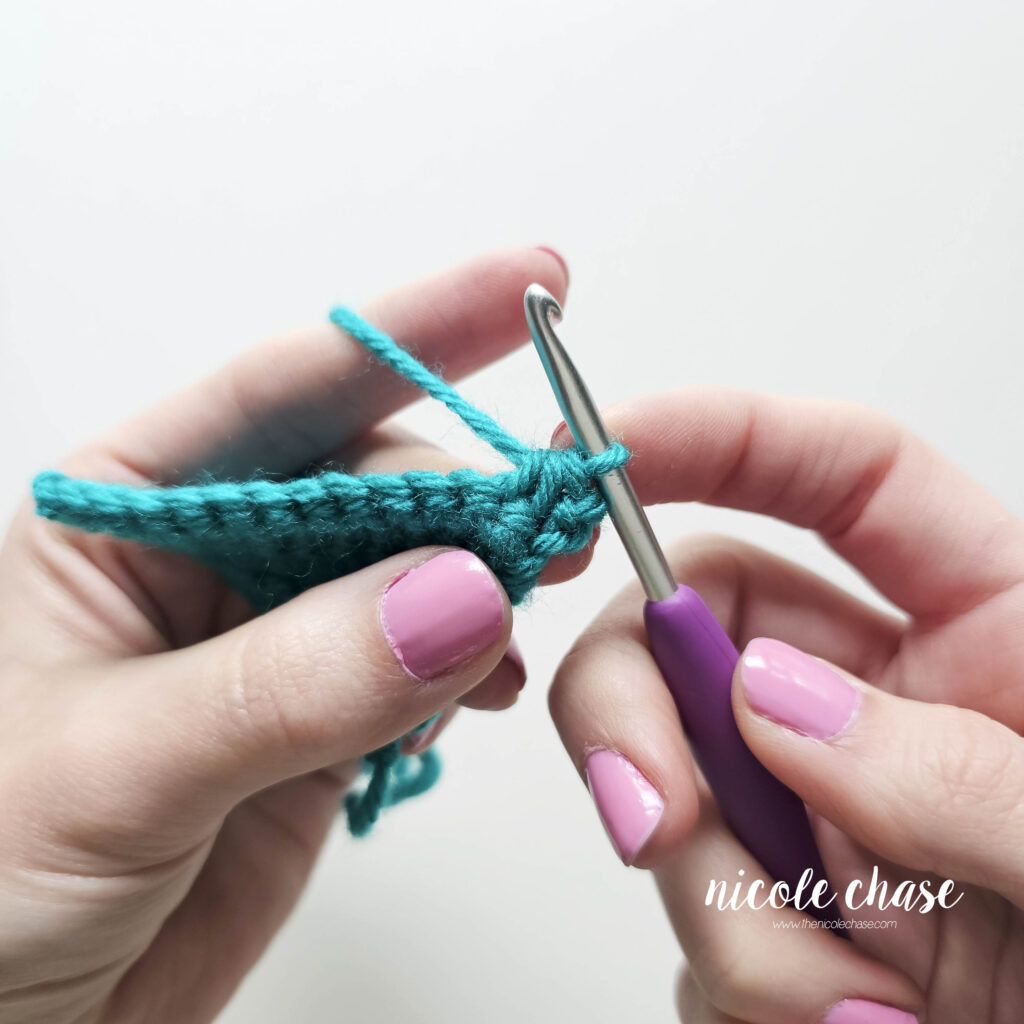
3. Complete the Decrease: Yarn over and pull through all 3 loops on your hook.
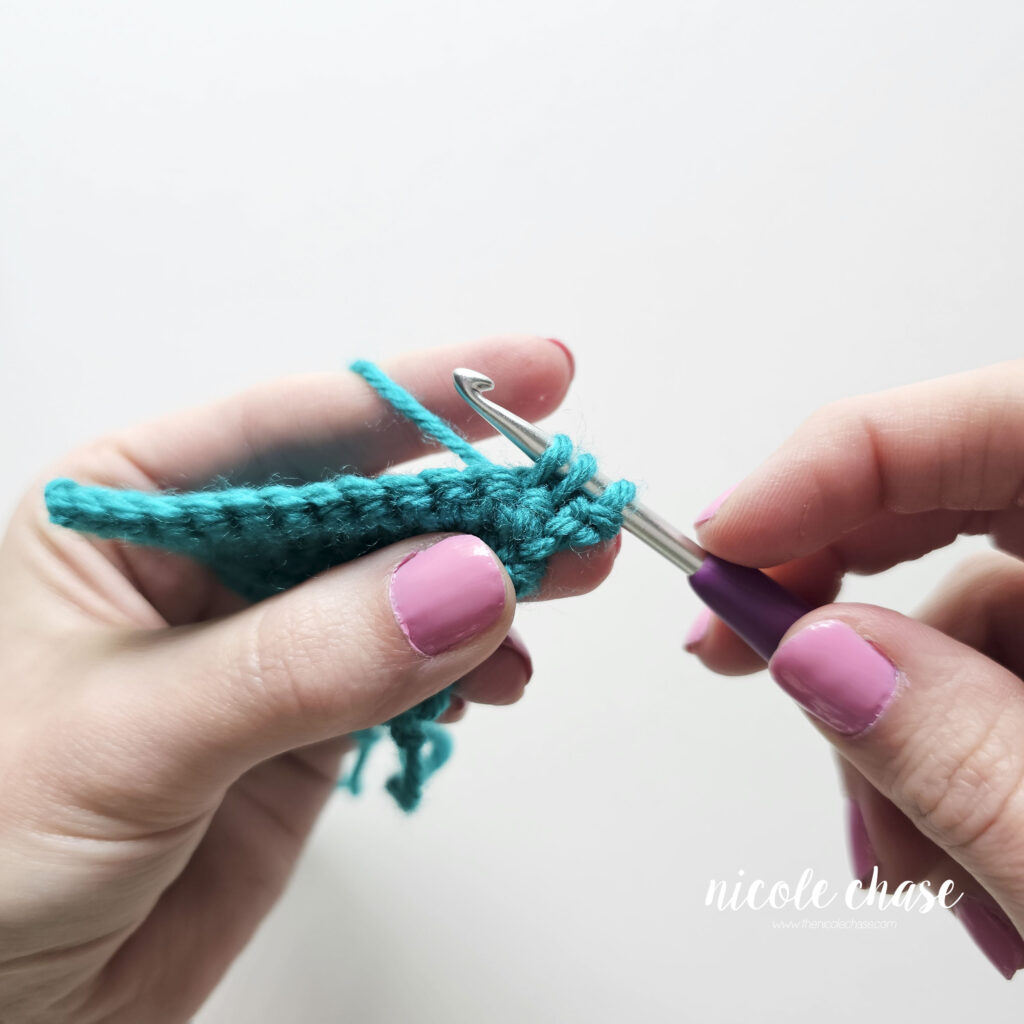
Here you can see the piece get more narrow, as each row stars and ends with a SC decrease. I started out with 14 single crochet stitches and then after 3 rows, the piece slowly became more narrow. I ended with a stitch count of 8 single crochet stitches.
Standard Decrease vs. Invisible Decrease
The decrease shown above is perfect for most projects like blankets, scarves, and garments that will be seen from the front and back of your work.
However, if you are using a decrease to make amigurumi or plush toys, the standard decrease can sometimes leave a small gap that allows your fiberfill stuffing to peek through. For toy making, it is often best to use an invisible decrease. It achieves the exact same result (reducing your stitch count by one) but it is much harder to spot and keeps your amigurumi stitches uniform. Because toys have a distinct “outside” and “inside”, the slightly more noticeable backside of an invisible decrease is hidden away on the inside of your project.
There are a few different techniques for creating an invisible decrease in crochet, but I have found one specific method to be the cleanest and easiest to execute. If you are making amigurumi and are looking for that gap-free finish, head over to see my preferred method in my step-by-step invisible decrease tutorial!
Video Tutorial: Single Crochet Increases and Decreases (SC2tog)
In this crochet video tutorial, I will demonstrate how to increase and decrease with the single crochet stitch.
This video is also available on YouTube. Watch this video: Increases and Decreases Crochet Tutorial on YouTube.
Single Crochet Increase & Decrease FAQ
Is SC2tog the same as dec?
Yes, SC2tog is a specific type of decrease. While DEC is a general abbreviation used in patterns to tell you to reduce your stitch count, SC2tog stands for “single crochet two together” and tells you the exact stitch (single crochet) to use to make that decrease.
Does an increase or decrease change your stitch count?
Yes. Every single crochet increase you work adds exactly one stitch to your row or round’s total count. Conversely, every single crochet decrease (SC2tog) removes exactly one stitch from your total count. Tracking these changes is the secret to successful project shaping.
What is the difference between a decrease and an invisible decrease?
A standard single crochet decrease works through both the front and back loops of your stitches, creating a reversible fabric that is ideal for things like blankets. An invisible decrease is worked using the front loops only and is designed specifically for amigurumi to prevent gaps and keep stuffing from showing through.
Why does my decrease stitch leave a hole?
If you see a visible gap or hole where you worked your SC2tog, it is usually the result of loose tension. When you insert your hook into the two adjacent stitches to pull up your loops, make sure to give your working yarn a gentle tug to pull the loops tight against your hook before completing the stitch.

More Crochet Basics & Tutorials
If you found this tutorial helpful, expand your skills and explore more beginner-friendly crochet resources on the blog:
- Master the Foundations: Refresh your core skills with my step-by-step guide on how to single crochet.
- Next Level Amigurumi: Learn how to achieve a clean, gap-free finish with my invisible decrease tutorial.
- Expand Your Stitch Skills: Ready to try a taller stitch? Learn how to increase and decrease using my tutorial on the double crochet stitch.
- Conquer Written Patterns: Don’t let pattern abbreviations hold you back! Read my full guide on how to read crochet patterns with confidence.


I hope you enjoyed this post! Be sure to leave me a comment below to let me know what you think.
Want to see more from me? Be sure to subscribe to my email newsletter so that you never miss a post!
Follow along with me on Instagram for daily updates and a behind the scenes look at my designs.
I’d love to see what you make with this tutorial! Don’t forget to share your finished work with me: on social media by tagging me @thenicolechase, in your Ravelry projects, or post over in my Facebook group!
Thanks for stopping by! Happy crafting!
Nicole
PATTERN COPYRIGHT © 2026 NICOLE CHASE. ALL RIGHTS RESERVED.
PATTERN MAY NOT BE ALTERED, COPIED, REDISTRIBUTED OR SOLD AS YOUR OWN PATTERN.
YOU MAY SELL THE FINISHED PRODUCT ON A SMALL SCALE. PATTERN/DESIGN CREDIT GIVEN TO WWW.THENICOLECHASE.COM IS APPRECIATED. PERMISSION TO SELL DOES NOT INCLUDE MASS PRODUCTION. LARGE SCALE PRODUCTION IS PROHIBITED.
PHOTOGRAPHY COPYRIGHT © 2026 NICOLE CHASE. ALL RIGHTS RESERVED.
PHOTOS MAY NOT BE ALTERED, COPIED, REDISTRIBUTED OR SOLD AS YOUR OWN.
This post may contain affiliate links. If you make a purchase through links on our site, we may earn a commission.