
Invisible Color Change in Crochet: Seamless Amigurumi Tutorial
This post may contain affiliate links. If you make a purchase through links on our site, we may earn a commission.
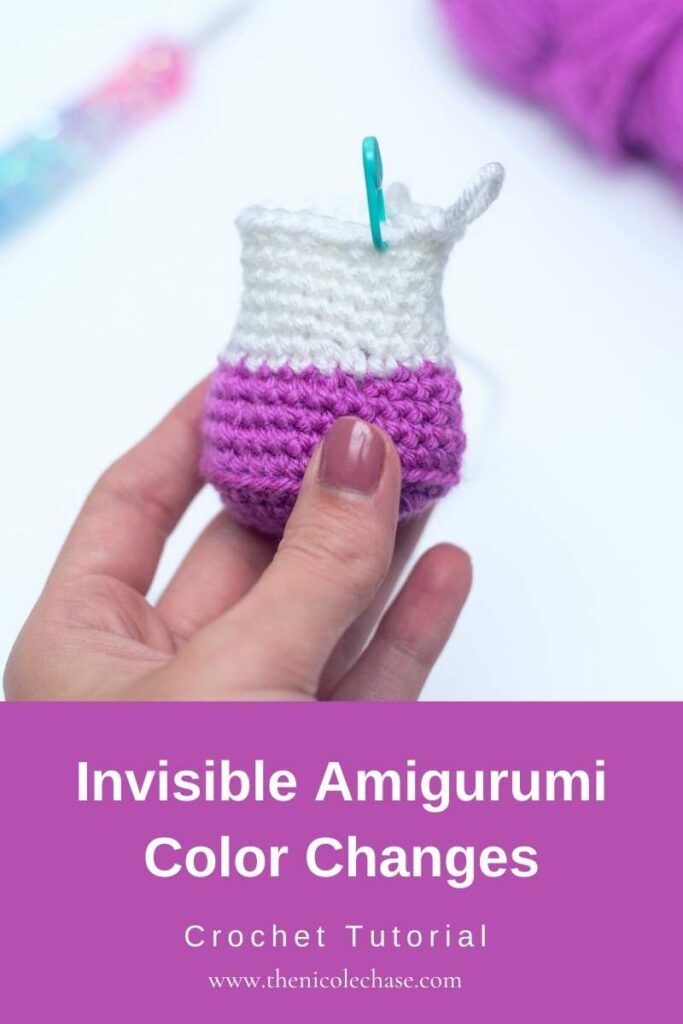
Tired of that frustrating color jog when changing yarns in continuous rounds? You’re not alone! The standard way of switching colors leaves a noticeable “stair-step” line in spiral crochet, but this invisible color change in crochet tutorial is here to save your projects.
Whether you’re making plush toys, hats, or baskets, learning how to make a seamless color change in crochet will give your work a polished, professional look. Here you’ll find step-by-step photos and a complete video tutorial to master this technique!
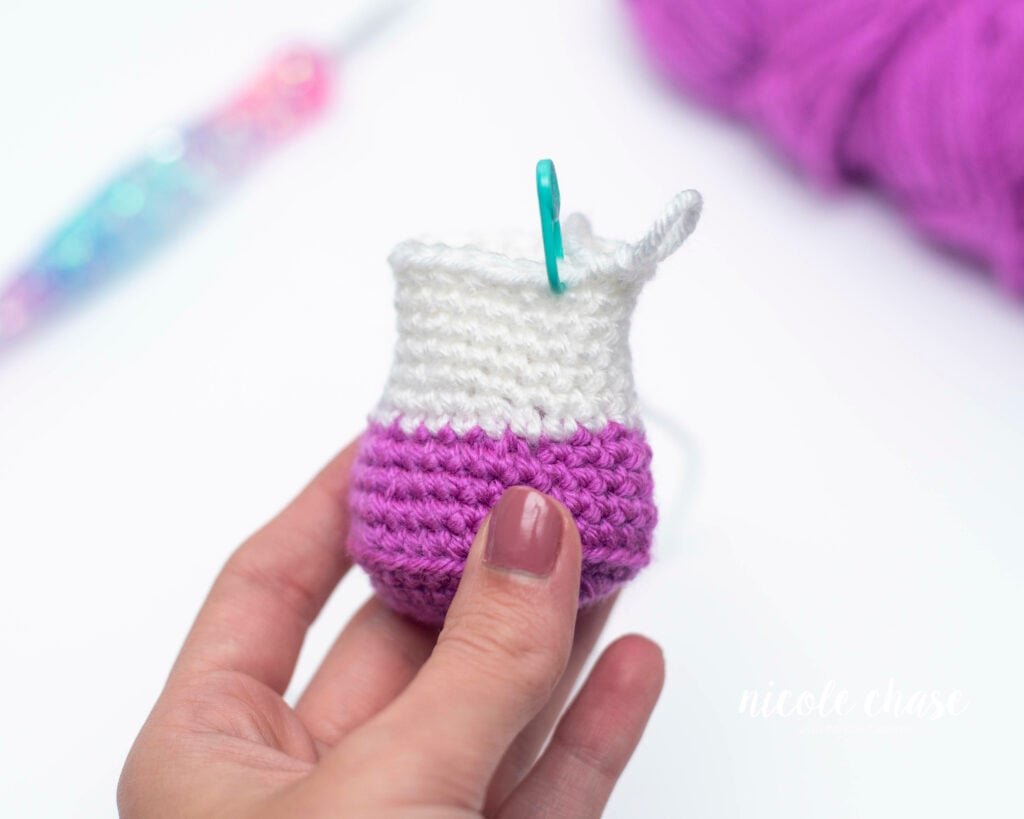
Quick Summary: Invisible Color Change
- Best For: Amigurumi, plushies, and any crochet projects worked in continuous (spiral) rounds.
- Why Use It: Eliminates the jagged “stair-step” line that happens during standard color switches.
- Skill Level: Beginner-friendly.
- Key Step: The final stitch of your round finalizes the color change and smooths the transition.
Table of Contents
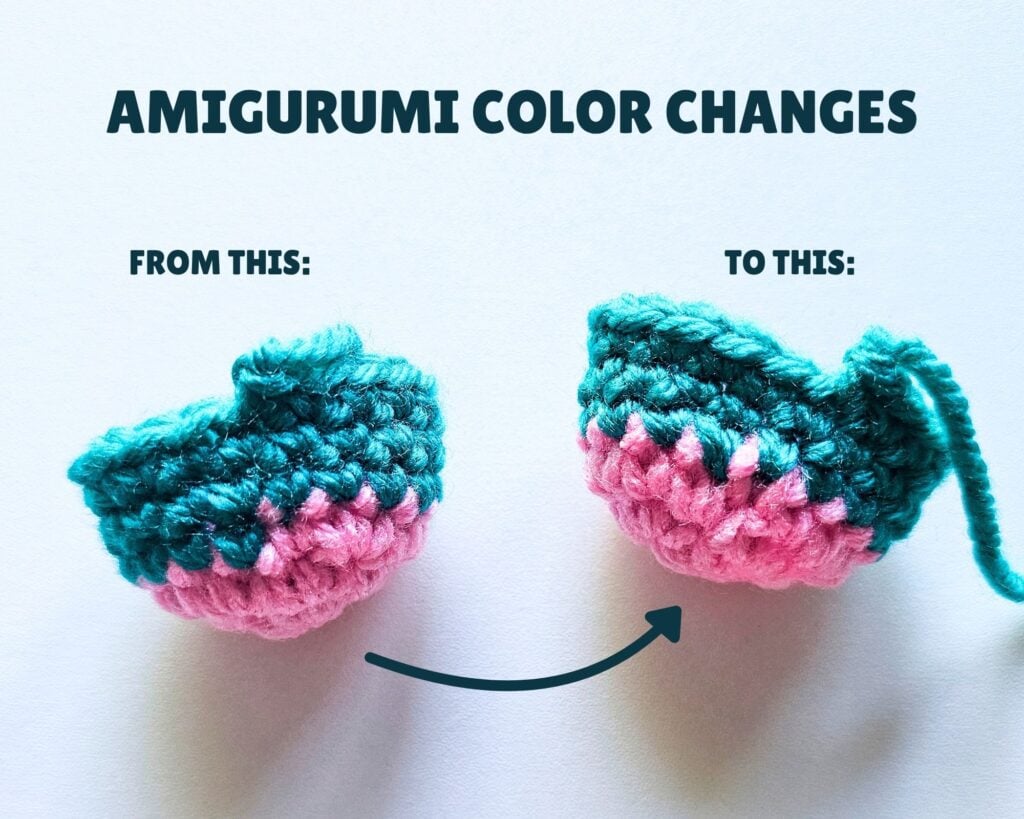
When to Use the Invisible Color Change in Crochet
The invisible color change (also called a seamless color change) is specifically designed for working single crochet in continuous rounds.
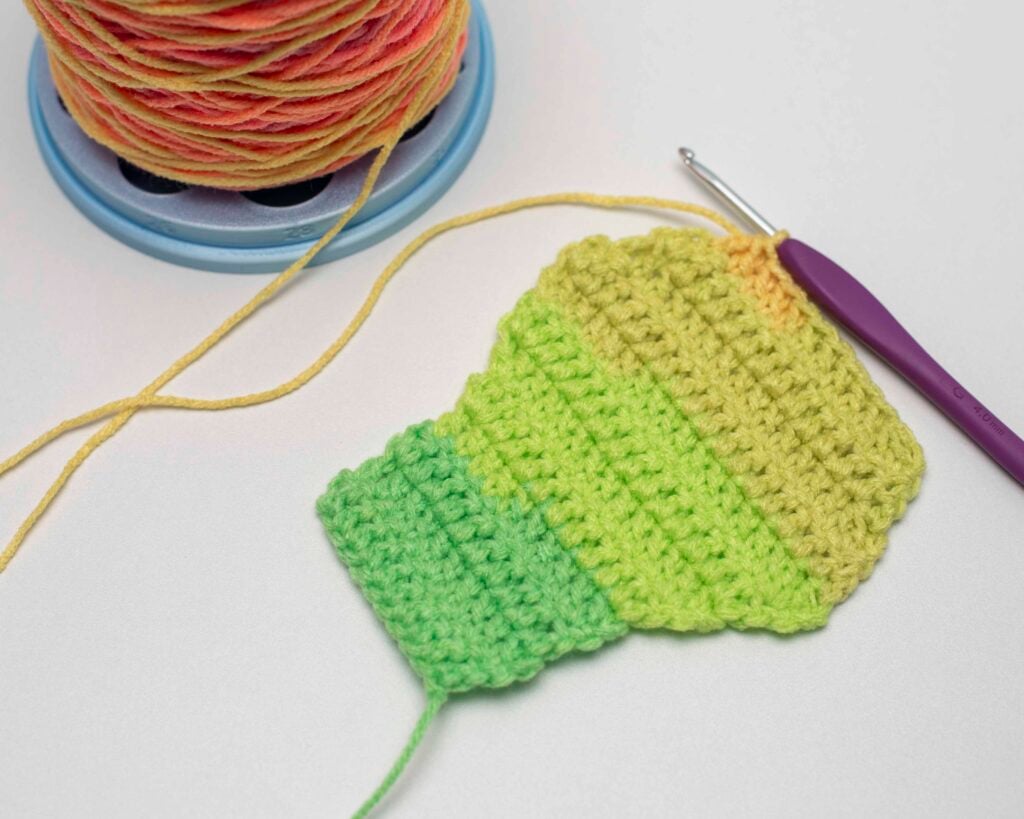
When working in continuous rounds, you don’t join at the end of each round, you just keep crocheting in a spiral. Because of this, traditional color change leaves a noticeable jog or stair step line when the new color begins.
Best Projects for this Technique
- Amigurumi & Plushies: Perfect for color transitions on bodies, arms, legs, etc.
- Hats & Beanie Crowns: Keeps color switches smooth when working top-down in spiral rounds.
- Baskets, Coasters & Accessories: Ensures a clean finish on any round project worked without joining rounds.
Pro Tip for Different Stitches: While I most commonly use this technique for single crochet in continuous rounds, it isn’t limited to it! I’ve had success using this same method with half double crochet (HDC) and double crochet (DC) stitches as well.
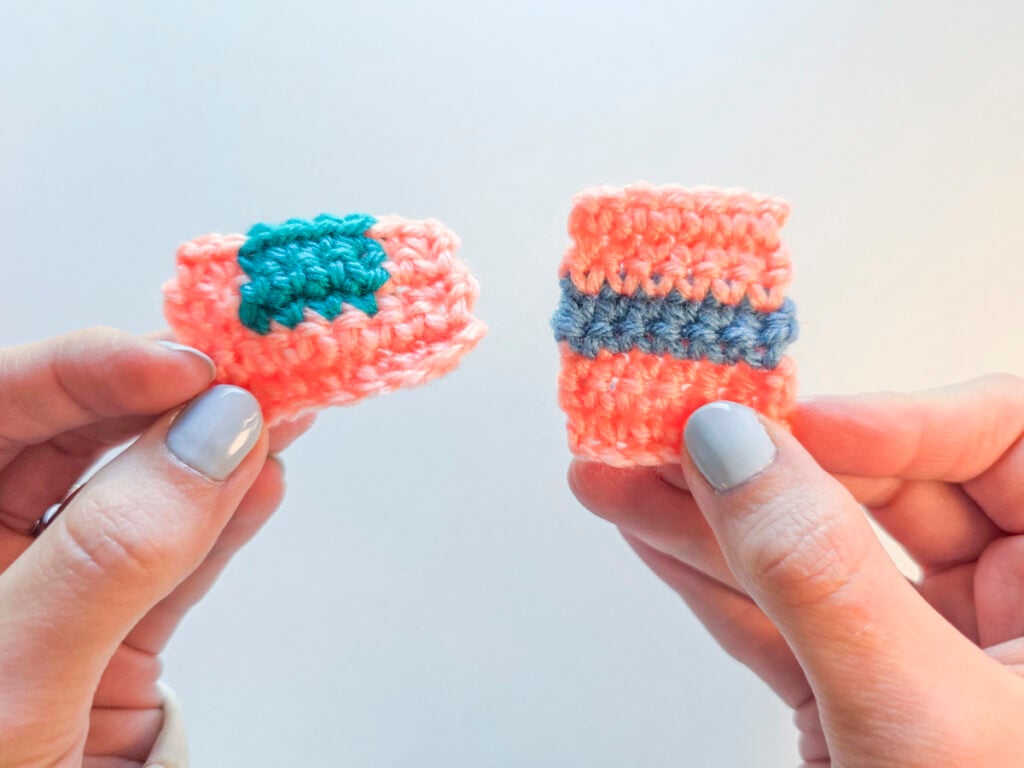
Looking for standard color change methods?
If you are working in flat rows or traditional joined rounds (or need a refresher on the basics), check out my complete guide on how to change colors in crochet for a full video walkthrough and photo tutorials covering those other methods!
Watch the Crochet Invisible Color Change Video Tutorial
If you prefer learning visually, watch the video tutorial below! In this video, I’ll walk you through how to execute the invisible color change method in amigurumi step-by-step so you can eliminate color jobs in your continuous rounds once and for all.
This video is also available on YouTube. Watch this video: Invisible Color Changes for Amigurumi on YouTube.
Step-by-Step Invisible Color Change Crochet Tutorial
There are a few different methods for making a crochet invisible color change, but the technique below is my absolute favorite for amigurumi because it creates the smooth, seamless line you need in continuous rounds.
Follow the step-by-step photo tutorial below to master this easy technique!
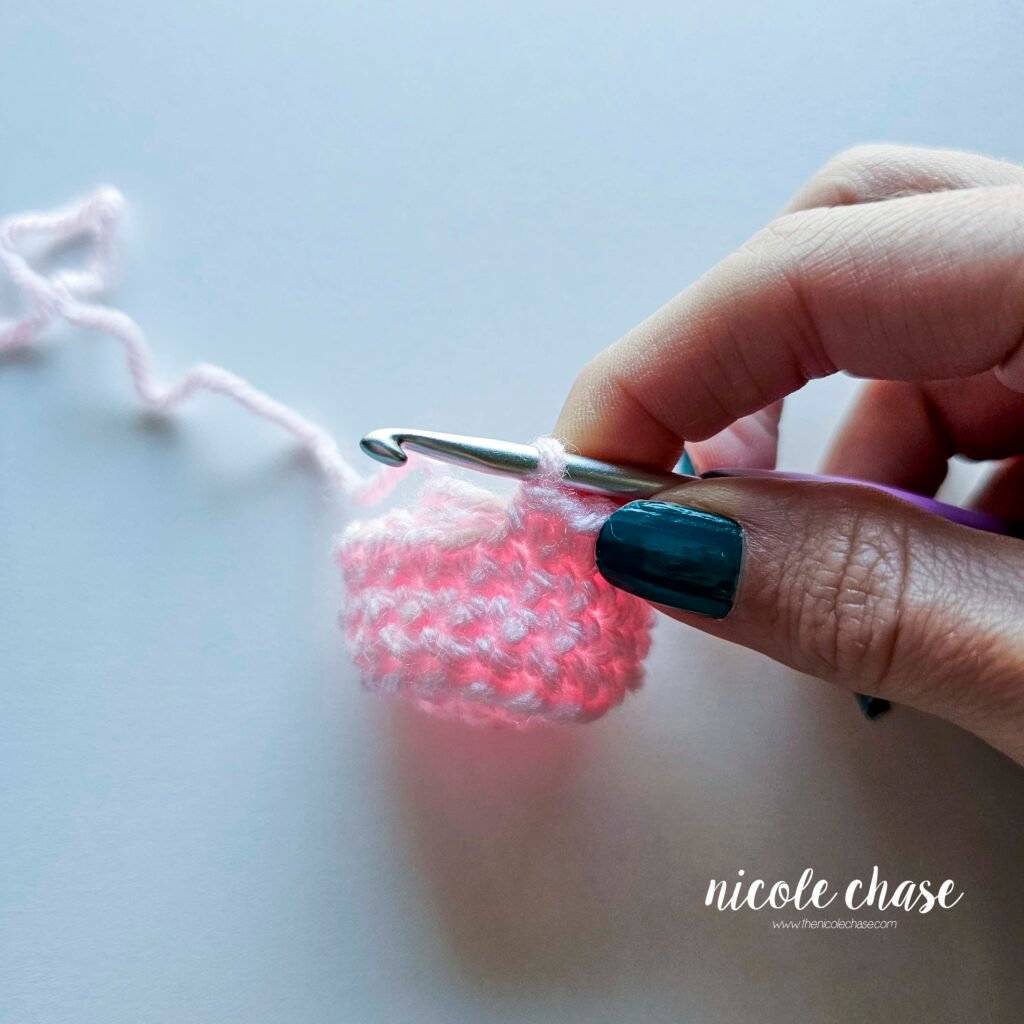
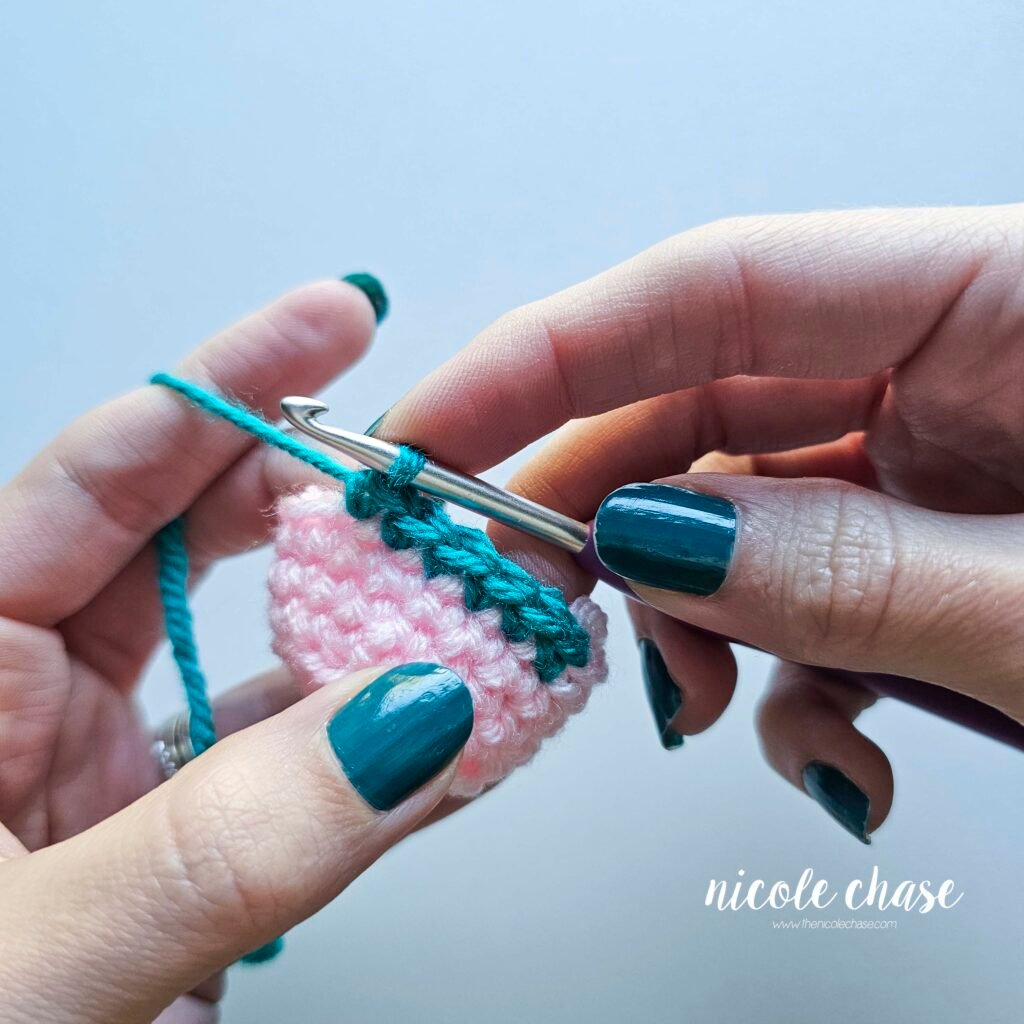
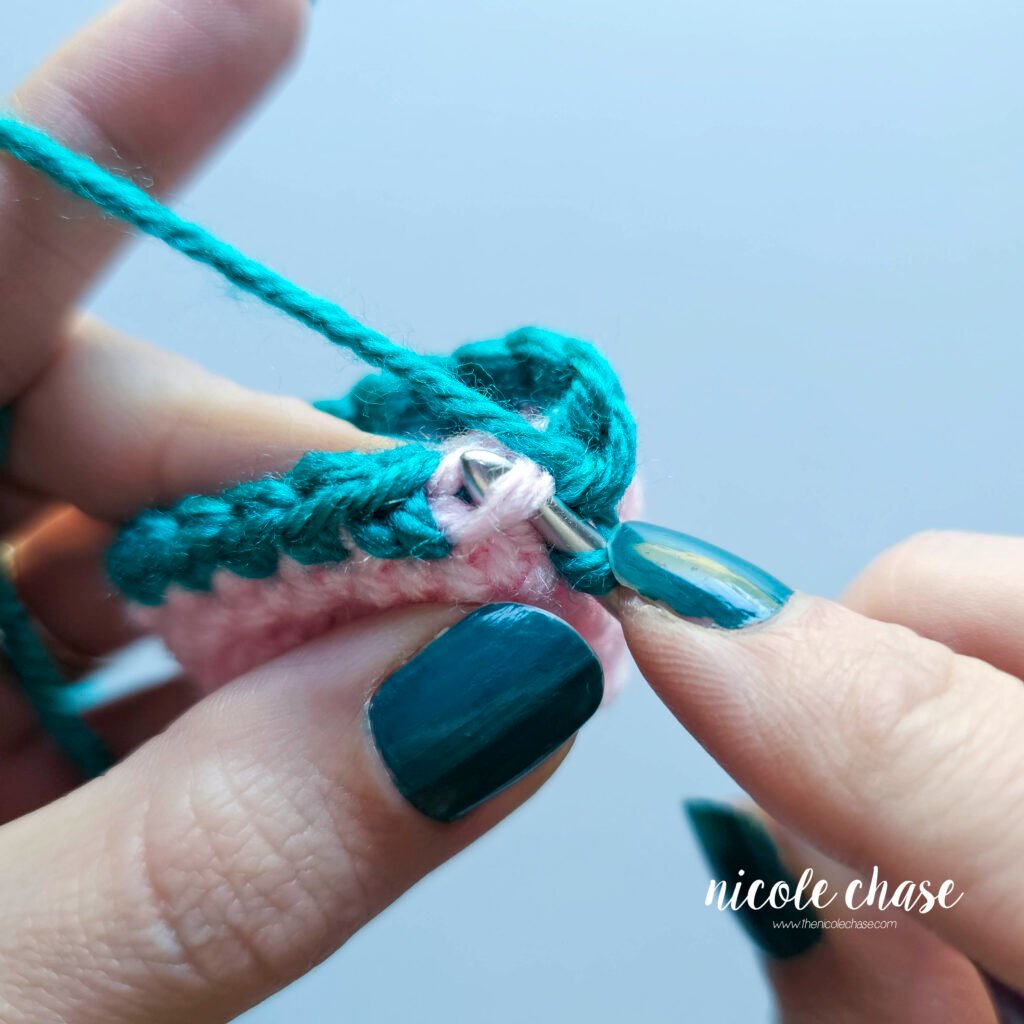
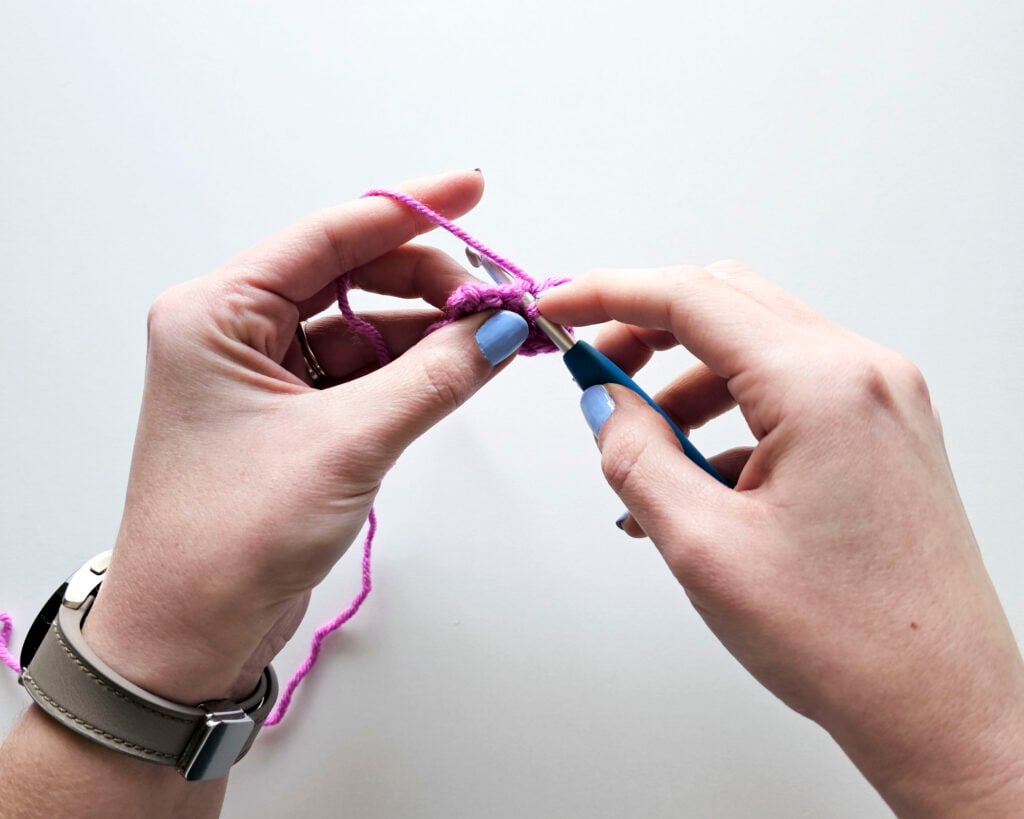
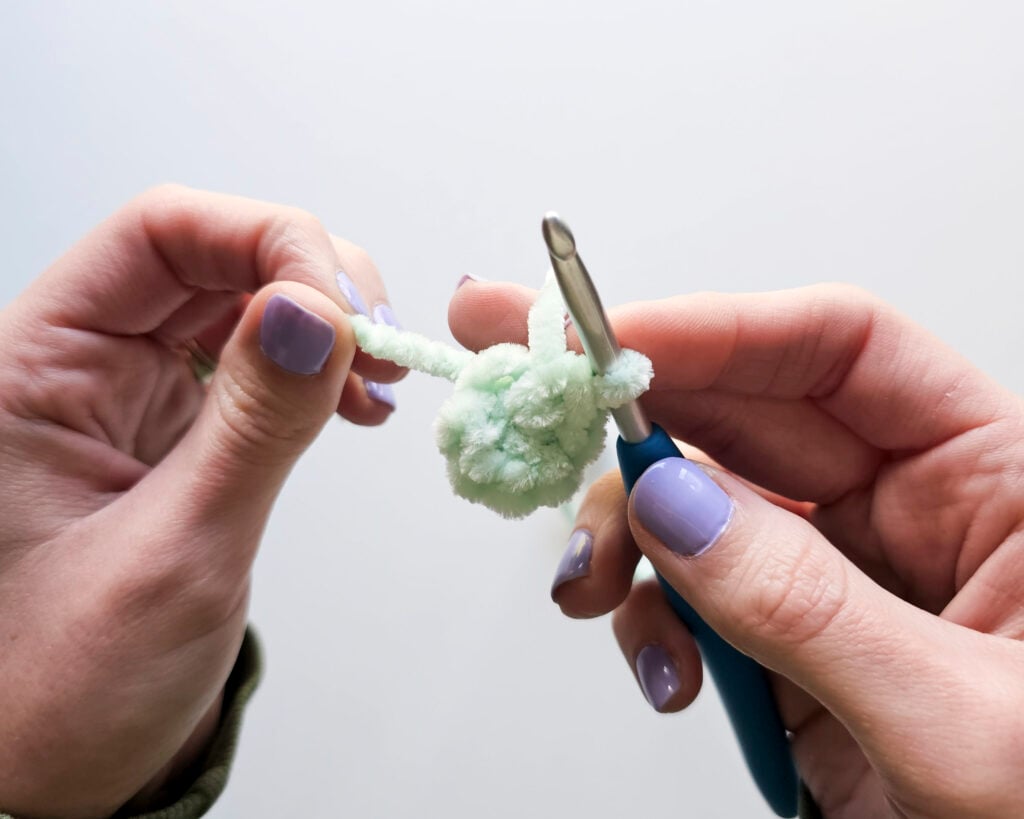
Step 1: Secure the New Color (Back Loop Start)
Start by cutting your original yarn color, leaving a short tail to tie off inside your work.
- Insert hook in back loop only: While still on your first color, insert your hook into the back loop only of the first stitch of the new round (where your new color will begin).
- Pull up new color: Join your new yarn color by pulling up a loop through that back loop.
- Secure inside: When making amigurumi, secure the yarn tails on the inside of your piece with a simple knot. Since the inside will be stuffed later, the knot stays completely hidden!
Pro Tip: Working in the back loop only for this first stitch helps drop the transition down slightly, keeping the color line crisp and preventing the new color from pulling the old color upward.
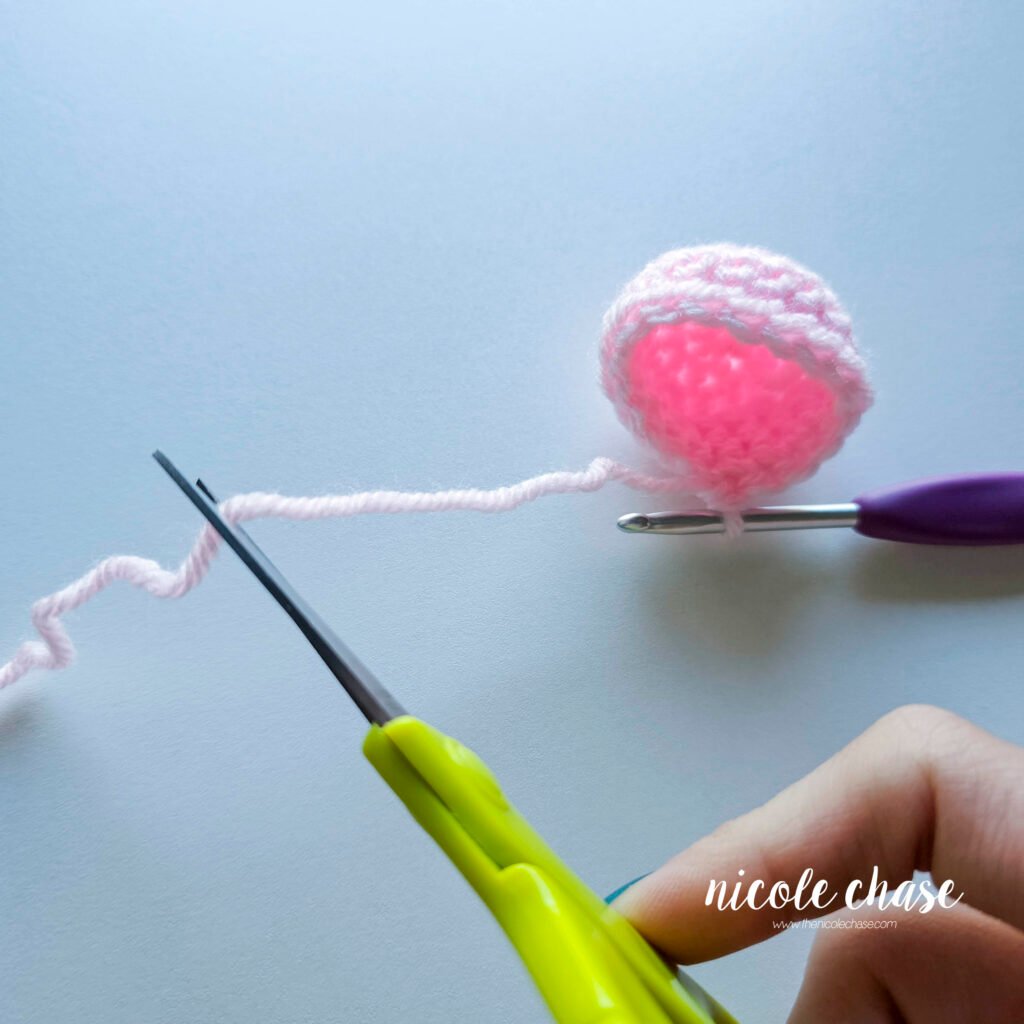
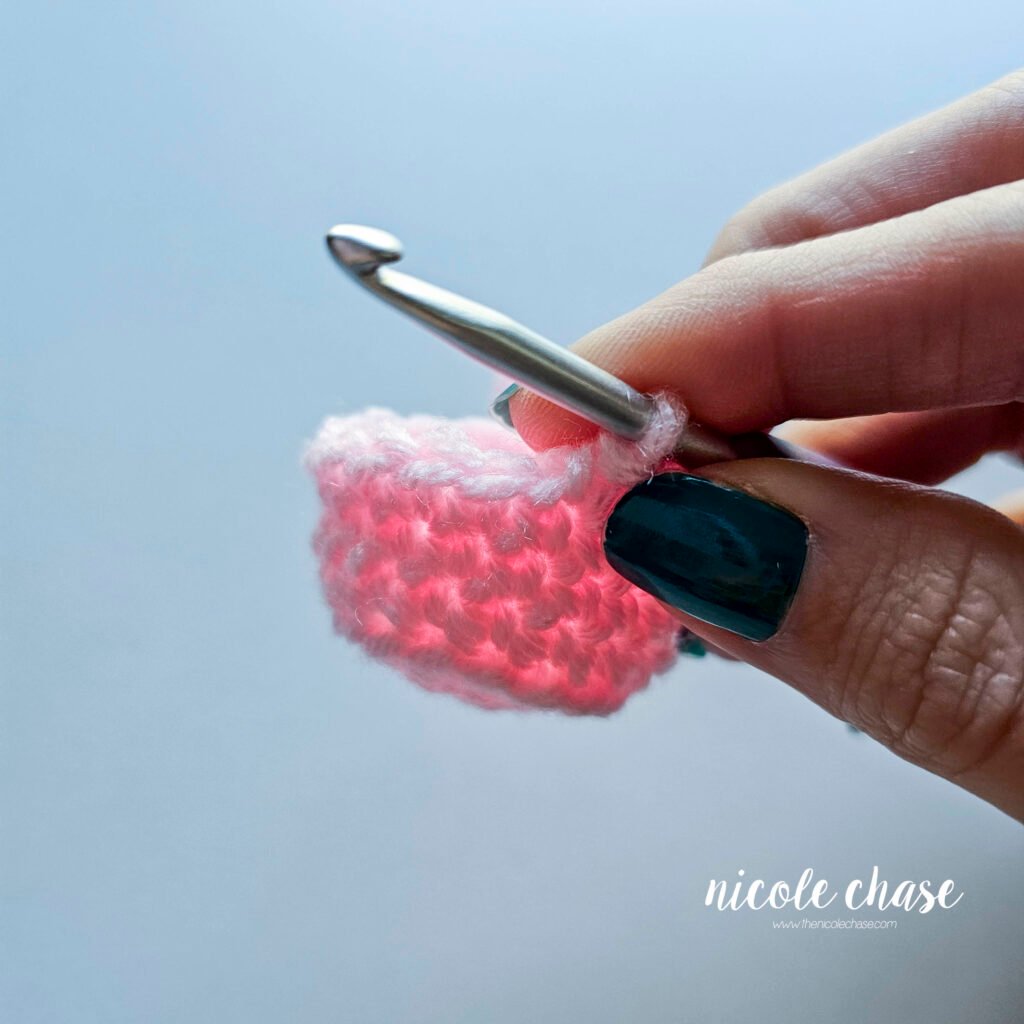
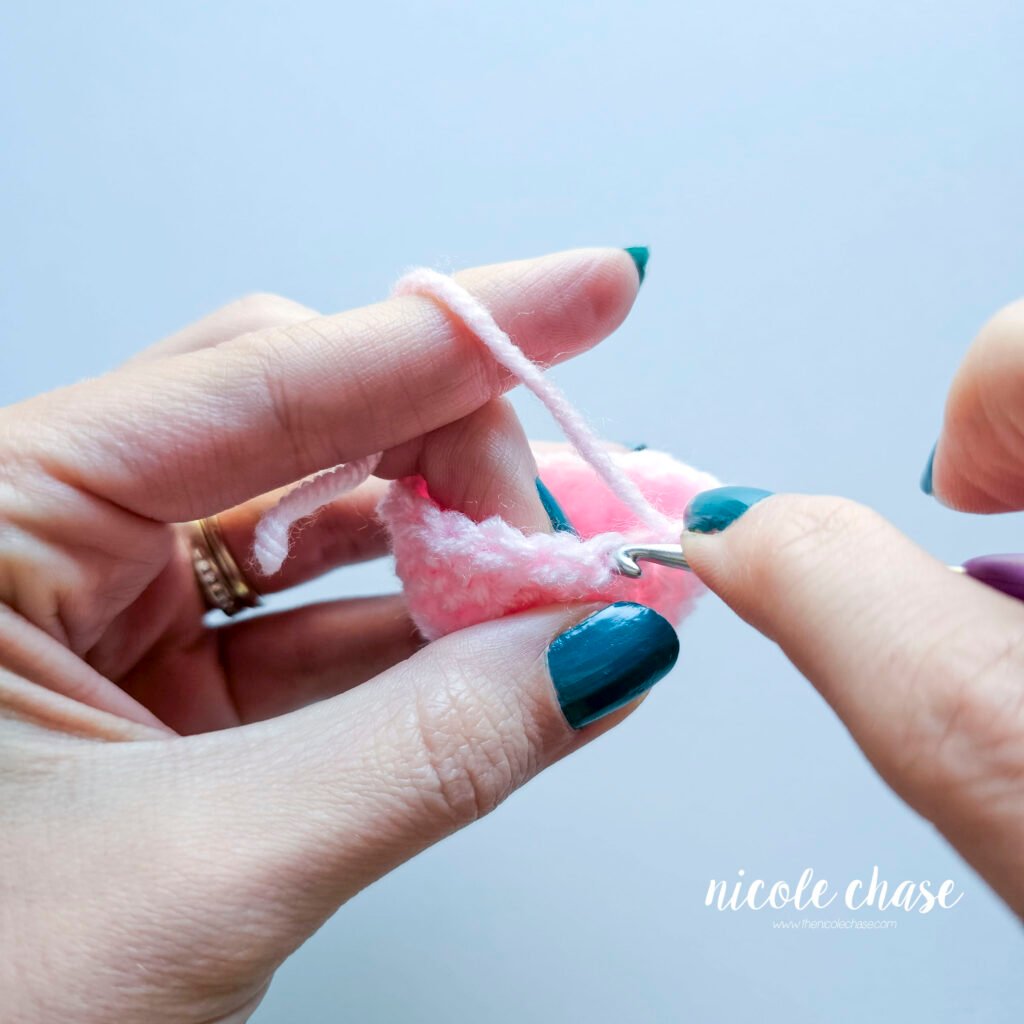
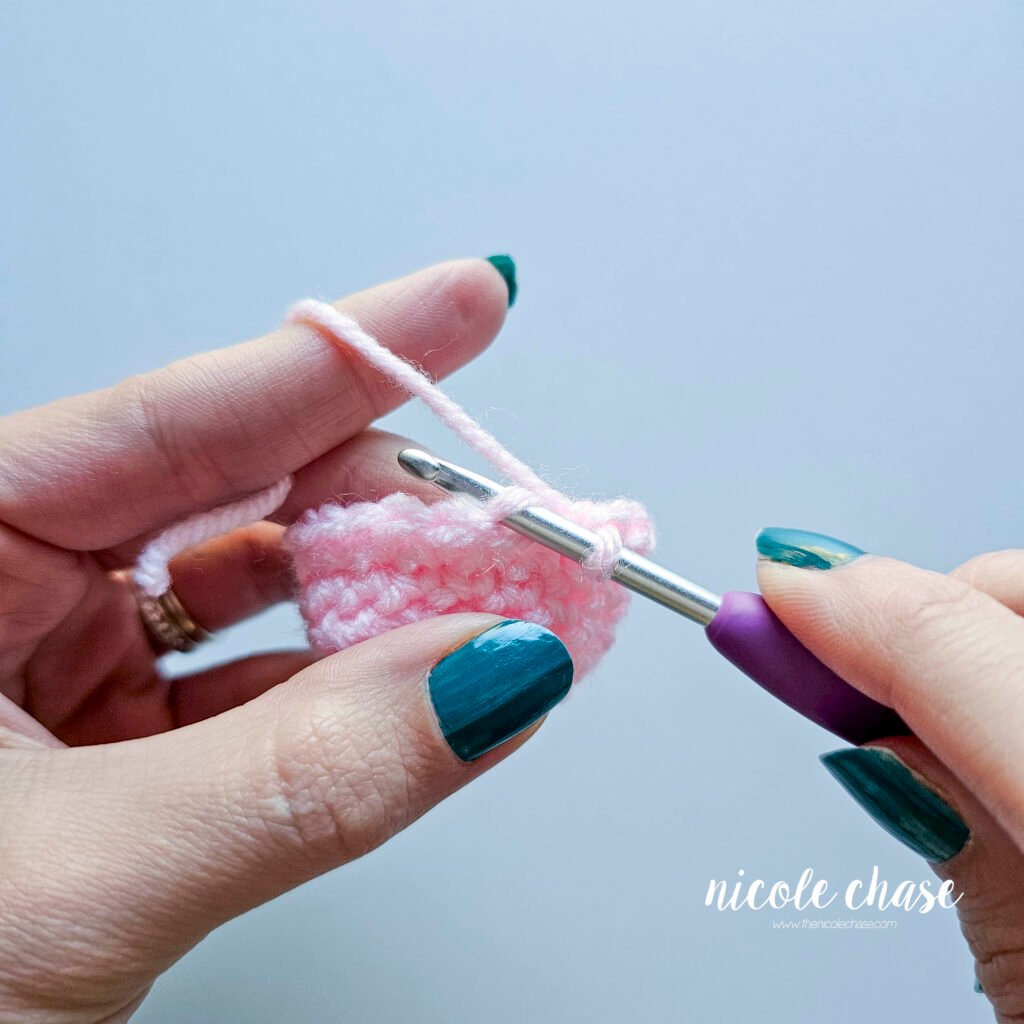
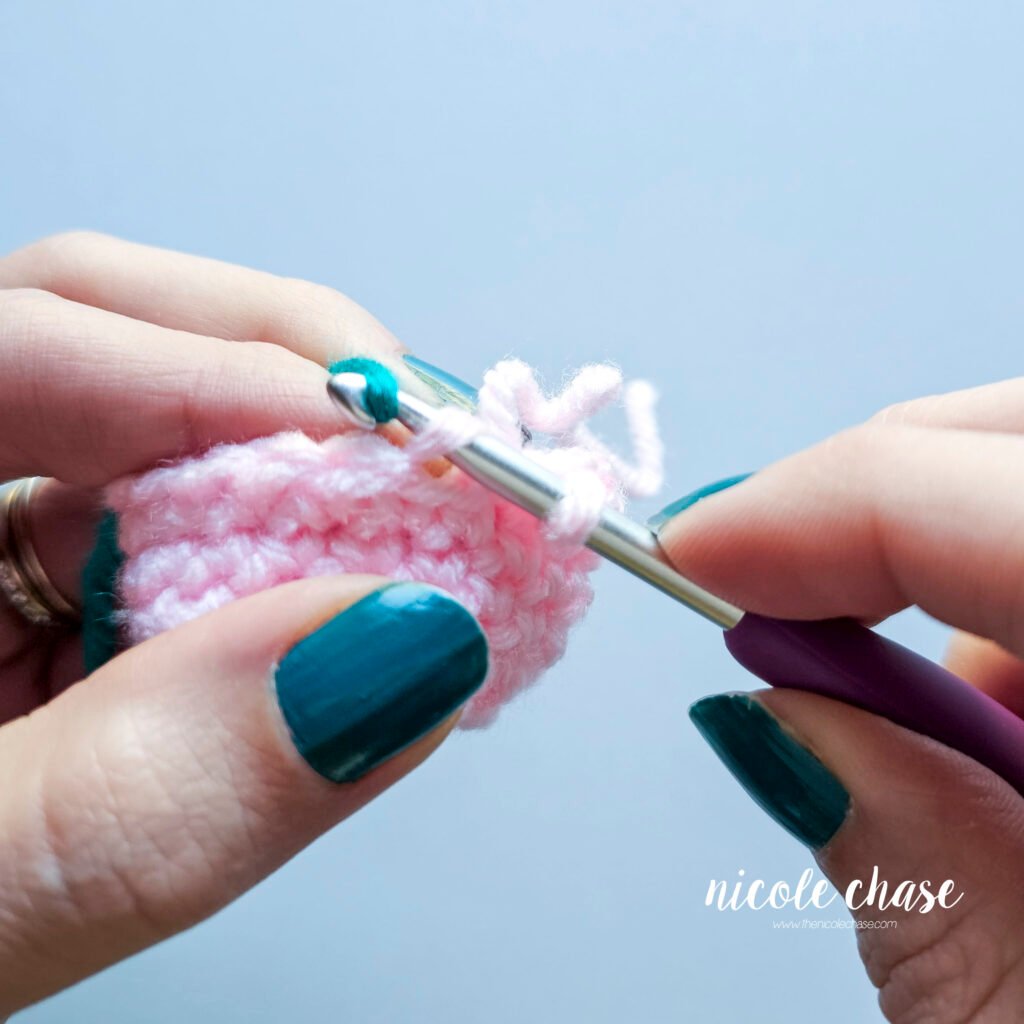
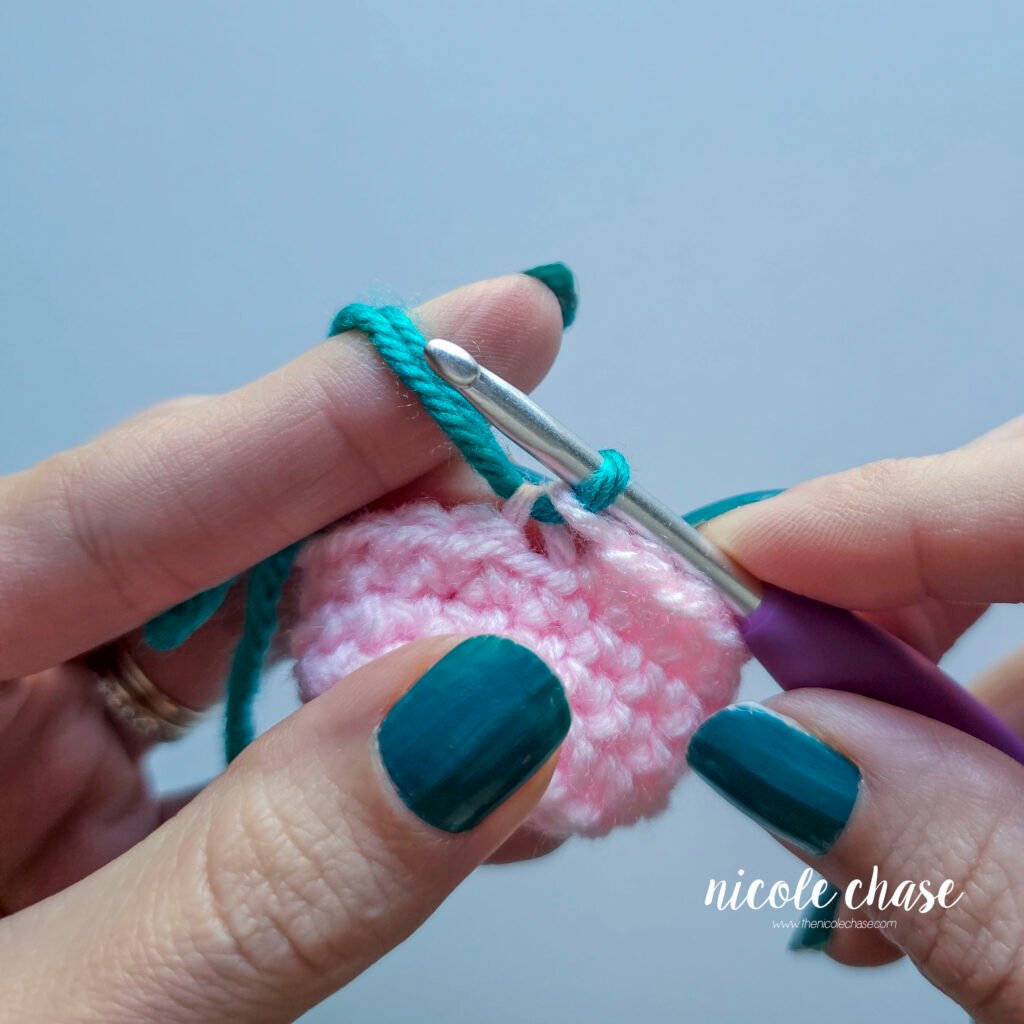
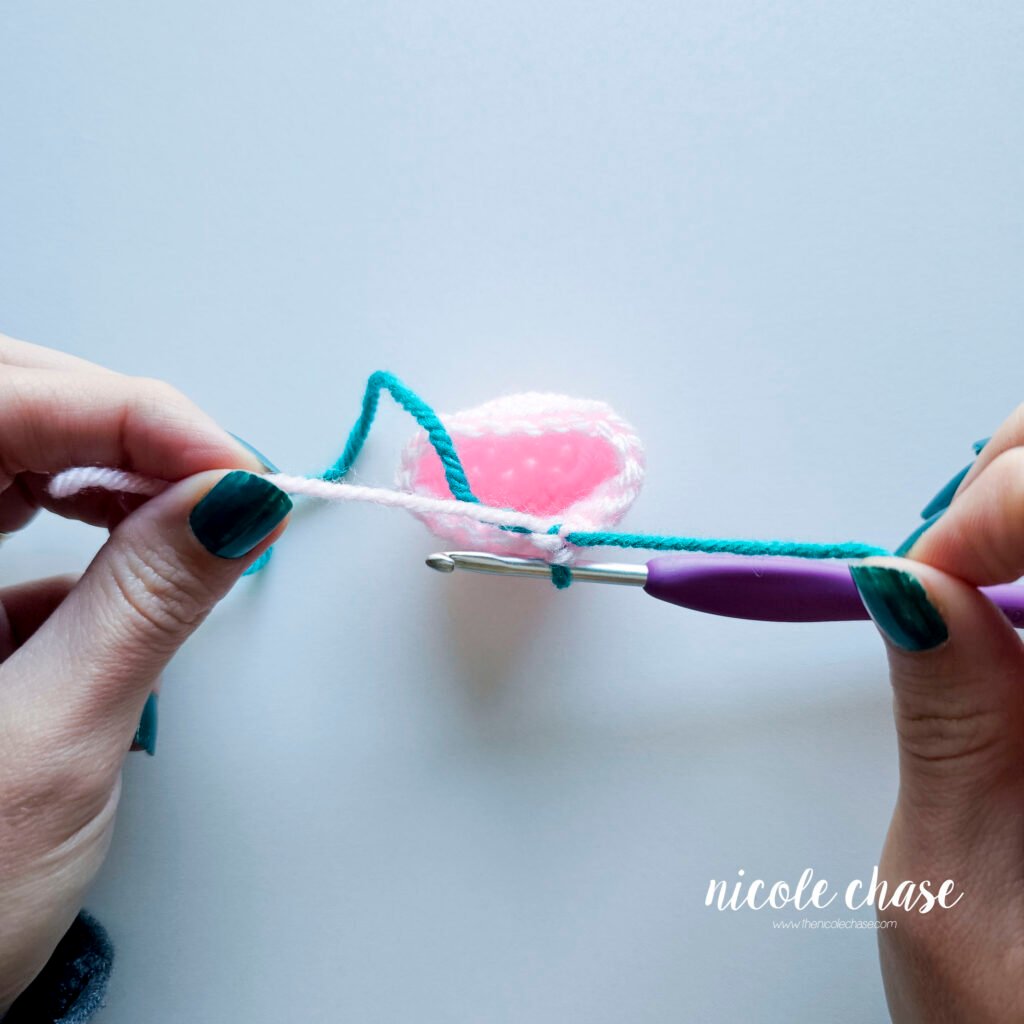
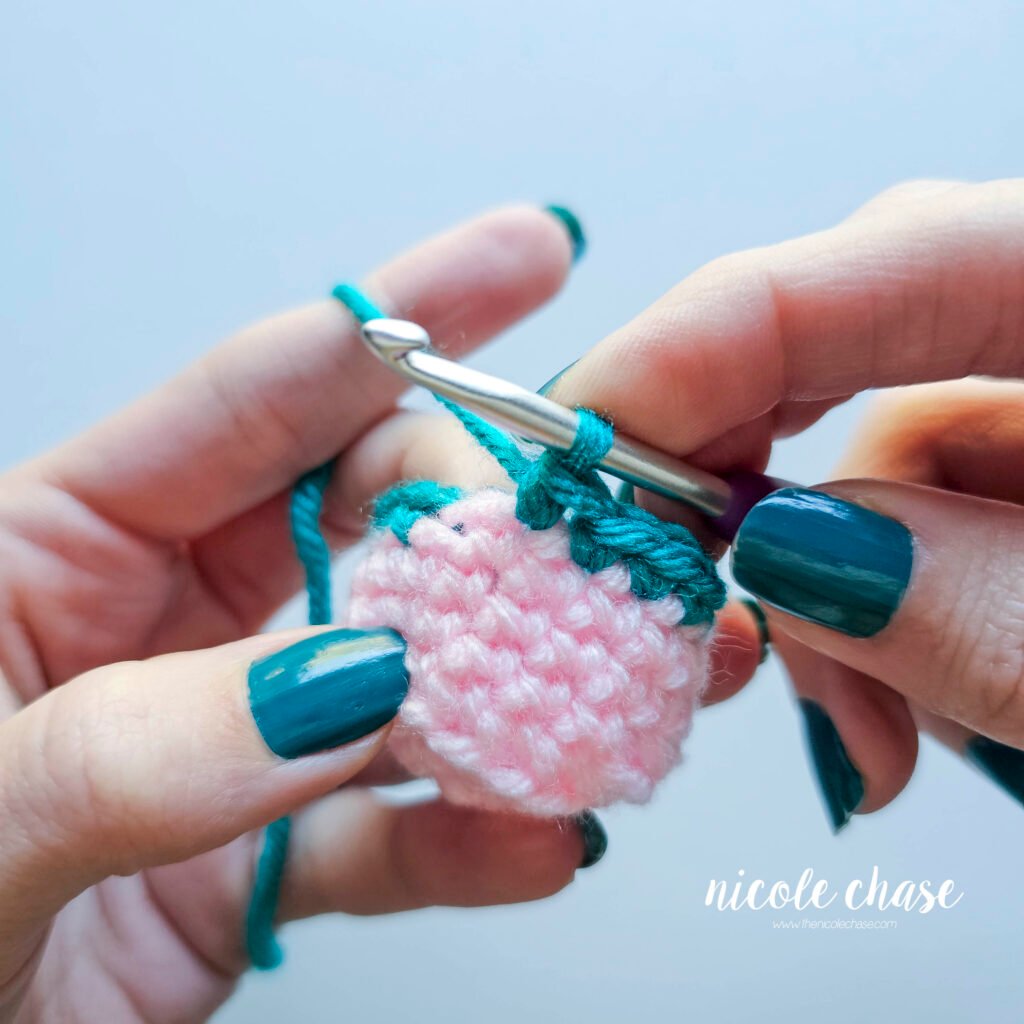
Step 2: Continue the Round with Your New Color
Now that your new color is joined, you’ll crochet around the rest of the piece until you return to your starting point.
- Single crochet around: Insert your hook into the next stitch after your join and work a standard single crochet. Continue working regular single crochets all the way around the round.
- Work back to the join: Keep crocheting in your new color until you reach the exact stitch where you made your back loop color change.
Don’t Worry if it Still Looks Uneven! If you notice that your color change doesn’t look seamless yet, don’t panic! We are going to lock that transition and smooth it out in the next step.
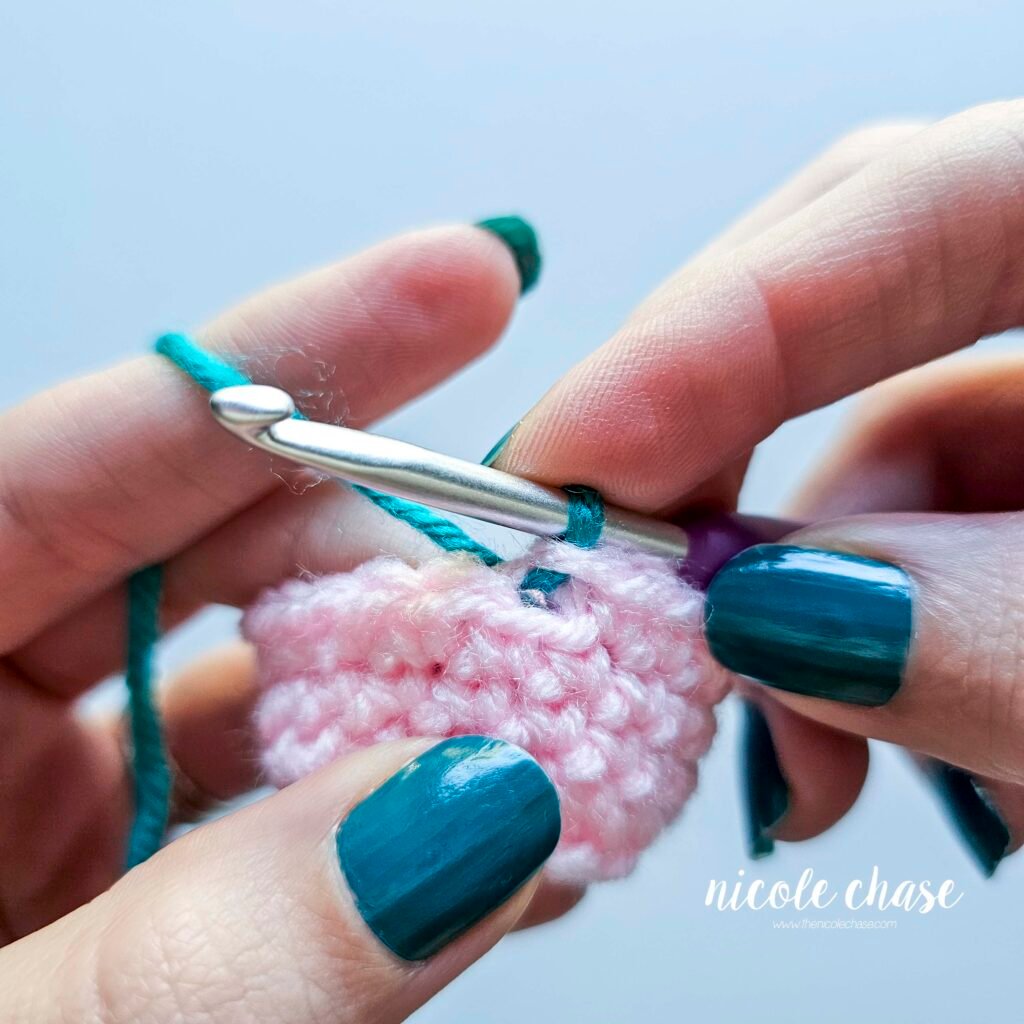
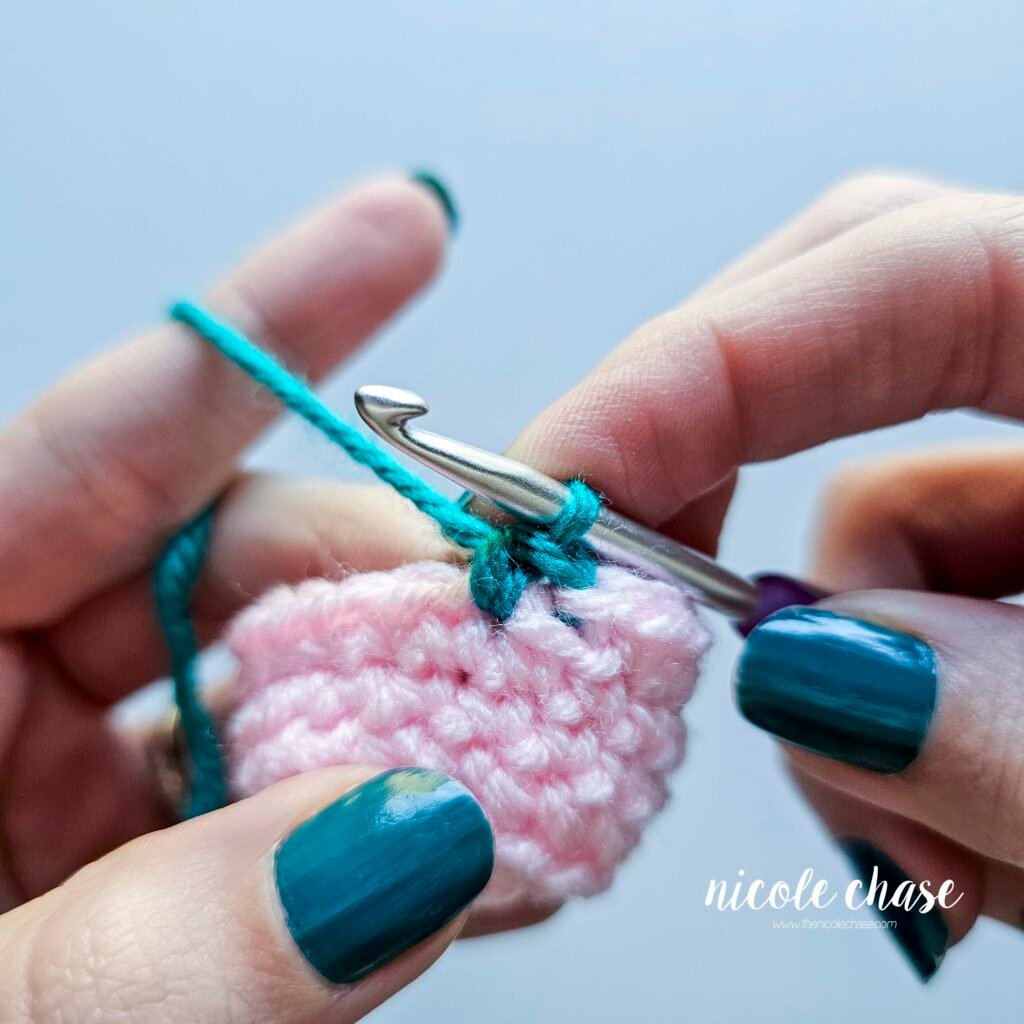
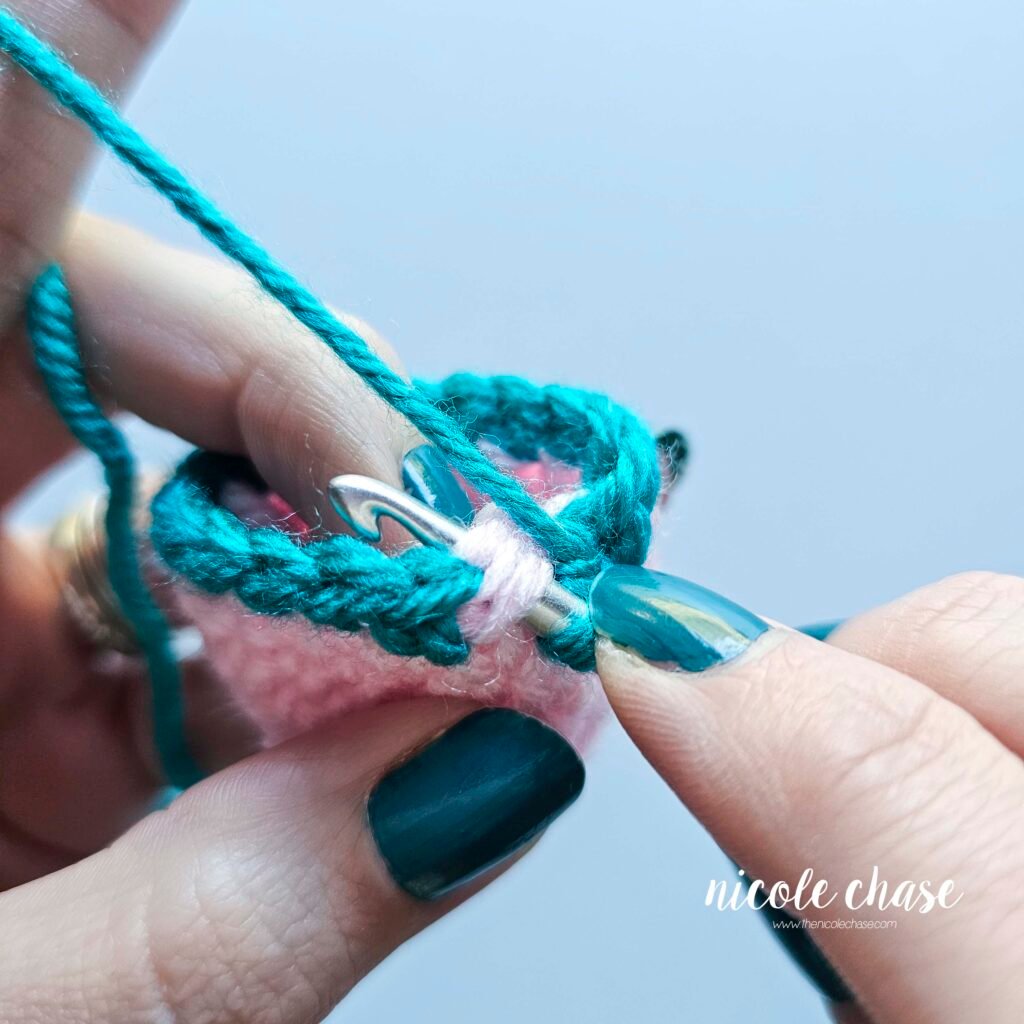
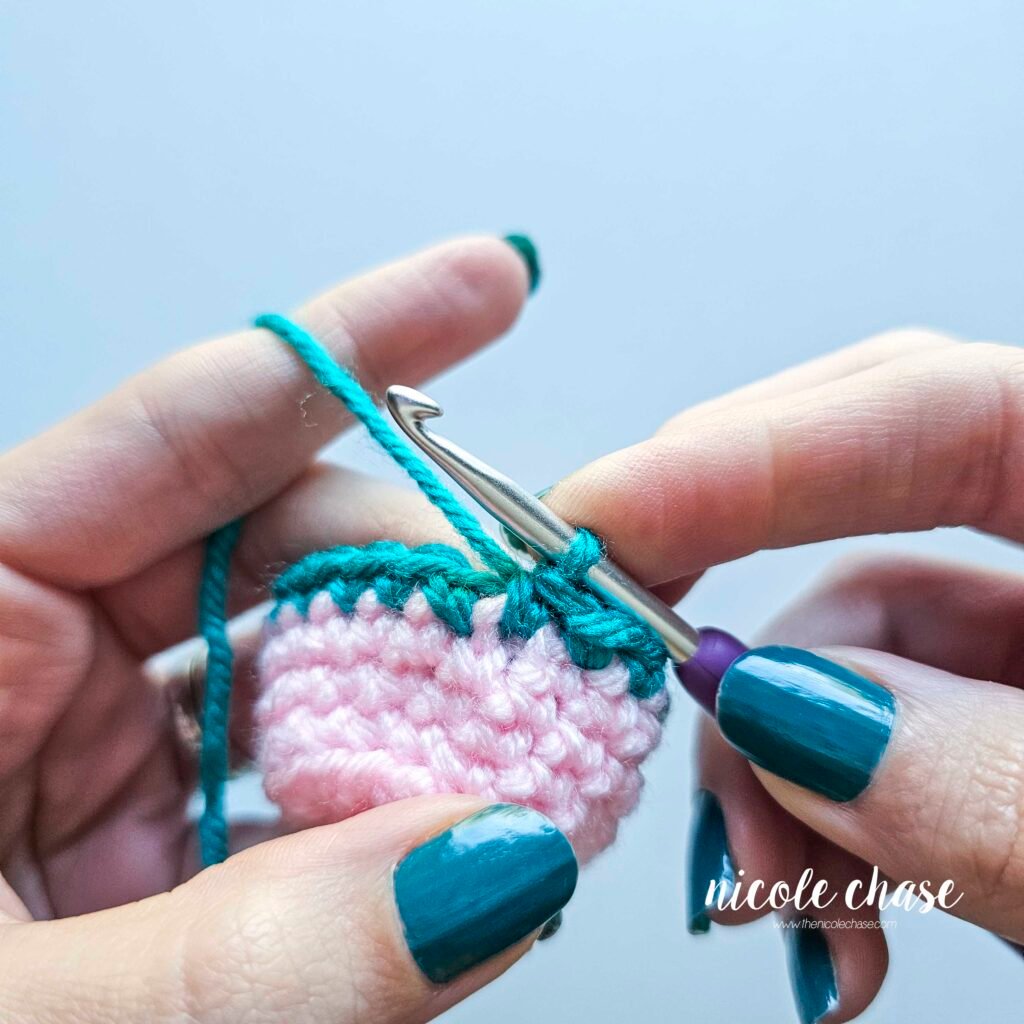
Step 3: Complete the Seamless Transition (Front Loop Finish)
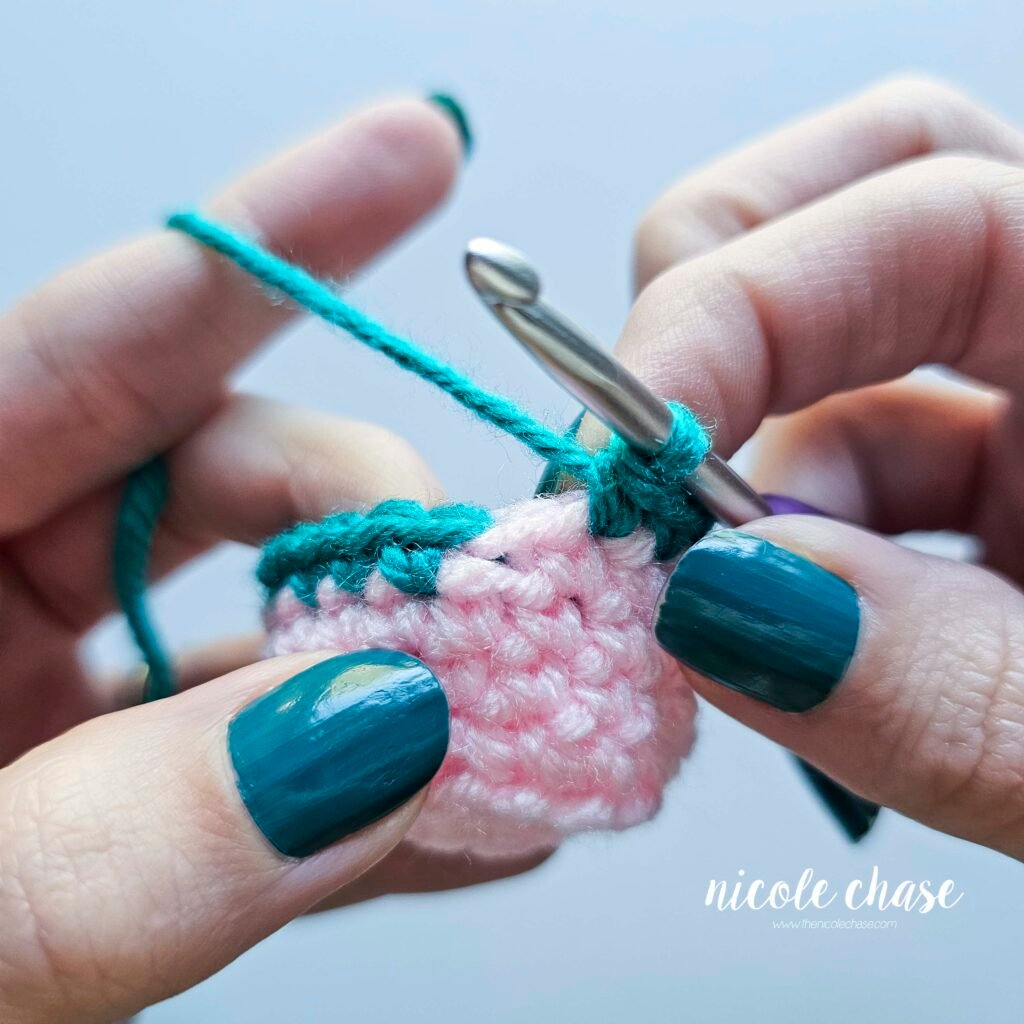
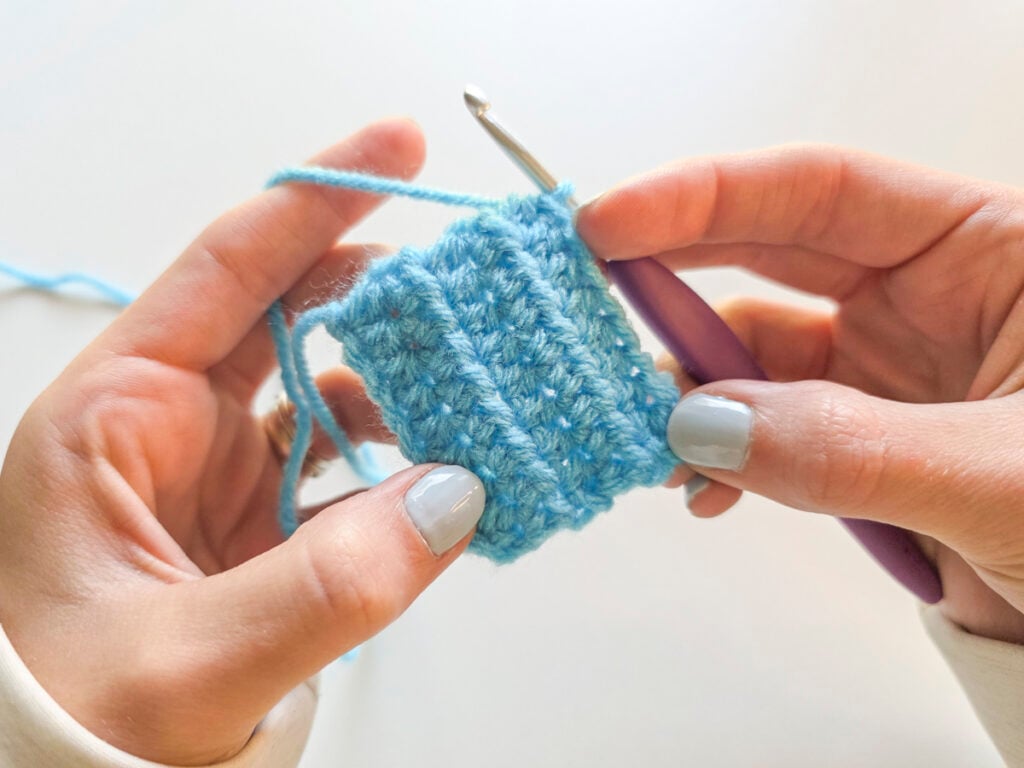
When you crochet back around to your starting point, you’ll reach the exact stitch where you pulled up your new color in the back loop. This is where we lock the transition in!
- Locate the unworked loop: Look at the base of your first color-change stitch. You will see the unworked front loop left over from Step 1, along with the loops from your yarn join.
- Work through all loops: Insert your hook through the unworked front loop and remaining loops left from your color change.
- Complete your single crochet: Work a standard single crochet through all of those loops together.
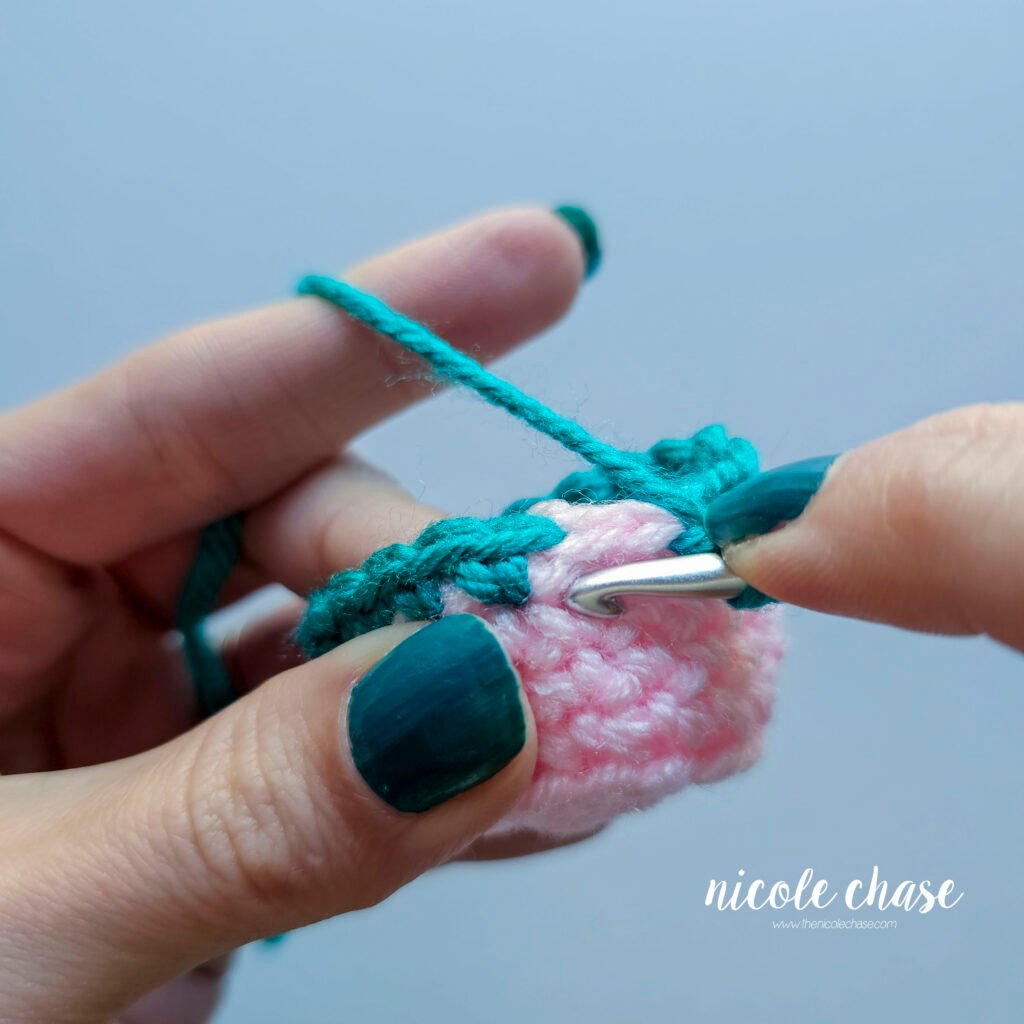
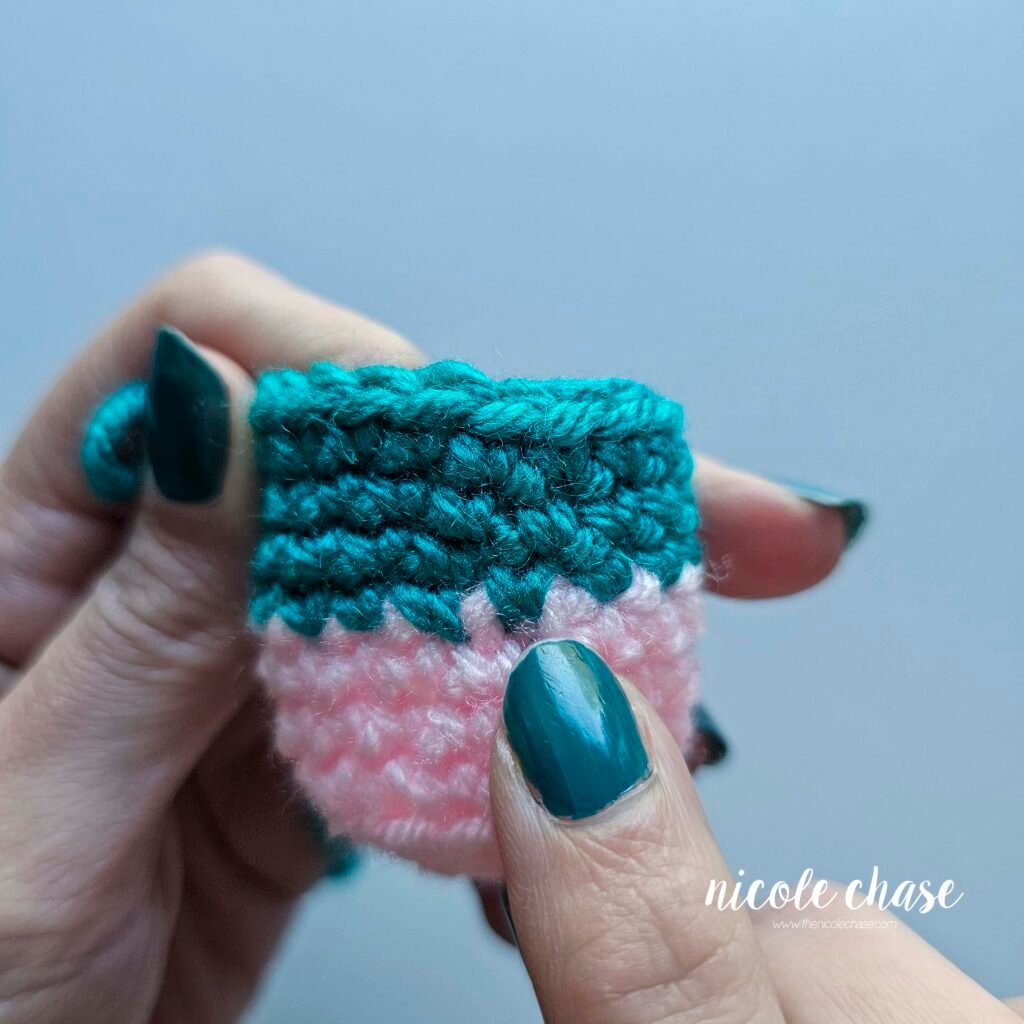
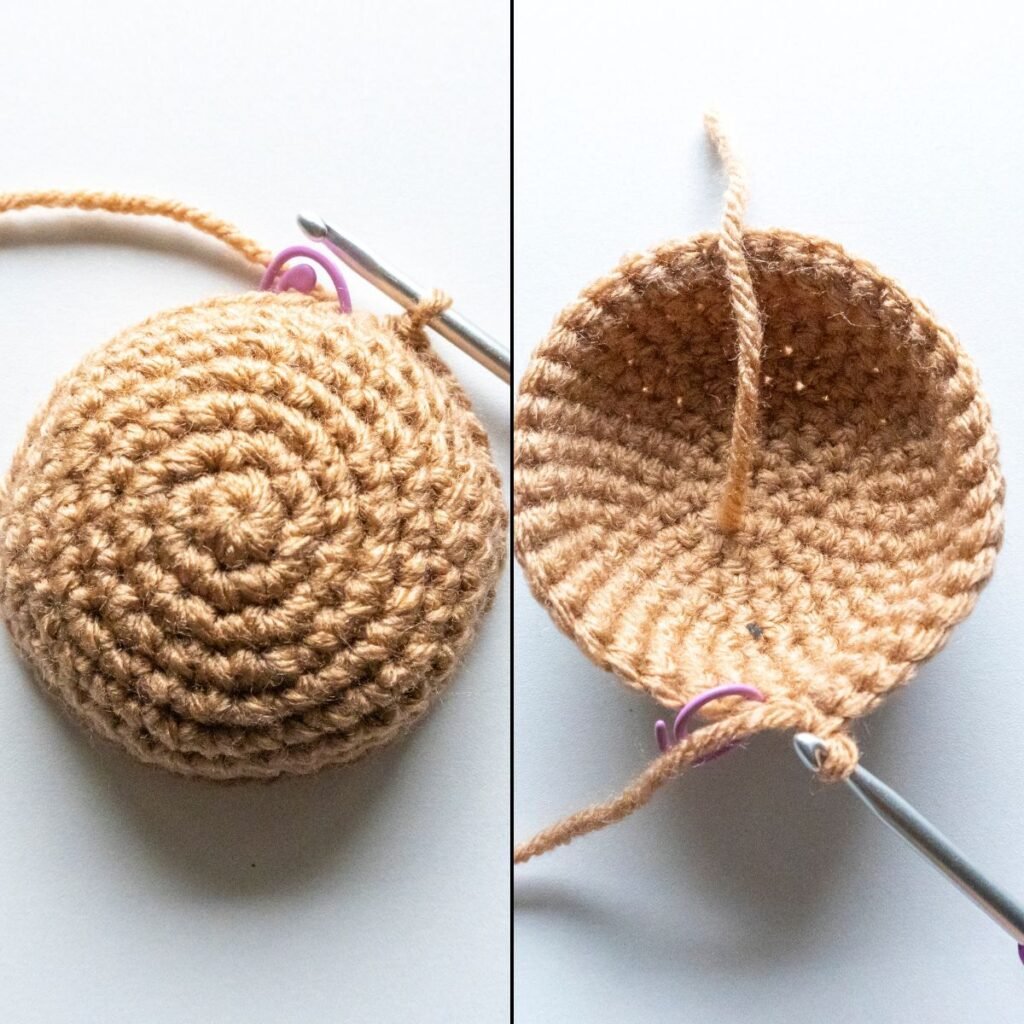
The Result: That’s it! By catching that unworked front loop, you pull the transition flat, eliminating the stair-step job. From here, just continue single crocheting around like normal in your new color.
As you crochet a few more rounds above it, the tension evens out and the transition flattens out even further into a clean, seamless line!
Save this Tutorial for Later!
Don’t lose this essential trick! Pin this invisible crochet color change tutorial to your favorite Pinterest board so you have it handy for your next amigurumi or project worked in the round.
Frequently Asked Questions (FAQ)
Why is my crochet color change still visible?
Don’t forget to work into the correct loop on the final stitch of the transition! Make sure you are going through the front loop that was left unworked, as well as the other loops from the initial color change setup. Additionally, it often takes a few more rounds of the new color for the stitches to settle and stack, naturally hiding any slight imperfect.
Can I use the invisible color change for rows instead of rounds?
Generally, no. The crochet invisible color change technique is specifically designed for continuous rounds (like those used in amigurumi) where you do not join and turn. Its purpose is to eliminate the diagonal jog that naturally occurs when changing colors in a continuous spiral.
Can I use this method for tapestry crochet or multiple color changes in one round?
No, this technique is designed for solid blocks of color where the entire round (and ideally 2+ rounds) is worked in the new color. If you are doing tapestry crochet or fair isle style work with frequent color swaps within a single round, a standard color change works much better.
Does this method shift the start of my round?
Yes, because of how the join and transition loops are worked, this technique slightly shifts the start of your round over by one stitch. For most amigurumi shapes (like bodies, arms, legs, etc), this tiny shift is completely unnoticeable. However, if your pattern features precise shaping (like angles, turns, or intricate facial shaping) keep this 1-stitch shift in mind!
Is this technique good for stripes?
It works best when your stripes are at least 2 or more rounds thick. Because the seamless join requires the start and end of a round to be worked in a specific way, single-round stripes (changing colors every single round) might not look correct.
What is the best way to secure yarn tails after an invisible color change?
Once you have completed the color change, tie a small, secure knot using the old and new color tails right where the color change started. Trim the yarn tails, leaving about a 1-2 inch length. When you are stuffing the amigurumi, ensure that the tails are pushed securely inside.

More Amigurumis Tips & Crochet Tutorials
Now that you’ve mastered the invisible crochet color change, elevate your amigurumi skills with these essential tutorials and free patterns:
- Comprehensive Amigurumi Tips and Tricks: Looking for more ways to polish your plushies? Check out my ultimate guide on amigurumi tips and tricks.
- Fix Amigurumi Head Wobble: If you ever struggle with loose or floppy heads on your plushies, don’t miss these easy steps to reinforce and stabilize your amigurumi neck with my preventing amigurumi head wobble tutorial.
- Free Amigurumi Crochet Patterns: Ready to put your new seamless color change skill to the test? Browse my collection of free amigurumi patterns and practice this invisible color change method.
First published August 2022.
I hope you enjoyed this post! Be sure to leave me a comment below to let me know what you think.
Want to see more from me? Be sure to subscribe to my email newsletter so that you never miss a post!
Follow along with me on Instagram for daily updates and a behind the scenes look at my designs.
I’d love to see what you make with this tutorial! Don’t forget to share your finished work with me: on social media by tagging me @thenicolechase, in your Ravelry projects, or post over in my Facebook group!
Thanks for stopping by! Happy crafting!
Nicole
PATTERN COPYRIGHT © 2026 NICOLE CHASE. ALL RIGHTS RESERVED.
PATTERN MAY NOT BE ALTERED, COPIED, REDISTRIBUTED OR SOLD AS YOUR OWN PATTERN.
YOU MAY SELL THE FINISHED PRODUCT ON A SMALL SCALE. PATTERN/DESIGN CREDIT GIVEN TO WWW.THENICOLECHASE.COM IS APPRECIATED. PERMISSION TO SELL DOES NOT INCLUDE MASS PRODUCTION. LARGE SCALE PRODUCTION IS PROHIBITED.
PHOTOGRAPHY COPYRIGHT © 2026 NICOLE CHASE. ALL RIGHTS RESERVED.
PHOTOS MAY NOT BE ALTERED, COPIED, REDISTRIBUTED OR SOLD AS YOUR OWN.
This post may contain affiliate links. If you make a purchase through links on our site, we may earn a commission.
This is a game changer! Thank you!
I’m so glad to hear that!
Do I start the new color by going through that back loop in the last stitch of the round I’m working on or the first stitch of the new round? I am not sure how to work it into my stitch count and I don’t want to mess up my stitch count.
Hello! You can do it whichever way you prefer. I generally do it in the first st of the new round. I recommend using this for projects that don’t have any one-sided shaping or multiple color changes, because it will shift the stitch count with each color change.