Gilbert the Ghost – Free Crochet Pattern
This post may contain affiliate links. If you make a purchase through links on our site, we may earn a commission.
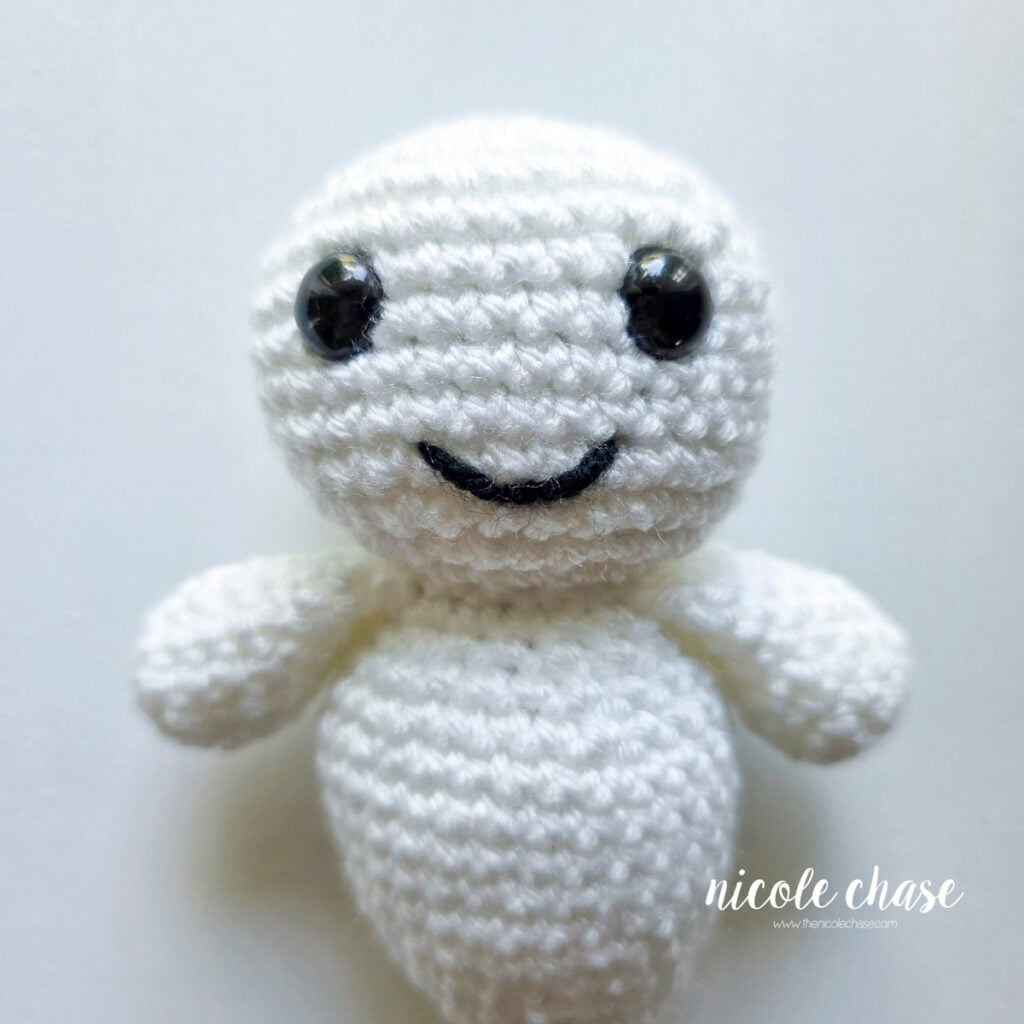
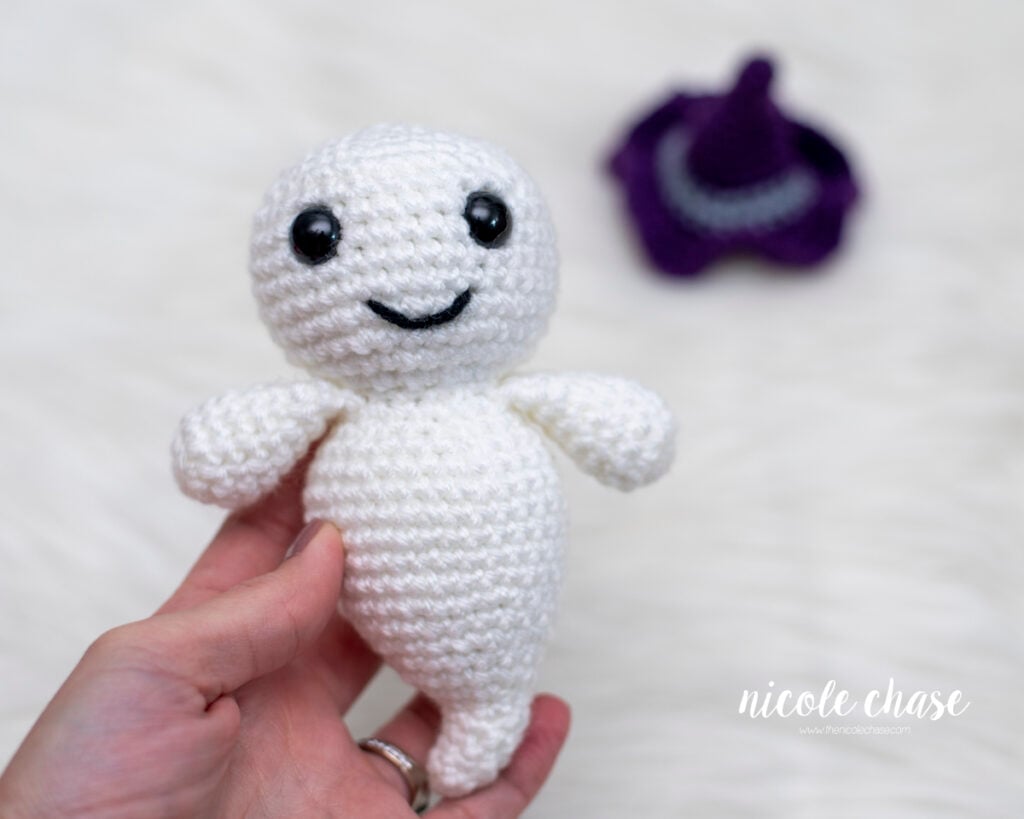
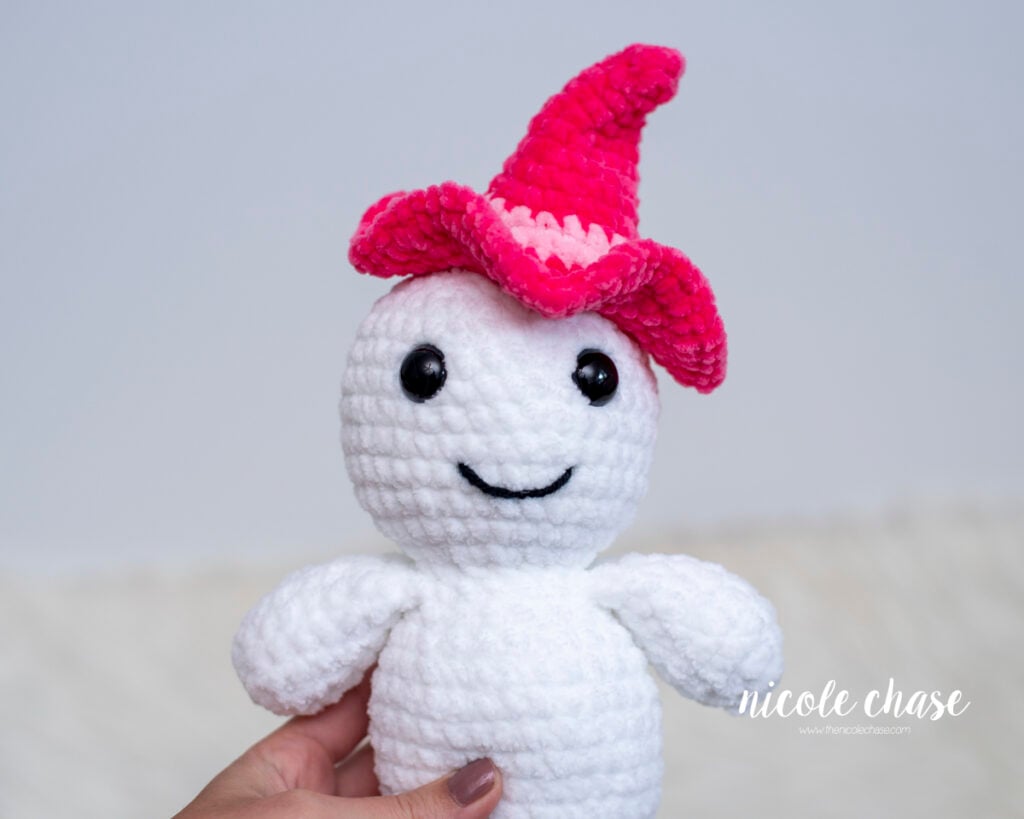
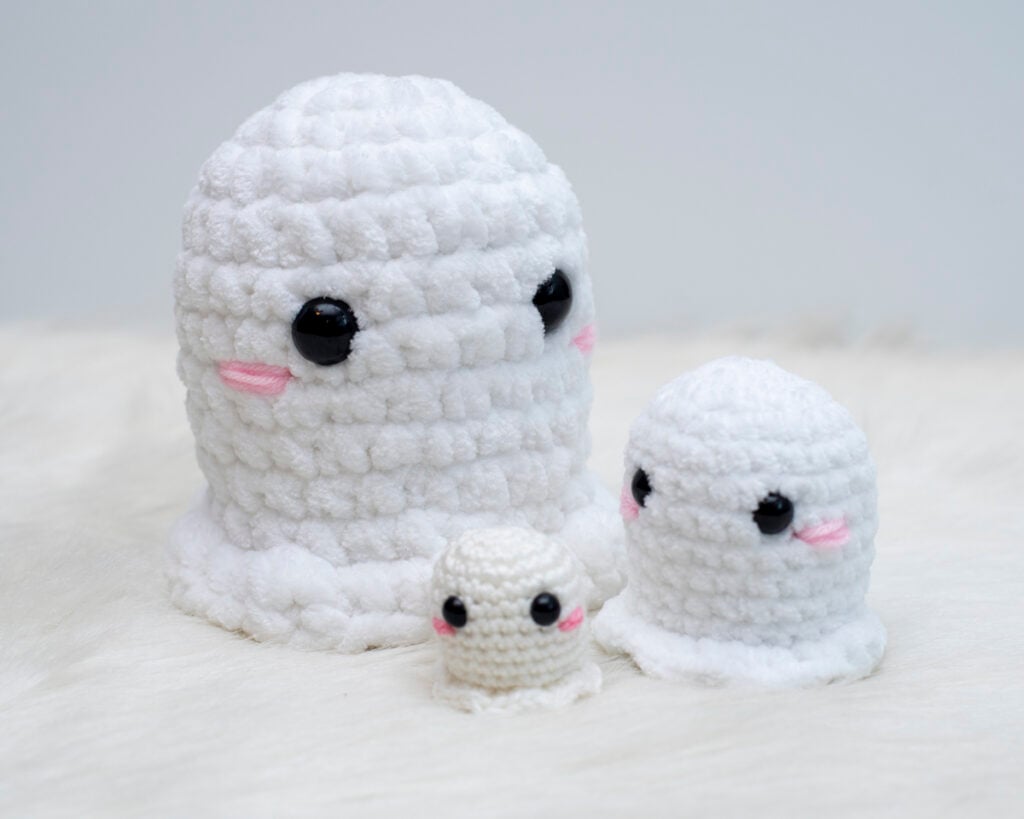
Meet Gilbert the Ghost! This free ghost crochet pattern is a fast, seamless amigurumi project that is worked in one piece from bottom to top (with the only sewing required being for attaching the witch hat, if desired). I’ve included details to make Gilbert in both plush chenille yarn and classic worsted weight yarn, making him ideal for quick Halloween market prep or spooky seasonal decor. Grab your hook, and let’s get started.
At a Glance: Gilbert the Ghost Crochet Pattern
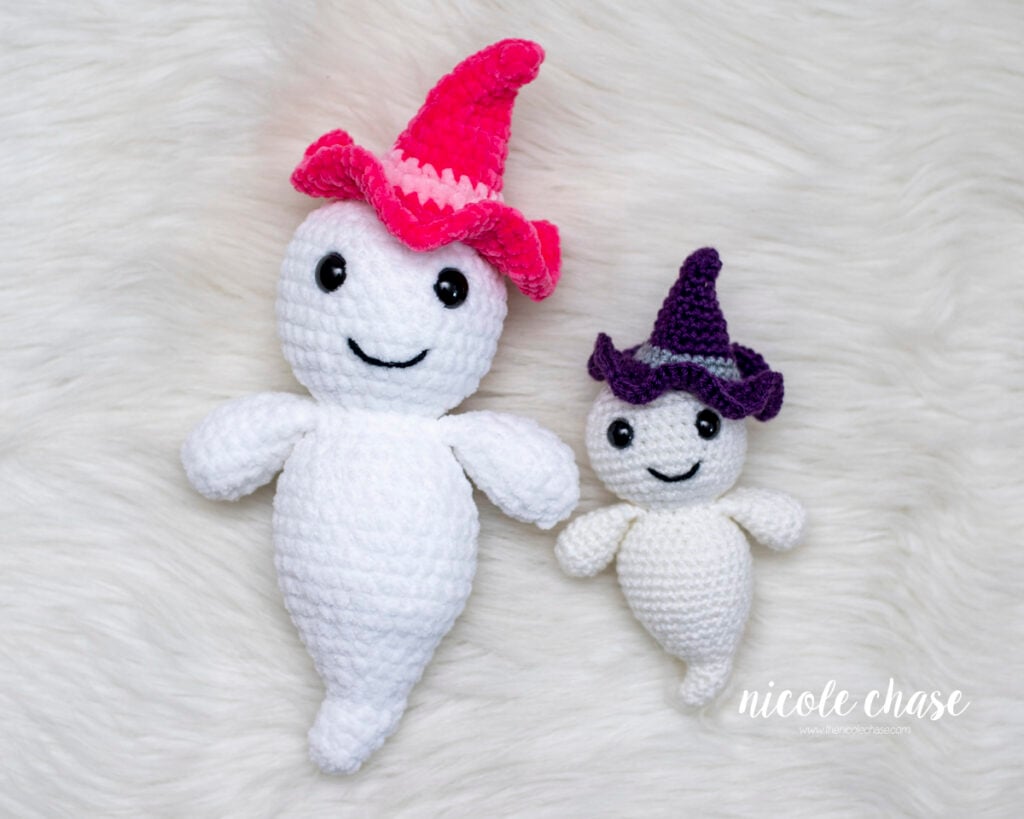
An adorable, quick-make amigurumi ghost featuring no-sew amigurumi construction, a sweet curled ghost tail, and a cute witch hat accessory. Designed for crafters looking for a quick and versatile pattern, this free crochet ghost pattern is perfect for spooky decor, quick craft fair prep, and stash-busting.
- Required Skills: Magic ring, single crochet (SC), increasing, and decreasing (SC2tog) with the invisible decrease method.
- Yarn: Any yarn that you choose in white for the ghost, and 2 contrasting colors for the hat.
- Hook Size: 4.0mm (G) crochet hook (worsted weight) or 5.0mm (H) crochet hook (plush chenille), or whatever hook size suits your chosen yarn.
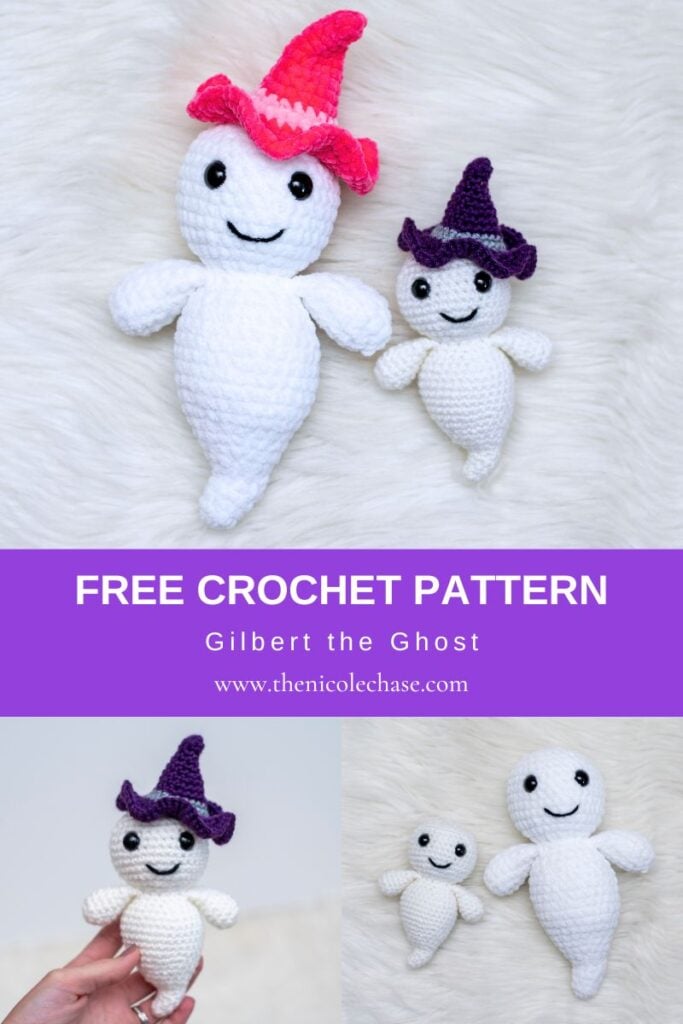
- Finished Size: Worsted weight version is approximately 5.5″ tall (without hat), and the plush version is approximately 9.5″ tall (without hat).
- Format & Resources: Free written pattern with step-by-step photos and helpful amigurumi tips.
Table of Contents
I would classify this free ghost crochet pattern as “advanced beginner”. It would be helpful to have had some experience with amigurumi before creating this project.
I hope you enjoy this free crochet pattern available here on my blog! An ad-free, formatted PDF version of this crochet pattern is also available for purchase here:
Save this pattern for later!
Don’t have time to stitch right now? Pin this project to your favorite crochet board on Pinterest, or add Gilbert the Ghost to your Ravelry queue so you can easily find it when you’re ready to start!
Free Crochet Pattern for Gilbert the Ghost
Pattern Specifics
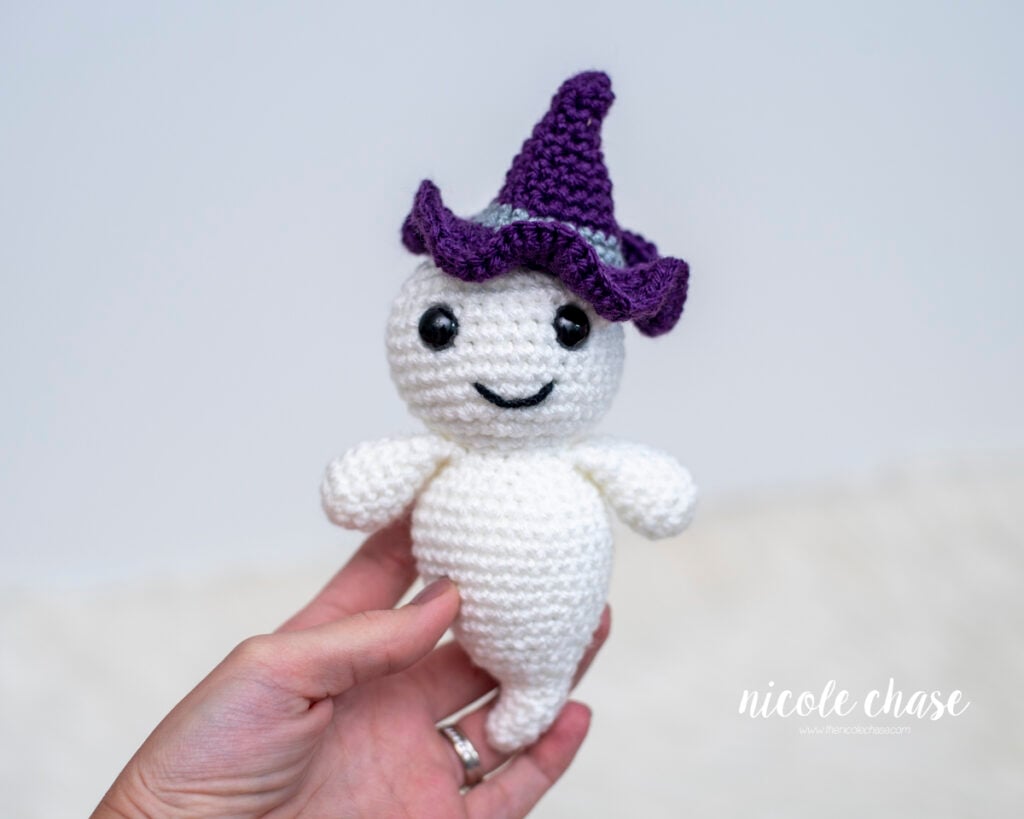
Measurements: Approximately 5.5” tall (without hat) or 7.5” tall (with hat)
Gauge: Not necessary for this pattern; see notes
Hook Size: 4.0mm (G) crochet hook
Other Tools: tapestry needle, stitch markers, scissors
Yarn Weight: Medium (4) Worsted Weight
Yarn Used: WeCrochet/Knit Picks Brava Worsted
Yardage: color A (white): 44 yds, color B (purple): 16 yds, color C (gray): 3 yds, color D (black): 1 yd
Other Materials: poly-fil stuffing, 12mm safety eyes
Measurements: Approximately 9.5” tall (without hat) or 11.5” tall (with hat)
Gauge: Not necessary for this pattern; see notes
Hook Size: 5.0mm (H) crochet hook
Other Tools: tapestry needle, stitch markers, scissors
Yarn Weight: Super Bulky (6)
Yarn Used: Premier Yarns Parfait Chunky
Yardage: color A (white): 68 yds, color B (pink): 18 yds, color C (light pink): 4 yds, color D (black): 1 yd
Other Materials: poly-fil stuffing, 16mm safety eyes
Abbreviations
st = stitch
sl st = slip stitch
ch = chain
SC = single crochet
SC2tog = single crochet 2 stitches together (invisible decrease is recommended)
Special Stitches
SC2tog (using invisible decrease method): Insert hook into front loop of the first stitch. Insert hook into front loop of second stitch. Yarn over. Draw through the first two loops on hook. Yarn over. Draw through both loops on hook.
Notes
- Checking your gauge is not required for this pattern. Use a hook that is smaller than the size recommended for your yarn weight. This will ensure that your stuffing will not show through the stitches.
- This pattern requires minimal sewing. The body and head are worked as one piece, and the arms are worked directly into the body as you work, rather than sewing later. The only sewing required is for attaching the hat, if desired.
- All pieces are worked in the round. Use a stitch marker to indicate the beginning of each round.
- Invisible decreases are recommended. Please see “Special Stitches”.
- Safety eyes and noses pose a choking risk for babies; therefore, if making this toy for a baby, I recommend using yarn, felt, or embroidered details.
- Arms, body, and head require stuffing. Stuff each piece as you work to ensure the piece is completely filled.
- See tutorial photos.
Pattern
Using the hook size indicated in Pattern Specifics above:
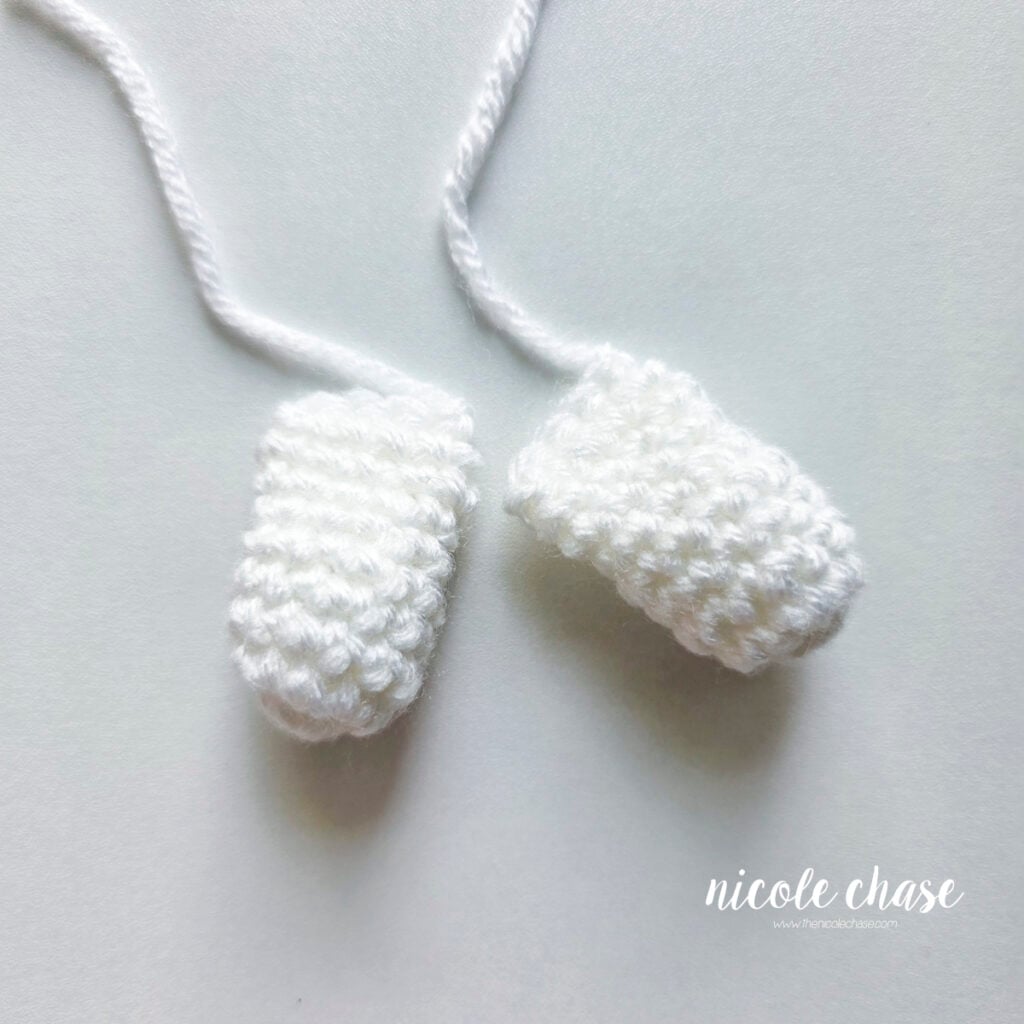
Arms (make 2)
Using color A (shown as white):
R1: Begin with 6 SC in a magic ring. (6 sts)
R2: *2 SC in each st around. (12 sts)
R3-5: 1 SC in each st around. (12 sts)
R6: *SC2tog, 1 SC in each of the next 4 sts. Repeat from * around. (10 sts)
R7-8: 1 SC in each st around. (10 sts)
Fill with stuffing.
R9: Fold the arm closed. Working through both sides, 1 SC in each st across, leaving 1 unworked st on each side. See tutorial photos. (4 sts)
Cut yarn and fasten off.
Body
Using color A (shown as white):
R1: Begin with 6 SC in a magic ring. (6 sts)
R2: 1 SC in each st around. (6 sts)
R3: *2 SC in next st, 1 SC in next st. Repeat from * around. (9 sts)
R4: 1 SC in each st around. (9 sts)
R5: *2 SC in next st, 1 SC in each of the next 2 sts. Repeat from * around. (12 sts)
R6: SC2tog, SC2tog, SC2tog, *2 SC in next st, 1 SC in next st. Repeat from * to beginning. (12 sts)
R7: 1 SC in each of the next 3 sts, *2 SC in next st, 1 SC in each of the next 2 sts. Repeat from * to beginning. (15 sts)
R8: 1 SC in each of the next 3 sts, *2 SC in next st, 1 SC in each of the next 3 sts. Repeat from * to beginning. (18 sts)
R9: 1 SC in each st around. (18 sts)
R10: *2 SC in next st, 1 SC in each of the next 2 sts. Repeat from * around. (24 sts)
R11: 1 SC in each st around. (24 sts)
R12: 1 SC in each of the next 8 sts, 2 SC in next st, *1 SC in each of the next 2 sts, 2 SC in next st. Repeat from * to beginning. (30 sts)
R13-17: 1 SC in each st around. (30 sts)
R18: *SC2tog, 1 SC in each of the next 8 sts. Repeat from * around. (27 sts)
R19: *SC2tog, 1 SC in each of the next 7 sts. Repeat from * around. (24 sts)
R20: *SC2tog, 1 SC in each of the next 2 sts. Repeat from * around. (18 sts)
In the next round you will place the arms. To attach, you will work through both the sts of the piece you are placing and the sts of the body. See tutorial photos.
R21: 1 SC in next st. place the first arm, and working through both the sts of the arm and the sts of the body, 1 SC in the next 4 sts. 1 SC in each of the next 5 sts. Place the second arm, and working through both the sts of the arm and the sts of the body, 1 SC in the next 4 sts. 1 SC in each of the next 4 sts. (18 sts)
***Note that the arms should be evenly placed on each side of the body, with the tail curve of the bottom of the body facing to one side (not front or back). Due to individual tension and yarn choice, you may need to adjust the number of sts before placing the first arm and after placing the second arm. For example, you may need to crochet 3 SC, 4 SC for arm, 5 SC, 4 SC for arm, 2 SC in order for the arms to be even on each side of the body.
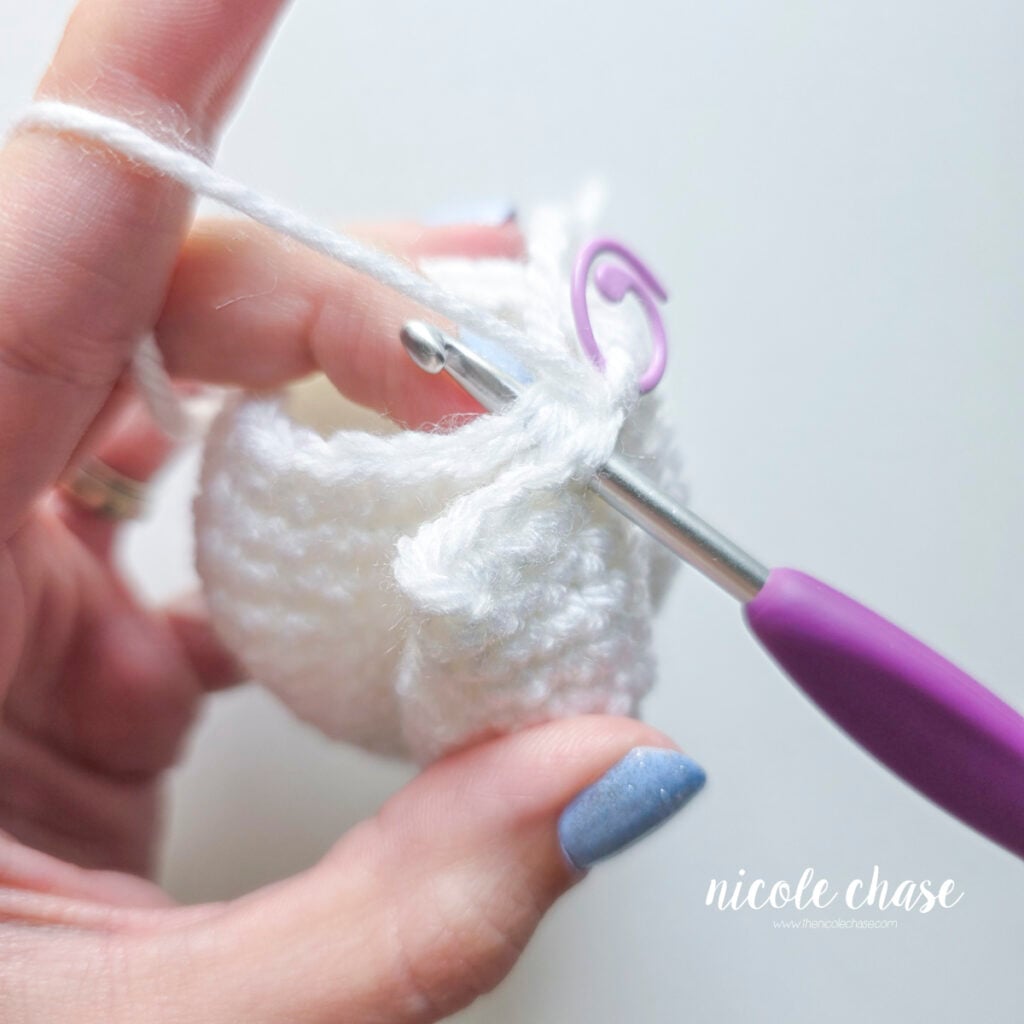
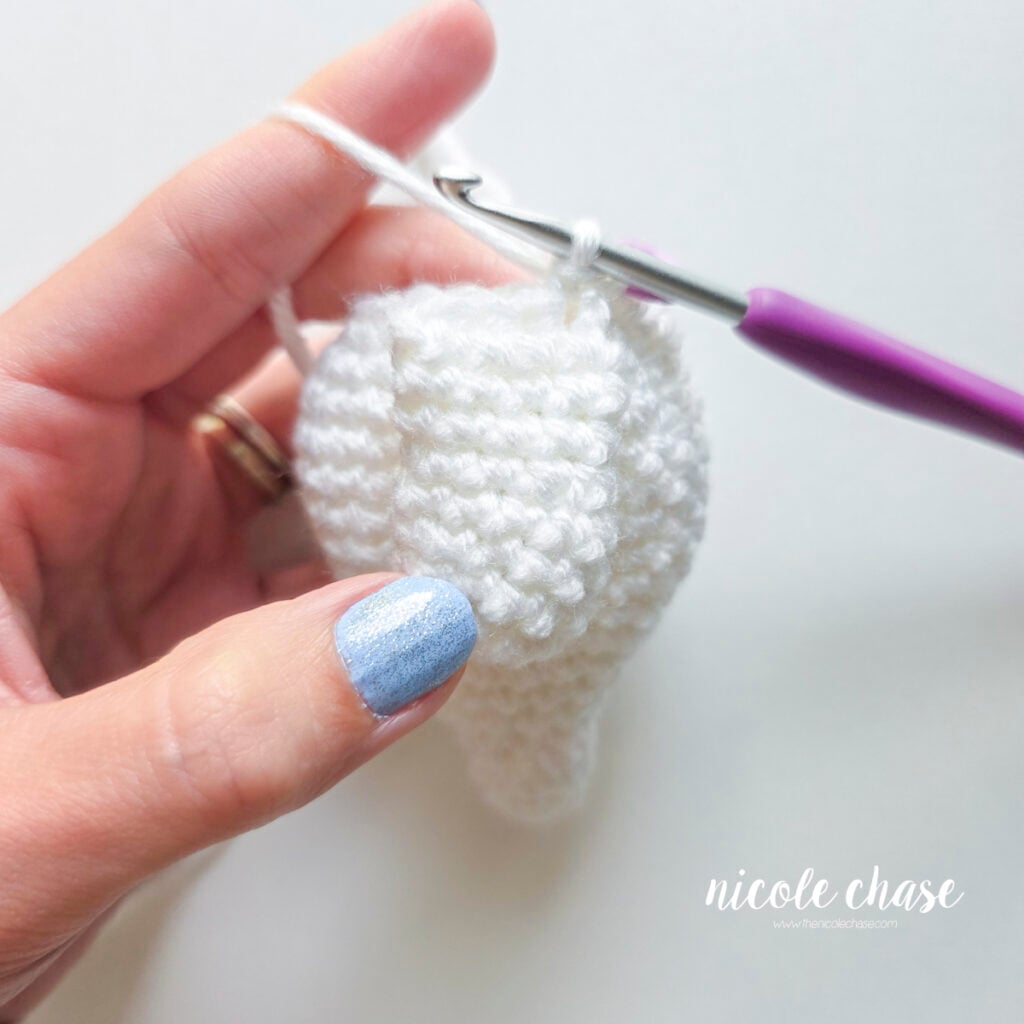
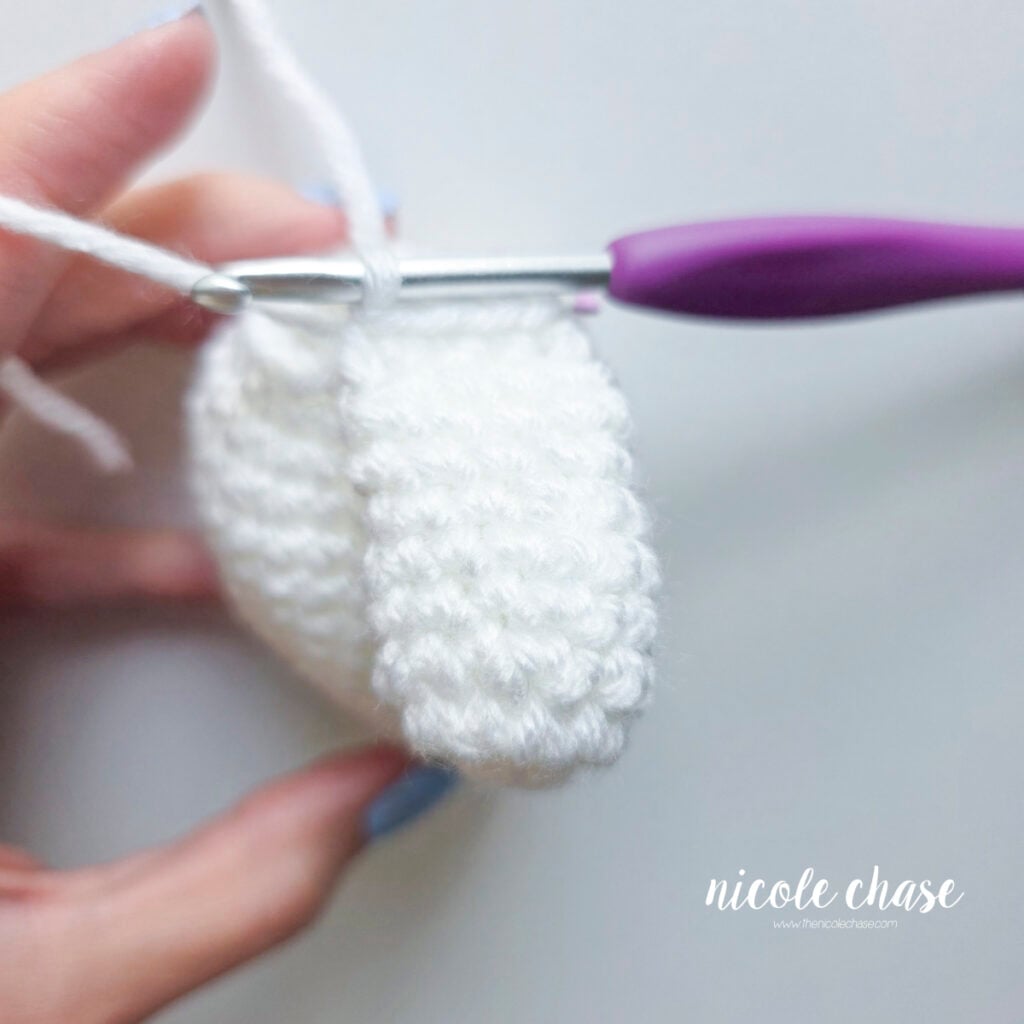
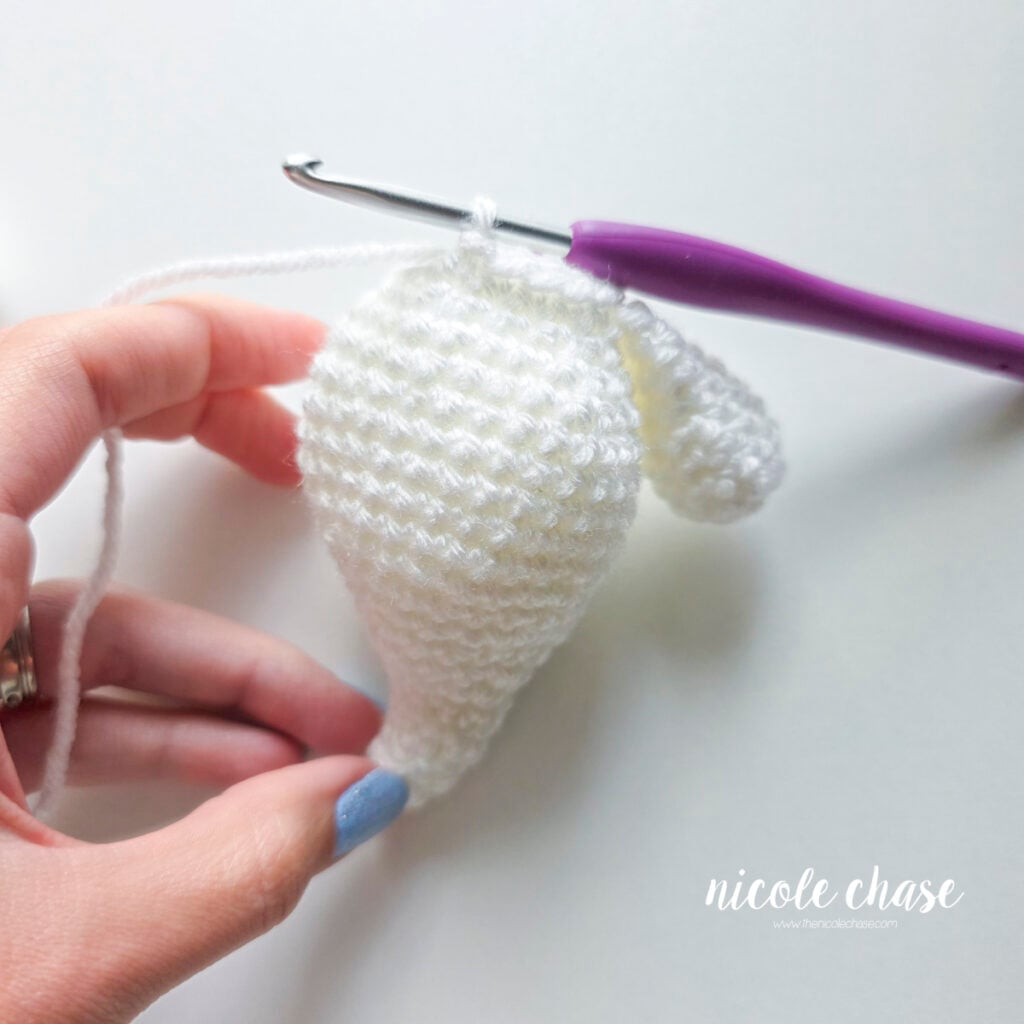
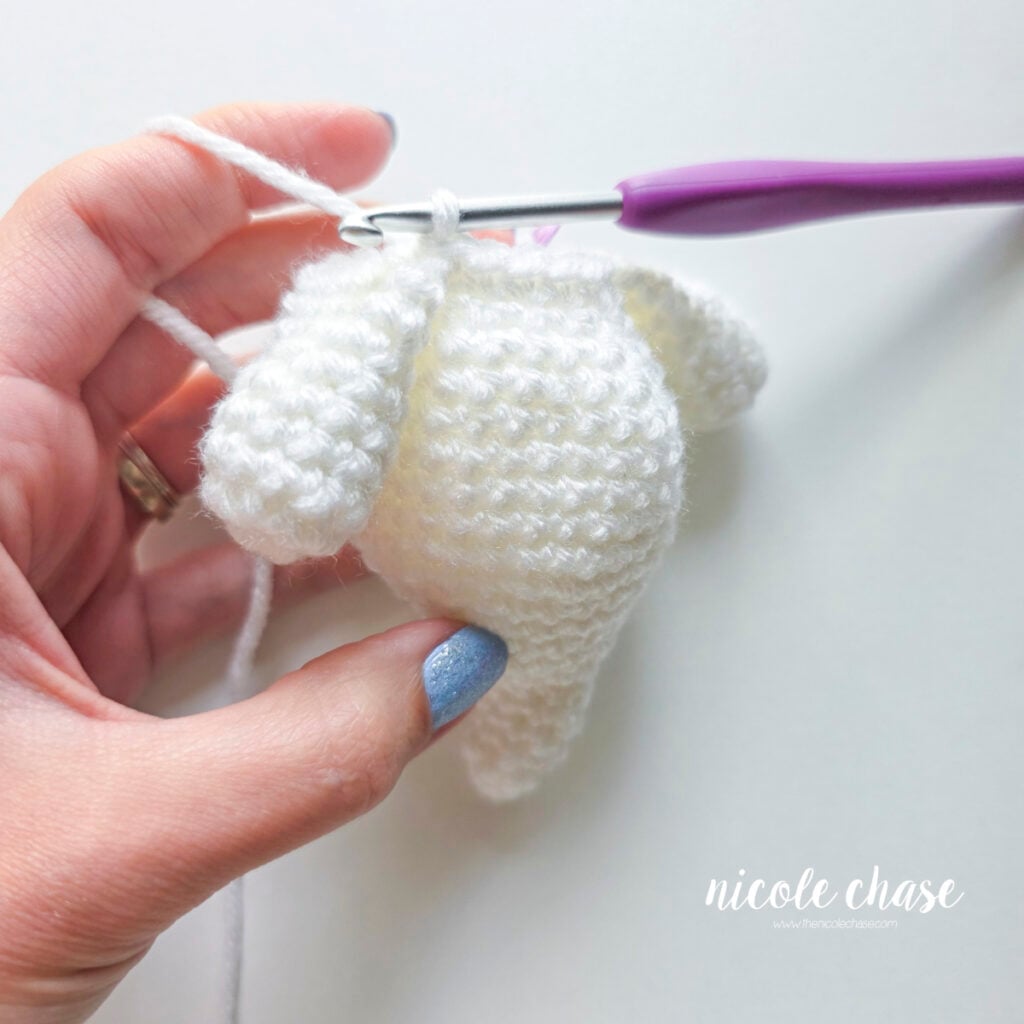
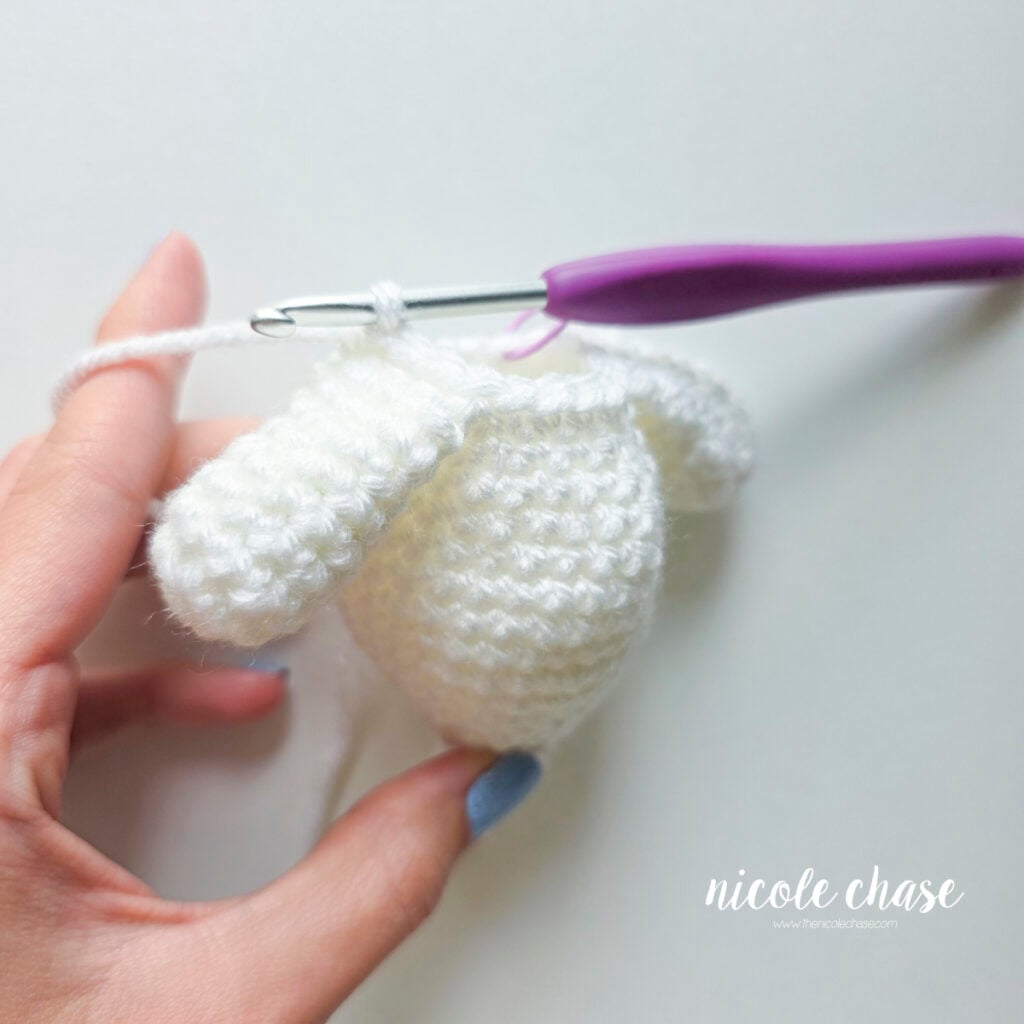
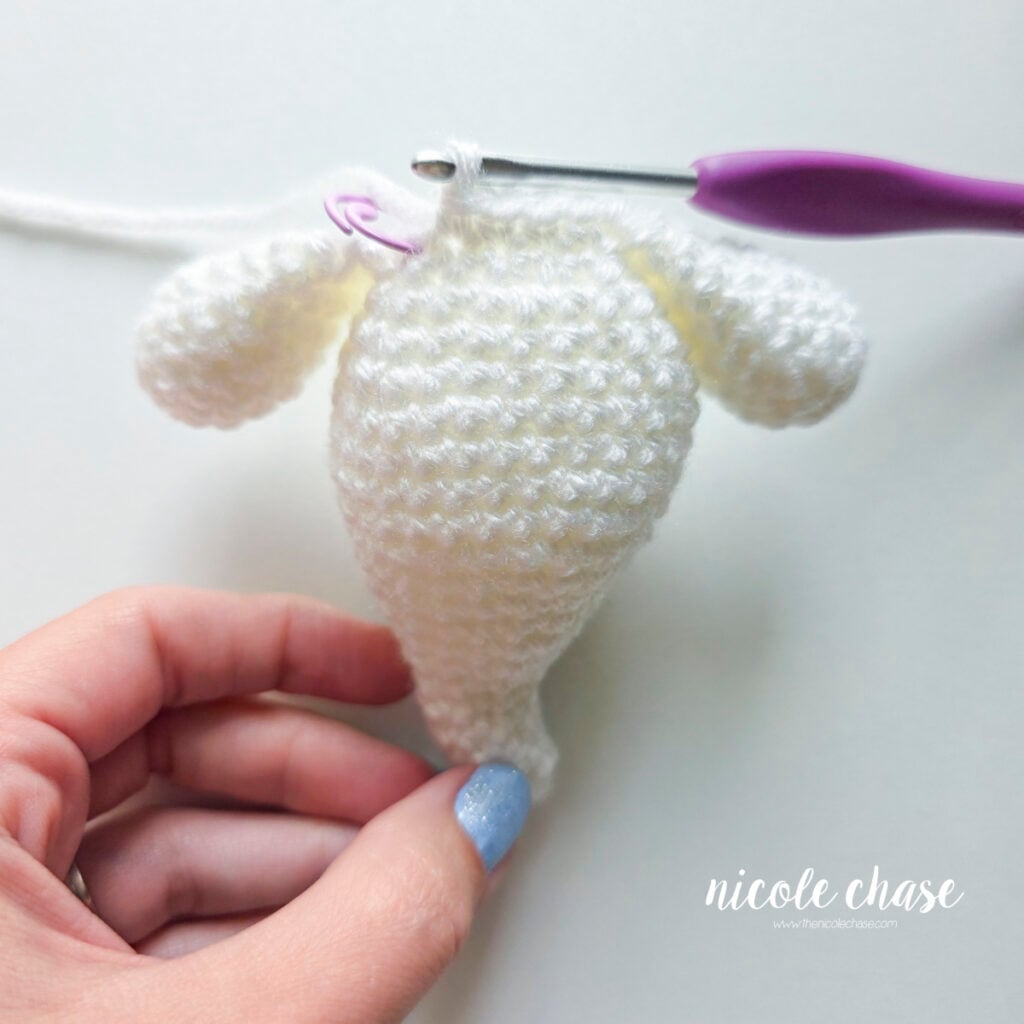
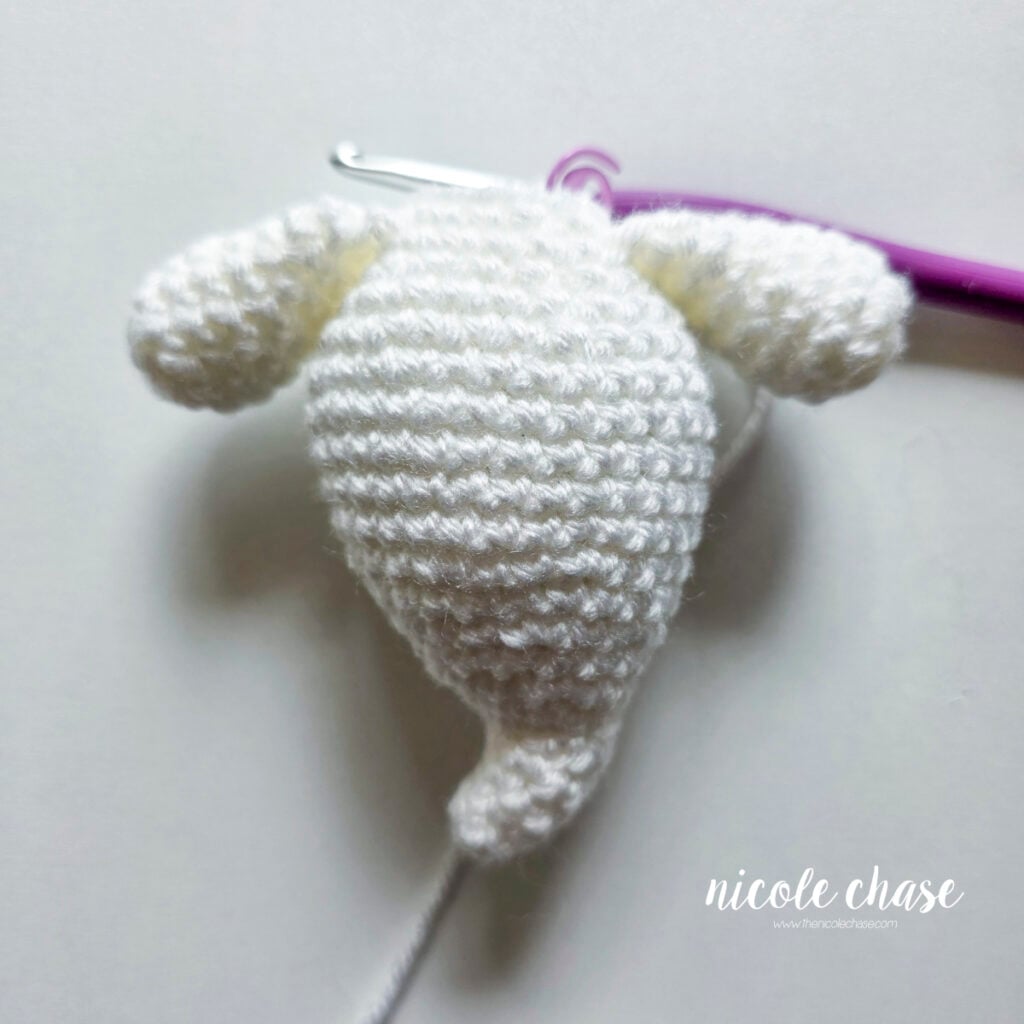
R22: *SC2tog, 1 SC in each of the next 4 sts. Repeat from * around. (15 sts)
Fill the body with stuffing.
Do not fasten off. Move on to Head.
Head
R23: 2 SC in each st around. (30 sts)
R24: 1 SC in each st around. (30 sts)
R25: *2 SC in next st, 1 SC in each of the next 4 sts. Repeat from * around. (36 sts)
R26-30: 1 SC in each st around. (36 sts)
R31: *SC2tog, 1 SC in each of the next 10 sts. Repeat from * around. (33 sts)
R32: *SC2tog, 1 SC in each of the next 9 sts. Repeat from * around. (30 sts)
R33: *SC2tog, 1 SC in each of the next 3 sts. Repeat from * around. (24 sts)
If using safety eyes, insert eyes between R29-30, with about 4-5 sts showing between them.
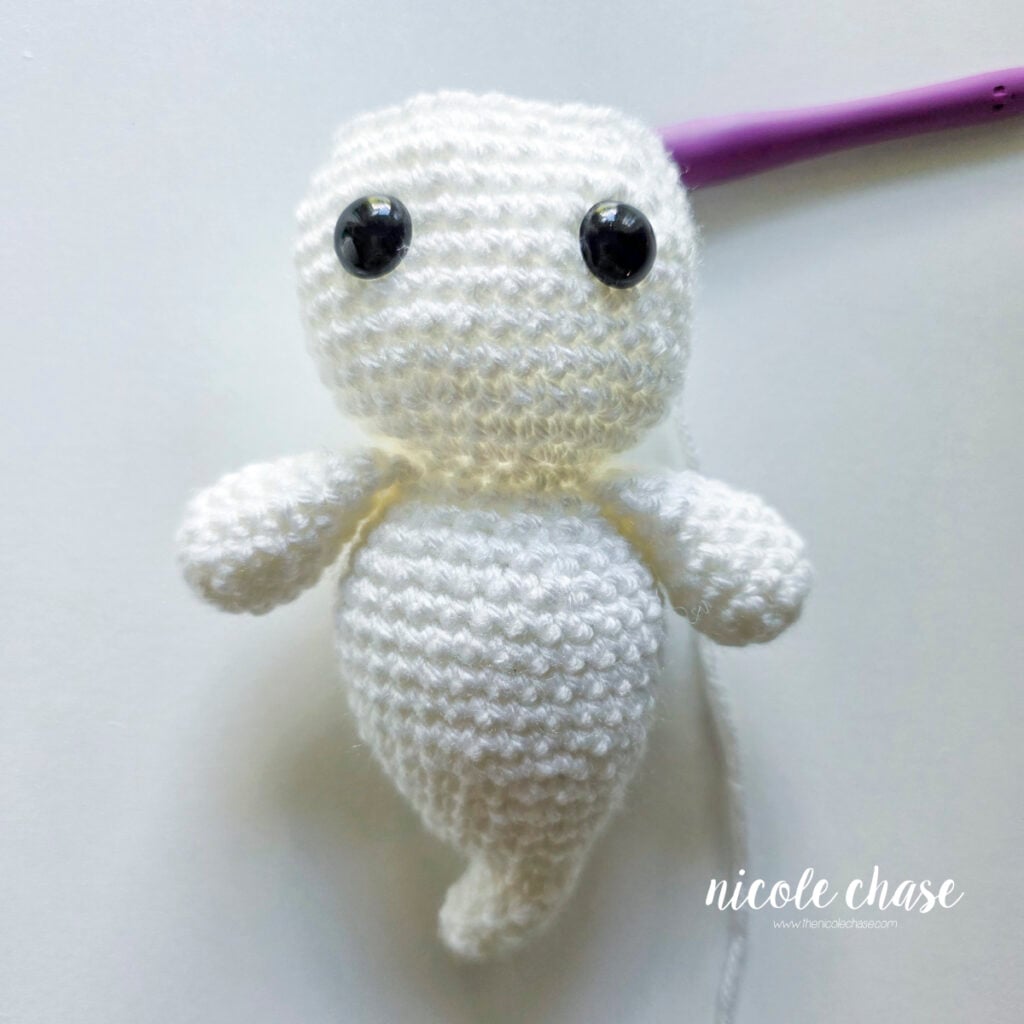
R34: *SC2tog, 1 SC in each of the next 2 sts. Repeat from * around. (18 sts)
Fill the head with stuffing.
R35: *SC2tog, 1 SC in the next st. Repeat from * around. (12 sts)
R36: *SC2tog. Repeat from * around. (6 sts)
Cut yarn, weave yarn in and out of remaining sts. Pull tight to close. Tie off and weave in ends.
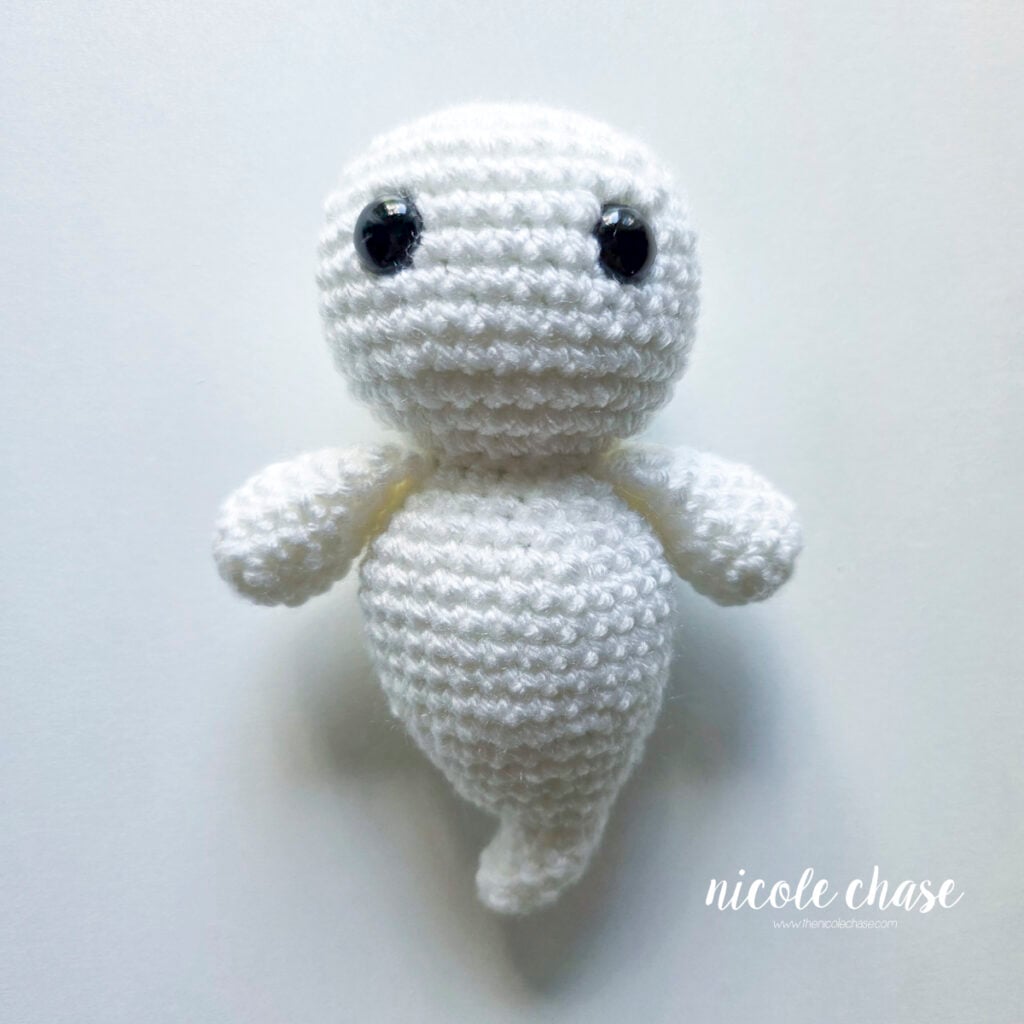
Hat
Using color B (shown as purple):
R1: Begin with 6 SC in a magic ring. (6 sts)
R2-3: 1 SC in each st around. (6 sts)
R4: *2 SC in next st, 1 SC in next st. Repeat from * around. (9 sts)
R5: 1 SC in each st around. (9 sts)
R6: *2 SC in next st, 1 SC in each of the next 2 sts. Repeat from * around. (12 sts)
R7: 1 SC in each st around. (12 sts)
R8: *2 SC in next st, 1 SC in each of the next 3 sts. Repeat from * around. (15 sts)
R9: 1 SC in each st around. (15 sts)
R10: *2 SC in next st, 1 SC in each of the next 4 sts. Repeat from * around. (18 sts)
Using color C (shown as gray):
R11: *2 SC in next st, 1 SC in each of the next 5 sts. Repeat from * around. (21 sts)
R12: *2 SC in next st, 1 SC in each of the next 6 sts. Repeat from * around. (24 sts)
Using color B (shown as purple):
R13: 1 SC in each st around. (24 sts)
R14: Working in the front loops only, *2 SC in next st, 1 SC in next st. Repeat from * around. (36 sts)
R15: *2 SC in next st, 1 SC in next st. Repeat from * around. (54 sts)
R16: *2 SC in next st, 1 SC in each of the next 2 sts. Repeat from * around. (72 sts)
Join with a slip stitch to beginning.
Cut yarn and fasten off. Weave in ends.
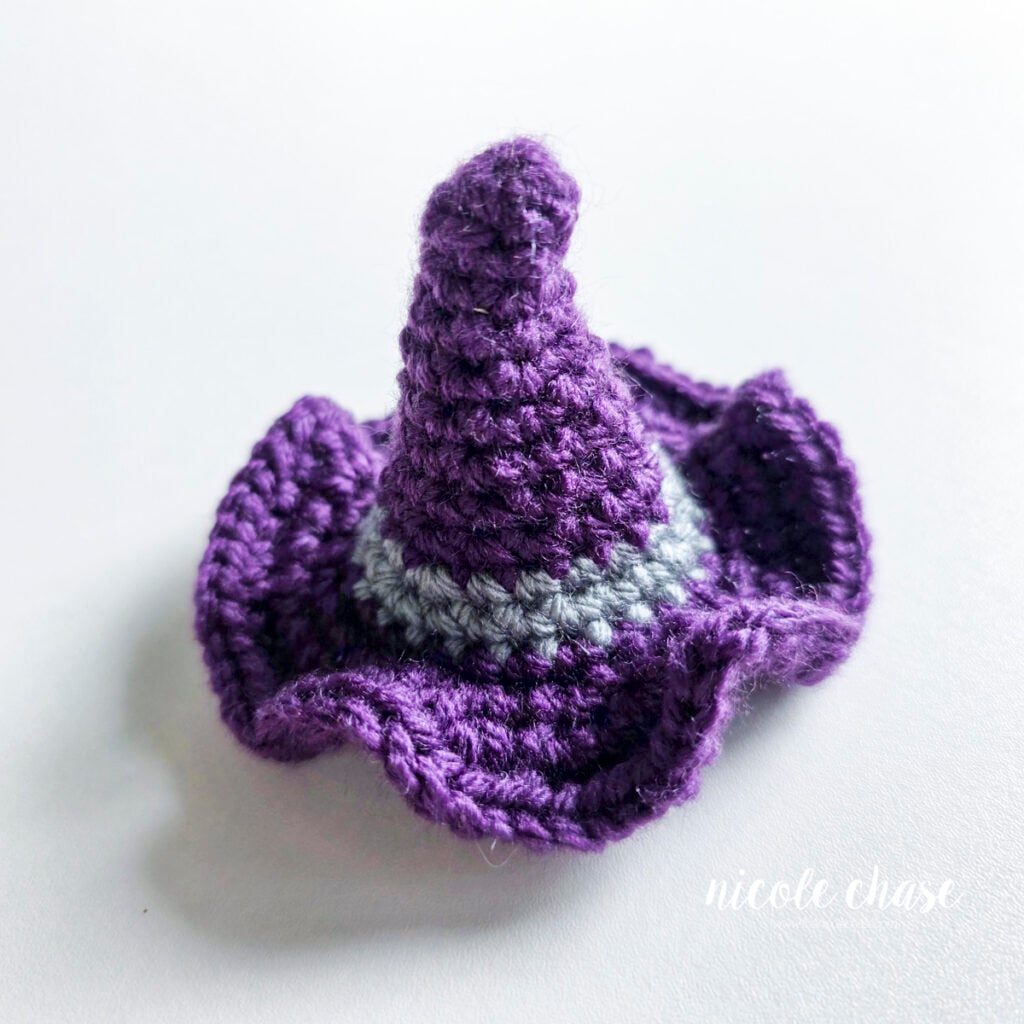
Assembly & Finishing
See tutorial photos.
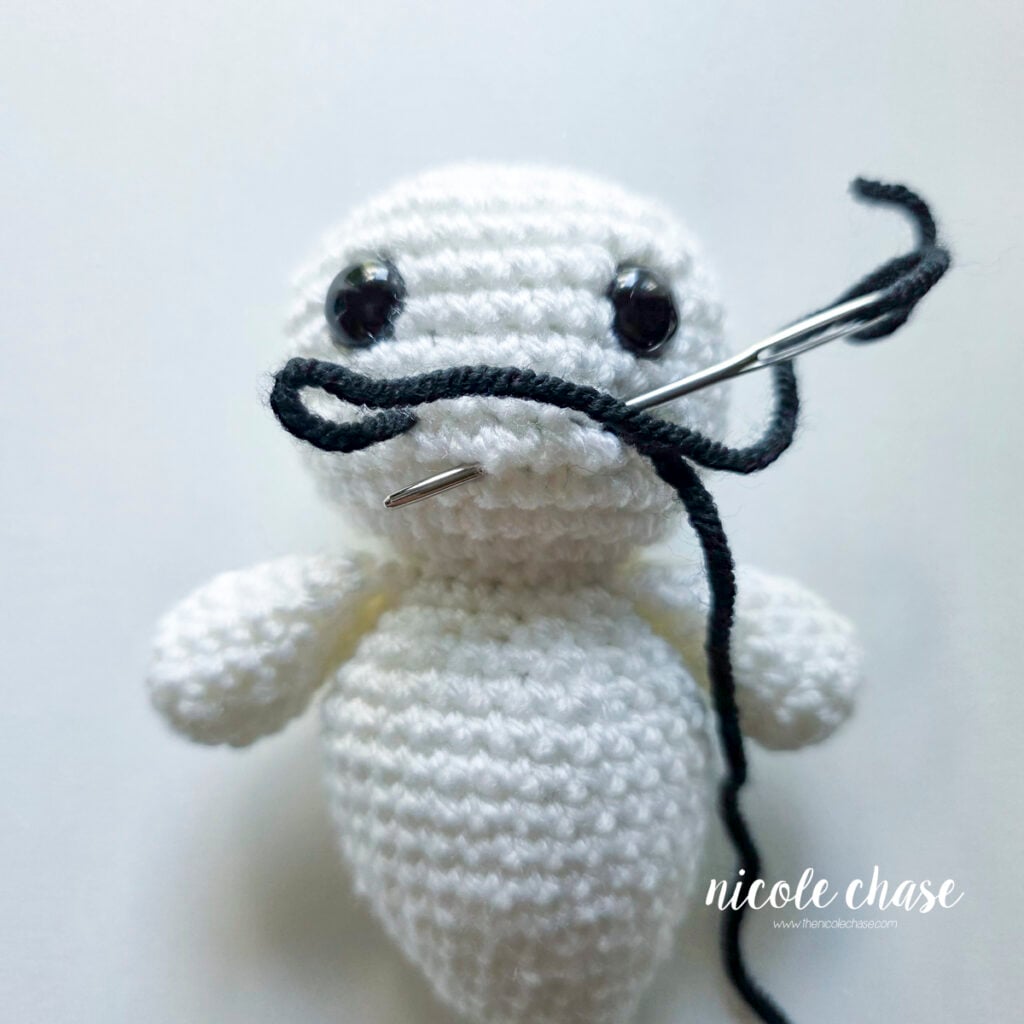
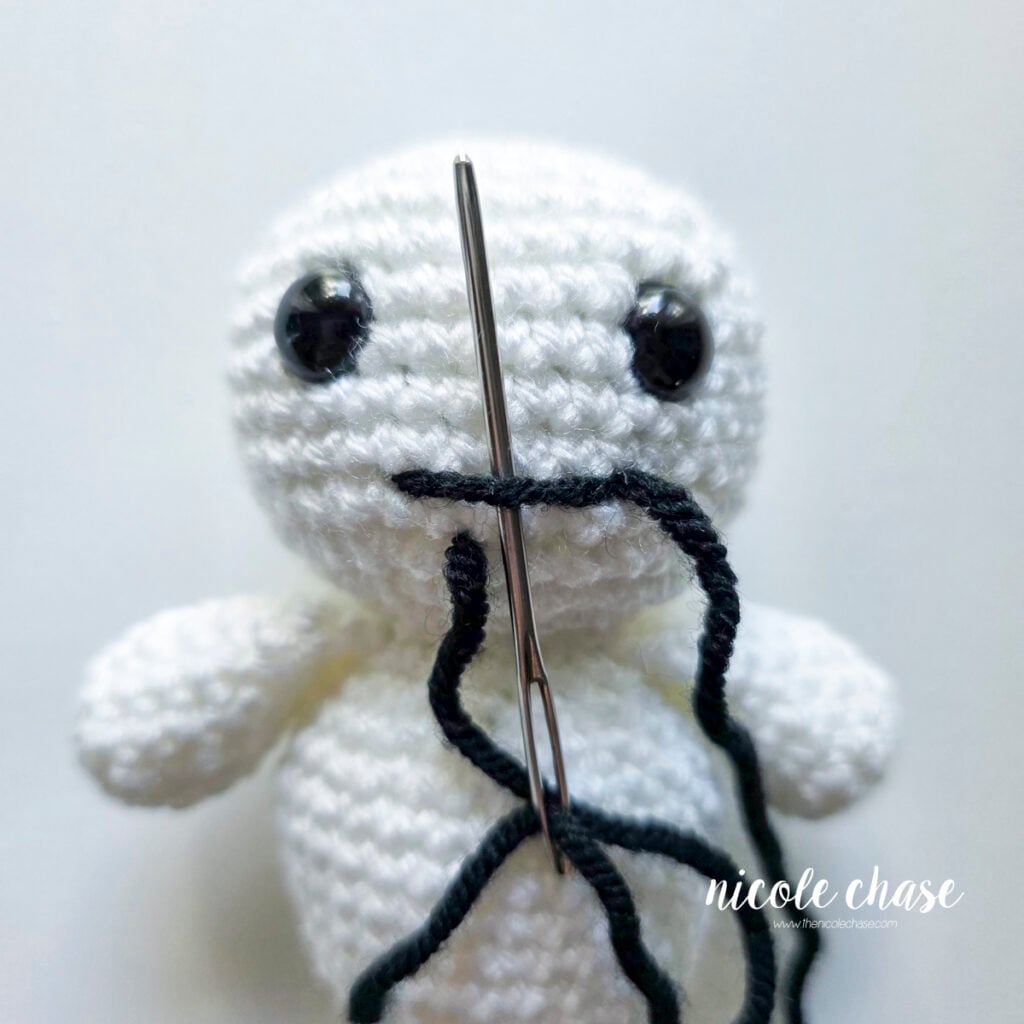
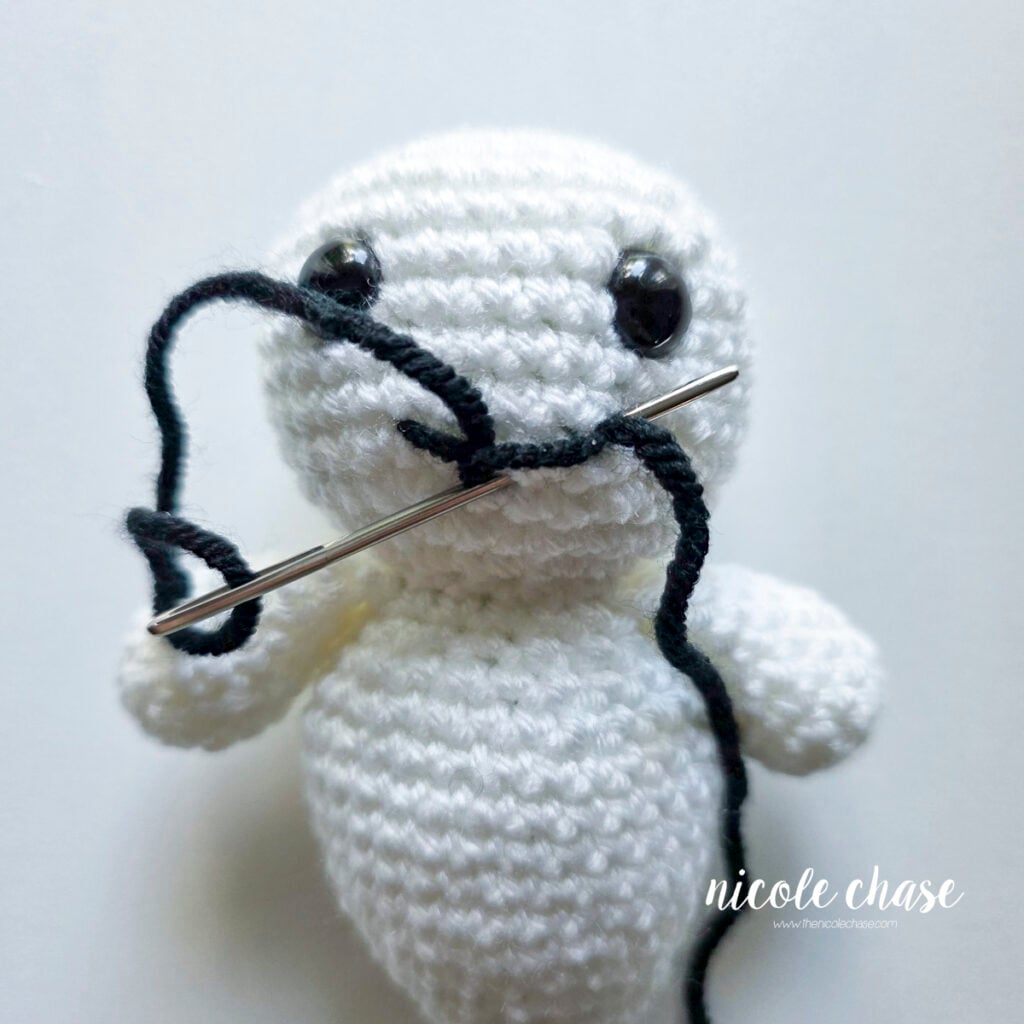
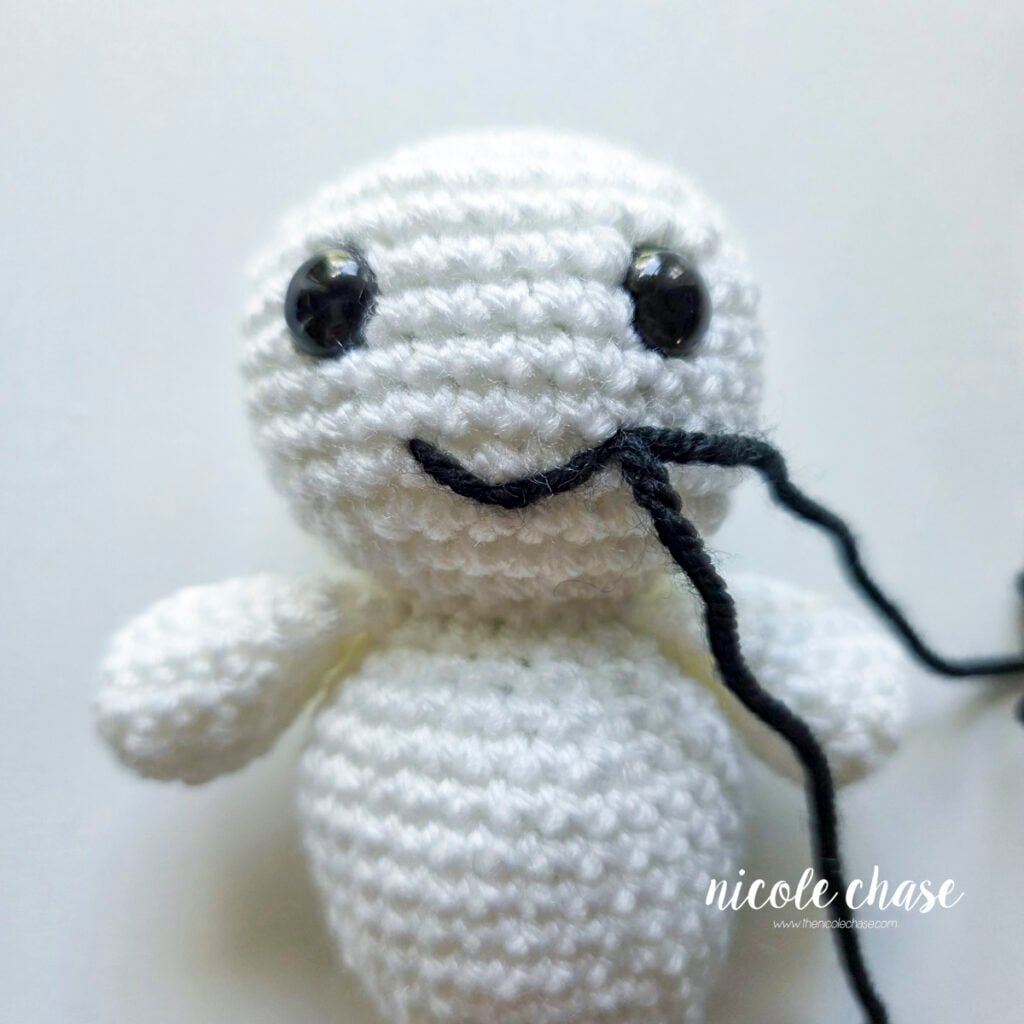
Using color D (shown as black), embroider smile between R27-28, with about 3 sts between the top ends of the smile, sloping down over 1 row.
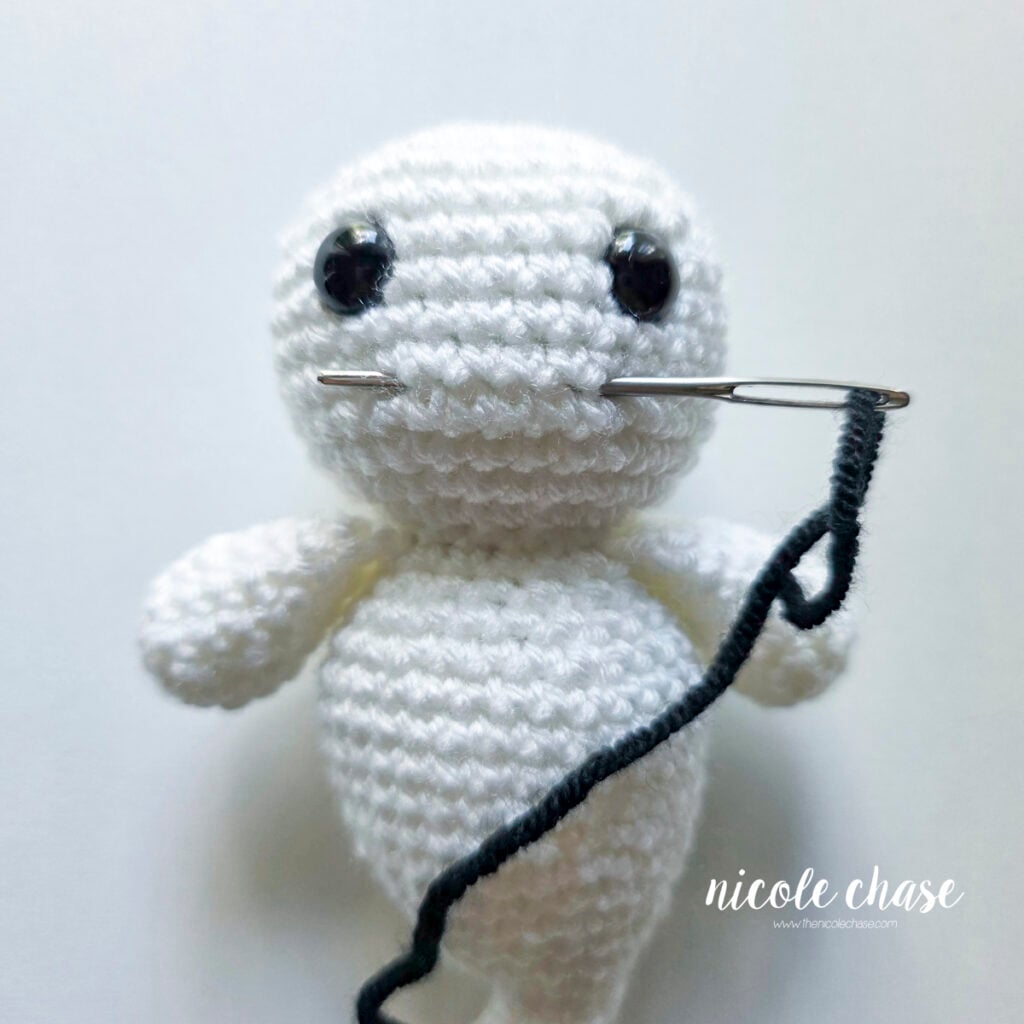
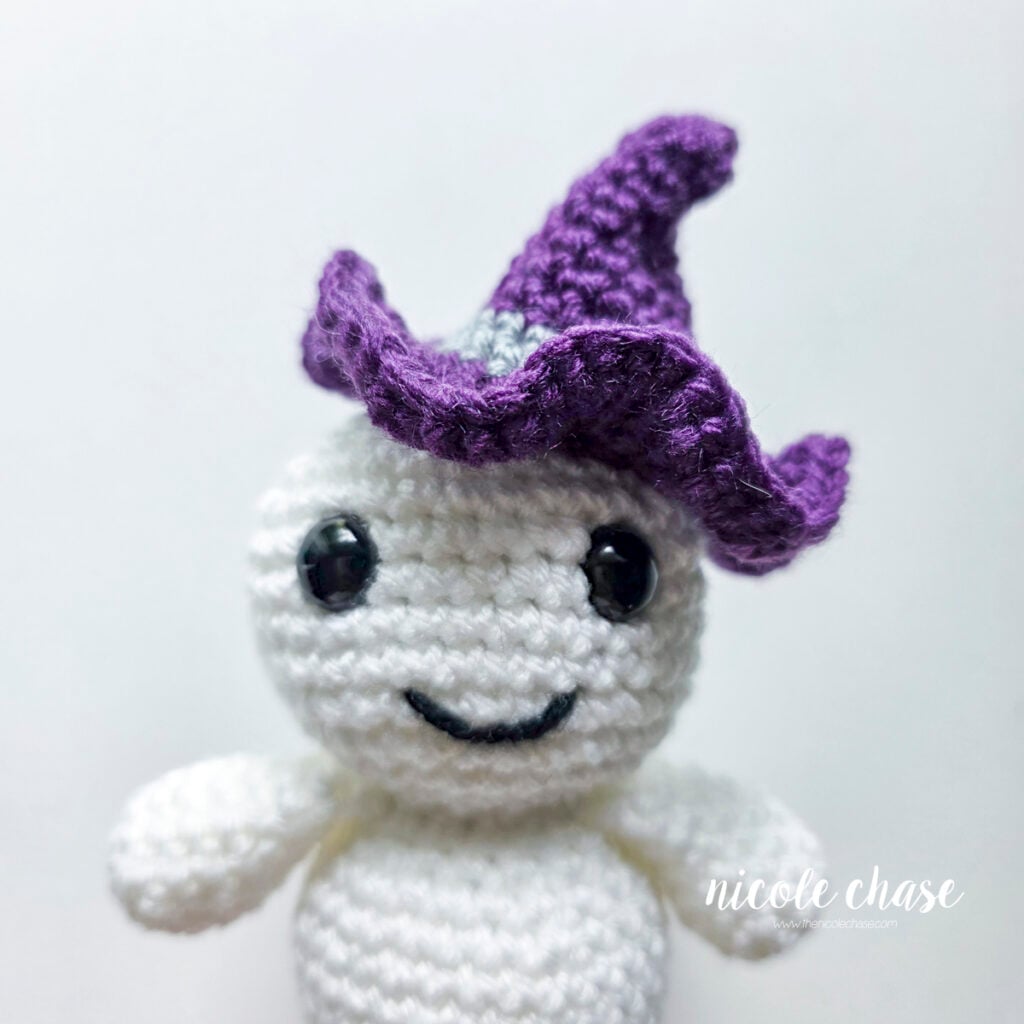
If desired, attach hat at an angle on top of the ghost head.
I hope you enjoyed making Gilbert the Ghost! I would love to see how your spooky ghost amigurumi pattern turned out! If you share your finished project on social media, be sure to tag me so I can see it.

Ad-Free PDF Pattern for Gilbert the Ghost
Tips & Tricks for your Ghost Amigurumi
- Use Stitch Markers for Continuous Rounds: When working in a continuous spiral, use stitch markers to indicate the beginning of each round.
- Master the Invisible Decrease: Using the invisible decrease method allows your decreases to blend in with your single crochet stitches.
- Stuff as You Go: Add your fiberfill stuffing gradually as you work and stuff firmly but without clumps to keep your amigurumi shapes.
- Explore More: Looking for more ways to polish your amigurumi skills? Check out my complete guide to amigurumi tips and tricks for more ideas.
Alterations for this crochet ghost pattern
- Yarn Variations: Play with different yarn weights to completely change the scale of your ghost.
- Glow in the Dark Yarn: Craft a fun nighttime surprise by swapping out your yarn for glow-in-the-dark yarn for a unique, interactive touch that kids will love!
- Mix & Match Hat Colors: Customize your ghost for different aesthetics by swapping up the witch hat colors. Try the classic purple, a bright orange, or a bright green for a fun contrast.
More Free Halloween Crochet Patterns
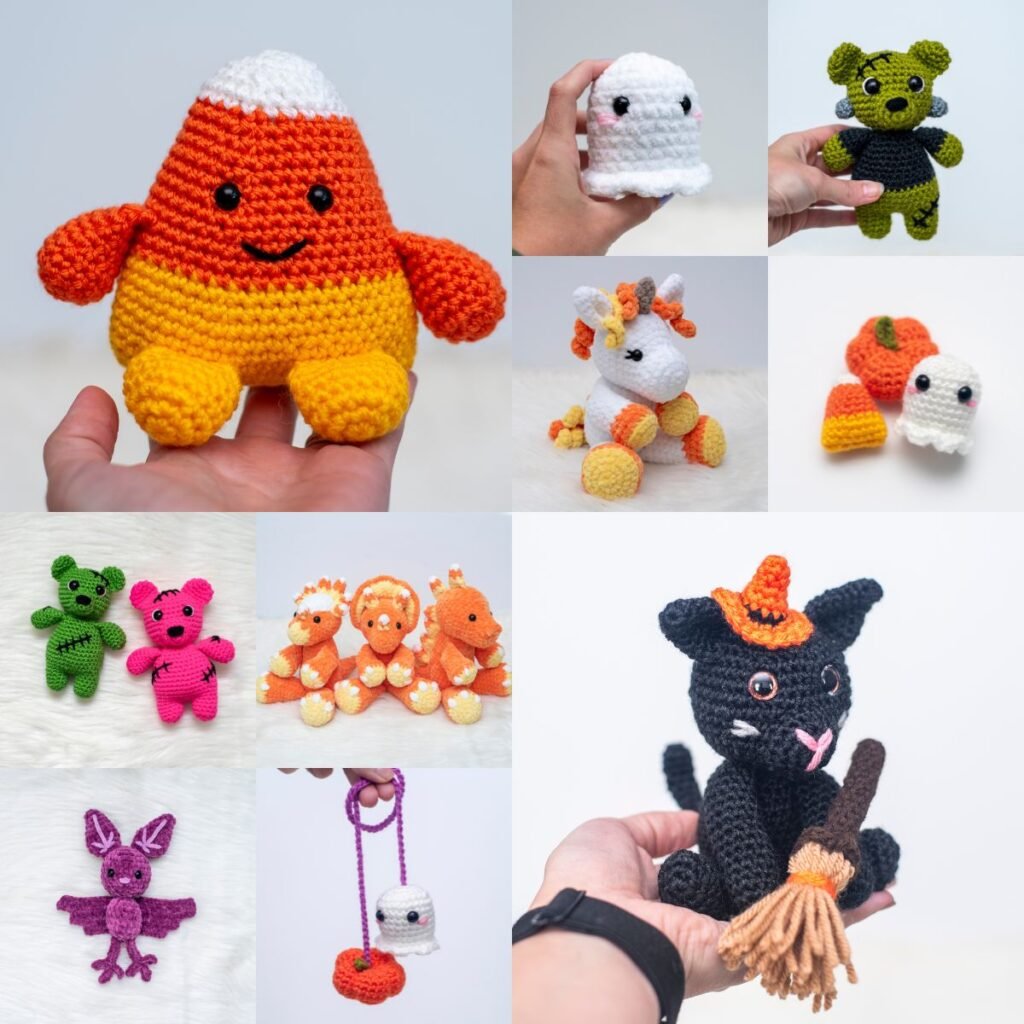
Looking for more spooky amigurumi projects to add to your Halloween lineup after this ghost amigurumi pattern? Check out these fun, beginner-friendly patterns:
- Zombie Bear Crochet Pattern: A sweet and spooky teddy bear worked with minimal sewing, complete with scar details and a Frankenstein option.
- Cobweb the Cat Crochet Pattern: A charming black witch cat featuring a mini broom and hat, designed with nearly no-sew constructions.
- Tiny Ghost Crochet Pattern: A fast, mini-sized ghost ornament that works up super quickly!
- Even More Free Halloween Crochet Patterns: Looking for more Halloween ideas? Explore my complete collection of Halloween crochet patterns, featuring all of my original spooky designs and more from the crochet community!

I hope you enjoyed this pattern! If you make it, leave me a comment below.
Want to see more from me? Be sure to subscribe to my email newsletter so that you never miss a pattern!
Follow along with me on Instagram for daily updates and a behind the scenes look at my designs.
I’d love to see what you make with this tutorial! Don’t forget to share your finished work with me: on social media by tagging me @thenicolechase, in your Ravelry projects, or post over in my Facebook group!
Thanks for stopping by! Happy crafting!
Nicole
PATTERN COPYRIGHT © 2026 NICOLE CHASE. ALL RIGHTS RESERVED.
PATTERN MAY NOT BE ALTERED, COPIED, REDISTRIBUTED OR SOLD AS YOUR OWN PATTERN.
YOU MAY SELL THE FINISHED PRODUCT ON A SMALL SCALE. PATTERN/DESIGN CREDIT GIVEN TO WWW.THENICOLECHASE.COM IS APPRECIATED. PERMISSION TO SELL DOES NOT INCLUDE MASS PRODUCTION. LARGE SCALE PRODUCTION IS PROHIBITED.
PHOTOGRAPHY COPYRIGHT © 2026 NICOLE CHASE. ALL RIGHTS RESERVED.
PHOTOS MAY NOT BE ALTERED, COPIED, REDISTRIBUTED OR SOLD AS YOUR OWN.
This post may contain affiliate links. If you make a purchase through links on our site, we may earn a commission.