Hug Me Duck Lovey – Free Crochet Pattern
This post may contain affiliate links. If you make a purchase through links on our site, we may earn a commission.
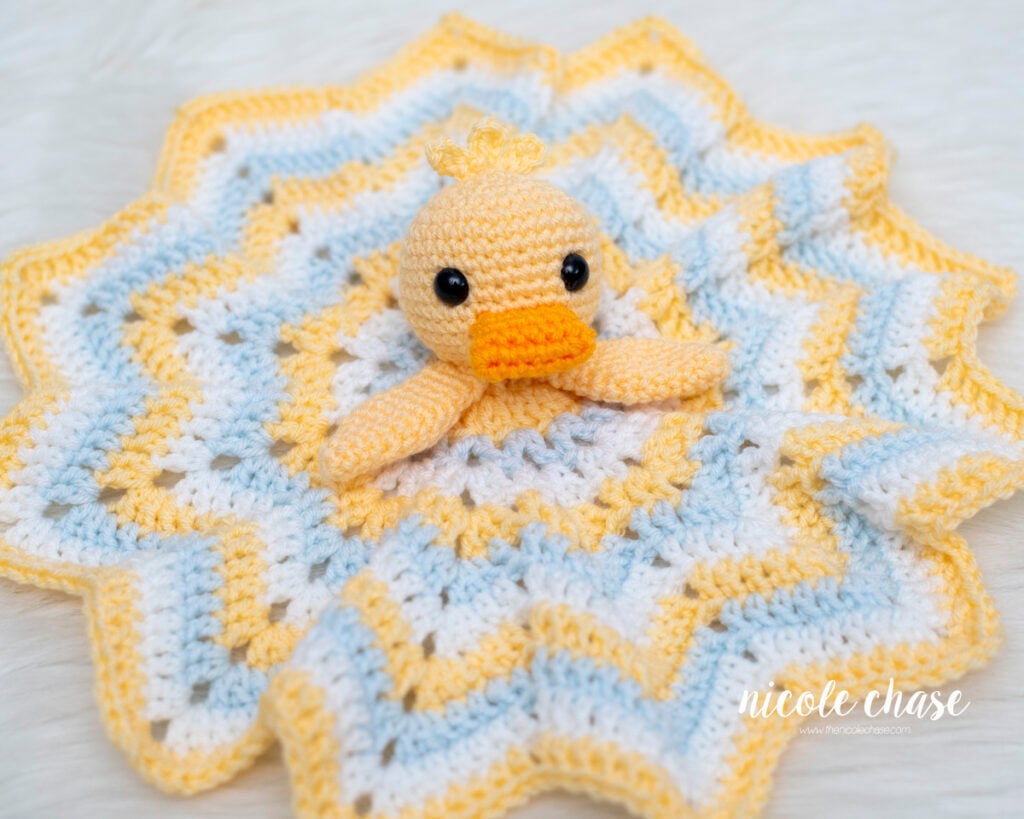
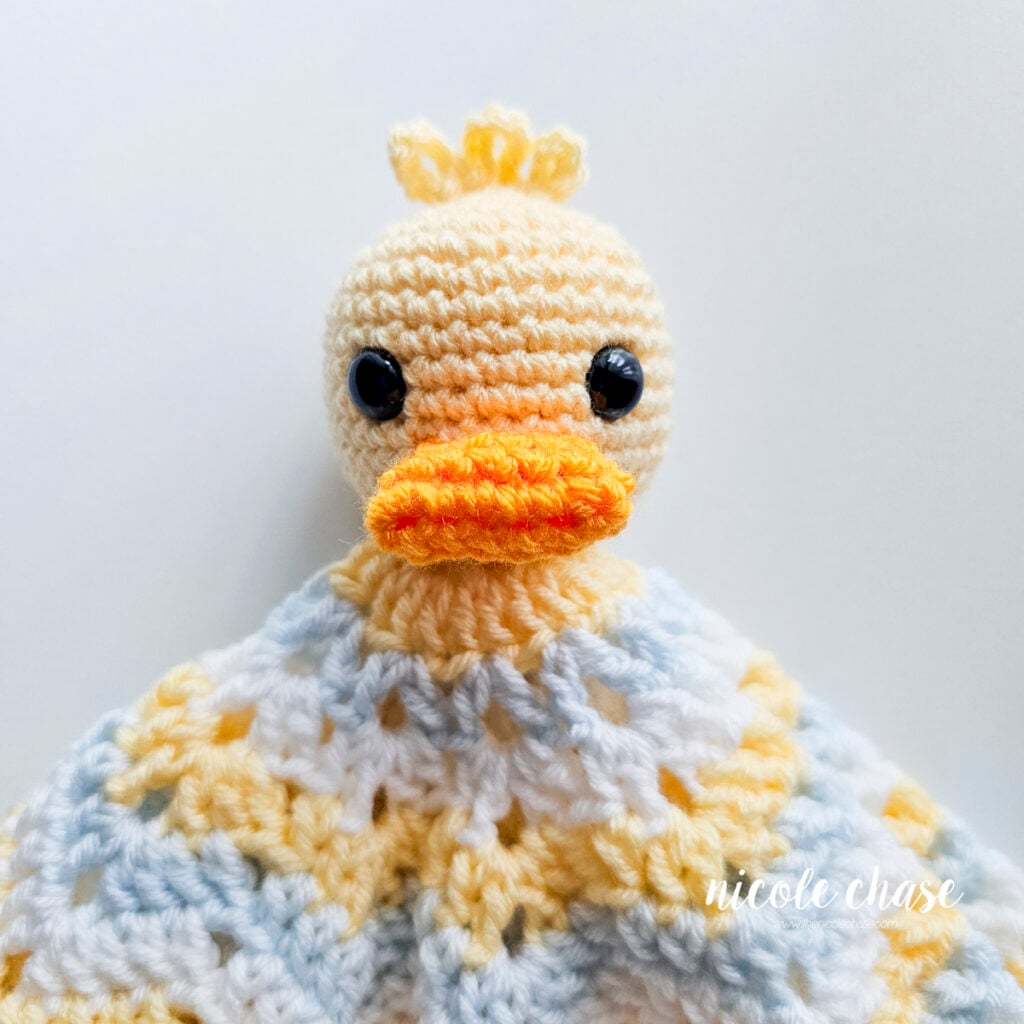
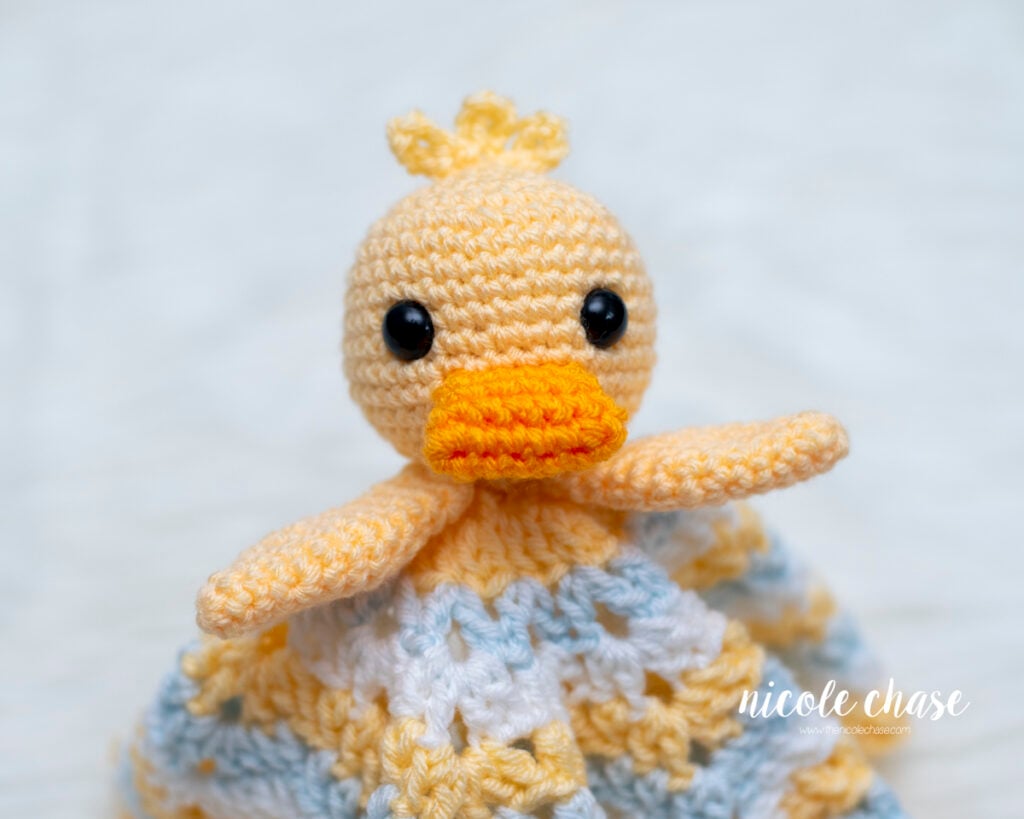
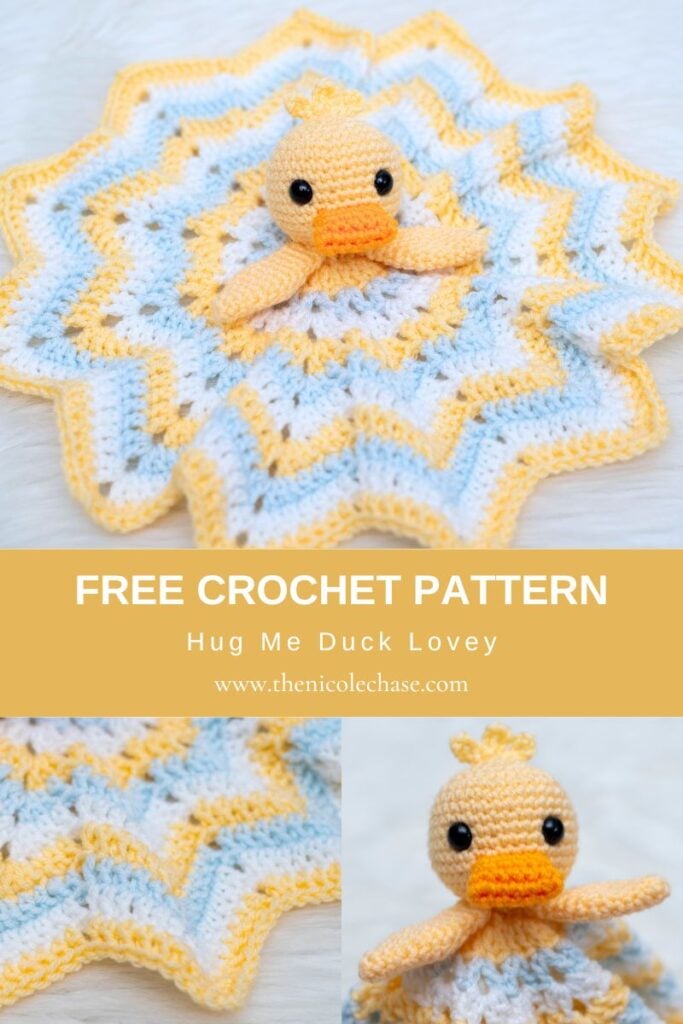
Brighten up the nursery with this sweet, star-shaped Hug Me Duck Lovey! This free crochet duck lovey pattern combines a plush amigurumi duckling with a small ripple blanket to create the ultimate handmade security blanket for baby showers and newborn gifts. Whether you are crafting for your own little one or stocking your market table, this design stitches up quickly and features a soft, textured finish that little hands will love to hold.
At a Glance: Crochet Duck Lovey Pattern
A sweet, star-shaped security blanket featuring an adorable amigurumi duckling head attached to a textured ripple star-shaped blanket. This free duck lovey crochet pattern is perfect for baby gifts and quick market makes!
- Required Skills: Magic ring, single crochet (SC), increasing, decreasing (SC2tog) with the invisible decrease method, and double crochet (DC).
- Yarn: Worsted weight (4) acrylic yarn in yellow, orange, light blue, and white.
- Hook Size: 4.0mm (G) crochet hook and 5.0mm (H) crochet hook
- Finished Size: Approximately 14″ across.
- Format & Extra Resources: Free on-page written pattern with step-by-step photos, assembly details, and helpful amigurumi tips.
Table of Contents
I would classify this free duck lovey crochet pattern as “advanced beginner”. It would be helpful to have had some experience with amigurumi before creating this project.
I hope you enjoy this free crochet pattern available here on my blog! An ad-free, formatted PDF version of this crochet pattern is also available for purchase here:
Save This Pattern
Want to save this pattern for later or add it to your project queue?
- Pin this amigurumi duck lovey pattern on Pinterest to return to it whenever you’re ready to stitch.
- Favorite and queue this pattern on Ravelry to keep your crochet project list organized!
Free Crochet Pattern for Hug Me Duck Lovey
Pattern Specifics
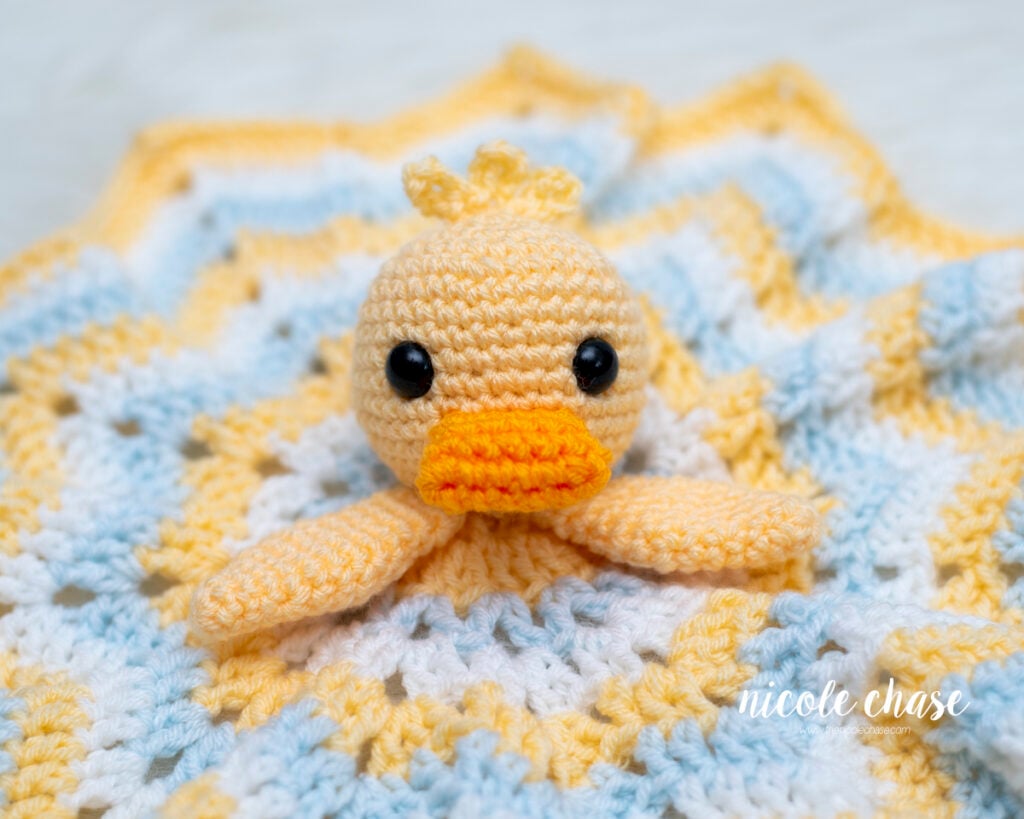
Measurements: Blanket measures approximately 14”; duck head is approximately 3” tall with 5” wing span
Gauge: Not necessary for this pattern; see notes
Hook Size: 4.0mm (G) crochet hook, 5.0mm (H) crochet hook
Other Tools: tapestry needle, stitch markers, scissors
Yarn Weight: Medium (4) Worsted Weight
Yarn Used: WeCrochet/Knit Picks Brava Worsted
Yardage: color A (orange): 5 yds, color B (yellow): 105 yds, color C (blue): 35 yds, color D (white): 48 yds
Other Materials: poly-fil stuffing, 12mm safety eyes
Abbreviations
st = stitch
sl st = slip stitch
ch = chain
SC = single crochet
SC2tog = single crochet 2 stitches together (invisible decrease is recommended)
DC = double crochet
Special Stitches
SC2tog (using invisible decrease method): Insert hook into front loop of the first stitch. Insert hook into front loop of second stitch. Yarn over. Draw through the first two loops on hook. Yarn over. Draw through both loops on hook.
Notes
- Checking your gauge is not required for this pattern. Use a hook that is smaller than the size recommended for your yarn weight. This will ensure that your stuffing will not show through the stitches.
- All pieces of the duck are worked in the round. Use a stitch marker to indicate the beginning of each round.
- Invisible decreases are recommended. Please see “Special Stitches”.
- Safety eyes and noses pose a choking risk for babies; therefore, if making this toy for a baby, I recommend using yarn, felt, or embroidered details.
- Head and bill require stuffing. Stuff each piece as you work to ensure the piece is completely filled. Do not add stuffing to the wings.
- Chain 2 at the beginning of each blanket round does not count as a stitch (unless otherwise specified).
- See tutorial photos.
Pattern
Using 4.0mm (G) hook:
Bill
Using color A (shown as orange):
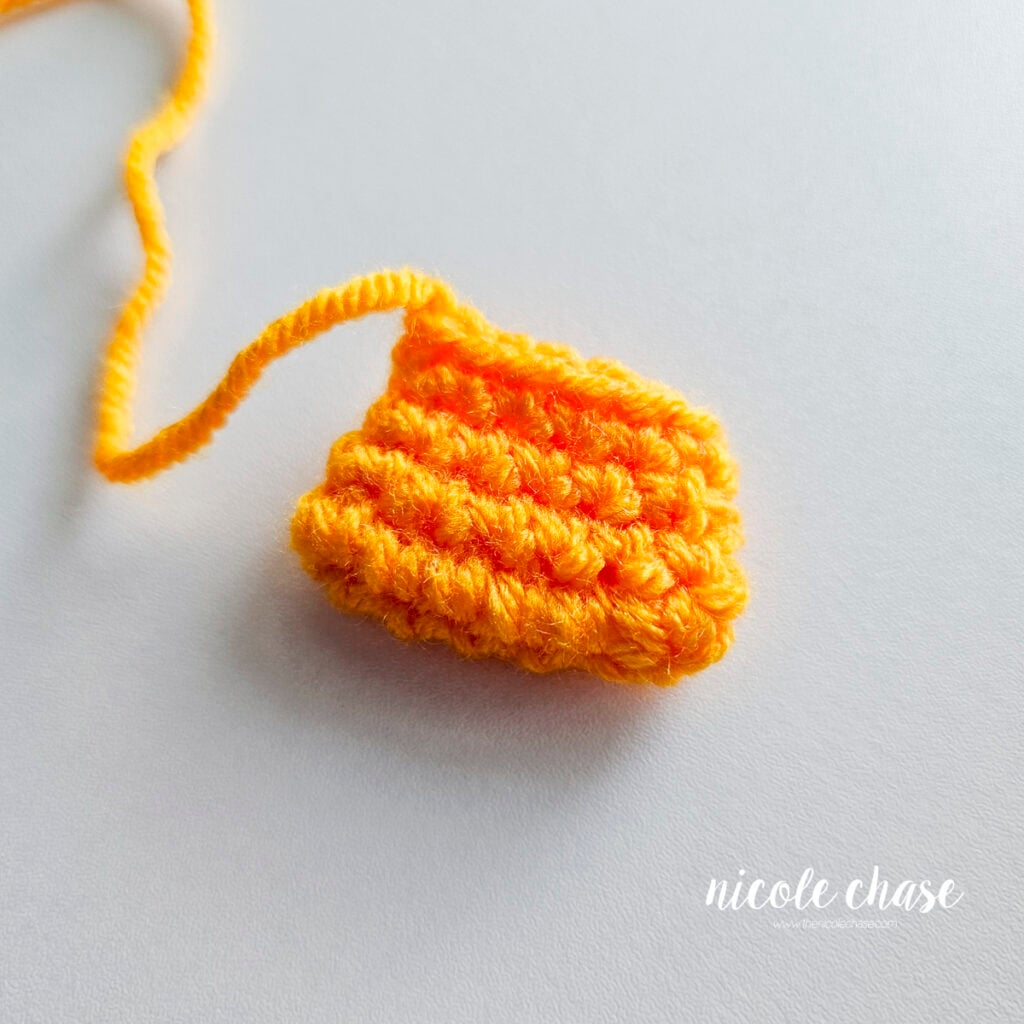
R1: Ch 7, turn, SC in second ch from hook and each of the next 4 sts. Working around to the other side of the ch, 3 SC in final ch. Now working on the other side of the ch, 1 SC in each of the next 4 sts, 2 SC in final ch. (14 sts)
R2: 1 SC in each st around. (14 sts)
R3: *SC2tog, 1 SC in each of the next 5 sts. Repeat from * around. (12 sts)
R4: 1 SC in each st around. (12 sts)
Cut yarn, leaving long strand for sewing. Fasten off. Lightly fill with stuffing.
Head
Using color B (shown as yellow):
R1: Begin with 6 SC in a magic ring. (6 sts)
R2: 2 SC in each st around. (12 sts)
R3: *2 SC in next st, 1 SC in next st. Repeat from * around. (18 sts)
R4: *2 SC in next st, 1 SC in each of the next 2 sts. Repeat from * around. (24 sts)
R5: *2 SC in next st, 1 SC in each of the next 3 sts. Repeat from * around. (30 sts)
R6: *2 SC in next st, 1 SC in each of the next 4 sts. Repeat from * around. (36 sts)
R7-13: 1 SC in each st around. (36 sts)
If using safety eyes, insert them now between R10-11 with approximately 6 sts between the eyes.
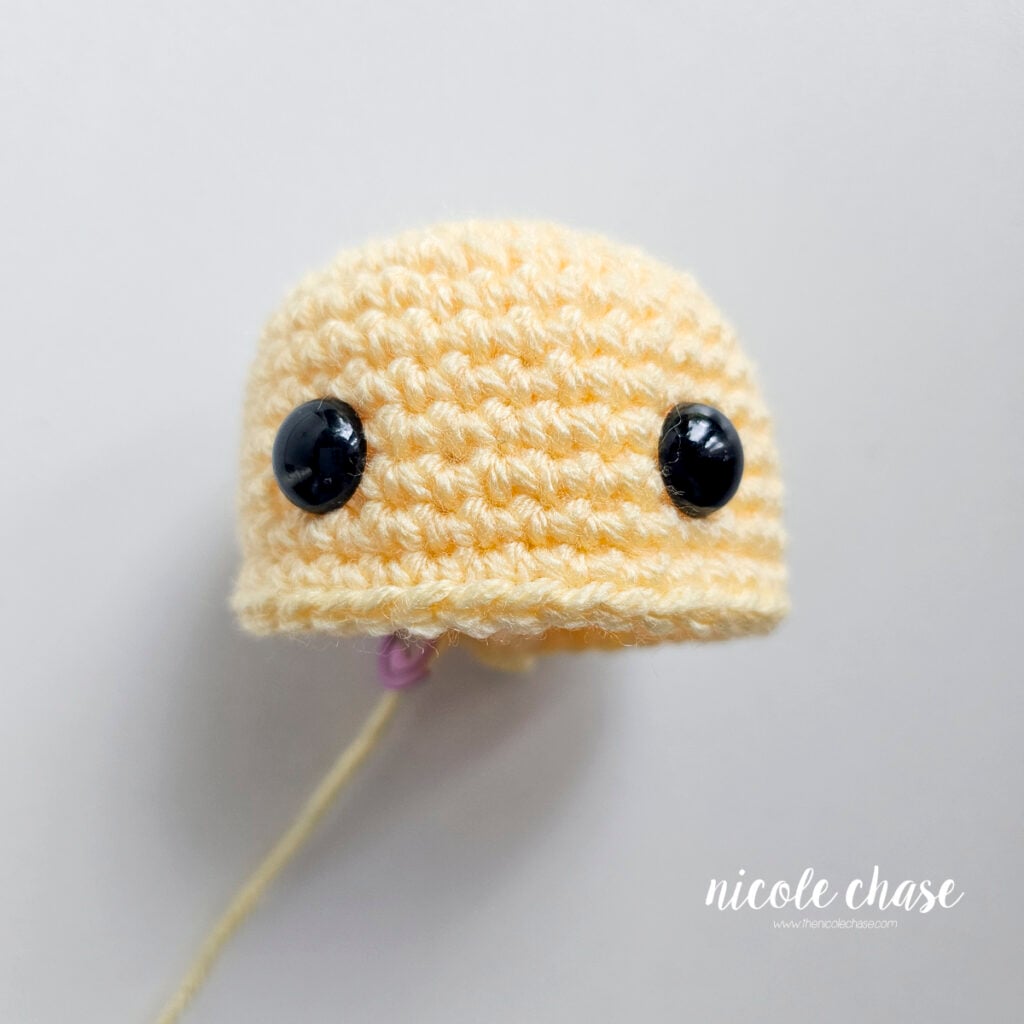
R14: *SC2tog, 1 SC in each of the next 4 sts. Repeat from * around. (30 sts)
R15: 1 SC in each st around. (30 sts)
R16: *SC2tog, 1 SC in each of the next 3 sts. Repeat from * around. (24 sts)
R17: *SC2tog, 1 SC in each of the next 2 sts. Repeat from * around. (18 sts)
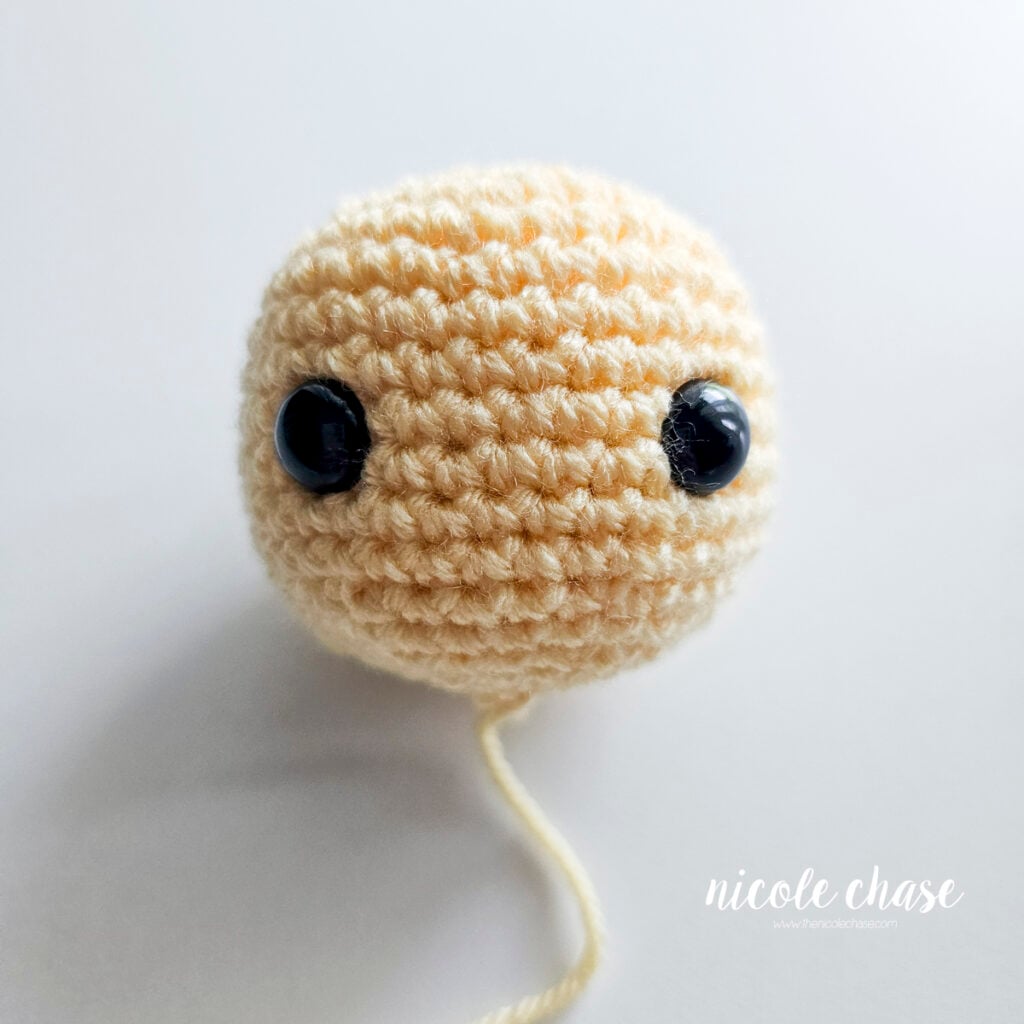
Fill with stuffing.
R18: *SC2tog, 1 SC in next st. Repeat from * around. (12 sts)
R19: *SC2tog. Repeat from * around. (6 sts)
Cut yarn, leaving long strand. Weave in and out of remaining sts. Pull tight to close. Tie off. Leave strand for attaching to blanket.
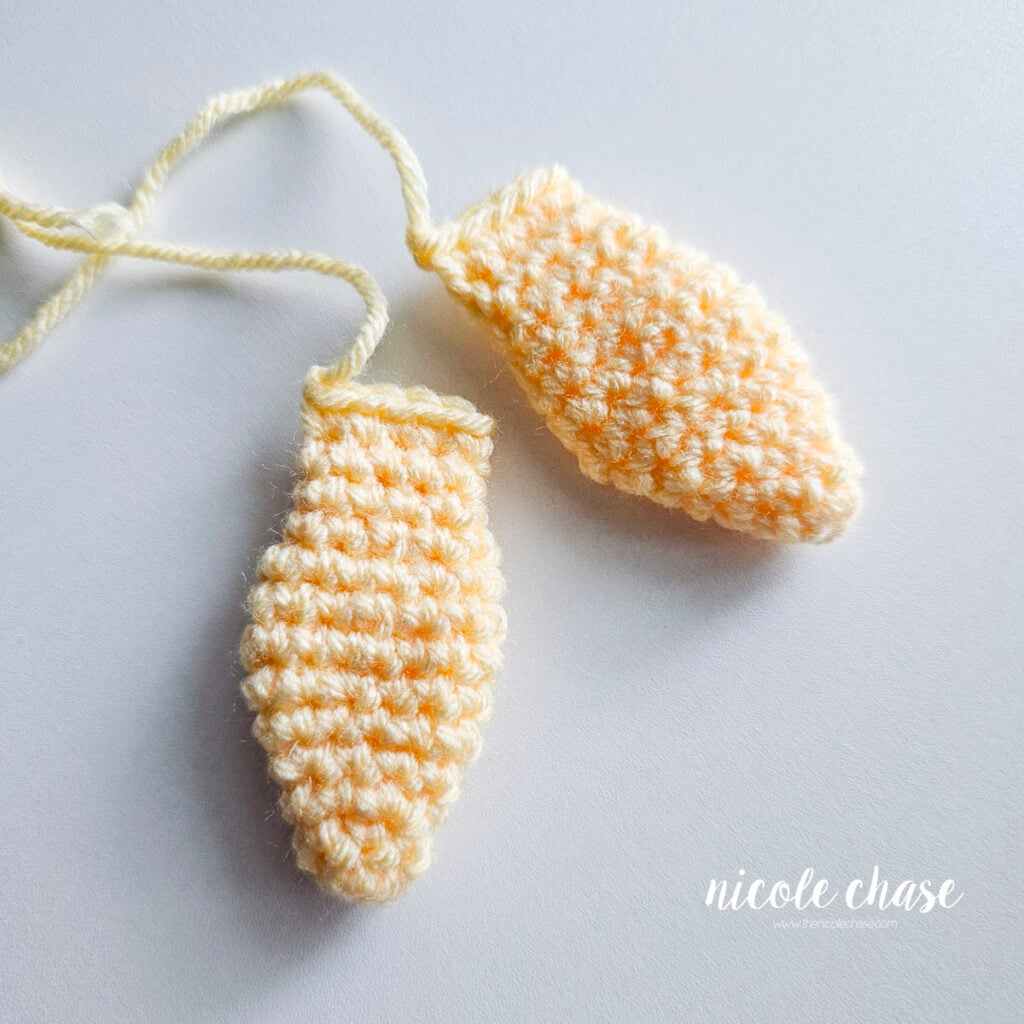
Wings (make 2)
Using color B (shown as yellow):
R1: Begin with 6 SC in a magic ring. (6 sts)
R2: 1 SC in each st around. (6 sts)
R3: *2 SC in next st, 1 SC in next st. Repeat from * around. (9 sts)
R4: 1 SC in each st around. (9 sts)
R5: *2 SC in next st, 1 SC in each of the next 2 sts. Repeat from * around. (12 sts)
R6: 1 SC in each st around. (12 sts)
R7: *2 SC in next st, 1 SC in each of the next 3 sts. Repeat from * around. (15 sts)
R8: 1 SC in each st around. (15 sts)
R9: *SC2tog, 1 SC in each of the next 3 sts. Repeat from * around. (12 sts)
R10: 1 SC in each st around. (12 sts)
R11: *SC2tog, 1 SC in each of the next 2 sts. Repeat from * around. (9 sts)
R12-13: 1 SC in each st around. (9 sts)
R14: Fold the wing closed. Leaving 1 unworked st at the beginning of the fold, working through both sides, 1 SC in each st across. See tutorial photos. (4 sts)
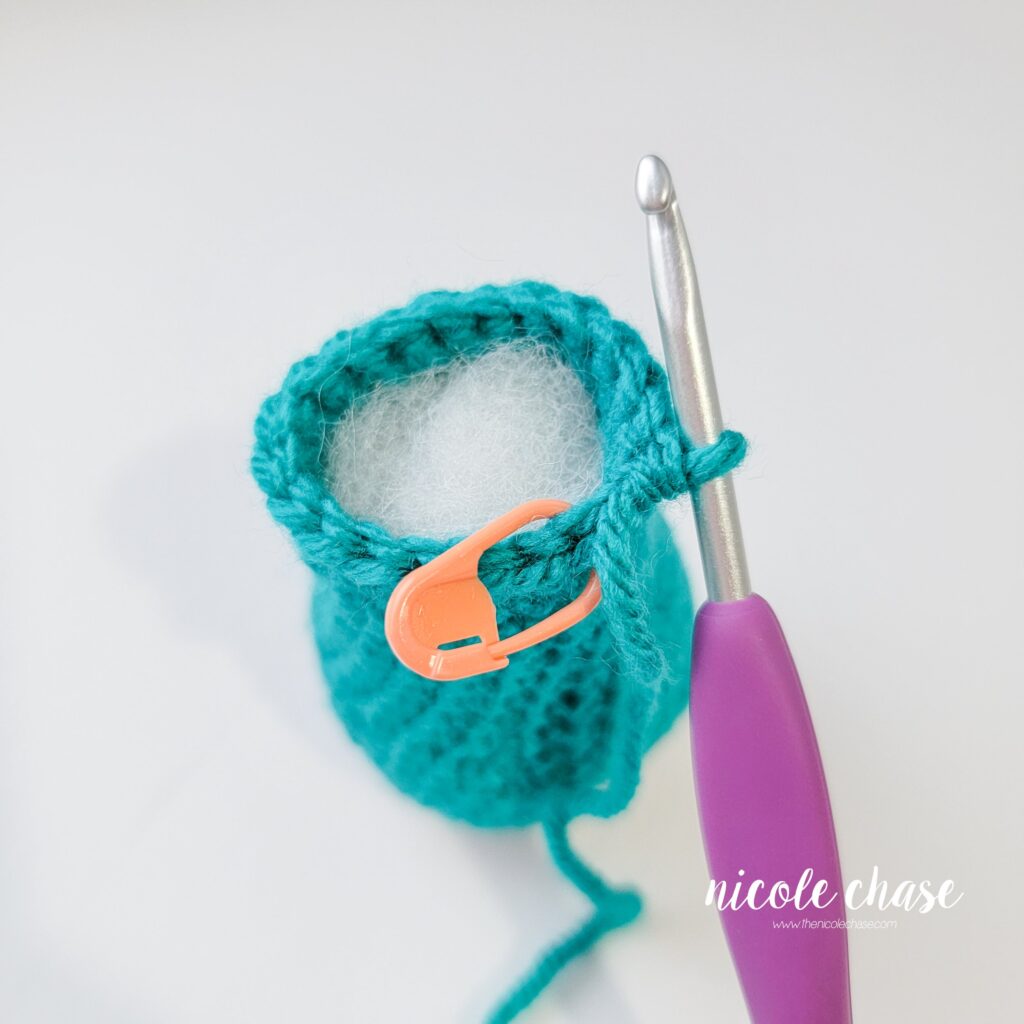
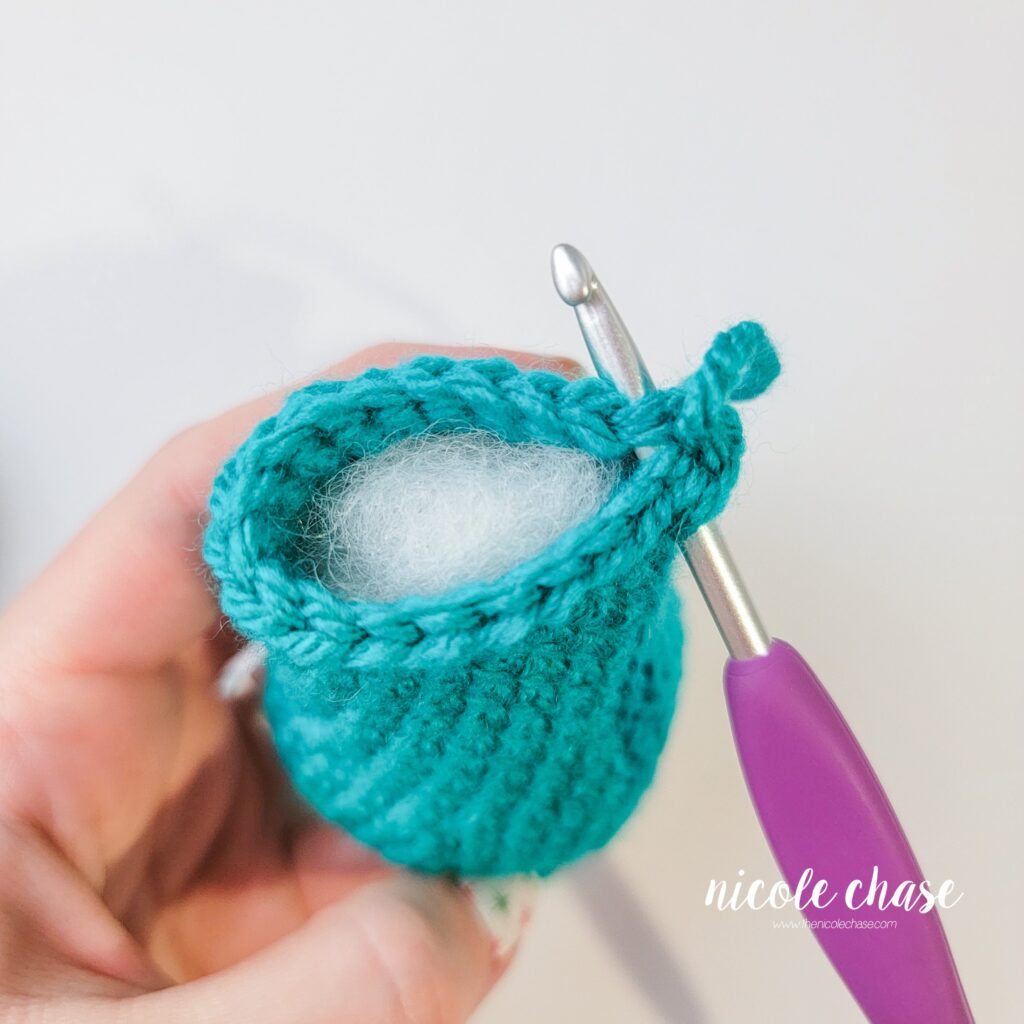
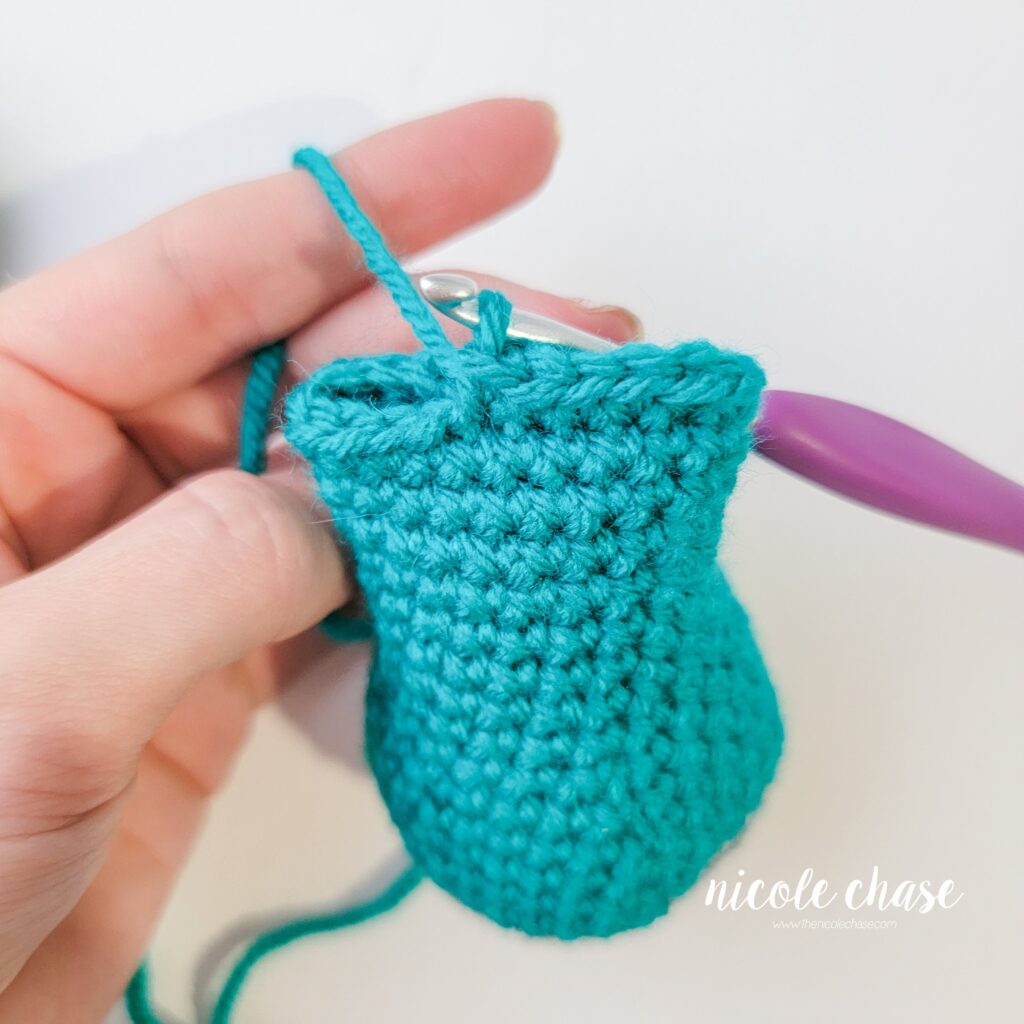
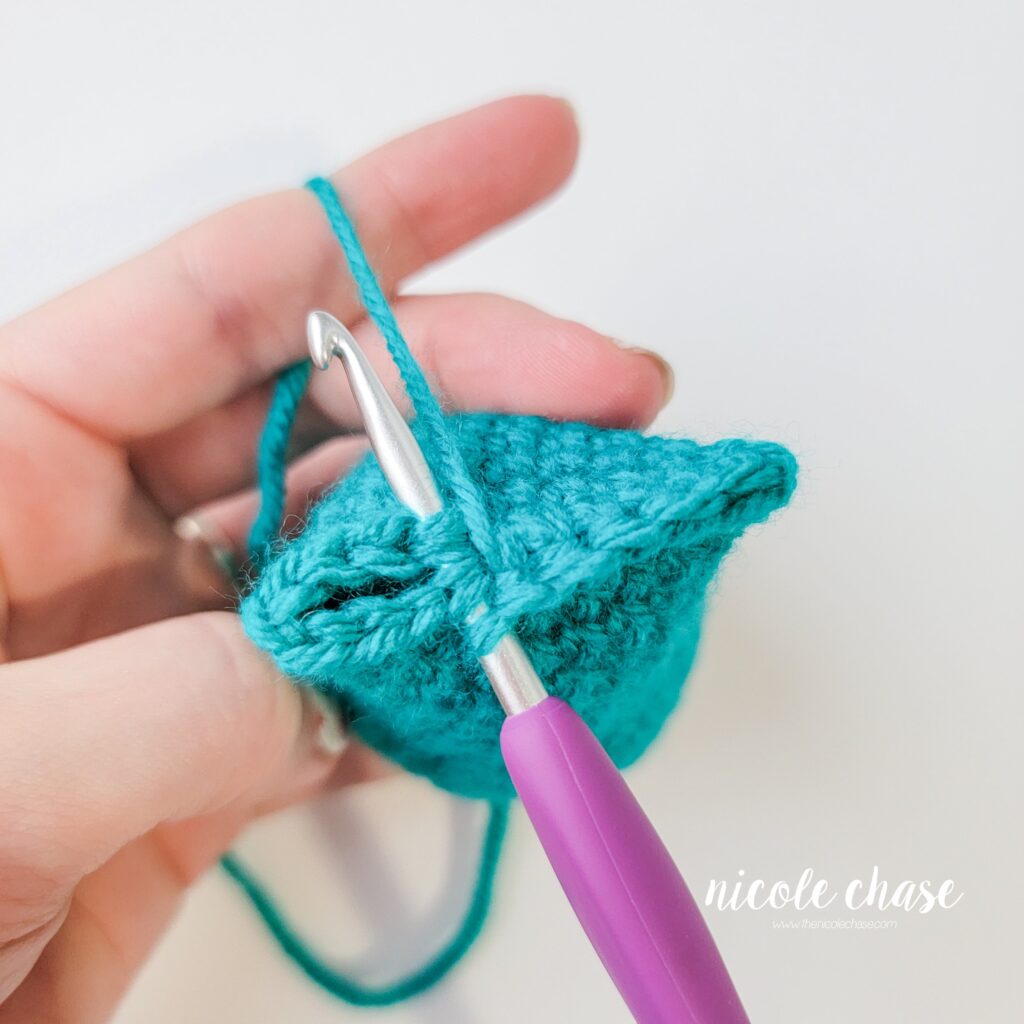
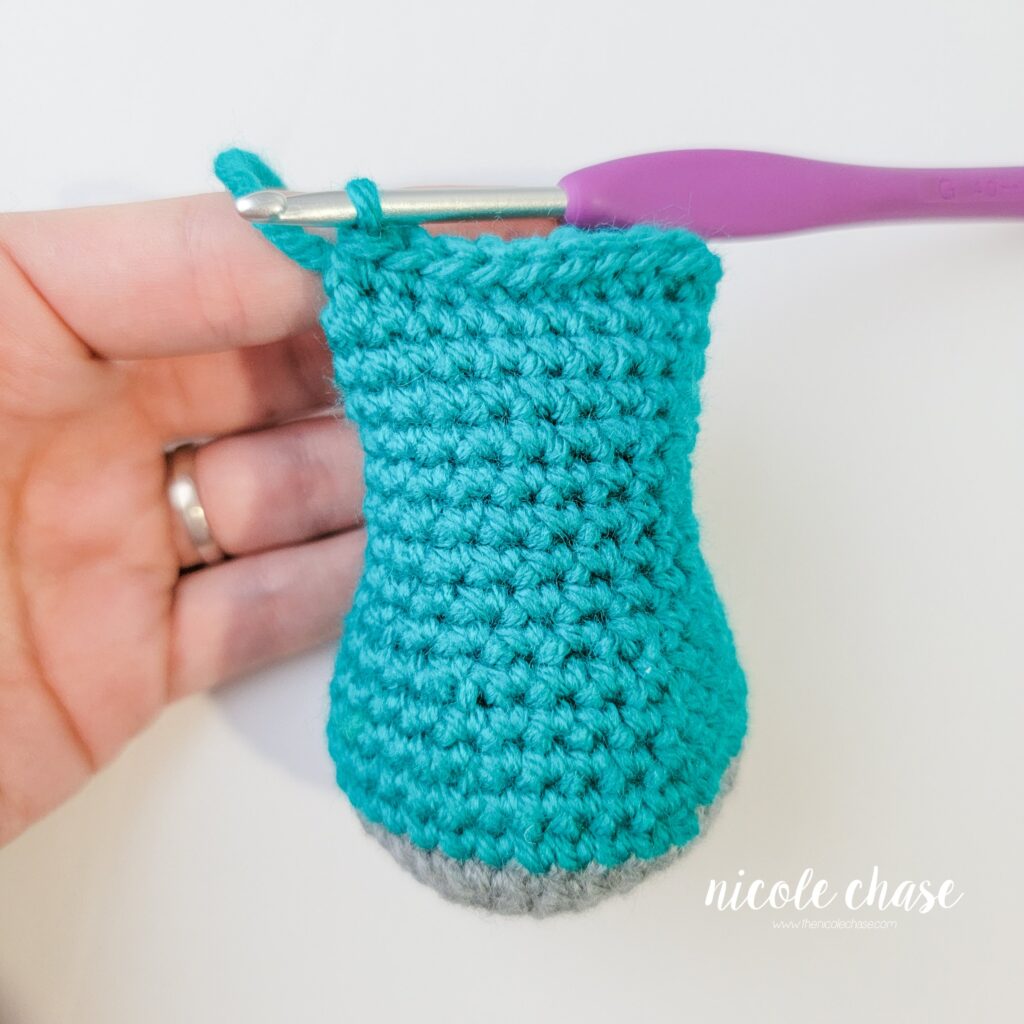
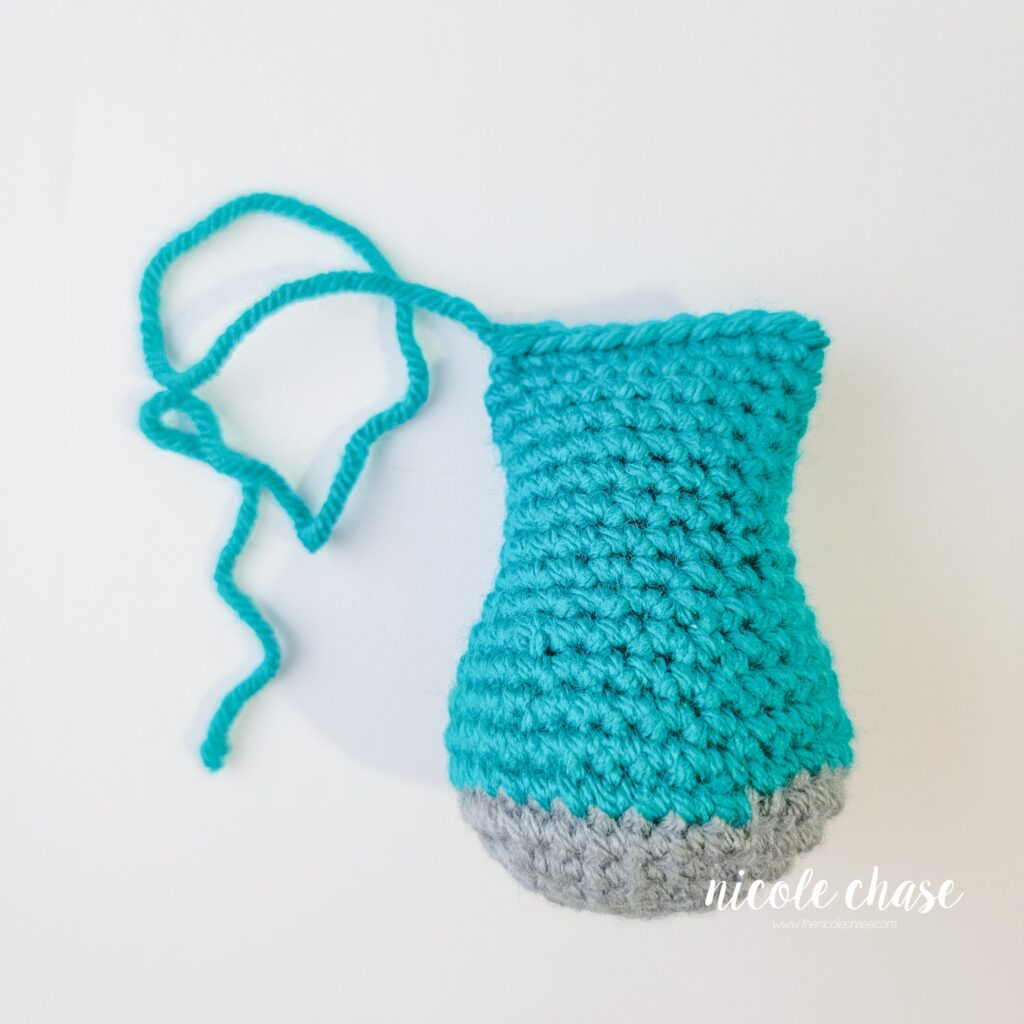
Cut yarn, leaving long strand for sewing. Fasten off.
Hair
Using color B (shown as yellow):
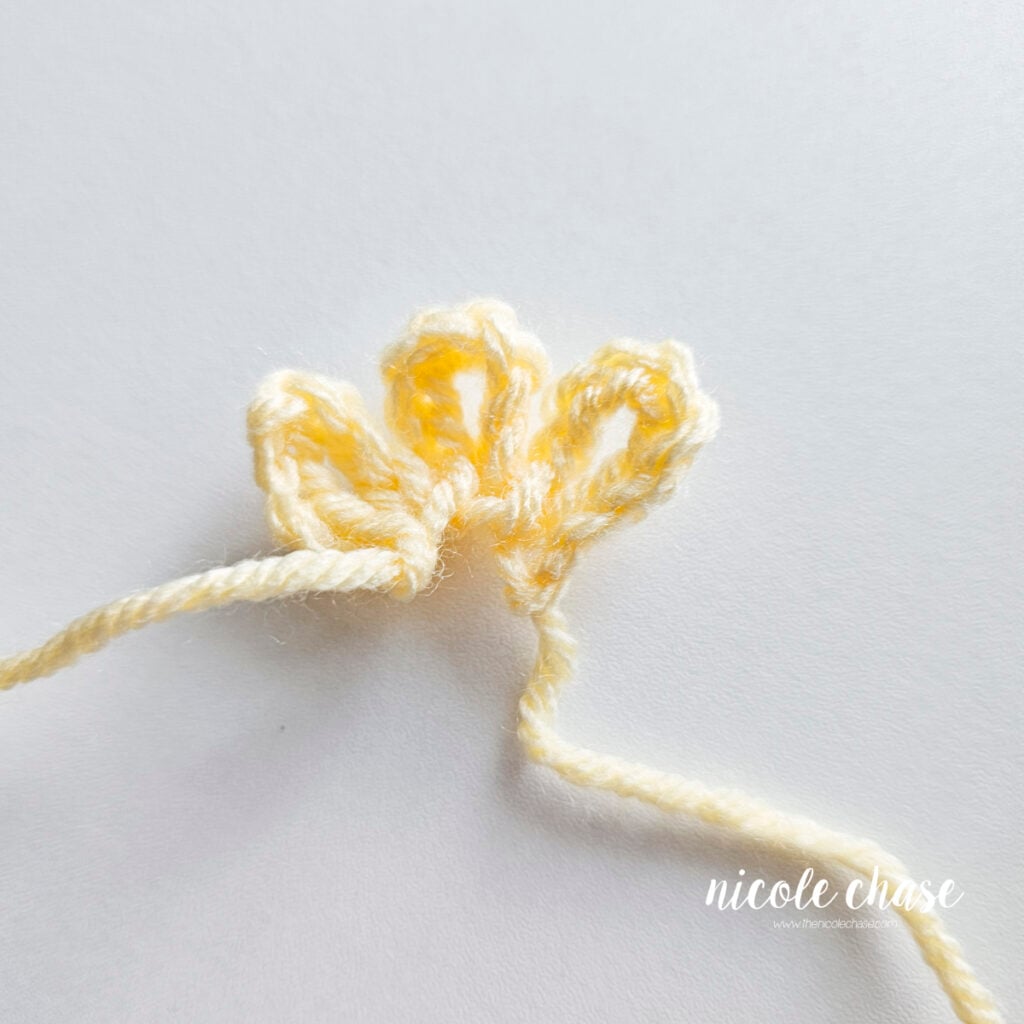
Start with a longer strand to easily hide inside the head when this piece is attached.
R1: Ch 8, bring ends of ch together and sl st into the first ch of the row, creating a loop. Do not fasten off.
R2: Ch 8, bring ends of ch together and sl st into the first ch of the row, creating a loop. Do not fasten off.
R3: Ch 8, bring ends of ch together and sl st into the first ch of the row, creating a loop.
Cut yarn, leaving long strand for sewing. Fasten off.
Blanket
Using 5.0mm (H) hook:
Using color B (shown as yellow):
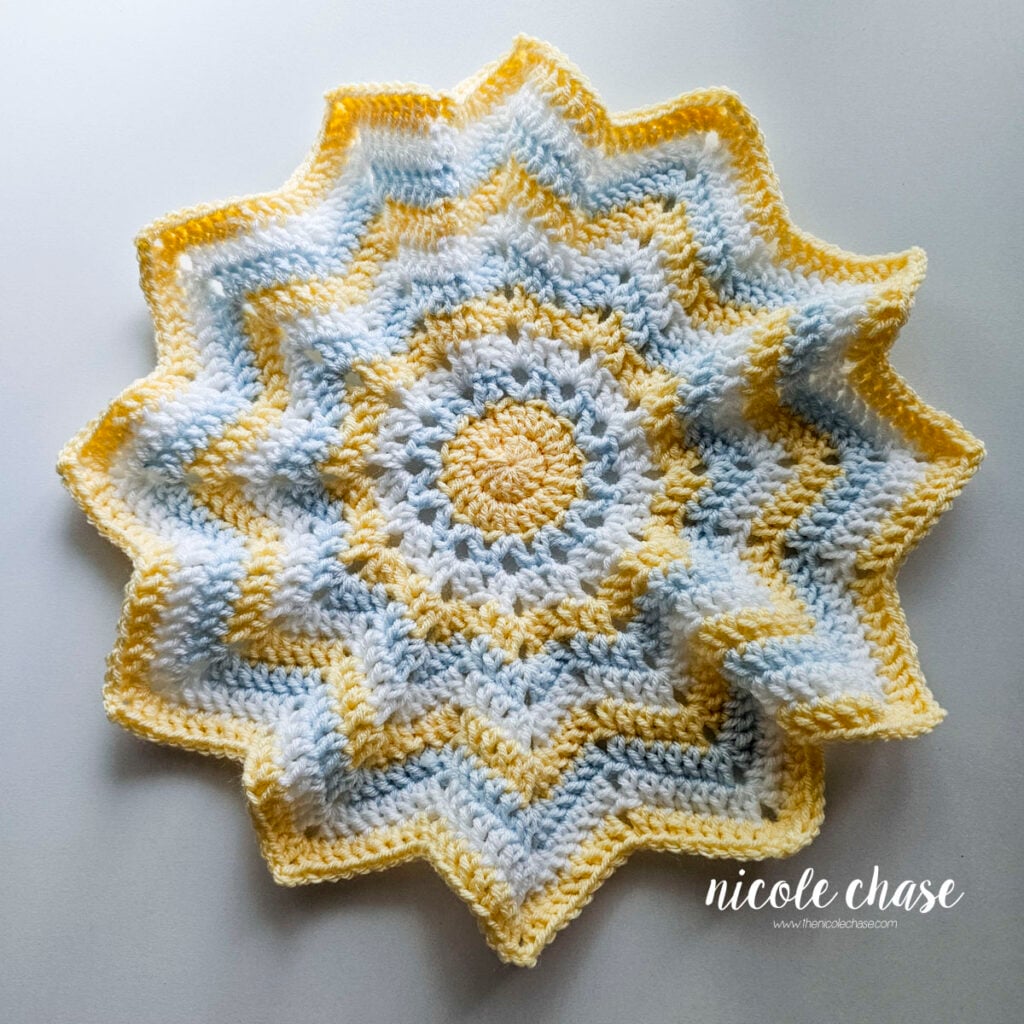
R1: In a magic ring, ch 2, 12 DC. Join with a sl st to beginning. (12 sts)
R2: Ch 2. 2 DC in each st around. Join with a sl st to beginning. (24 sts)
Using color C (shown as blue):
R3: Ch 2, (DC, ch 2, DC) in first st, skip next st, *(DC, ch 2, DC) in next st, skip next st. Repeat from * to end. Join with a sl st to beginning, sl st into the ch 2 space. (24 DC sts + 12 ch 2 spaces)


**Note: These tutorial photos demonstrate the process only; colors shown may differ from the current pattern.
Using color D (shown as white):
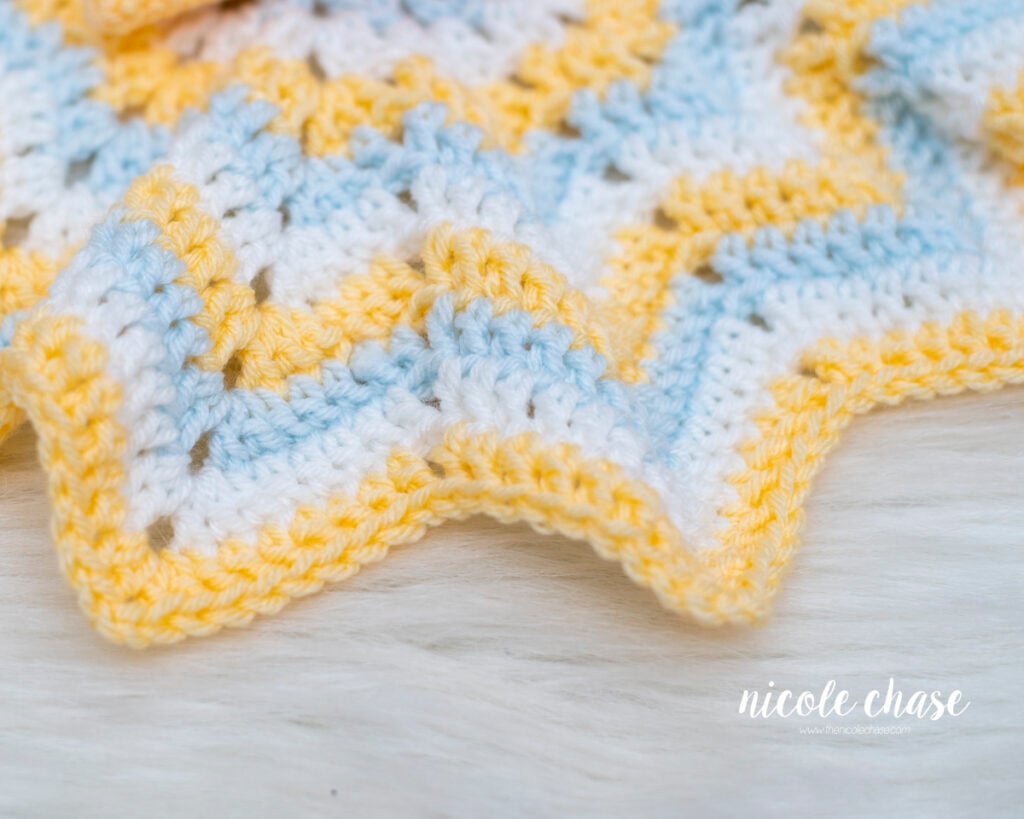
R4: Ch 2, *(2 DC, ch 2, 2 DC) in ch 2 space from previous round. Repeat from * to end. Join with a sl st to beginning, sl st into the next st. (48 DC sts + 12 ch 2 spaces)


**Note: These tutorial photos demonstrate the process only; colors shown may differ from the current pattern.
Using color B (shown as yellow):
R5: Ch 2, *1 DC (2 DC, ch 2, 2 DC) in ch 2 space from previous round, 1 DC, skip next 2 DC sts. Repeat from * to end. Join with a sl st to beginning, sl st into the next st. (72 DC sts + 12 ch 2 spaces)


**Note: These tutorial photos demonstrate the process only; colors shown may differ from the current pattern.
Using color C (shown as blue):
R6: Ch 2, *1 DC in each of the next 2 sts, (2 DC, ch 2, 2 DC) in ch 2 space from previous round, 1 DC in each of the next 2 sts, skip next 2 DC sts. Repeat from * to end. Join with a sl st to beginning, sl st into next st. (96 DC sts + 12 ch 2 spaces)


**Note: These tutorial photos demonstrate the process only; colors shown may differ from the current pattern.
Using color D (shown as white):
R7: Ch 2, *1 DC in each of the next 3 sts, (2 DC, ch 2, 2 DC) in ch 2 space from previous round, 1 DC in each of the next 3 sts, skip next 2 DC sts. Repeat from * to end. Join with a sl st to beginning, sl st into next st. (120 DC sts + 12 ch 2 spaces)
Using color B (shown as yellow):
R8: Ch 2, *1 DC in each of the next 4 sts, (2 DC, ch 2, 2 DC) in ch 2 space from previous round, 1 DC in each of the next 4 sts, skip next 2 DC sts. Repeat from * to end. Join with a sl st to beginning, sl st into next st. (144 DC sts + 12 ch 2 spaces)
Using color C (shown as blue):
R9: Ch 2, *1 DC in each of the next 5 sts, (2 DC, ch 2, 2 DC) in ch 2 space from previous round, 1 DC in each of the next 5 sts, skip next 2 DC sts. Repeat from * to end. Join with a sl st to beginning, sl st into next st. (168 DC sts + 12 ch 2 spaces)
Using color D (shown as white):
R10: Ch 2, *1 DC in each of the next 6 sts, (2 DC, ch 2, 2 DC) in ch 2 space from previous round, 1 DC in each of the next 6 sts, skip next 2 DC sts. Repeat from * to end. Join with a sl st to beginning, sl st into next st. (192 DC sts + 12 ch 2 spaces)
Using color B (shown as yellow):
R11: Ch 2, *1 DC in each of the next 7 sts, (2 DC, ch 2, 2 DC) in ch 2 space from previous round, 1 DC in each of the next 7 sts, skip next 2 DC sts. Repeat from * to end. Join with a sl st to beginning, sl st into next st. (216 DC sts + 12 ch 2 spaces)
Fasten off. Weave in ends.
Assembly & Finishing
See tutorial photos.
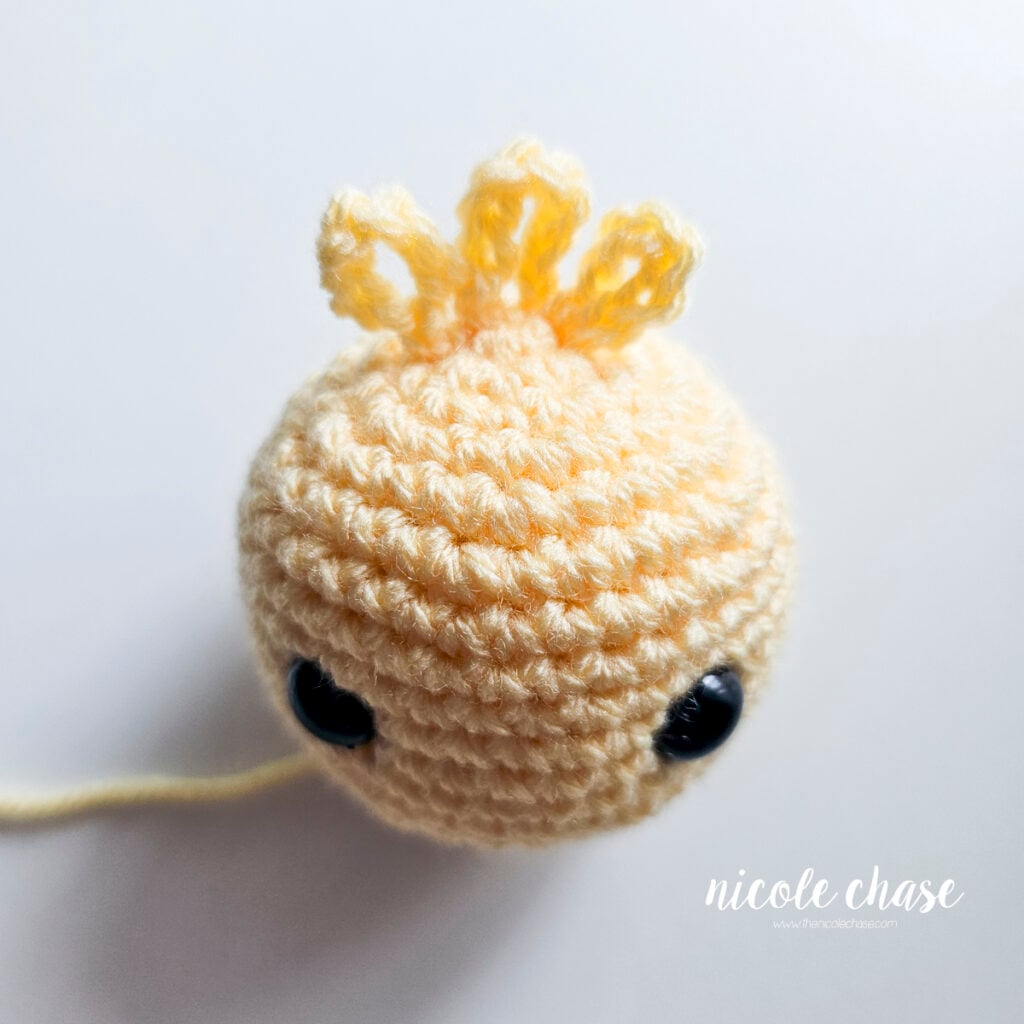
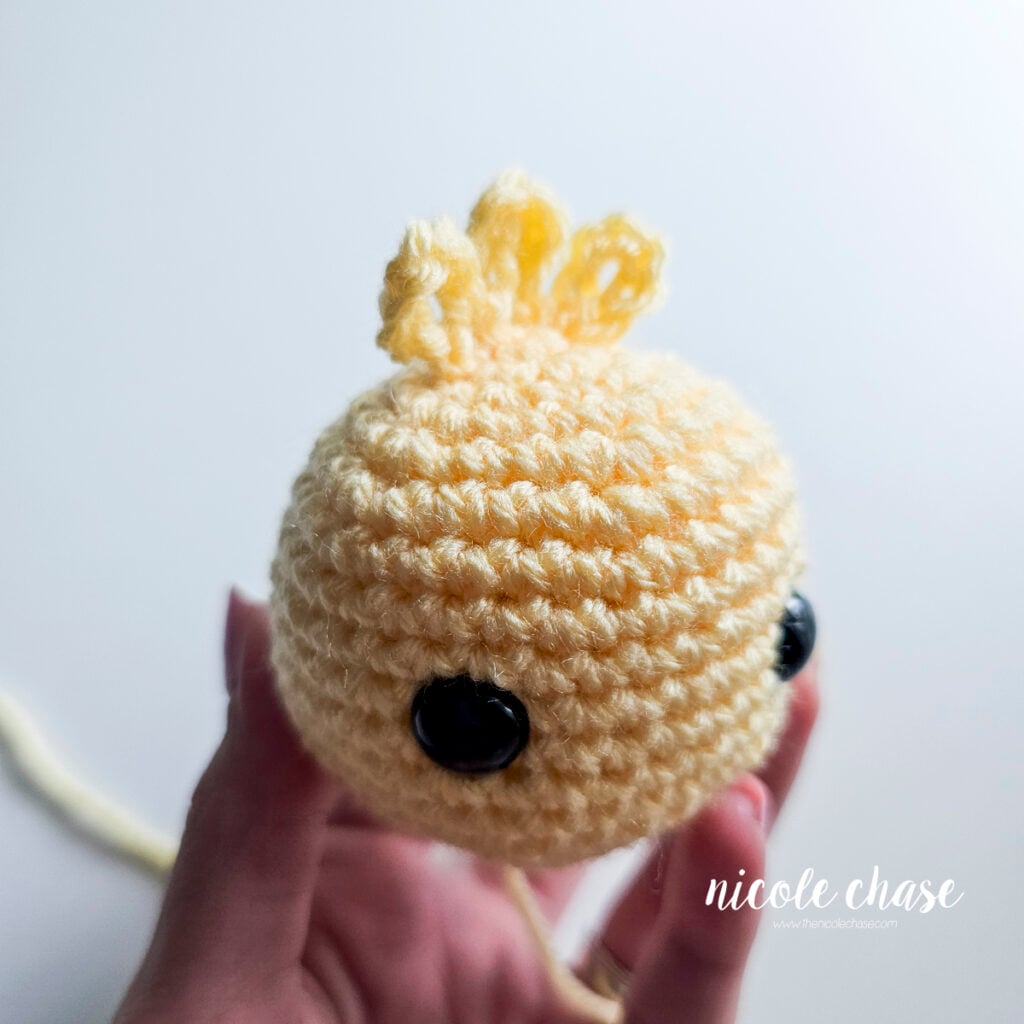
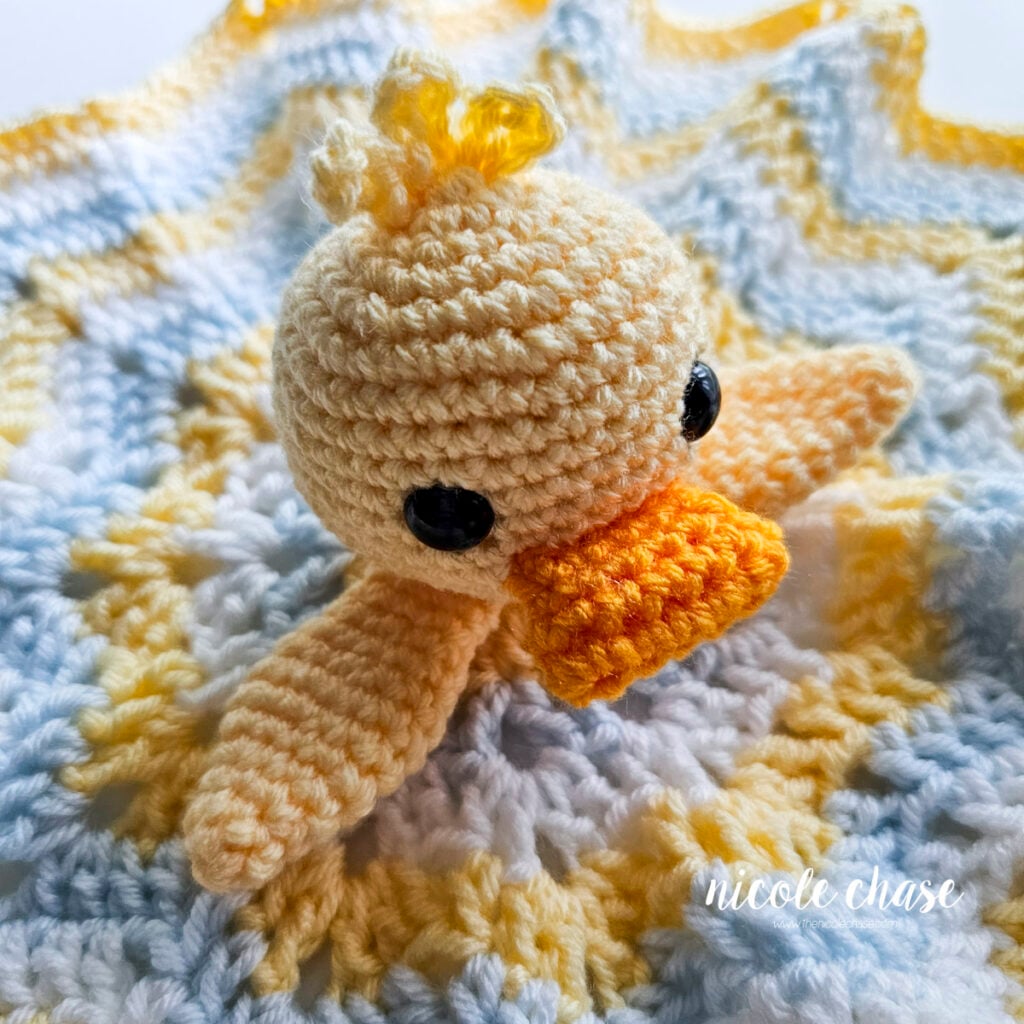
Attach hair to the top center of the head, over R1-2.
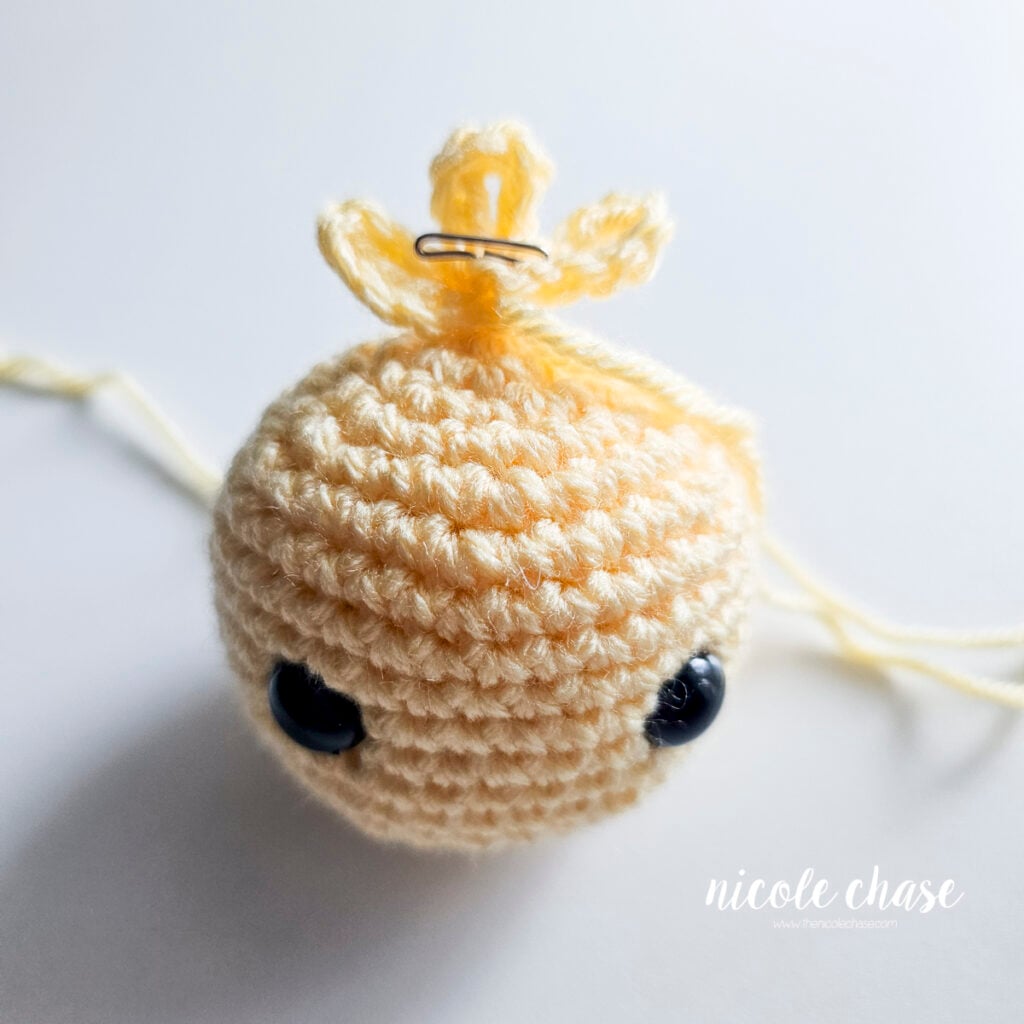
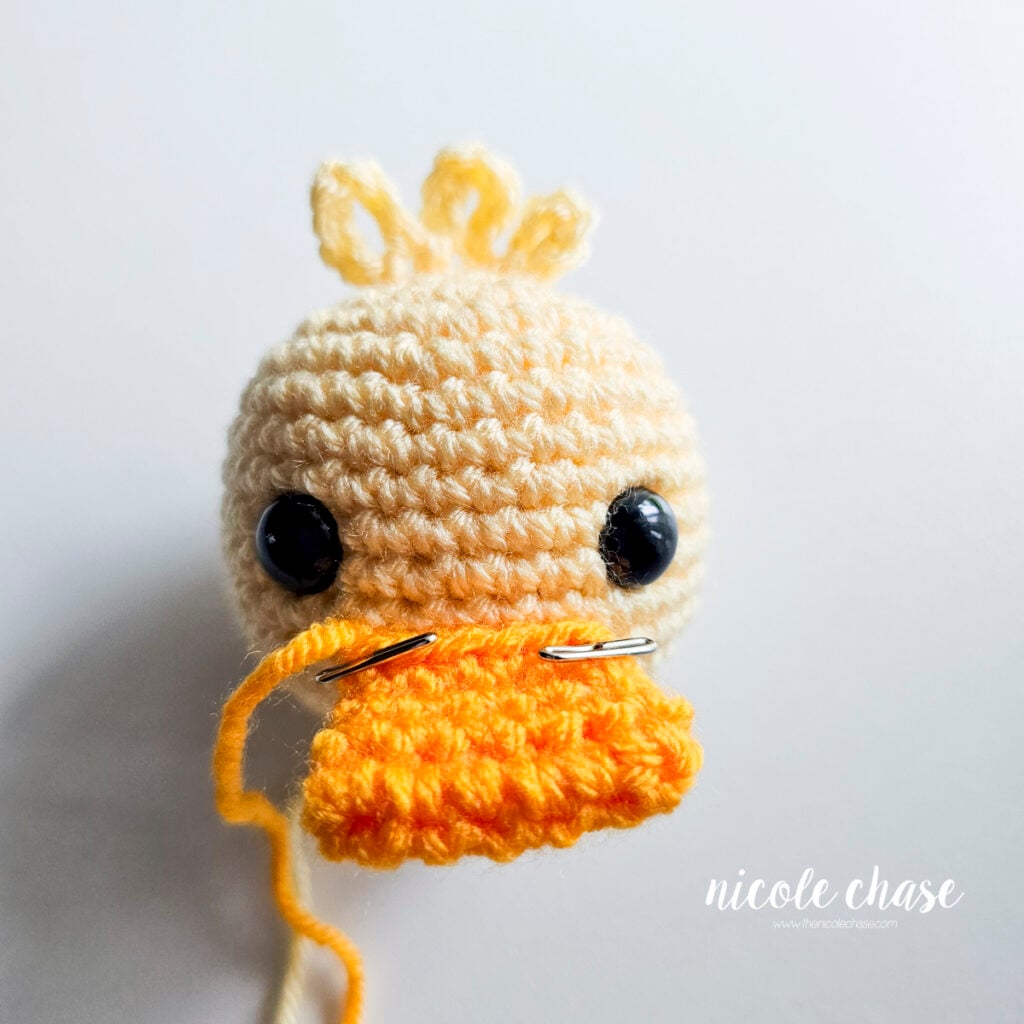
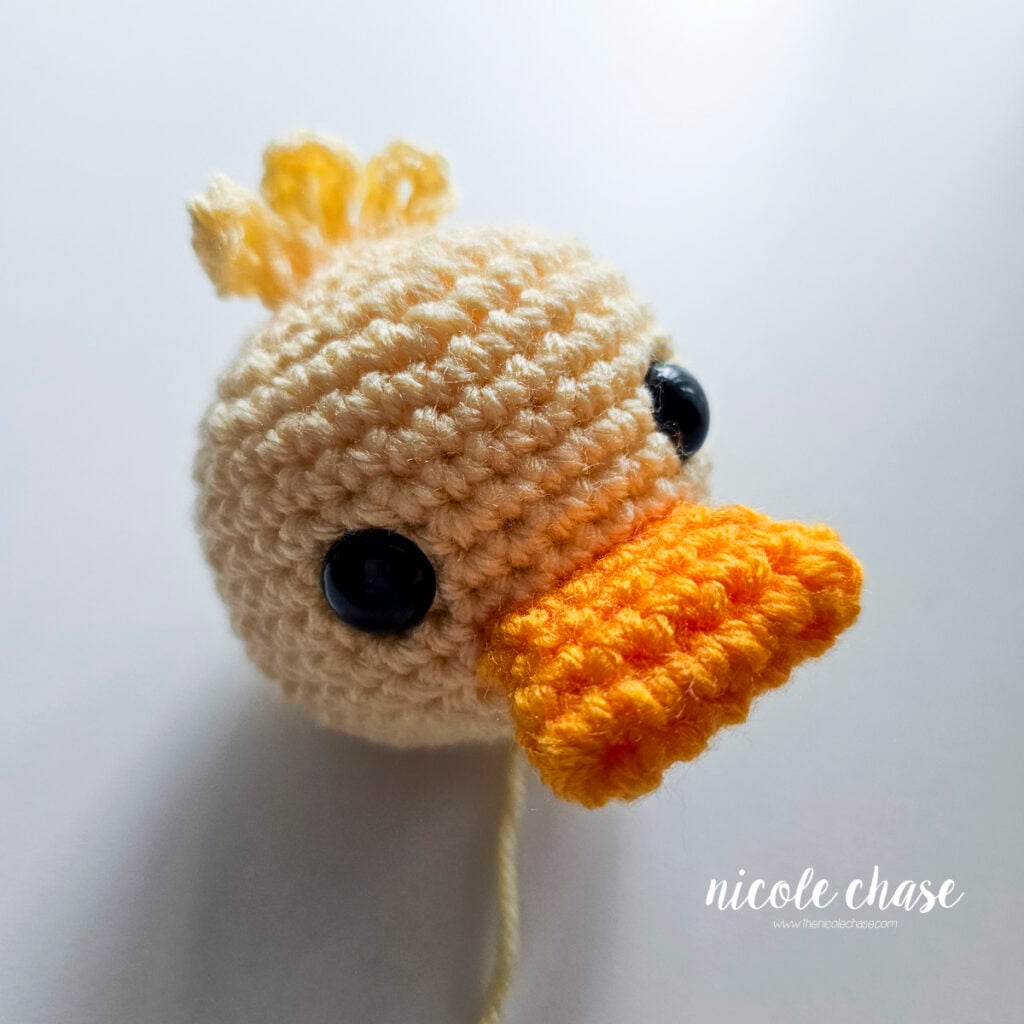
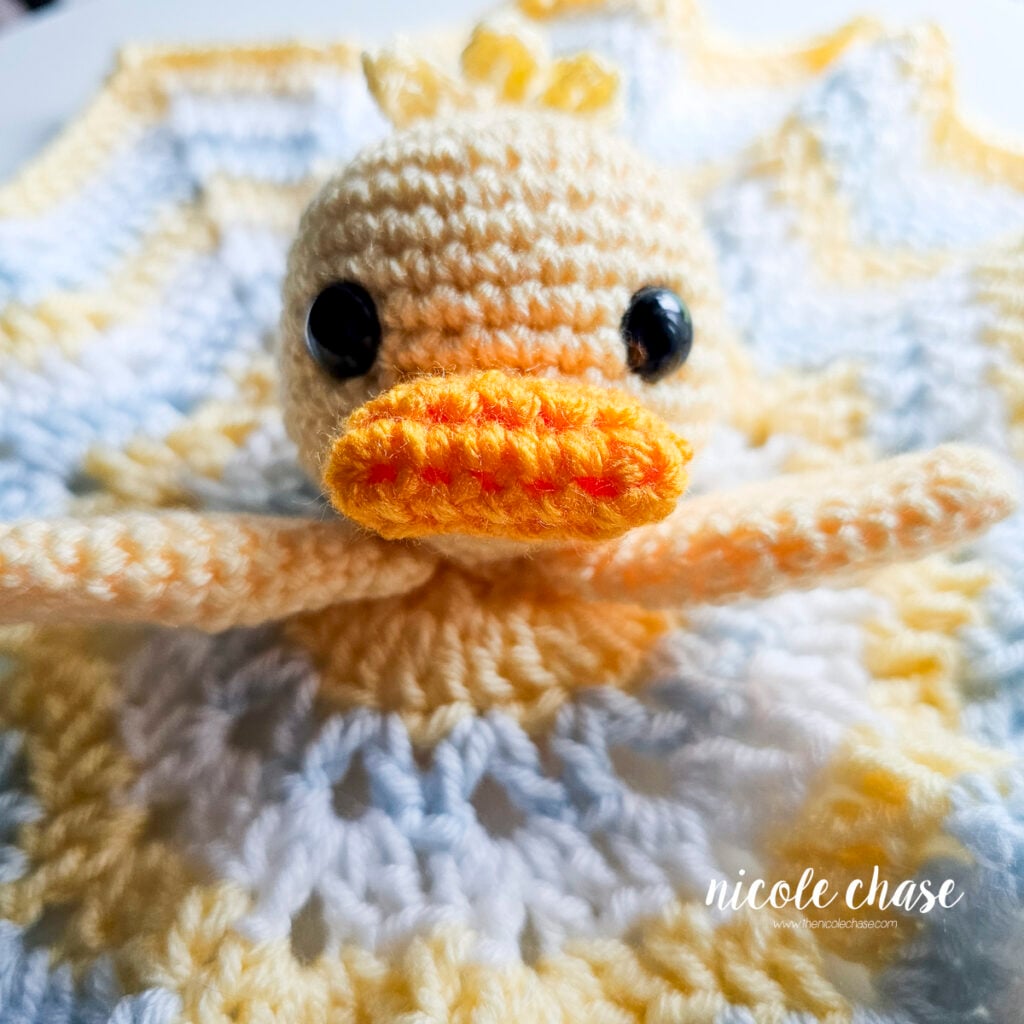
Attach bill to the front of the head, between the eyes, over R13.
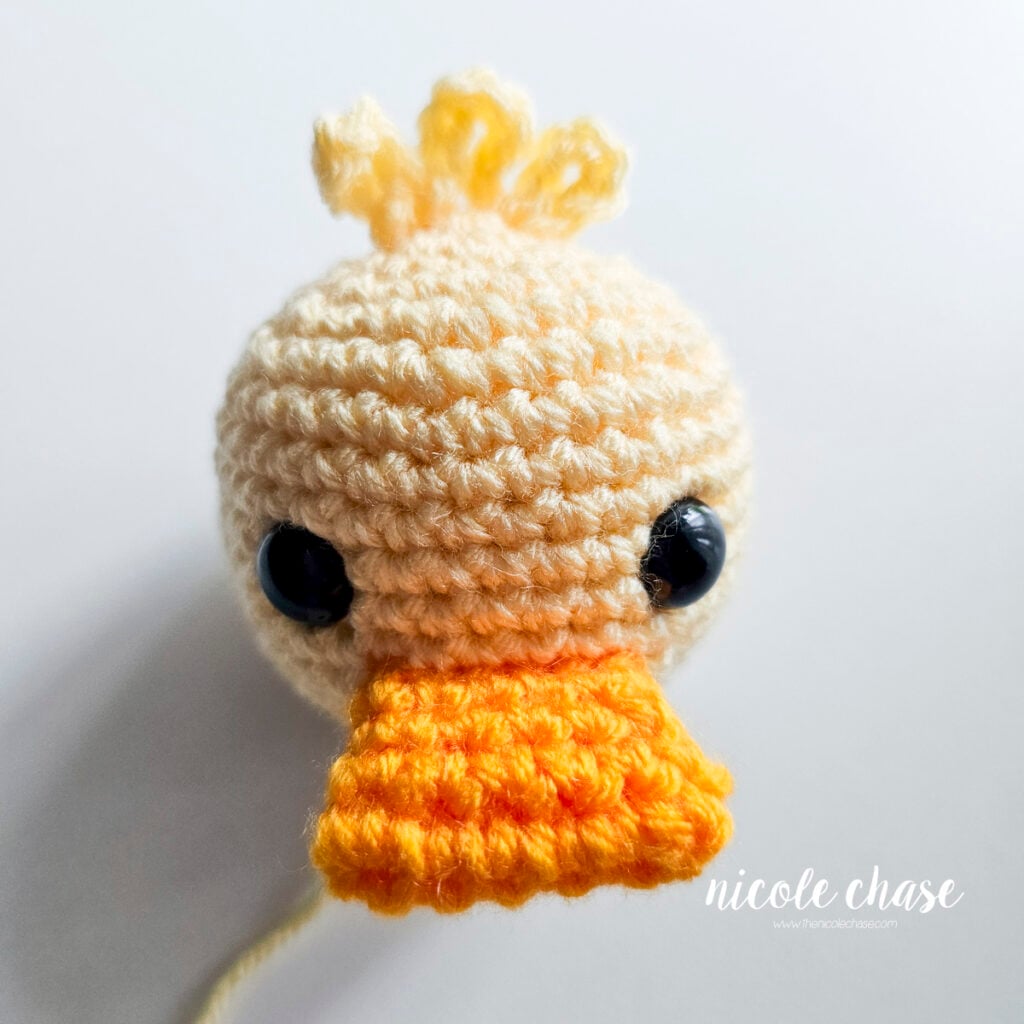
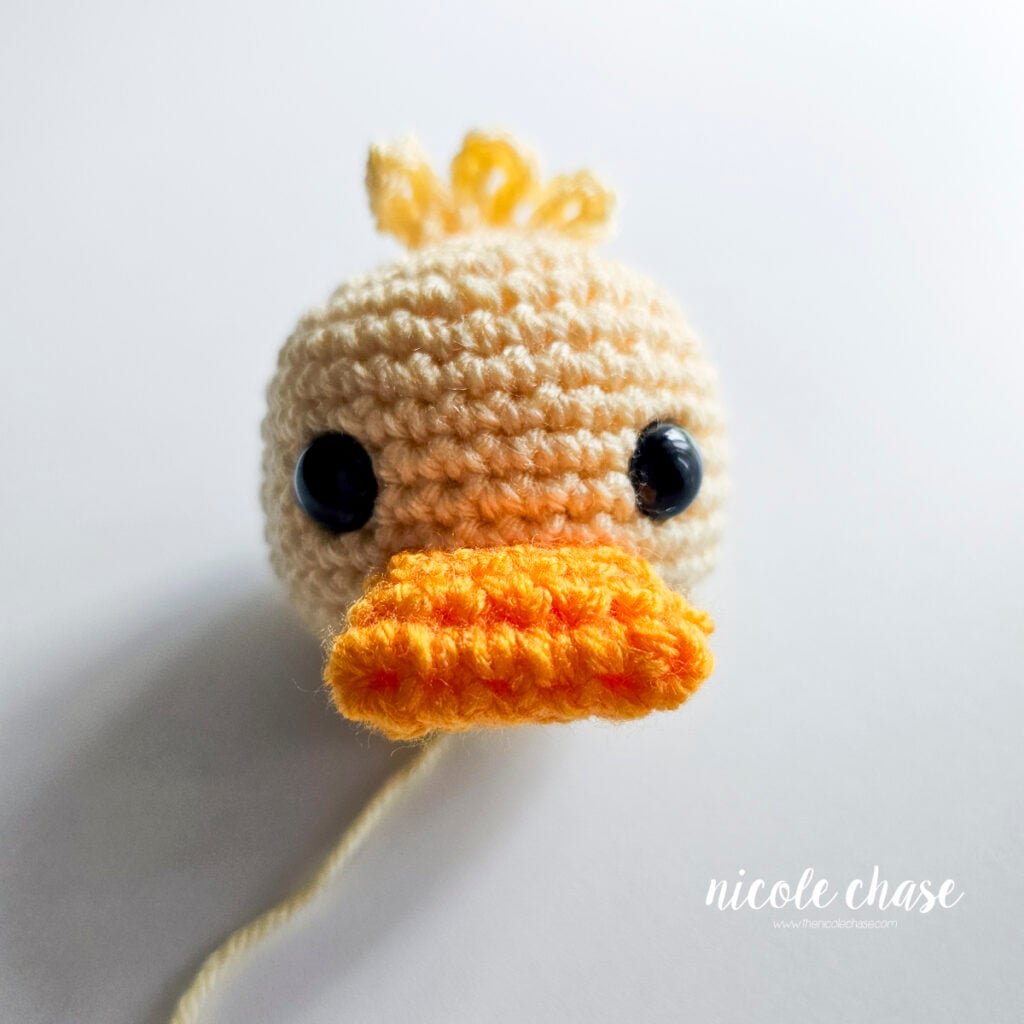
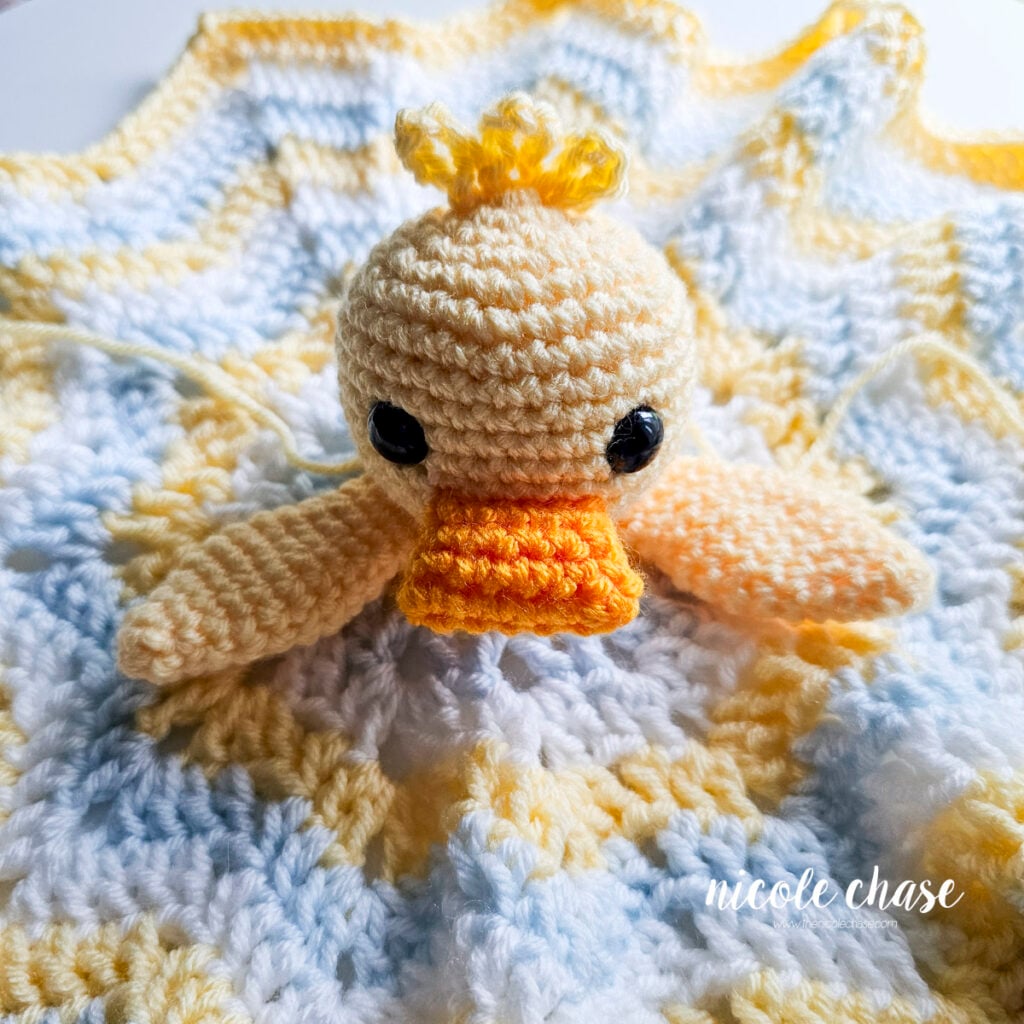
Attach the head to the middle of the blanket. Be sure to sew to the top loops of the blanket only to ensure a clean look on the underside of the blanket.
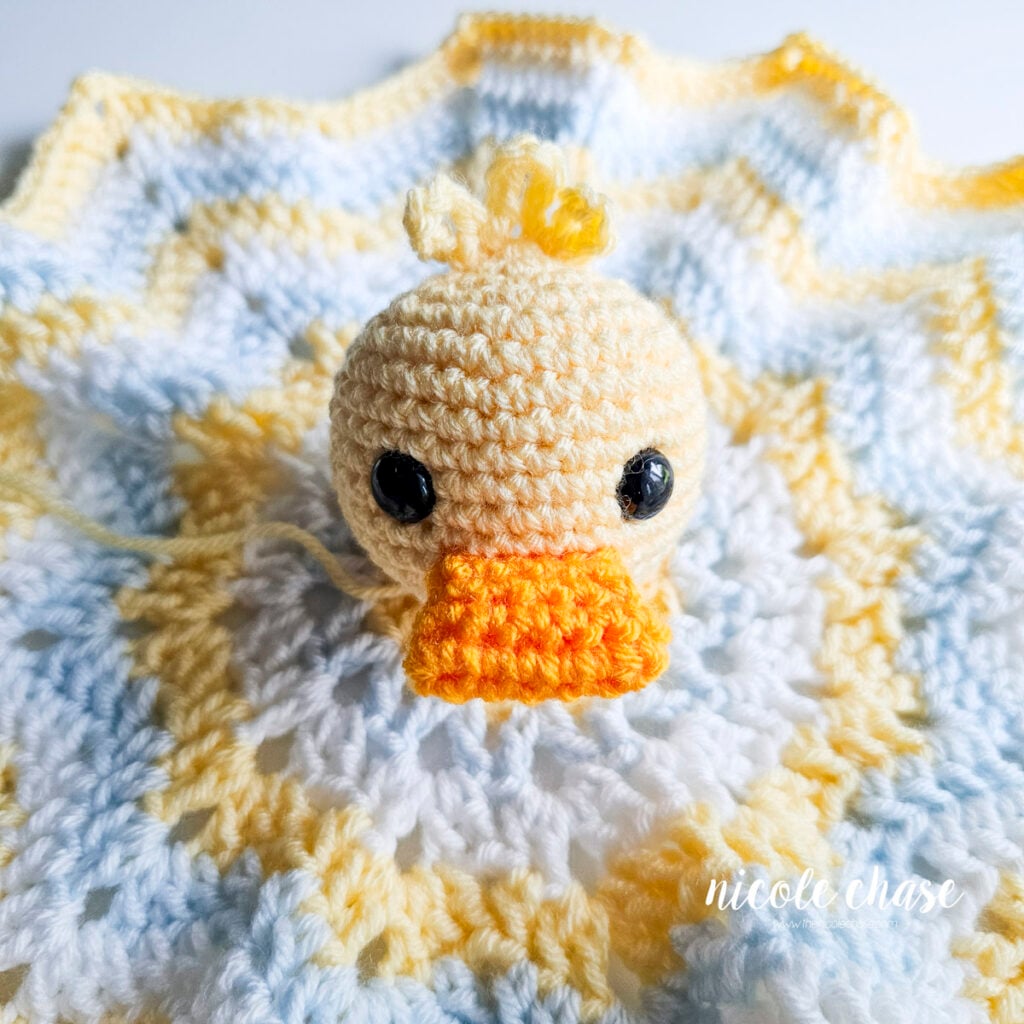
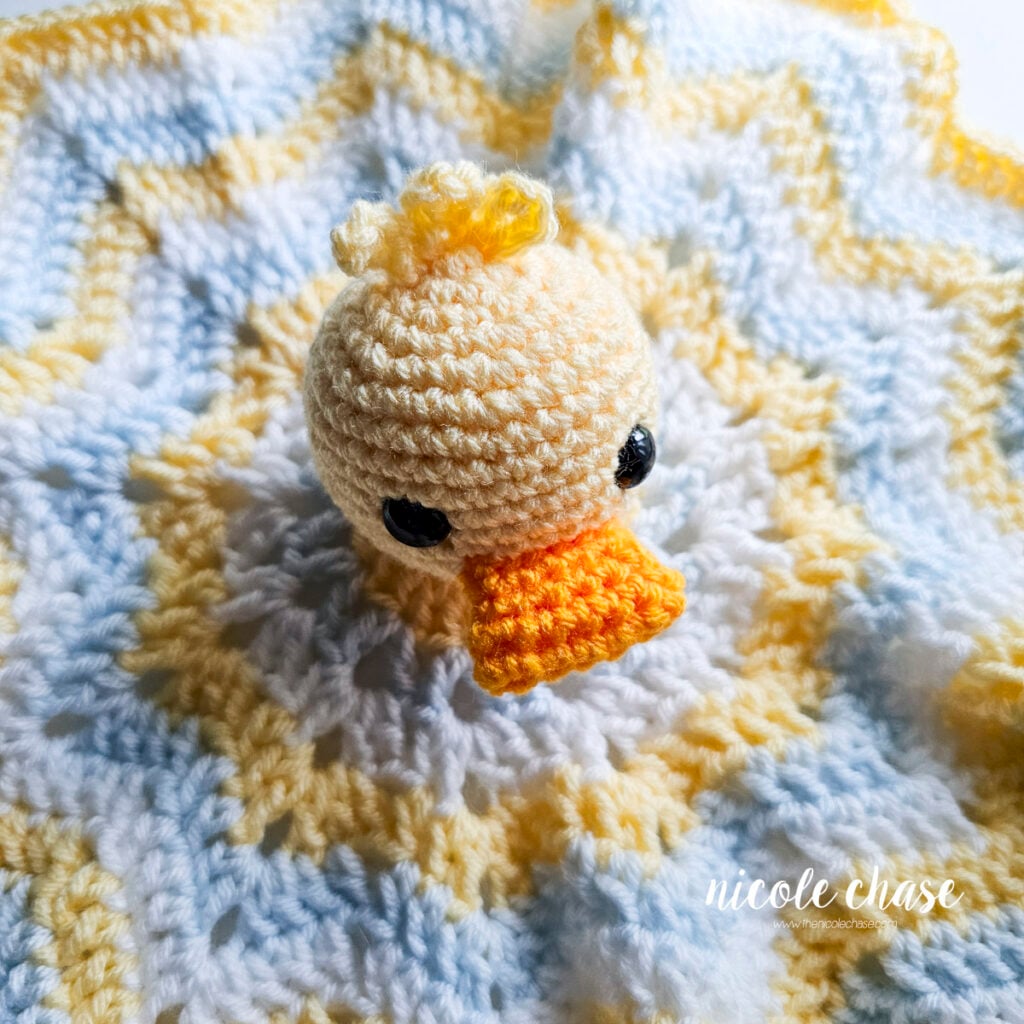
Attach wings where the head and blanket meet, on each side of the head. Have the arms angled towards the front.
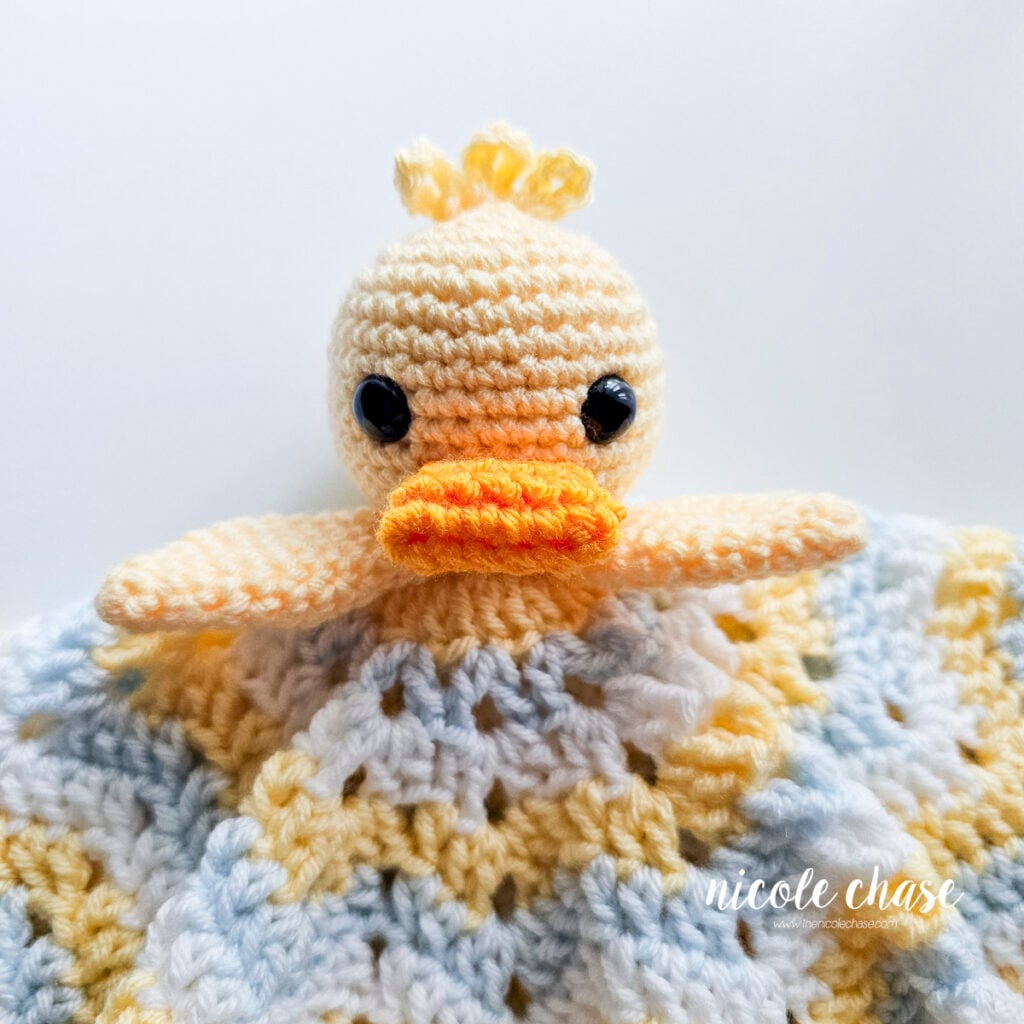
I hop you enjoyed crafting this free duck lovey crochet pattern! I would love to see your finished creation, so please tag me on social media or share your project so I can admire your work.

Ad-Free PDF Pattern for Hug Me Duck Lovey
Tips & Tricks for Success
- Use Pins for Placement: Pin the bill, tuft of hair, head, and wings in place before sewing to keep everything symmetrical and prevent shifting.
- Track Your Rounds: Place a stitch marker in the first stitch of the round so you don’t lose your place.
- Master the Basics: Visit my full list of tips and tricks for amigurumi for extra help with your projects!
Alterations
- Swap for Plush Yarn: Want an extra squishy, oversized version? Work the pattern in a plush yarn like Parfait Chunky and a 5.0mm hook, or a suitable hook for your chosen yarn for a larger, softer baby gift.
- Stitch a Mallard Lovey: Change up the color palette! Use green for the head, add white at the beginning of the blanket, and brown/tan for the wings to create a sweet mallard duck design.
- Create a Baby Gift Set: Pair this adorable duck security blanket with my full-sized Daphne the Duck crochet pattern to craft a matching stuffed toy and lovey set for nurseries or baby showers.
More Free Crochet Patterns You’ll Love
If you enjoyed making this adorable amigurumi duck lovey, be sure to check out some of my other free crochet patterns:
- Full collection of free baby lovey crochet patterns
- Free alligator crochet pattern
- Free otter crochet pattern
If you’re looking for even more fun patterns, take a look at my collection of free farm animal amigurumi, or my full collection of animal amigurumi patterns.
I hope you enjoyed this pattern! If you make it, leave me a comment below.
Want to see more from me? Be sure to subscribe to my email newsletter so that you never miss a pattern!
Follow along with me on Instagram for daily updates and a behind the scenes look at my designs.
I’d love to see what you make with this tutorial! Don’t forget to share your finished work with me: on social media by tagging me @thenicolechase, in your Ravelry projects, or post over in my Facebook group!
Thanks for stopping by! Happy crafting!
Nicole
PATTERN COPYRIGHT © 2026 NICOLE CHASE. ALL RIGHTS RESERVED.
PATTERN MAY NOT BE ALTERED, COPIED, REDISTRIBUTED OR SOLD AS YOUR OWN PATTERN.
YOU MAY SELL THE FINISHED PRODUCT ON A SMALL SCALE. PATTERN/DESIGN CREDIT GIVEN TO WWW.THENICOLECHASE.COM IS APPRECIATED. PERMISSION TO SELL DOES NOT INCLUDE MASS PRODUCTION. LARGE SCALE PRODUCTION IS PROHIBITED.
PHOTOGRAPHY COPYRIGHT © 2026 NICOLE CHASE. ALL RIGHTS RESERVED.
PHOTOS MAY NOT BE ALTERED, COPIED, REDISTRIBUTED OR SOLD AS YOUR OWN.
This post may contain affiliate links. If you make a purchase through links on our site, we may earn a commission.