How to Change Colors in Crochet
This post may contain affiliate links. If you make a purchase through links on our site, we may earn a commission.
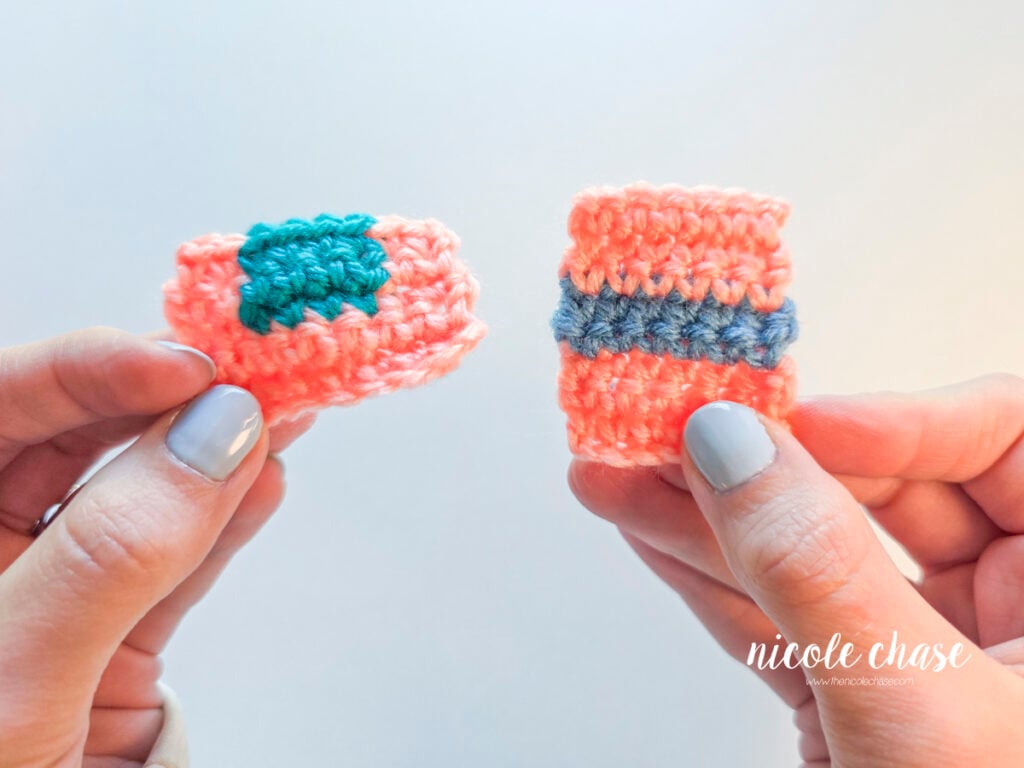
Learning how to change colors in crochet is one of the most important skills needed to elevate your projects, whether you are making colorful blankets, garments, or plushies. If you’ve ever ended up with uneven stitches, loose tails, or jagged transitions, don’t worry, changing yarn colors is simple once you master this technique!
Quick Summary: How to Change Crochet Colors
- Best For: Adding new yarn colors, working colorwork designs, or seamlessly joining a new skein of yarn in flat rows or joined rounds.
- Why Learn It: Master clean transitions with crochet color changes without unspooling stitches, creating bulk or leaving visible knots on your work.
- Skill Level: Beginner.
- Key Techniques: You can swap colors by pulling your new yarn through the existing loop on your hook, or by completing the final yarn-over of the previous stitch with your new color.
Table of Contents
Save this Tutorial for Later!
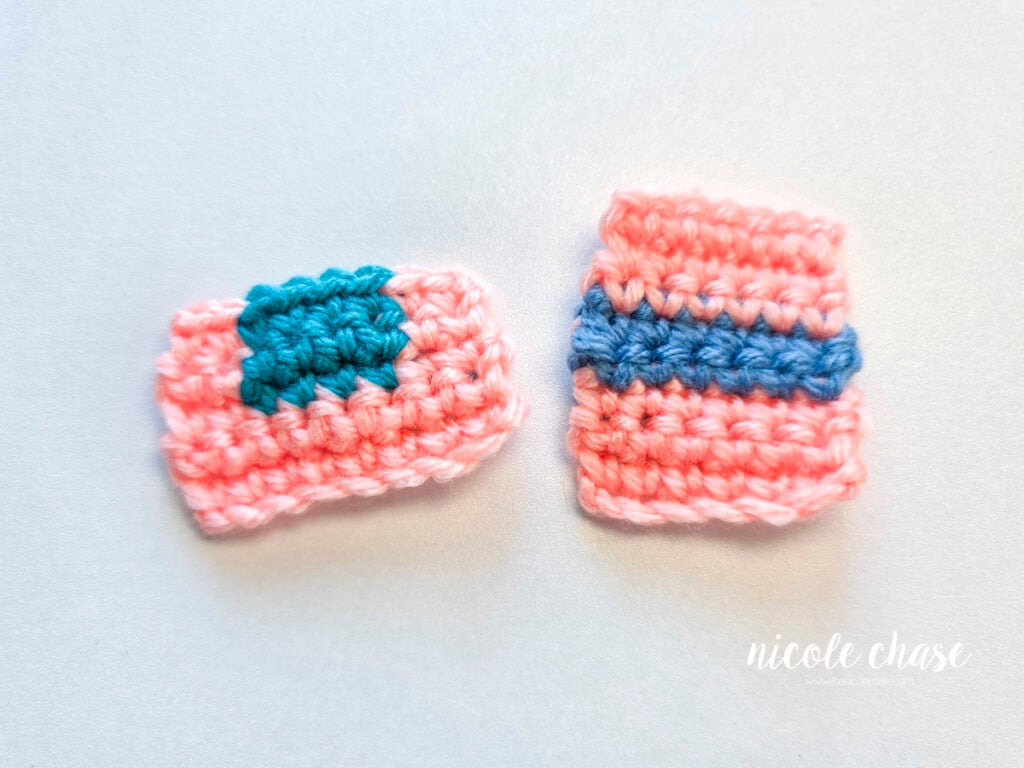
Pin this crochet color change tutorial to your favorite Pinterest board so you can find it later!
Watch the Crochet Color Change Video Tutorial
In the video below, I’ll walk you through 3 different ways to change yarn colors in crochet step-by-step.
We’ll start with two standard color change methods that work wonderfully for flat rows, basic joined rounds, graphics, and all projects really. Then, I’ll show you a seamless, invisible color change technique which is my absolute favorite for amigurumi and continuous rounds! Follow along with the video below, or scroll down for the step-by-step photo tutorial.
This video is also available on YouTube. Watch this video: How to Change Colors in Crochet on YouTube.
Method 1: Basic Pull-Through Color Change (Easiest)
This quick pull-through technique is one of the simplest ways when learning how to change colors in crochet. While the tutorial photos below demonstrate this method at the end of a flat row, keep in mind that the core pull-through concept can be adapted across almost any stitch pattern or row placement.
Step-by-Step Instructions
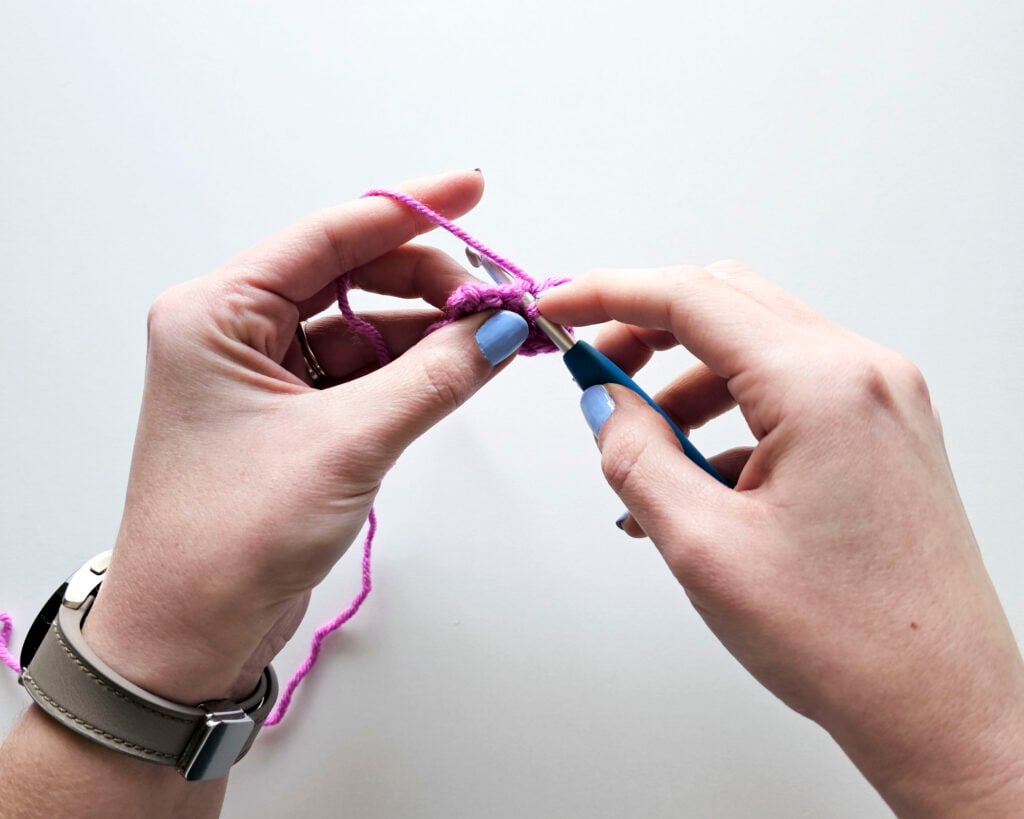
Step 1: Complete your final stitch in your first color as you normally would. Drop that first color. Place a loop of your next color onto your crochet hook and pull it directly through the loop on your hook.
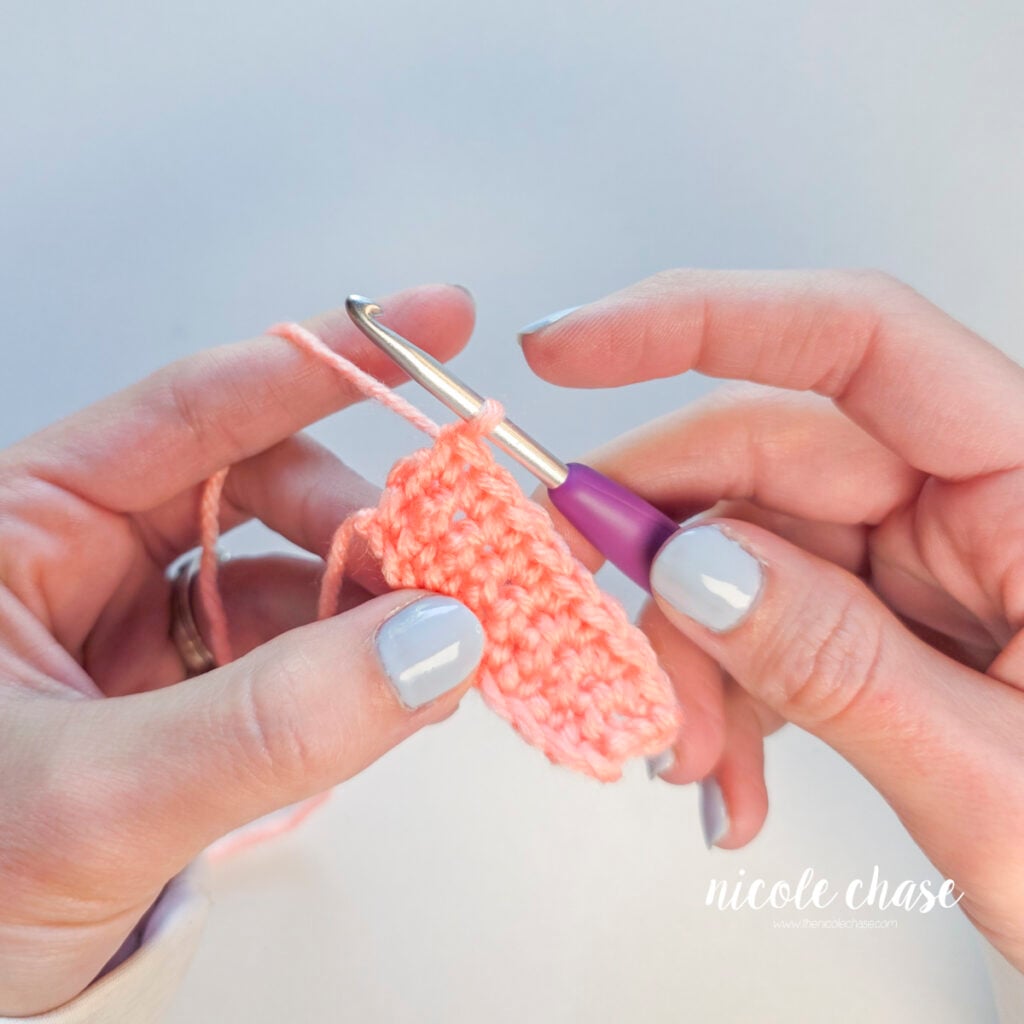
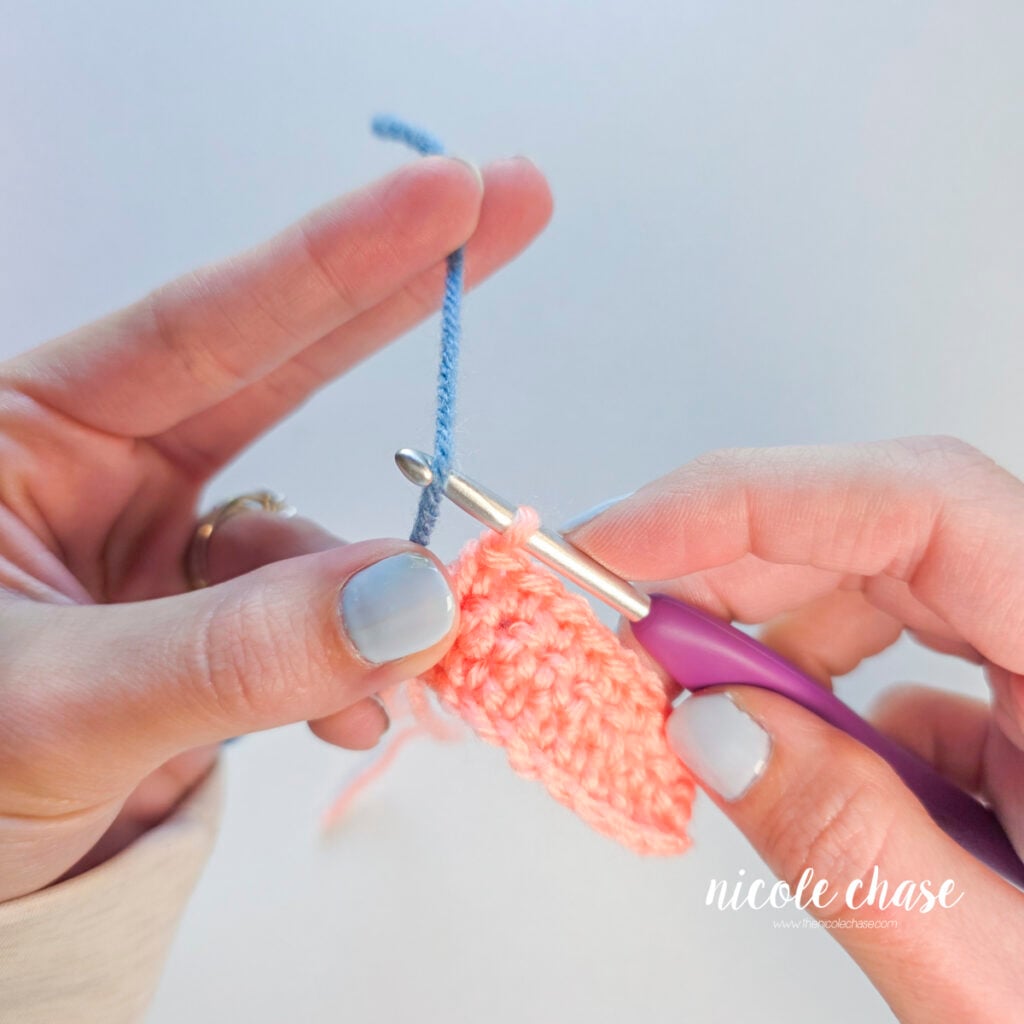
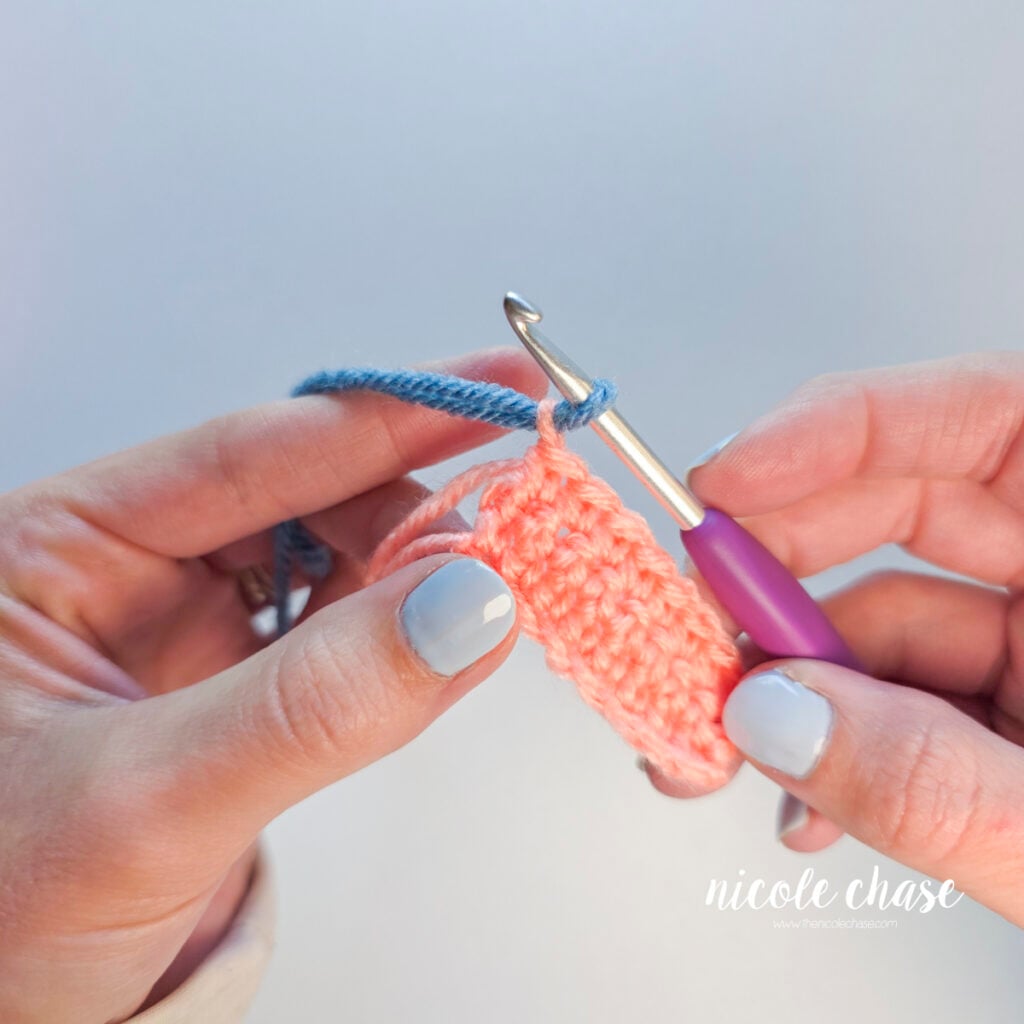
Step 2: Tug the tail of your first color tightly to collapse and close the old loop, leaving only the loop of your new color on your hook. Secure your yarn tails. I prefer to secure my yarn tails with a knot.
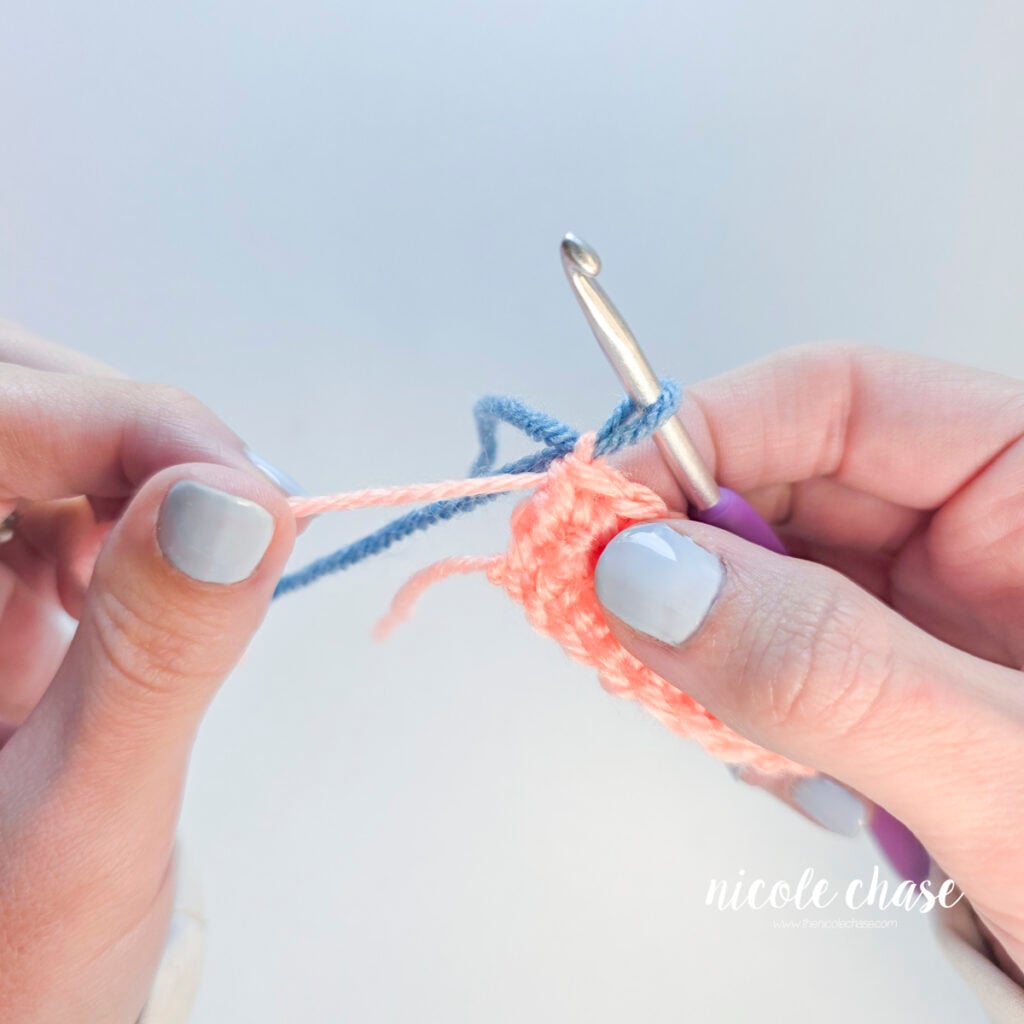
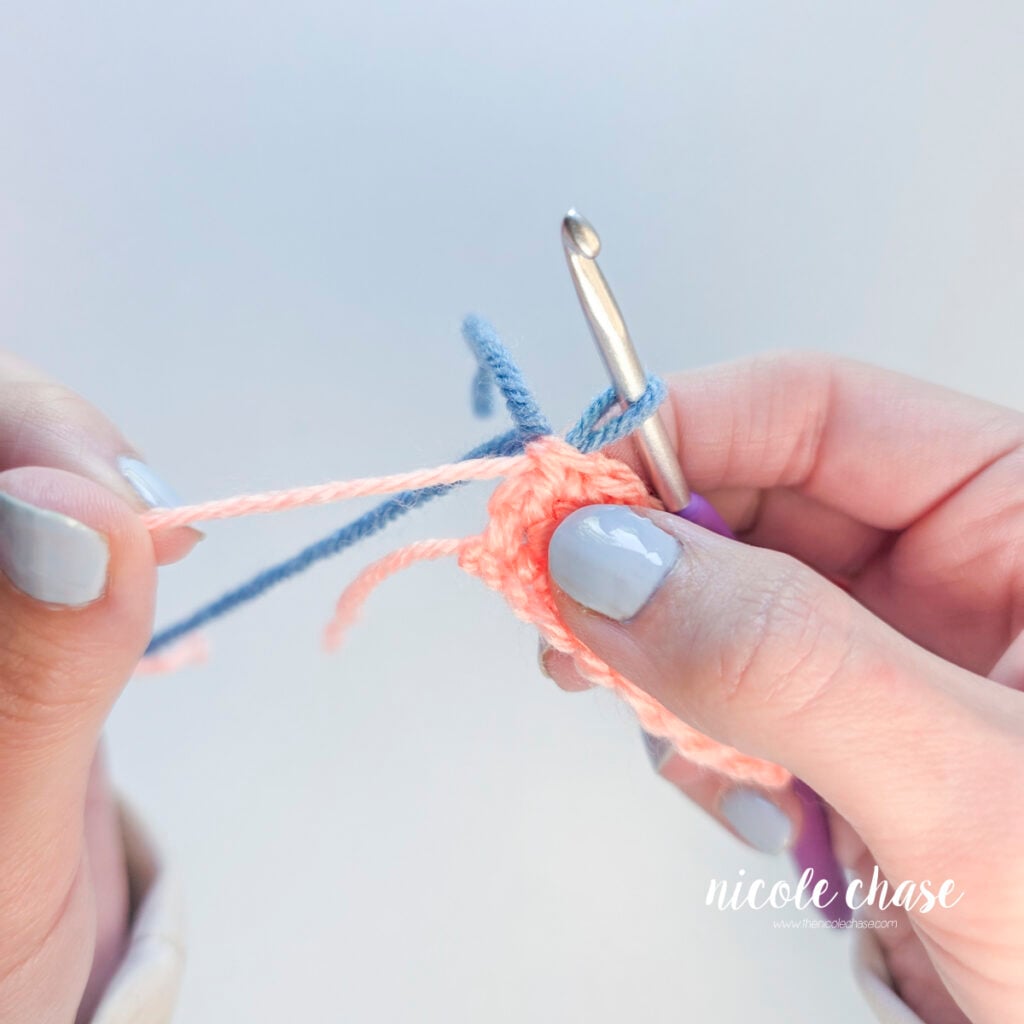
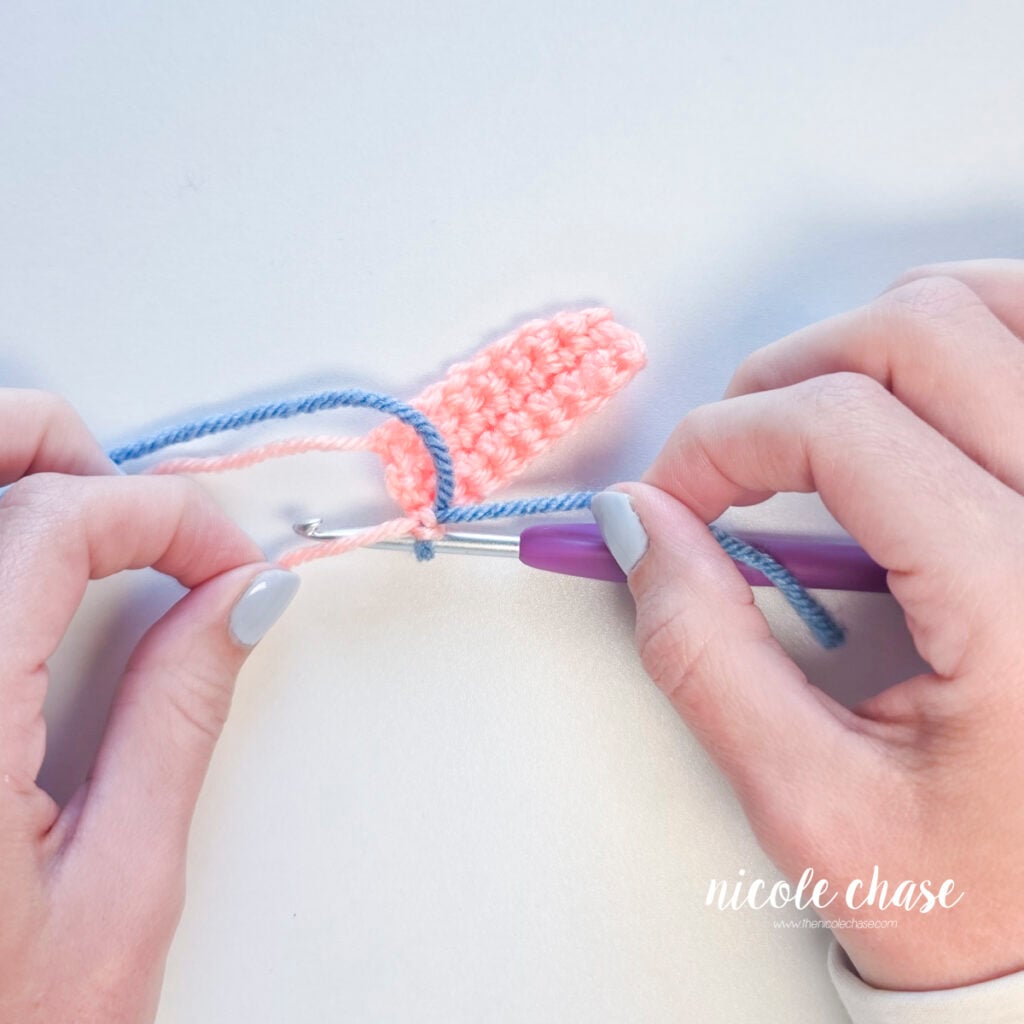
Step 3: You now have your new color on your hook and are ready to chain, turn, and continue crocheting your next stitches in the new color.
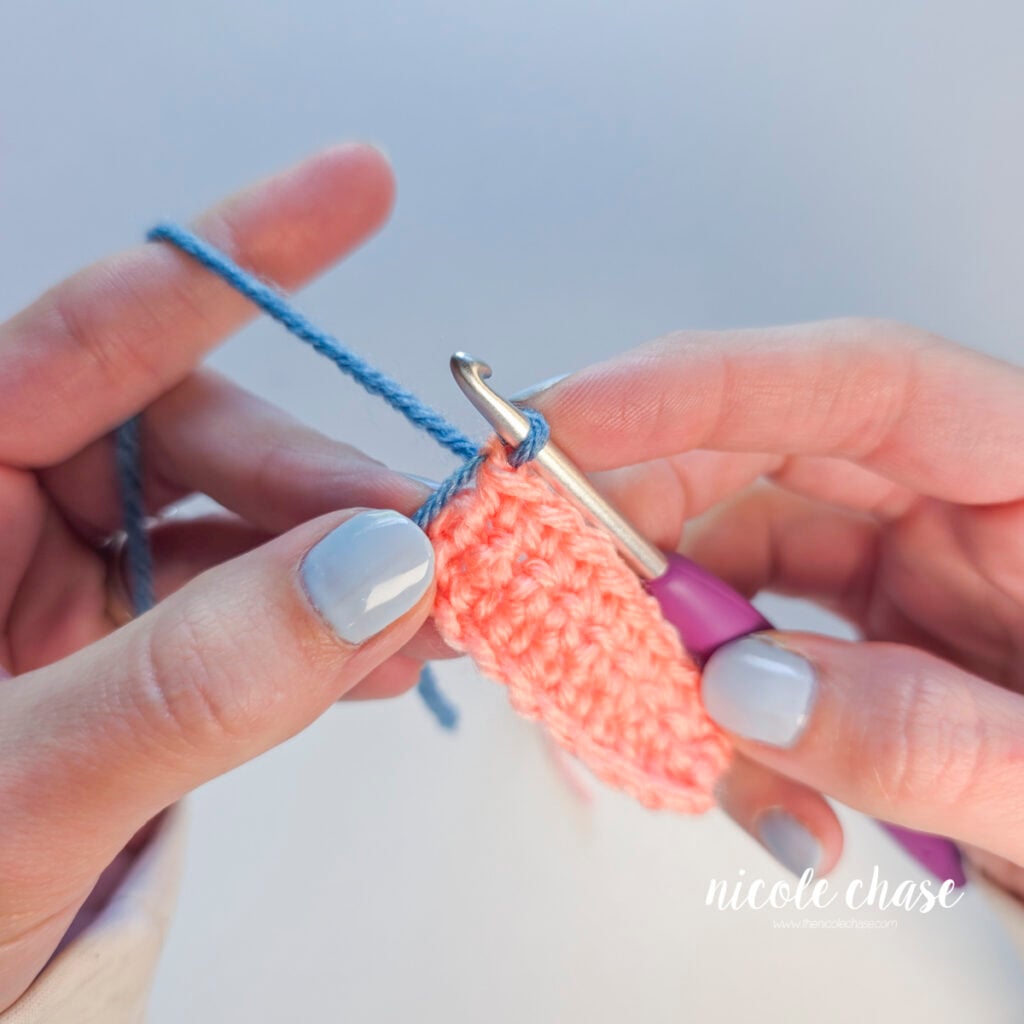
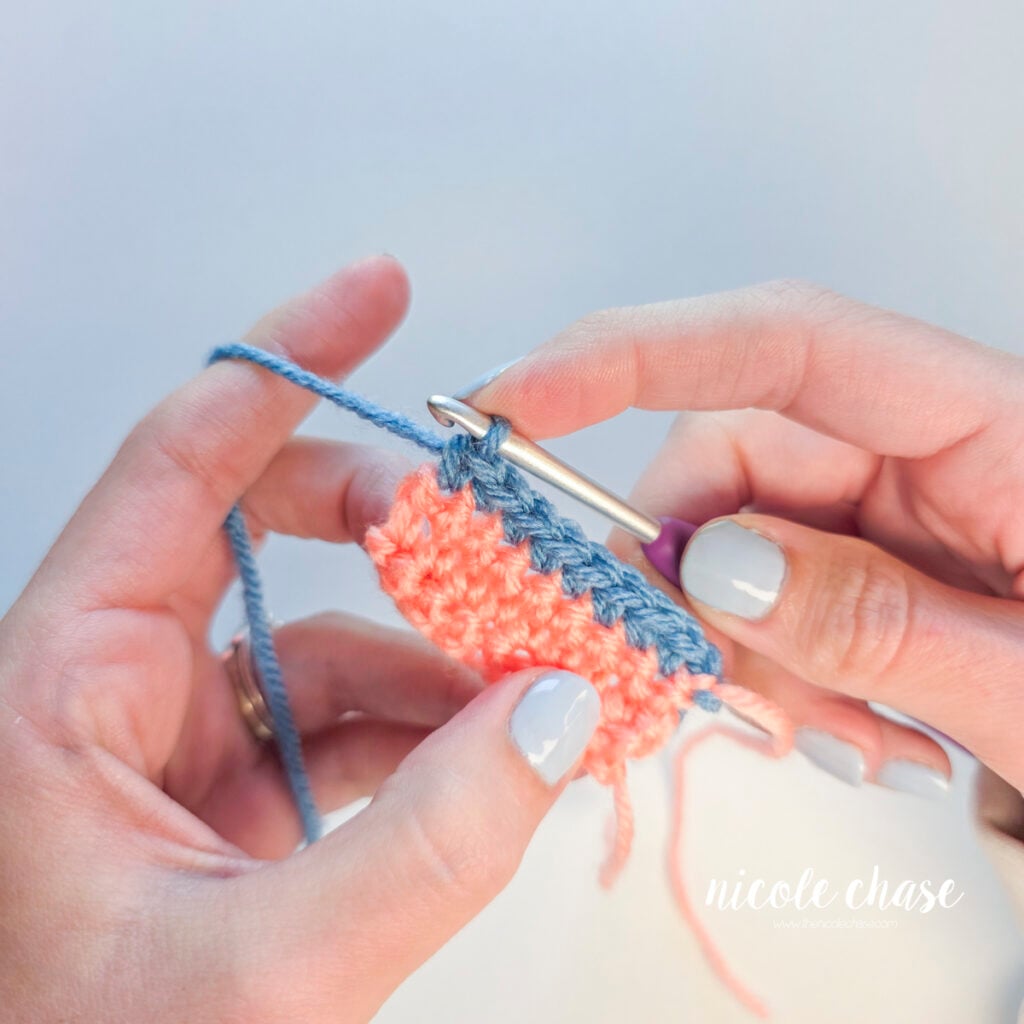
Pro Tip for Method 1: Depending on your project type, you can tie the yarn tails of your two colors together on the wrong side of your work to secure them, and let them become hidden on the inside of your project, or leave the yarn tails loose to weave in with a tapestry needle later.
Method 2: Standard Color Change (Recommended)
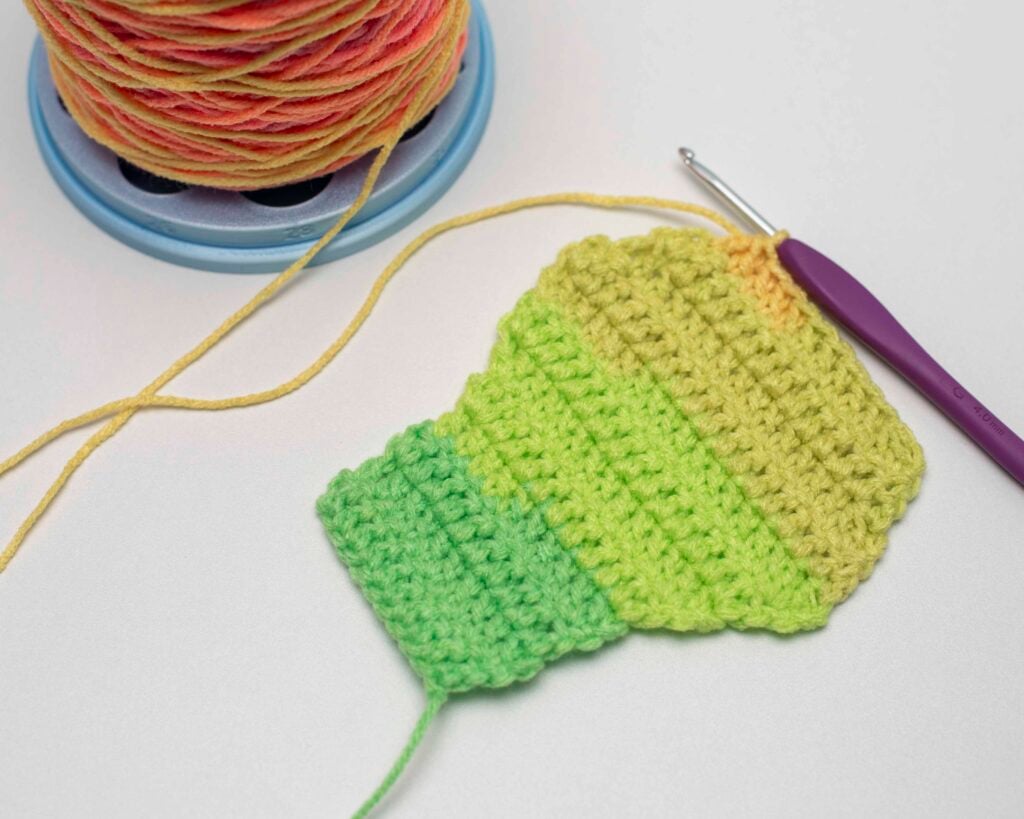
This standard color change method is widely considered the best practice across general crochet patterns for how to change crochet colors. By finishing the final yarn-over of your last stitch in your new color, your next stitch starts with a clean, perfectly formed loop on your hook. This technique works seamlessly whether you are changing colors at the end of a row or mid-row.
Step-by-Step Instructions
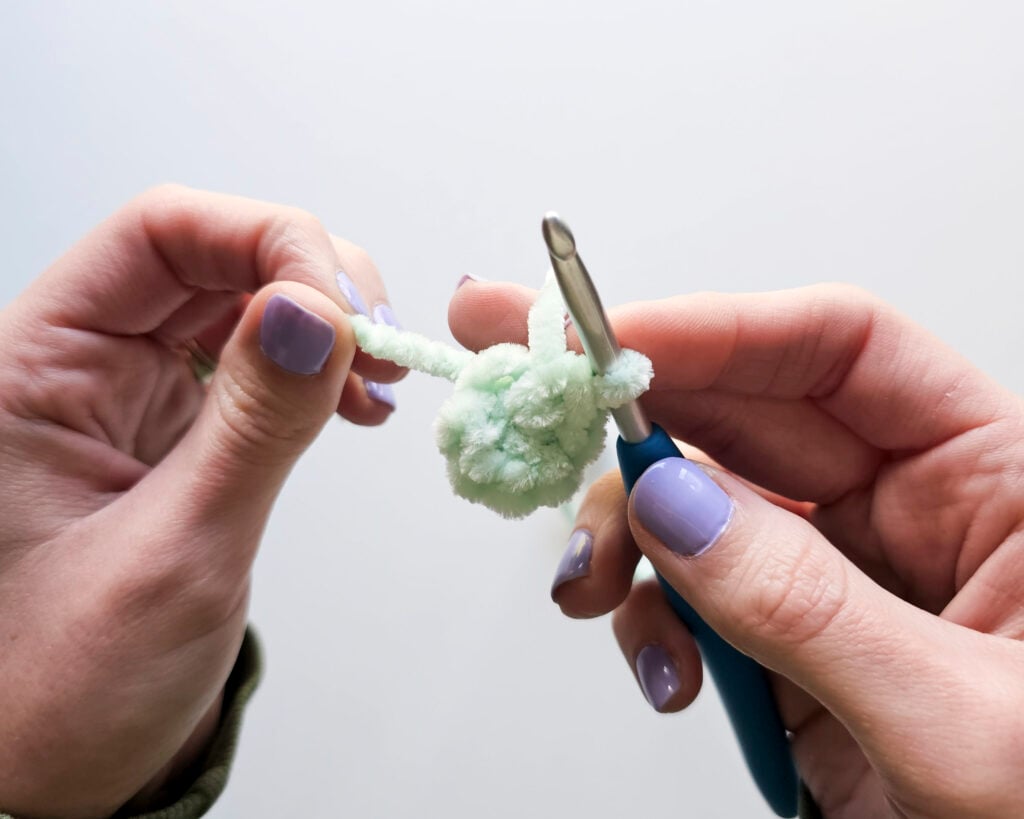
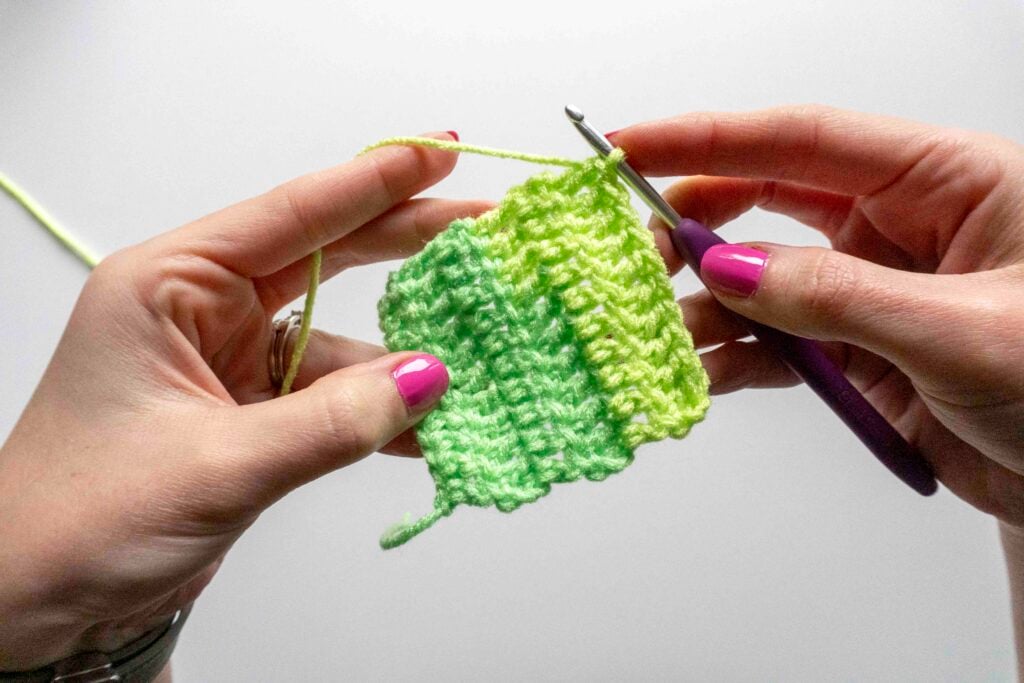
Step 1: Work your final stitch before the color change in your current color up until the final yarn over. (For a single crochet, insert your hook into the stitch and pull up a loop, leaving two loops on your hook).
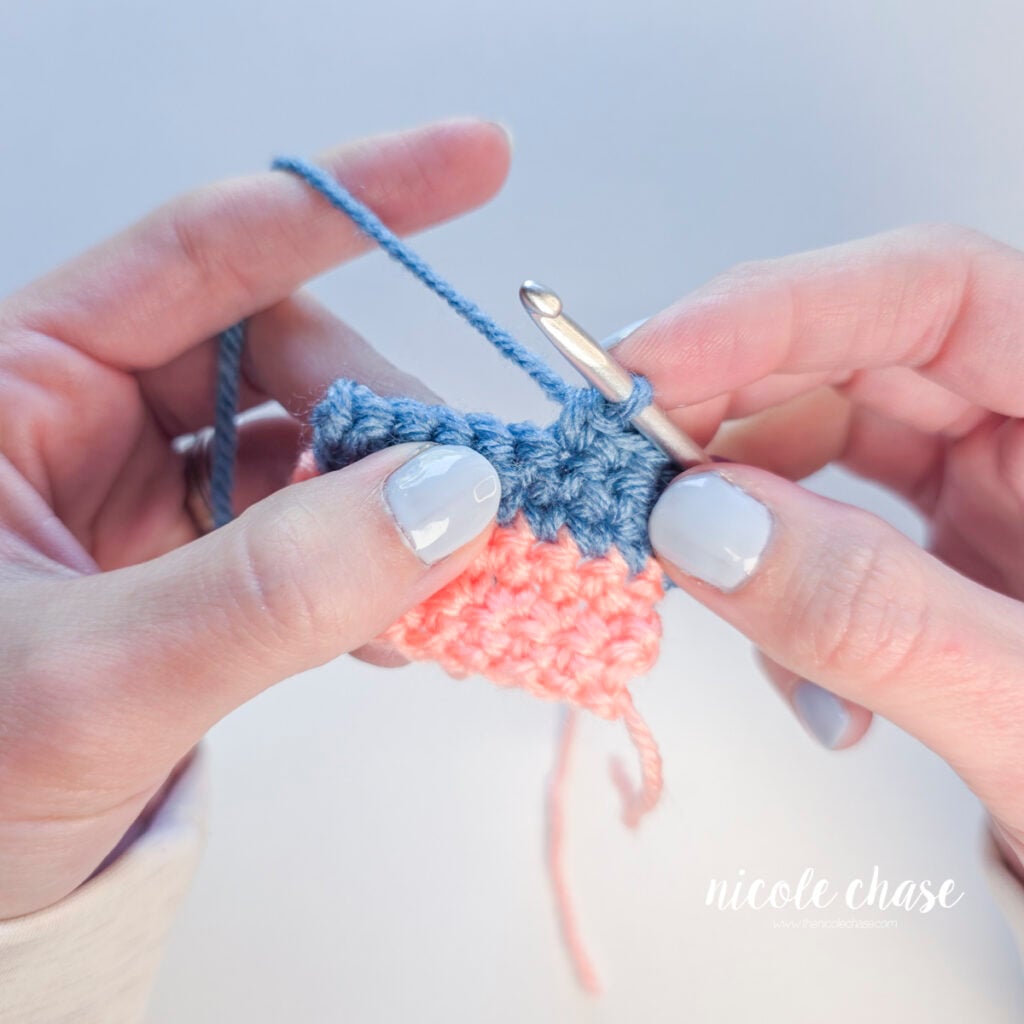
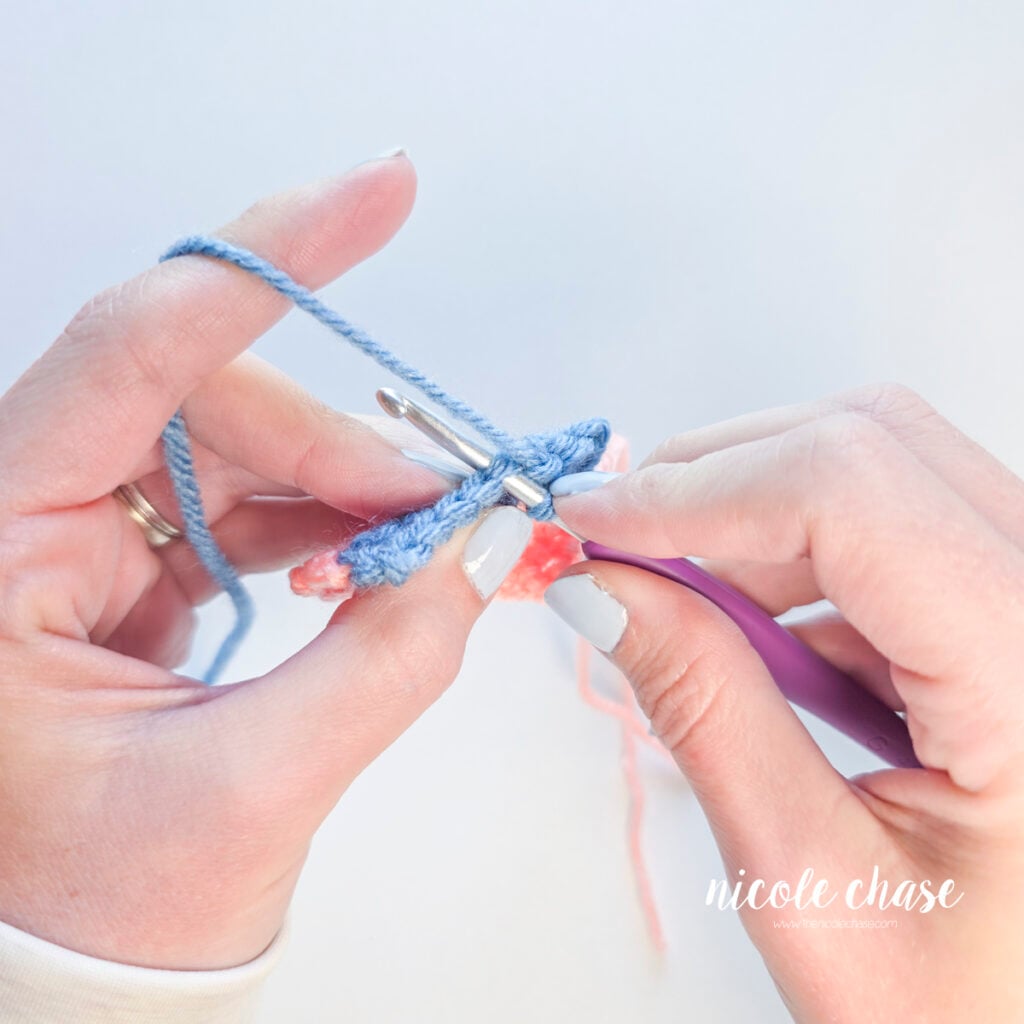
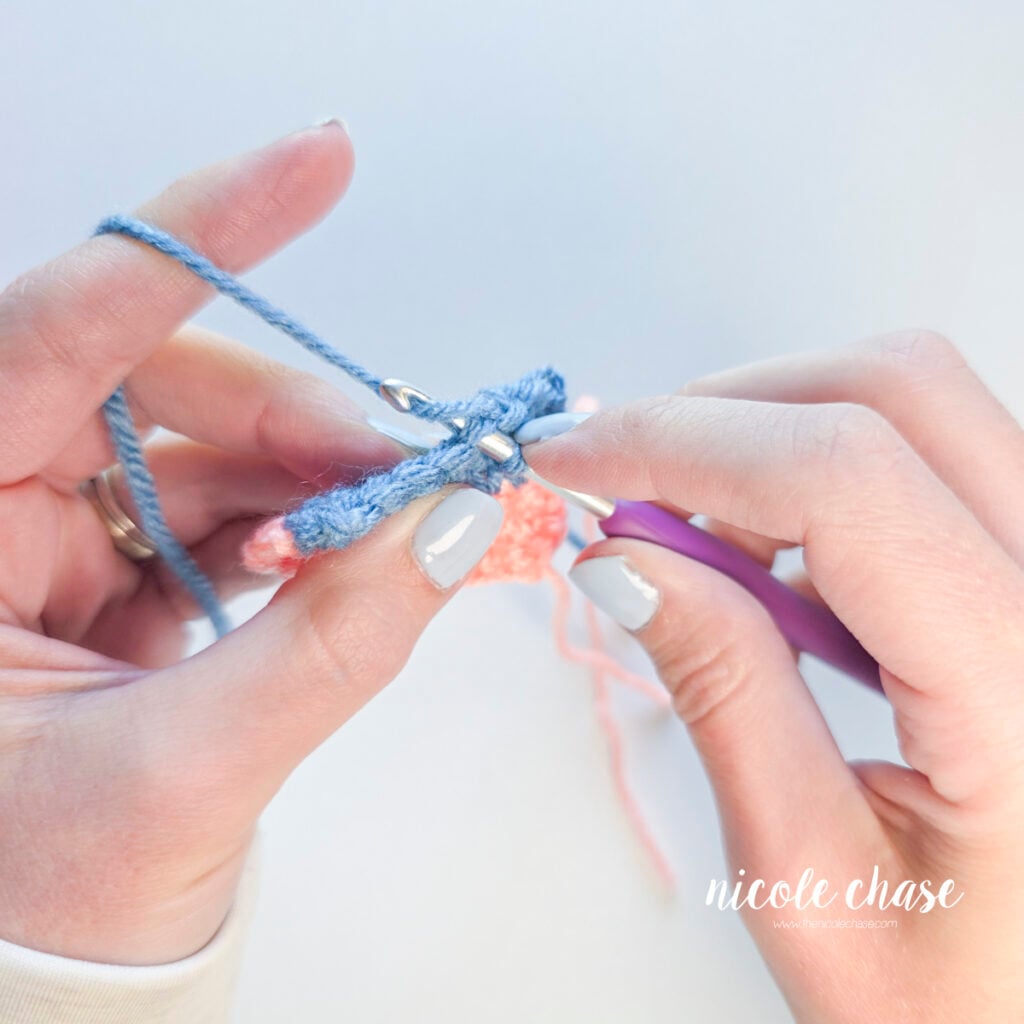
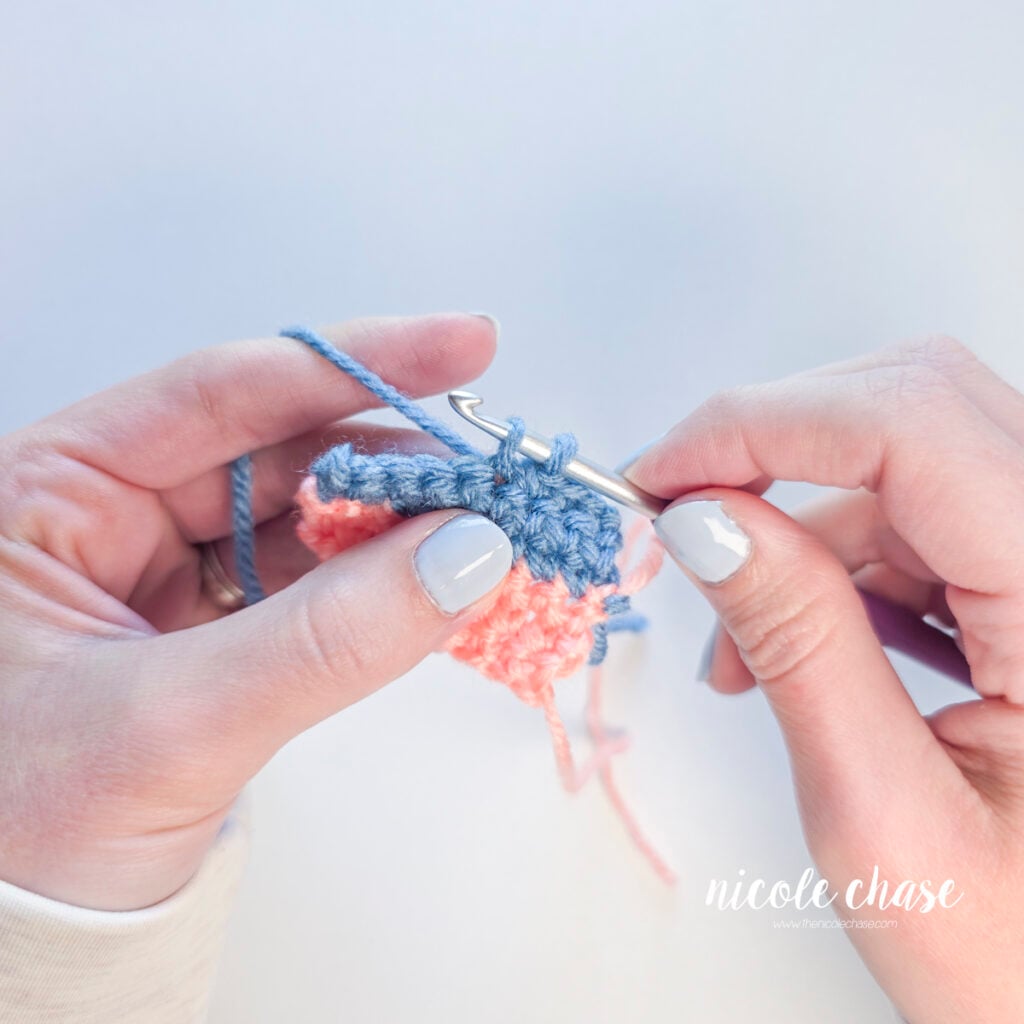
Step 2: Drop your first color, yarn over with your new color, and pull it through both loops on your hook to complete the stitch. Secure your yarn tails with a knot if desired.
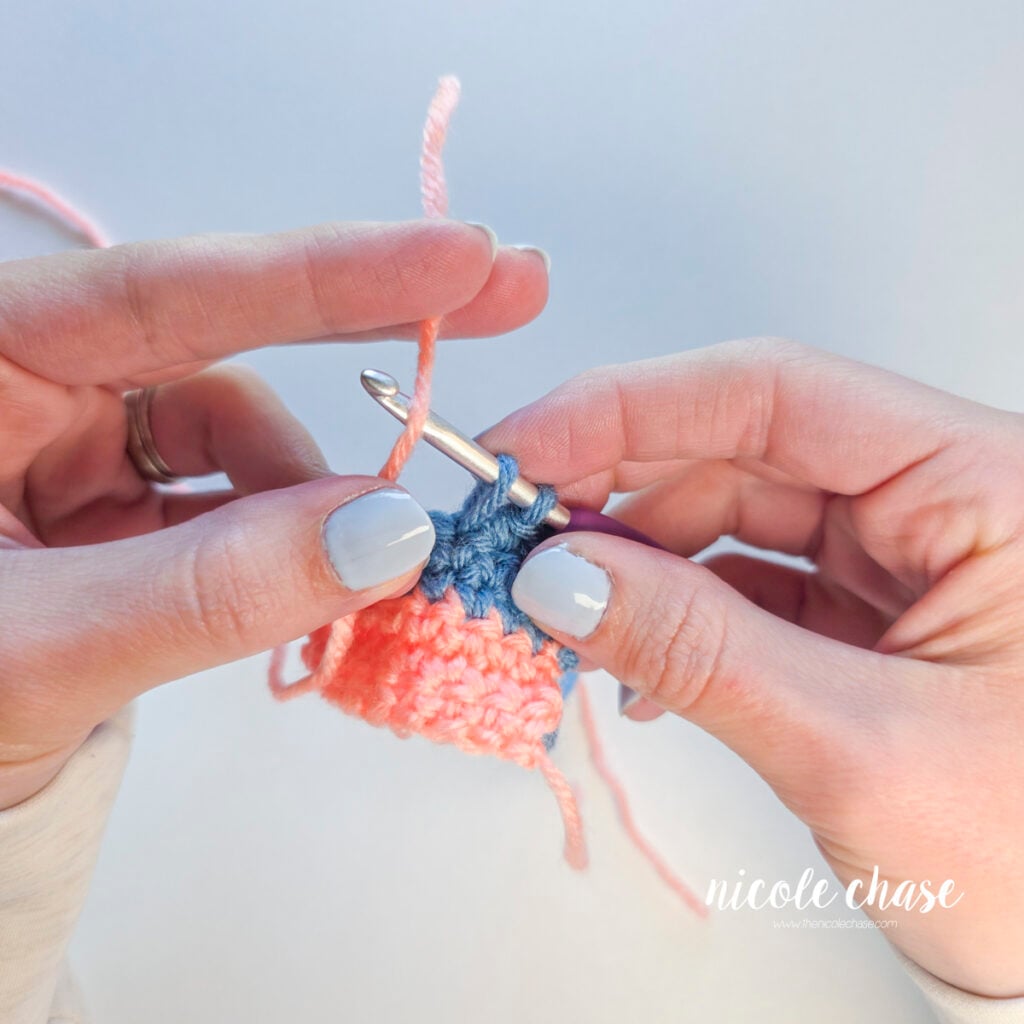
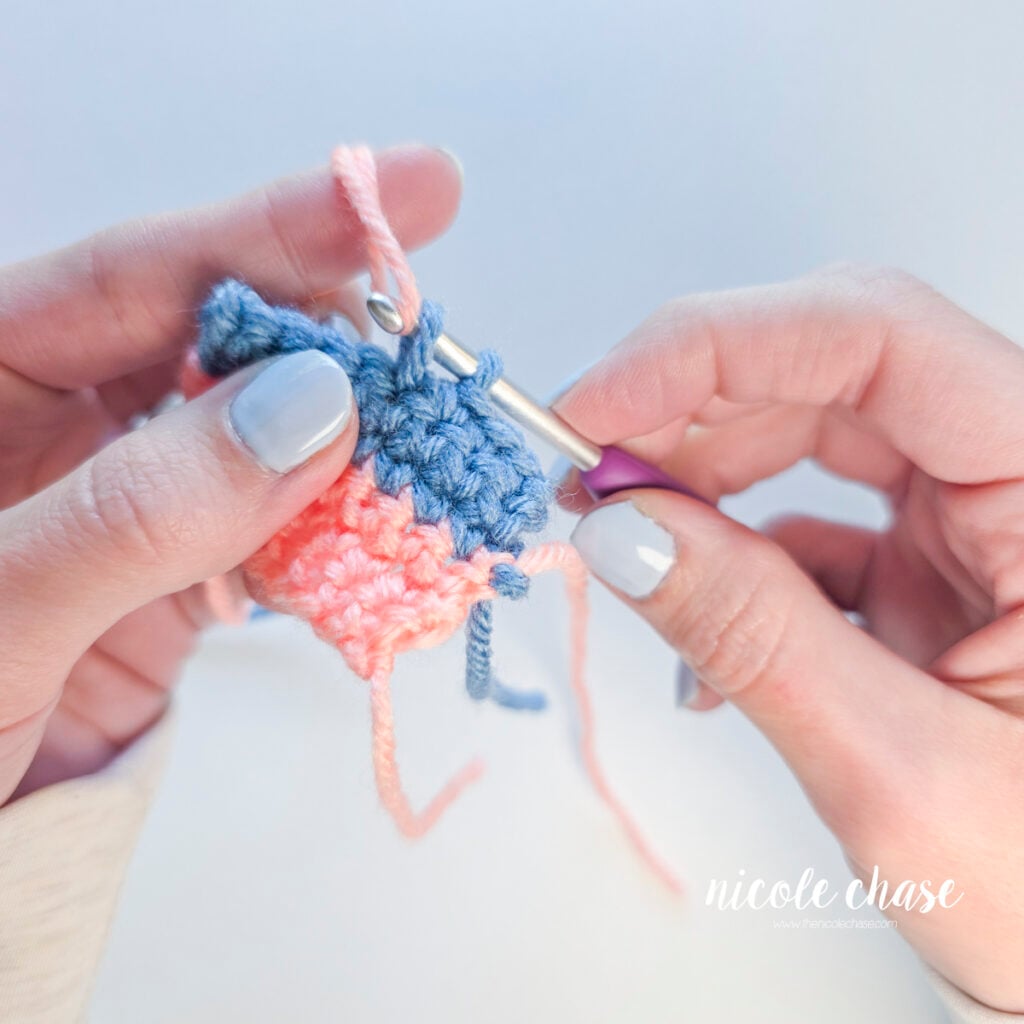
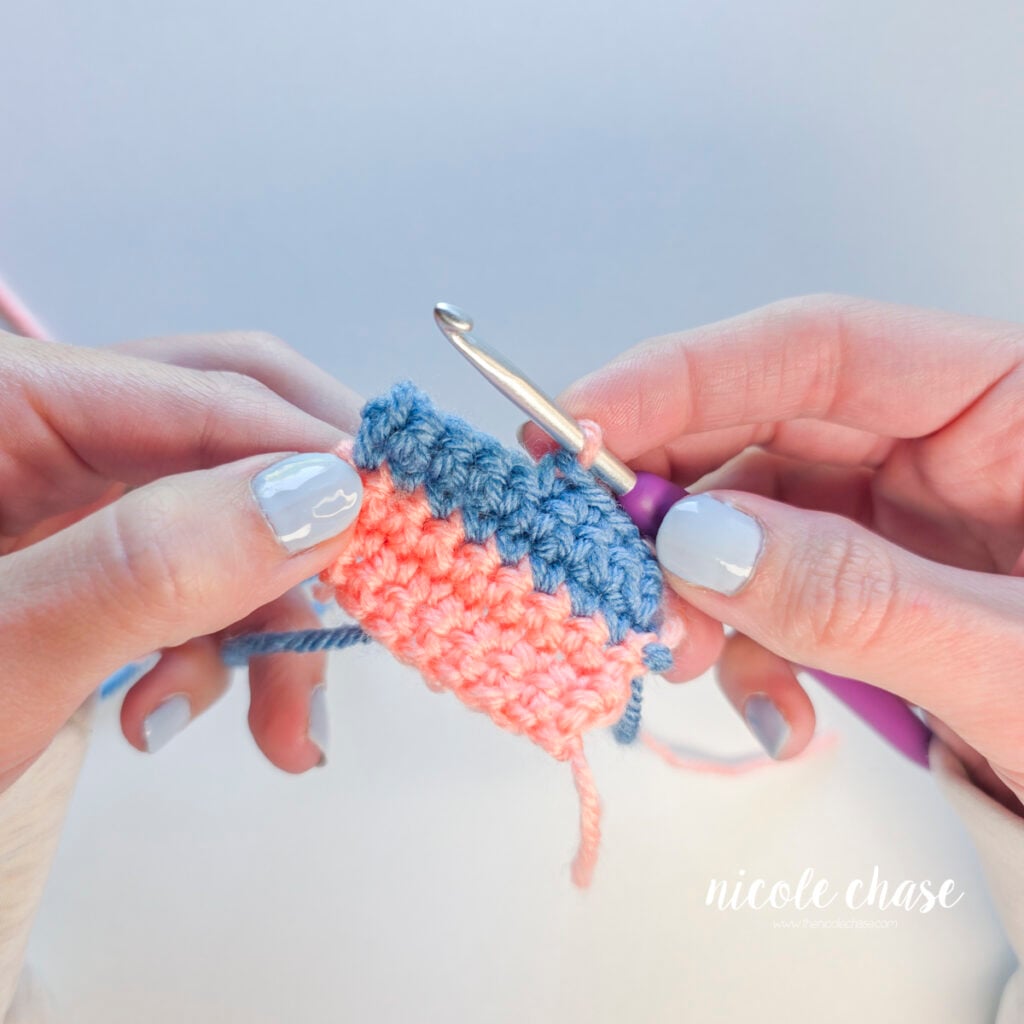
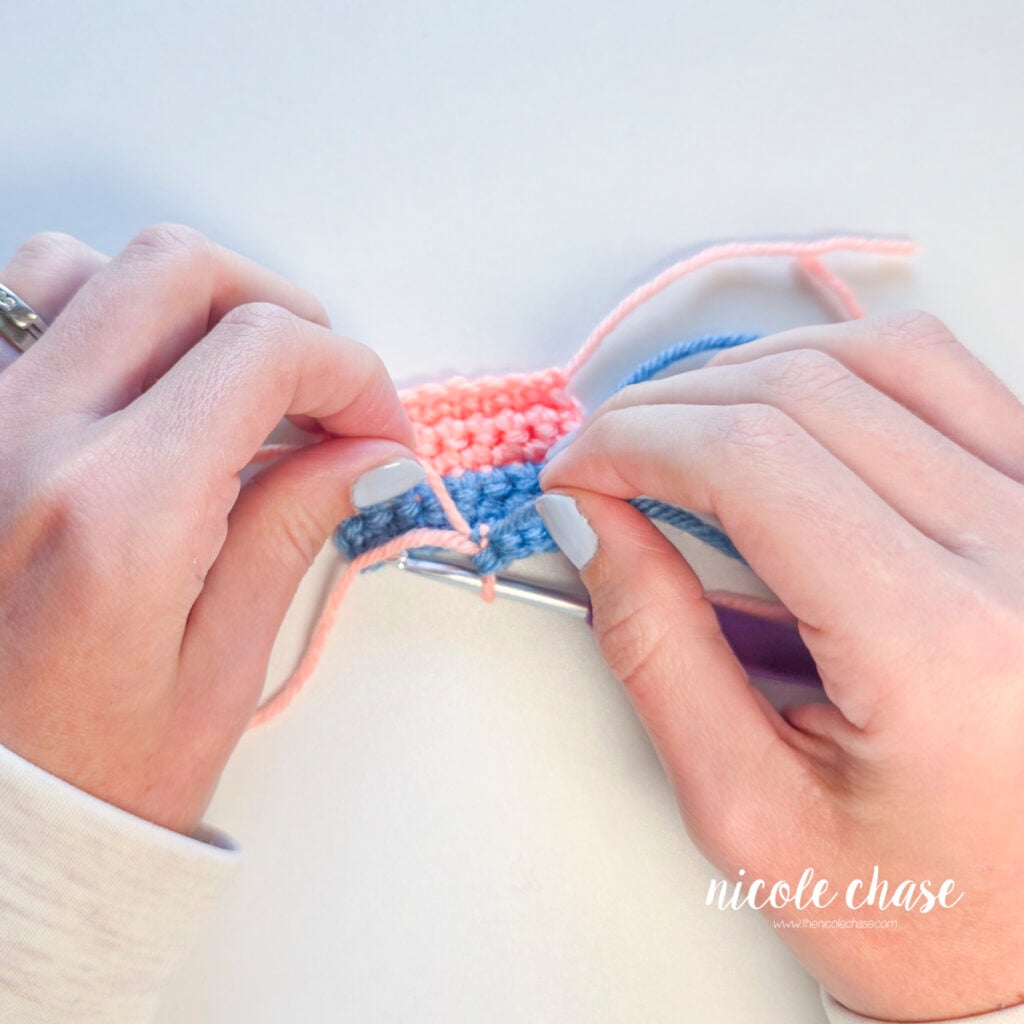
Step 3: You now have a loop of your new color on your hook, ready to begin your next stitch.
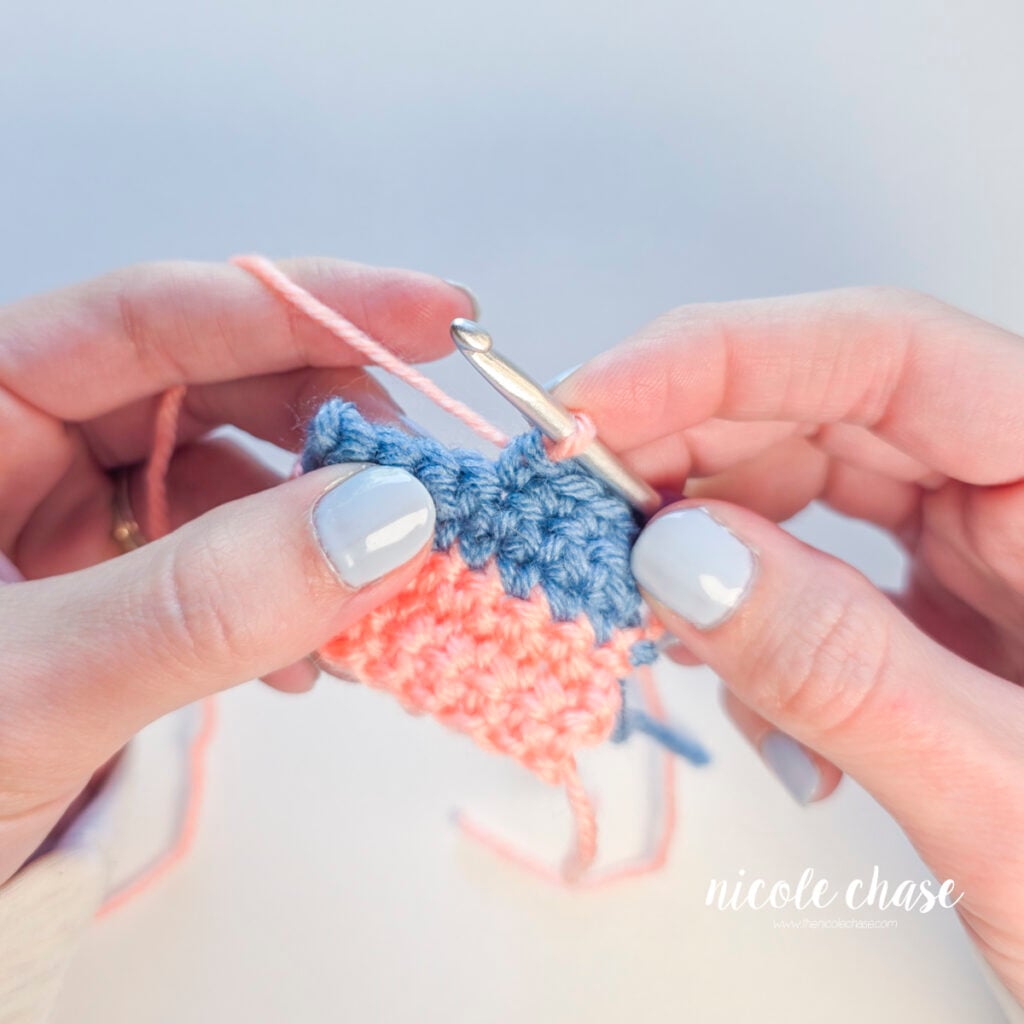
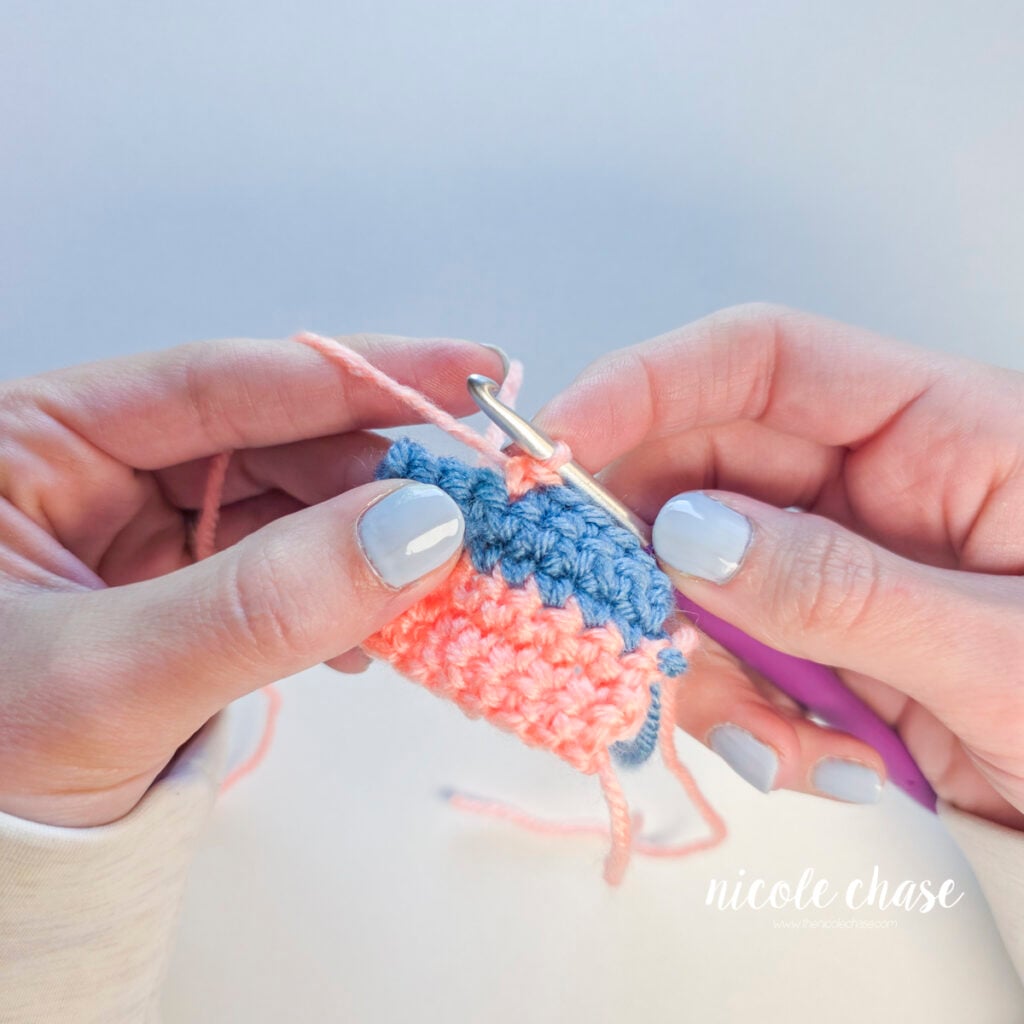
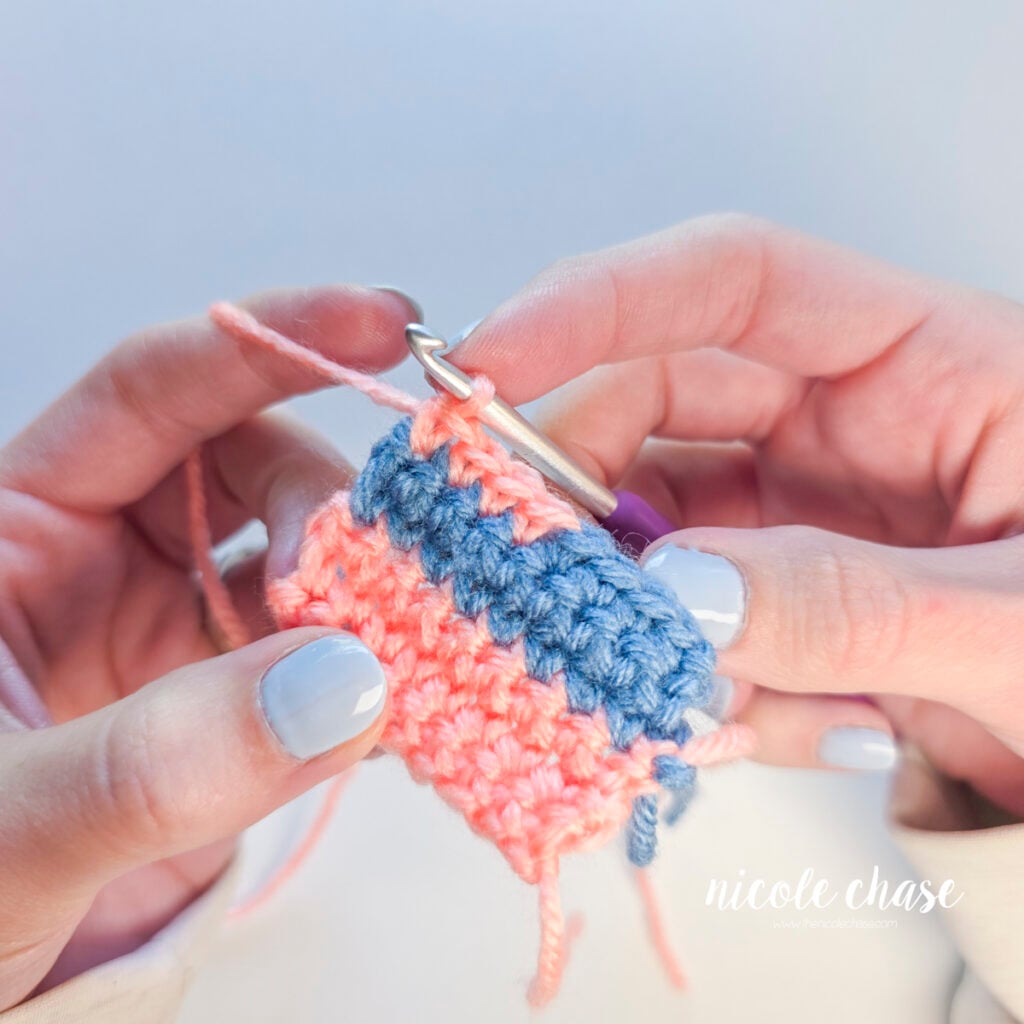
Pro Tip for Method 2: When working color changes mid-row (such as in tapestry crochet or multi-color graphs), you can carry the unused yarn along the back of your work or crochet over it to minimize weave in loose ends later.
Method 3: Seamless Invisible Color Change (for Amigurumi)
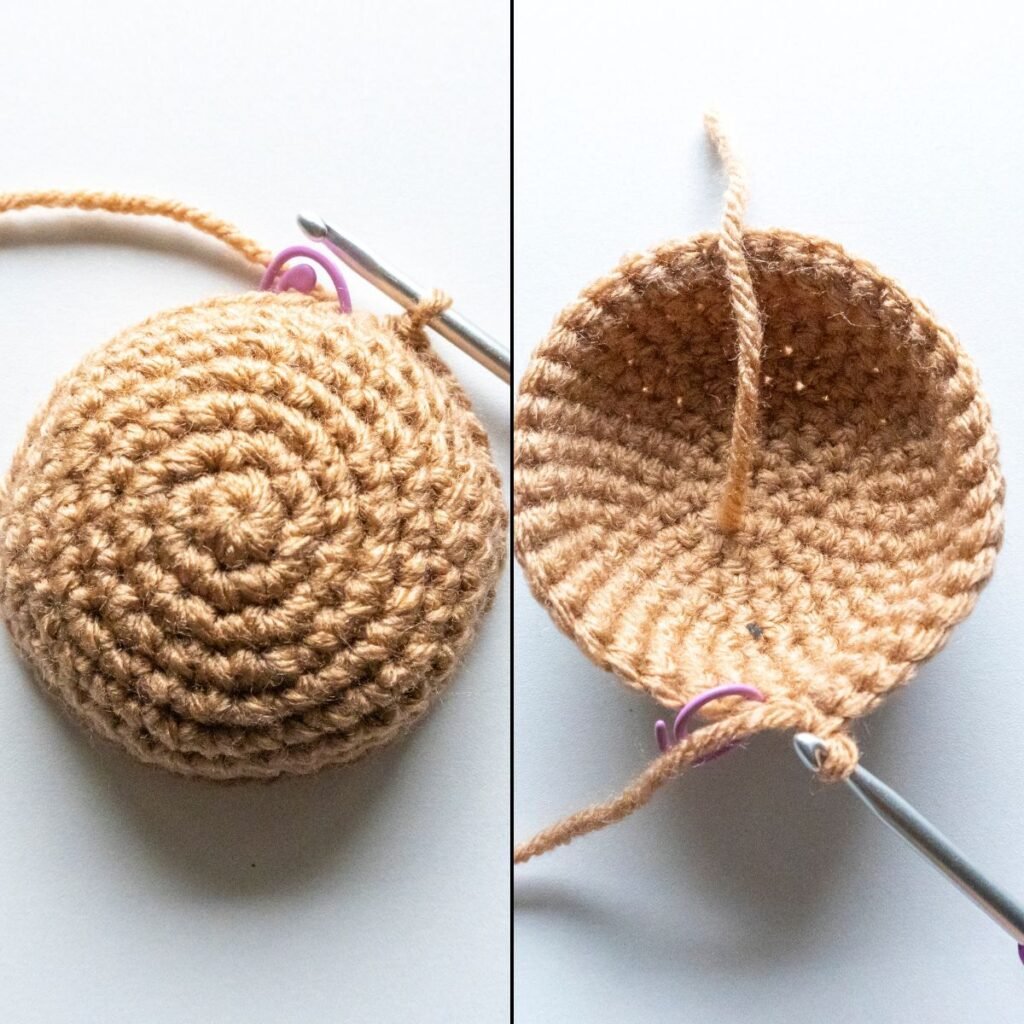
If you work in continuous spiral rounds, such as when you are making amigurumi, you’ve likely noticed that standard color changes leave a jagged “step” line where the old color ends and the new color begins.
The invisible color change method solves this problem by smoothing out that transition for a crisp, seamless line.
When to Use this Method (and When Not to):
- Best Used For: Full round transitions worked in continuous spirals, such as changing colors from a plushie’s foot to its leg, creating striped tails, or transitioning from a shirt to body section.
- Avoid Use For: Mid-round color switches, color graphs, or small color patches (like eye patches or spots). For those mid-round changes, stick with Method 2 above!
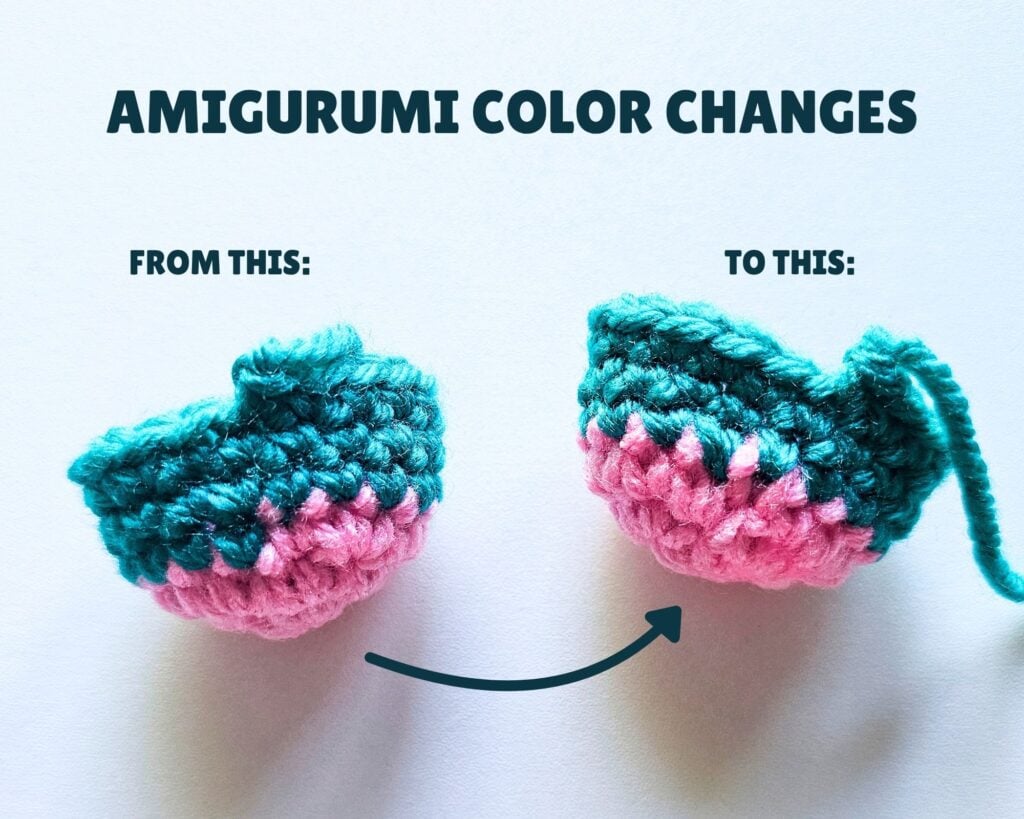
How it Works (At a Glance):
- Complete your last stitch in your starting color.
- Insert your hook into the back loop only of your next stitch and join your new color through that back loop.
- Continue working your stitches around in the new color as normal.
- On the final stitch of the following round, you’ll work into both the unworked front loop and the color change loops to lock everything smoothly in place.
Because this technique requires specific stitch placement across continuous rounds, I have a complete, dedicated guide to this exact method!
Want the full step-by-step photo and video walkthrough?
Check out my detailed guide on how to make an invisible color change in crochet for a deep dive for this amigurumi-friendly technique!
Frequently Asked Questions on Changing Colors in Crochet
How do I prevent gaps or loose stitches when changing colors in crochet?
Gaps usually happen when the yarn tails of your old and new colors are pulled unevenly. To prevent this, pull both yarn tails gently after making your color switch to tighten the loops down to match the rest of your row. Tying the tails in a knot on the wrong side of your work (or weaving them in securely) will keep your tension locked in place.
What do I do with the yarn tails when switching colors?
You have two main options depending on your project type: 1) Weave them in with a tapestry needle securely into the back of your stitches. This is best for items where both sides are visible. 2) Tie the old and new yarn tails together on the inside of your work and leave them hidden inside, no weaving required. This is best for items like amigurumi where only one side of your work is visible.
How do I change colors when working in the round?
If you are working in joined rounds, use Method 1 or 2 at the end of your round. If you are working in continuous spiral rounds (like amigurumi), use Method 3, the invisible color change method, to eliminate the jagged “step” like between rounds.
Do I need to cut my yarn every time I change colors?
Not necessarily! If you are altering colors every few rows (e.g. stripes), you can “float” or carry the unused yarn up the edge of your work instead of cutting it. If you won’t be using that color again for many rows, or if you’re working mid-row colorwork, it’s best to cut the yarn.

More Crochet Tutorials for Beginners
If you found this beginner tutorial helpful, check out these other crochet tutorials to keep building your crochet skills:
- Stitch Fundamentals: Master the basics with step-by-step guides for the single crochet stitch and double crochet stitch.
- Starting Your Project: Learn how to start projects worked in the round with my magic ring tutorial or try the magic ring alternative for something easier.
- Learn Amigurumi Construction: Learn how to identify the right side vs. wrong side of crochet with my full tutorial.
- Ready to Make Crochet Plushies? Check out my free Amigurumi for Beginners Course that is designed to take you from absolute beginner to confidently crocheting your own plush toys!
I hope you enjoyed this post! Be sure to leave me a comment below to let me know what you think.
Want to see more from me? Be sure to subscribe to my email newsletter so that you never miss a post!
Follow along with me on Instagram for daily updates and a behind the scenes look at my designs.
I’d love to see what you make with this tutorial! Don’t forget to share your finished work with me: on social media by tagging me @thenicolechase, in your Ravelry projects, or post over in my Facebook group!
Thanks for stopping by! Happy crafting!
Nicole
PATTERN COPYRIGHT © 2026 NICOLE CHASE. ALL RIGHTS RESERVED.
PATTERN MAY NOT BE ALTERED, COPIED, REDISTRIBUTED OR SOLD AS YOUR OWN PATTERN.
YOU MAY SELL THE FINISHED PRODUCT ON A SMALL SCALE. PATTERN/DESIGN CREDIT GIVEN TO WWW.THENICOLECHASE.COM IS APPRECIATED. PERMISSION TO SELL DOES NOT INCLUDE MASS PRODUCTION. LARGE SCALE PRODUCTION IS PROHIBITED.
PHOTOGRAPHY COPYRIGHT © 2026 NICOLE CHASE. ALL RIGHTS RESERVED.
PHOTOS MAY NOT BE ALTERED, COPIED, REDISTRIBUTED OR SOLD AS YOUR OWN.
This post may contain affiliate links. If you make a purchase through links on our site, we may earn a commission.