Cocoa the Christmas Bear – Free Crochet Pattern
This post may contain affiliate links. If you make a purchase through links on our site, we may earn a commission.
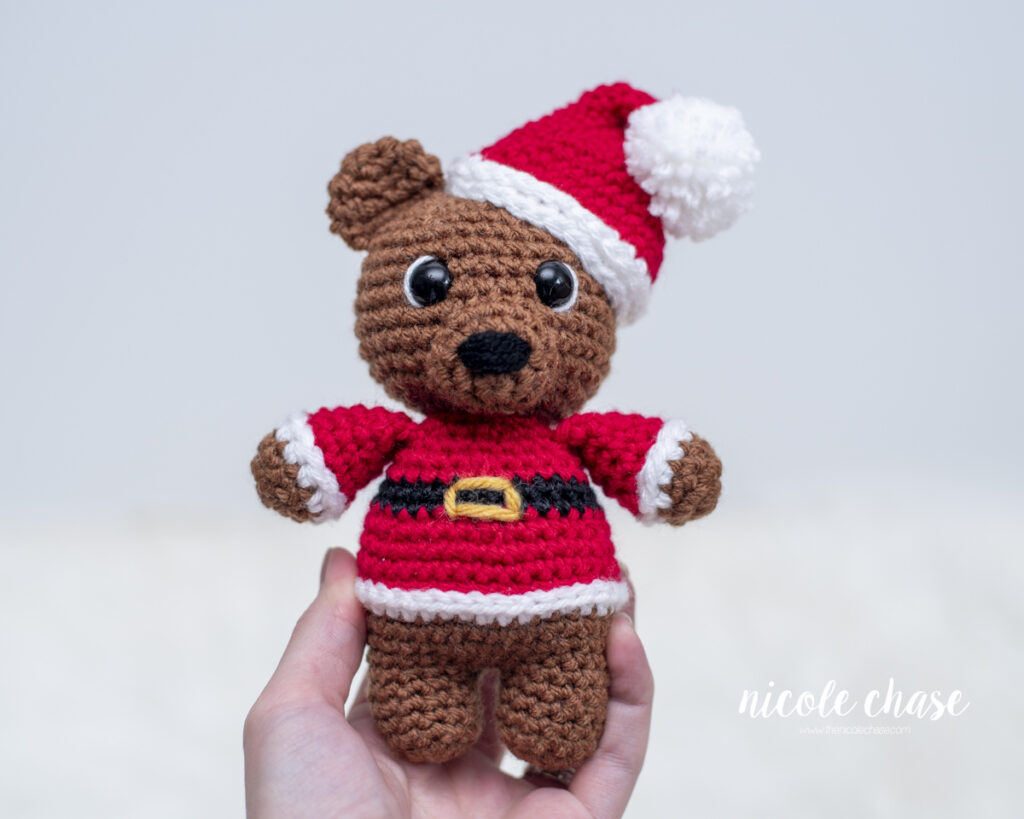
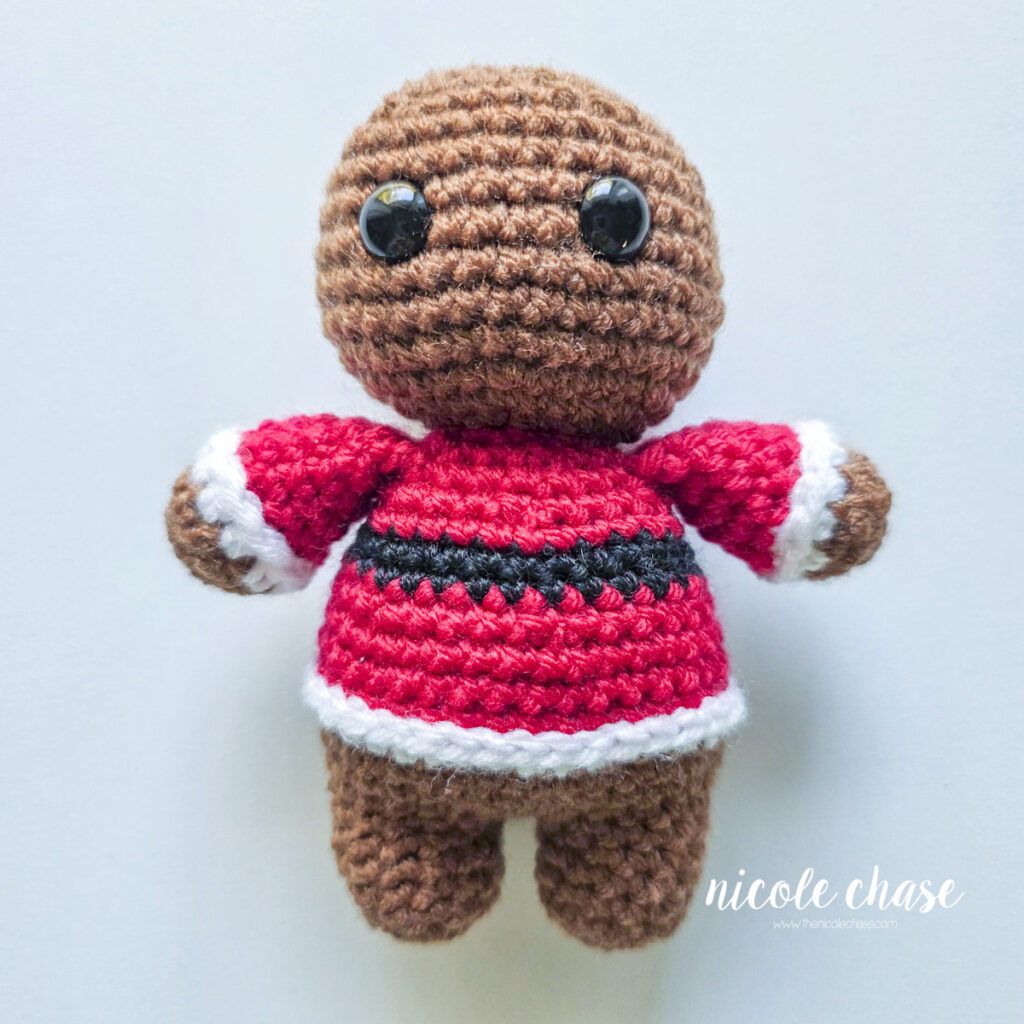
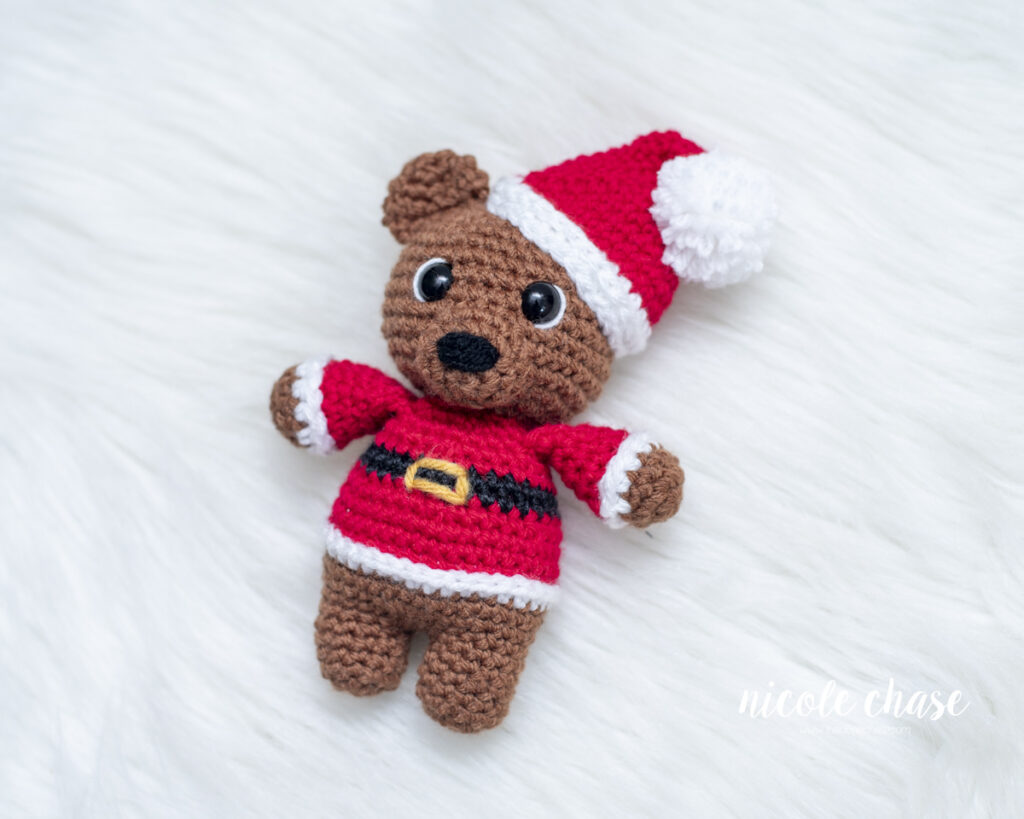
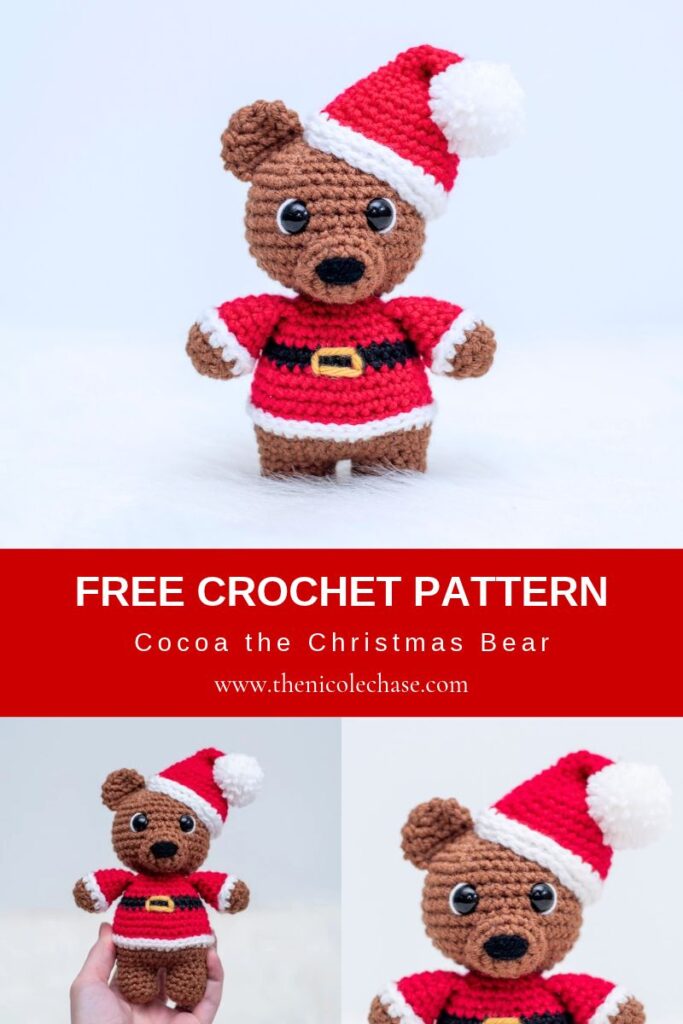
Meet Cocoa the Christmas Bear, an adorable free Santa crochet pattern of a teddy bear dressed in a Santa coat and hat! If you are looking for a quick, beginner-friendly Christmas bear crochet pattern, this festive Christmas amigurumi works up fast and makes a sweet handmade gift or holiday shelf decoration.
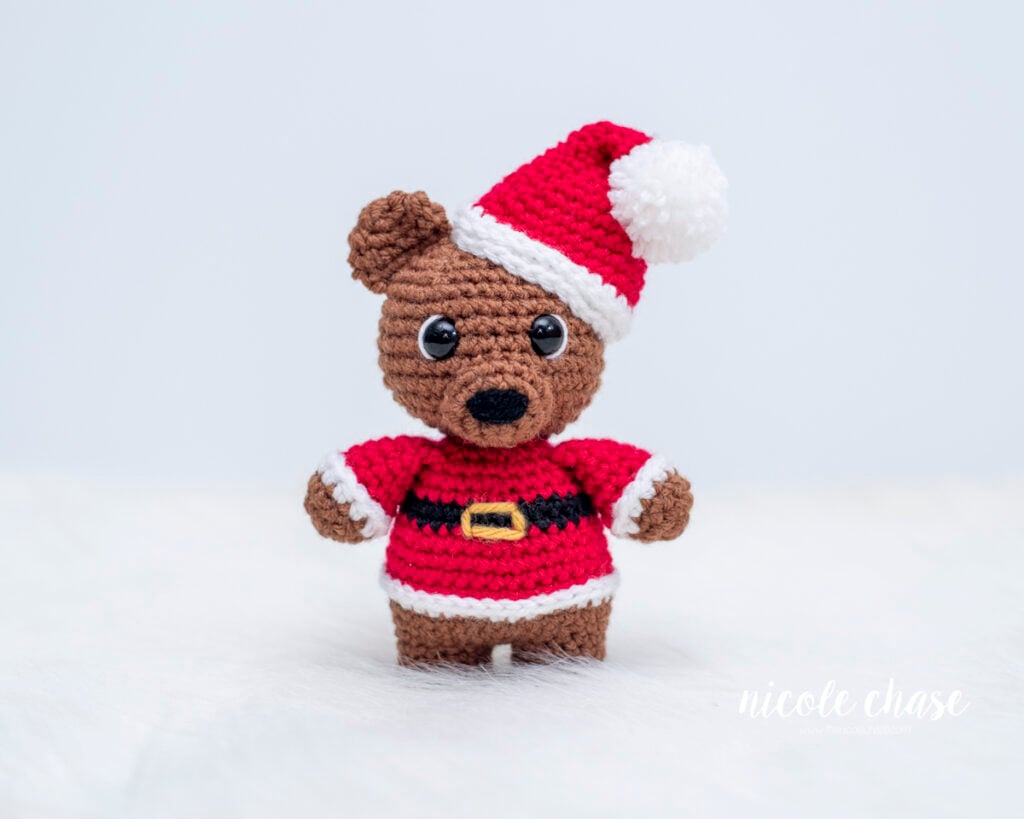
Table of Contents
I would classify this free Santa crochet pattern as “advanced beginner”. It would be helpful to have had some experience with amigurumi before creating this project.
I hope you enjoy this free crochet pattern available here on my blog! An ad-free, formatted PDF version of this crochet pattern is also available for purchase here:
At a Glance: Cocoa the Christmas Bear Crochet Pattern
A charming, minimal-sew teddy bear amigurumi dressed in a classic red and white Santa coat with a gold-buckled belt and Santa hat. This easy pattern is designed as a fun teddy bear twist on a free Santa crochet pattern. This crochet Christmas amigurumi bear is ideal for holiday gifting, stocking stuffers, and festive decor.
- Required Skills: Magic ring, single crochet (SC), increasing and decreasing (SC2tog) with the invisible decrease method, half double crochet (HDC), and working in the third loop of HDC.
- Yarn: Medium (4) worsted weight yarn in light gray, dark gray, black, and white (or your preferred yarn).
- Hook Size: 4.0mm (G) crochet hook (or a suitable hook size for your chosen yarn).
- Finished Size: Approximately 6″ tall without hat, or 7.5″ tall with hat.
- Format & Resources: Free written pattern right here on the blog with step-by-step photos and helpful amigurumi tips.
Save this Pattern for Later!
Planning your holiday makes ahead of time? Save this Christmas bear crochet pattern to your favorite board on Pinterest so you can find it later, or add it to your Ravelry queue to track your project!
Free Crochet Pattern for Cocoa the Christmas Bear
Pattern Specifics
Measurements: Approximately 6″ tall without hat, or 7.5″ tall with hat.
Gauge: Not necessary for this pattern; see notes
Hook Size: 4.0mm (G) crochet hook
Other Tools: tapestry needle, stitch markers, scissors
Yarn Weight: Medium (4) Worsted Weight
Yarn Used: WeCrochet/Knit Picks Brava Worsted
Yardage: color A (brown): 46 yds, color B (white): 11 yds, color C (red): 30 yds, color D (black): 5 yds, white and gold yarn for embroidery
Other Materials: poly-fil stuffing, 12mm safety eyes
Abbreviations
st = stitch
sl st = slip stitch
ch = chain
SC = single crochet
SC2tog = single crochet 2 stitches together (invisible decrease is recommended)
HDC = half double crochet
Special Stitches
SC2tog (using invisible decrease method): Insert hook into front loop of the first stitch. Insert hook into front loop of second stitch. Yarn over. Draw through the first two loops on hook. Yarn over. Draw through both loops on hook.
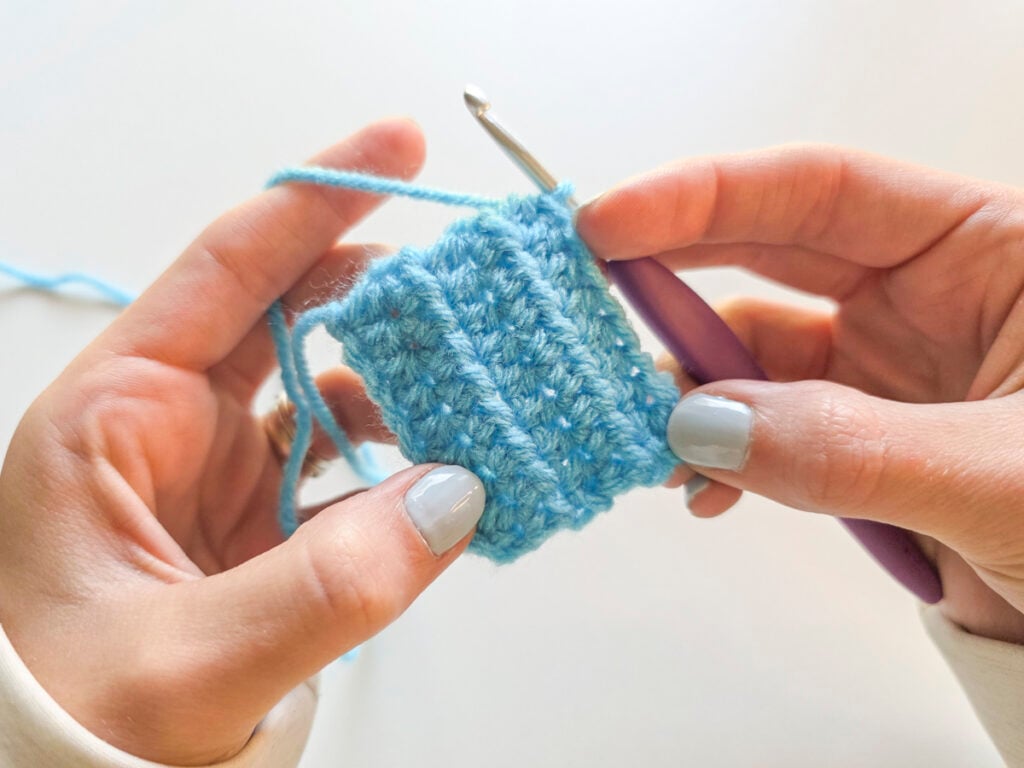
Third Loop of HDC: On a HDC stitch, you will see the typical “V” shape (front loop and back loop) on the top of your stitch. A third horizontal loop is formed just behind the back loop on the wrong side of the stitch. Insert your hook under this back horizontal loop to work your next stitch. This pushes the top “V” of the HDC forward, creating a textured ridge.
Notes
- Checking your gauge is not required for this pattern. Use a hook that is smaller than the size recommended for your yarn weight. This will ensure that your stuffing will not show through the stitches.
- This pattern requires minimal sewing. The legs, body and head are worked as one piece, and the arms are worked directly into the body as you work, rather than sewing later. The only sewing required is for the snout, ears, and hat (if desired).
- All pieces are worked in the round. Use a stitch marker to indicate the beginning of each round.
- Invisible decreases are recommended. Please see “Special Stitches”.
- Safety eyes and noses pose a choking risk for babies; therefore, if making this toy for a baby, I recommend using yarn, felt, or embroidered details.
- Body, head, legs, and arms require stuffing. Stuff each piece as you work to ensure the piece is completely filled. Do not add stuffing to the ears.
- See tutorial photos.
Pattern
Using 4.0mm (G) hook:
Arms (make 2)
Using color A (shown as brown):
R1: Begin with 6 SC in a magic ring. (6 sts)
R2: 2 SC in each st around. (12 sts)
R3: 1 SC in each st around. (12 sts)
Using color B (shown as white):
R4: 1 HDC in each st around. (12 sts)
Using color C (shown as red):
R5: Working in the third loop of the HDC, 1 SC in each st around. (12 sts)
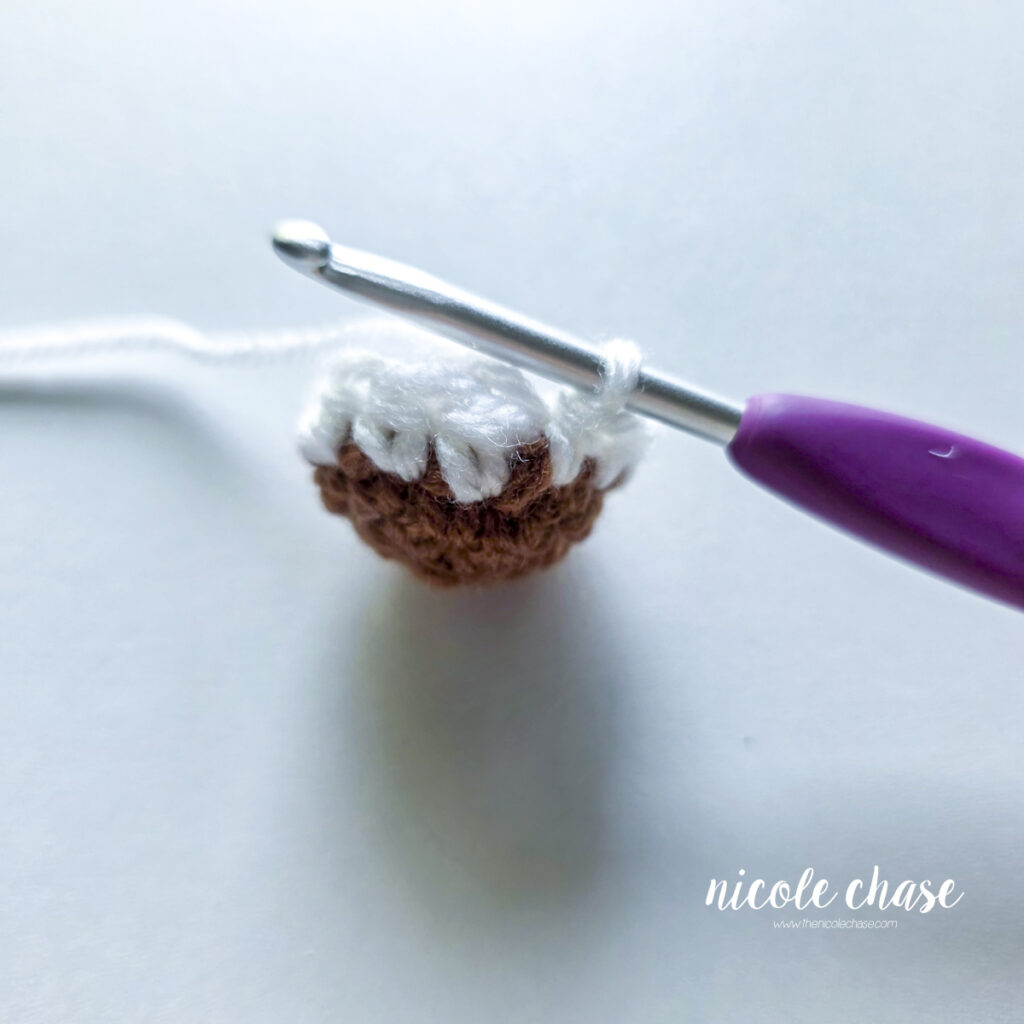
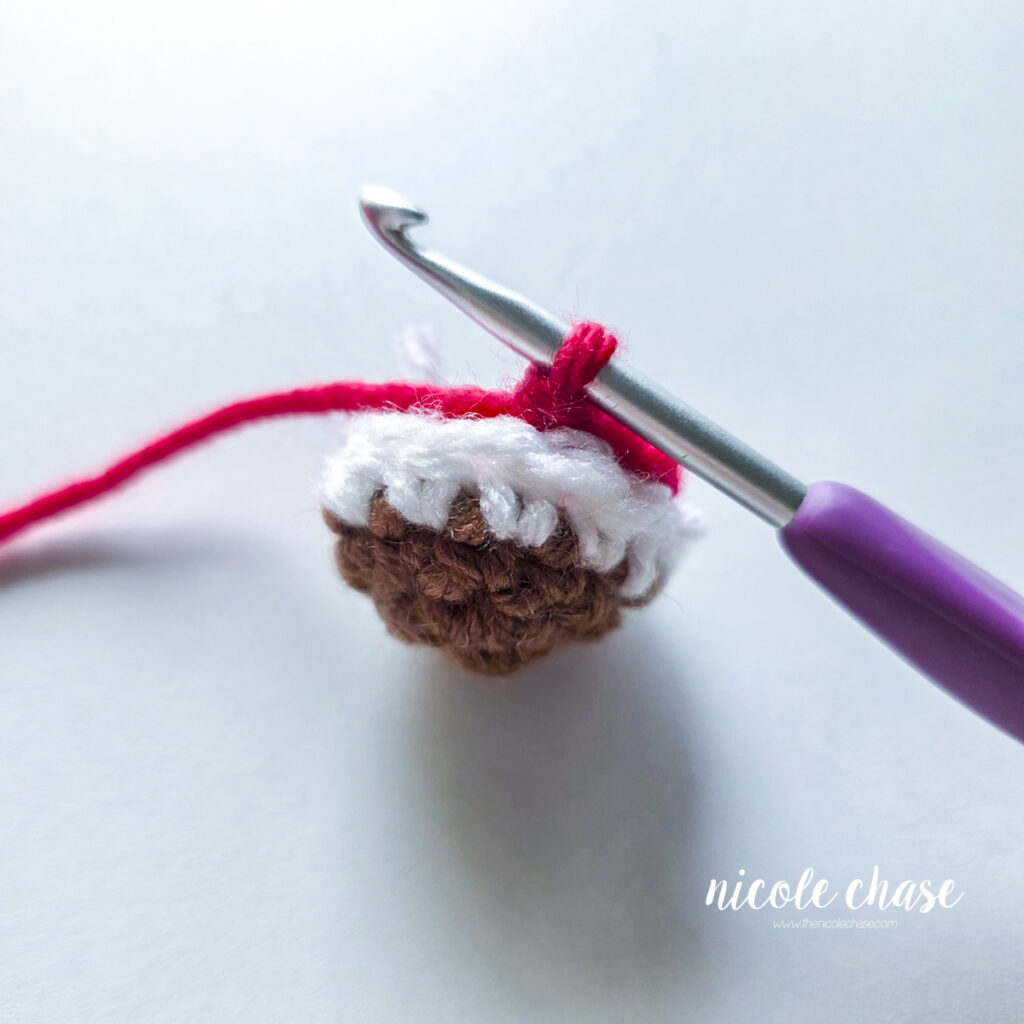
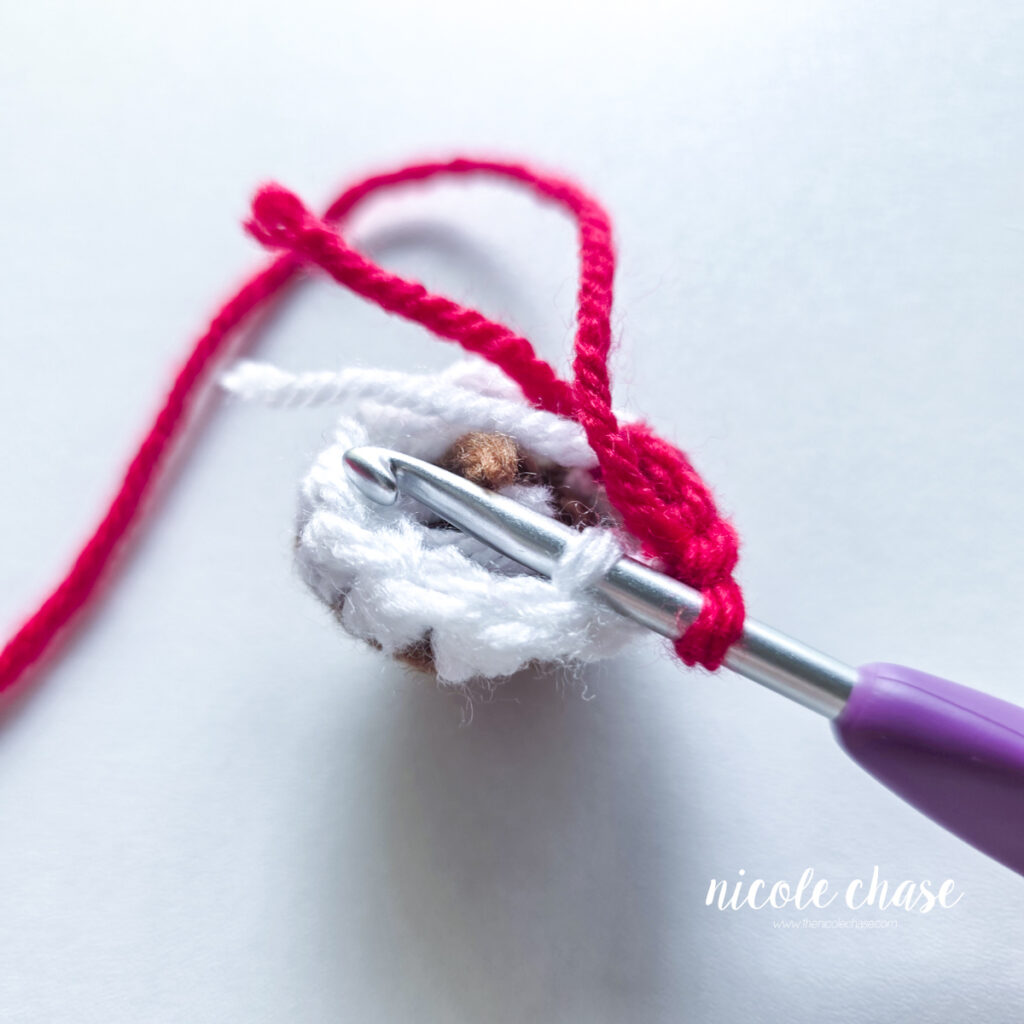
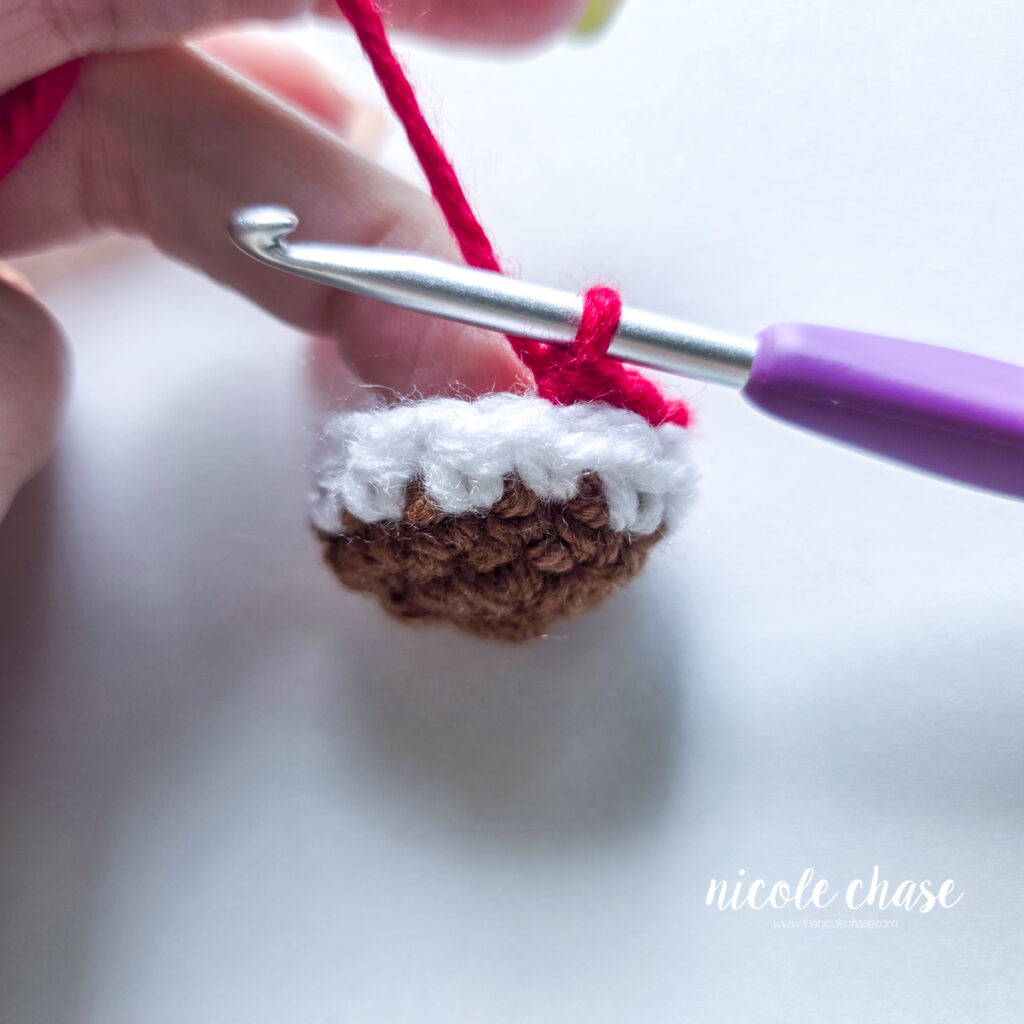
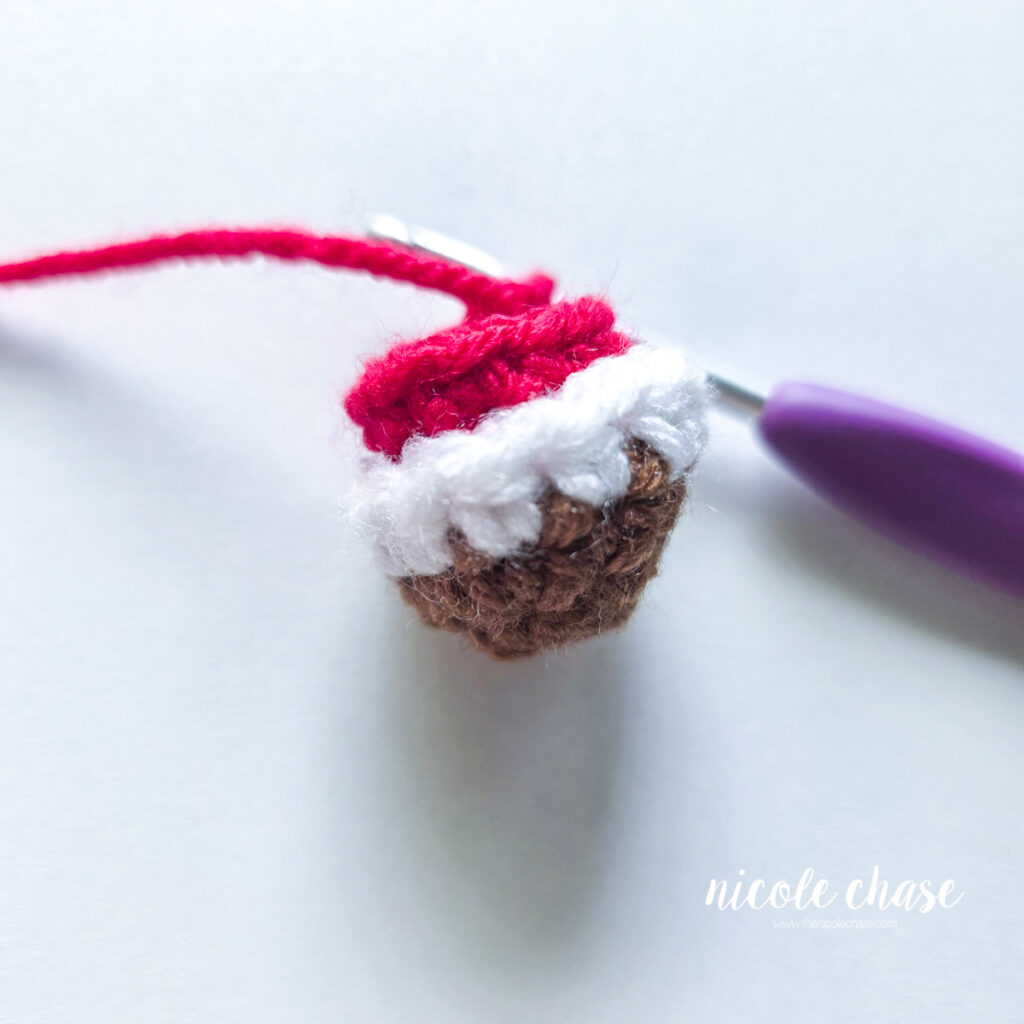
R6-9: 1 SC in each st around. (12 sts)
Fill with stuffing.
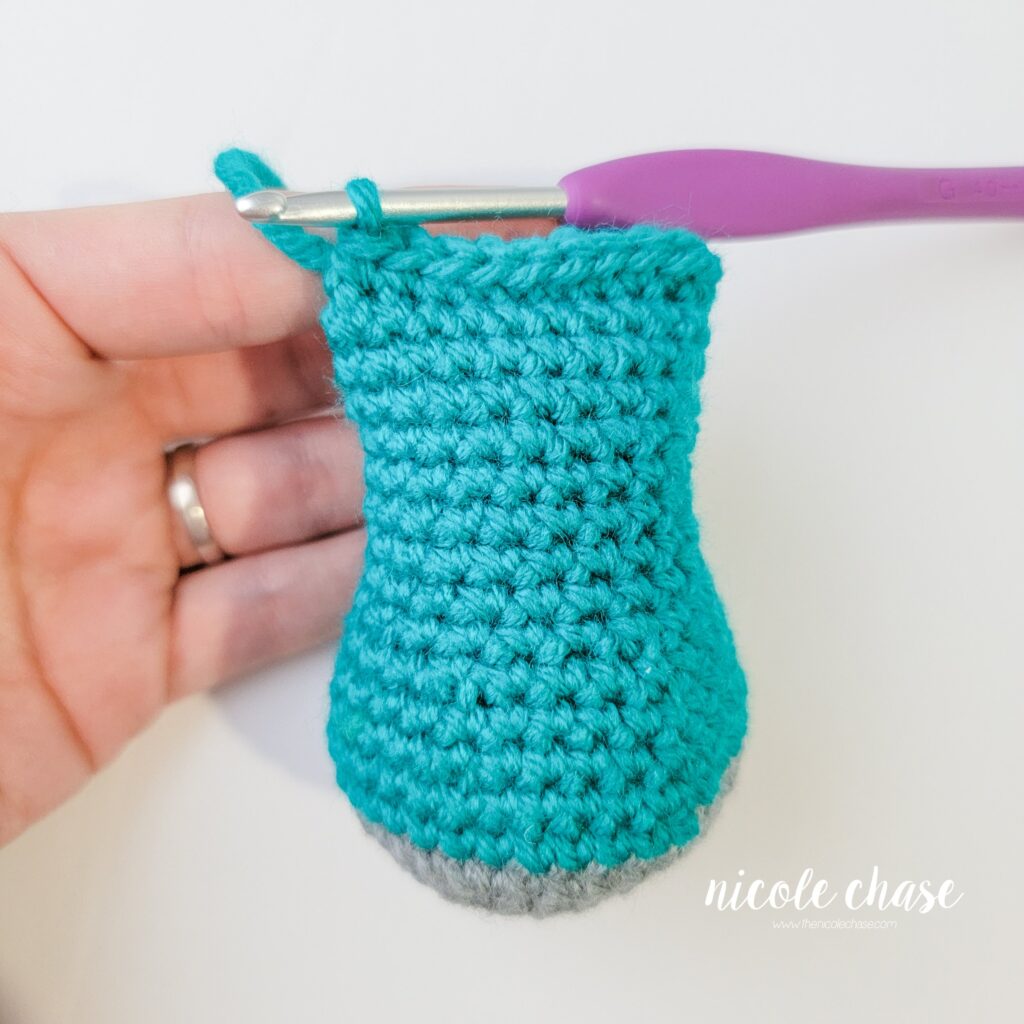
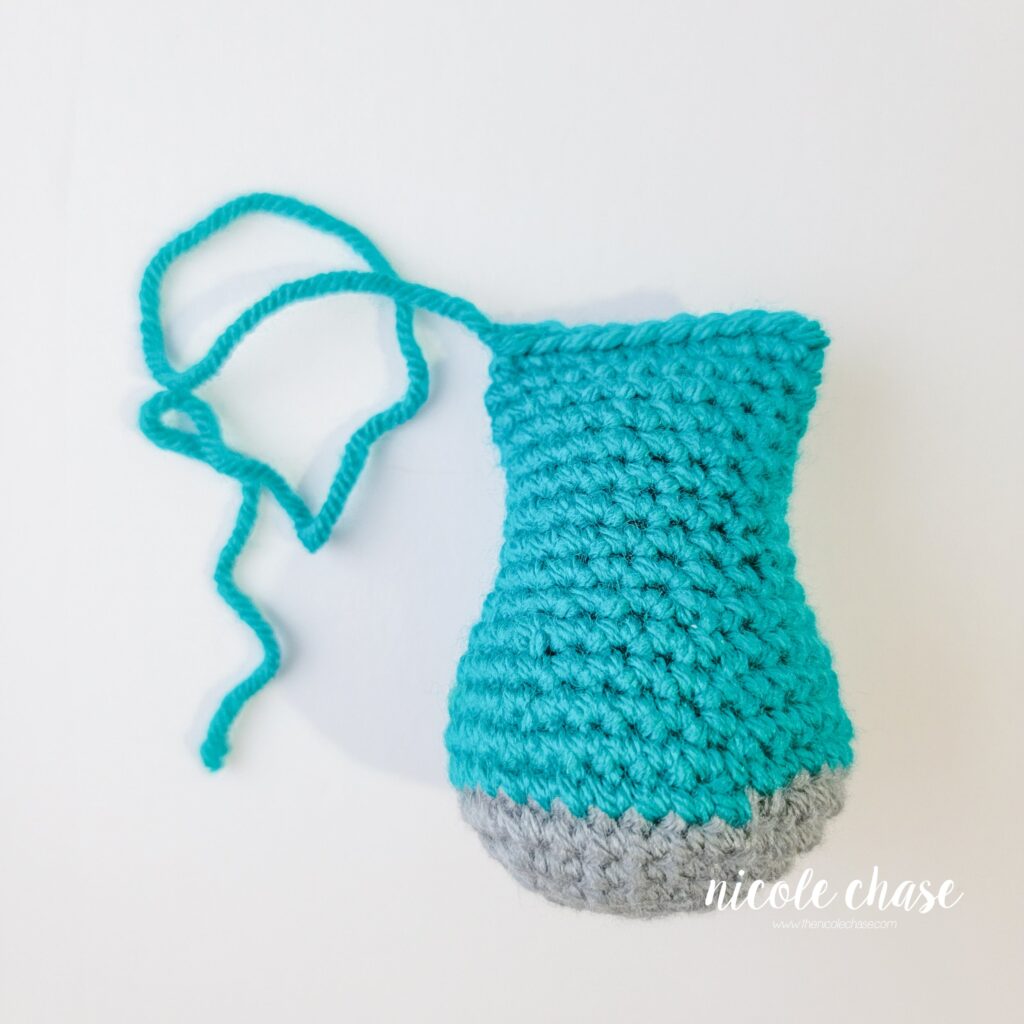
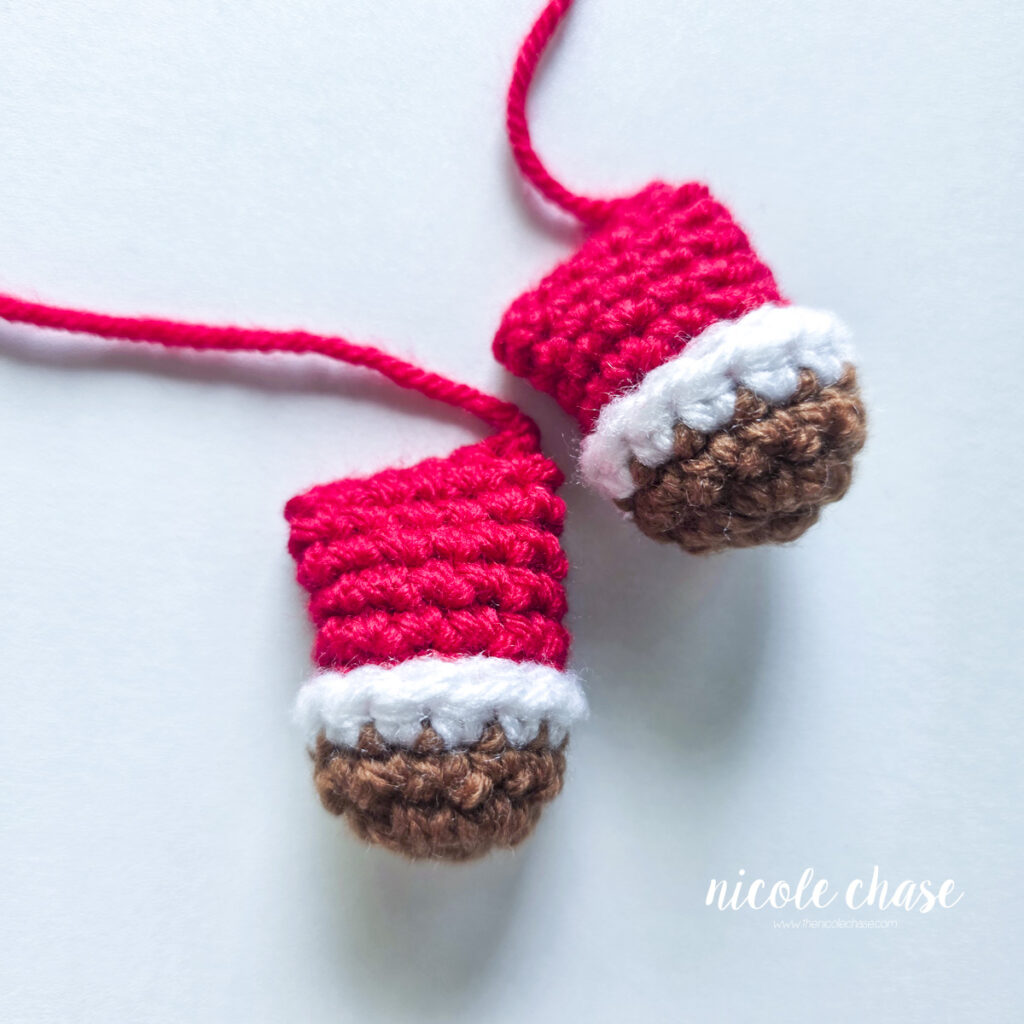
R10: Fold the arm closed, leaving 1 unworked st on each side of the fold. Working through both sides to close, 1 SC in each st across. See tutorial photos. (5 sts)
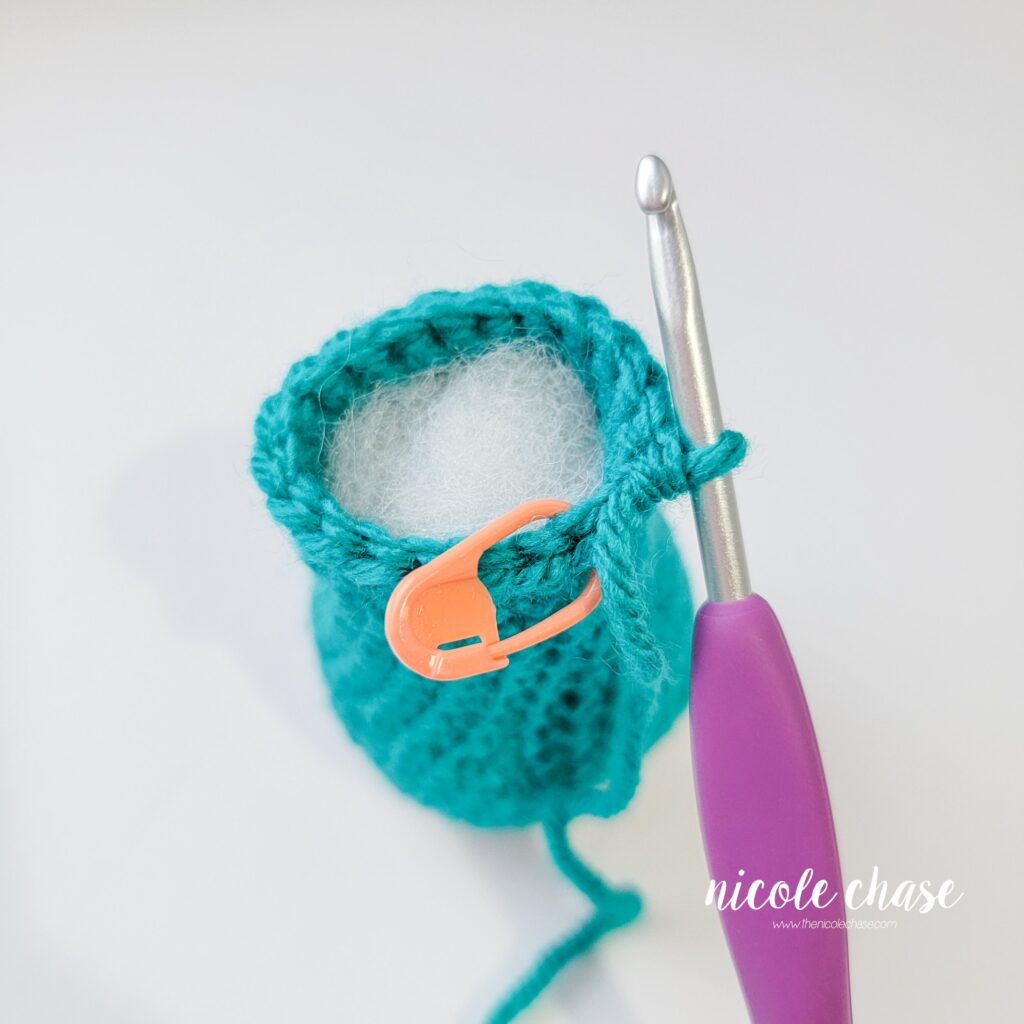
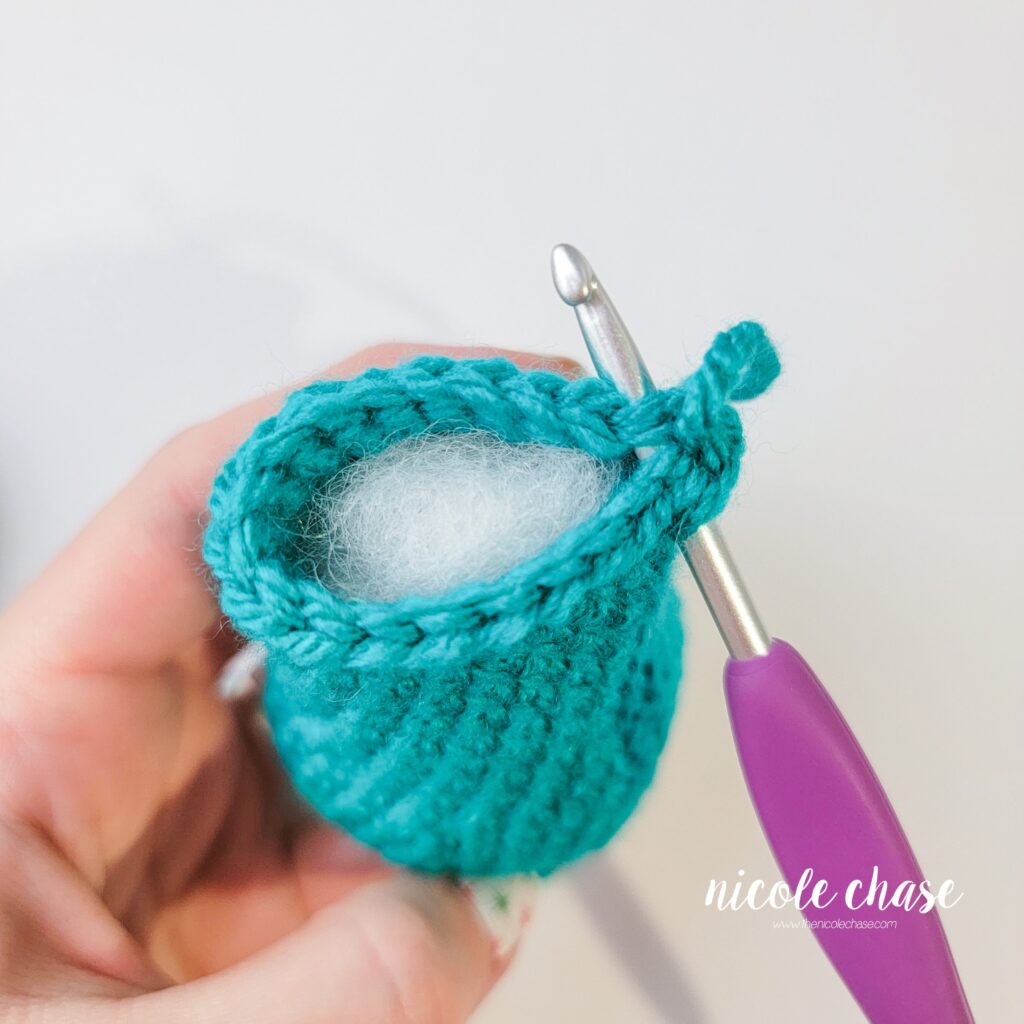
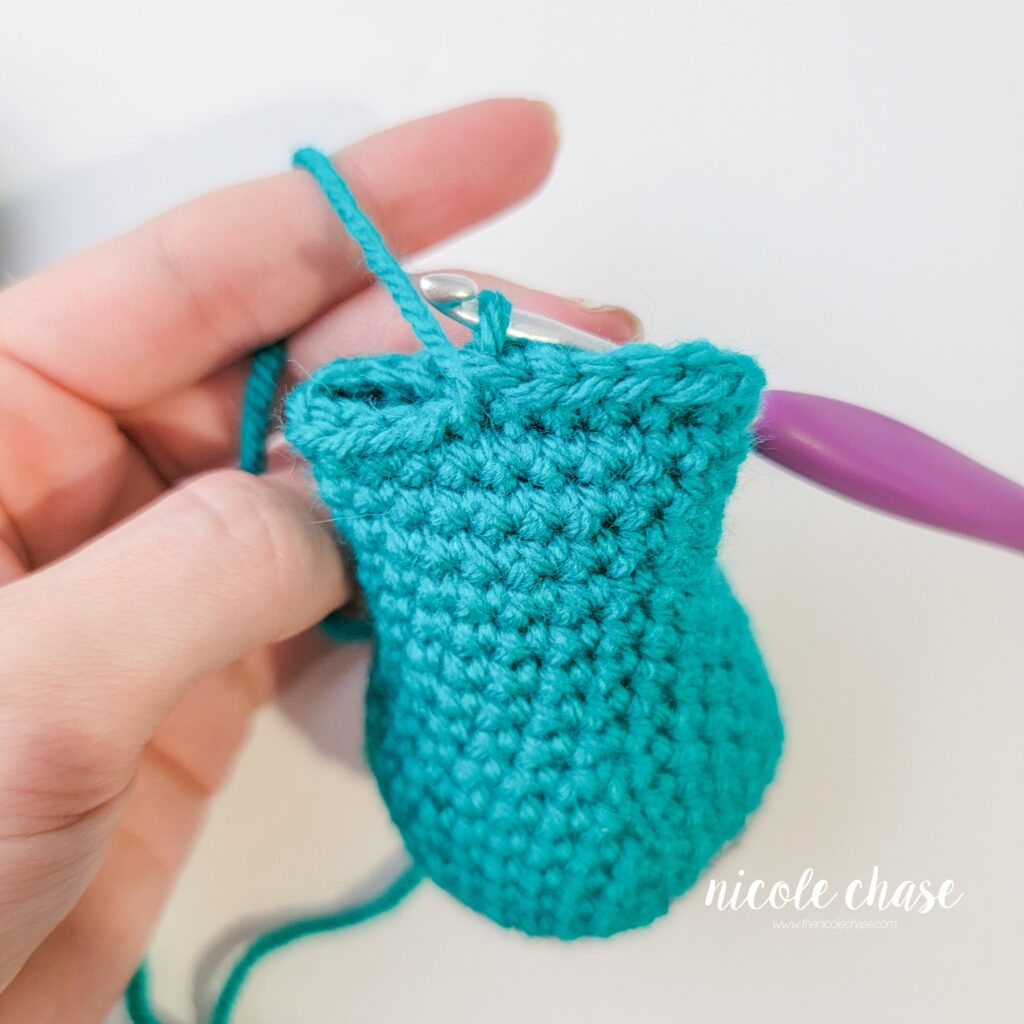
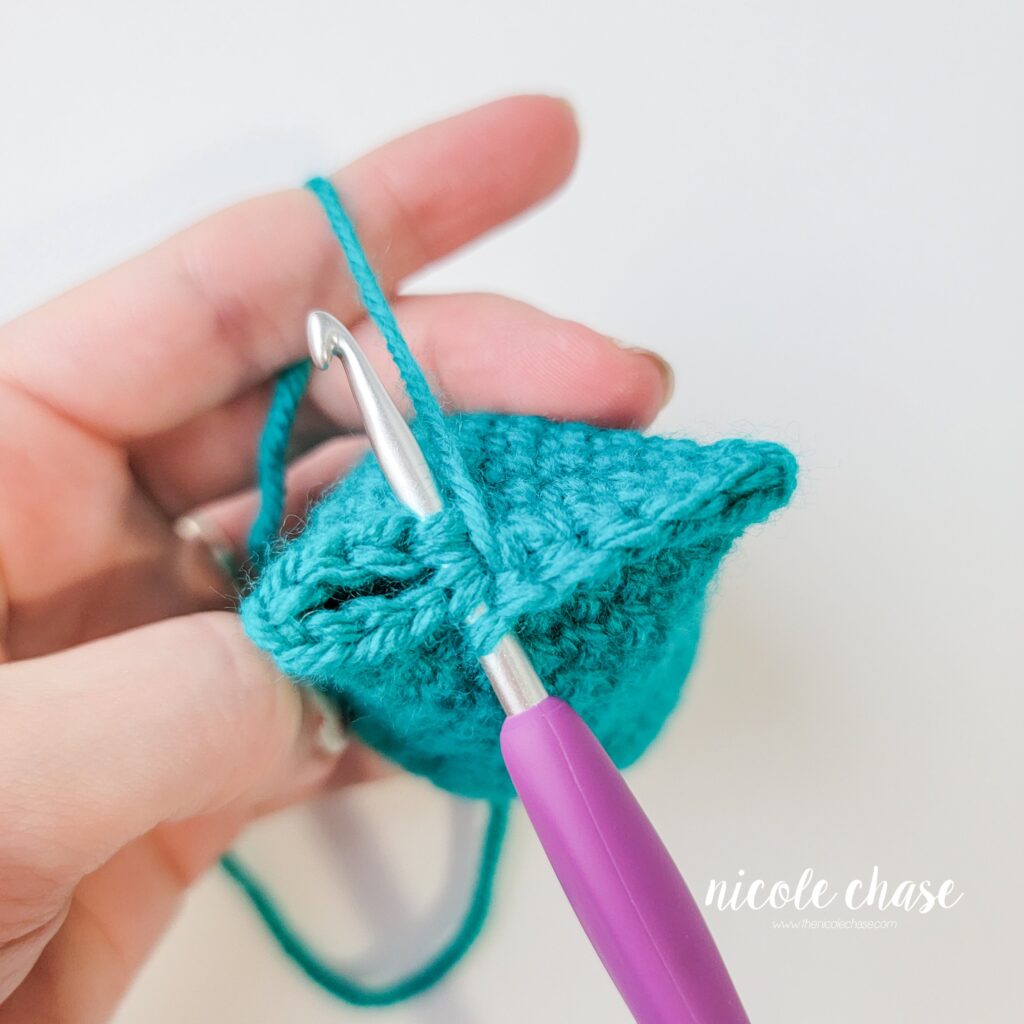
Fasten off.
Snout
Using color A (shown as brown):
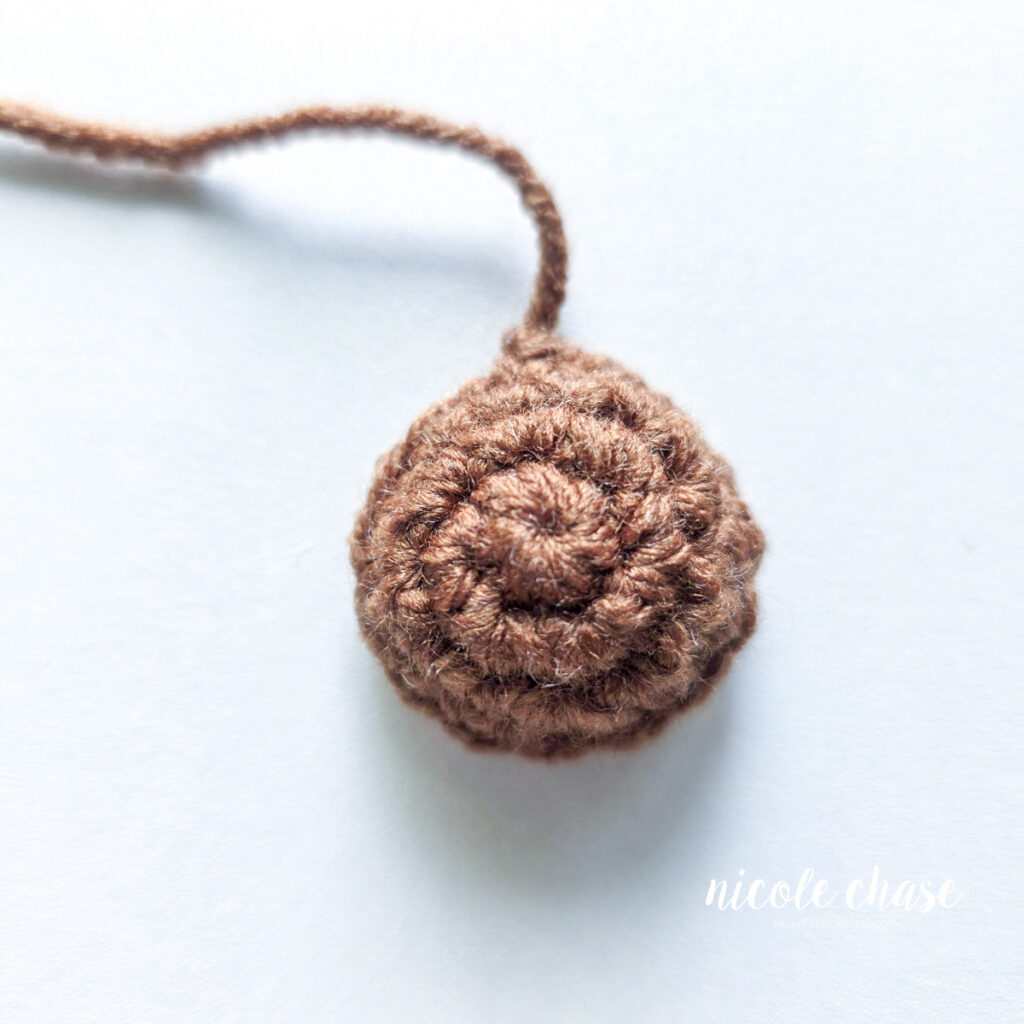
R1: Begin with 6 SC in a magic ring. (6 sts)
R2: 2 SC in each st around. (12 sts)
R3: *2 SC in next st, 1 SC in each of the next 3 sts. Repeat from * around. (15 sts)
R4: 1 SC in each st around. (15 sts)
Cut yarn, leaving long strand for sewing. Fasten off.
First Leg
Using color A (shown as brown):
R1: Begin with 6 SC in a magic ring. (6 sts)
R2: *2 SC in each st around. (12 sts)
R3-5: 1 SC in each st around. (12 sts)
Fasten off.
Second Leg
Using color A (shown as brown):
R1: Begin with 6 SC in a magic ring. (6 sts)
R2: *2 SC in each st around. (12 sts)
R3-5: 1 SC in each st around. (12 sts)
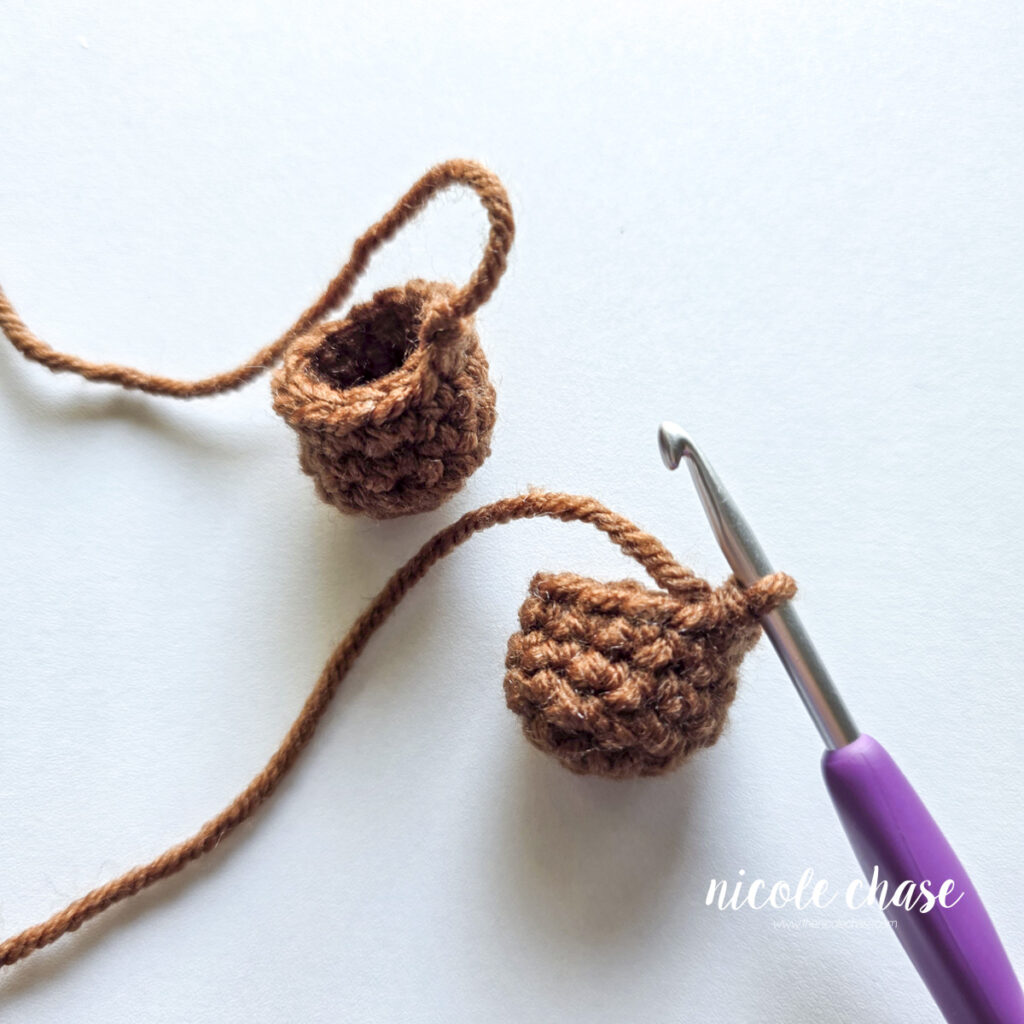
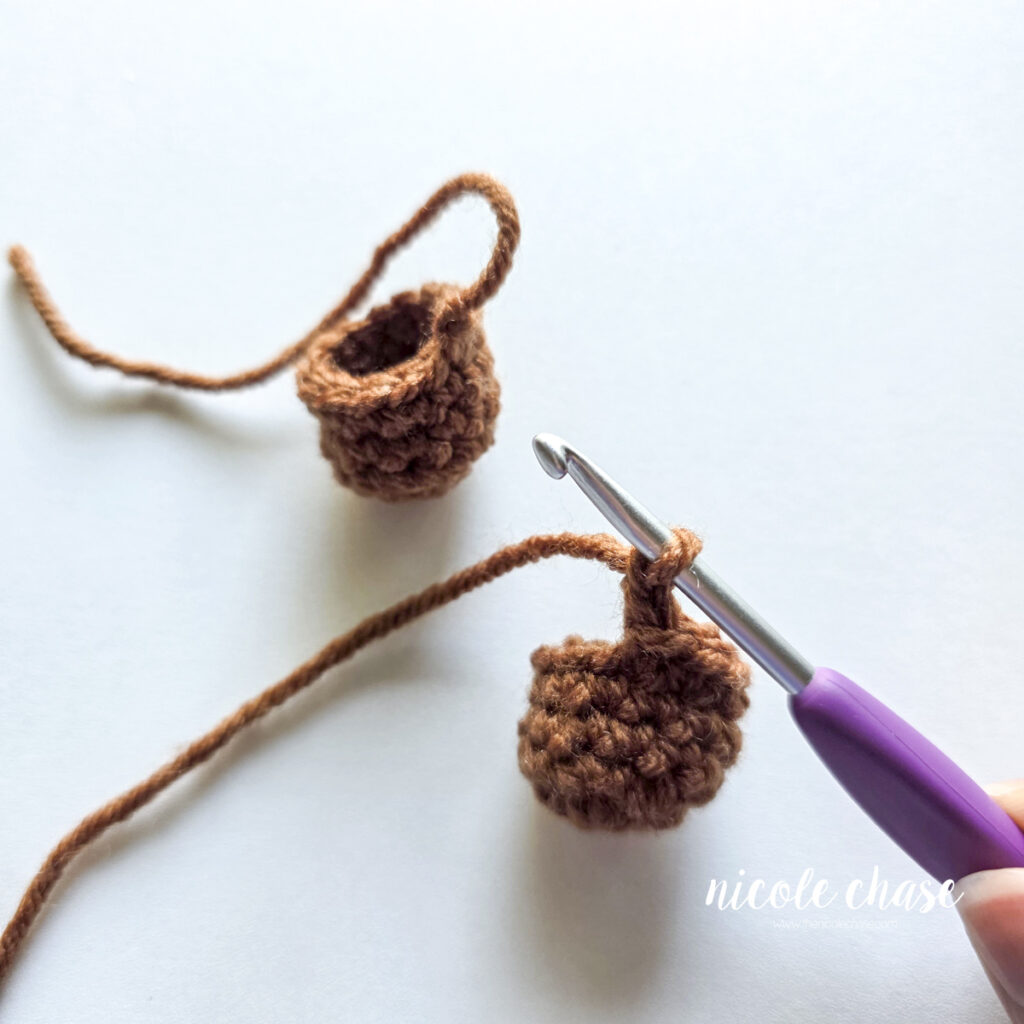
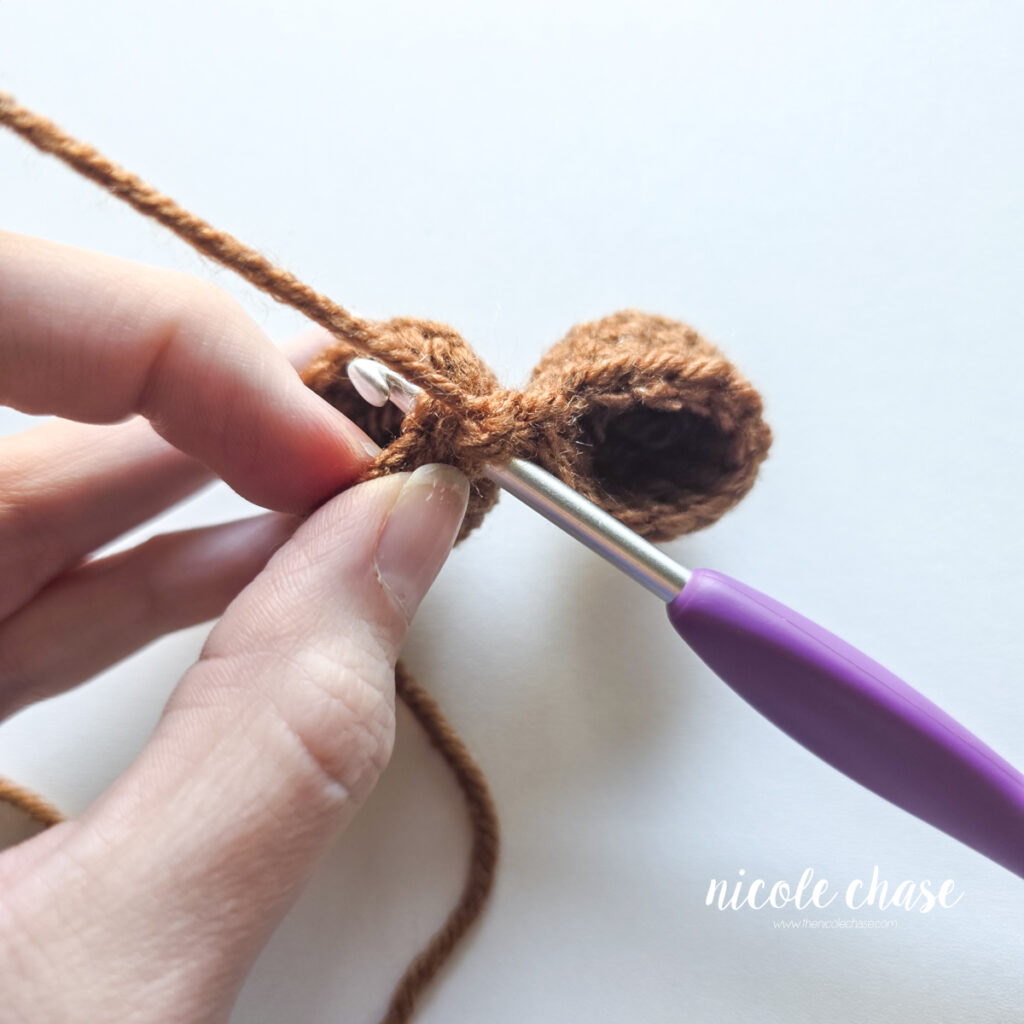
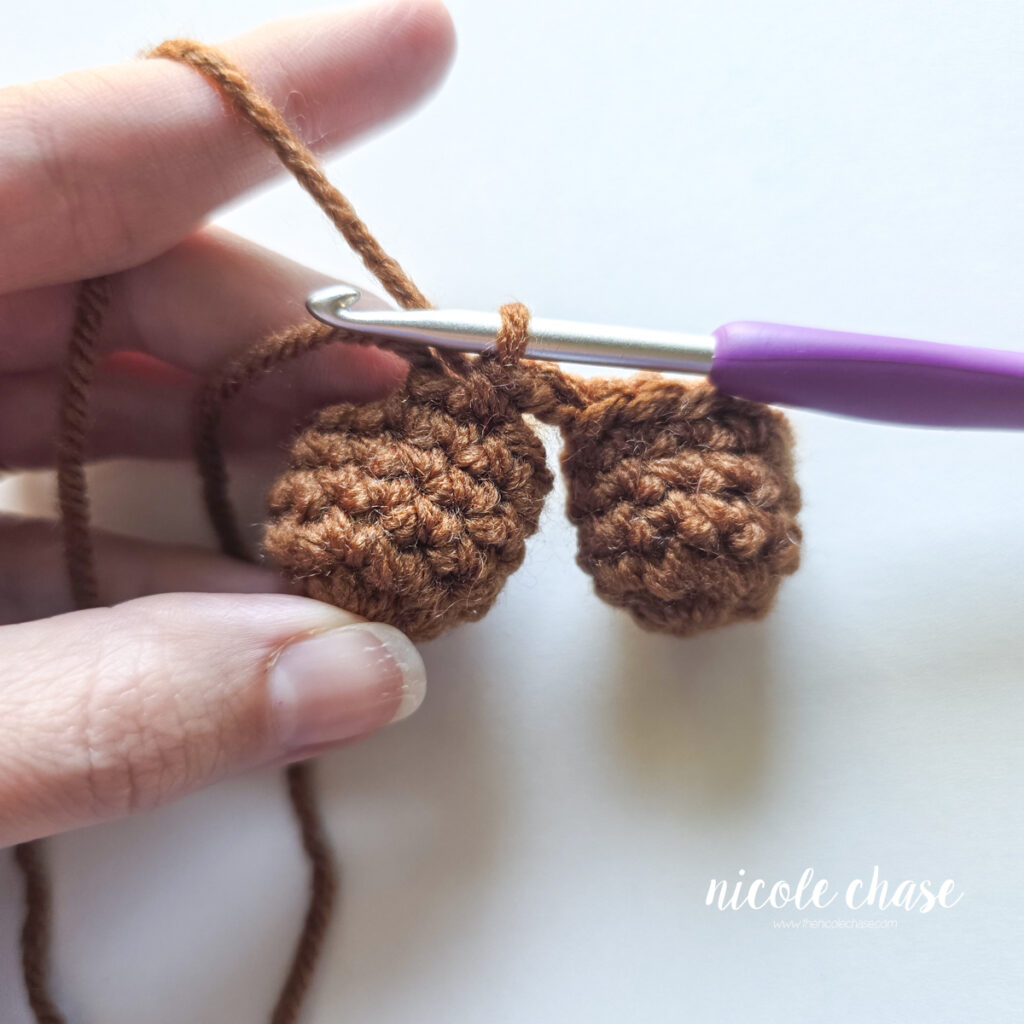
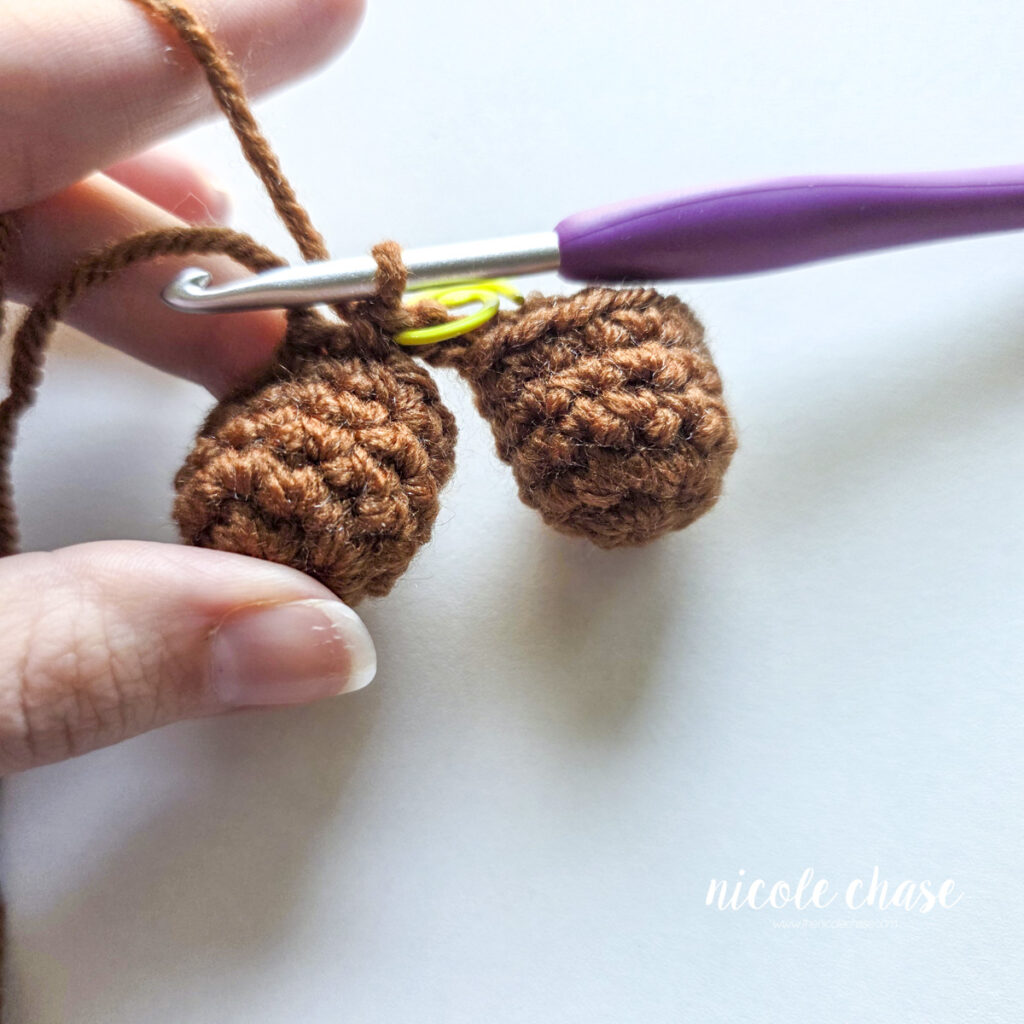
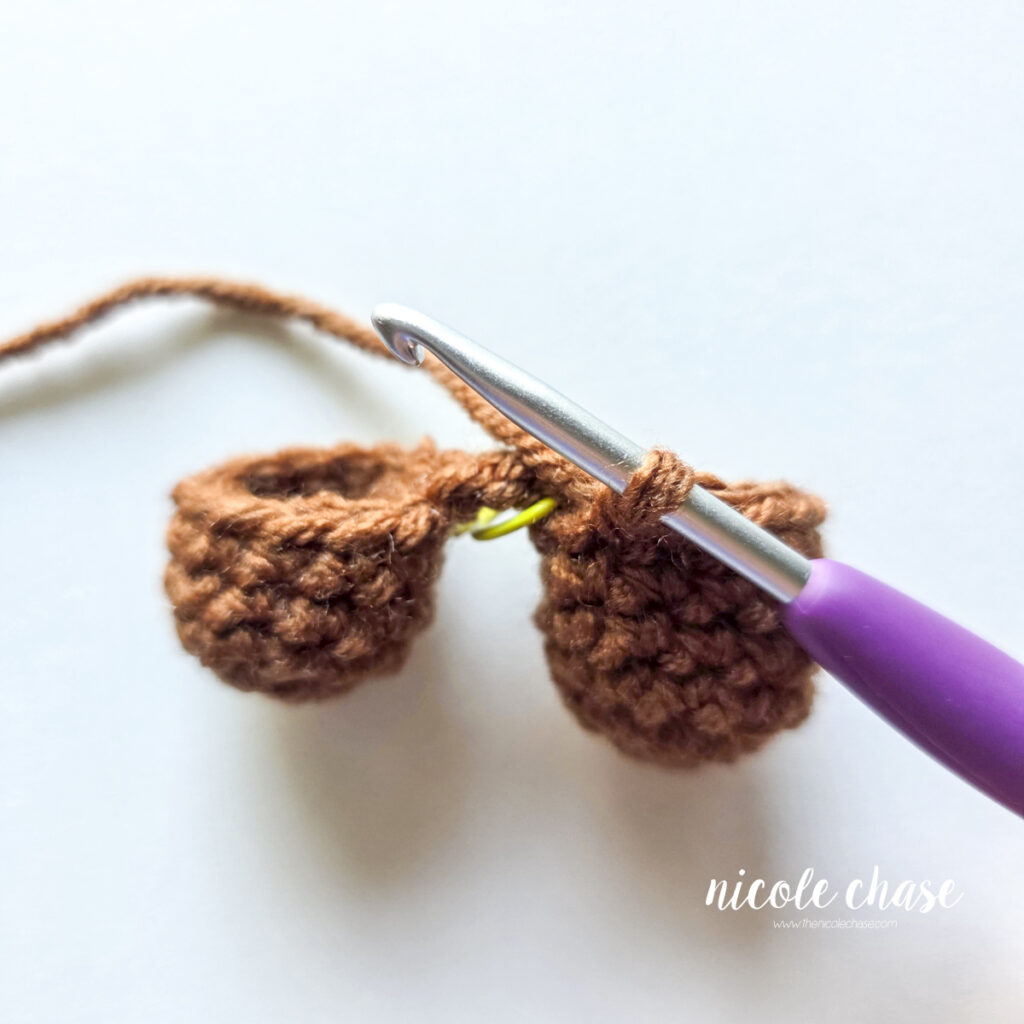
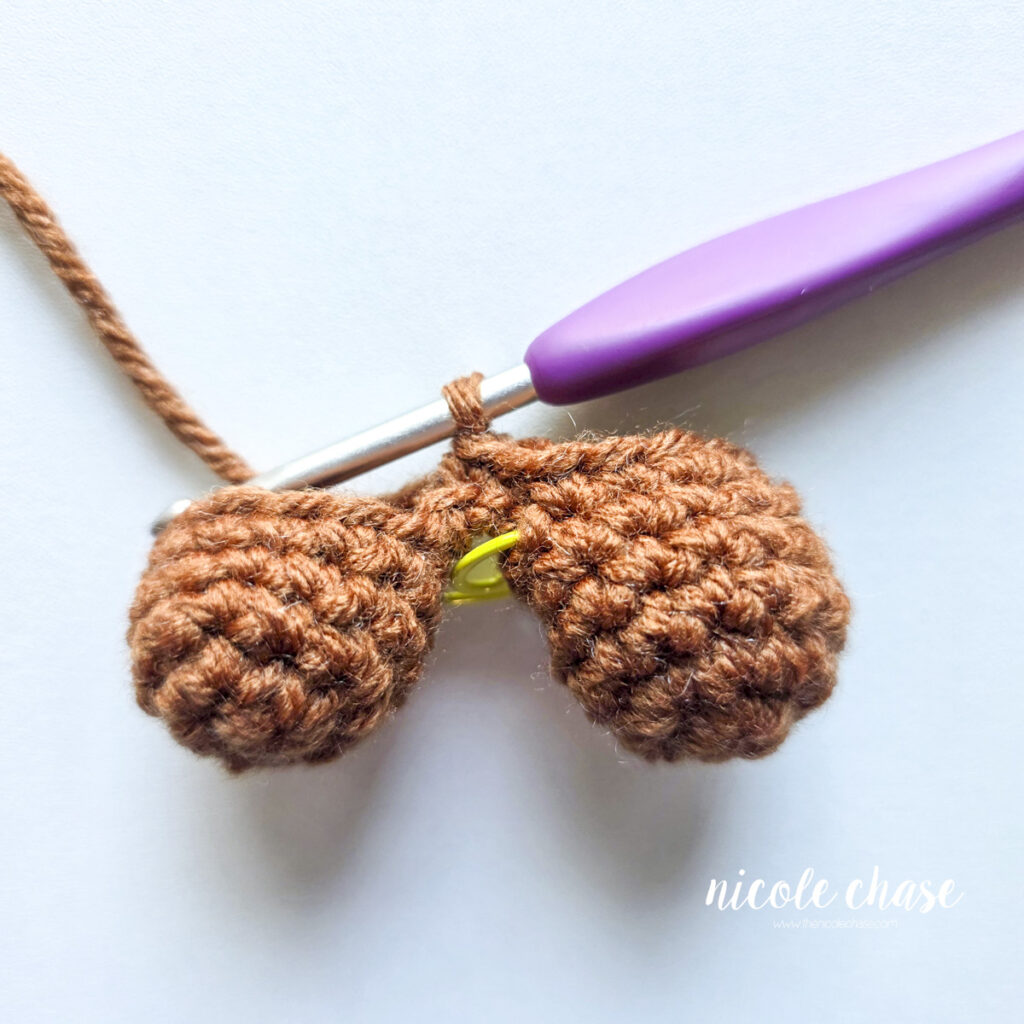
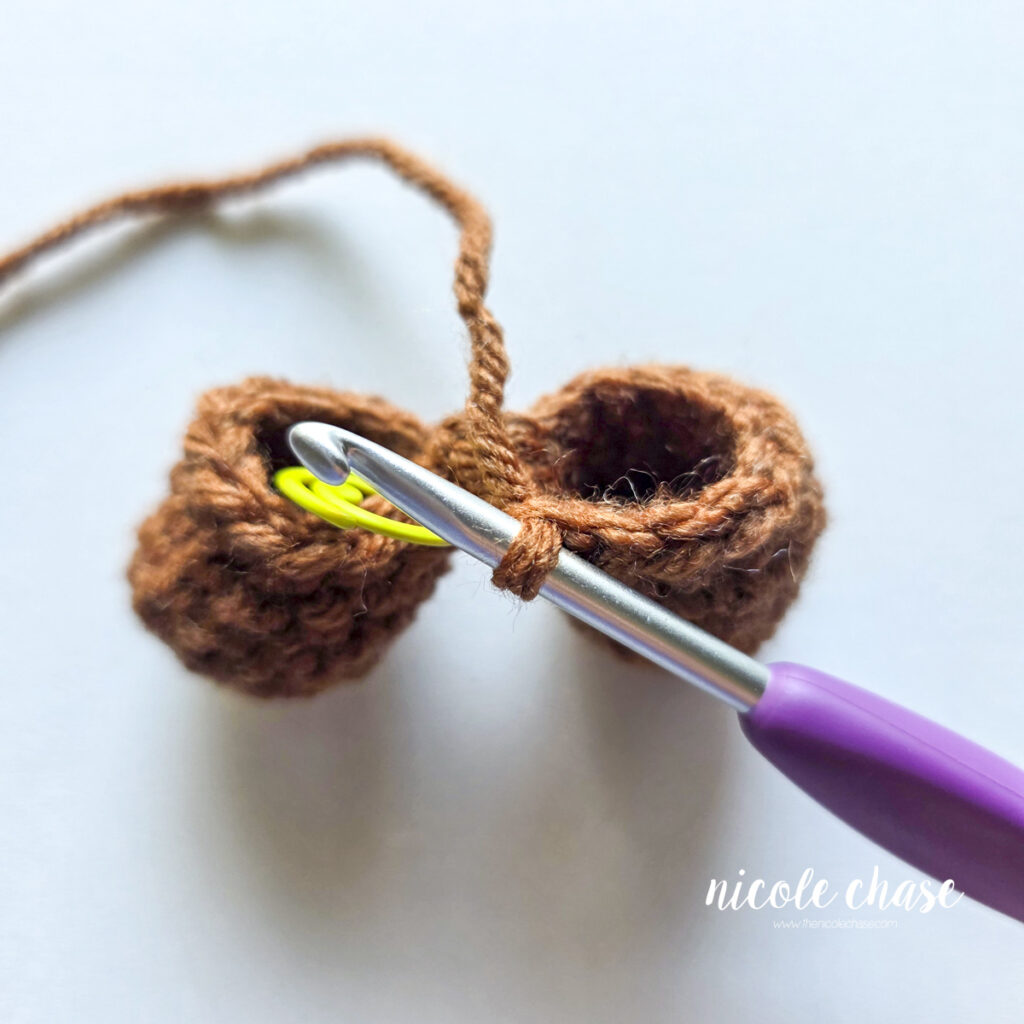
R6: Ch 2. Join to first leg with a SC. Add a stitch marker to this first SC st. SC in each st around first leg, across ch 2, around second leg, back across ch 2, to beginning. (28 sts) See tutorial photos.
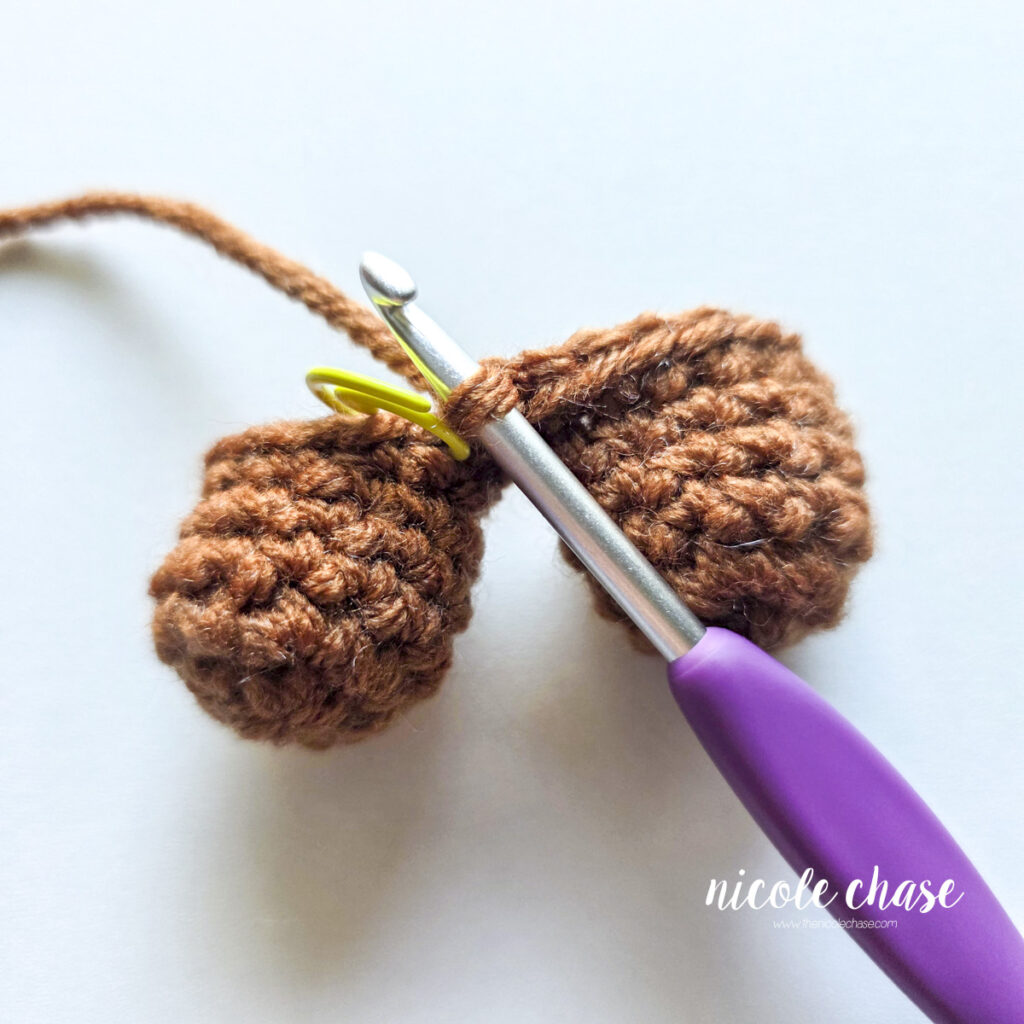
Do not fasten off, move on to body.
Body
R7: *2 SC in next st, 1 SC in each of the next 13 sts. Repeat from * around. (30 sts)
Fill legs with stuffing.
R8: 1 SC in each st around. (30 sts)
R9: *2 SC in next st, 1 SC in each of the next 4 sts. Repeat from * around. (36 sts)
R10: 1 SC in each st around. (36 sts)
Using color B (shown as white):
R11: 1 HDC in each st around. (36 sts)
Using color C (shown as red):
R12: Working in the third loop of the HDC, 1 SC in each st around. (36 sts)
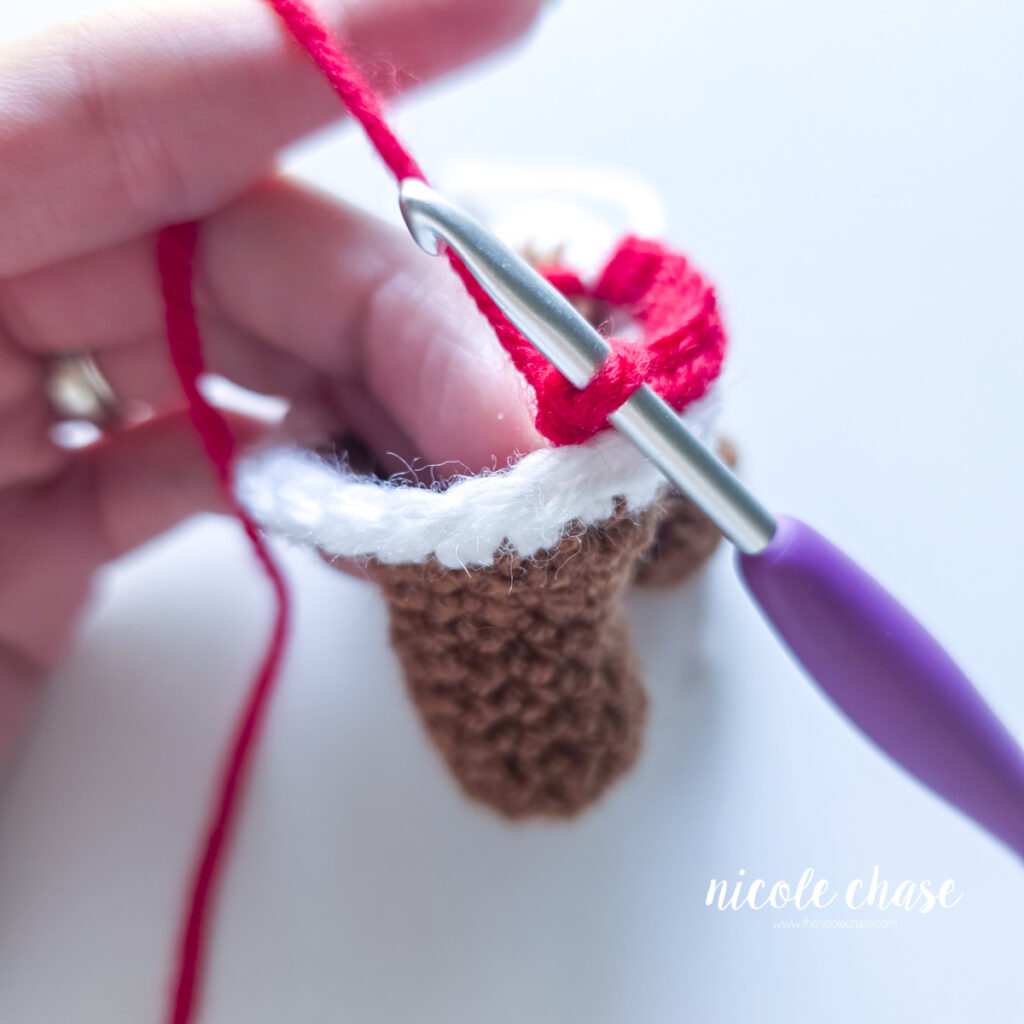
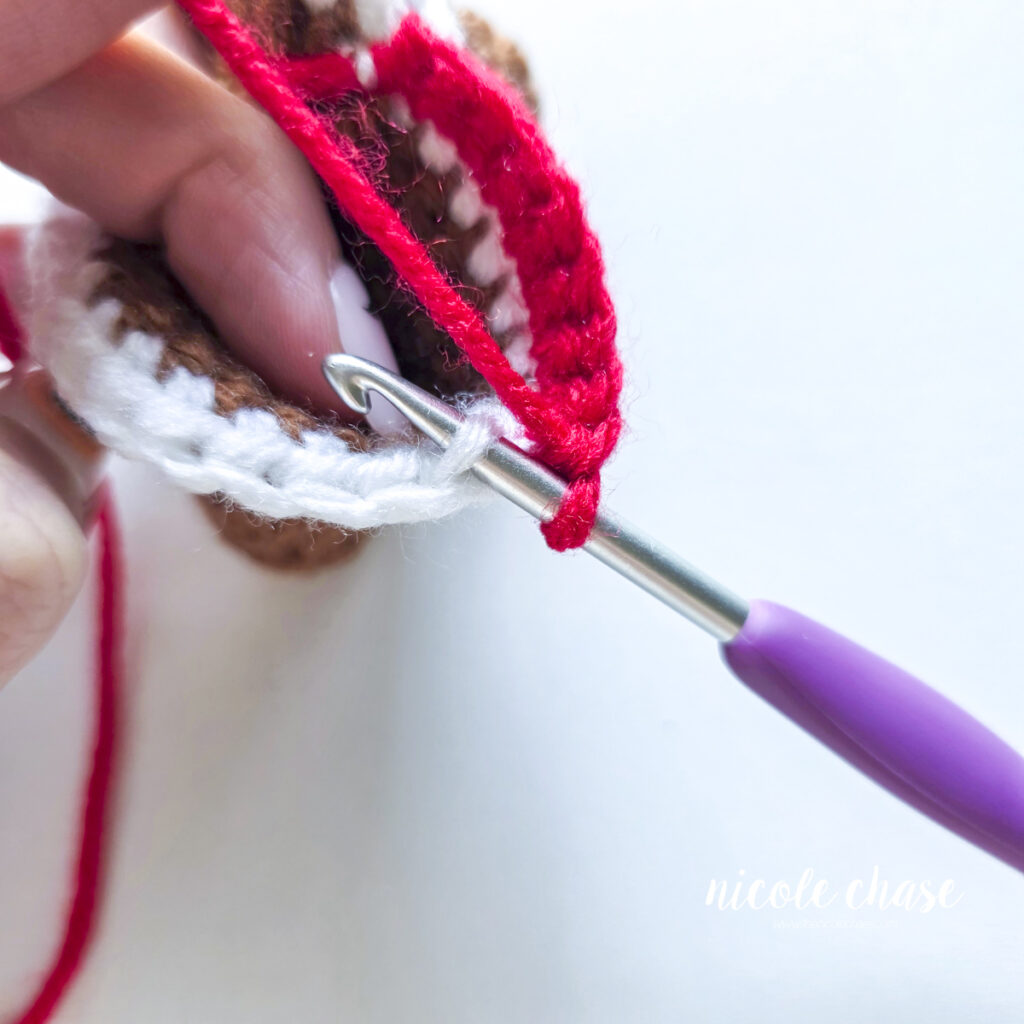
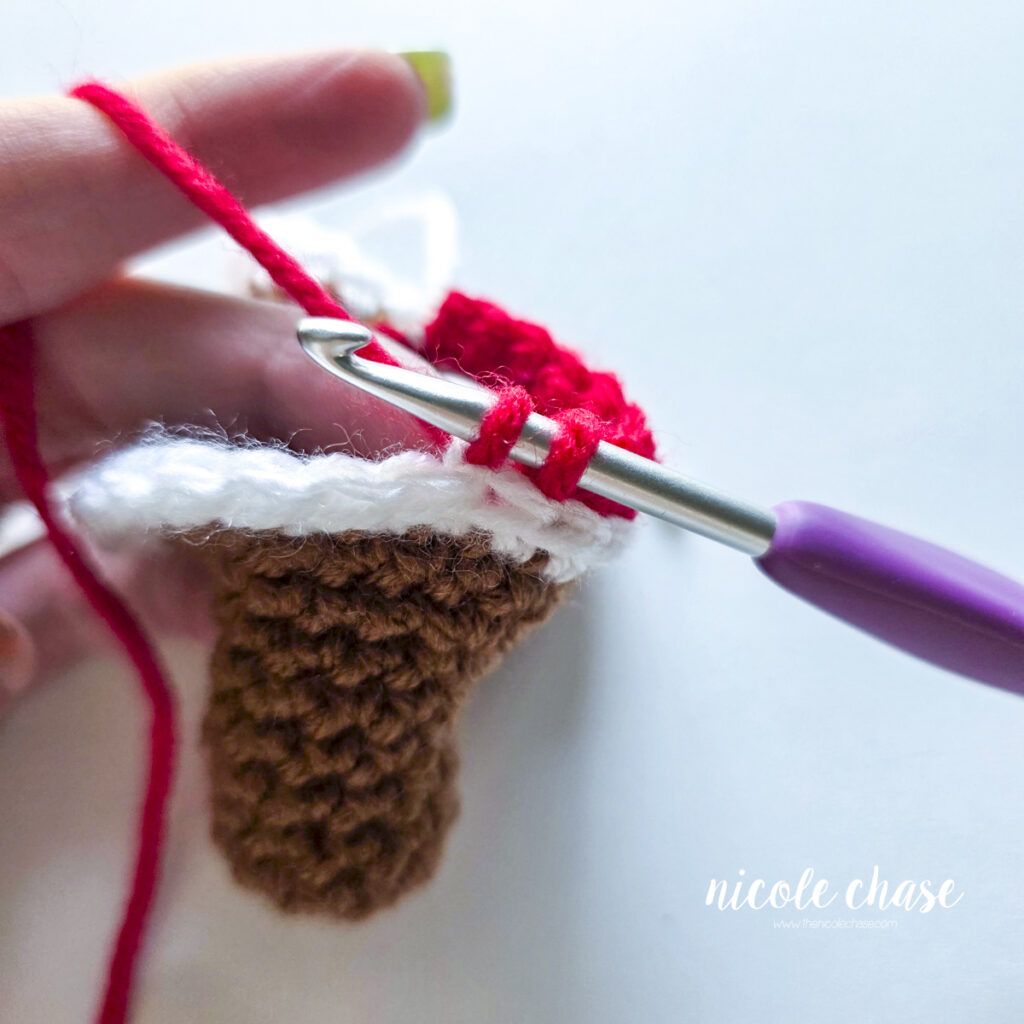
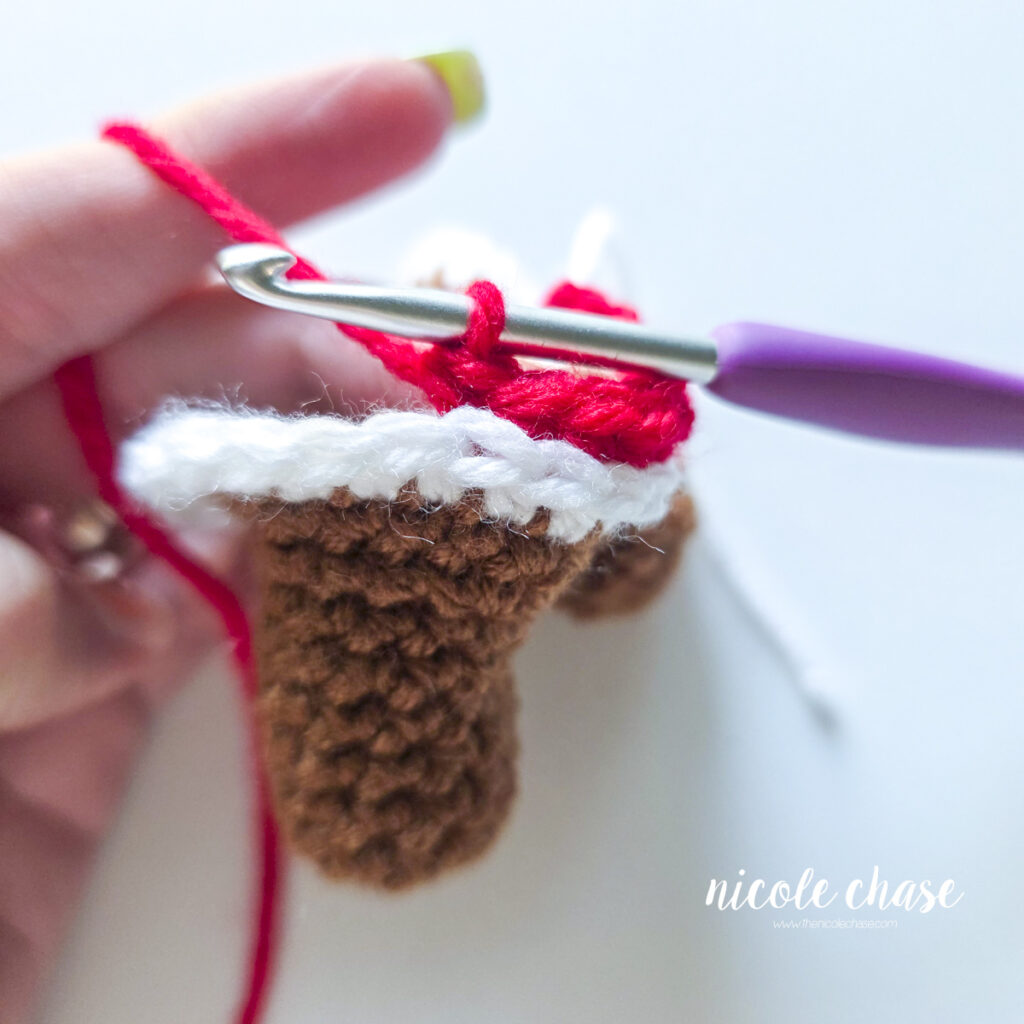
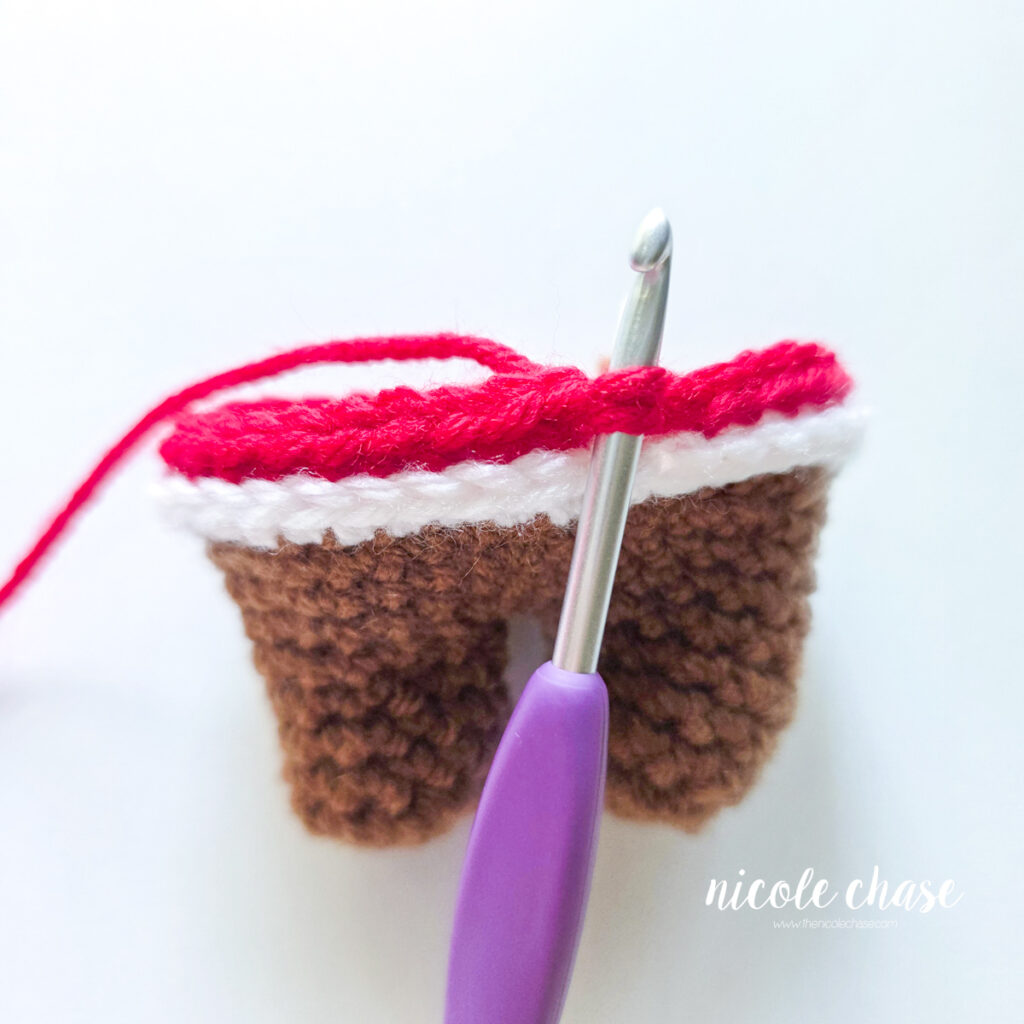
R13-14: 1 SC In each st around. (36 sts)
R15: *SC2tog, 1 SC in each of the next 4 sts. Repeat from * around. (30 sts)
Using color D (shown as black):
R16-17: 1 SC in each st around. (30 sts)
Using color C (shown as red):
R18: 1 SC in each st around. (30 sts)
R19: *SC2tog, 1 SC in each of the next 3 sts. (24 sts)
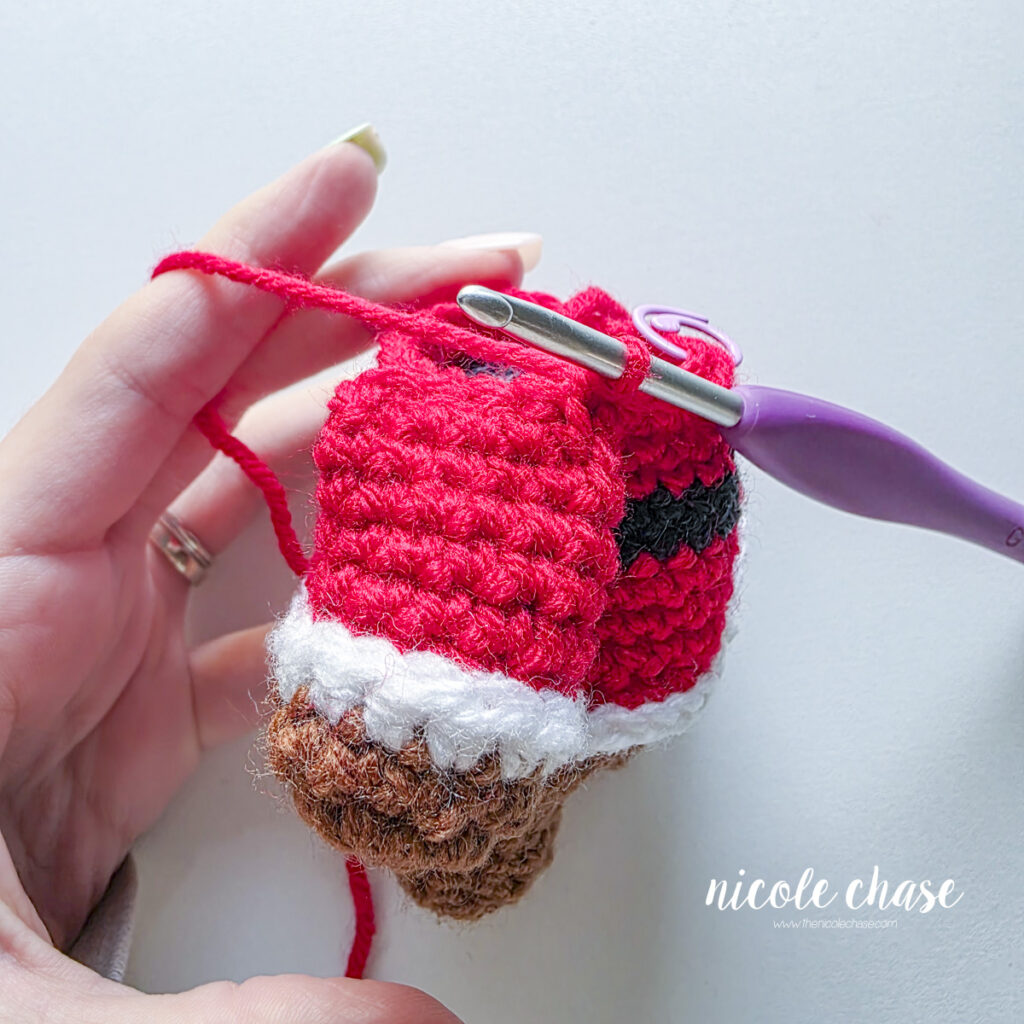
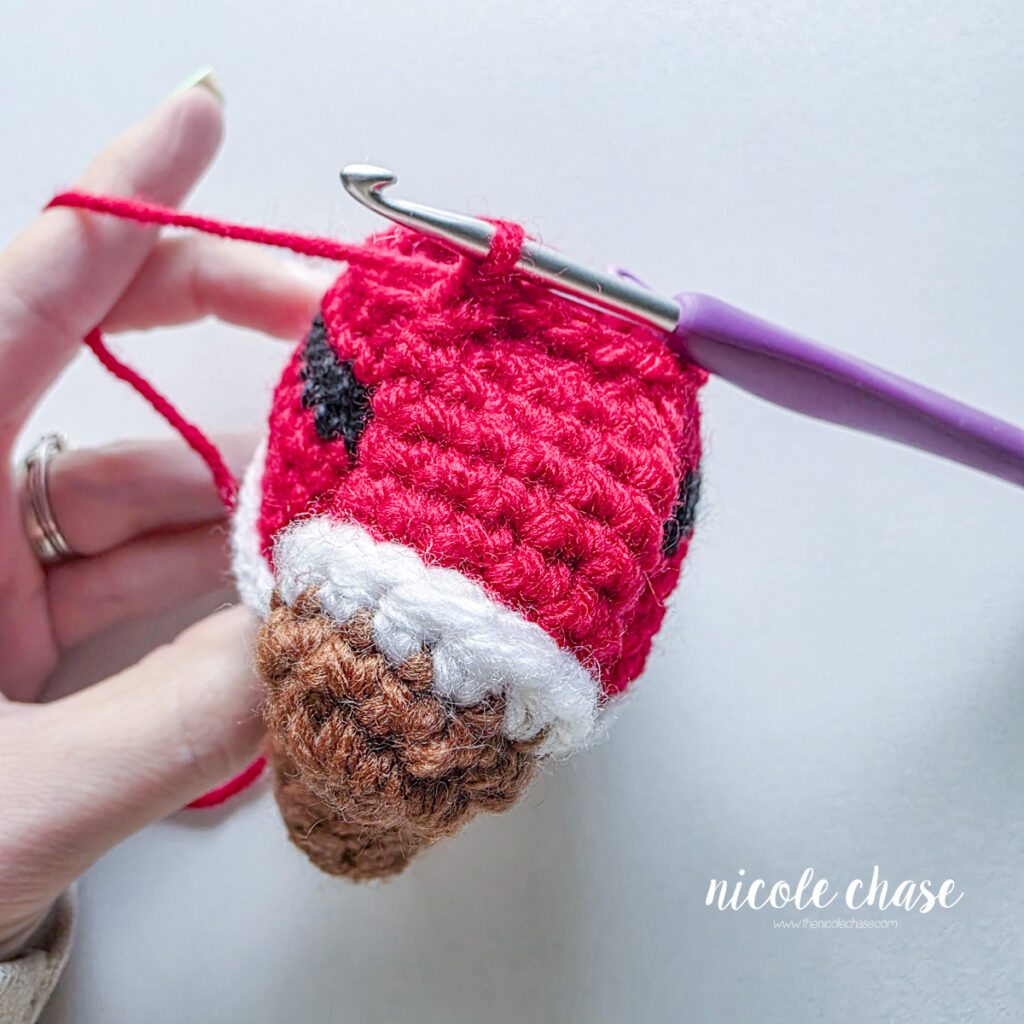
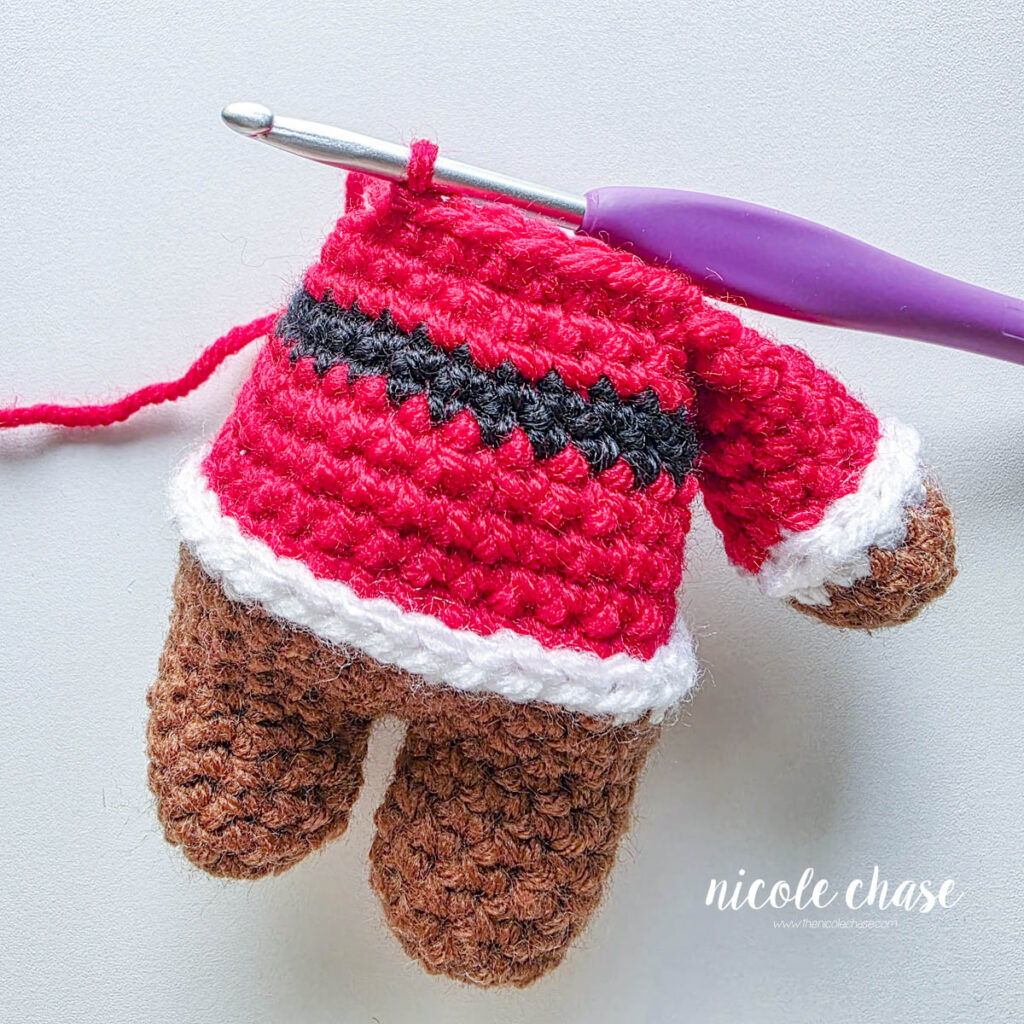
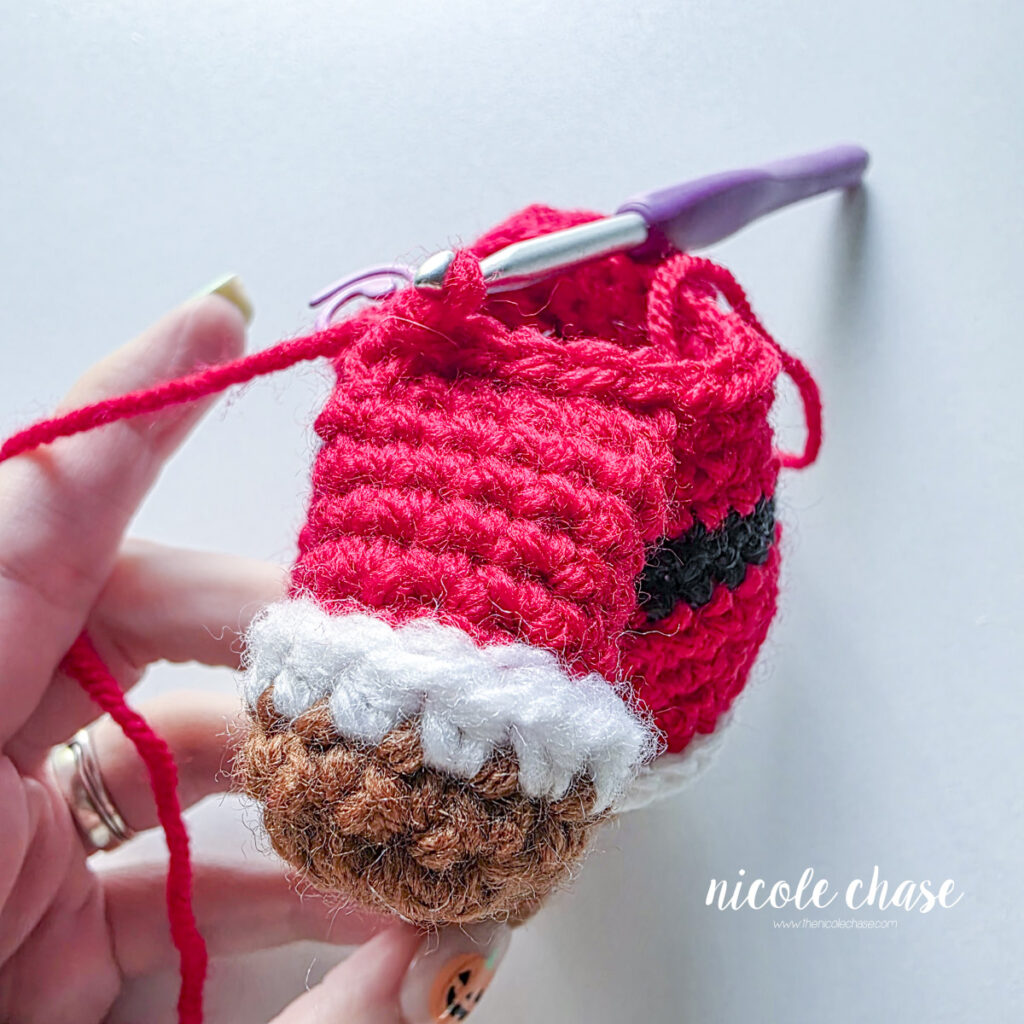
**Note: In the next round you will be crocheting the arms in place. Due to differences in tension, yarn, etc., you may need to adjust the placement of the arms to ensure that they are properly positioned on the sides of the body. The arms will require 5 sts each and should be positioned on the sides of the body. There wil be 7 sts between each arm on both the front and back of the body.
For example, if you only need 3 sts at the start of the round to get the appropriate placement for the first arm, you will then crochet the arm in place with 5 sts, work the next 7 sts, crochet the second arm in place with 5 sts, and then complete the round with 4 sts; still completing the round with 24 sts in total.
R20: 1 SC in each of the next 5 sts. Place the first arm, and working through both the sts of the arm and the sts of the body, 1 SC in the next 5 sts. 1 SC in each of the next 7 sts. Place the second arm, and working through both the sts of the arm and the sts of the body, 1 SC in the next 5 sts. 1 SC in each of the next 2 sts. (24 sts) See tutorial photos.
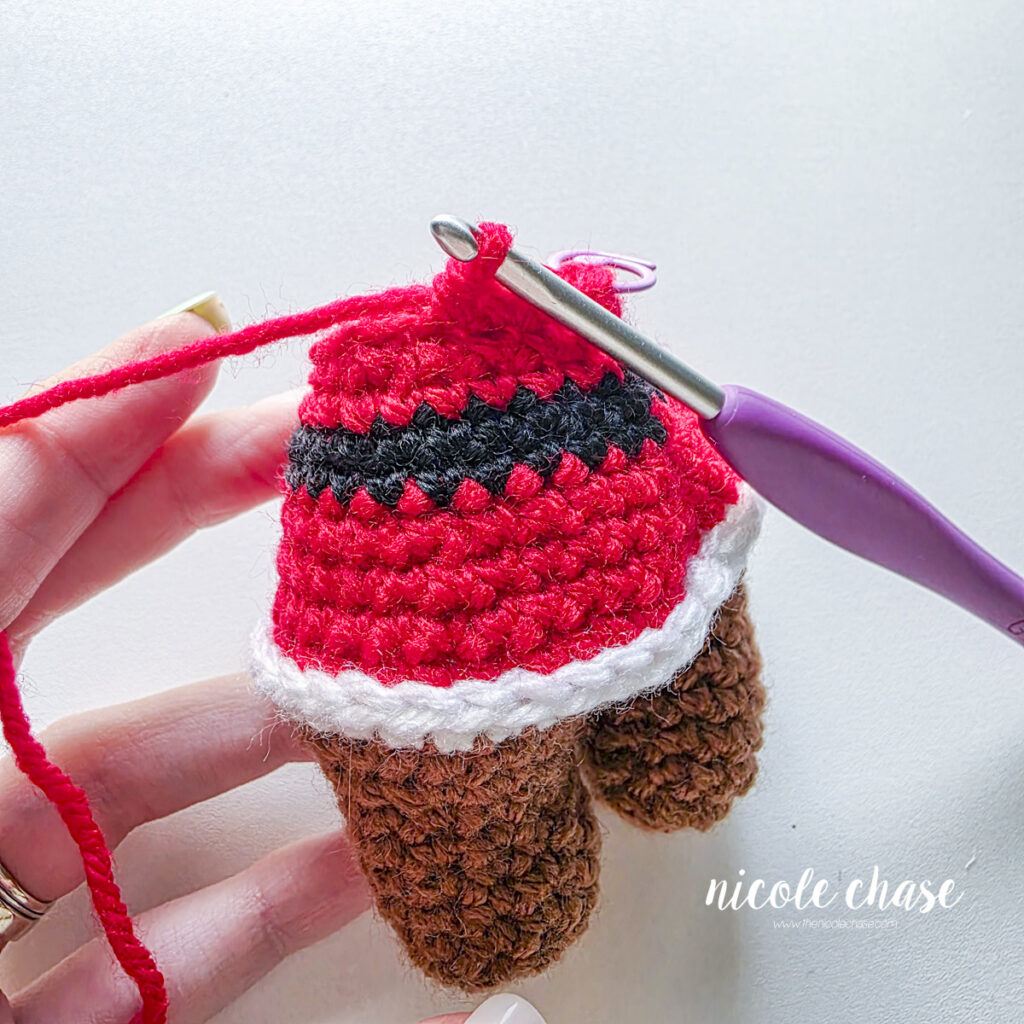
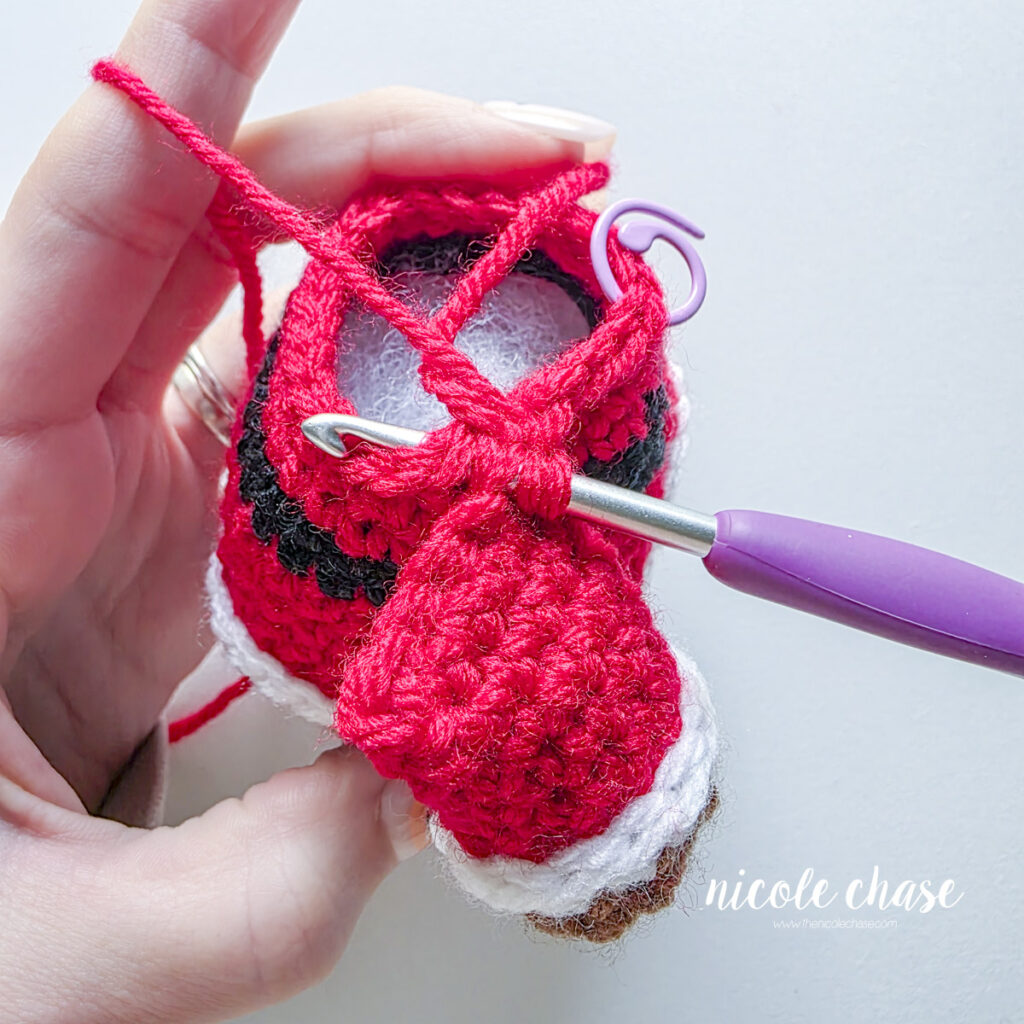
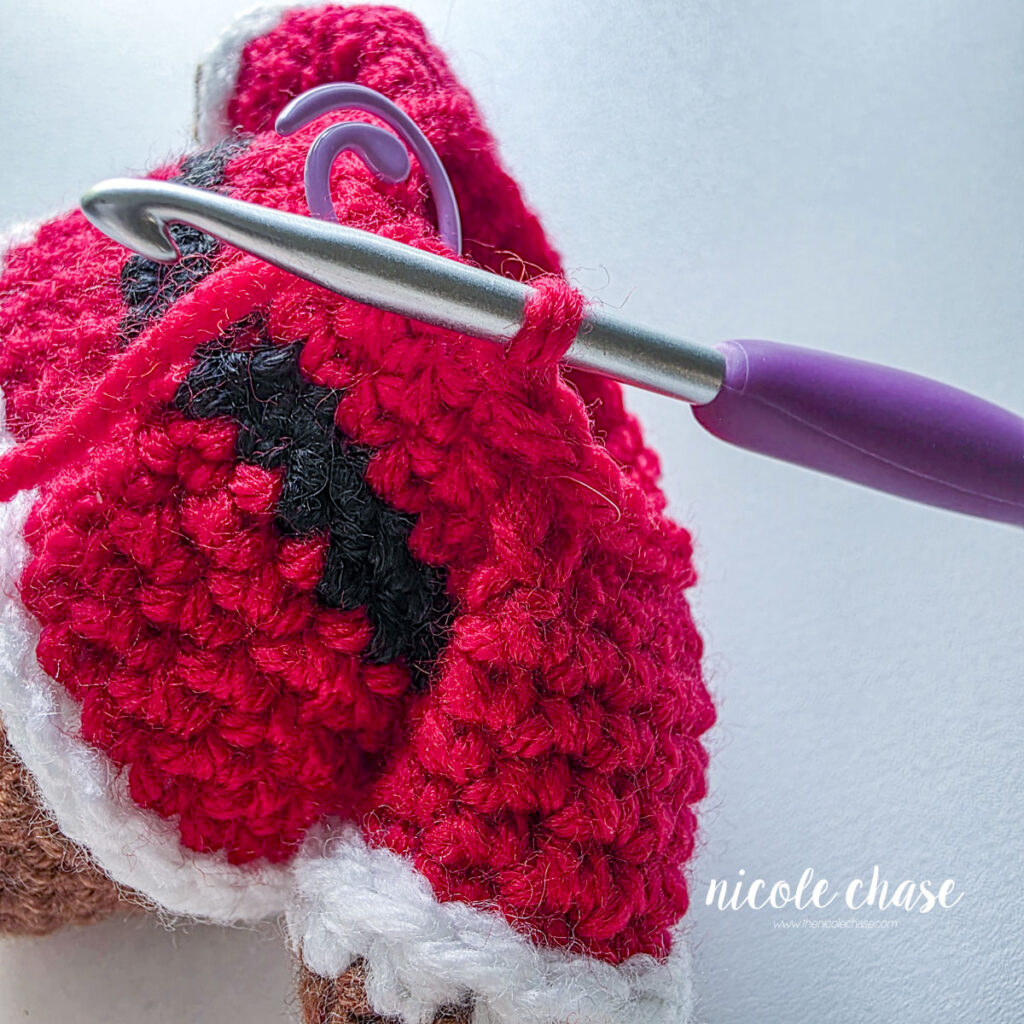
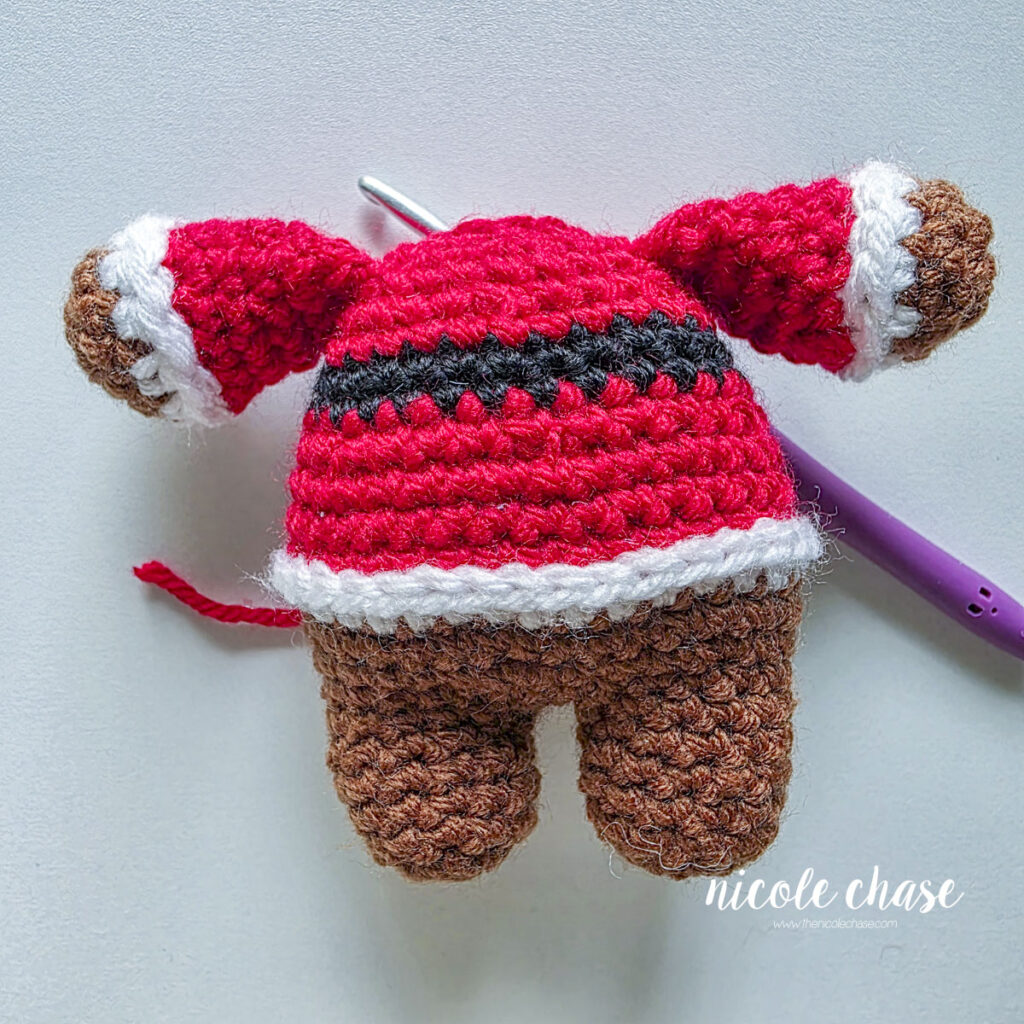
R21: *SC2tog, 1 SC in each of the next 2 sts. Repeat from * around. (18 sts)
R22: *SC2tog, 1 SC in next st. Repeat from * around. (12 sts)
Fill body with stuffing.
Head
Using color A (shown as brown):
R23: 2 SC in each st around. (24 sts)
R24: *2 SC in next st, 1 SC in each of the next 3 sts. Repeat from * around. (30 sts)
R25: *2 SC in next st, 1 SC in each of the next 4 sts. Repeat from * around. (36 sts)
R26-32: 1 SC in each st around. (36 sts)
R33: *SC2tog, 1 SC in each of the next 4 sts. Repeat from * around. (30 sts)
If using safety eyes, insert them between R29 and R30 with 4 sts between.
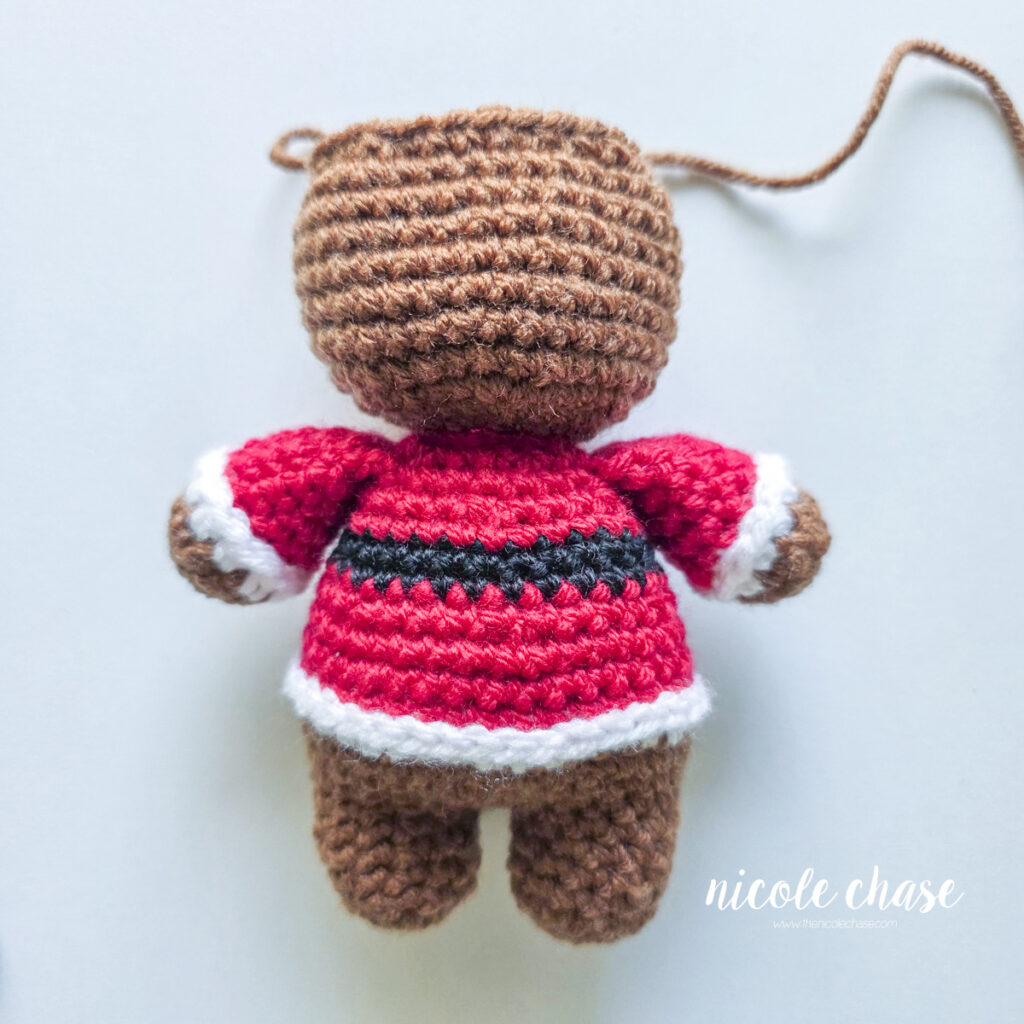
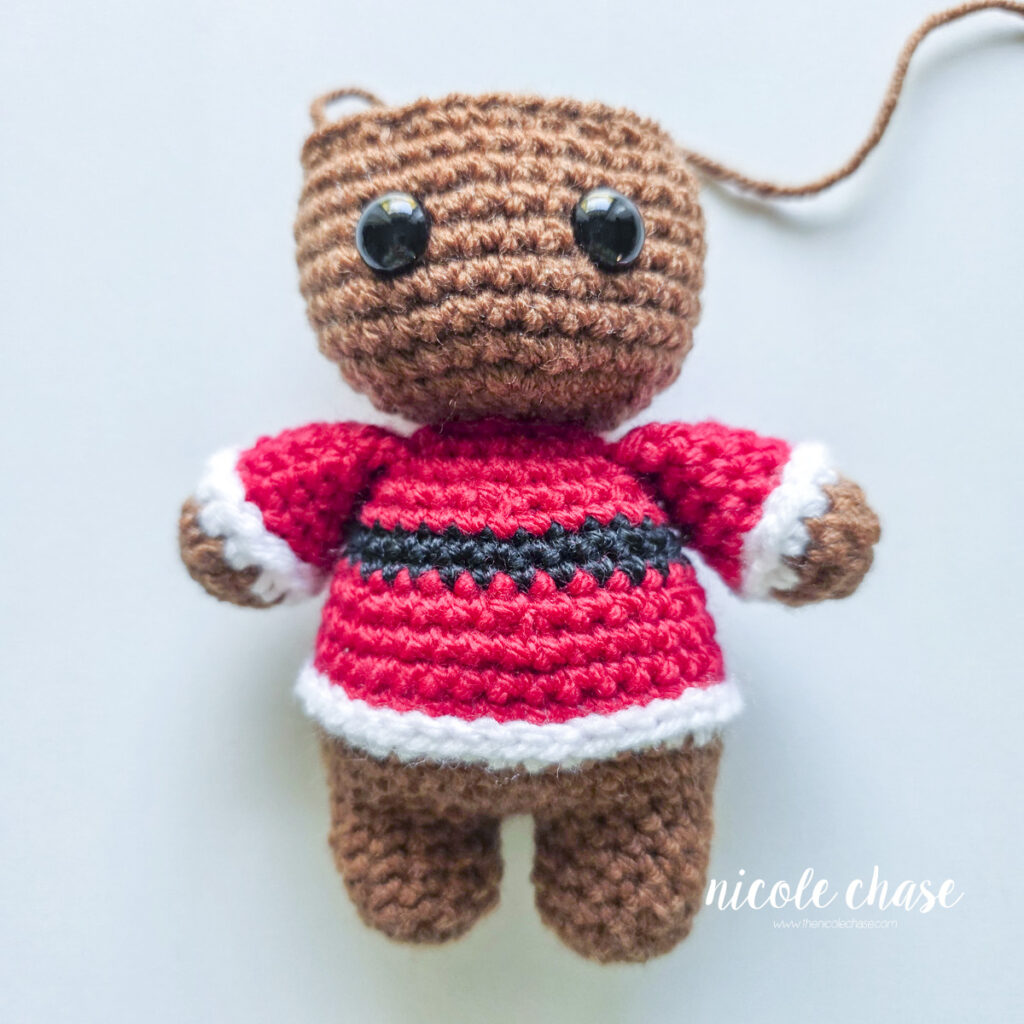
R34: *SC2tog, 1 SC in each of the next 3 sts. Repeat from * around. (24 sts)
R35: *SC2tog, 1 SC in each of the next 2 sts. Repeat from * around. (18 sts)
Fill head with stuffing.
R36: *SC2tog, 1 SC in next st. Repeat from * around. (12 sts)
R37: *SC2tog. Repeat from * around. (6 sts)
Cut yarn, weave in and out of remaining sts. Pull tight to close. Weave in ends.
Ears (make 2)
Using color A (shown as brown):
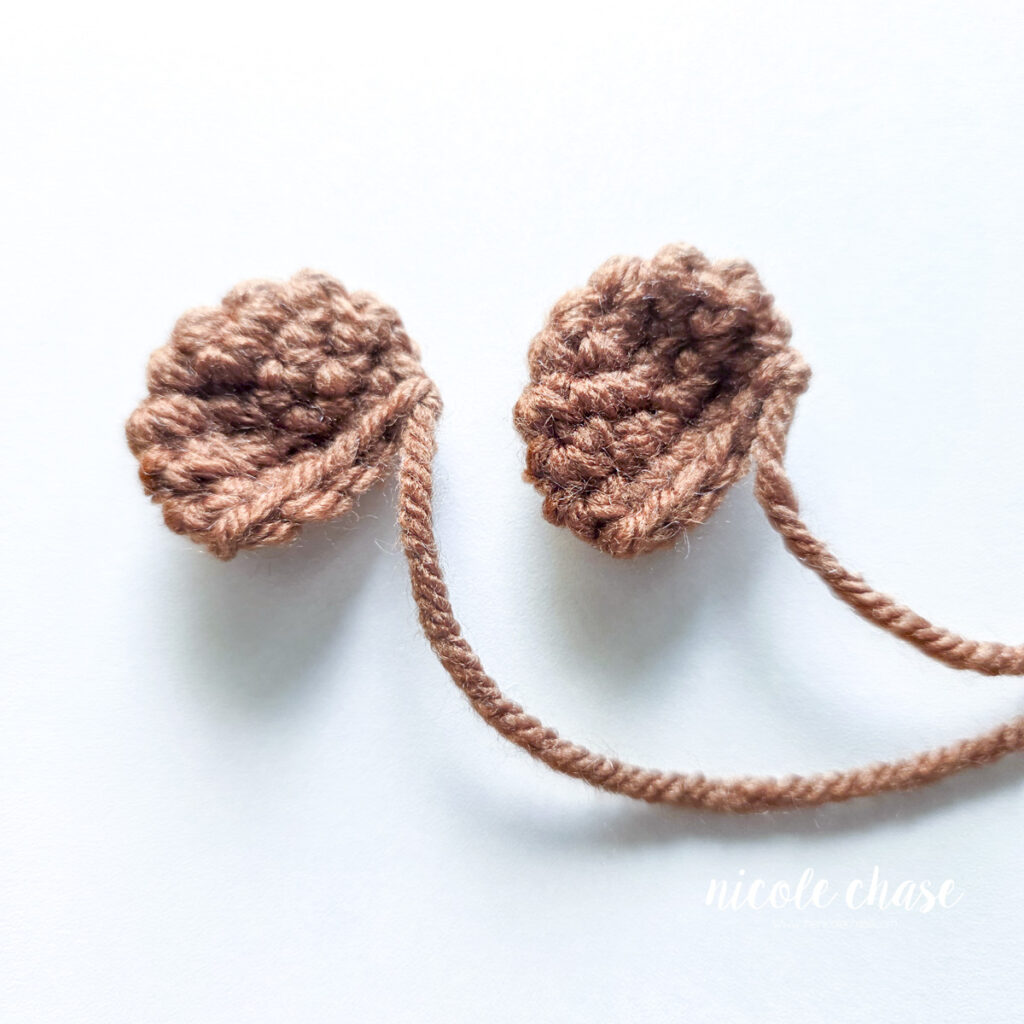
R1: Begin with 6 SC in a magic ring. (6 sts)
R2: 2 SC in each st around. (12 sts)
R3: *2 SC in next st, 1 SC in each of the next 3 sts. Repeat from * around. (15 sts)
R4: *SC2tog, 1 SC in each of the next 3 sts. Repeat from * around. (12 sts)
R5: Fold the ear closed, leaving 1 unworked st on each side for the fold. Working through both sides to close, 1 SC in each st across. (5 sts) See tutorial photos.
Cut yarn, leaving long tail for sewing. Fasten off.
Hat
Using color C (shown as red):
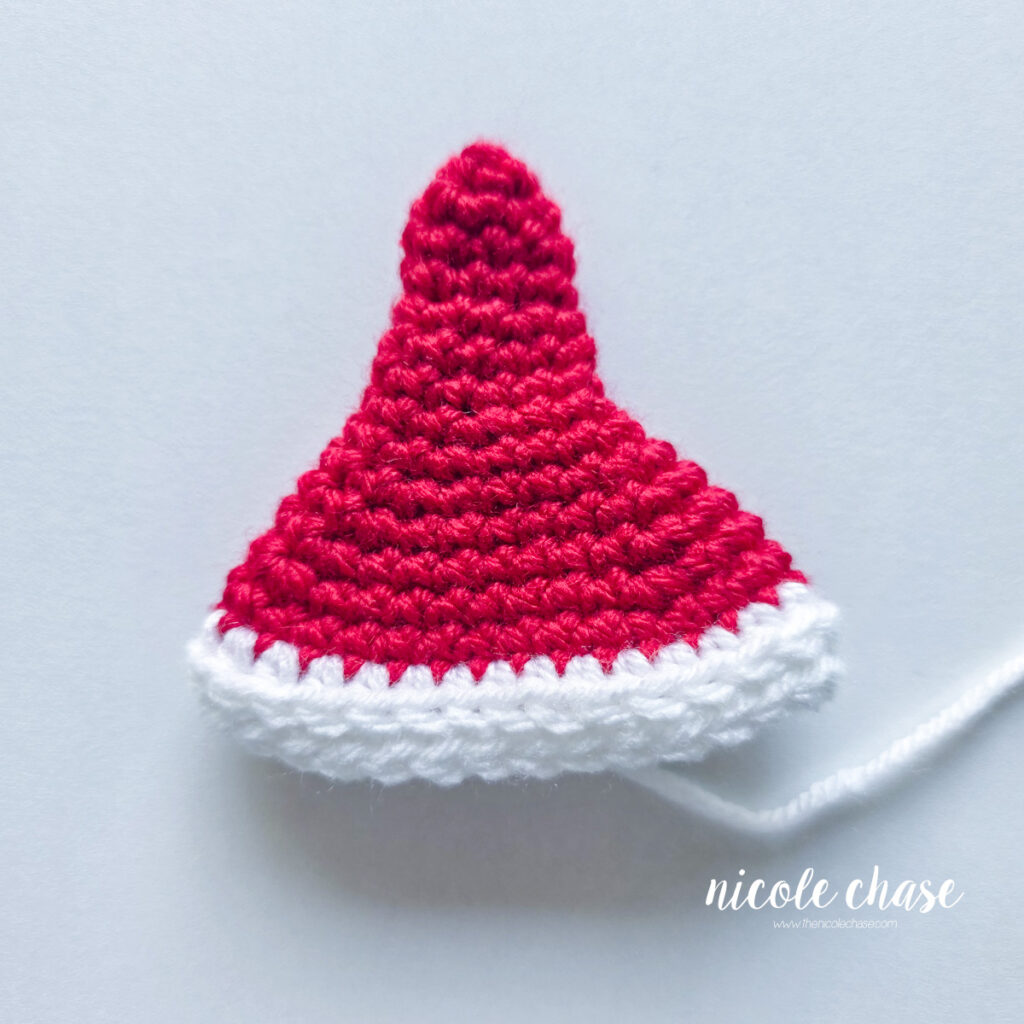
R1: Begin with 6 SC in a magic ring. (6 sts)
R2: 1 SC in each st around. (6 sts)
R3: *2 SC in next st, 1 SC in next st. Repeat from * around. (9 sts)
R4-5: 1 SC in each st around. (9 sts)
R6: *2 SC in next st, 1 SC in each of the next 2 sts. Repeat from * around. (12 sts)
R7-8: 1 SC in each st around. (12 sts)
R9: *2 SC in next st, 1 SC in each of the next 3 sts. Repeat from * around. (15 sts)
R10: *2 SC in next st, 1 SC in each of the next 4 sts. Repeat form * around. (18 sts)
R11: *2 SC in next st, 1 SC in each of the next 5 sts. Repeat from * around. (21 sts)
R12: *2 SC in next st, 1 SC in each of the next 6 sts. Repeat from * around. (24 sts)
R13: *2 SC in next st, 1 SC in each of the next 7 sts. Repeat from * around. (27 sts)
R14: *2 SC in next st, 1 SC in each of the next 8 sts. Repeat from * around. (30 sts)
R15: 1 SC in each st around. (30 sts)
Using color B (shown as white):
R16: 1 HDC in each st around. (30 sts)
R17: Working in the third loop of the HDC, 1 SC in each st around. (30 sts)
If you will be attaching the hat, cut yarn, leaving a long strand for sewing.
If you will not be attaching the hat, cut yarn and fasten off. Weave in ends.
Assembly & Finishing
See tutorial photos.
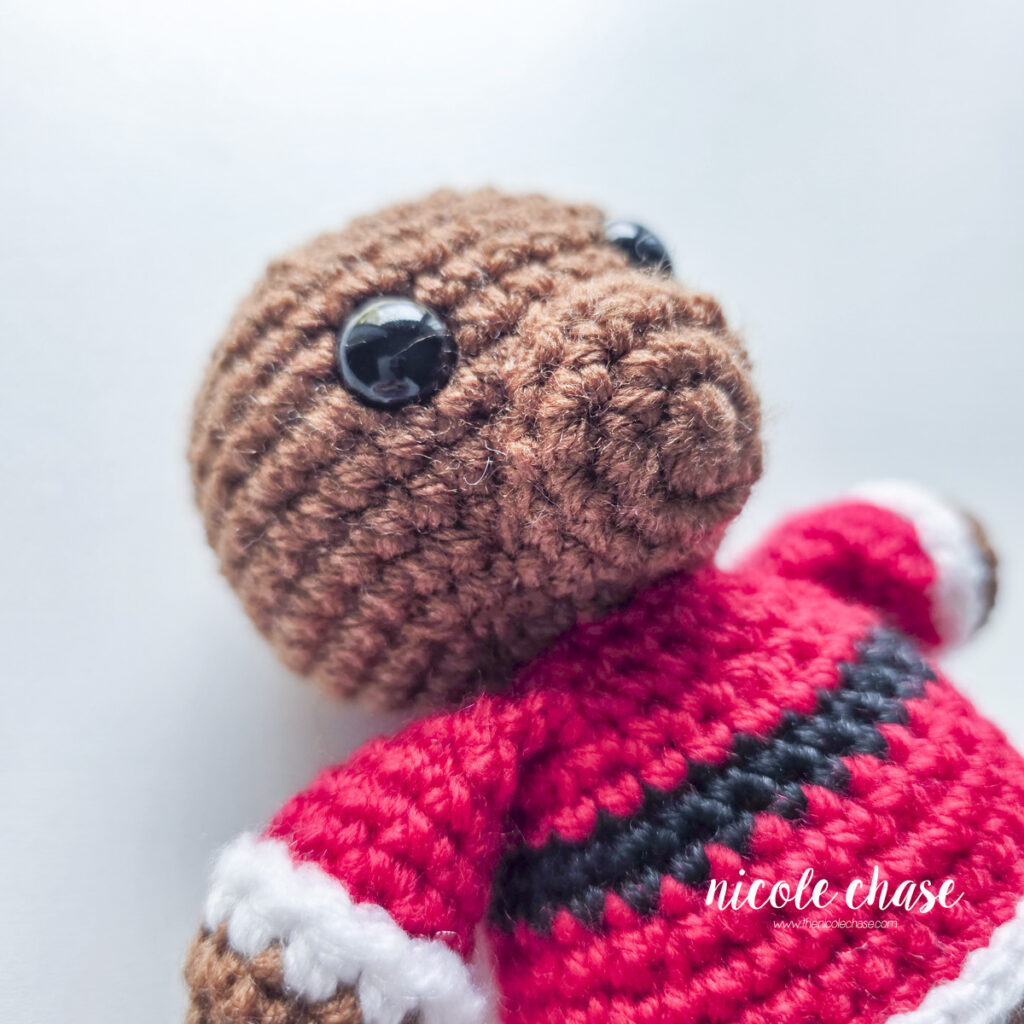
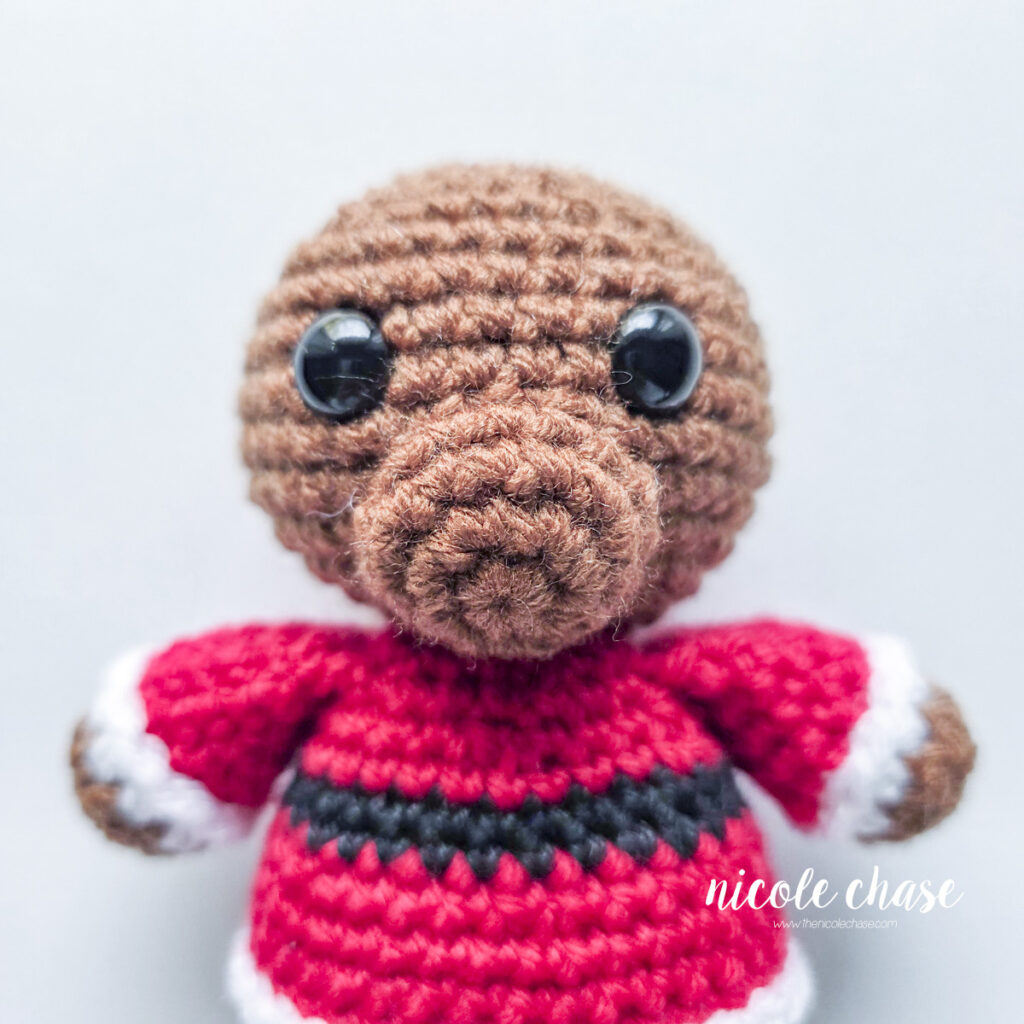
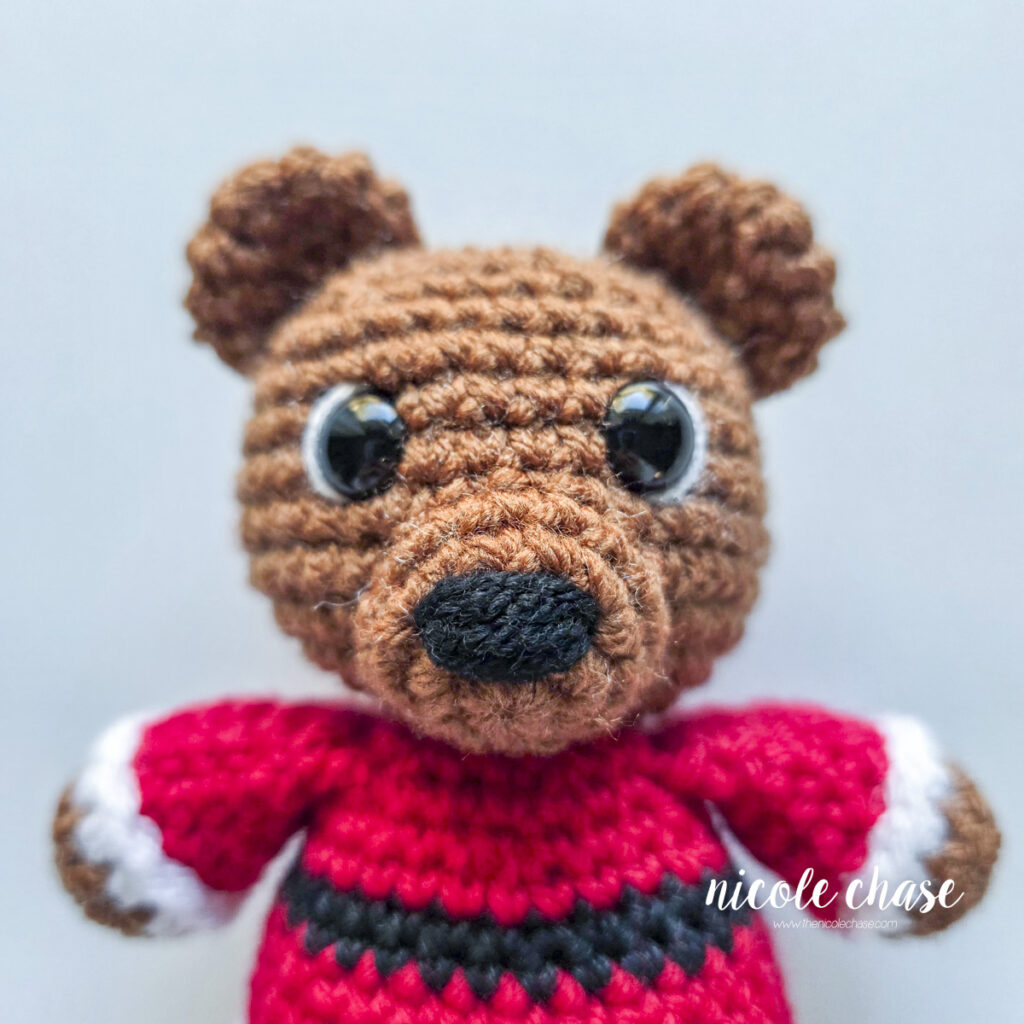
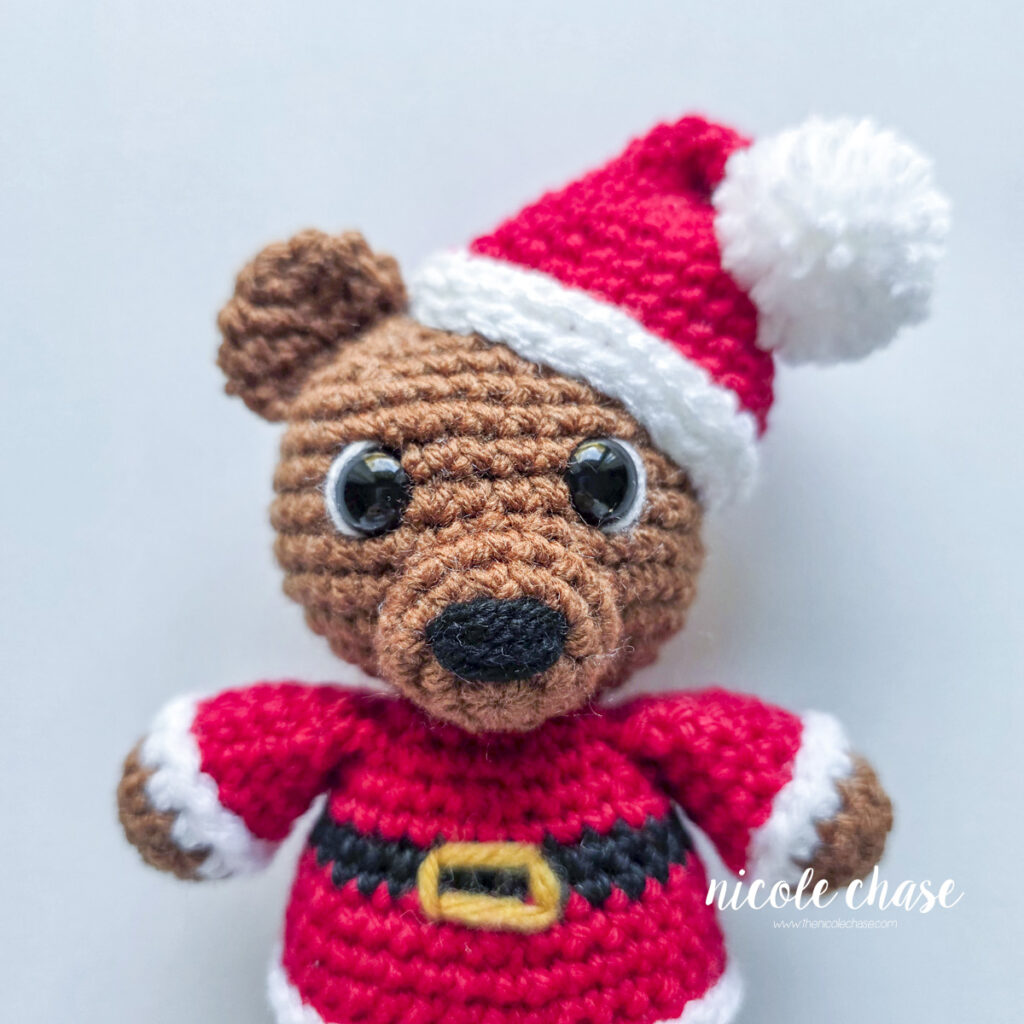
Attach snout over R24-28 on the head, between the eyes. Just before you’ve finished sewing, fill the snout with stuffing and complete sewing.
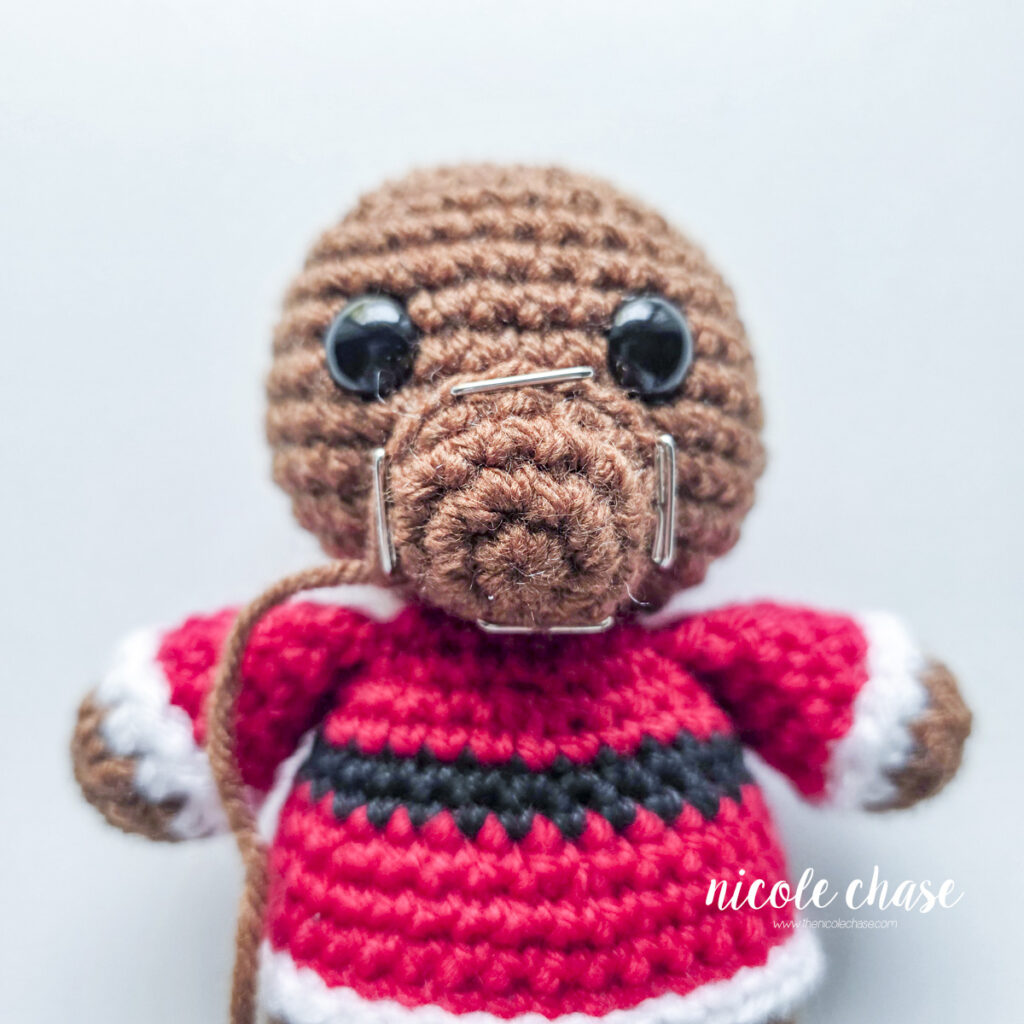
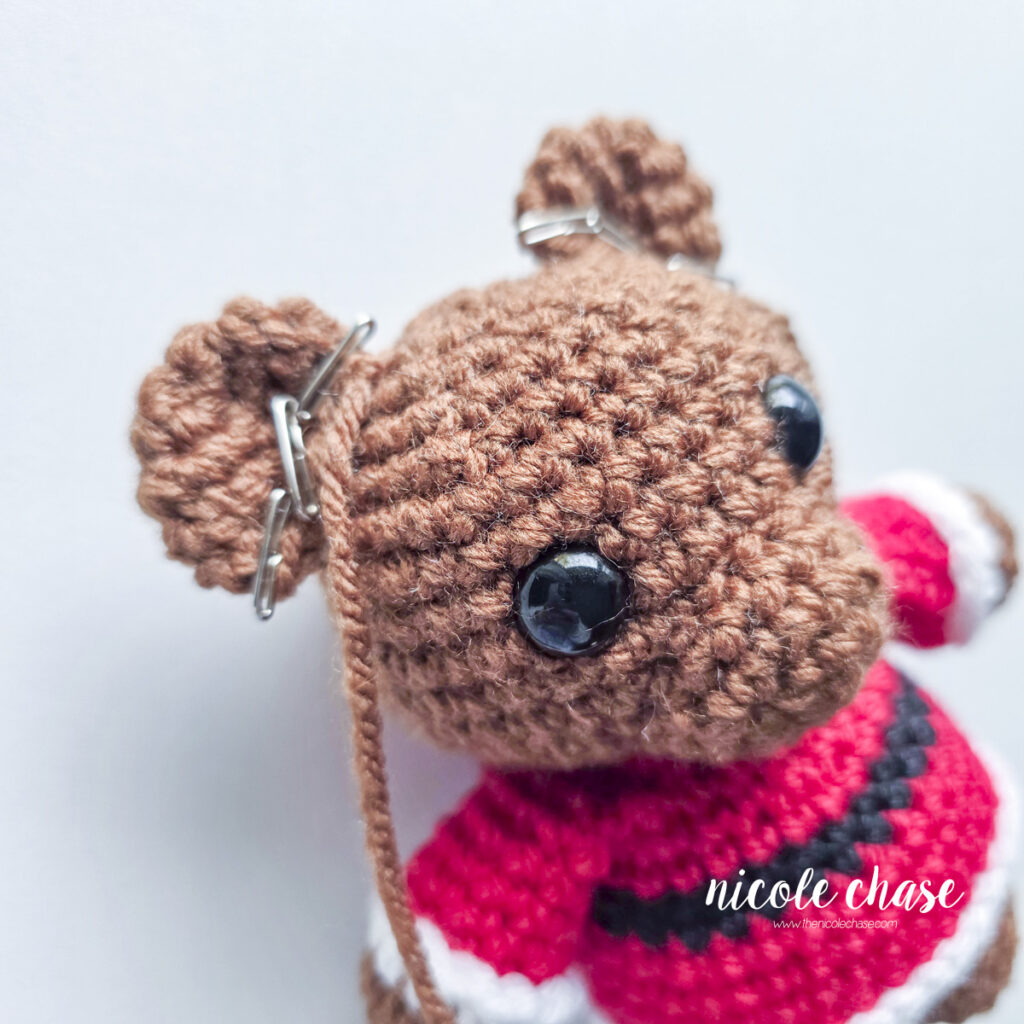
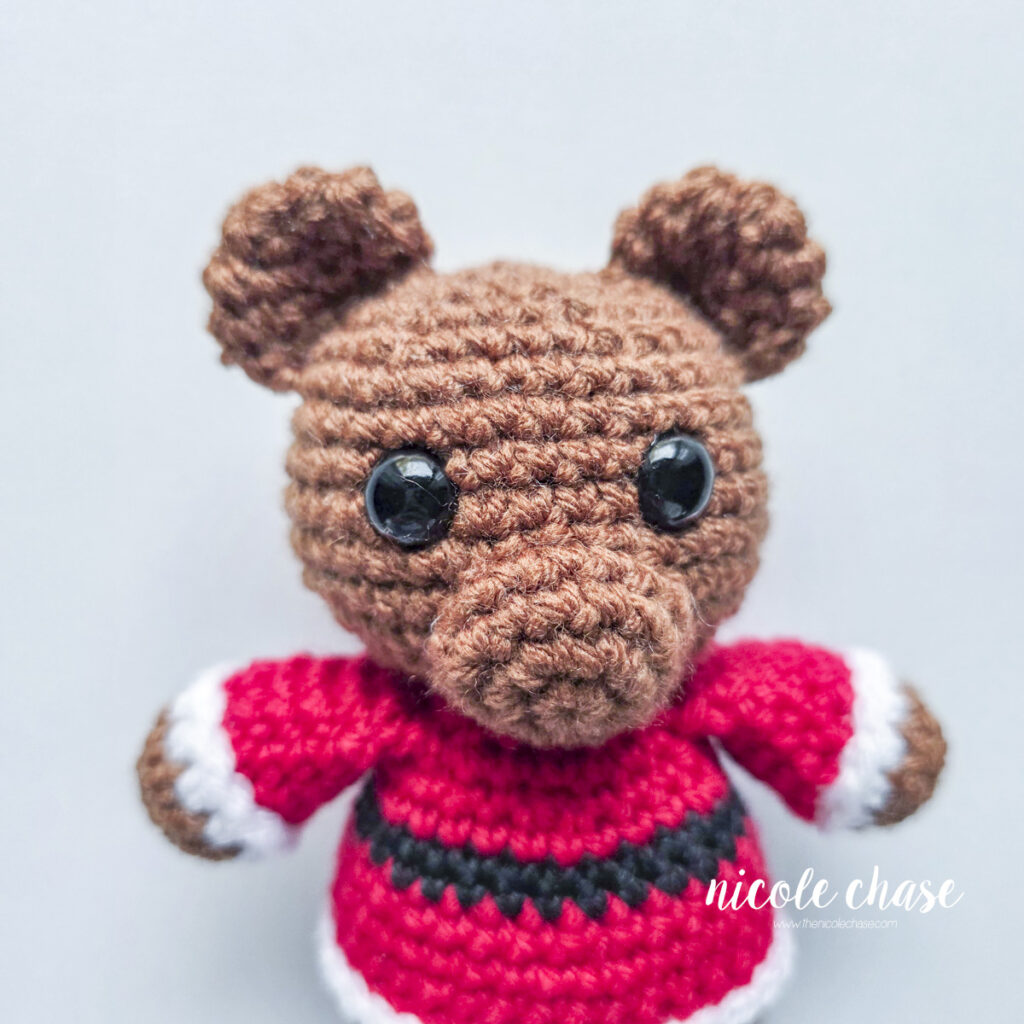
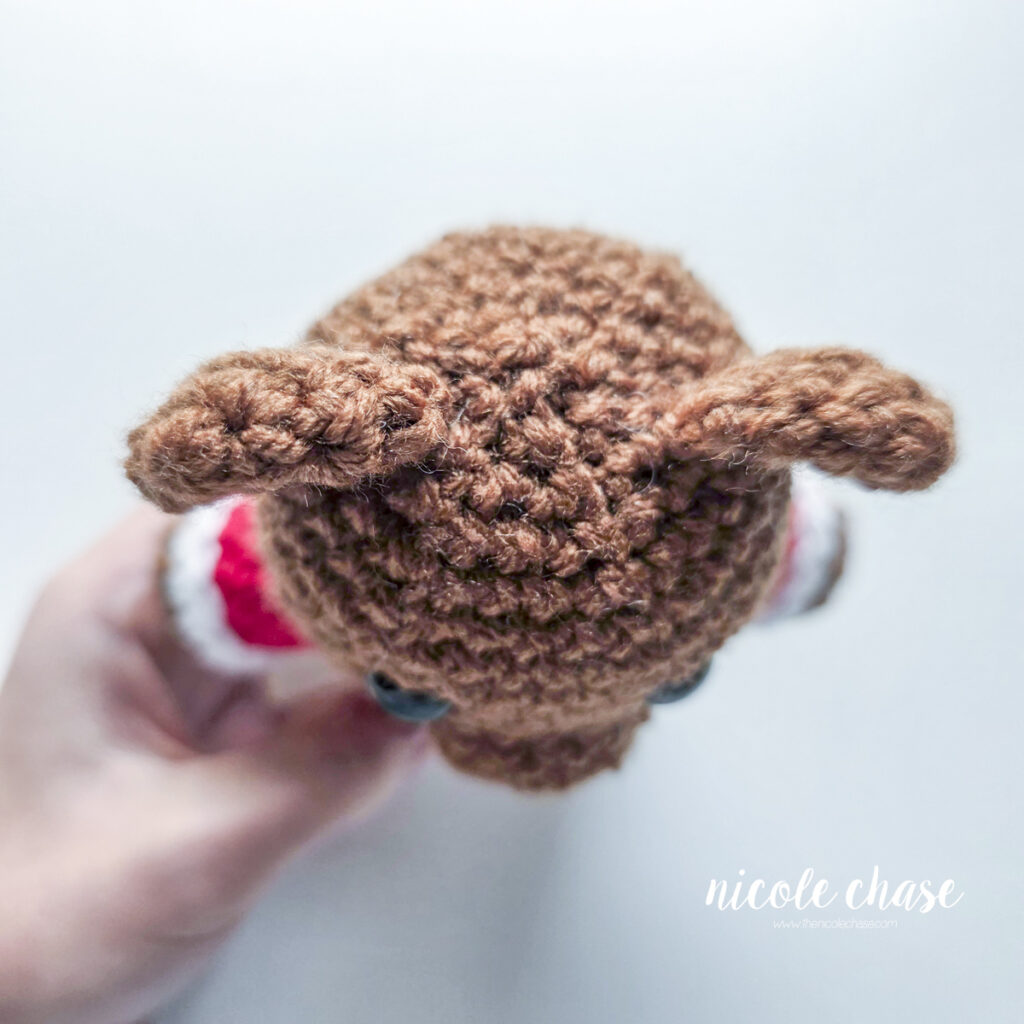
Attach each ear to the top sides of the head over R31-35.
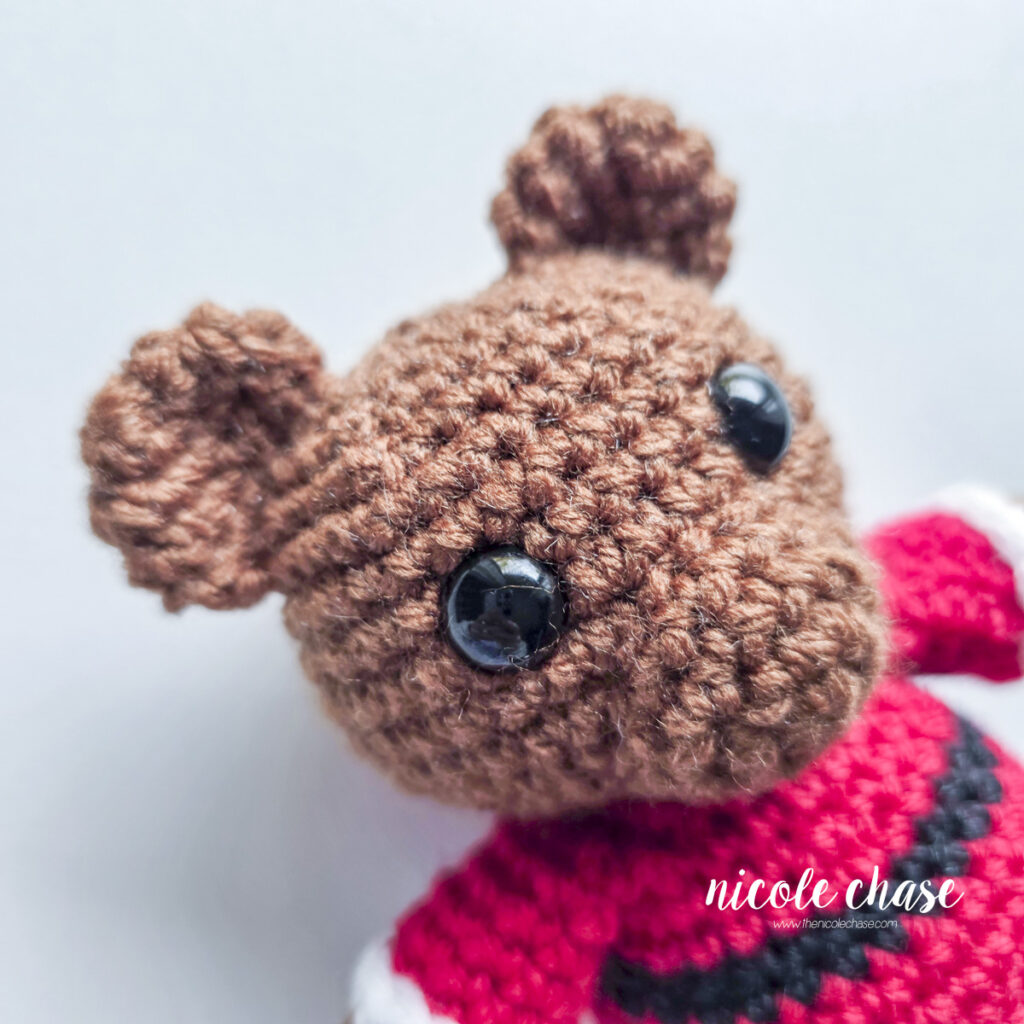
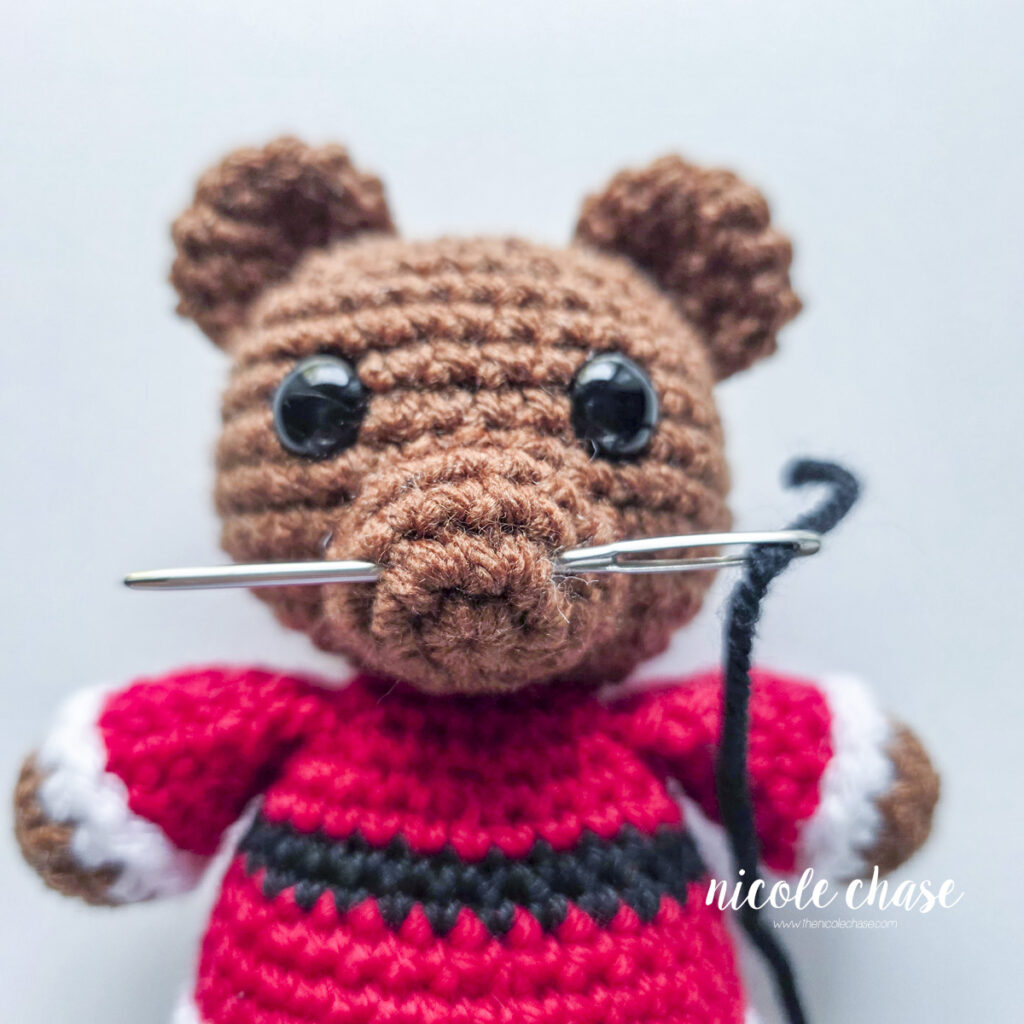
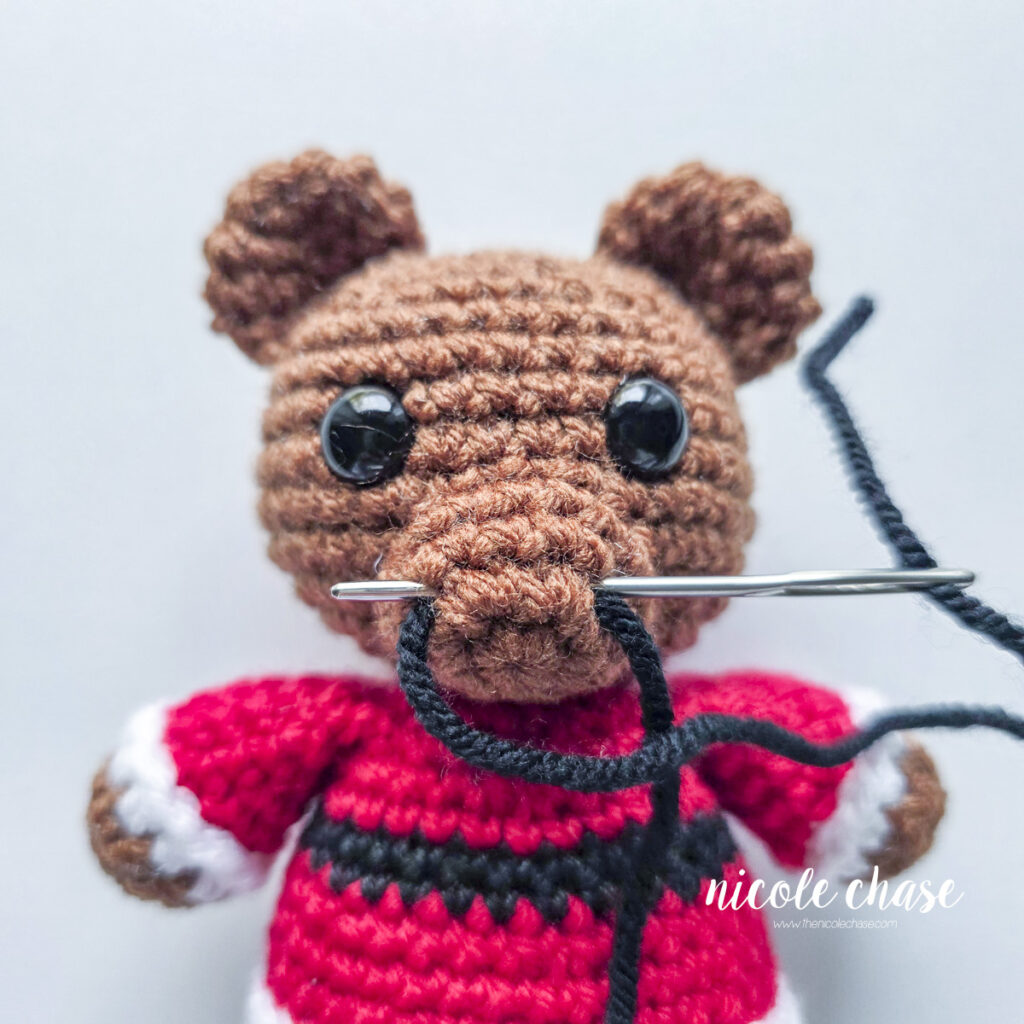
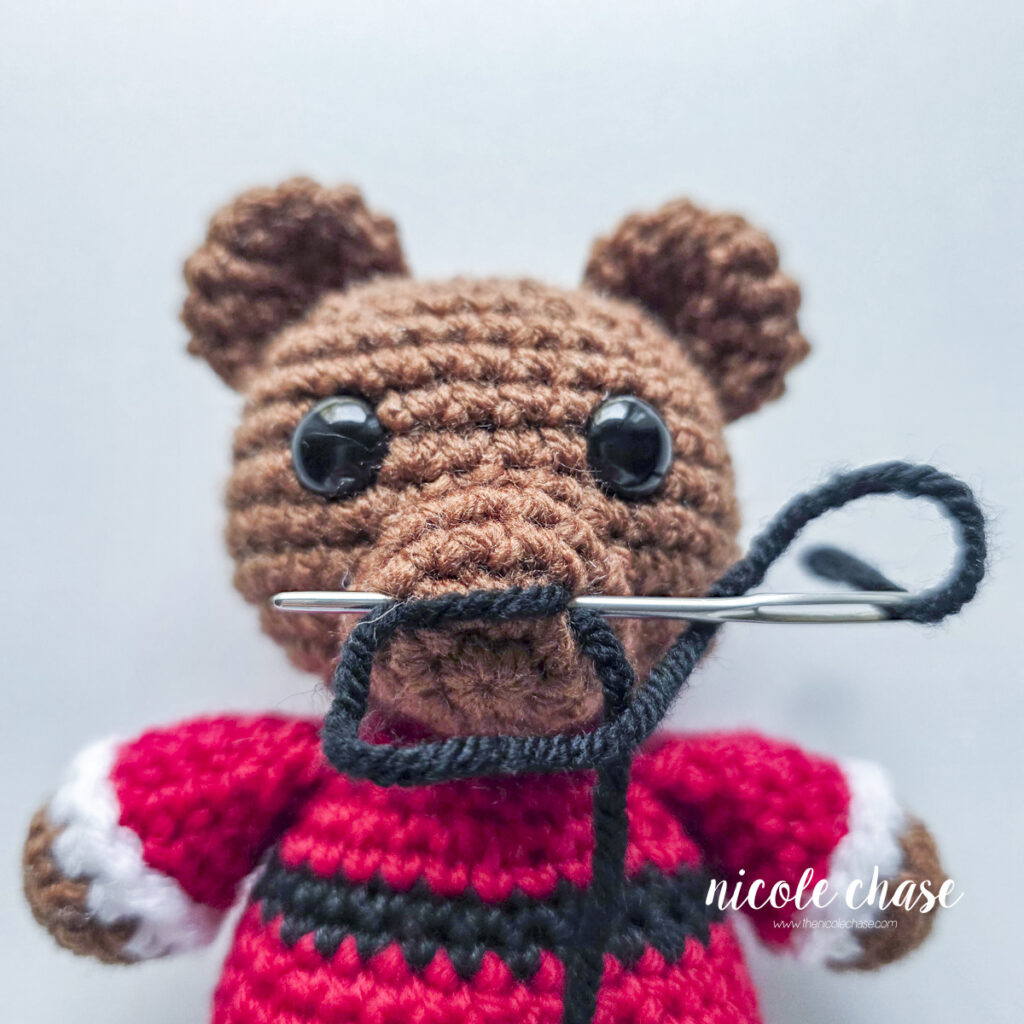
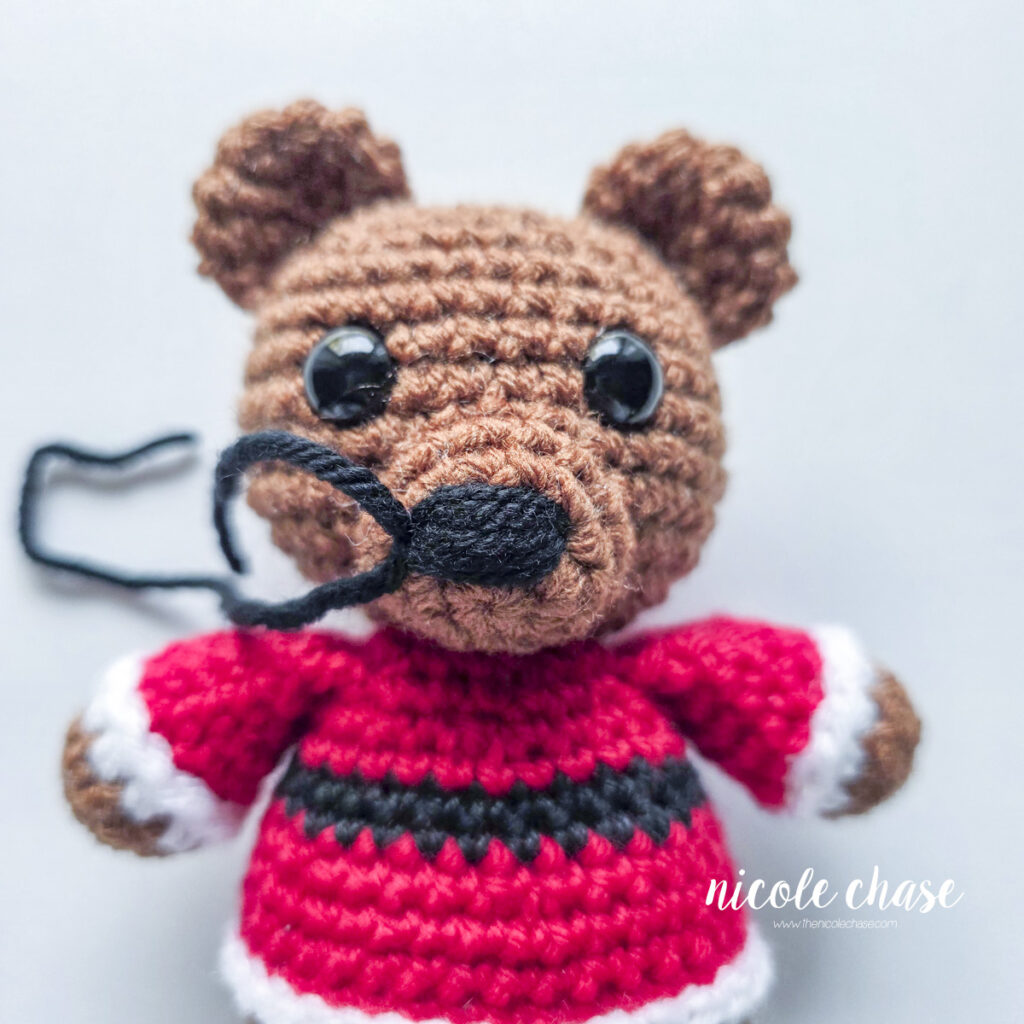
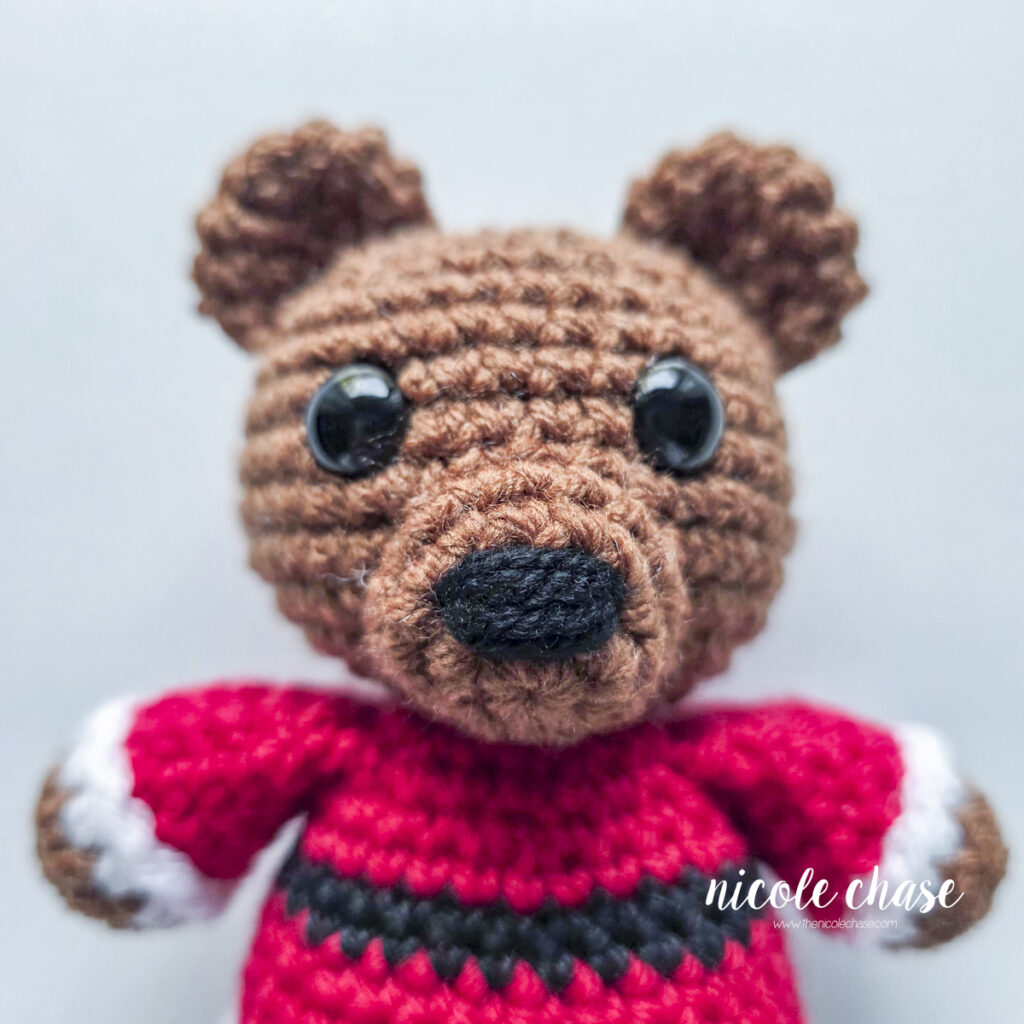
Using black yarn, embroider nose between R2 and R3, over 3-4 sts. See tutorial photos.
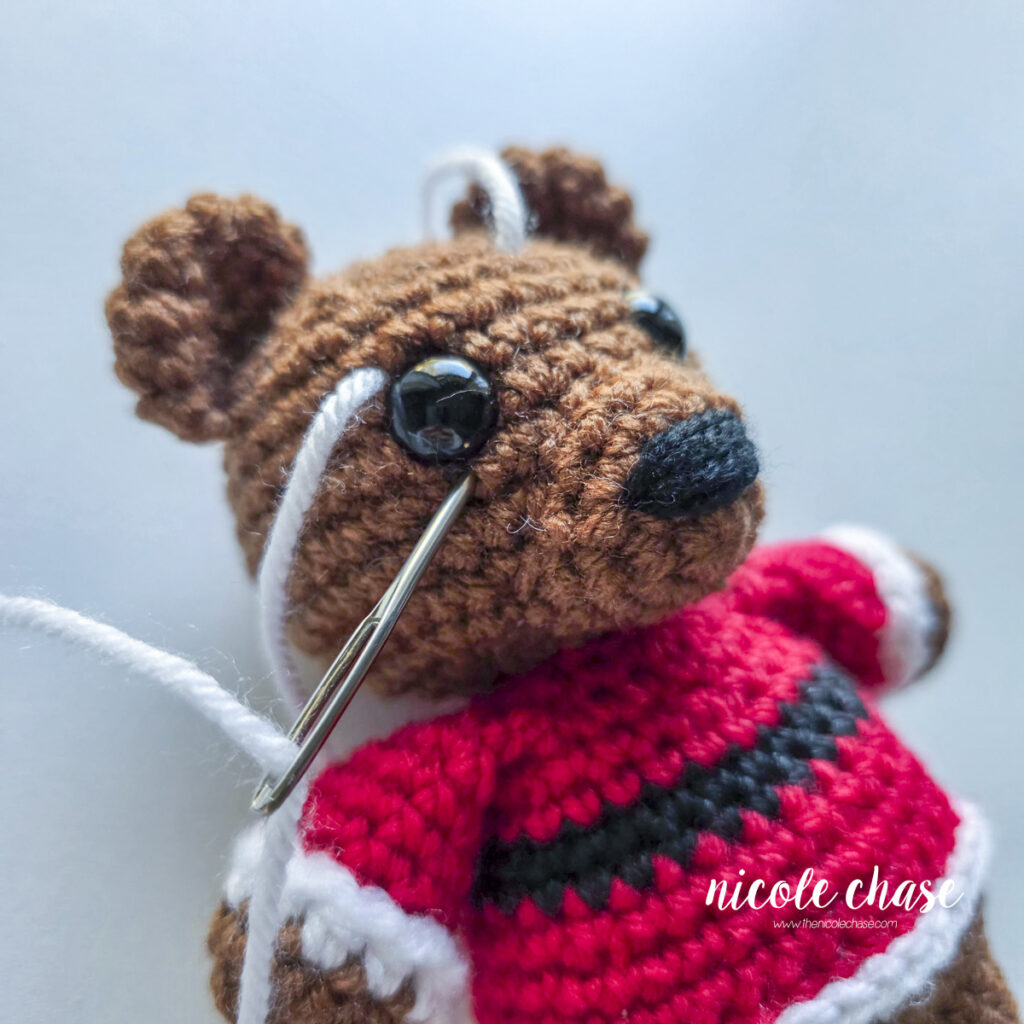
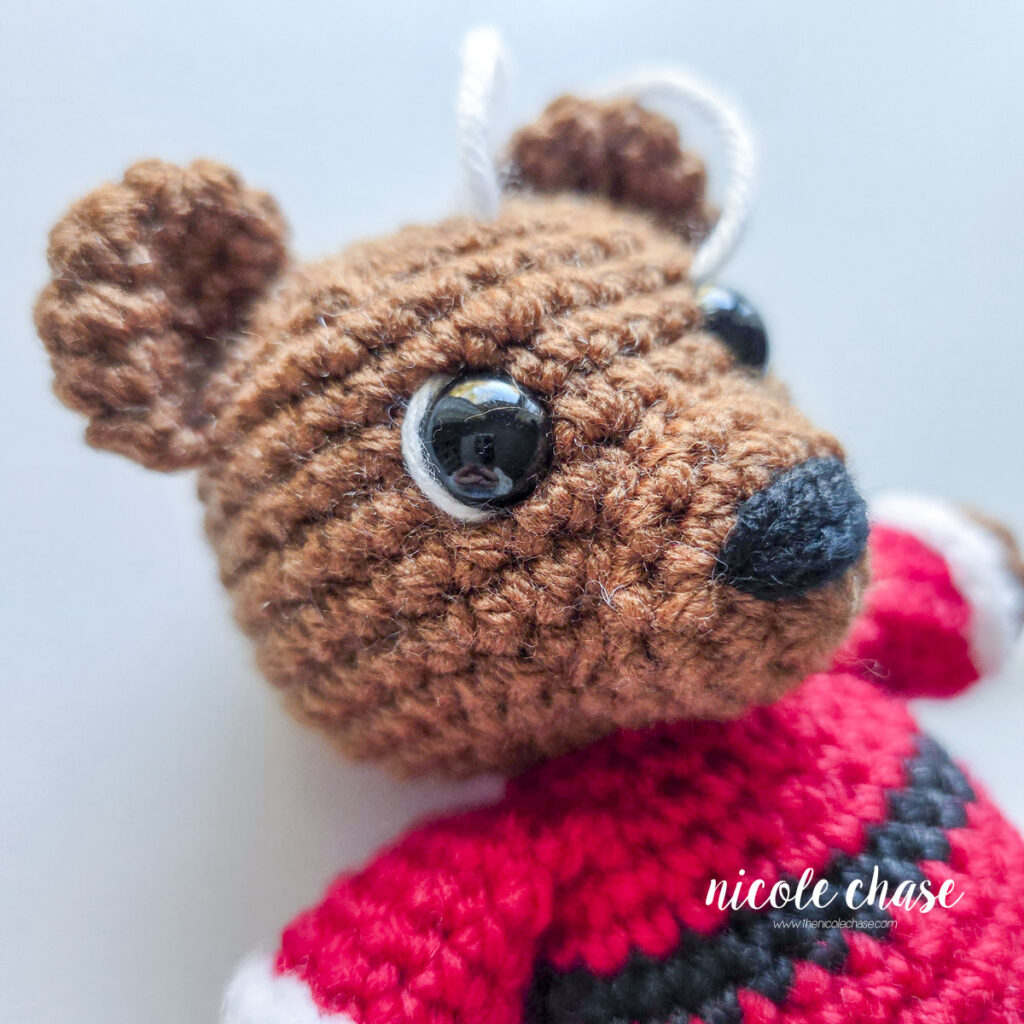
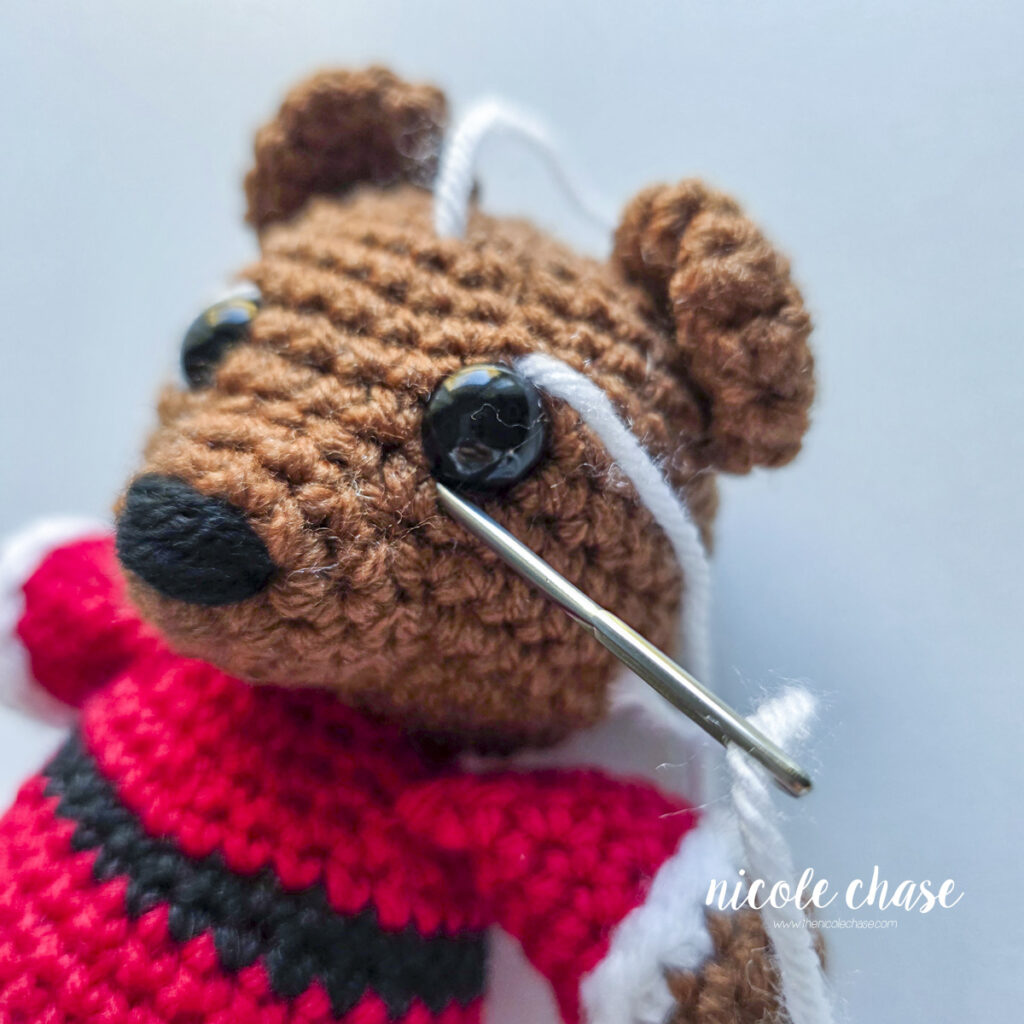
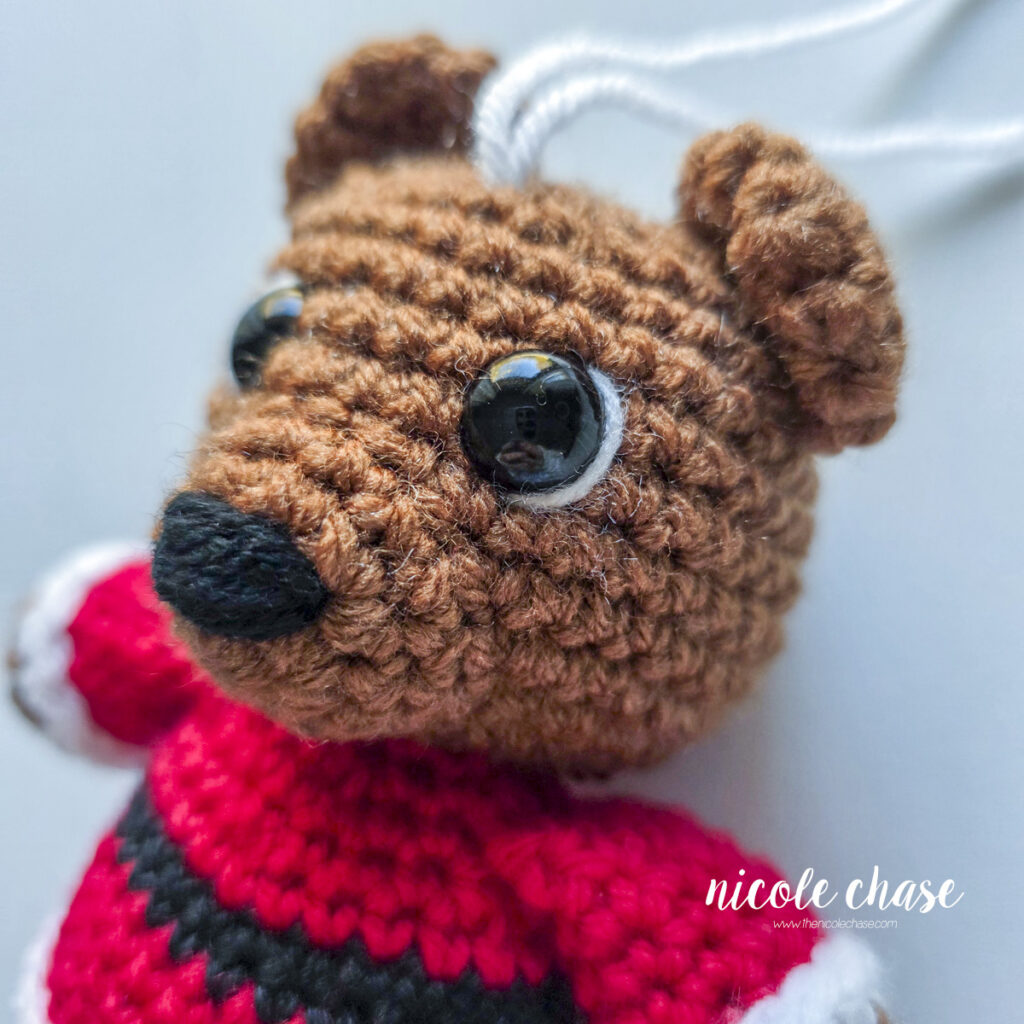
Using white yarn, embroider white outlines around the safety eyes. See tutorial photos.
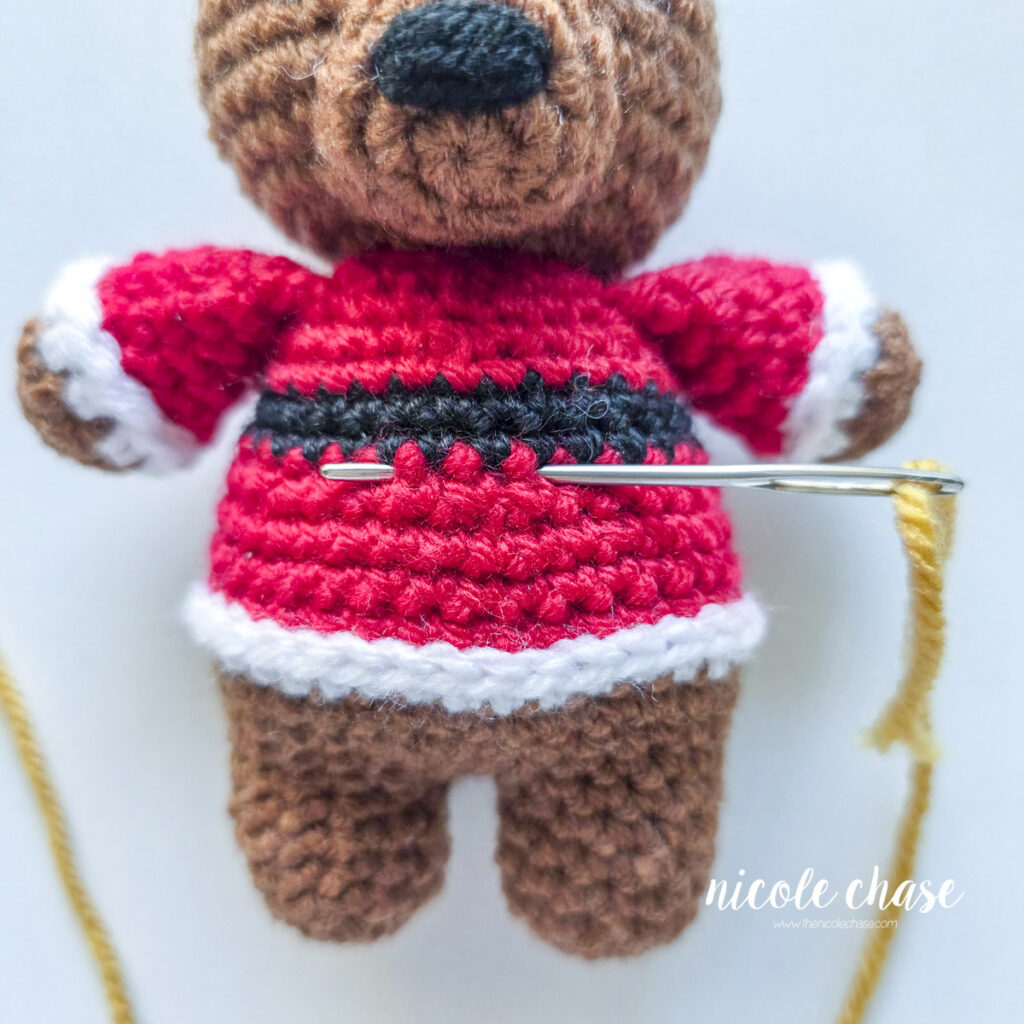
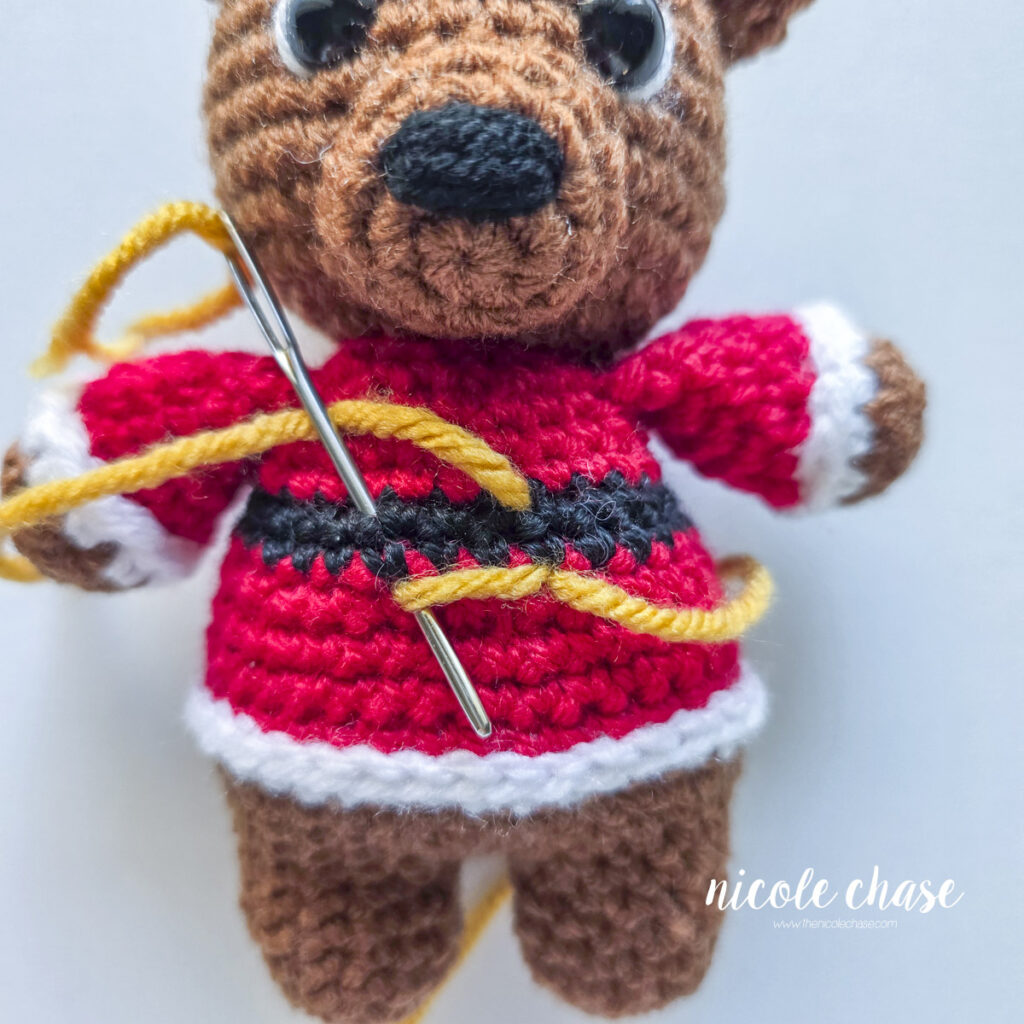
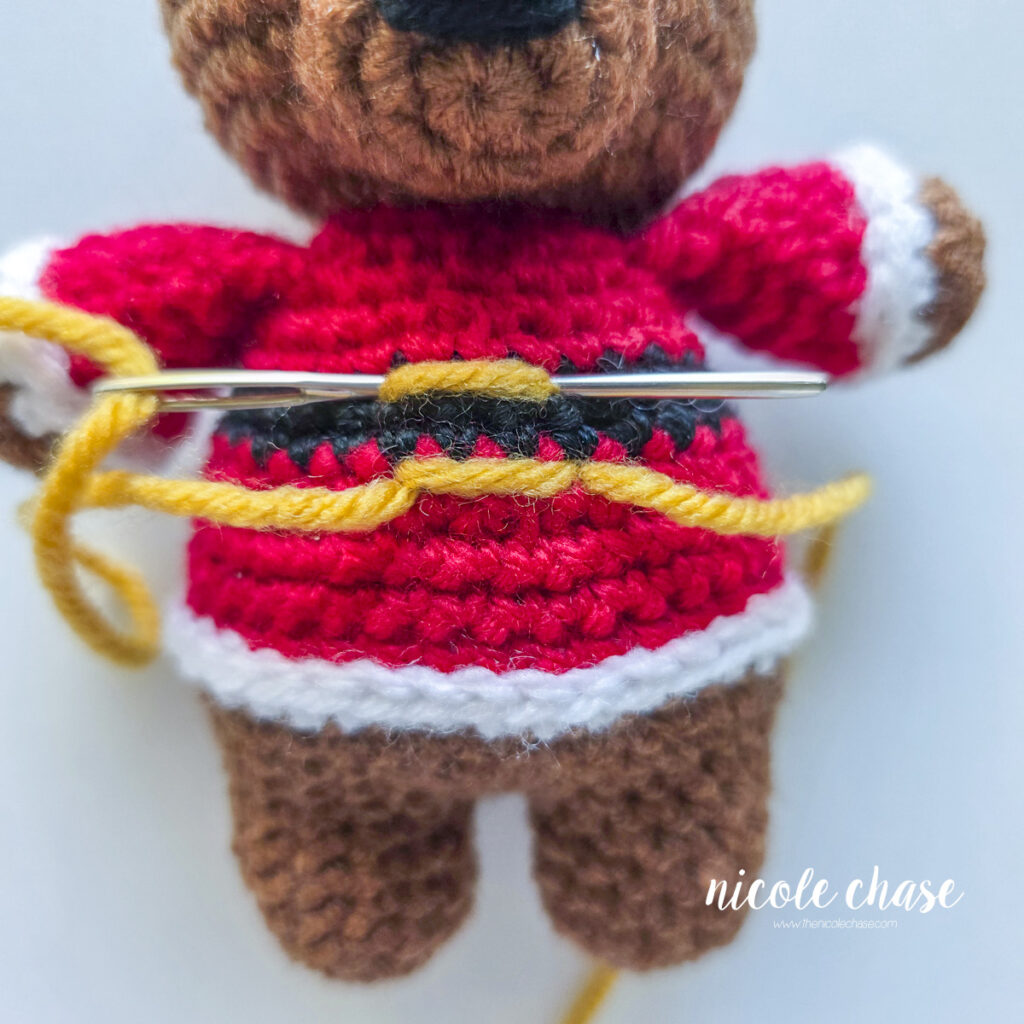
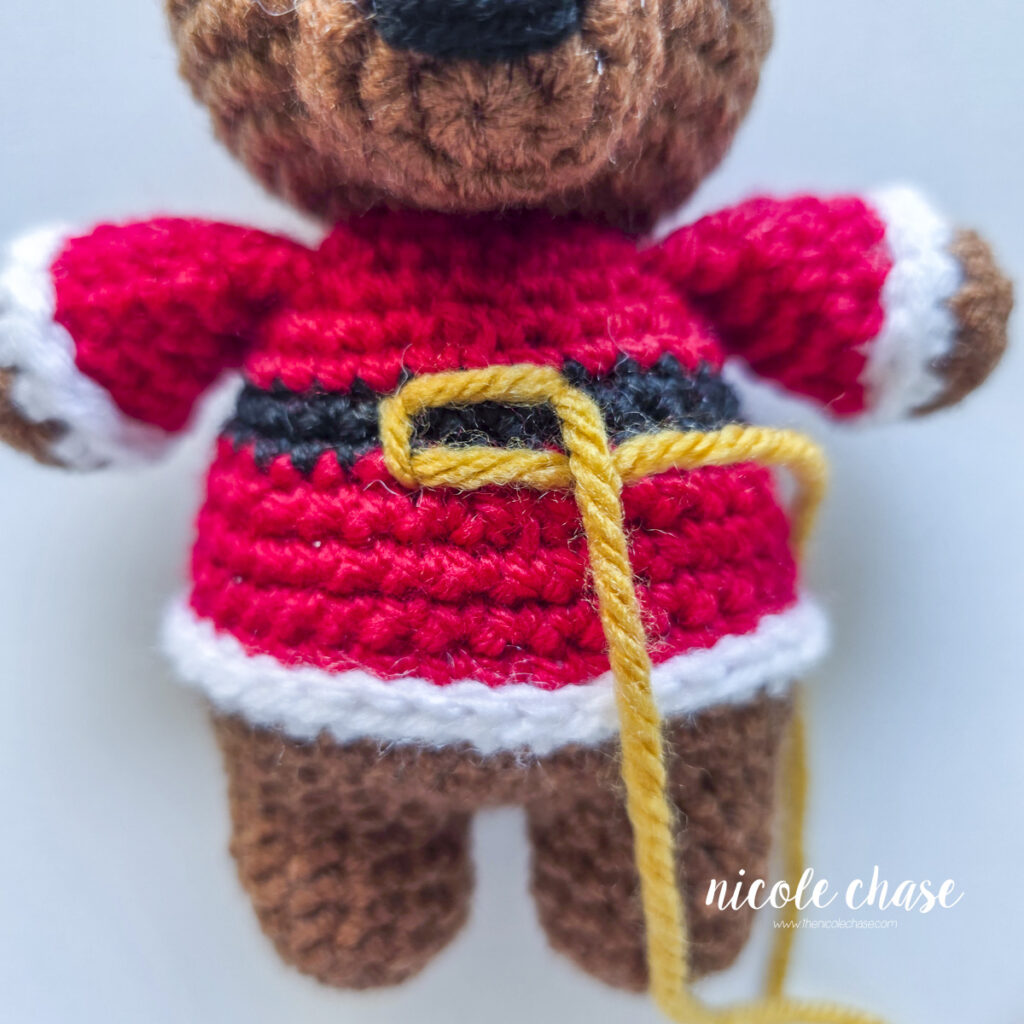
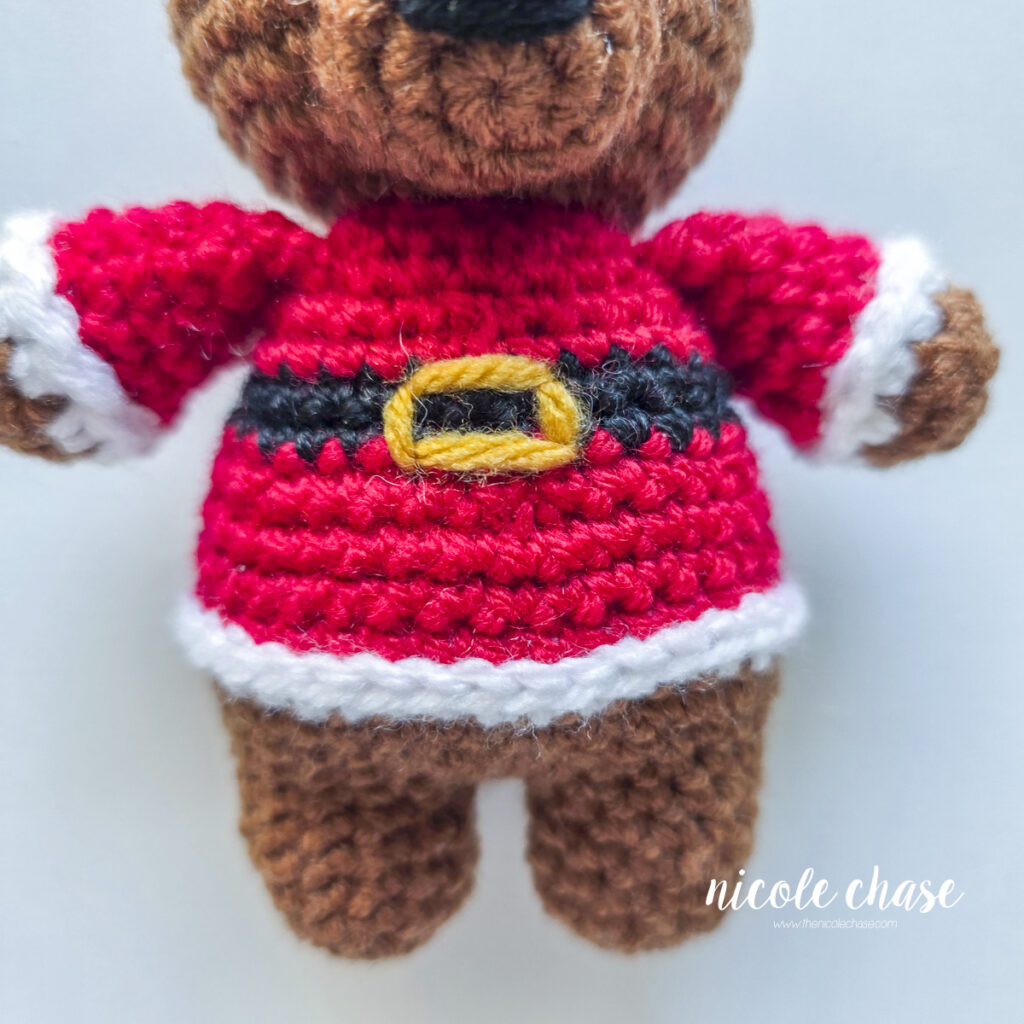
Using gold yarn, embroider a rectangle that is 3 sts wide and 2 rows high, over the black belt on R16-17 of the center of the body for the buckle.
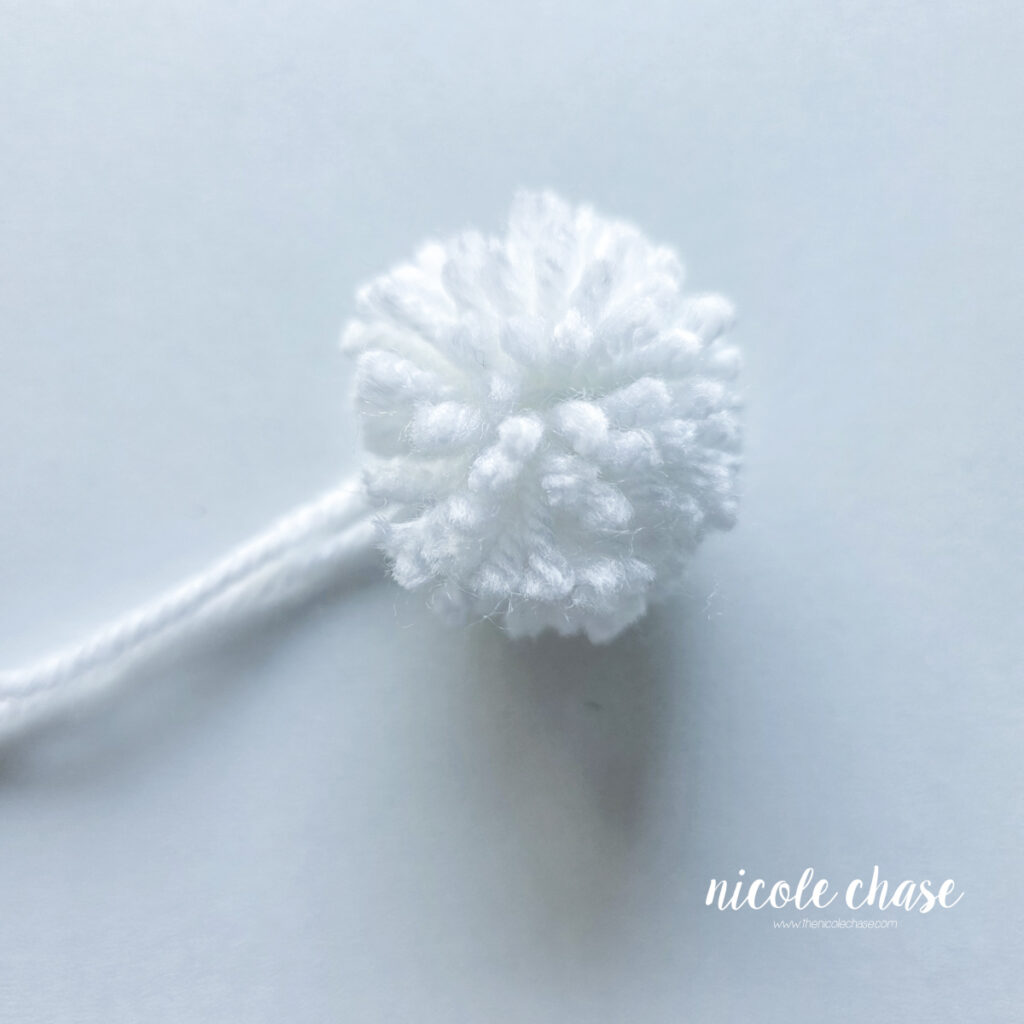
Create a pom pom with white yarn.
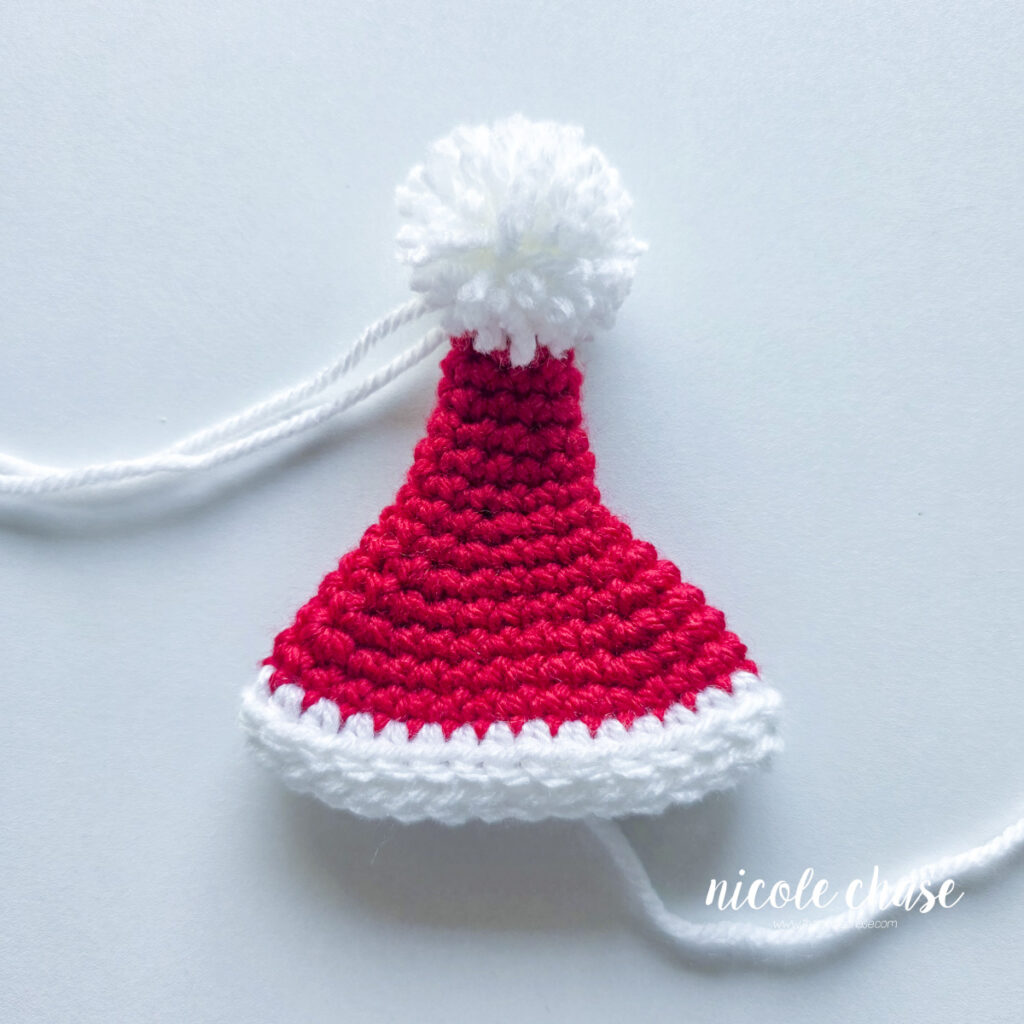
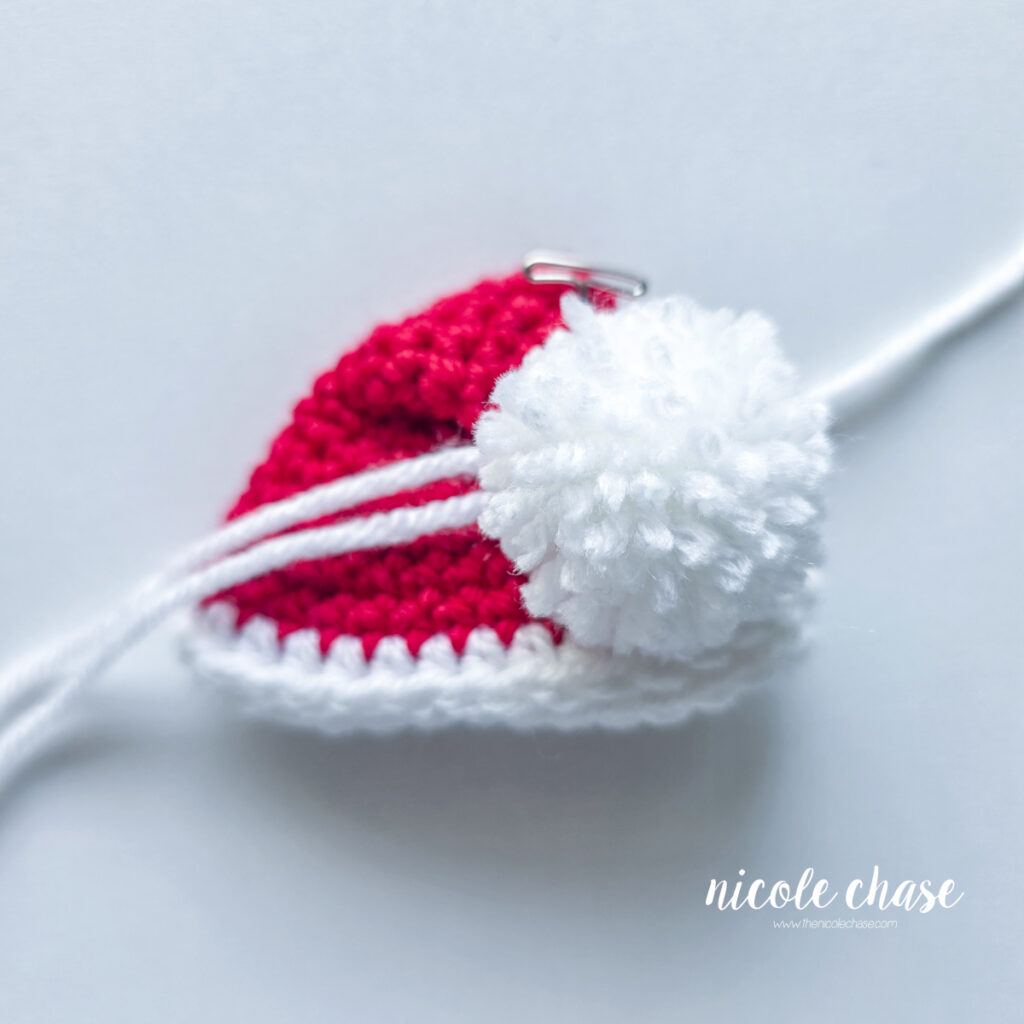
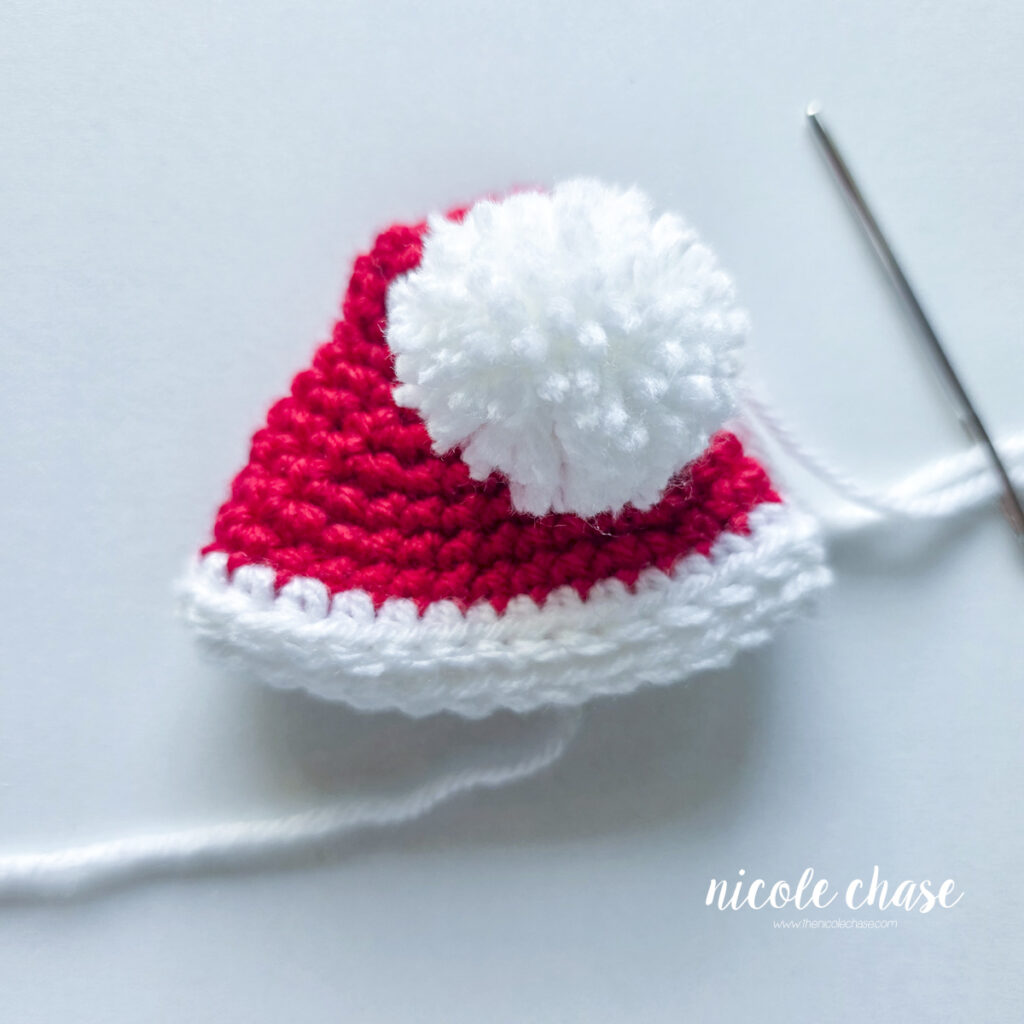
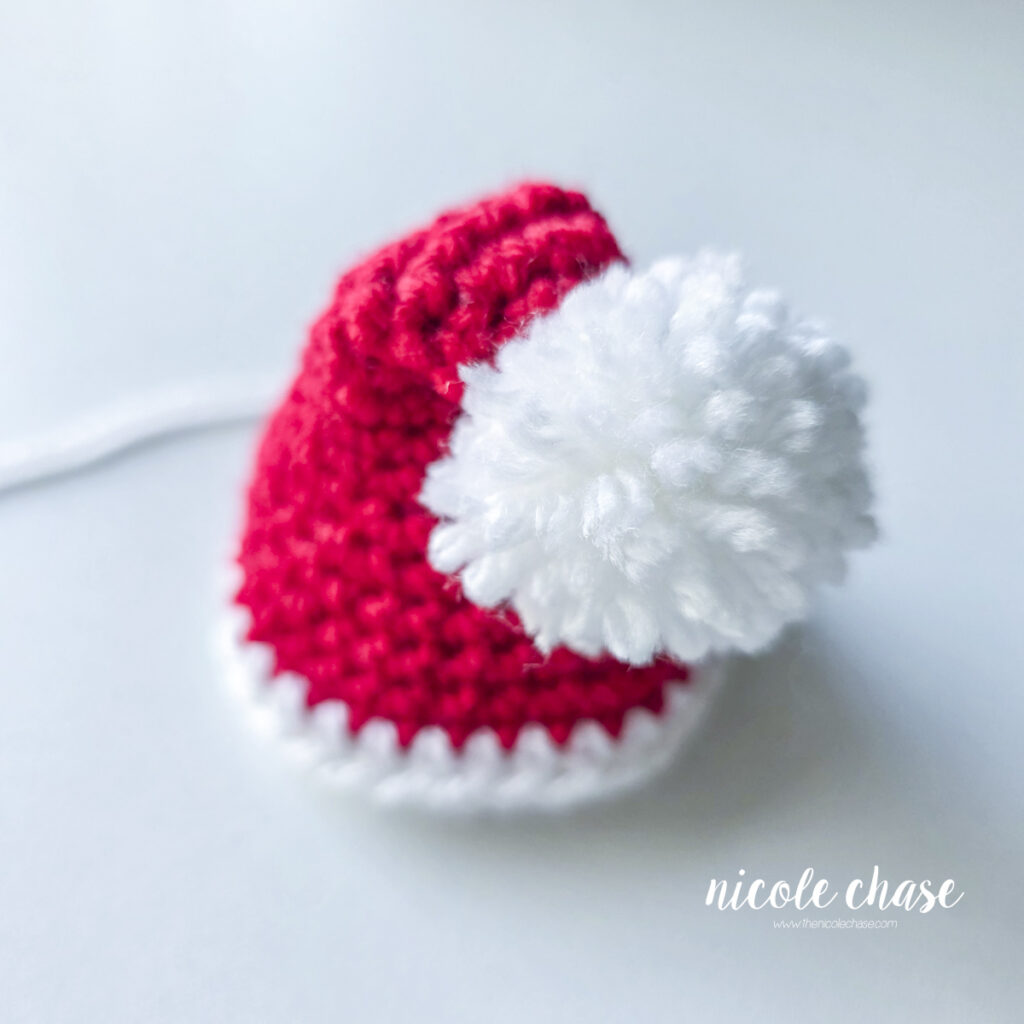
Attach pom pom to the top of the hat. Fold the top of the hat down and sew the tip down in the folded position. See tutorial photos.
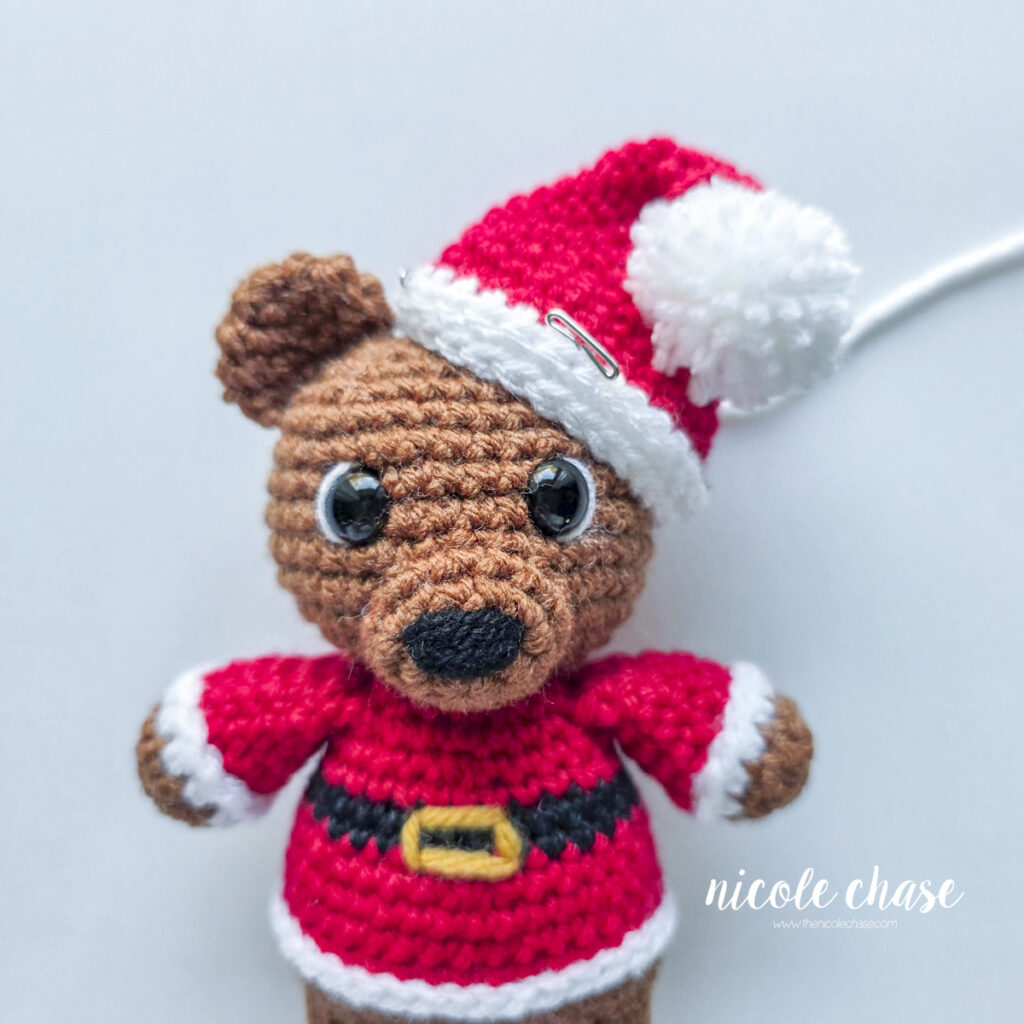
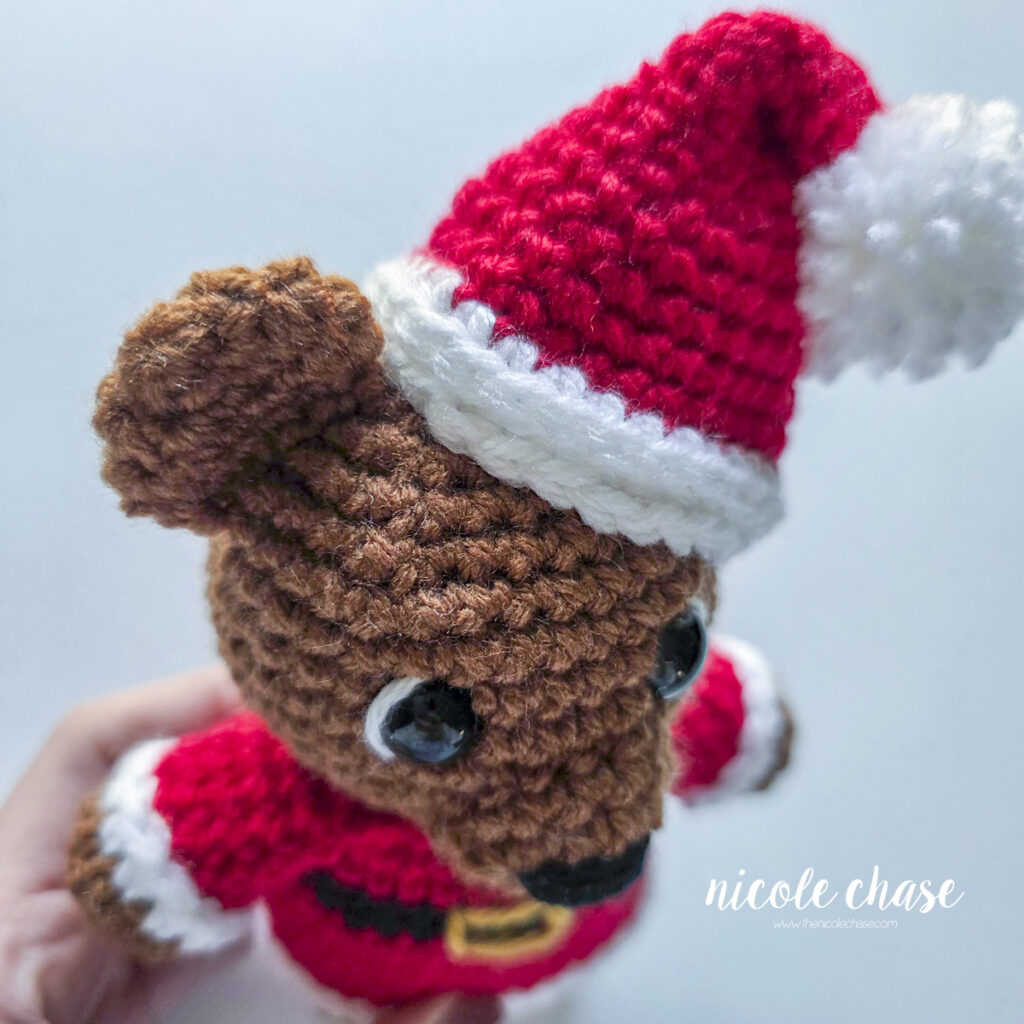
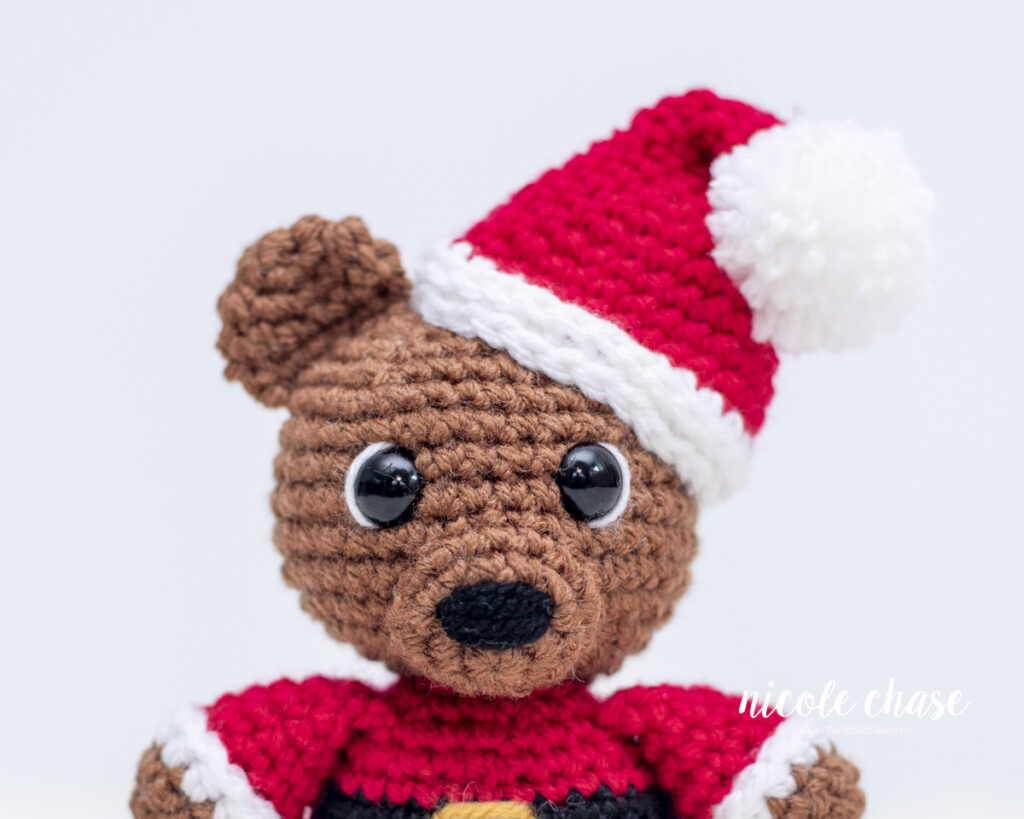
If desired, attach the hat over one ear, angled on the top side of the head.
I hope you enjoyed making Cocoa the Christmas Bear with this free Christmas crochet pattern! Whether you stitch him up as a handmade gift, a stocking stuffer, or a cute amigurumi for Christmas decor, I would love to see how your festive bear turned out. Be sure to tag me on social media!

Ad-Free PDF Pattern for Cocoa the Christmas Bear
Tips and Tricks for Making your Christmas Amigurumi Bear
- Use Stitch Markers for Continuous Rounds: Because Cocoa is worked in continuous spiral rounds, always place a stitch marker in the first stitch of your round so you never lose track of your stitch count.
- Pin Before You Sew: Before sewing on the snout, ears, and Santa hat, use pins to hold each piece in place before stitching to make sure you have your preferred placement.
- Use the Invisible Decrease: For your SC2tog stitches, use the invisible decrease method to ensure that your decreasing stitches will blend in with your other single crochets.
- amigurumi tips and tricks
Customizing your Santa Bear Crochet Pattern
- Make a Cuddly Plush Version: Swap the worsted weight yarn for a super bulky chenille or plush yarn, such as Parfait Chunky. Be sure to use a comparable hook size to suit your chosen yarn.
- Create a Classic Polar Bear or Black Bear: Change the main bear color from brown to crisp white or cream for a festive polar bear in a Santa suit, or use a black yarn for a different style bear.
- Try Embroidered Eyes: In place of the black safety eyes, use embroidered eyes with eyelashes, or sleepy eyes for a more custom look.
More Free Christmas Crochet Patterns You’ll Love
If you enjoyed stitching up Cocoa the Christmas Bear crochet pattern, here are a few more festive Christmas amigurumi to add to your holiday make list:
- Free Christmas Reindeer Amigurumi Pattern: Pair Cocoa with a festive reindeer friend for a complete North Pole shelf display or handmade holiday gift set.
- Free Gingerbread Crochet Pattern: Crochet the cutest gingerbread friend with this nearly no-sew crochet pattern.
- Free Christmas Tree Cake Ornament Pattern: Another quick-make winter amigurumi that uses minimal sewing and makes a great stocking stuffer or craft fair bestseller.
I hope you enjoyed this pattern! If you make it, leave me a comment below.
Want to see more from me? Be sure to subscribe to my email newsletter so that you never miss a pattern!
Follow along with me on Instagram for daily updates and a behind the scenes look at my designs.
I’d love to see what you make with this tutorial! Don’t forget to share your finished work with me: on social media by tagging me @thenicolechase, in your Ravelry projects, or post over in my Facebook group!
Thanks for stopping by! Happy crafting!
Nicole
PATTERN COPYRIGHT © 2026 NICOLE CHASE. ALL RIGHTS RESERVED.
PATTERN MAY NOT BE ALTERED, COPIED, REDISTRIBUTED OR SOLD AS YOUR OWN PATTERN.
YOU MAY SELL THE FINISHED PRODUCT ON A SMALL SCALE. PATTERN/DESIGN CREDIT GIVEN TO WWW.THENICOLECHASE.COM IS APPRECIATED. PERMISSION TO SELL DOES NOT INCLUDE MASS PRODUCTION. LARGE SCALE PRODUCTION IS PROHIBITED.
PHOTOGRAPHY COPYRIGHT © 2026 NICOLE CHASE. ALL RIGHTS RESERVED.
PHOTOS MAY NOT BE ALTERED, COPIED, REDISTRIBUTED OR SOLD AS YOUR OWN.
This post may contain affiliate links. If you make a purchase through links on our site, we may earn a commission.