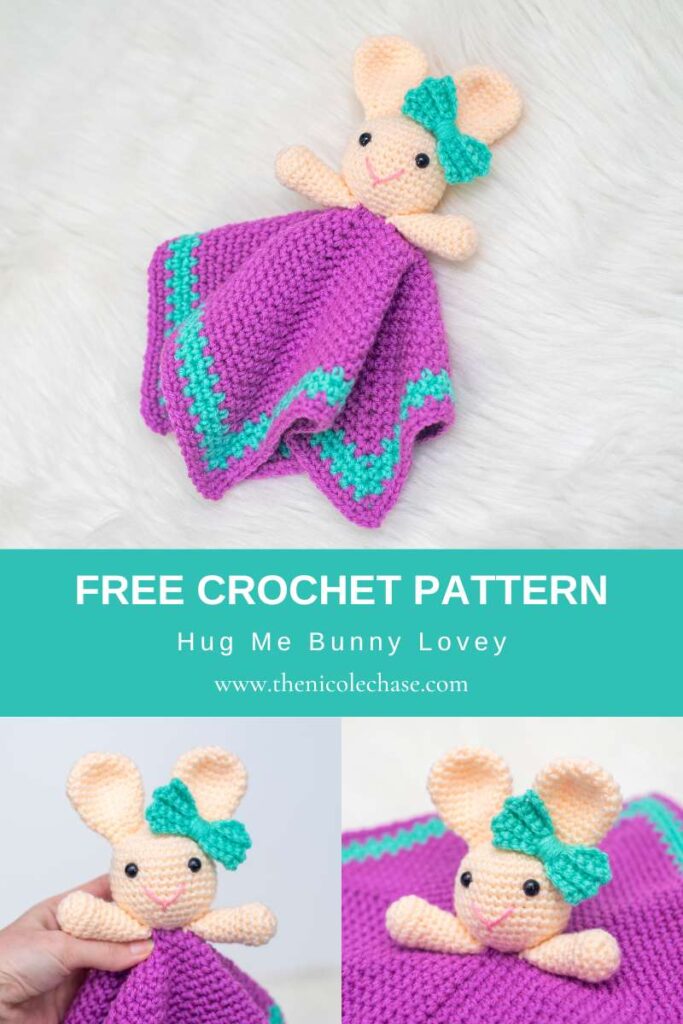
Hug Me Bunny Lovey – Free Crochet Pattern
This post may contain affiliate links. If you make a purchase through links on our site, we may earn a commission.
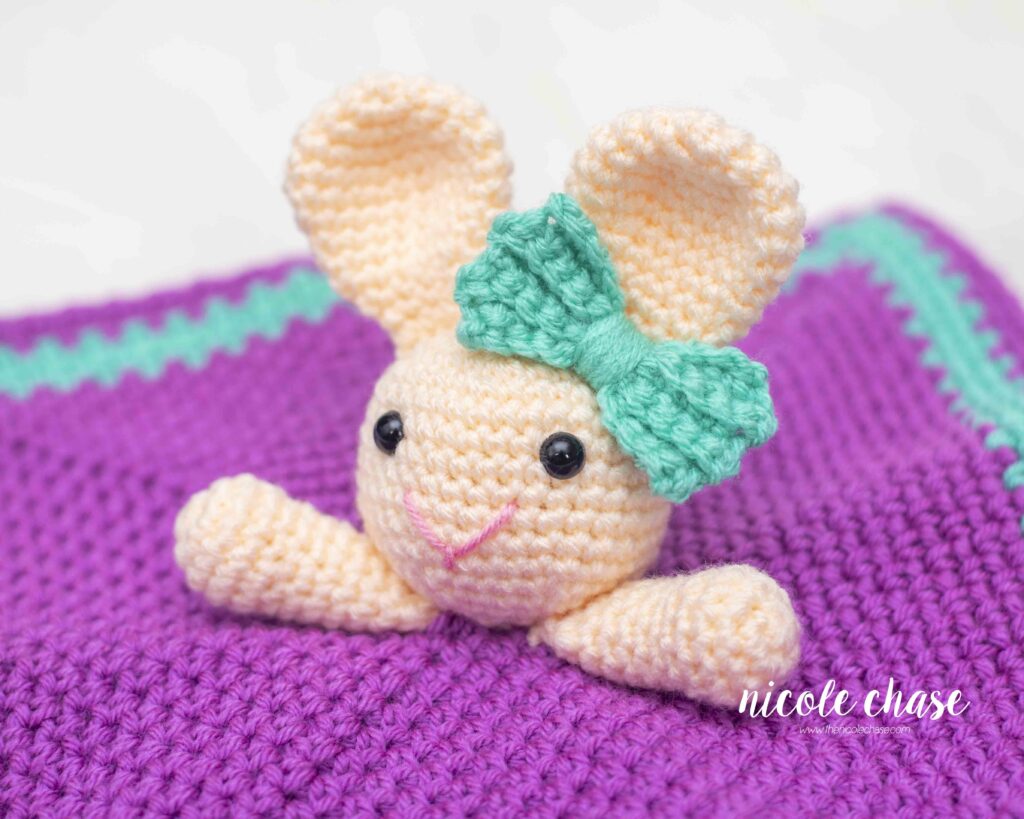
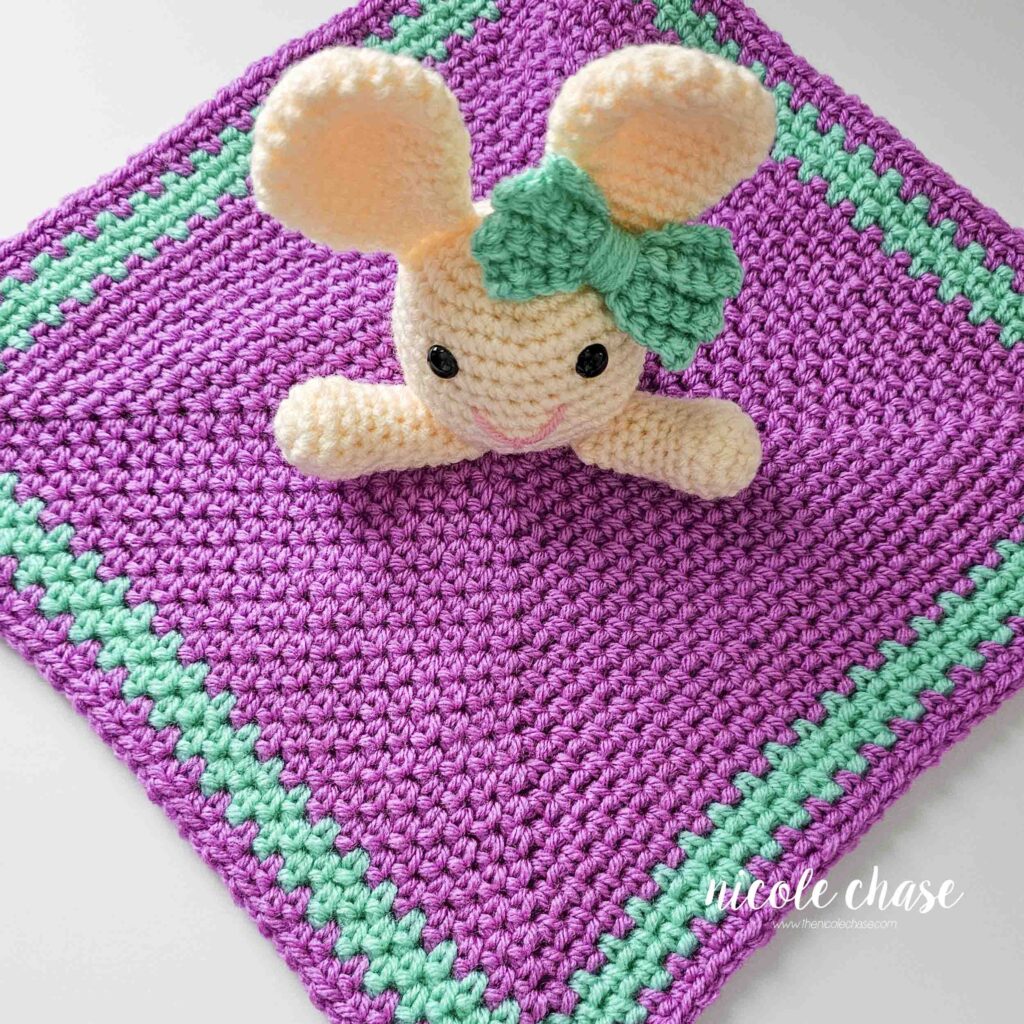
Meet the Hug Me Bunny Lovey! As part of my series of free crochet lovey patterns, this free bunny lovey crochet pattern is designed to be the ultimate soft, squishy companion for little ones. My lovey designs are perfectly sized for tiny hands to cuddle.
If you are searching for a free bunny baby lovey pattern, you’re in the right place. This rabbit lovey crochet pattern is an ideal project for Easter crochet gifts or a quick nursery addition. I’ve also included my expert tips on choosing the best yarn to ensure your finished project stays soft and durable.
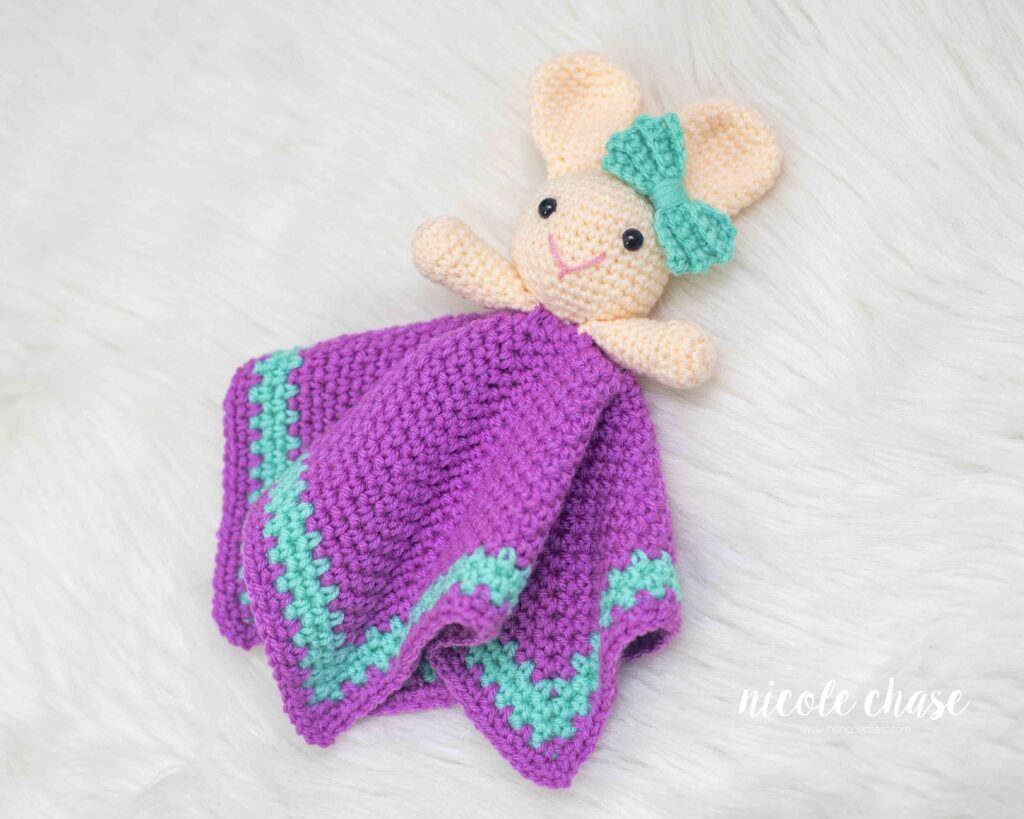
Table of Contents
I would classify this free bunny lovey crochet pattern as “advanced beginner”. It would be helpful to have had some experience with amigurumi before creating this project.
I hope you enjoy this free crochet pattern available here on my blog! An ad-free, formatted PDF version of this crochet pattern is also available for purchase here:
Love this project? Pin it to your favorite crochet Pinterest board so you can find it later.
Save this free bunny lovey crochet pattern to your favorites on Ravelry!
Free Crochet Pattern for Hug Me Bunny Lovey

Pattern Specifics
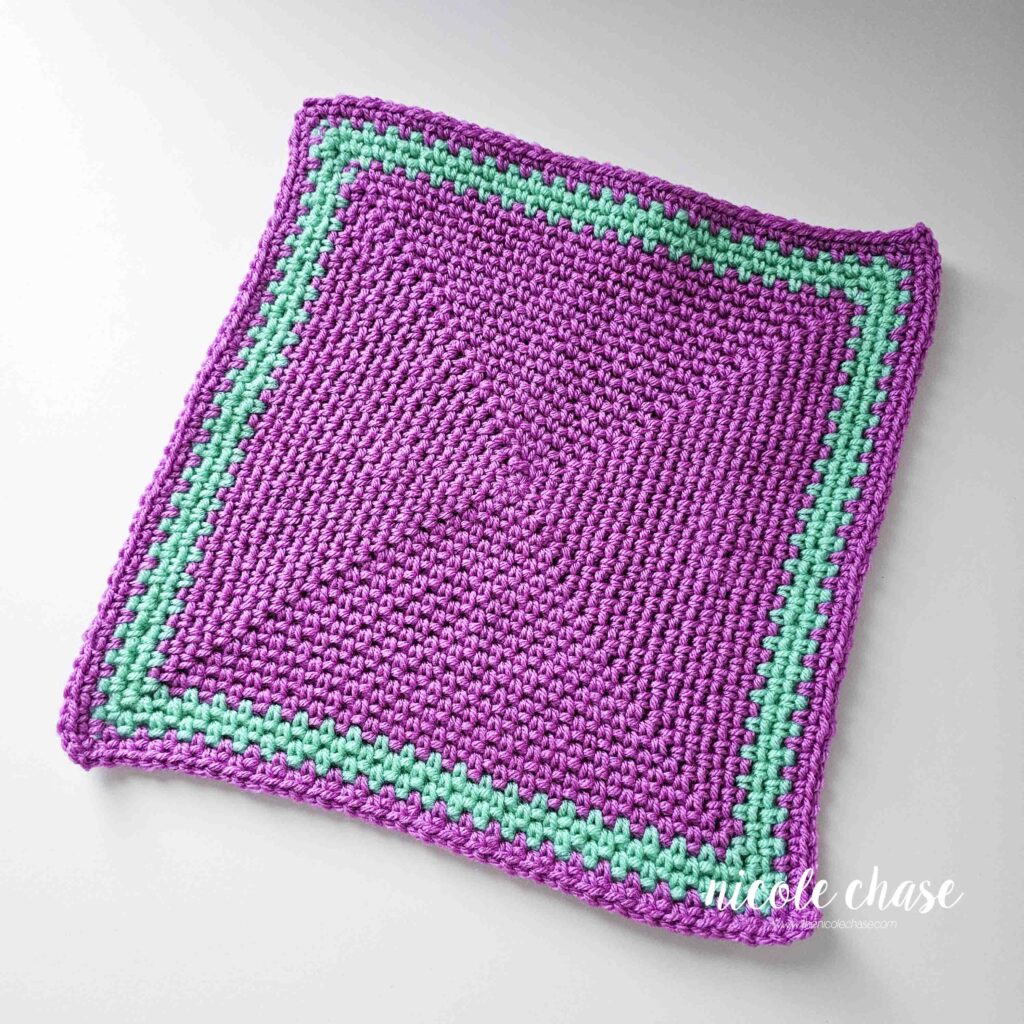
Measurements: Approximately 4.5” tall (head), 11.5”x11.5” (blanket)
Gauge: Not necessary for this pattern; see notes
Hook Size: 4.0mm (G) crochet hook, 5.0mm (H) crochet hook
Other Tools: tapestry needle, stitch markers, scissors
Yarn Weight: Medium (4), Worsted
Yarn Used: WeCrochet / Knit Picks Brava Worsted
Yardage: color A (cream): 56 yds, color B (teal): 32 yds, color C (purple): 105 yds, color D (pink): 1 yd
Other Materials: poly-fil stuffing, 9mm safety eyes
Stitch Abbreviations
st = stitch
sl st = slip stitch
ch = chain
SC = single crochet
SC2tog = single crochet 2 stitches together (invisible decrease is recommended)
Special Stitches
SC2tog (using invisible decrease method): Insert hook into front loop of the first stitch. Insert hook into front loop of second stitch. Yarn over. Draw through the first two loops on hook. Yarn over. Draw through both loops on hook.
Notes
- Checking your gauge is not required for this pattern. Use a hook that is smaller than the size recommended for your yarn weight. This will ensure that your stuffing will not show through the stitches.
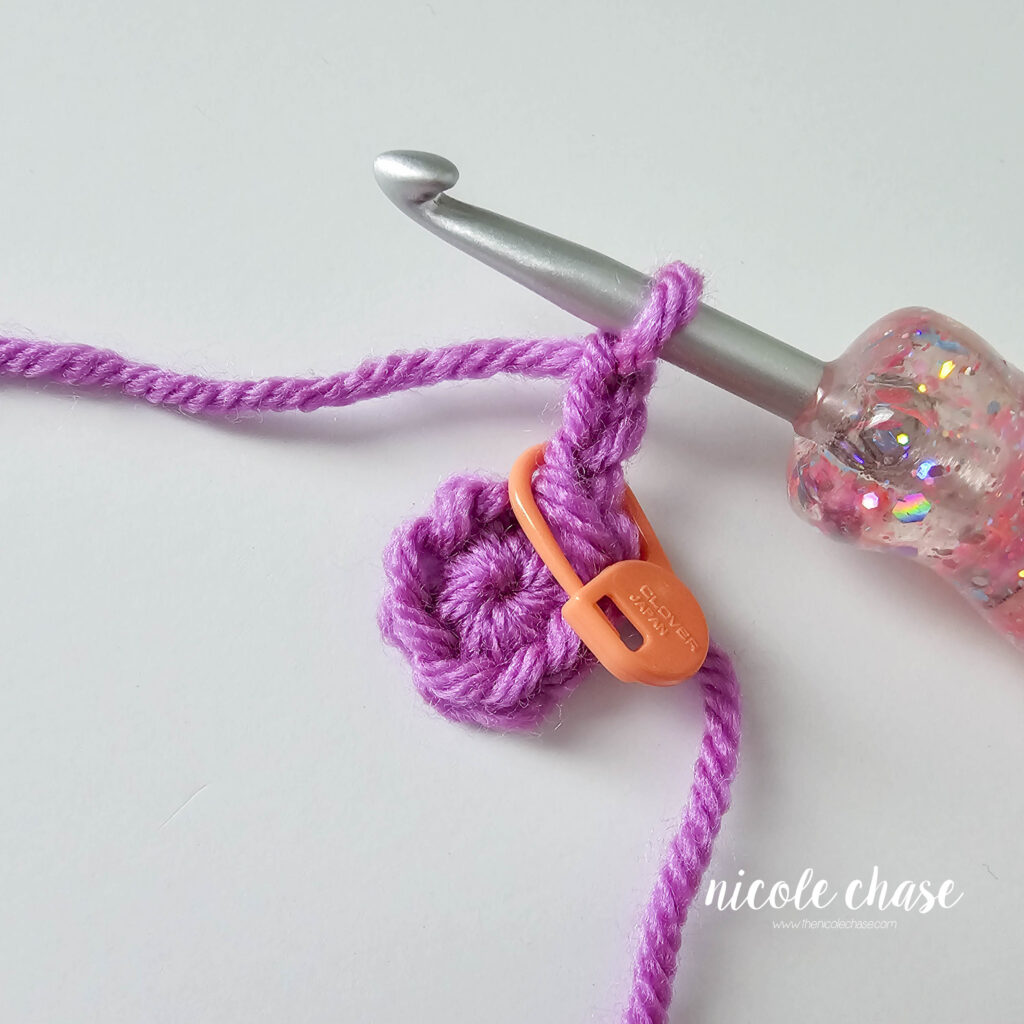
- All pieces are worked in the round. Use a stitch marker to indicate the beginning of each round.
- Invisible decreases are recommended. Please see “Special Stitches”.
- Safety eyes and noses pose a choking risk for babies; therefore, if making this toy for a baby, I recommend using yarn, felt, or embroidered details.
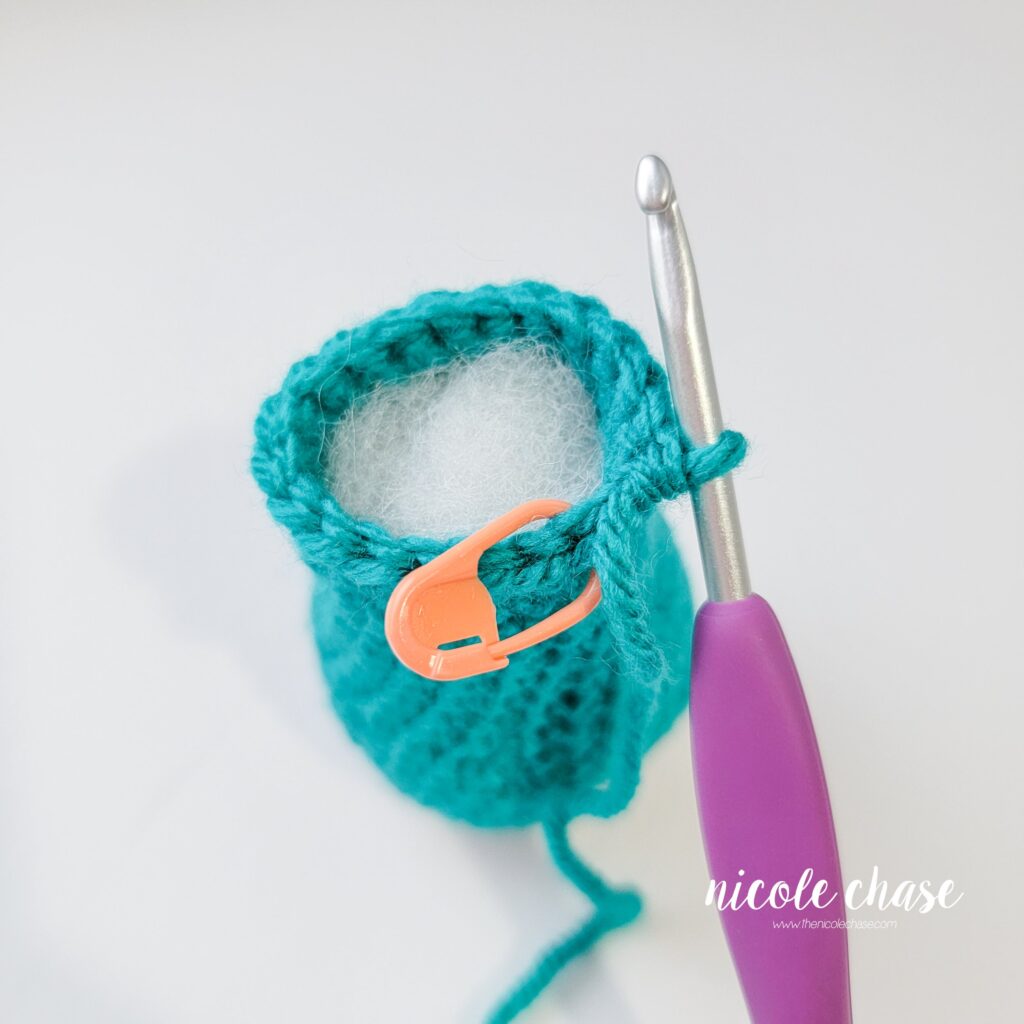
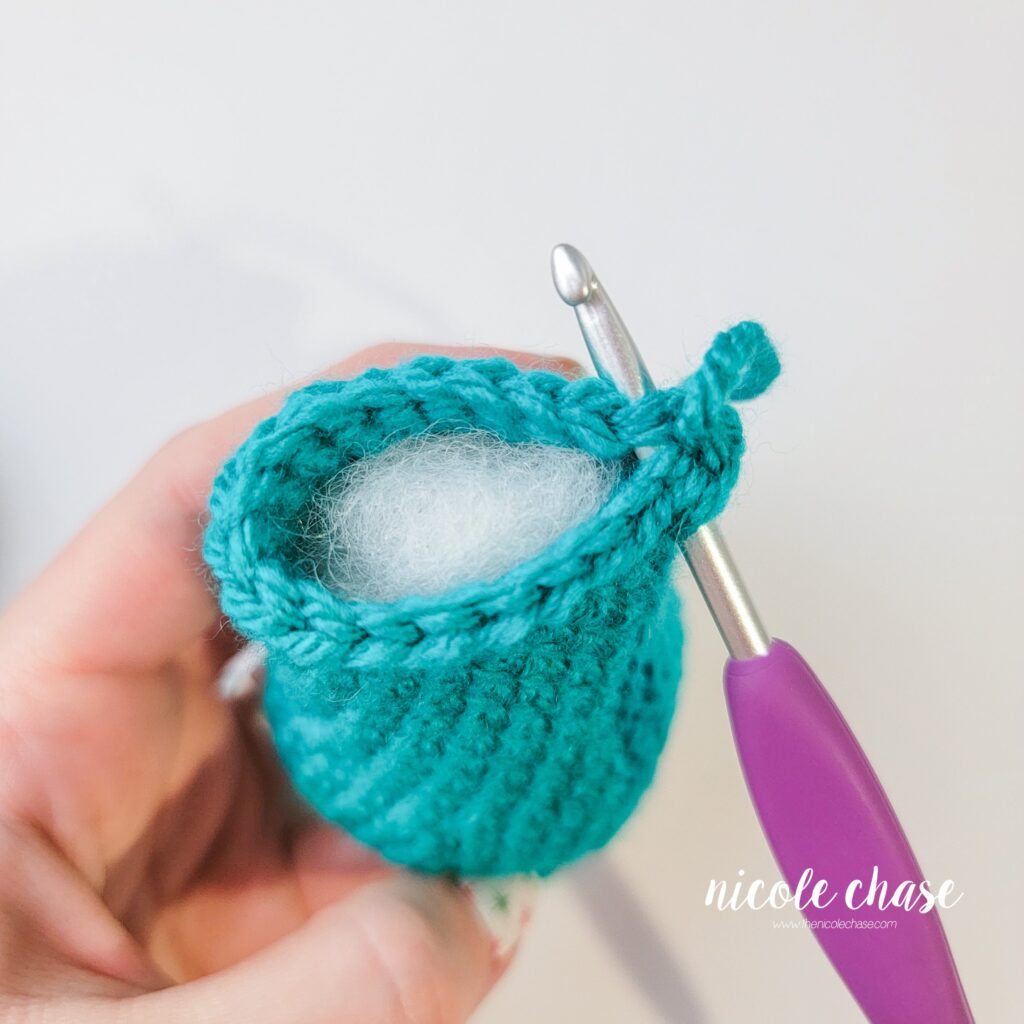
- Head and arms require stuffing. Stuff each piece as you work to ensure the piece is completely filled. Do not add stuffing to the ears.
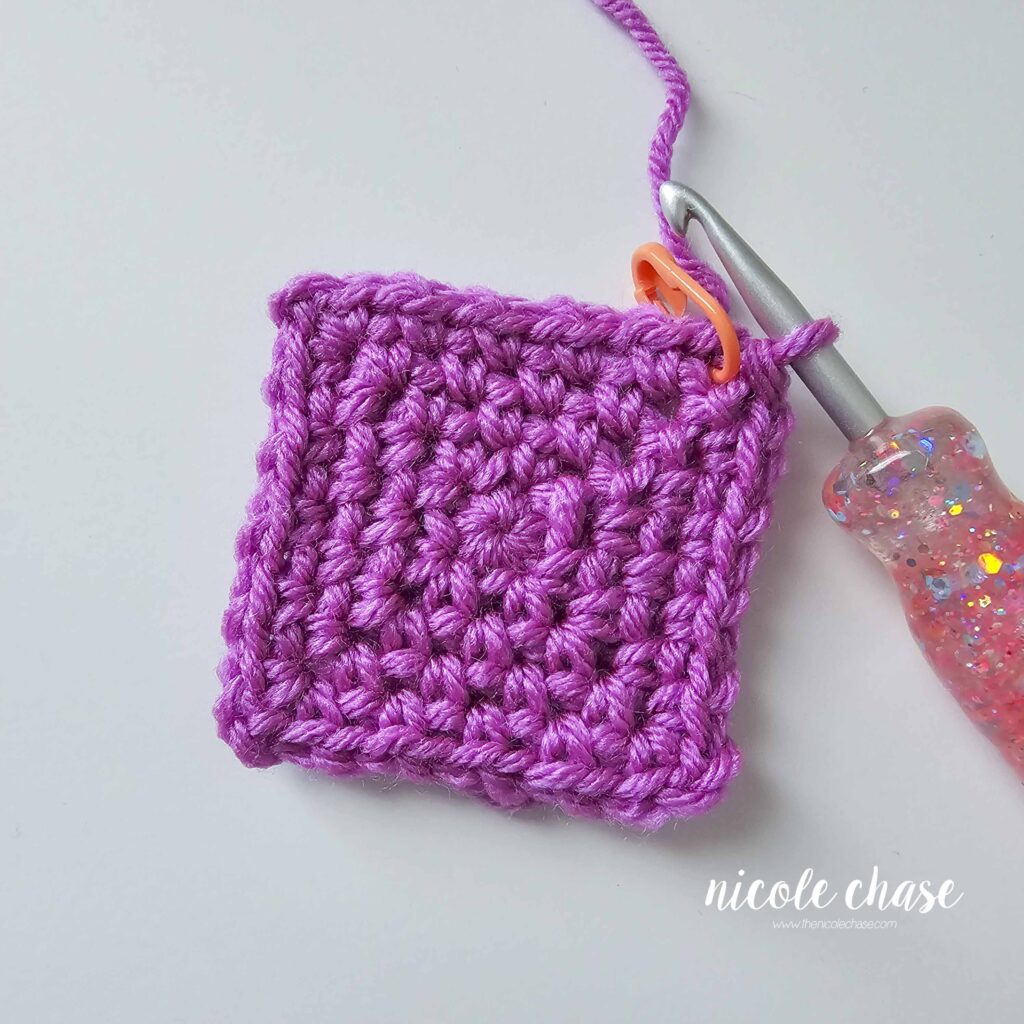
- Blanket corners are made of the following sequence: SC, ch 2, SC. Mark the start of each blanket round with a st marker at the beginning ch 3.
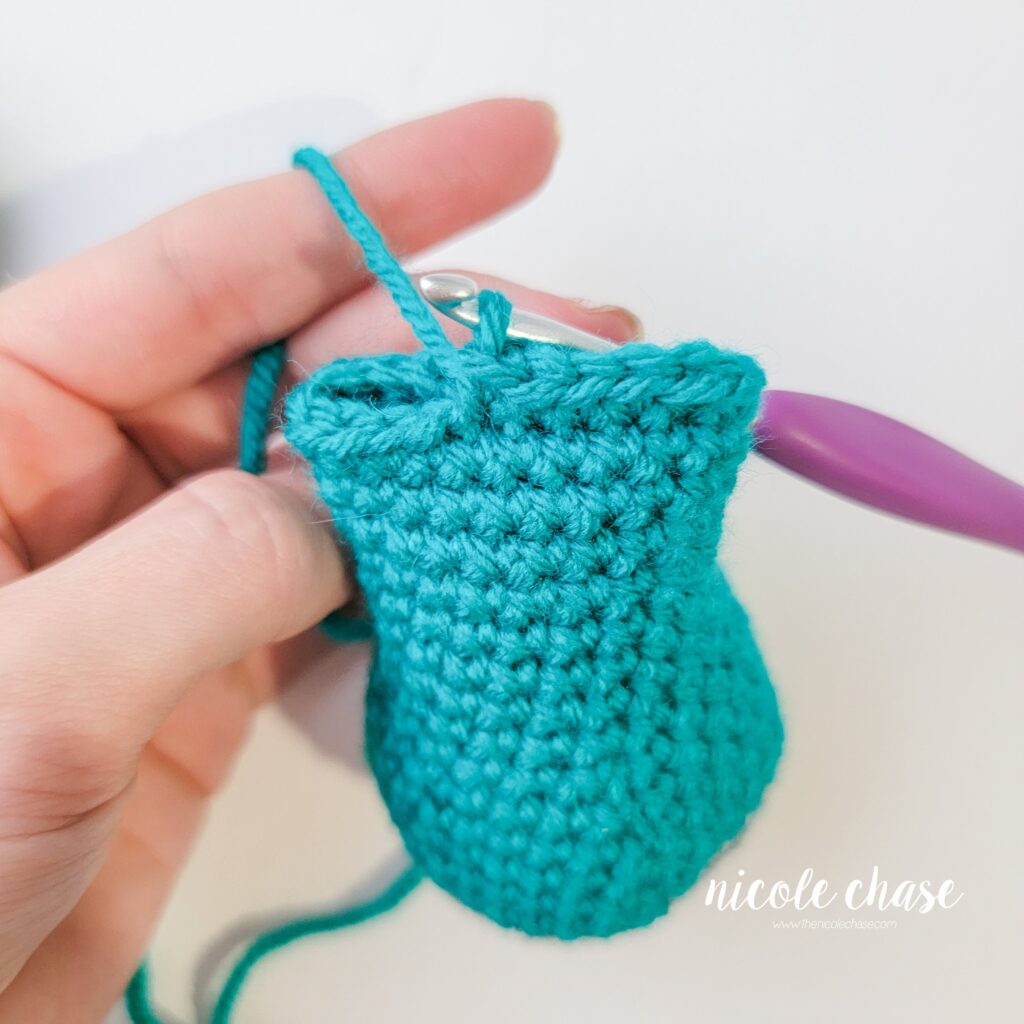
- See tutorial photos.
Pattern
Using 4.0mm (G) crochet hook:
Head
Using color A (shown as cream):
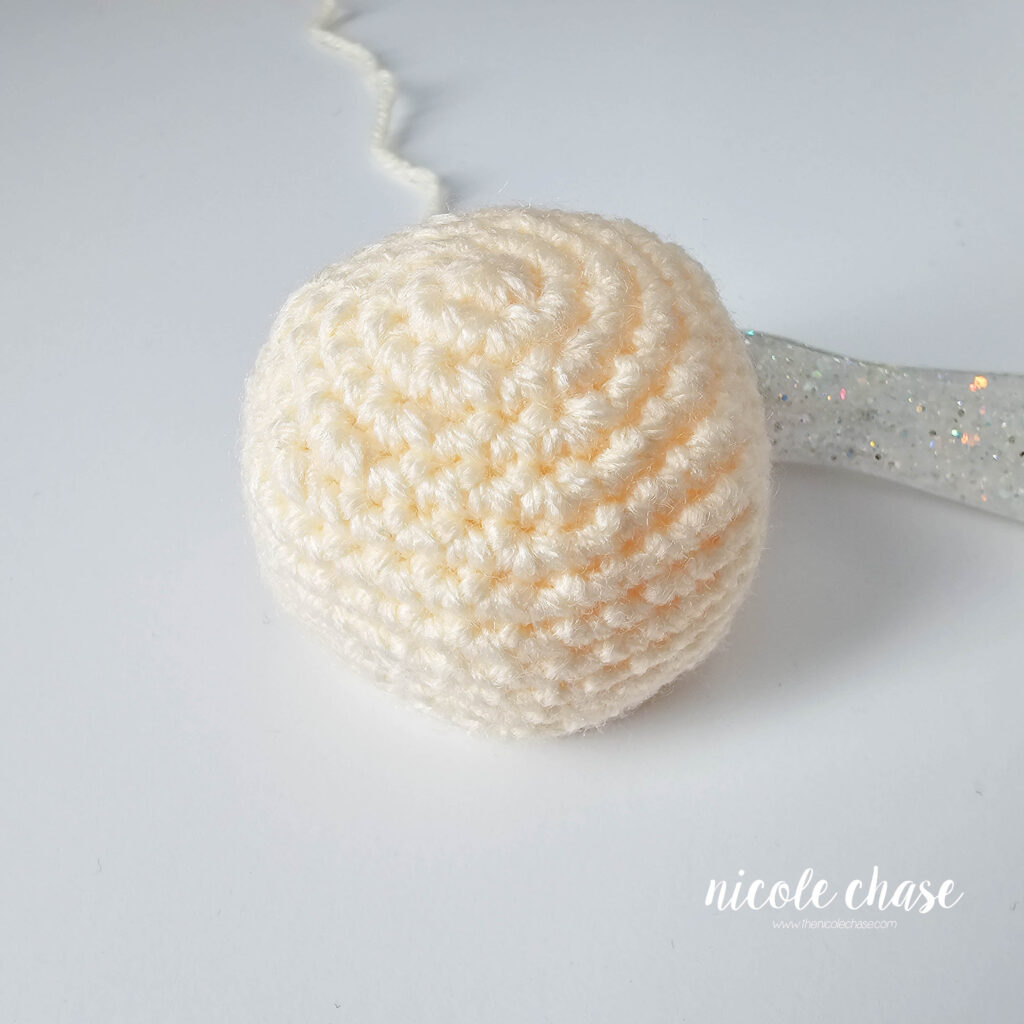
R1: Begin with 6 SC in a magic ring. (6 sts)
R2: 2 SC in each st around. (12 sts)
R3: *2 SC in next st, 1 SC in next st. Repeat from * around. (18 sts)
R4: *2 SC in next st, 1 SC in each of the next 2 sts. Repeat from * around. (24 sts)
R5: *2 SC in next st, 1 SC in each of the next 3 sts. Repeat from * around. (30 sts)
R6: *2 SC in next st, 1 SC in each of the next 4 sts. Repeat from * around. (36 sts)
R7-13: 1 SC in each st around. (36 sts)
R14: *SC2tog, 1 SC in each of the next 4 sts. Repeat from * around. (30 sts)
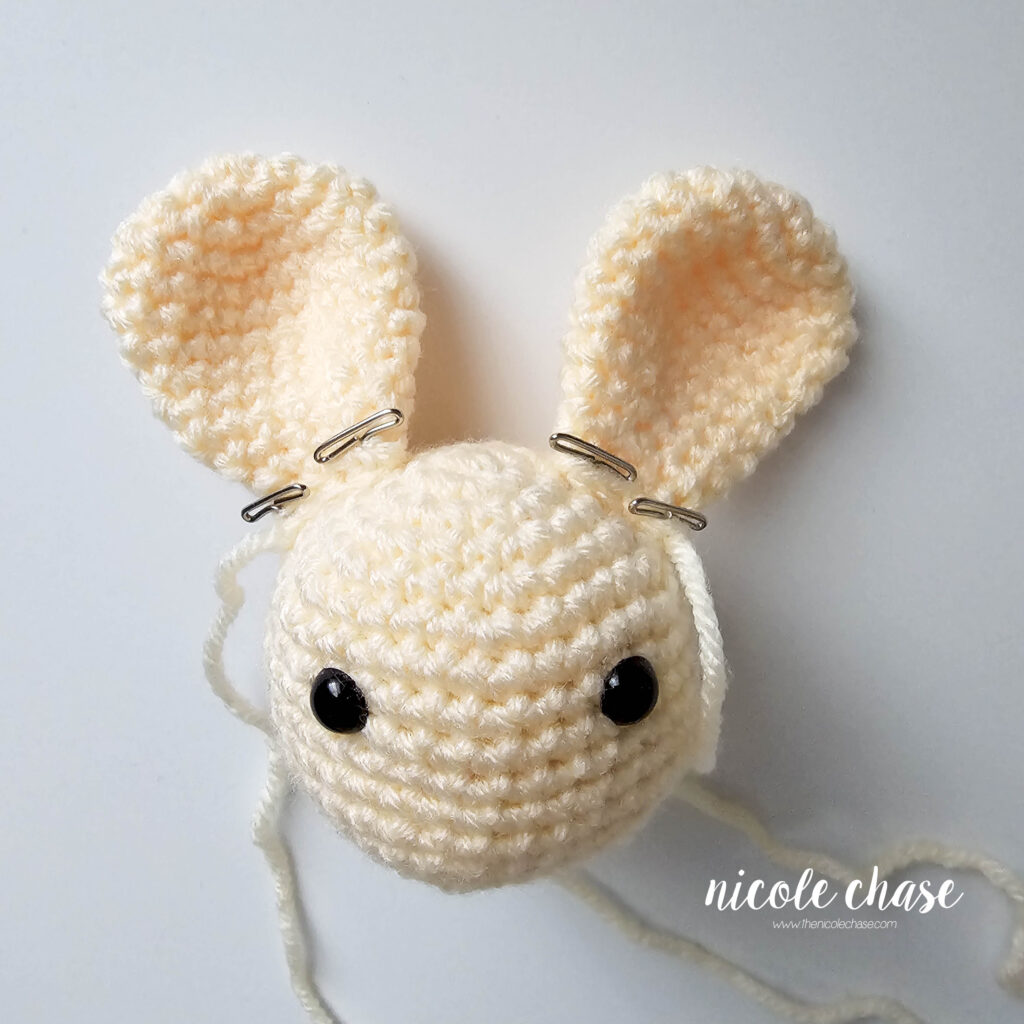
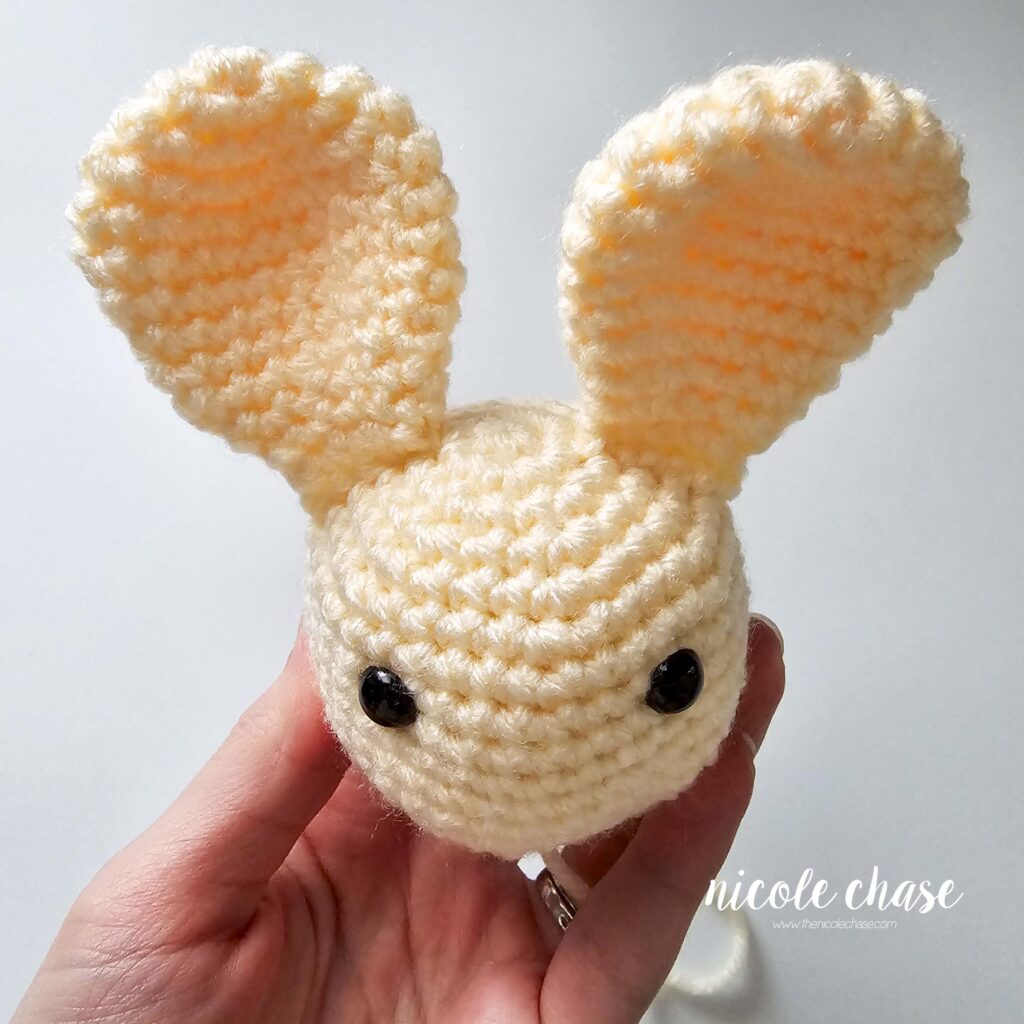
If using safety eyes, insert them now between R8-9, with 6 sts between.
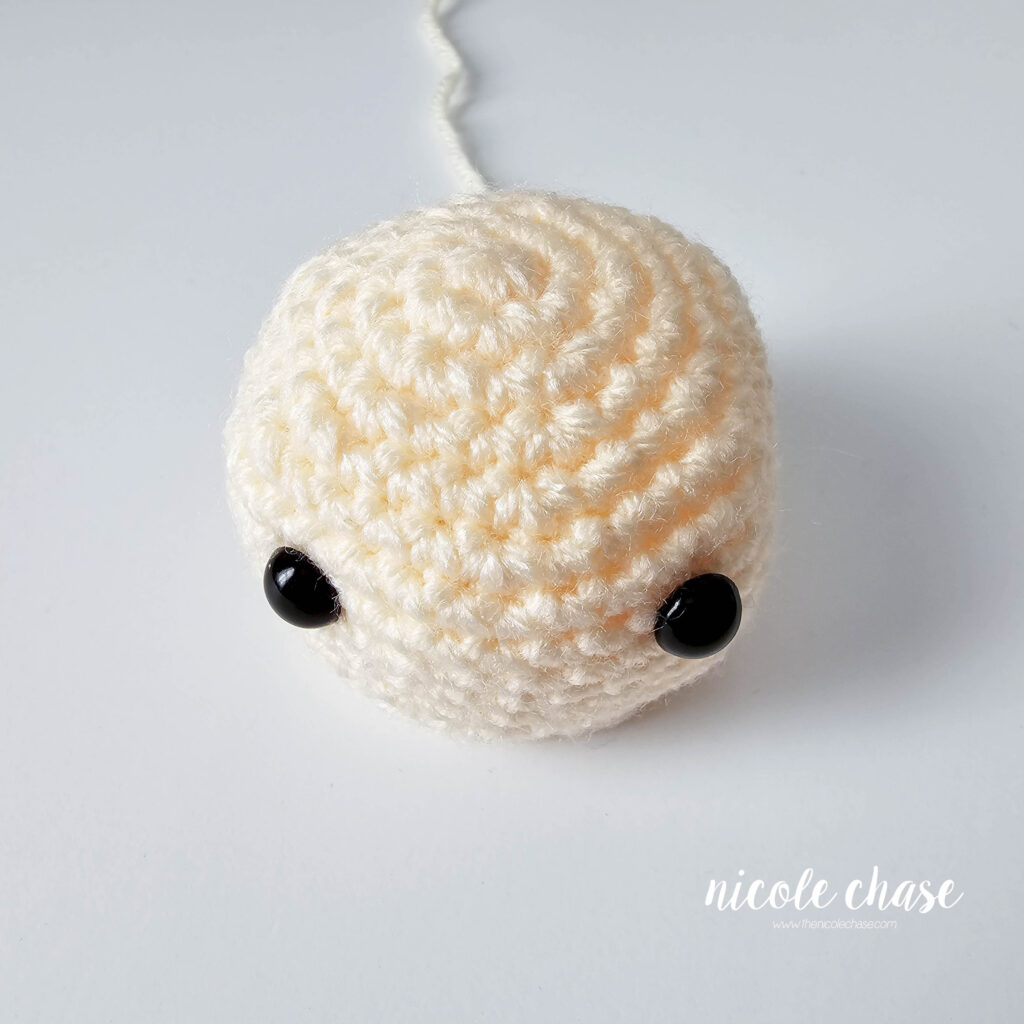
R15: *SC2tog, 1 SC in each of the next 3 sts. Repeat from * around. (24 sts)
R16: *SC2tog, 1 SC in each of the next 2 sts. Repeat from * around. (18 sts)
Fill with stuffing.
R17: *SC2tog, 1 SC in next st. Repeat from * around. (12 sts)
R18: *SC2tog. Repeat from * around. (6 sts)
Cut yarn, leaving long strand for sewing. Weave yarn in and out of remaining sts. Pull tight to close. Tie off and weave in ends.
Ears (make 2)
Using color A (shown as cream):
R1: Begin with 6 SC in a magic ring. (6 sts)
R2: 2 SC in each st around. (12 sts)
R3. *2 SC in next, 1 SC in next. Repeat from * around. (18 sts)
R4: *2 SC in next, 1 SC in each of the next 2 sts. Repeat from * around. (24 sts)
R5-6: 1 SC in each st around. (24 sts)
R7: *SC2tog, 1 SC in each of the next 6 sts. Repeat from * around. (21 sts)
R8: *SC2tog, 1 SC in each of the next 5 sts. Repeat from * around. (18 sts)
R9: 1 SC in each st around. (18 sts)
R10: *SC2tog, 1 SC in each of the next 4 sts. Repeat from * around. (15 sts)
R11: *SC2tog, 1 SC in each of the next 3 sts. Repeat from * around. (12 sts)
R12: *SC2tog, 1 SC in each of the next 2 sts. Repeat from * around. (9 sts)
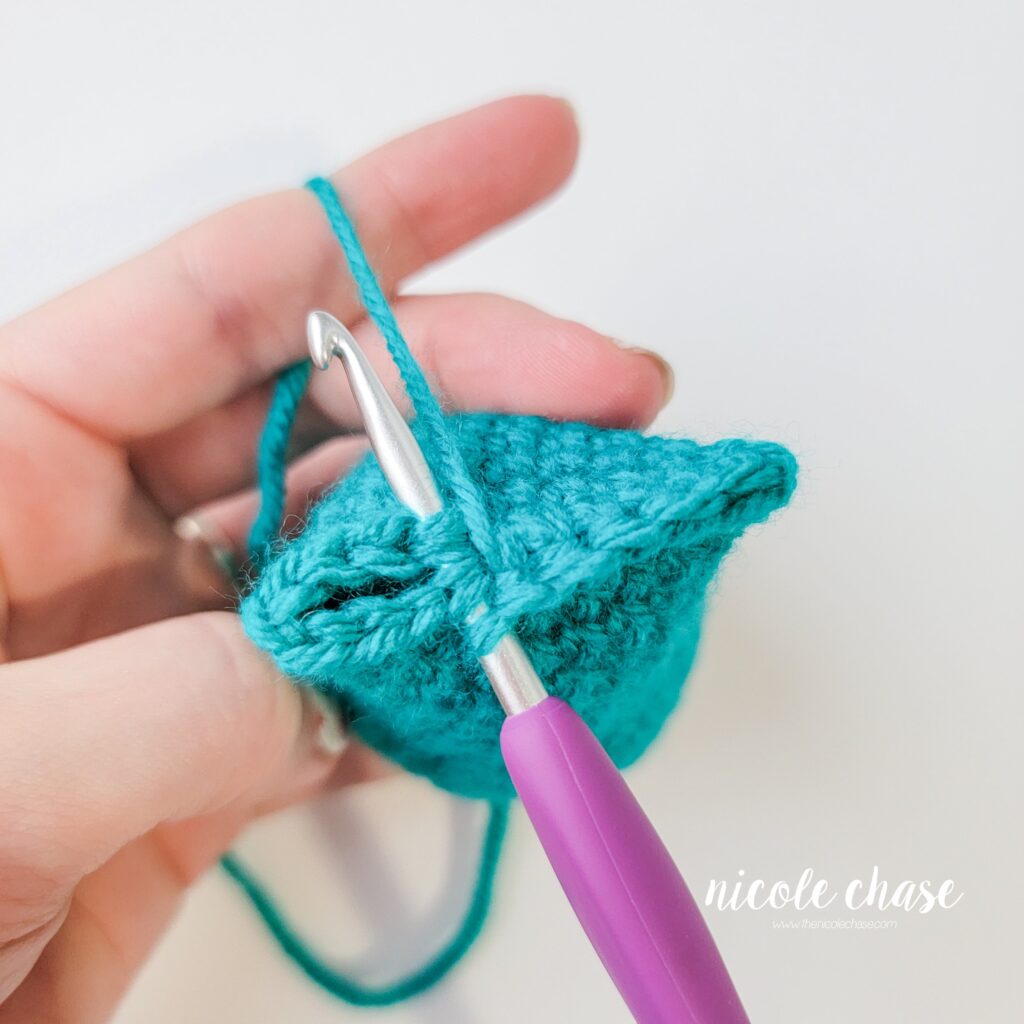
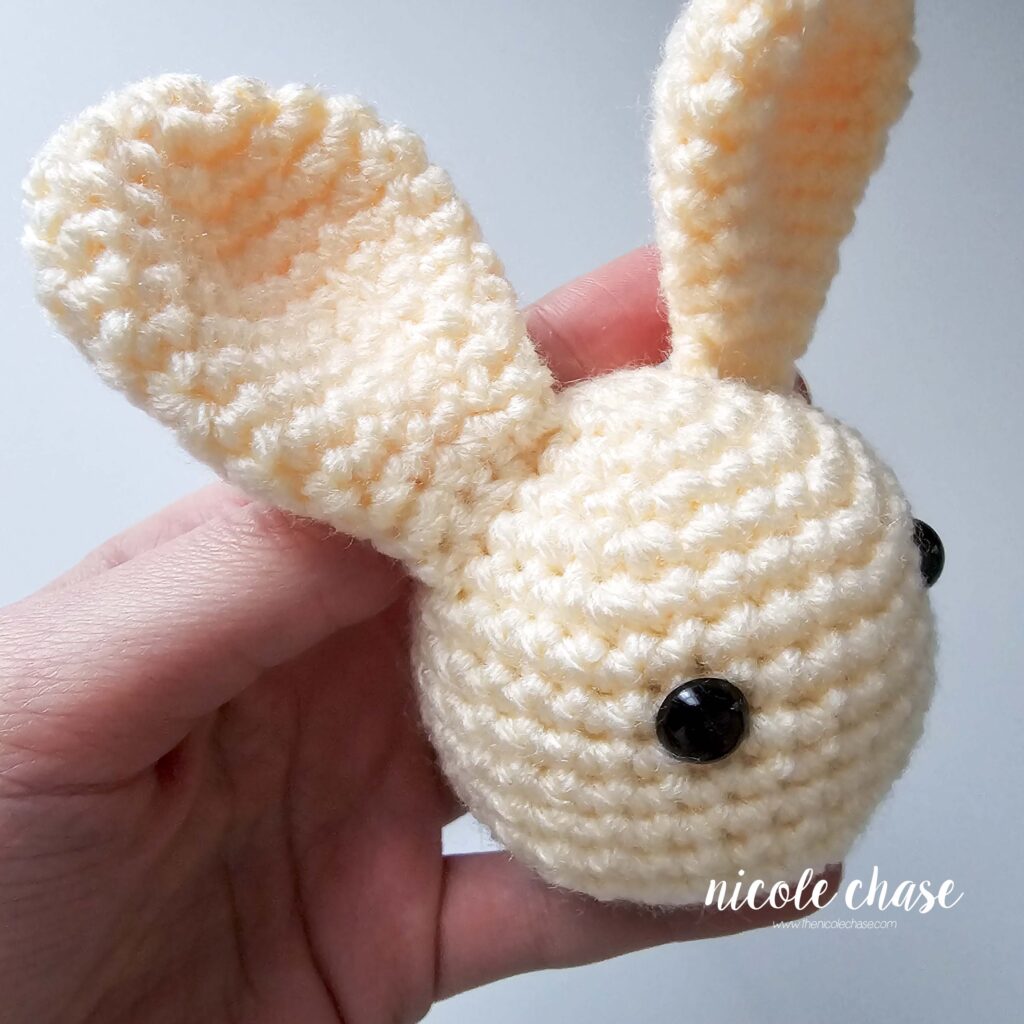
R13: Fold the ear closed, leaving 1 unworked st at the beginning of the fold. Working through both sides, 1 SC in each st across. See tutorial photos. (4 sts)
Cut yarn, leaving long strand for sewing.
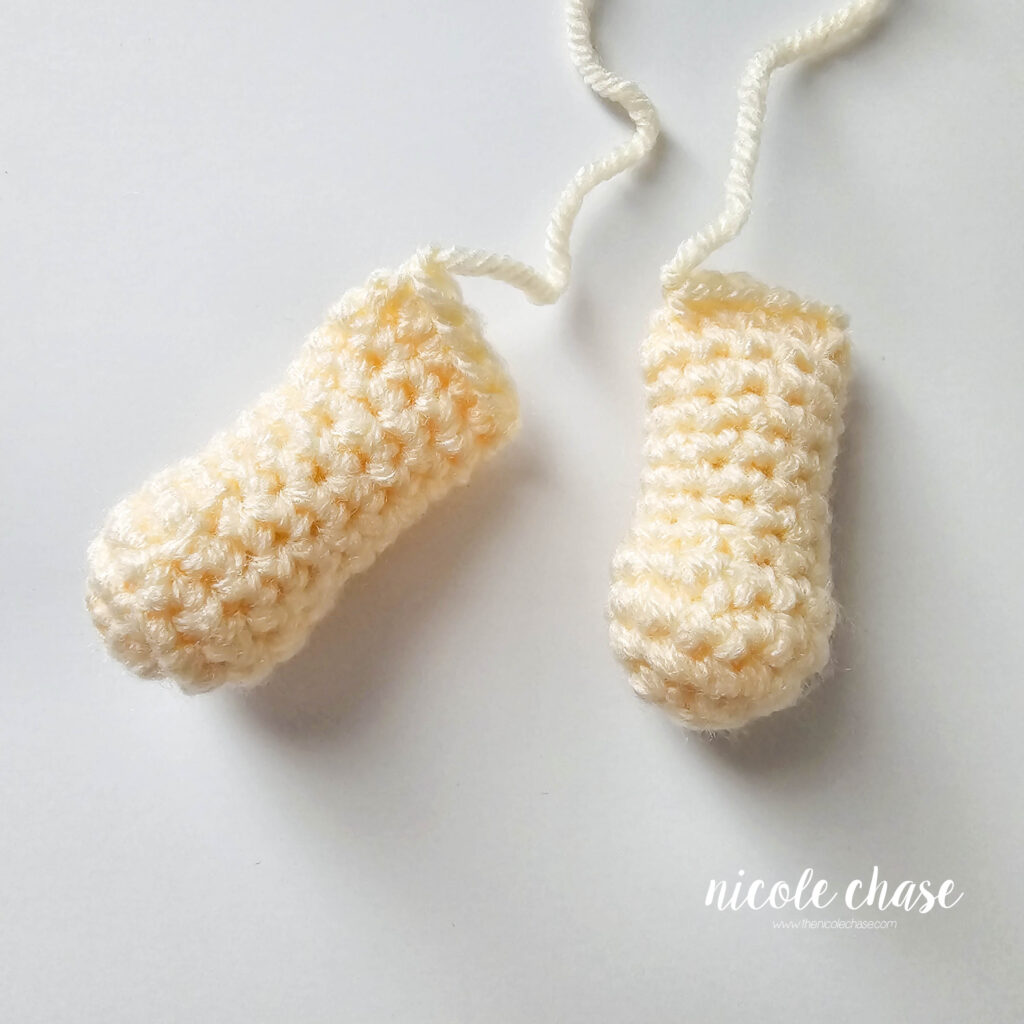
Arms (make 2)
Using color A (shown as cream):
R1: Begin with 6 SC in a magic ring. (6 sts)
R2: 2 SC in each st around. (12 sts)
R3: *2 SC in next st, 1 SC in each of the next 3 sts. Repeat from * around. (15 sts)
R4: 1 SC in each st around. (15 sts)
R5: *SC2tog, 1 SC in each of the next 3 sts. Repeat from * around. (12 sts)
R6: *SC2tog, 1 SC in each of the next 4 sts. Repeat from * around. (10 sts)
R7-12: 1 SC in each st around. (10 sts)
Fill with stuffing.
R13: Fold the arm closed, working through both sides, 1 SC in each st across, leaving 1 unworked st on each side. See tutorial photos. (4 sts)
Cut yarn, leaving long strand for sewing.
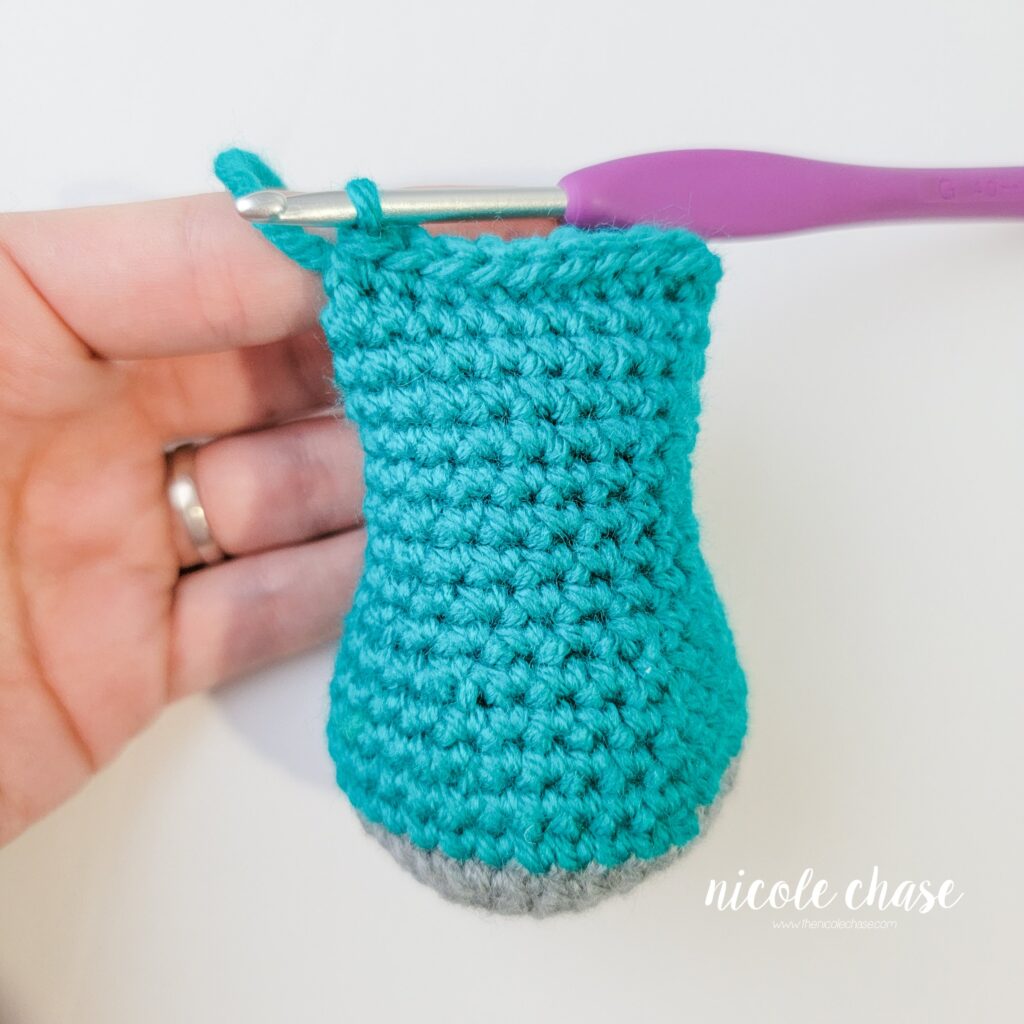
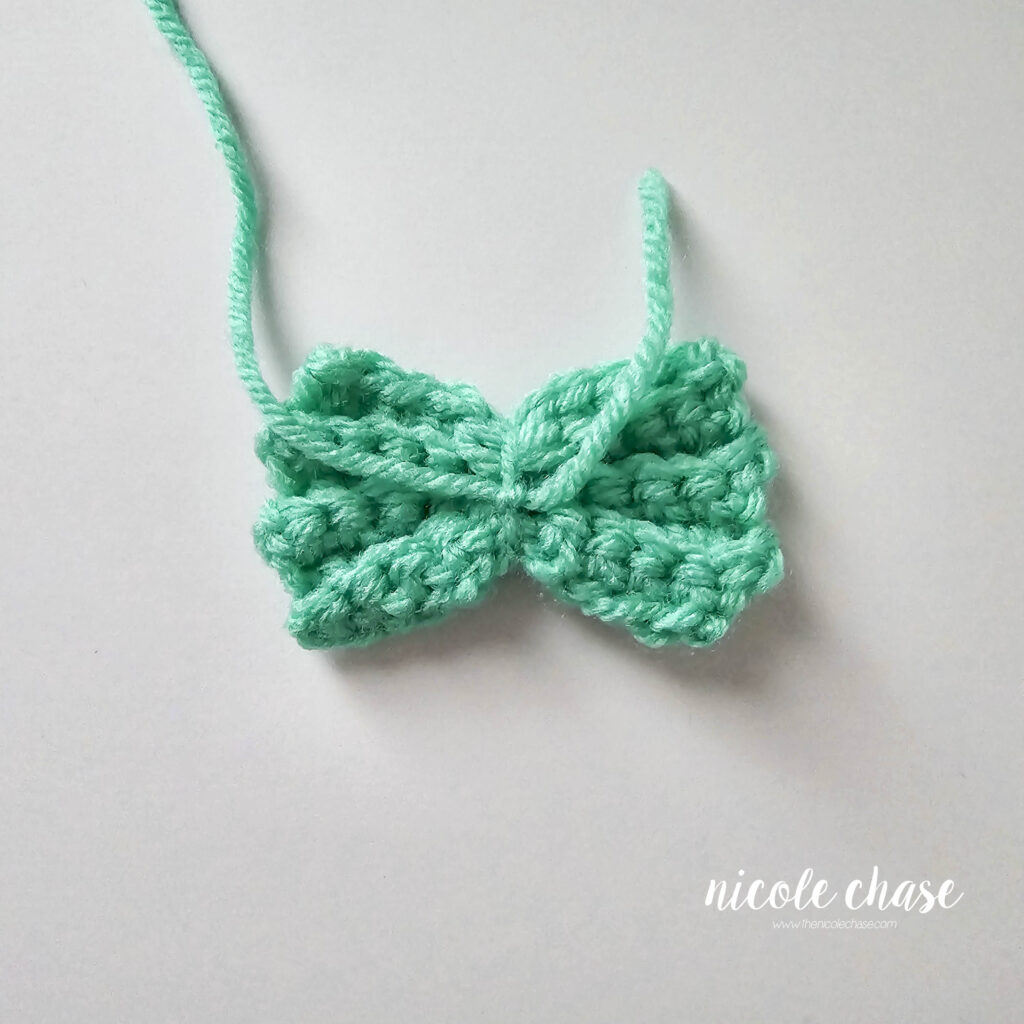
Bow
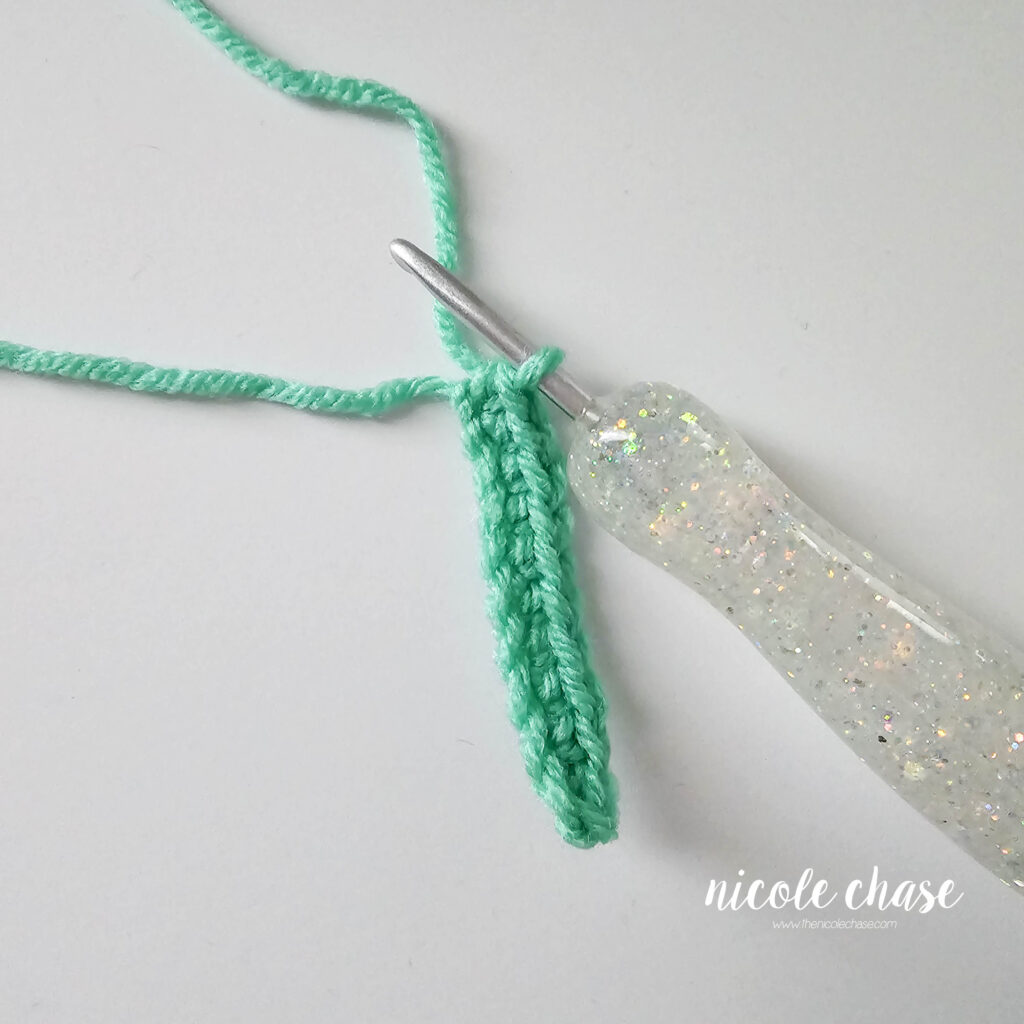
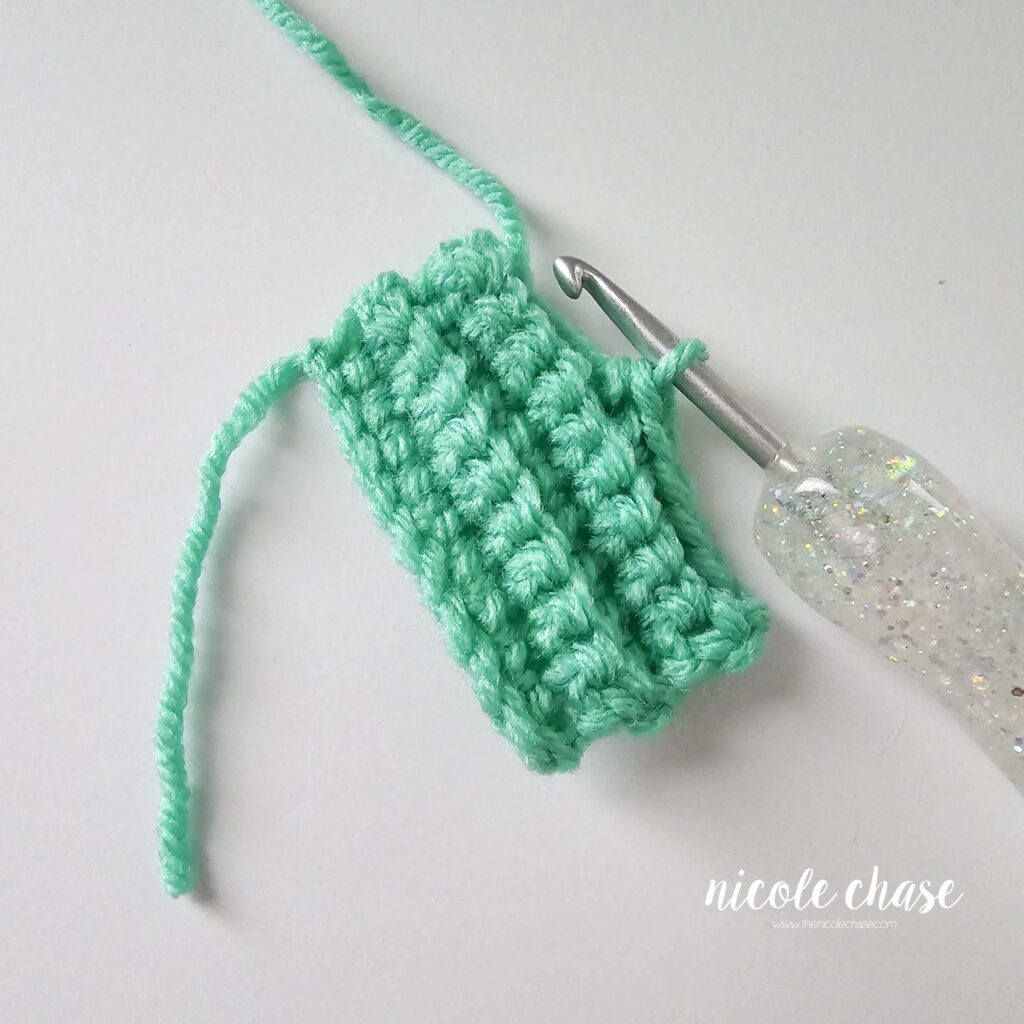
Using color B (shown as teal):
R1: Ch 11, 1 SC in second ch from hook and each st to end. (10 sts)
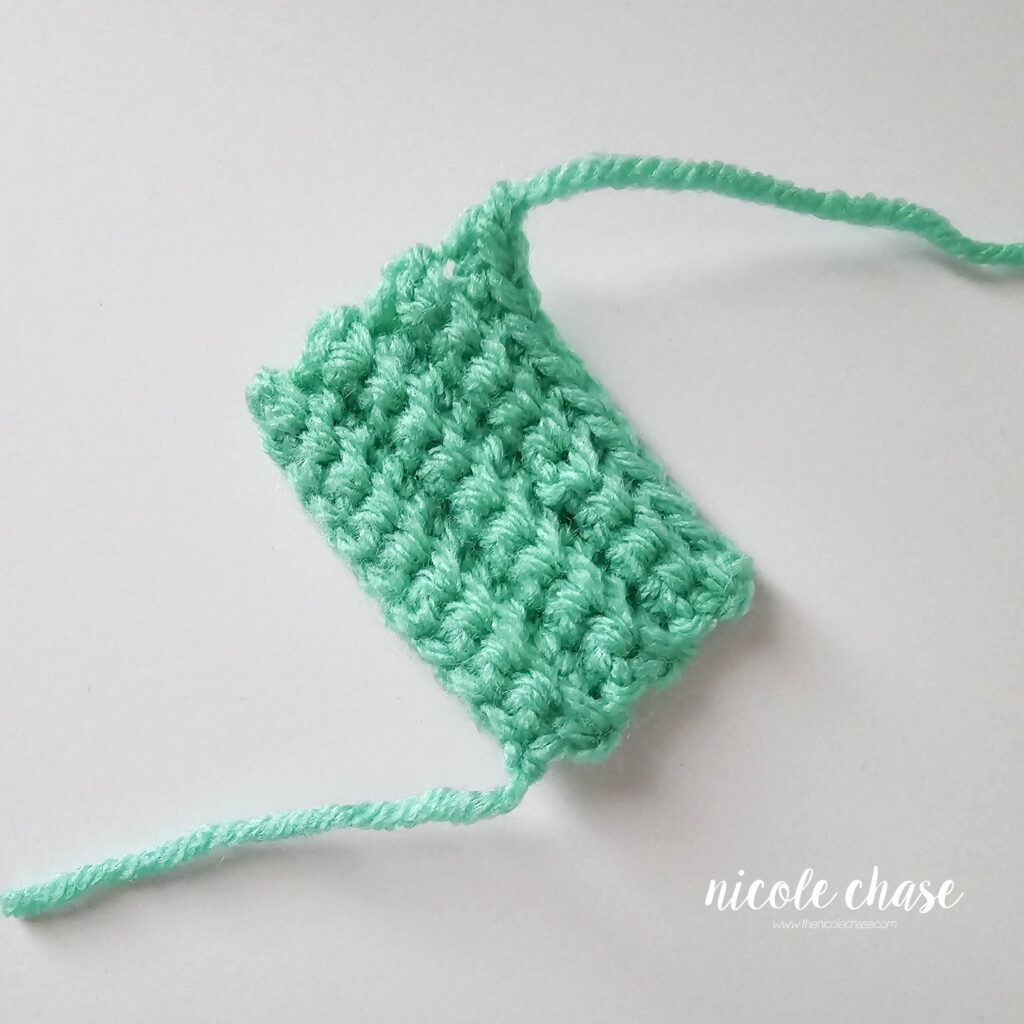
R2-6: Ch 1, 1 SC in back loops of each st to end. (10 sts)
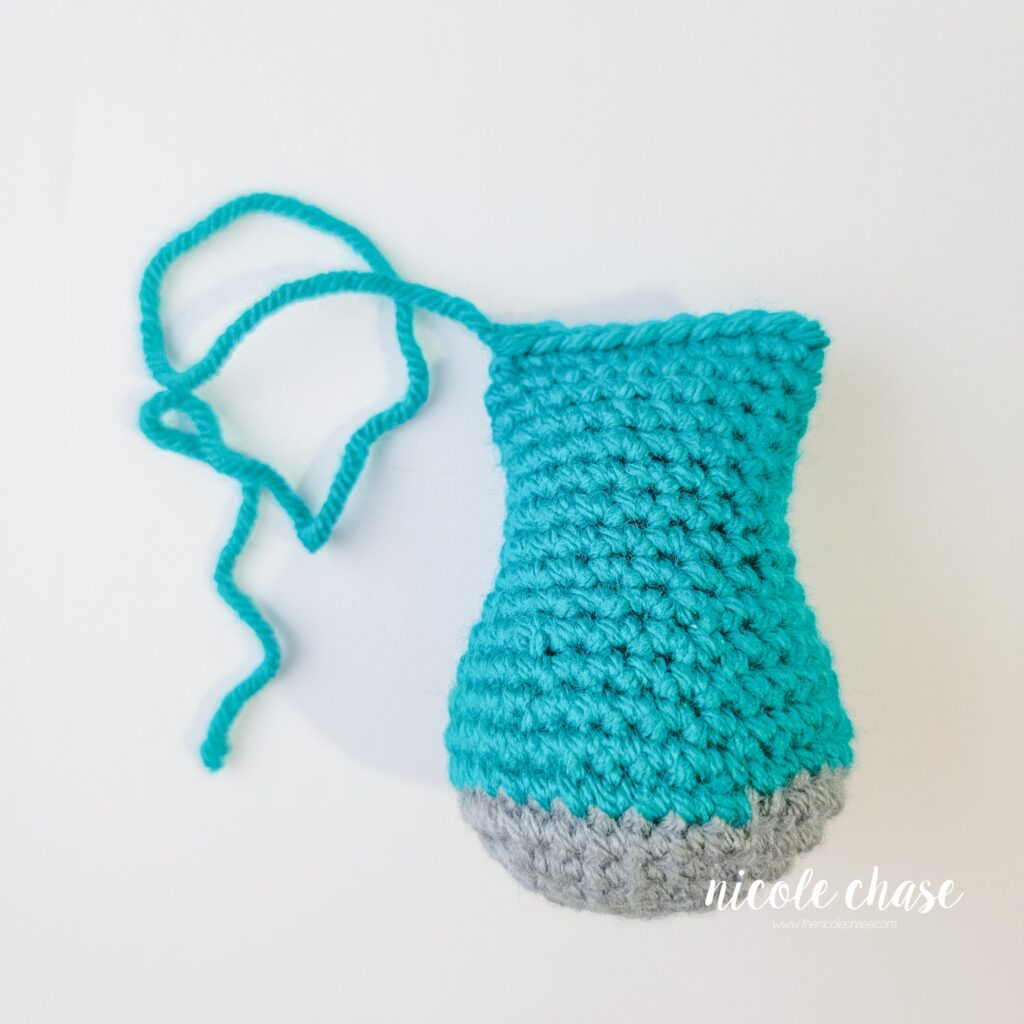
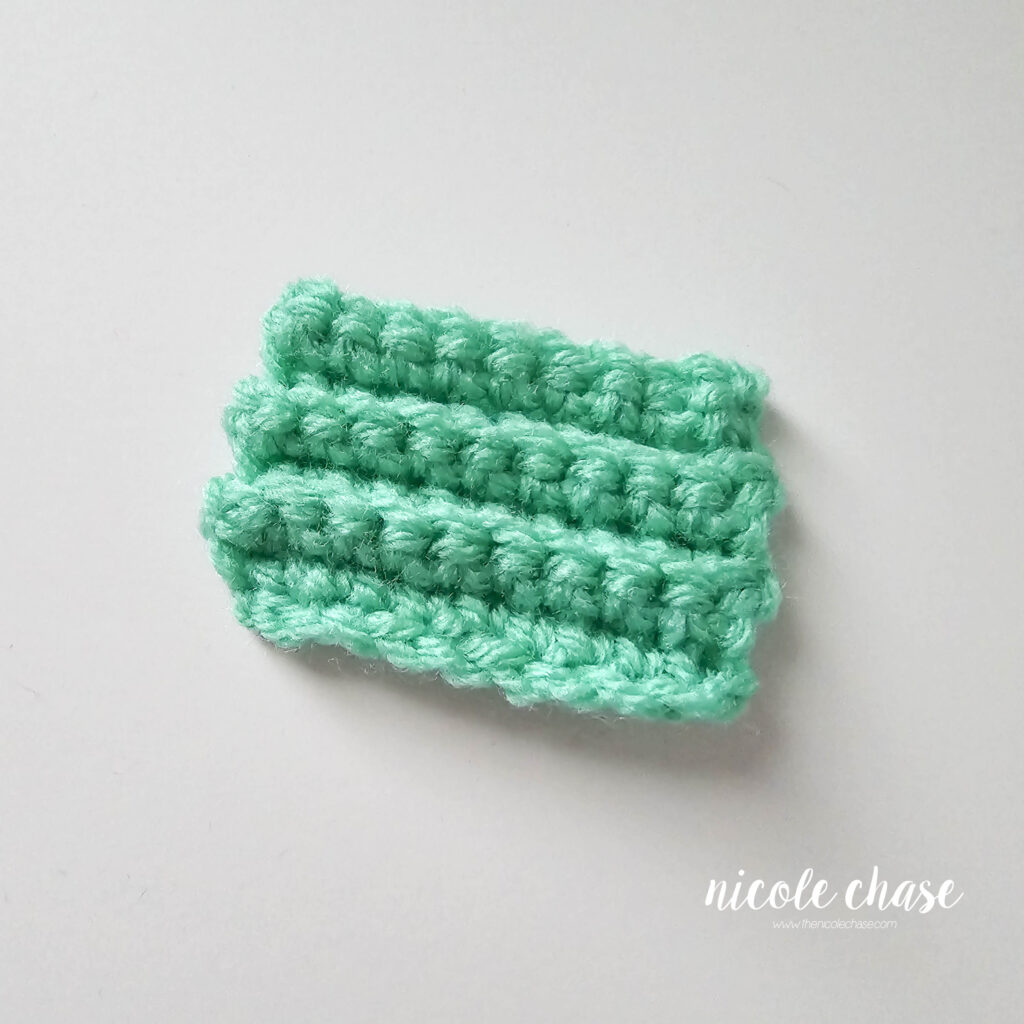
Cut yarn, weave in ends.
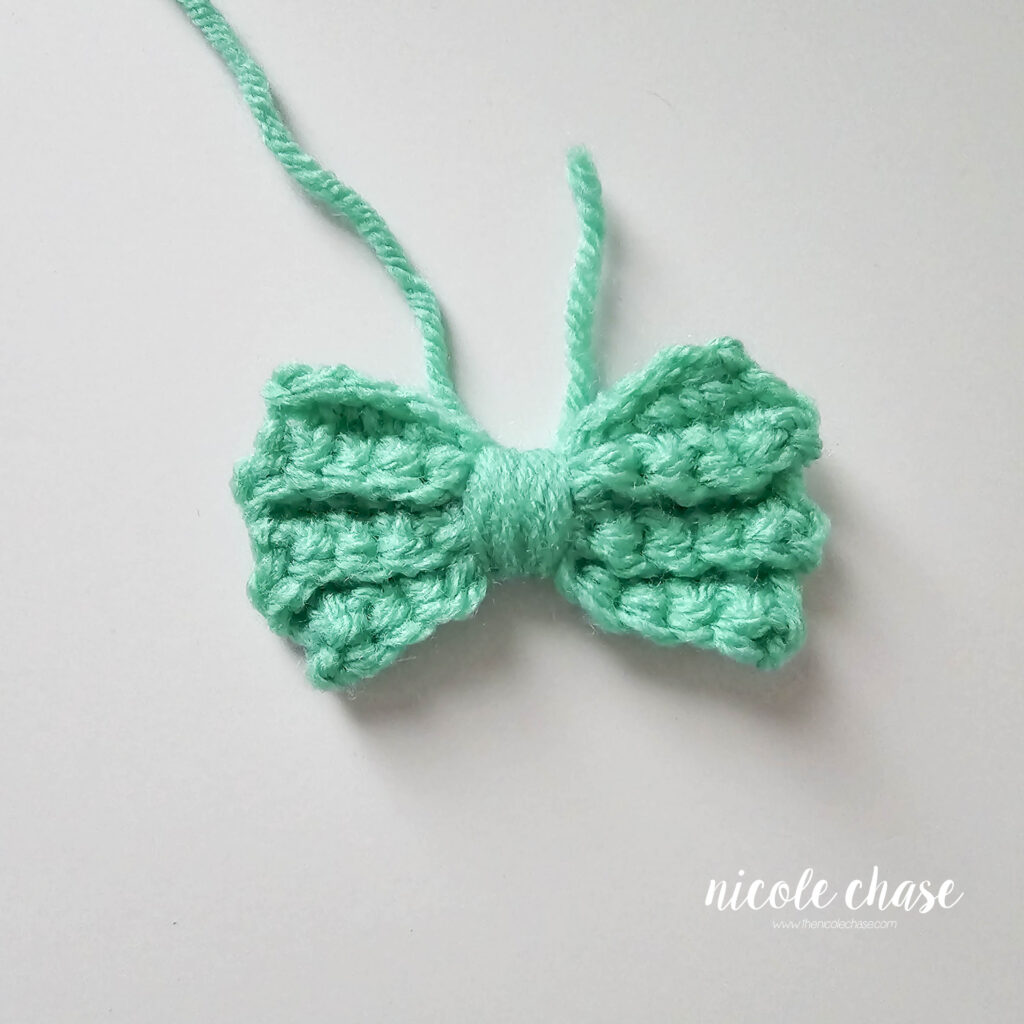
Pinch the middle of the bow. Using a long strand of yarn, wrap around the middle of the bow. Tie off, cut yarn, leaving long strand for sewing.

Using 5.0mm (H) crochet hook:
Blanket
Using color C (shown as purple):
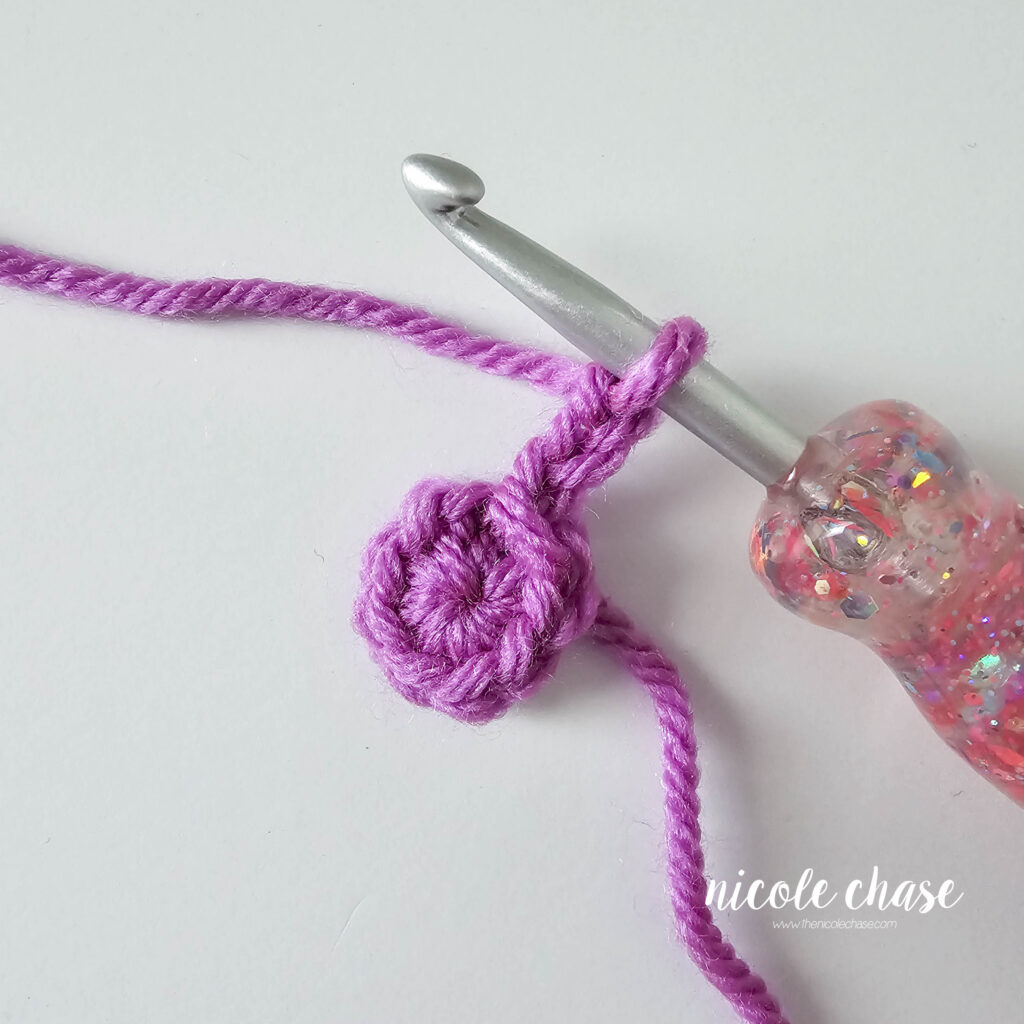
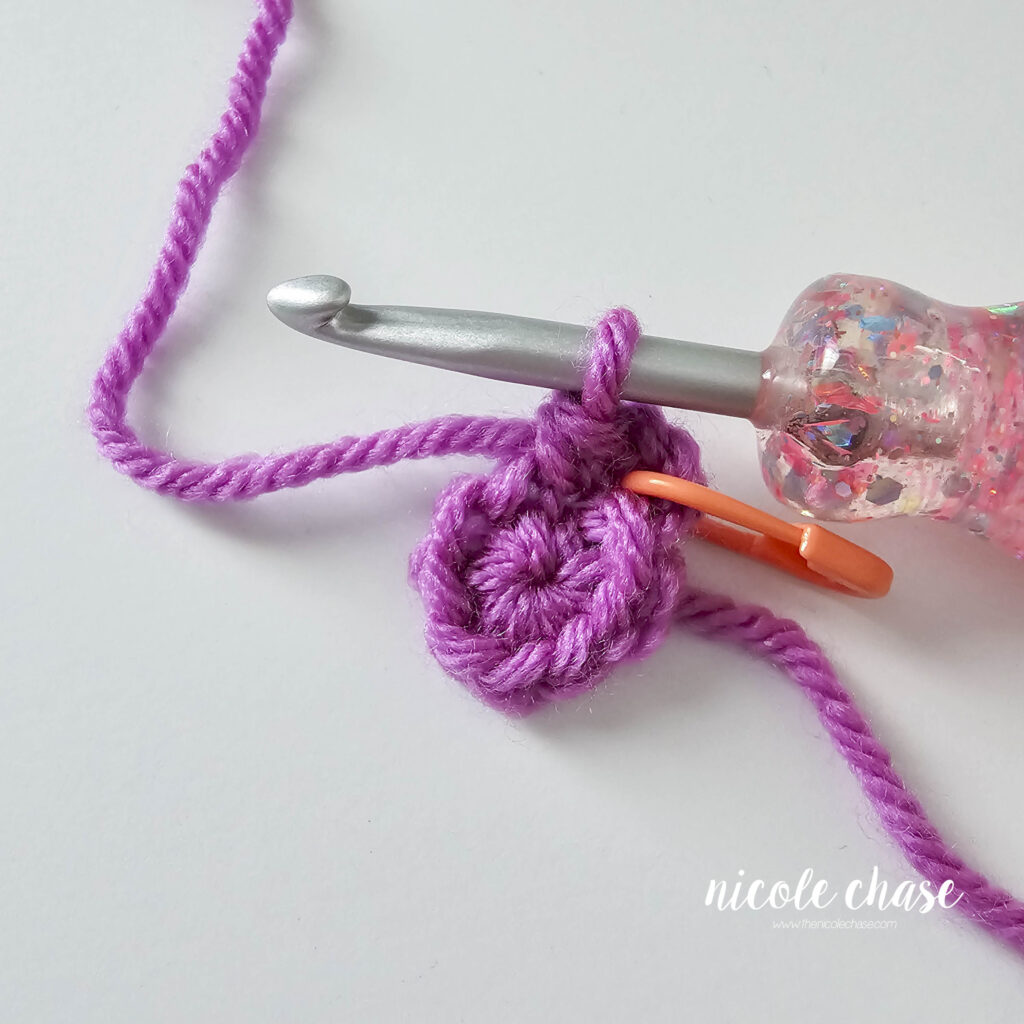
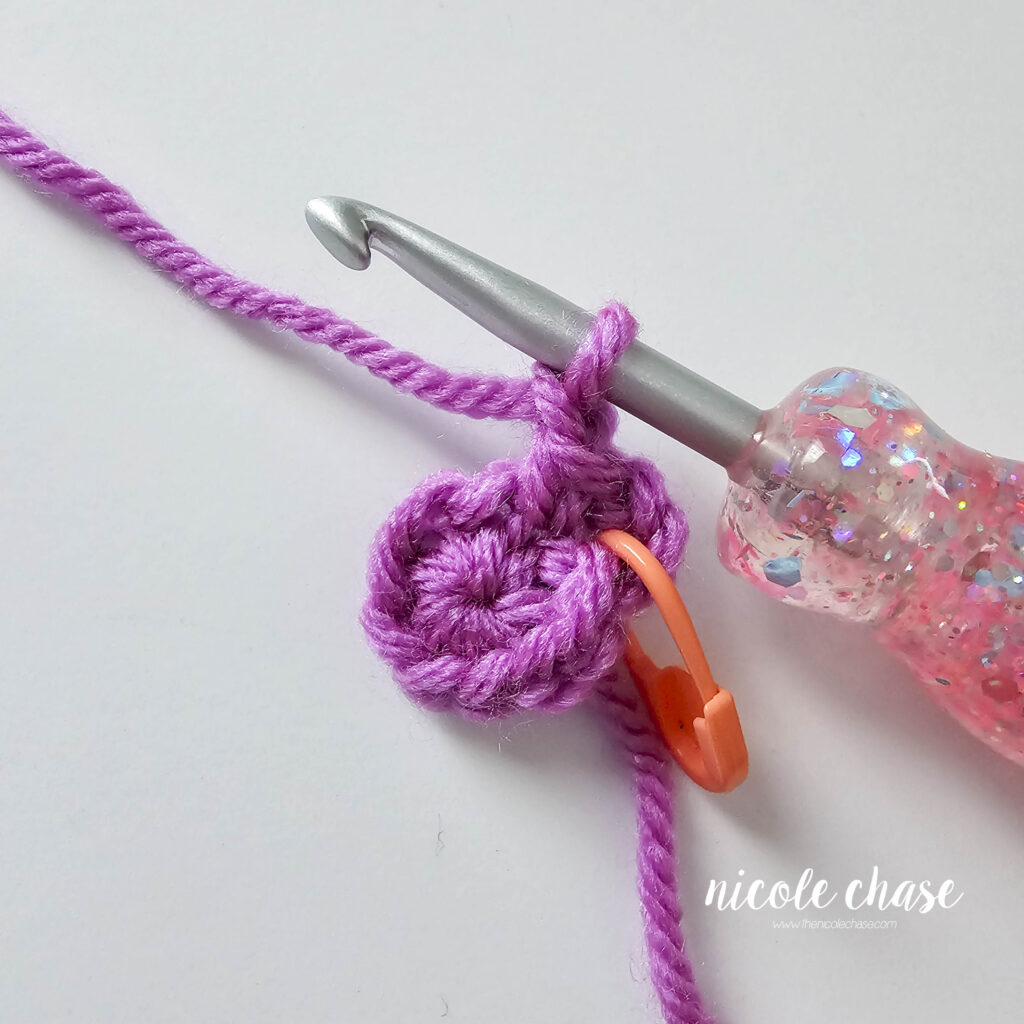
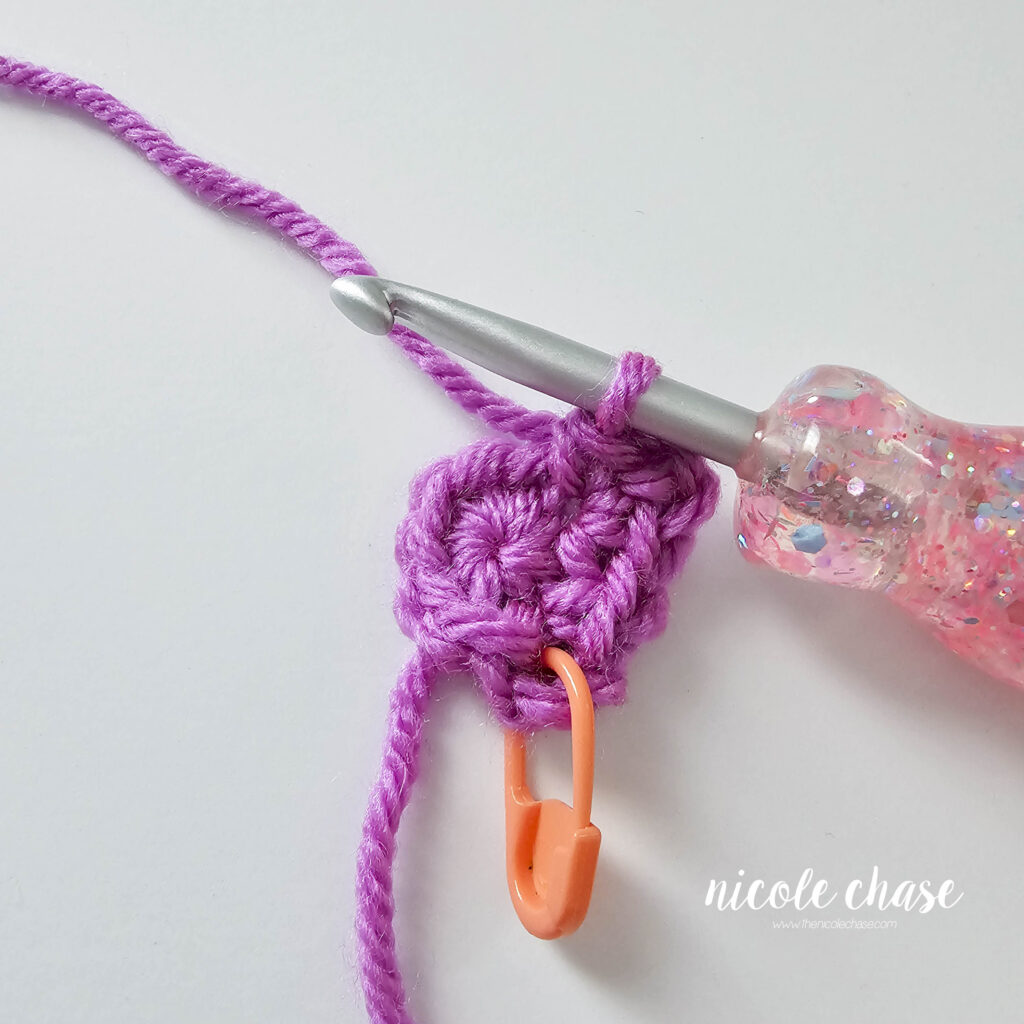
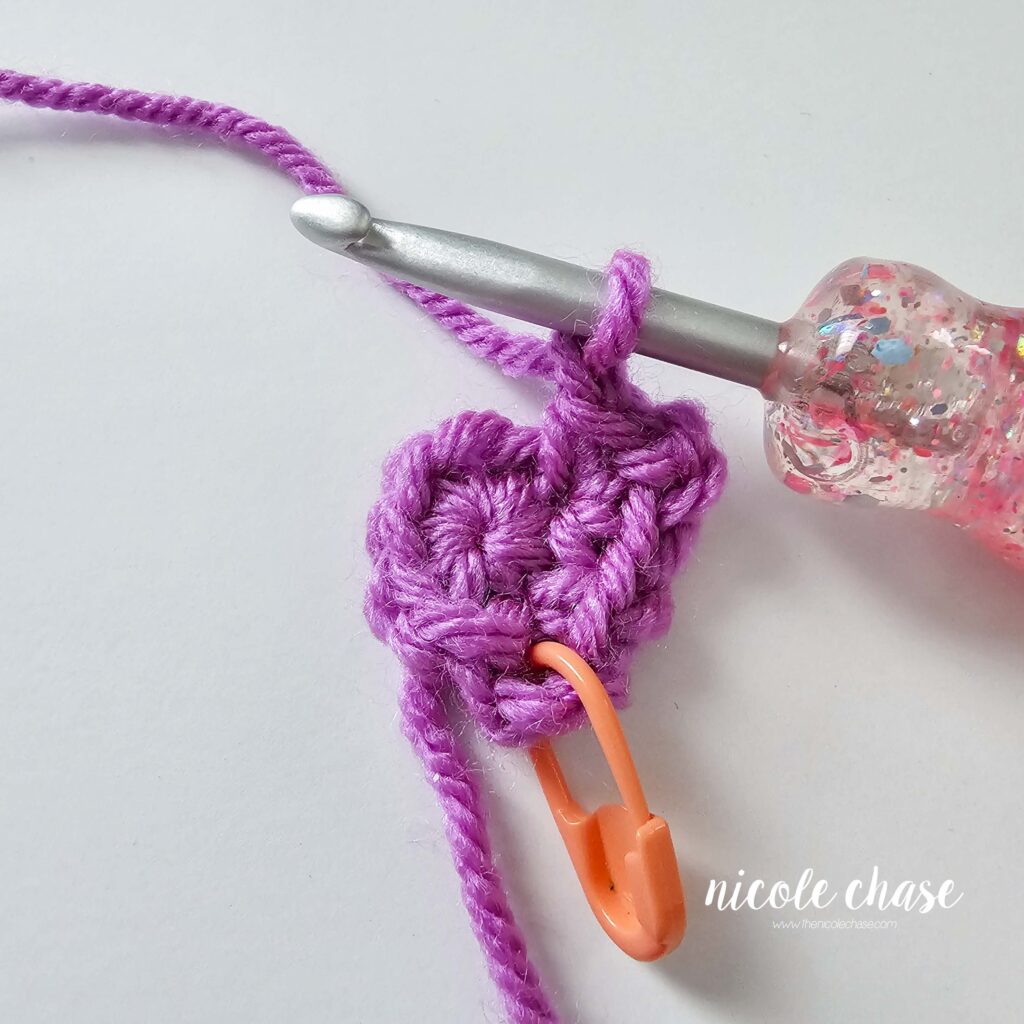
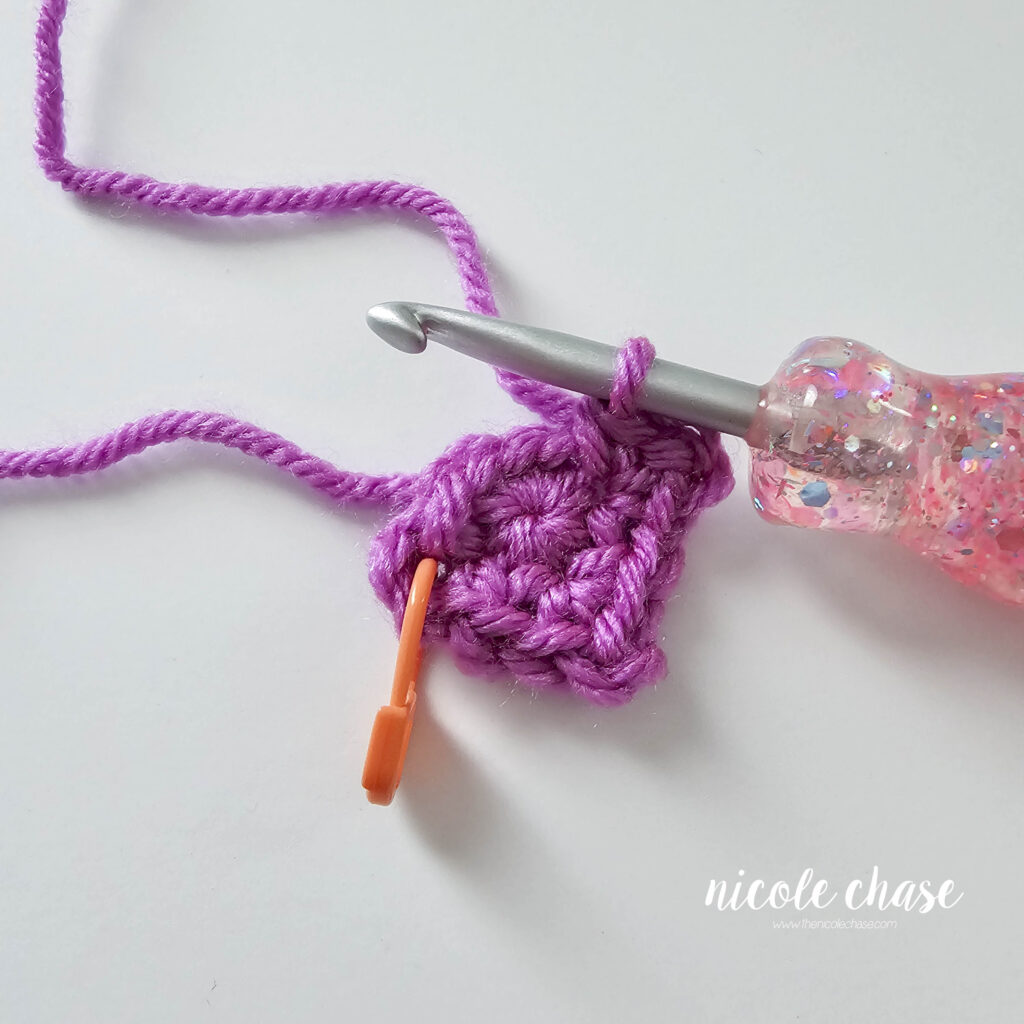
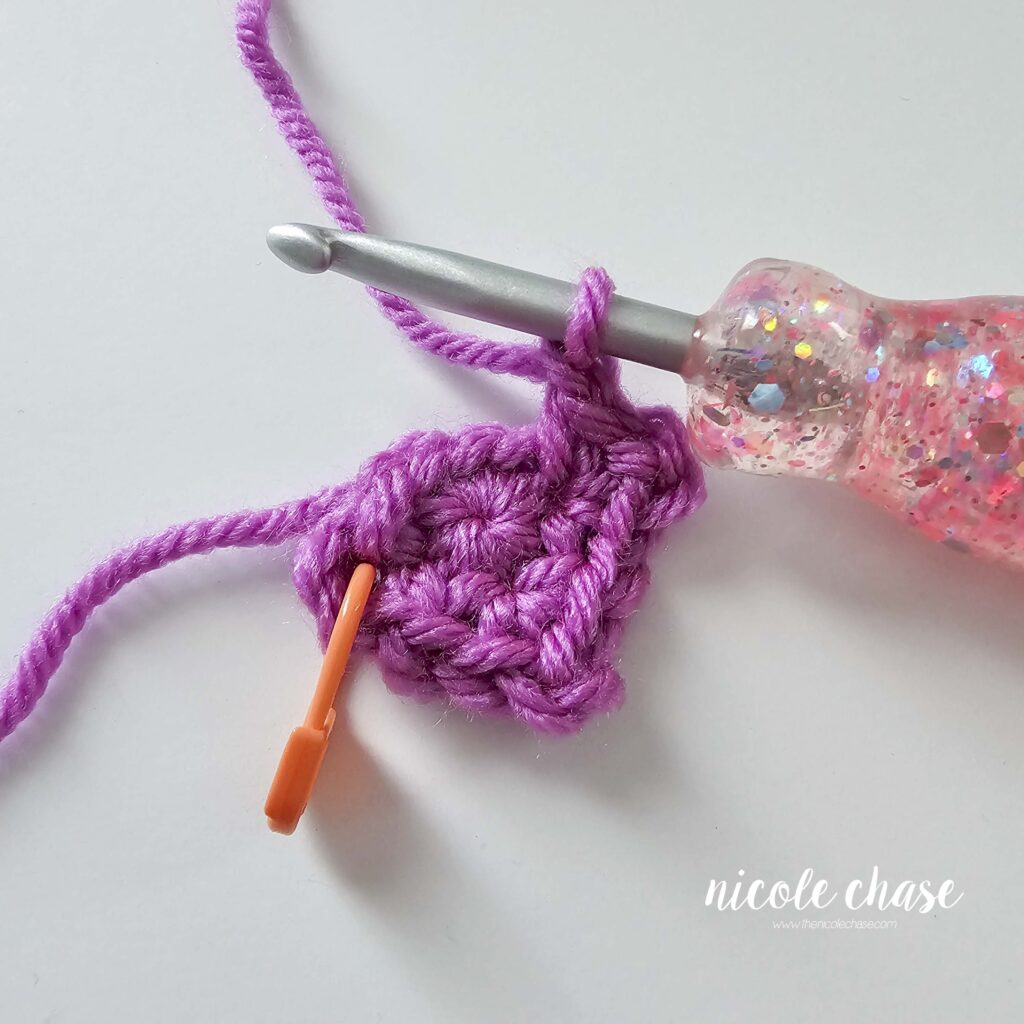
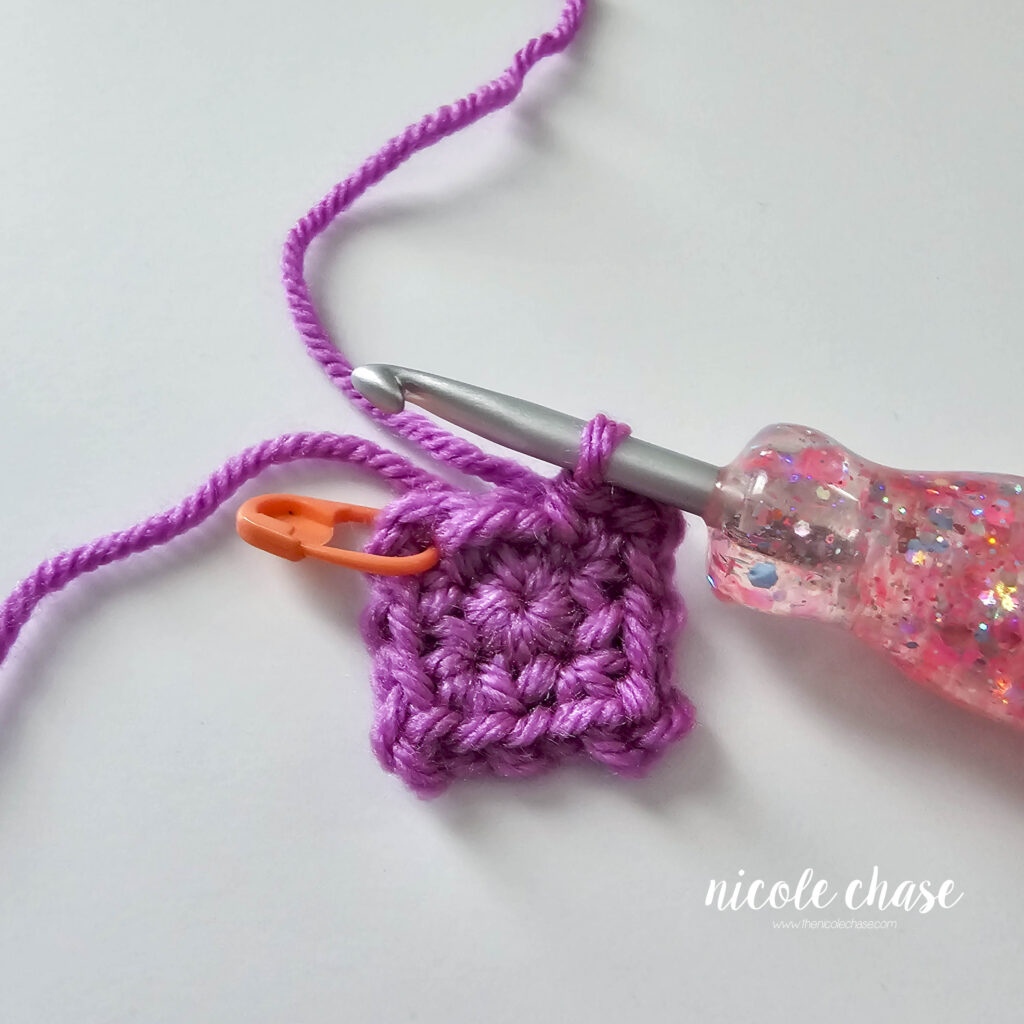
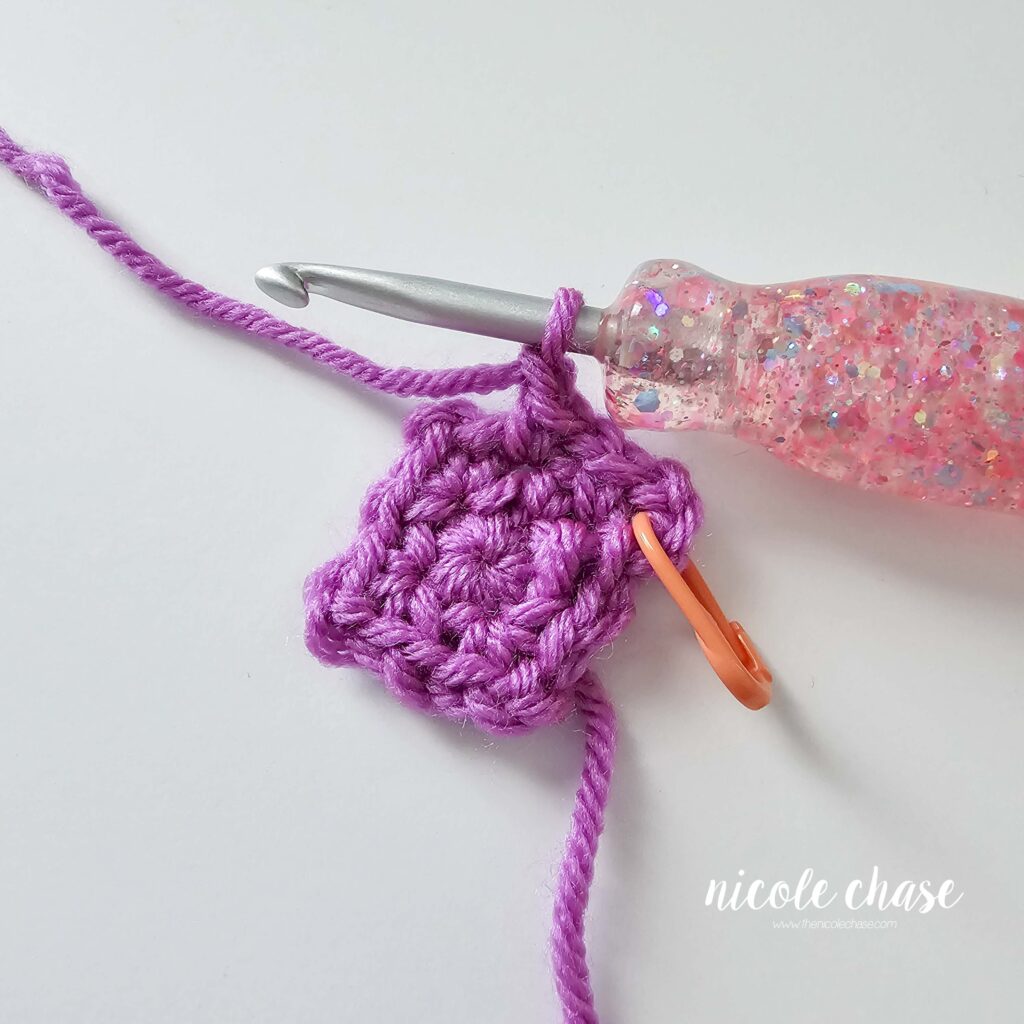
R1: Begin with 8 SC in a magic ring. Join with a sl st to beginning. (8 sts)
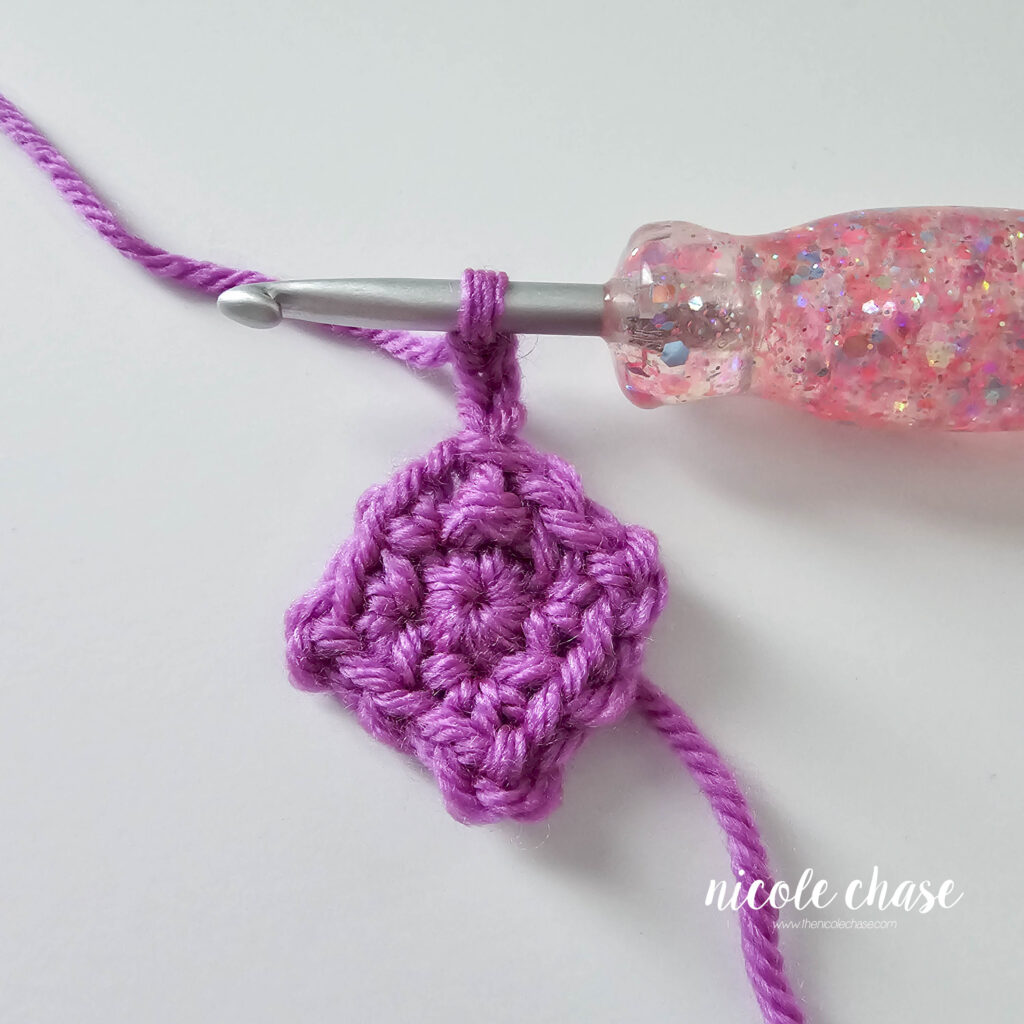
R2: Ch 3 (counts as SC + ch 2 now and throughout), 1 SC in same st (creating first corner), ch 1, skip next st, *[SC, ch 2, SC] (corner made), ch 1, skip next st, Repeat from * to beginning. Join with a sl st to beginning ch 3 space. (4 ch 1 spaces, 4 corner spaces)

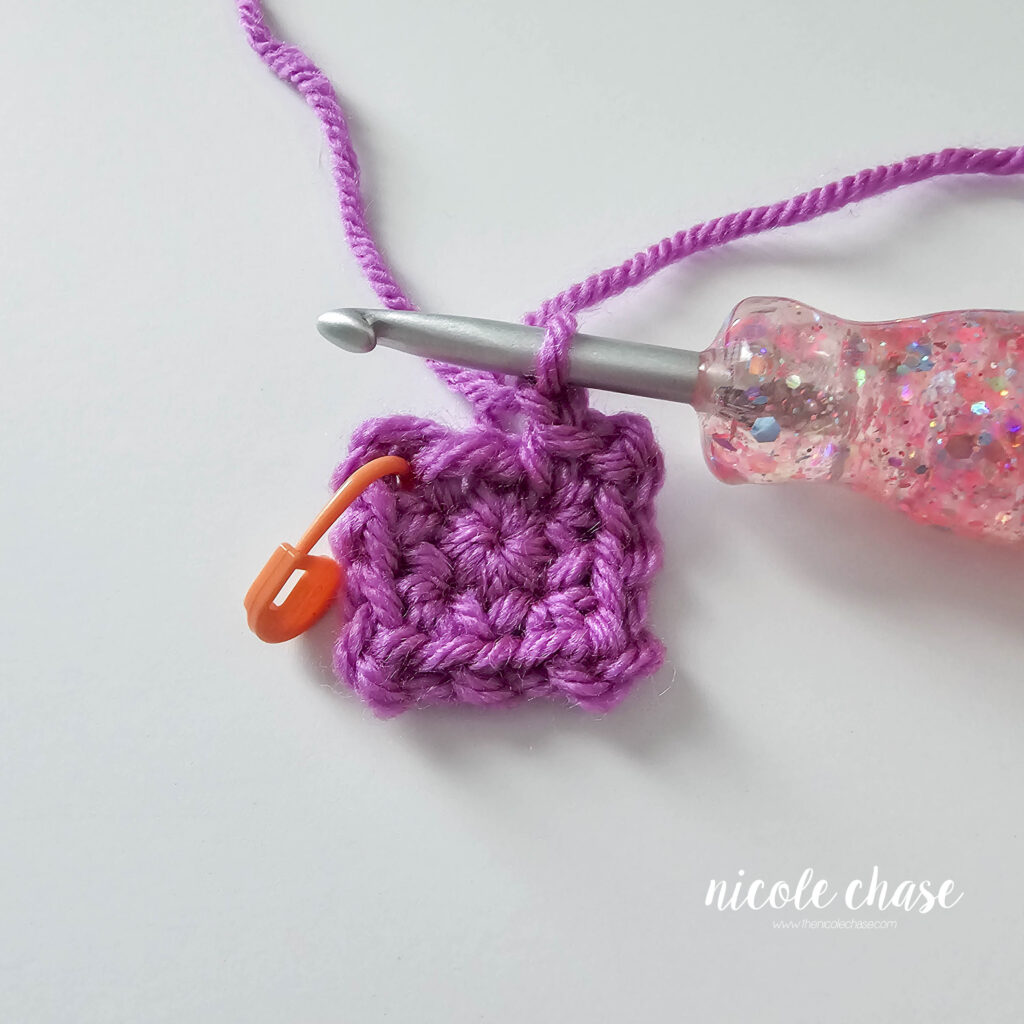
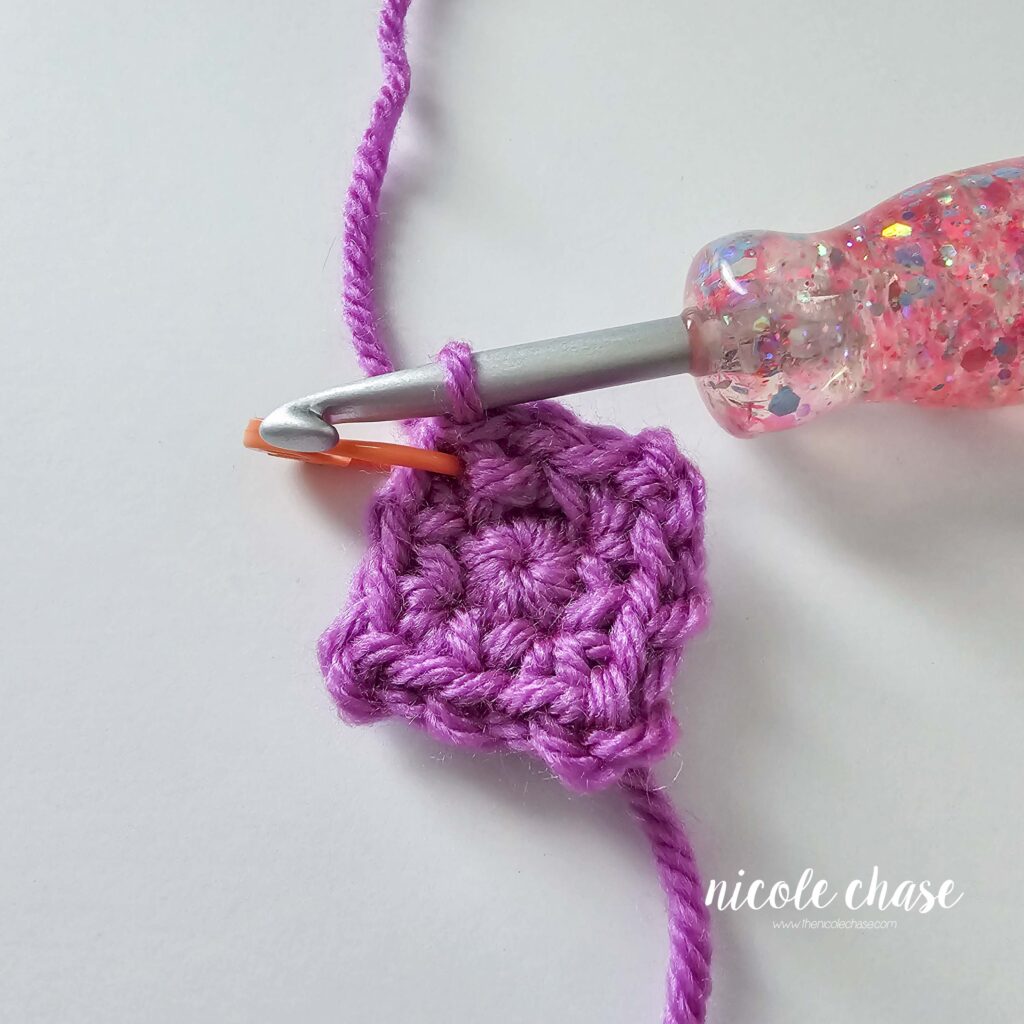
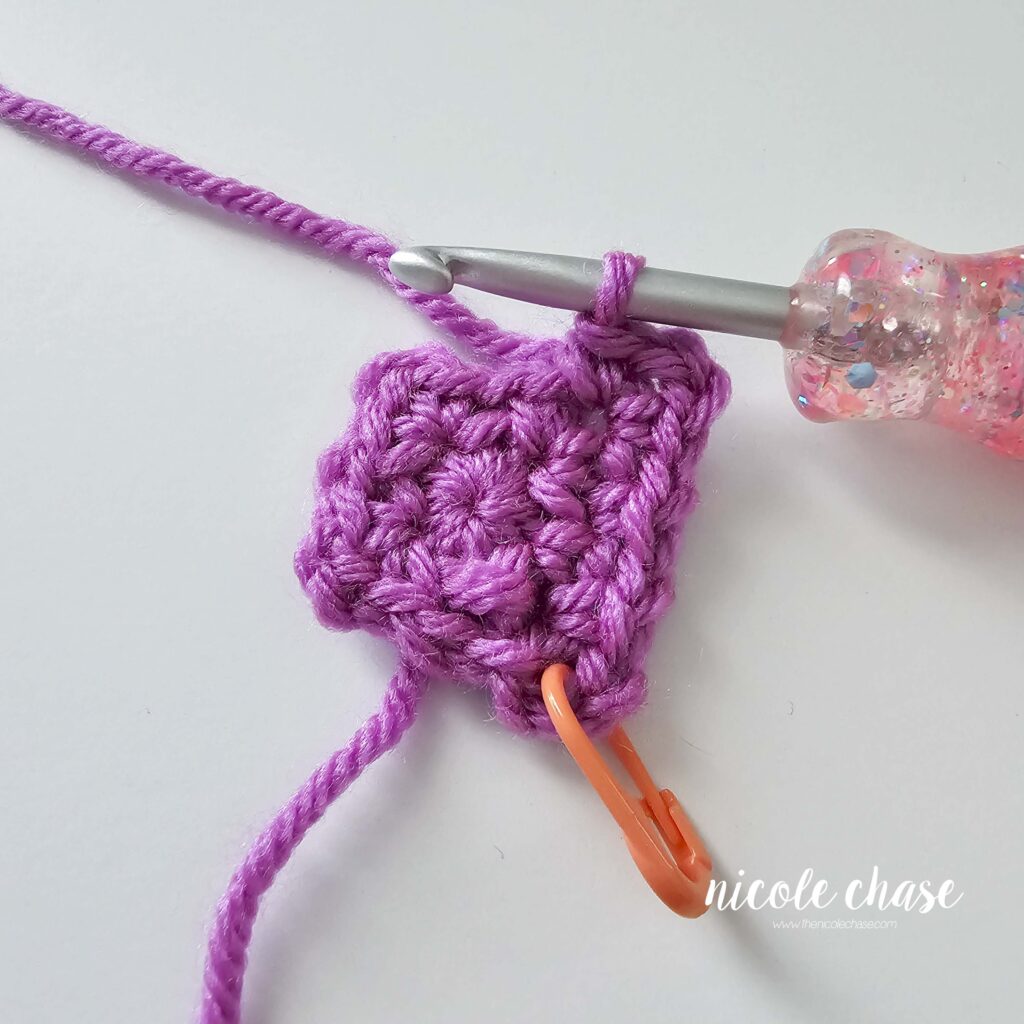
R3: Ch 3, SC into same ch 3 space from previous round (creating first corner), *ch 1, SC + ch 1 in ch 1 space from previous round, [SC, ch 2, SC] in corner space (corner made). Repeat from * an additional 2 times. Ch 1, SC + ch 1 in ch 1 space from previous round. Join with a sl st to beginning ch 3 space. (8 ch 1 spaces, 4 corner spaces)
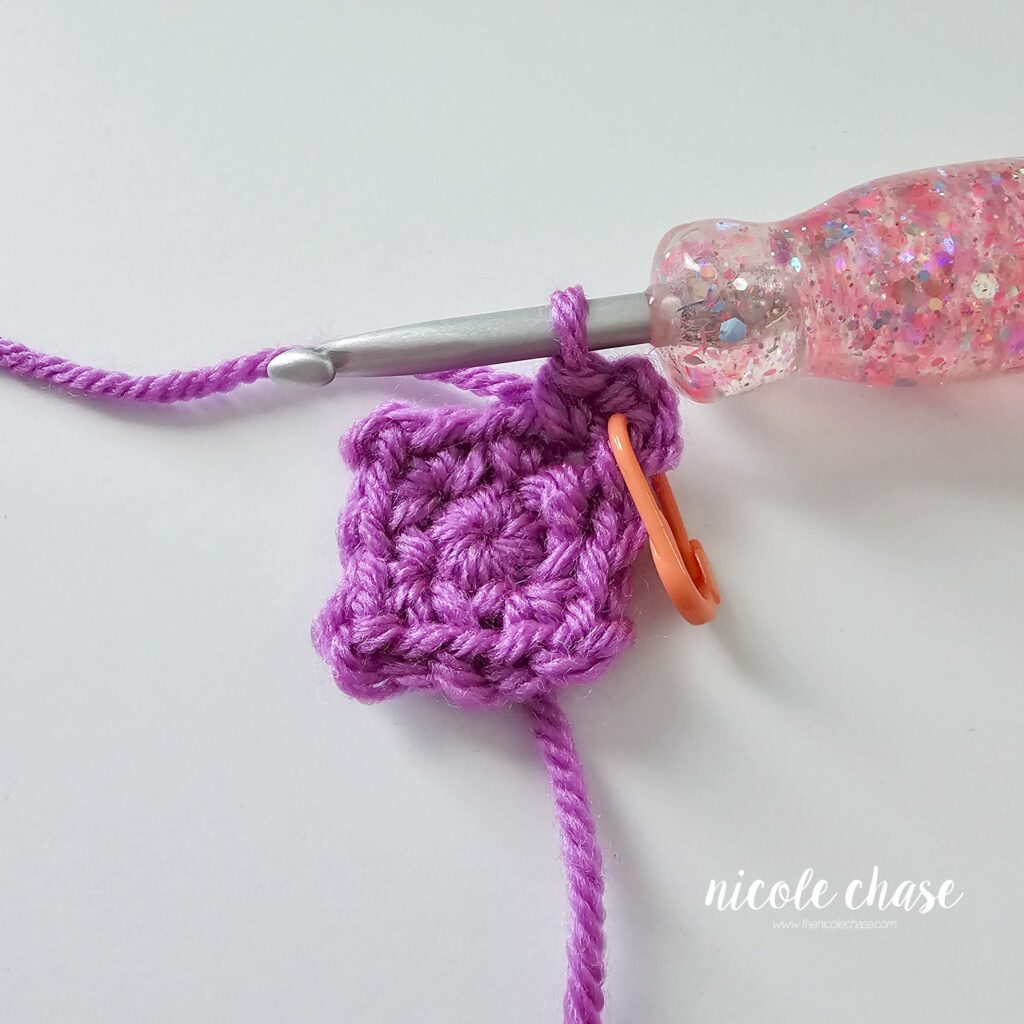
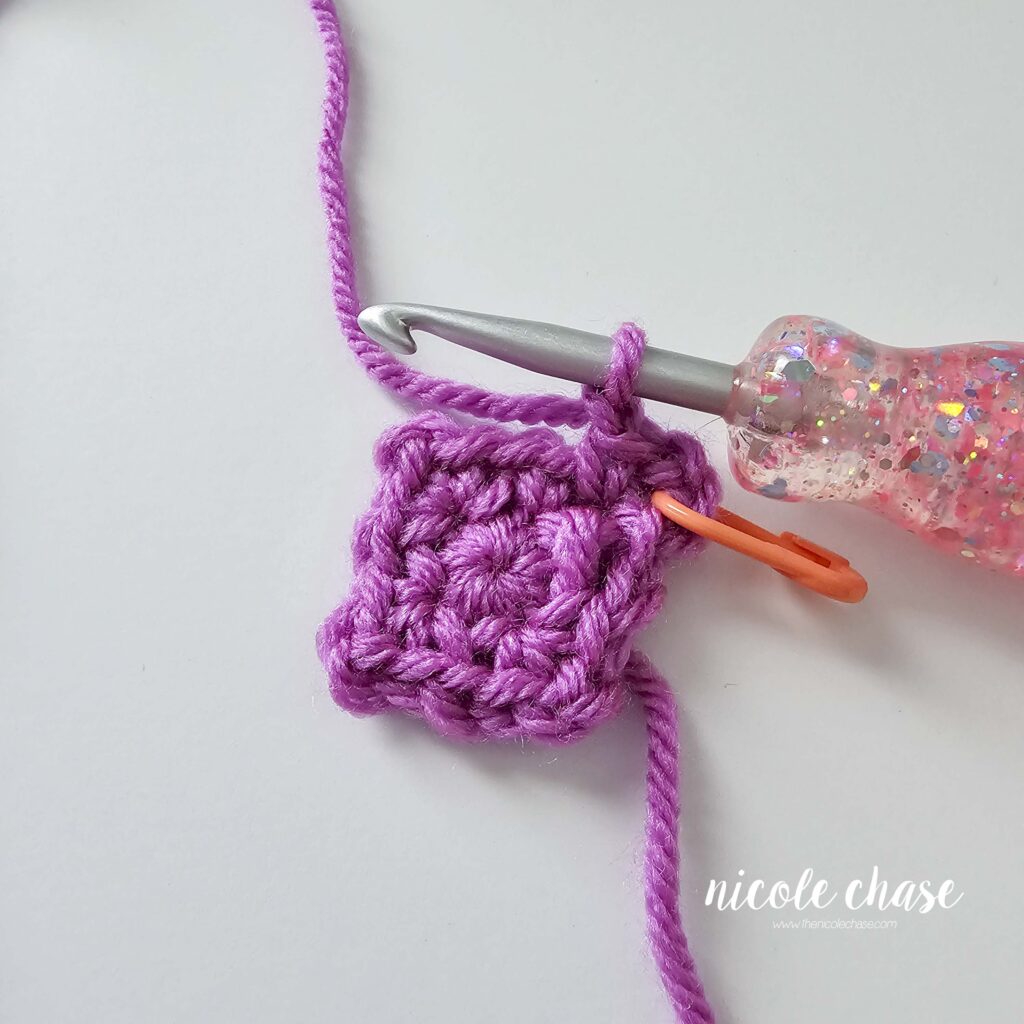
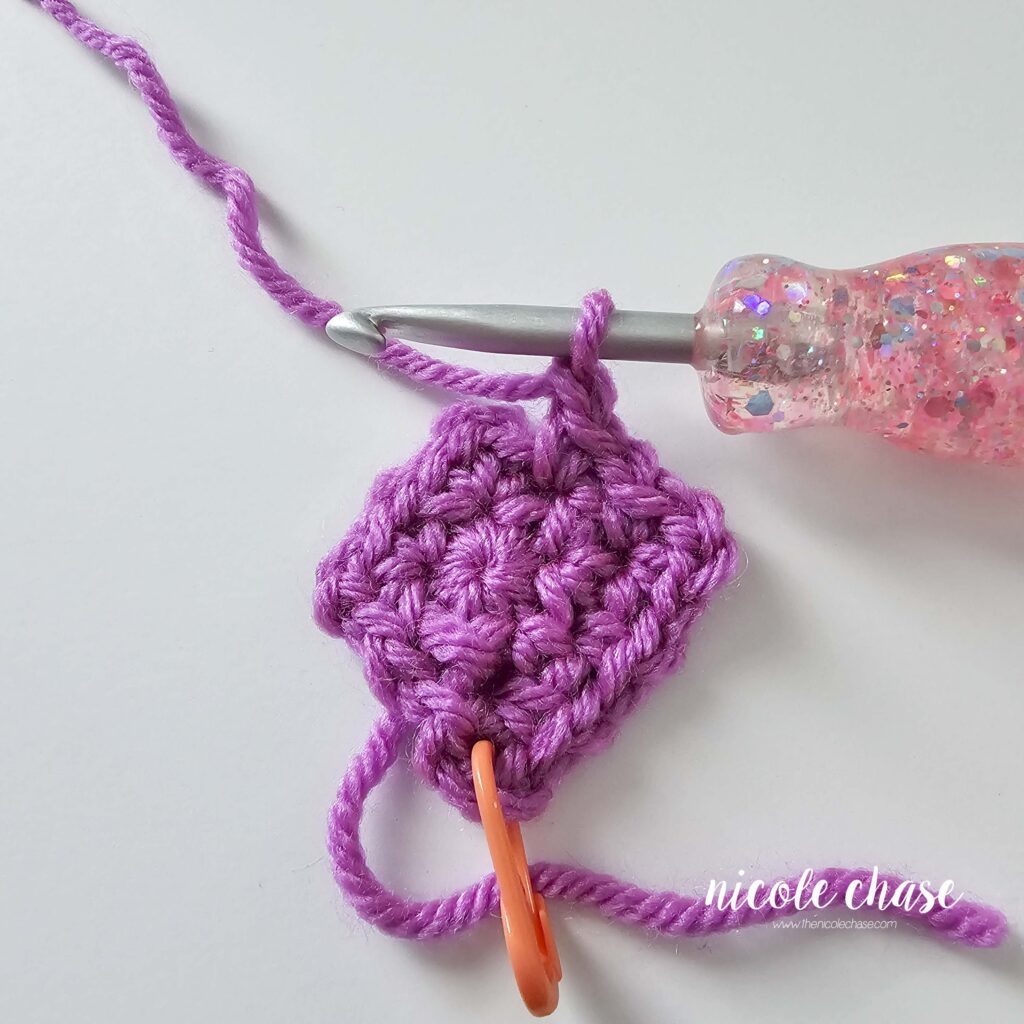
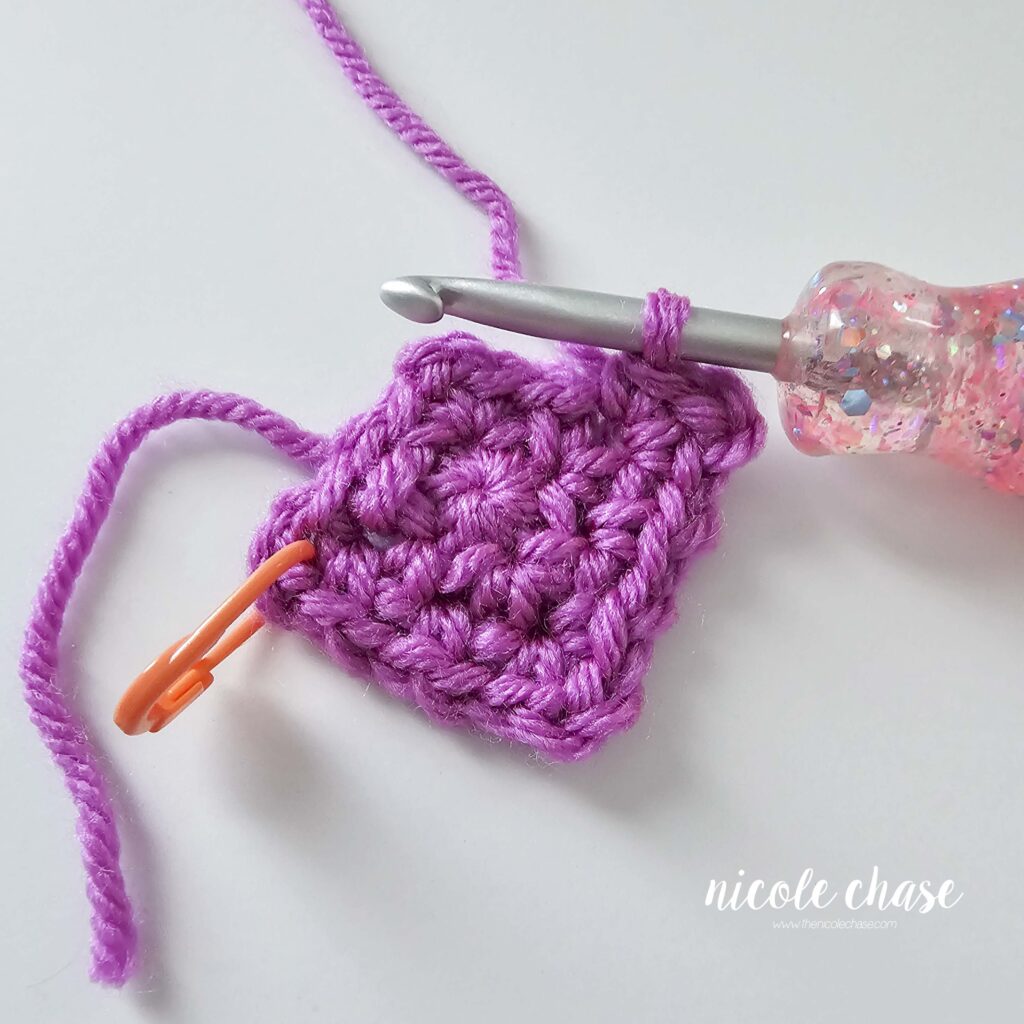
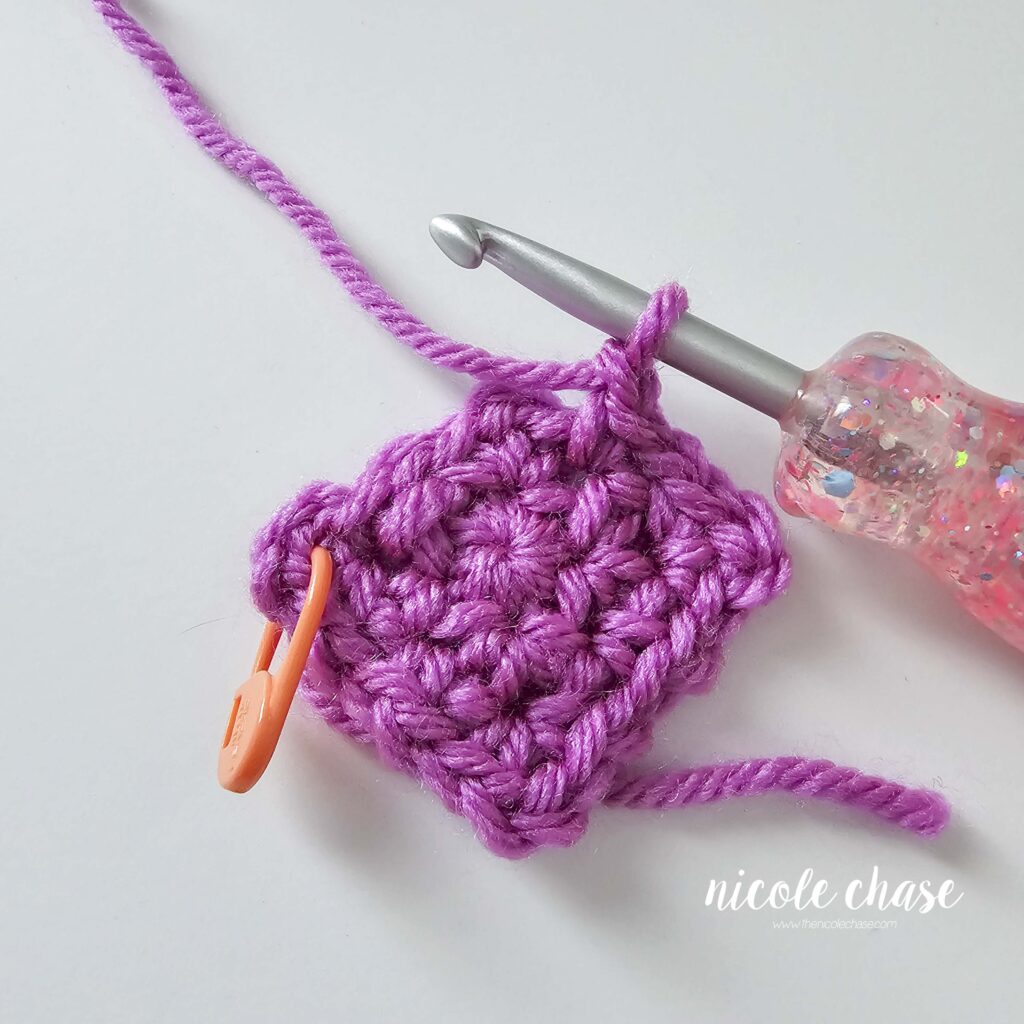
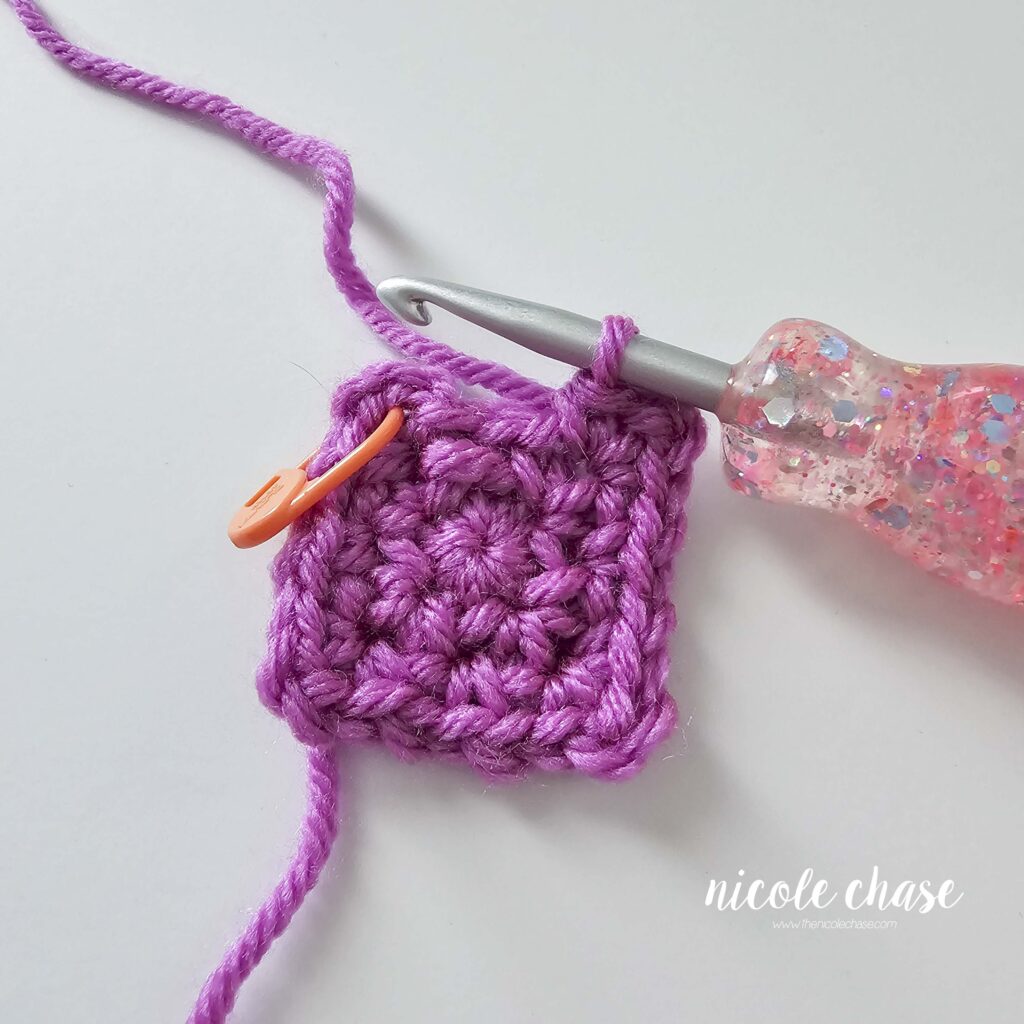
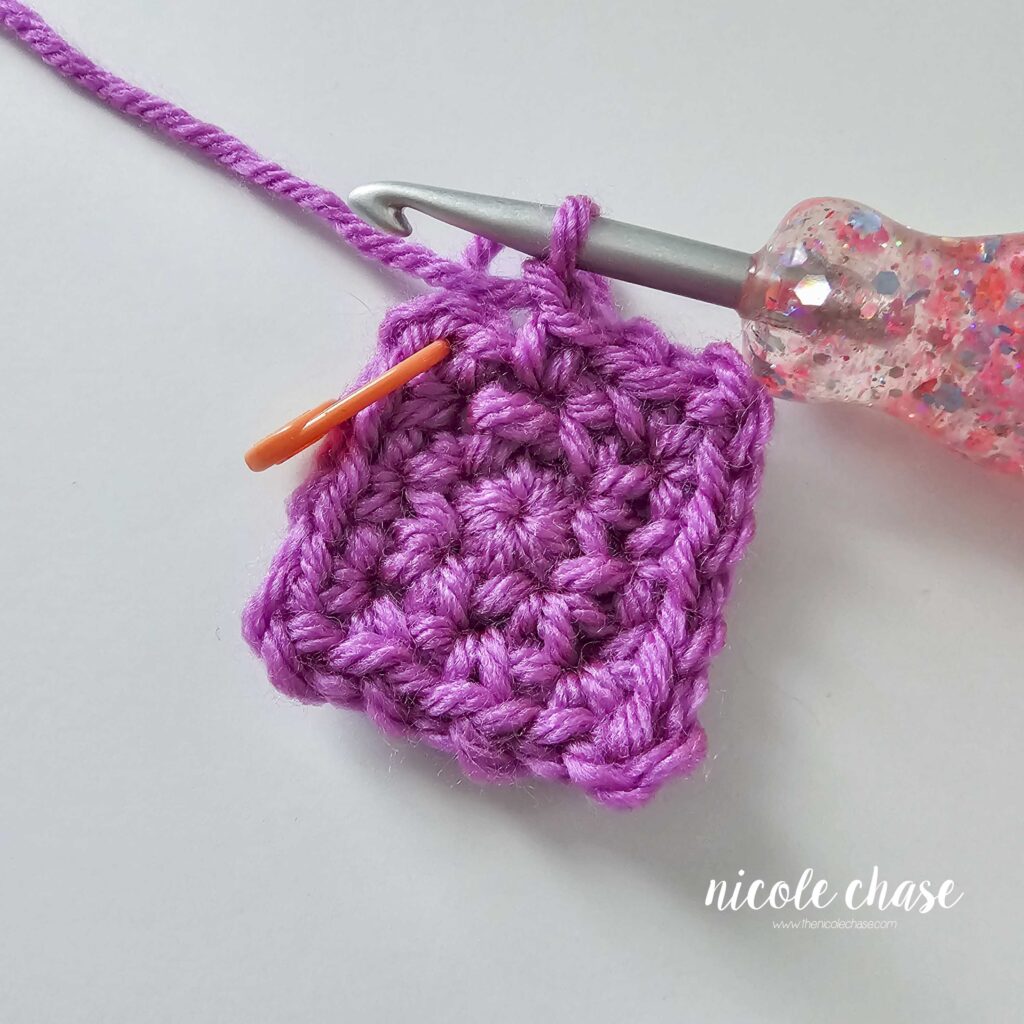
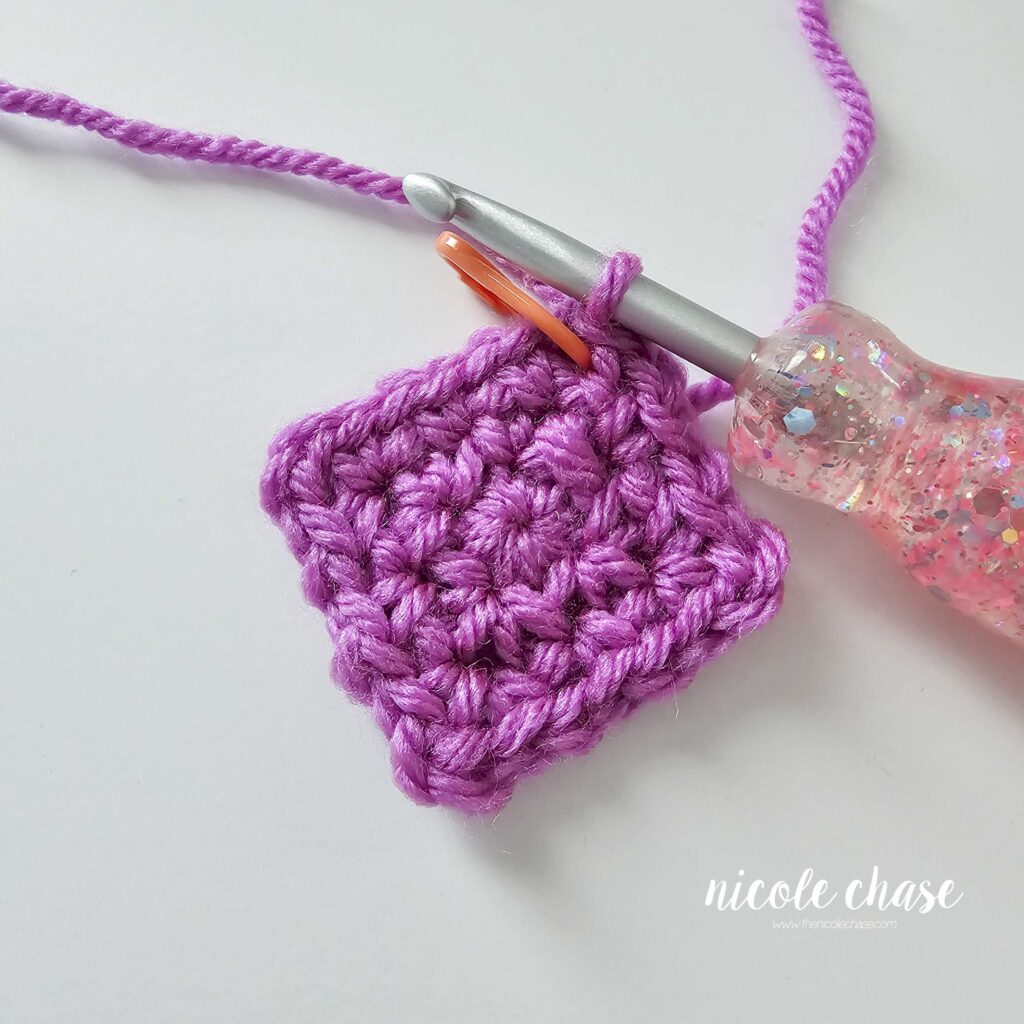
R4: Ch 3, SC into same ch 3 space from previous round (creating first corner), *ch 1, SC + ch 1 in each ch 1 space from previous round to corner, [SC, ch 2, SC] in corner space (corner made). Repeat from * an additional 2 times. Ch 1, SC + ch 1 in each ch 1 space from previous round to beginning. Join with a sl st to beginning ch 3 space.
R5-21: Repeat R4.
Using color B (shown as teal):
R22-24: Repeat R4.
Using color C (shown as purple):
R25-26. Repeat R4.
Fasten off. Weave in ends.
Assembly & Finishing
See tutorial photos.
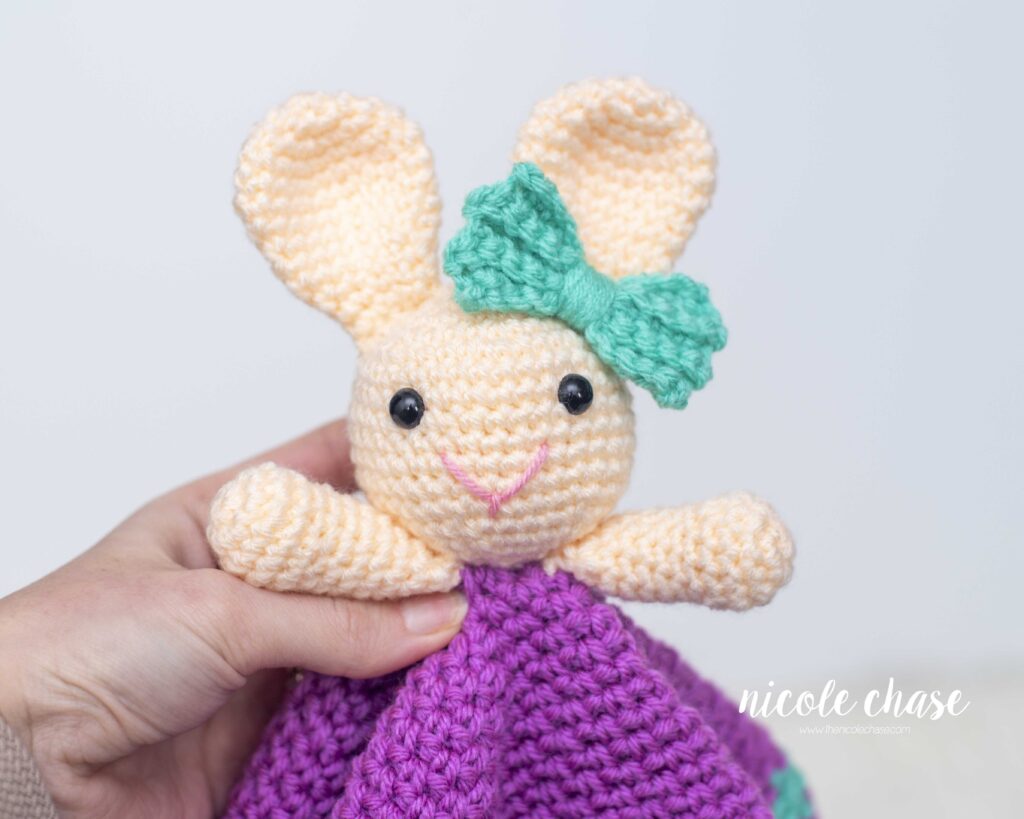
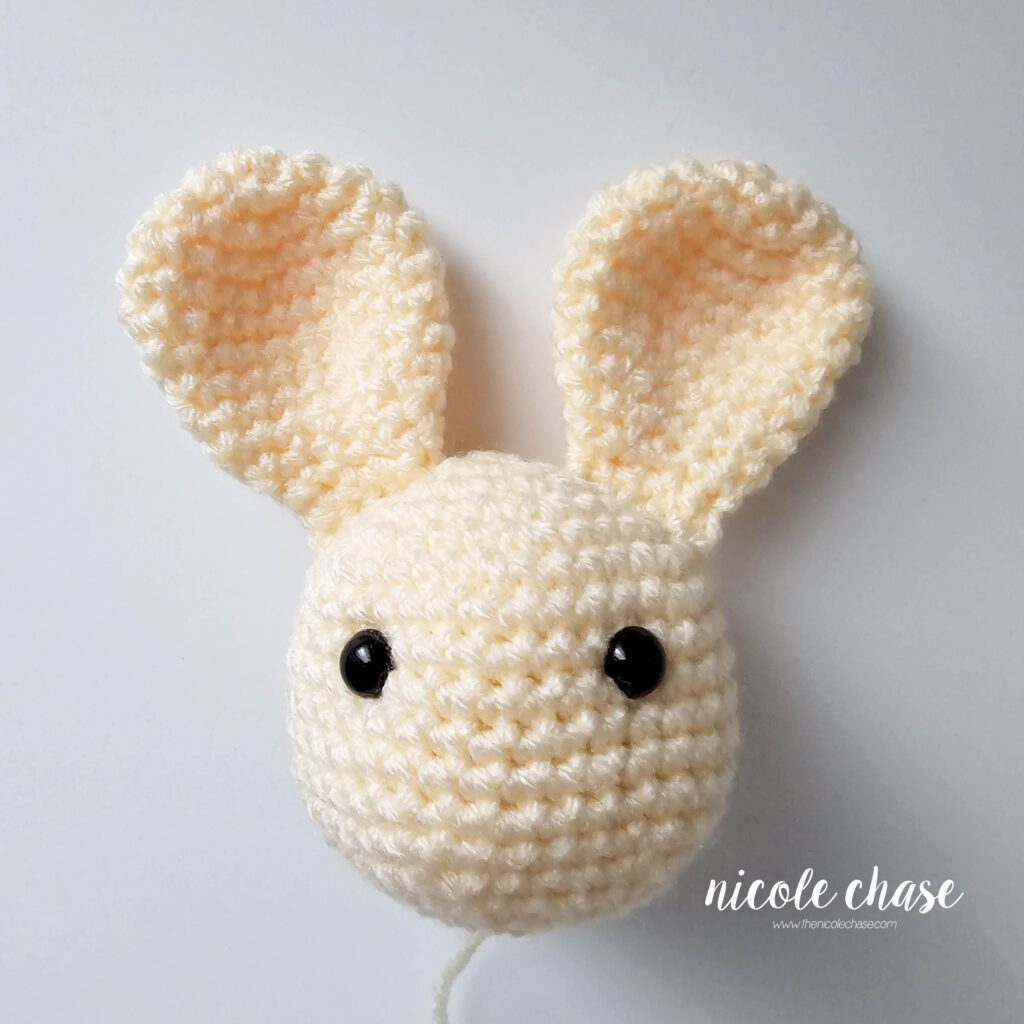
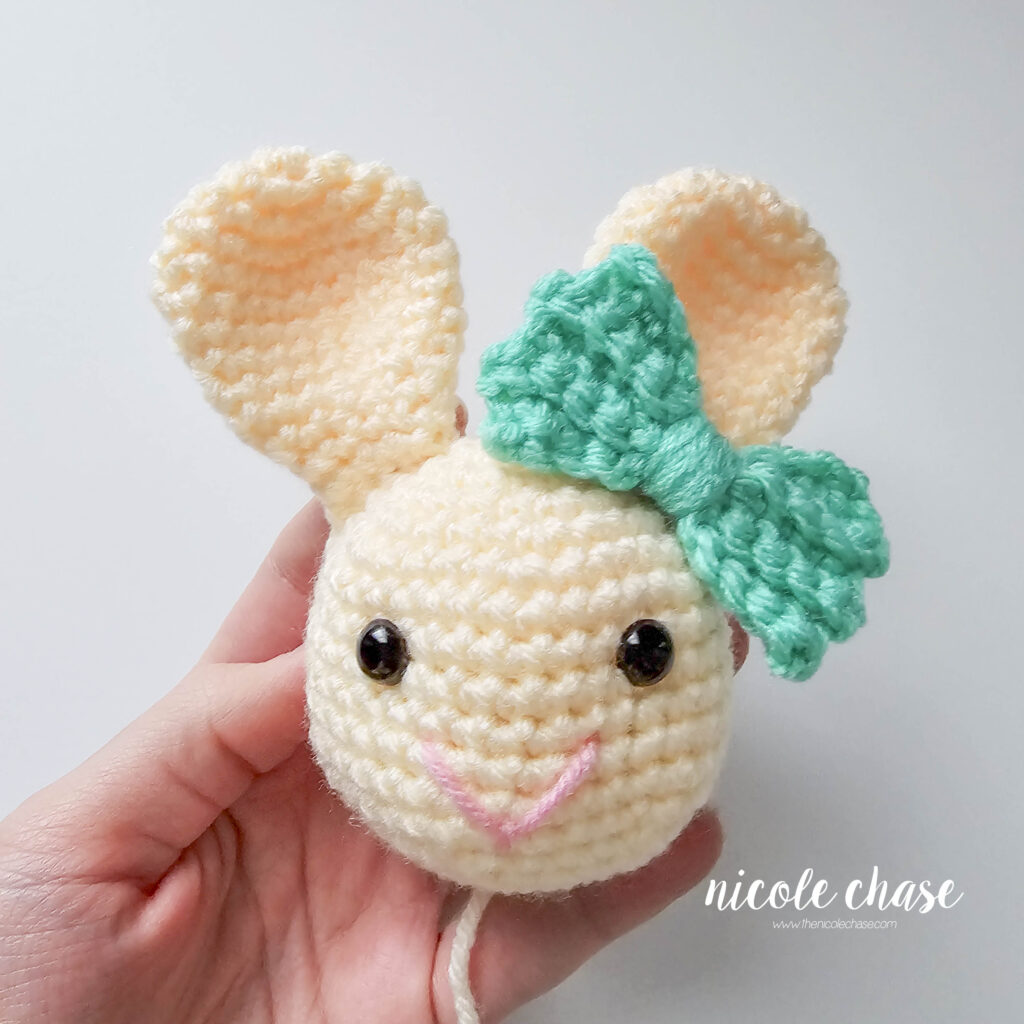
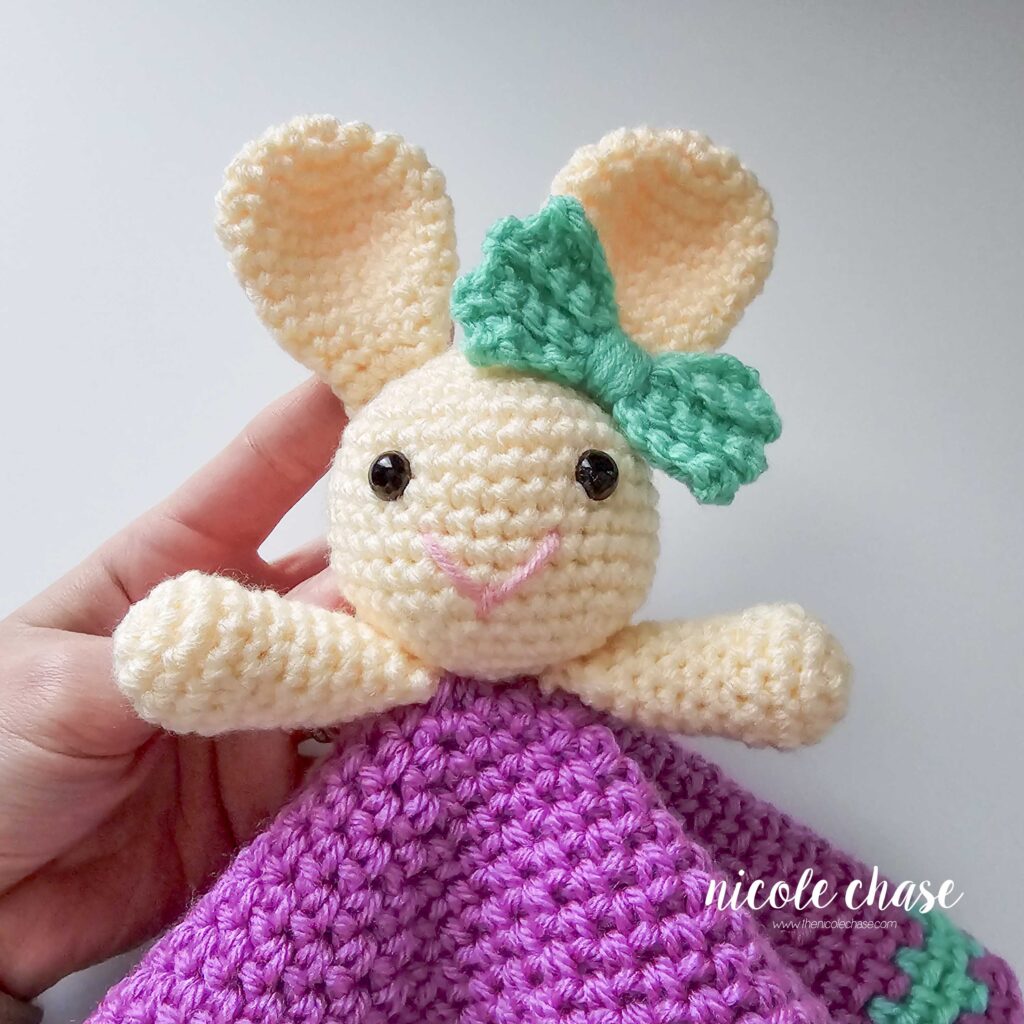
Attach each ear to either side of the top of the head, over R3-6.
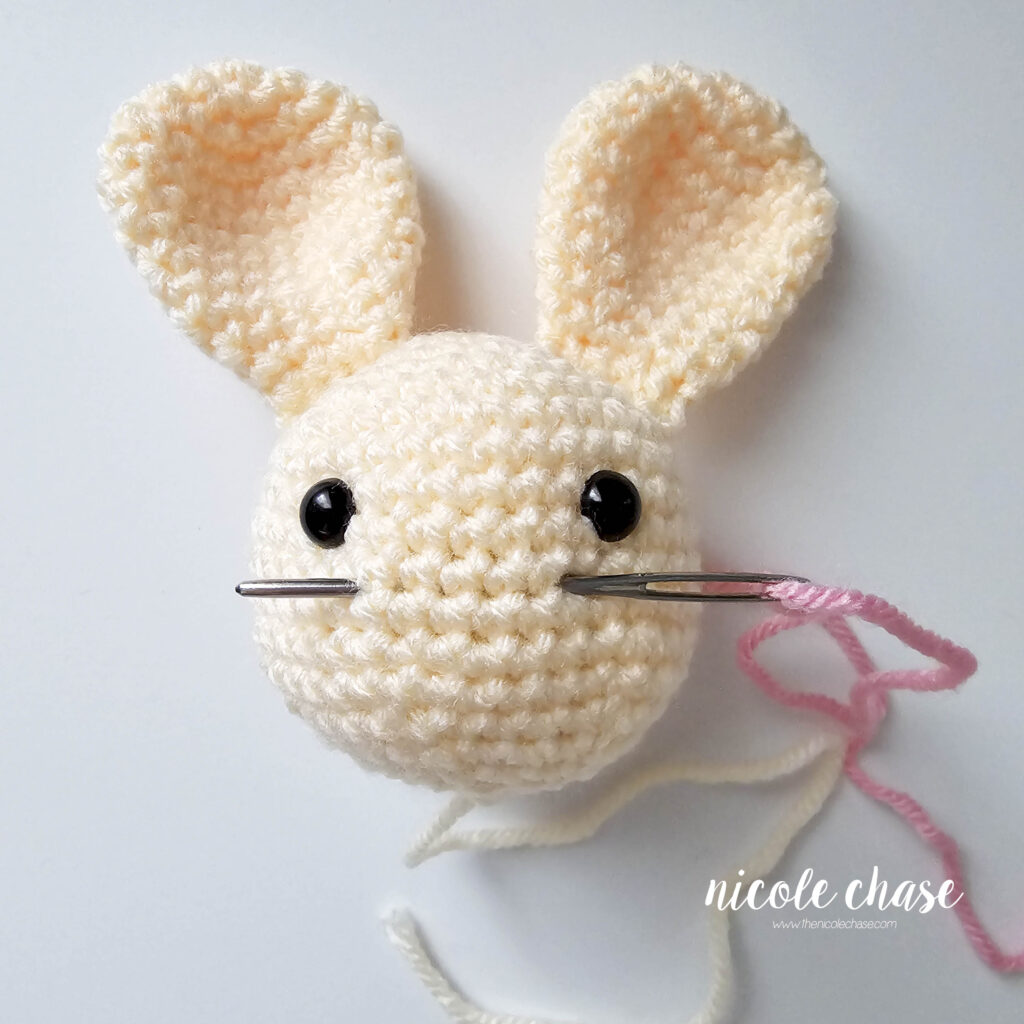
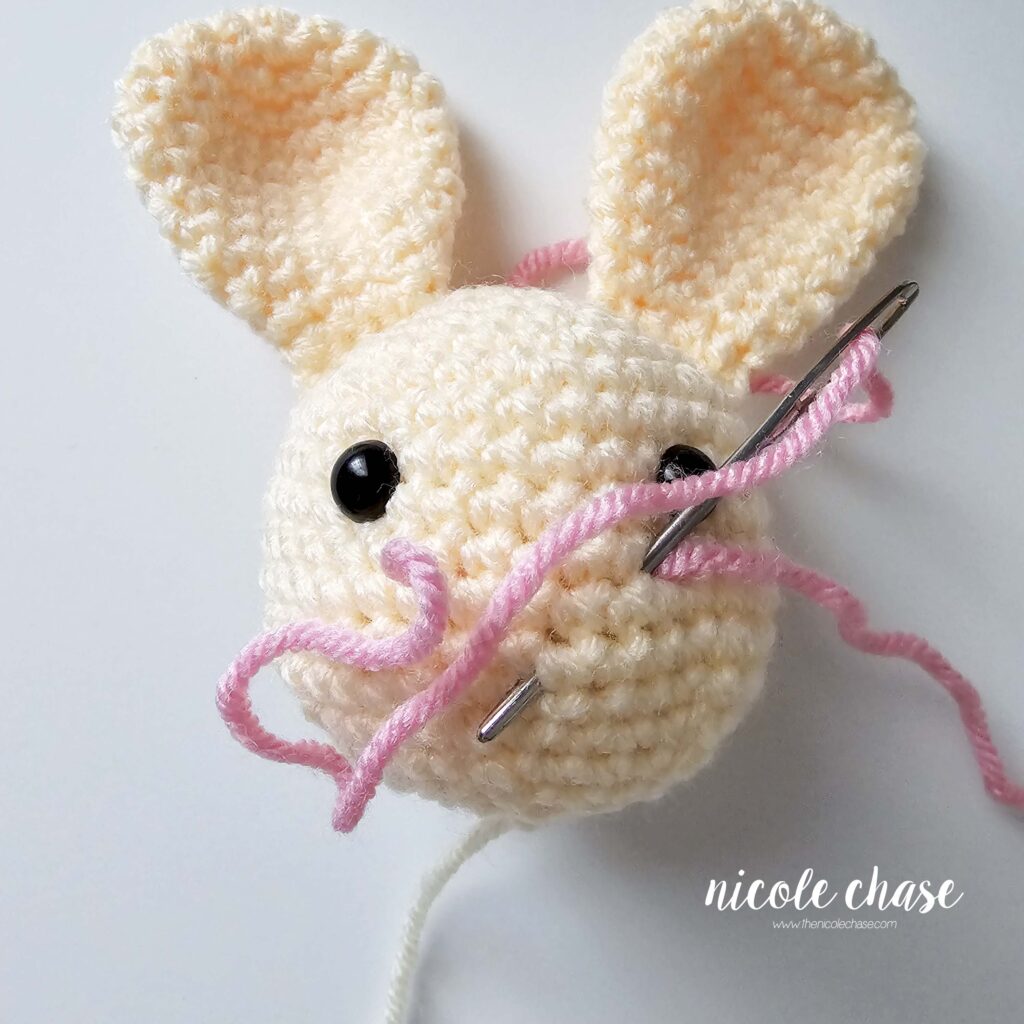
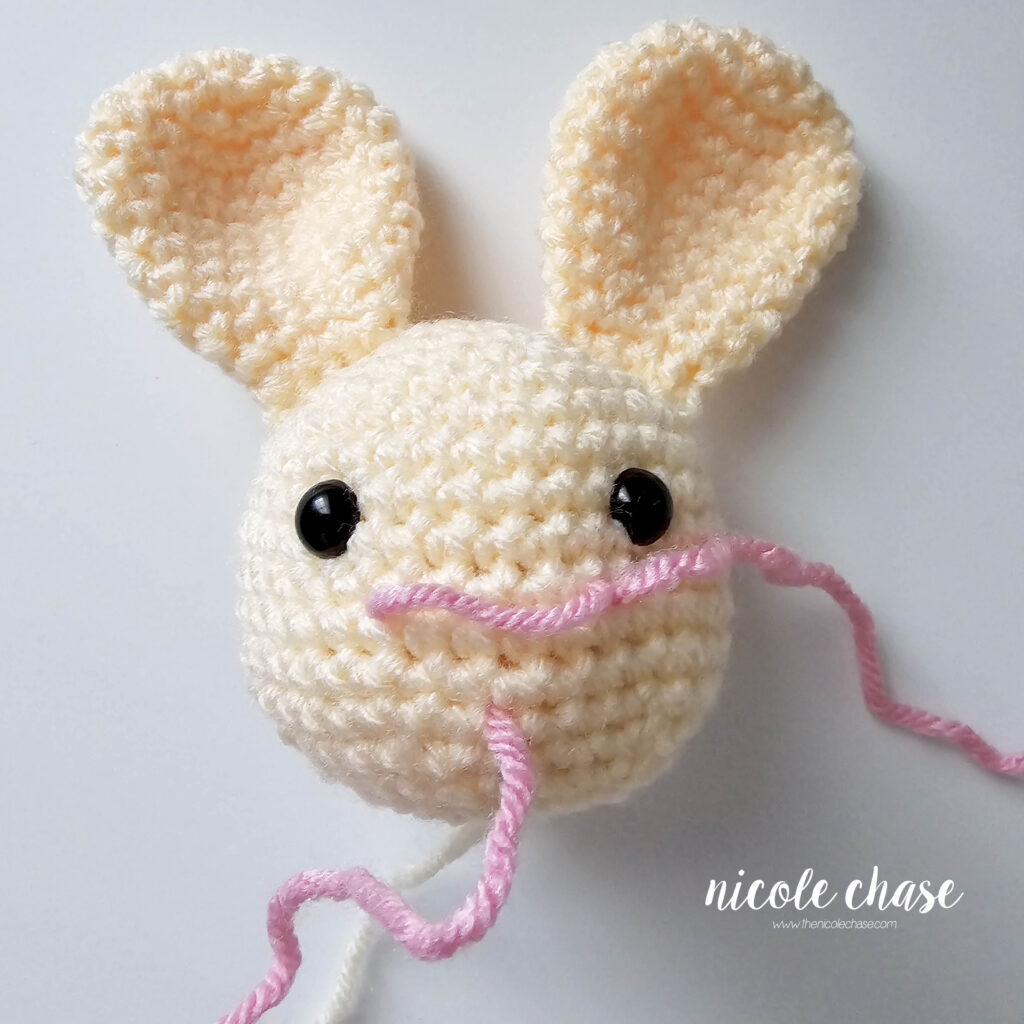
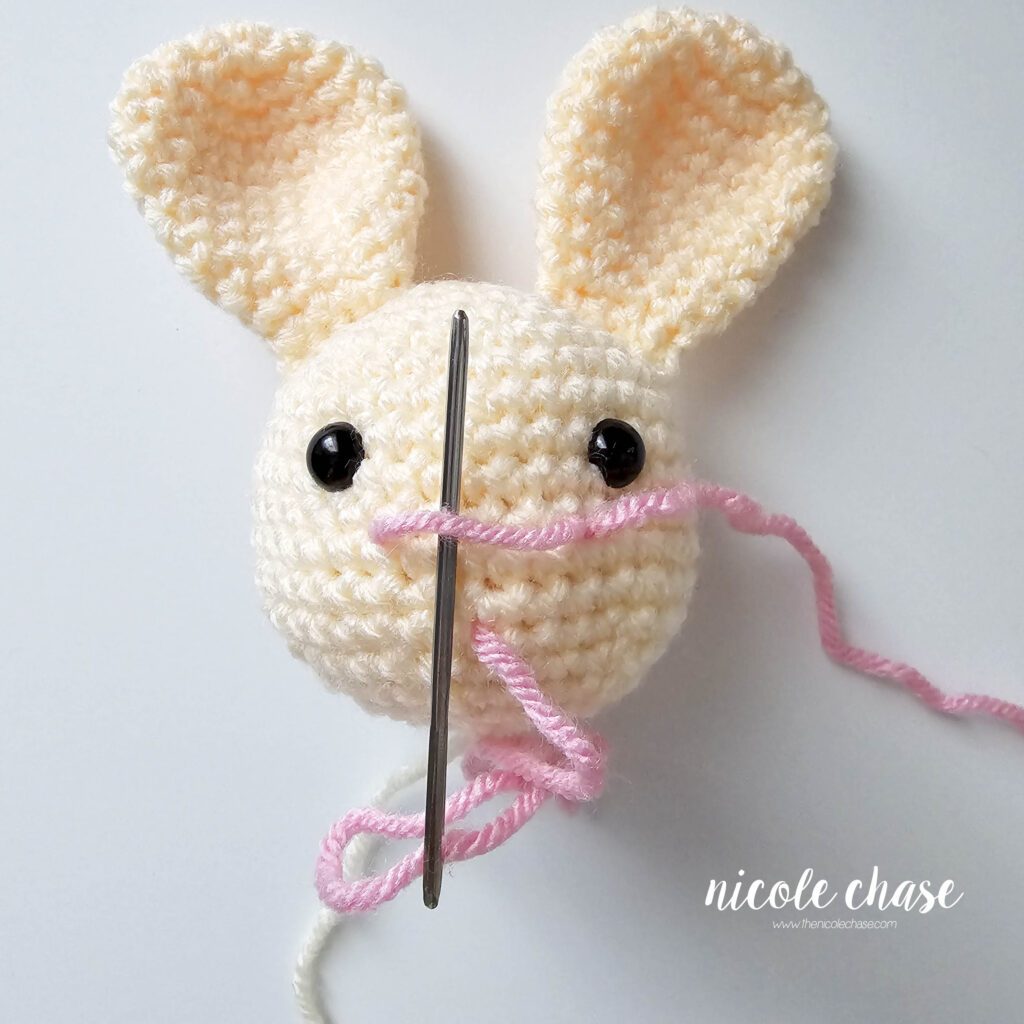
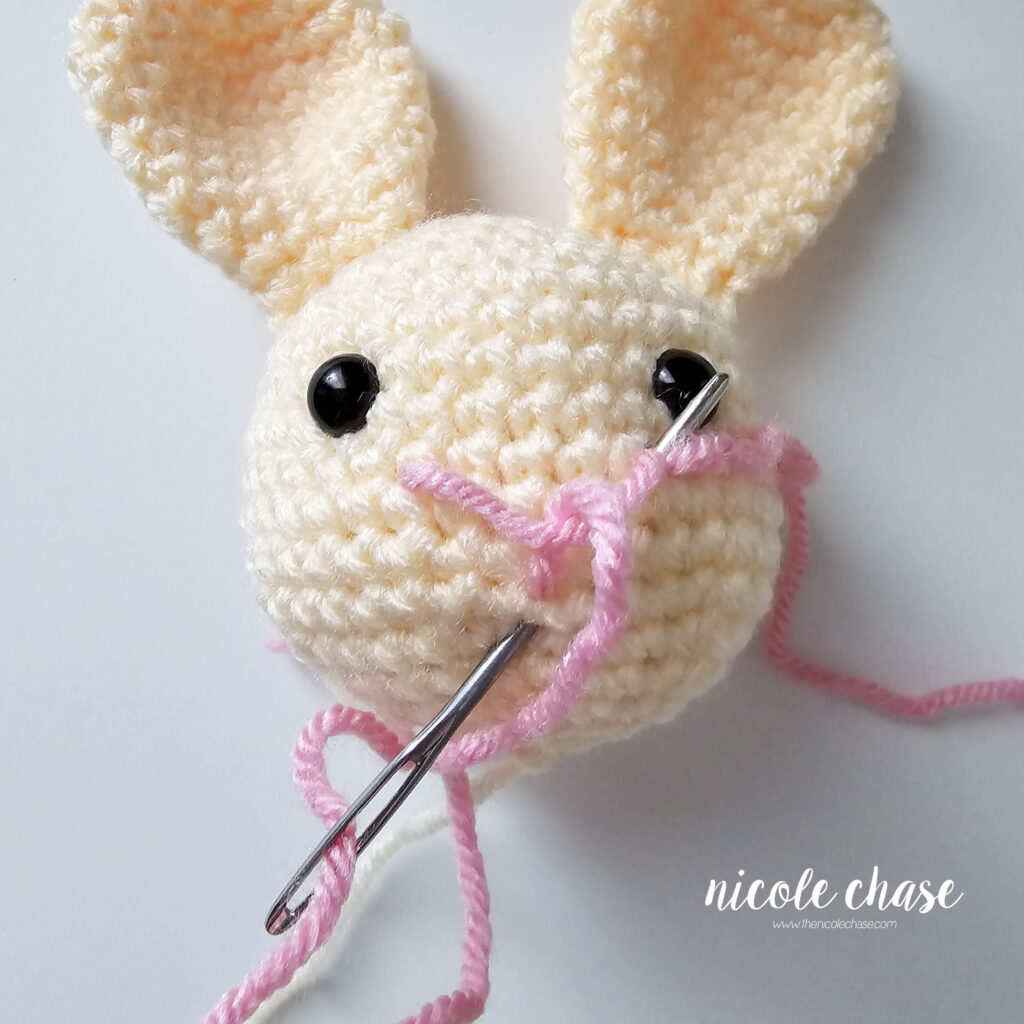
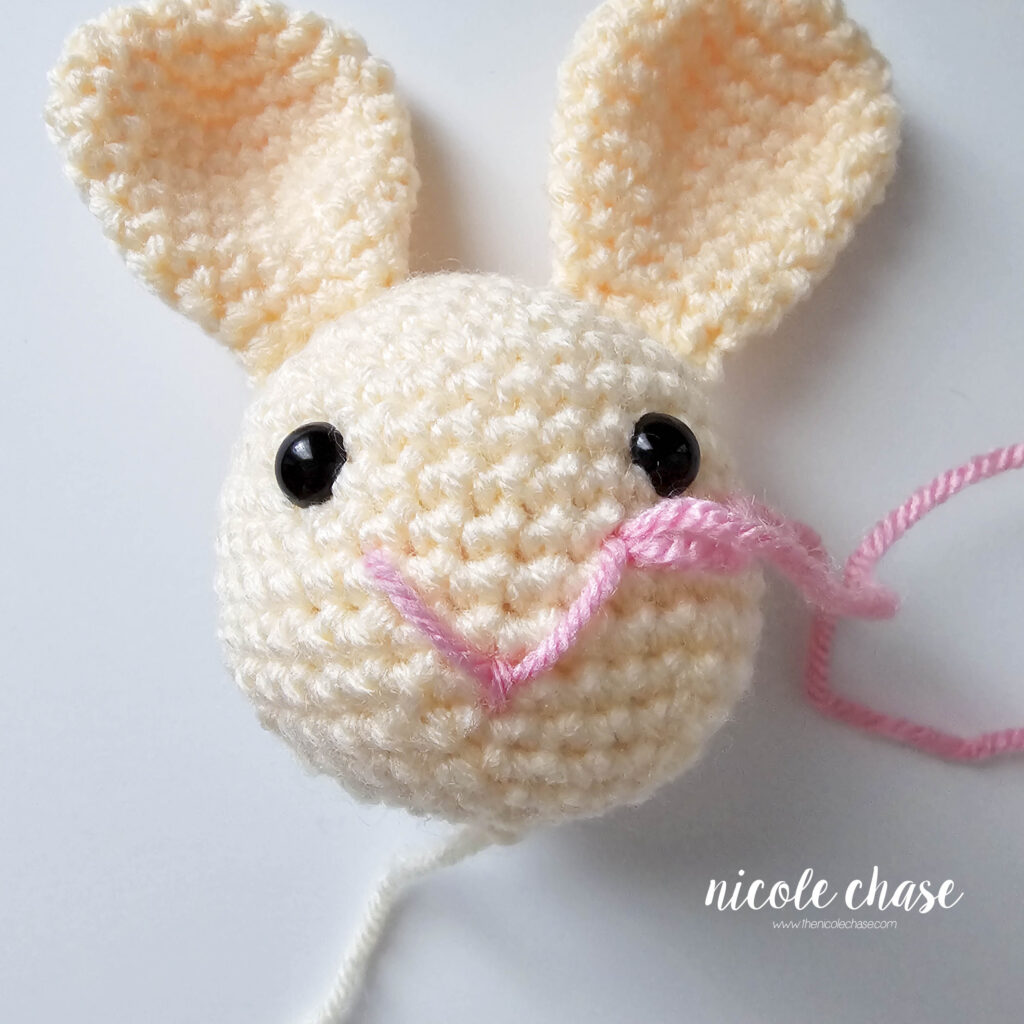
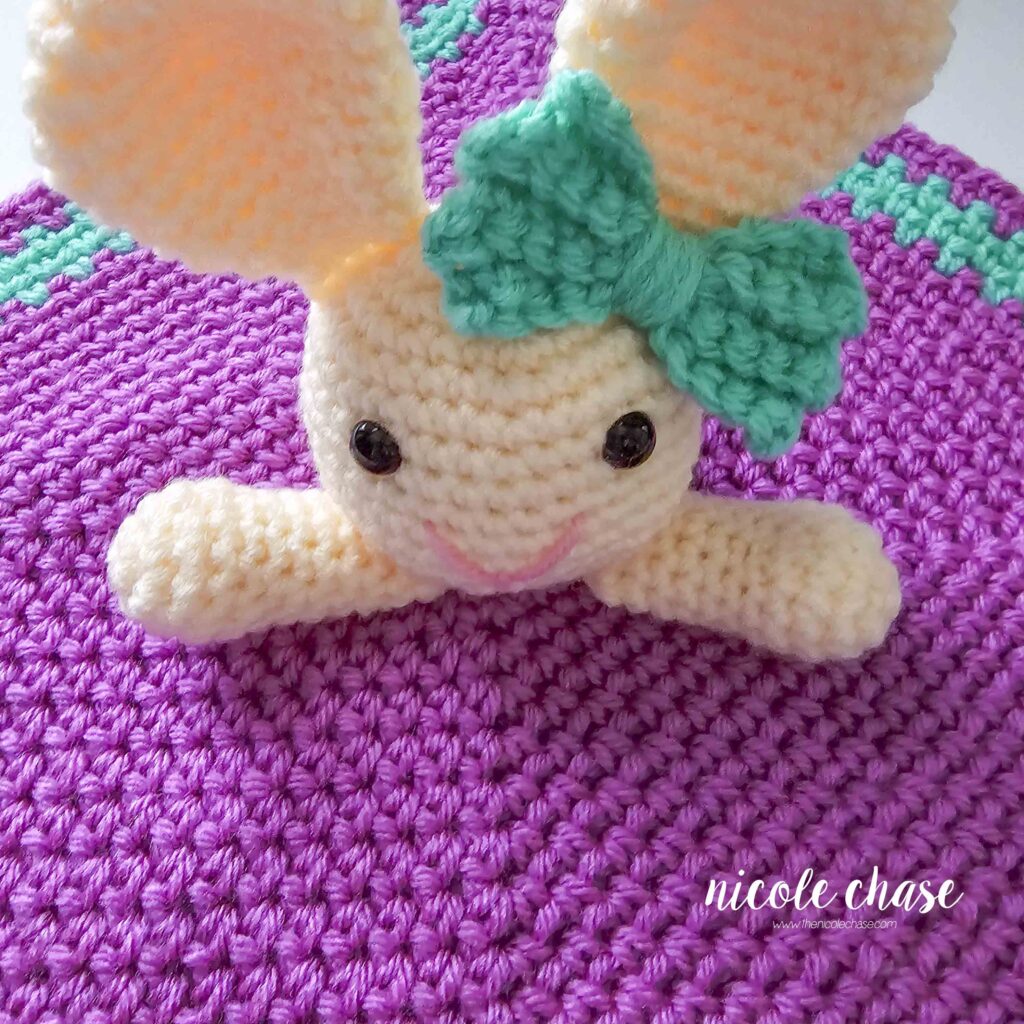
Using pink yarn, embroider a nose in the shape of a Y with the tips between R10-11, centered between the eyes, with approximately 4 sts between, dipping down over 2 rows, with a small line down for the post, over 1 row.

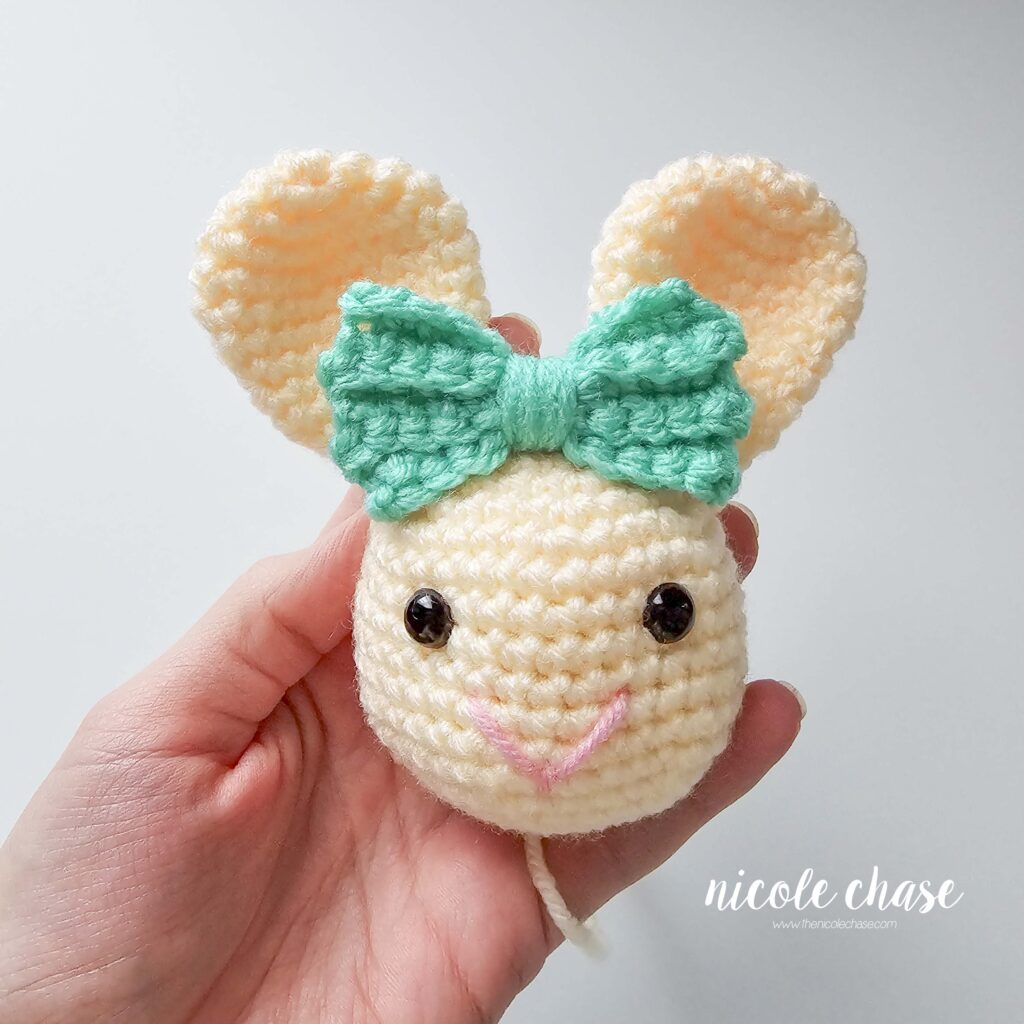
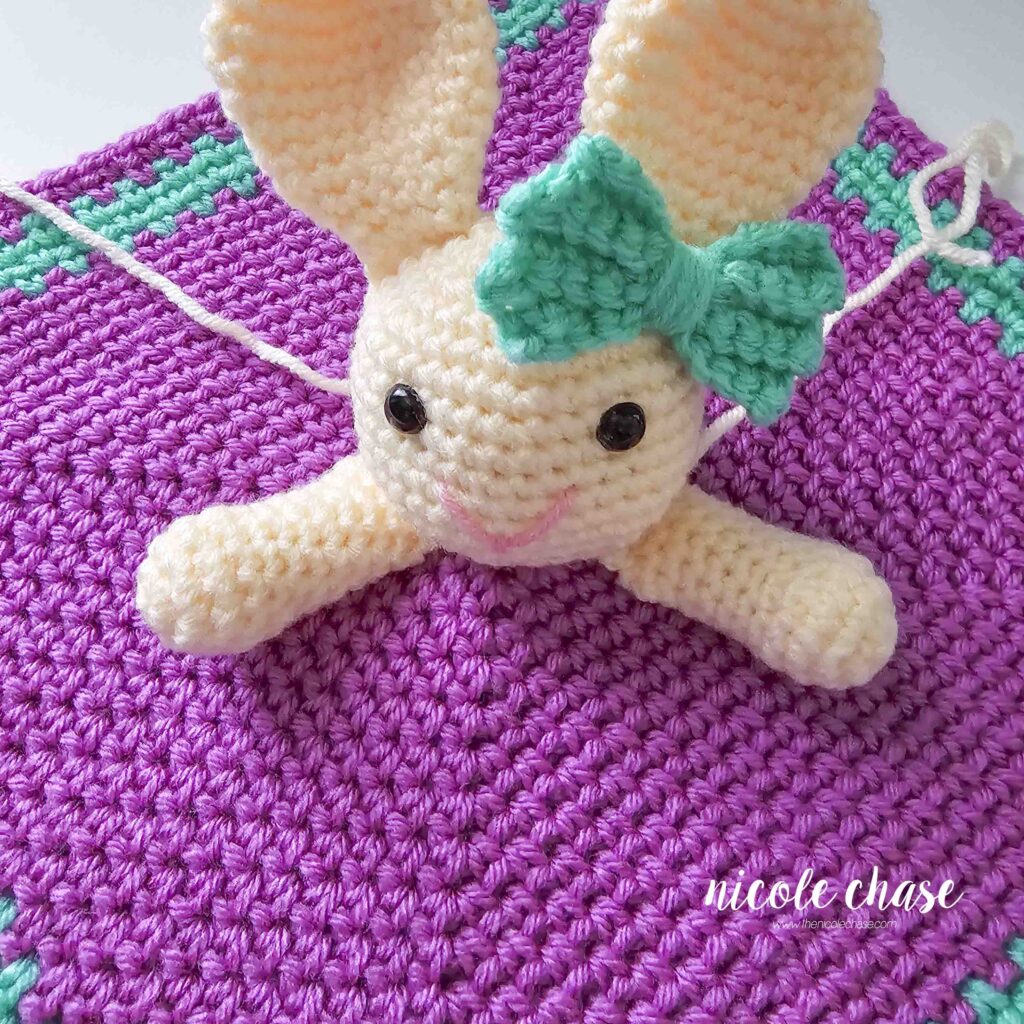
For a more feminine bunny, attach the bow on the top of the head, either in front of one ear, or centered between the ears.
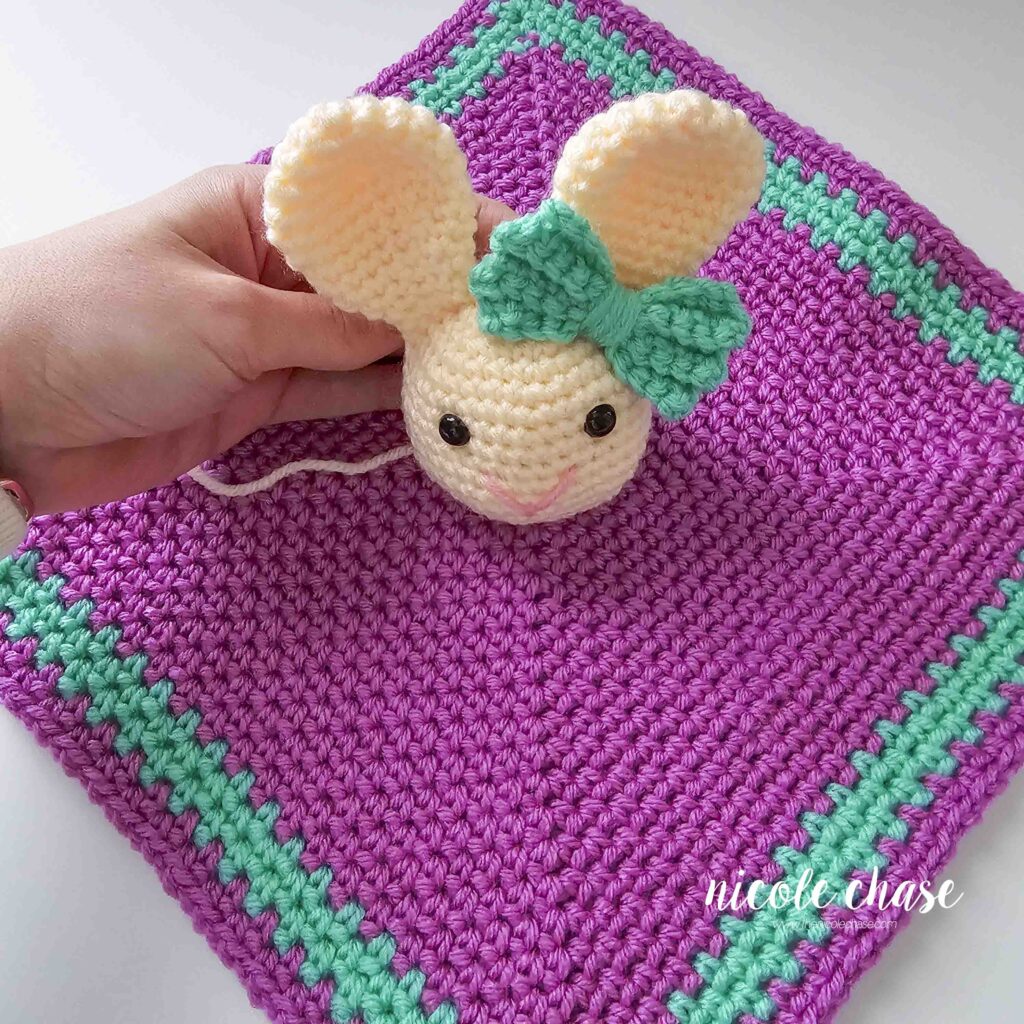
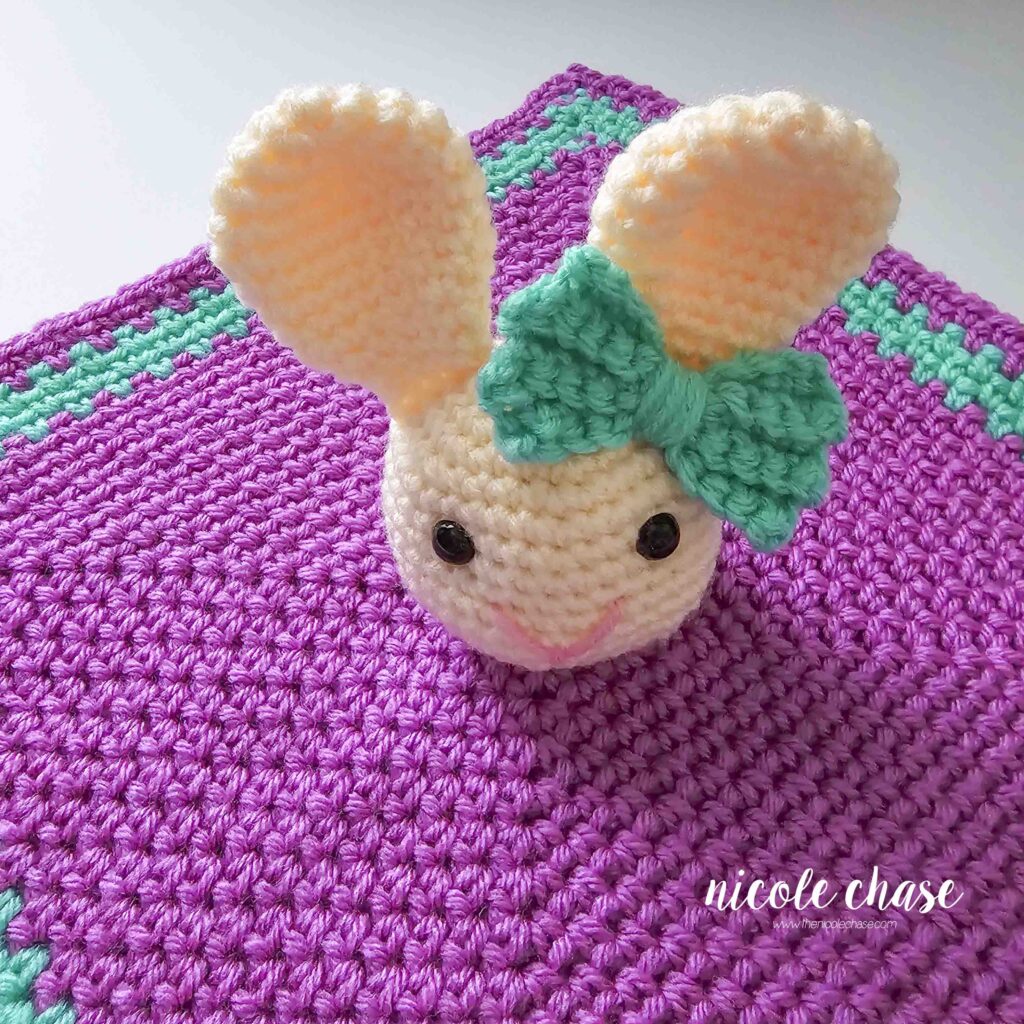
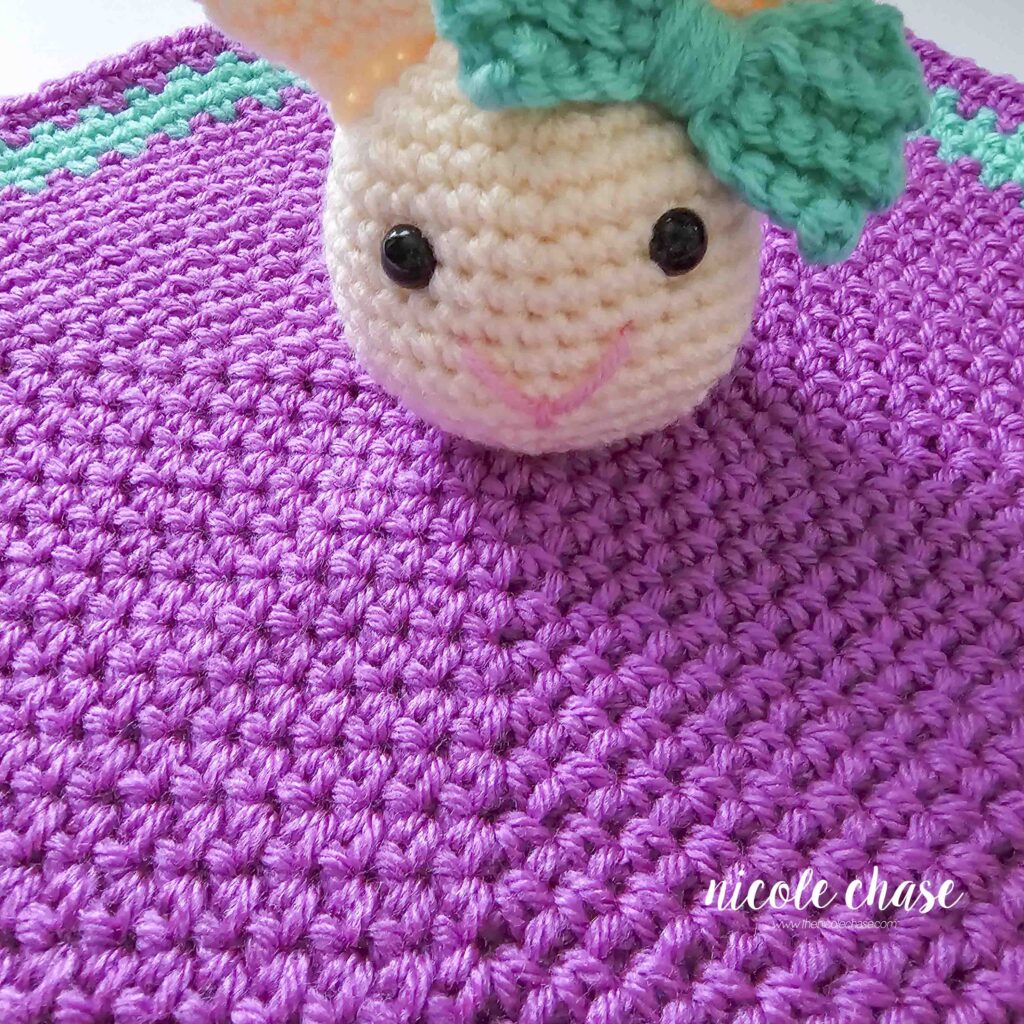
Angling the blanket to be in a diamond shape rather than a square, attach head to the middle of the blanket. Be sure to sew to the top loops of the blanket only to ensure a clean underside of the blanket.
For a more masculine bunny, attach the bow below the head as a bow tie.
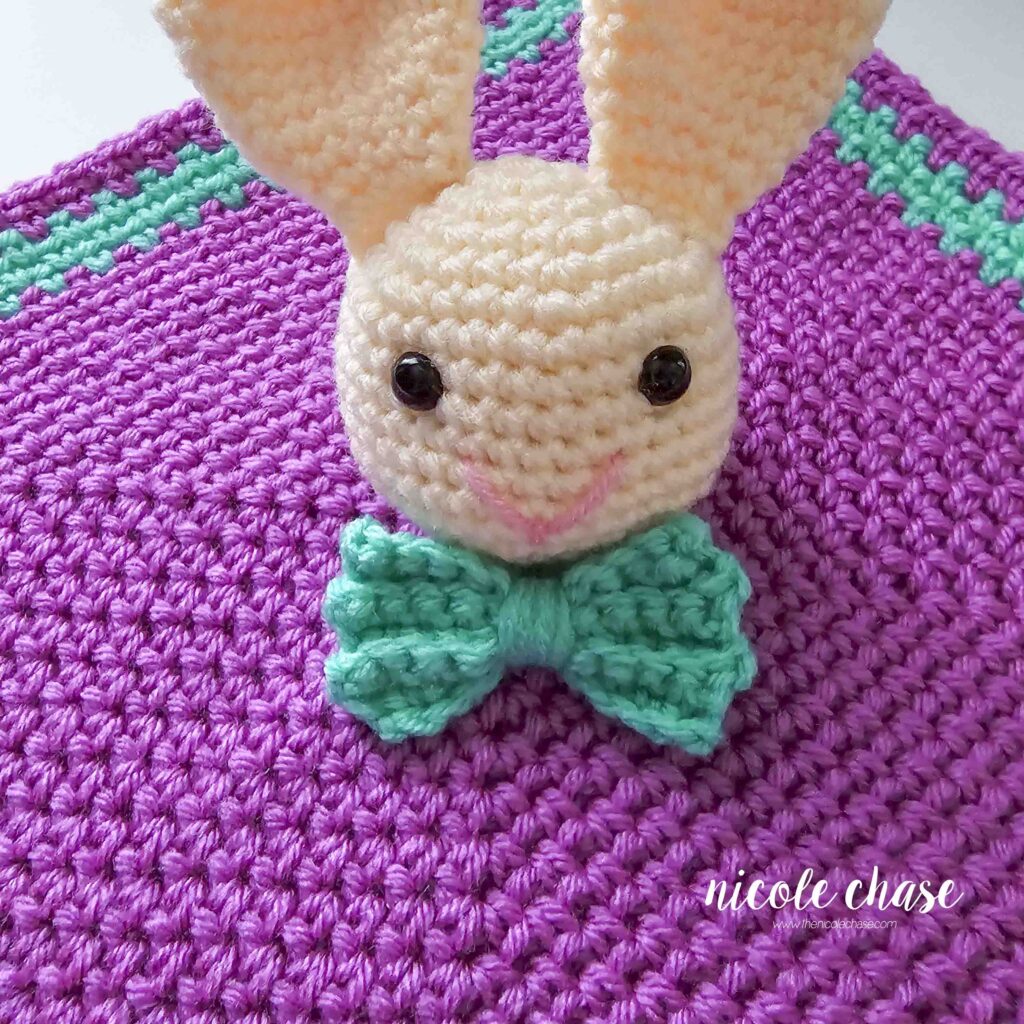
Attach arms to the blanket on either side of the head, facing towards the front, close enough that they appear to be connected to the head.
I hope you enjoyed making the Hug Me Bunny Lovey! This free bunny lovey crochet pattern is one of my favorite designs for gifting. If you are ready for your next project, or want to see more from this series, check out my full collection of free crochet lovey patterns!


Ad-Free PDF Pattern for Hug Me Bunny Lovey
Pro Tips for Crocheting Loveys
- Choosing the Best Yarn: When selecting yarn for your crochet bunny lovey, choose a fiber that can withstand frequent washing. I typically lean towards high-quality acrylics for amigurumi and crochet bunny comforters because they hold their shape. My personal favorite is Brava because it stays soft even after multiple trips through the wash.
- Uniform Stitches: Use the invisible decrease technique for your SC2tog stitches in this bunny lovey crochet pattern. This prevents small gaps in the fabric and ensures your decreases blend perfectly with your standard single crochet stitches.
- Assembly Perfection: Using pins while assembling your rabbit lovey crochet pattern is a game changer! It keeps the head and ears in place while you sew, ensuring your bunny doesn’t end up lopsided.
Customizing Your Hug Me Bunny Lovey
- Adjusting the Blanket Size: Creating a larger blanket on this free bunny lovey crochet pattern is simple. Just add additional rows following the same pattern until you reach your desired length.
- Safety for Infants: If you are creating this crochet bunny lovey as a toy for children ages 3 and under, please use an alternative to plastic safety eyes. Embroidered “sleepy eyes” or simple yarn knots are much safter for babies and look incredibly cute!
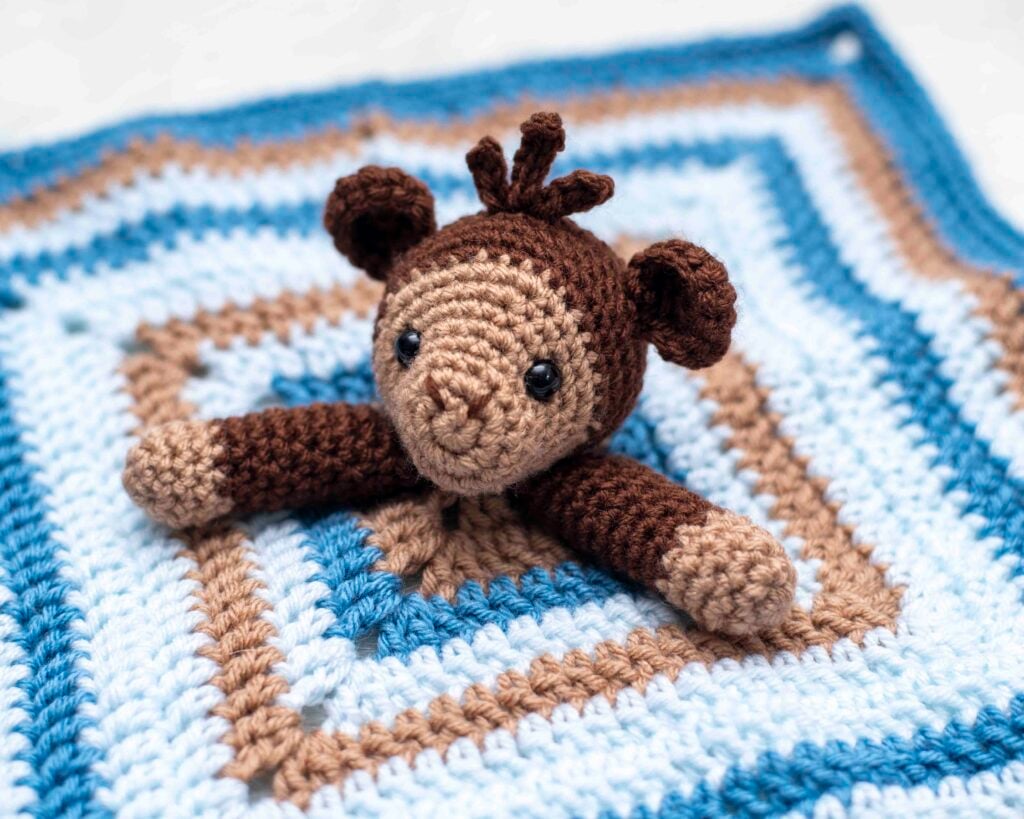
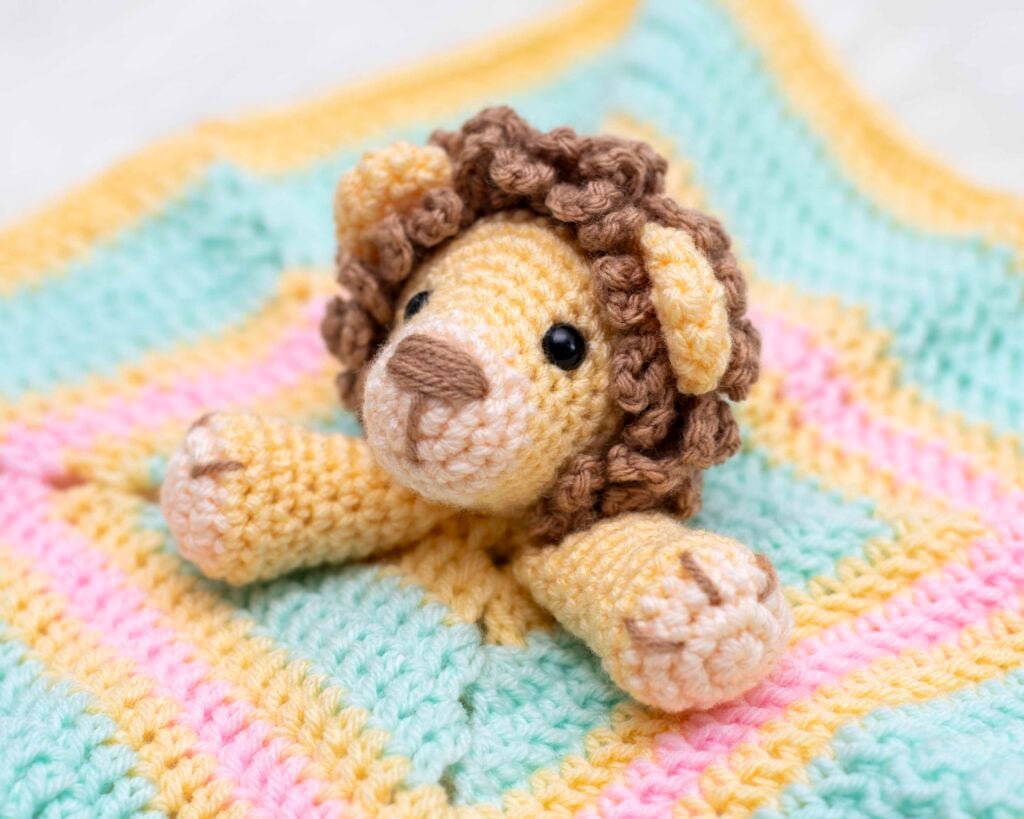
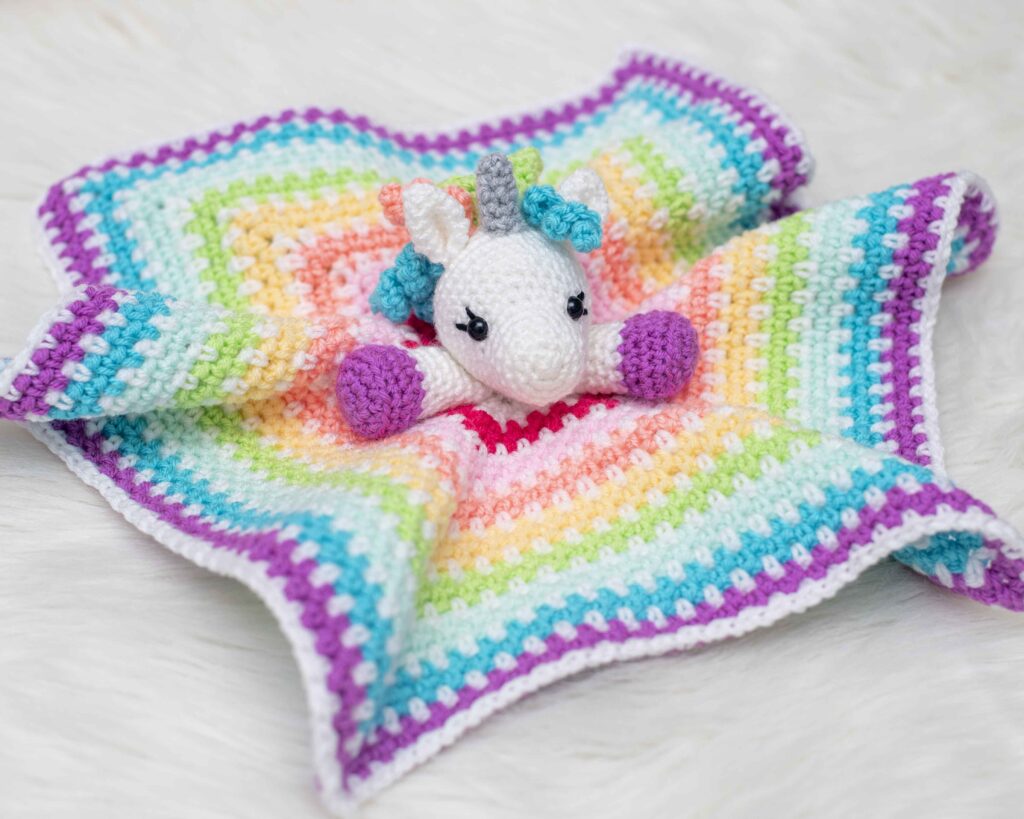
- Mix and Match Your Lovey: One of the best things about my “Hug Me” lovey series is the versatility! You can easily swap the bunny head and arms from this pattern and pair them with the blanket design from my Hug Me Lion Lovey or Hug Me Giraffe Lovey for a completely custom look.
Frequently Asked Questions (FAQ)
How do I wash my Crochet Bunny Lovey?
To keep your bunny baby lovey clean and safe, always check the care instructions on your specific yarn label first. I recommend choosing a yarn suited for frequent washes, like a high-quality acrylic or cotton blend. For the best results, place the lovey in a mesh laundry bag and machine wash on a cold, delicate cycle, then reshape and air dry.
What is the Best Yarn for a Baby Lovey?
The best yarn for a a crochet baby lovey is one that is soft against a baby’s skin but durable enough to be laundered often. I love Brava yarn for baby items.
Can I make the Blanket Portion Larger?
Yes! You can easily customize this free bunny lovey crochet pattern by adding additional rounds to the blanket section until you reach your desired size. Note that a larger blanket will require more yarn than listed in the materials section.
Is this Pattern Safe for Newborns?
While this design is intended for babies, safety is the top priority. If gifting to a child under three, I recommend using embroidered eyes instead of plastic safety eyes to eliminate any potential choking hazards.
More Free Crochet Patterns
I hope you enjoyed this free bunny lovey crochet pattern! If you’re looking for more inspiration, I have plenty of other designs to help you create the perfect handmade gift.
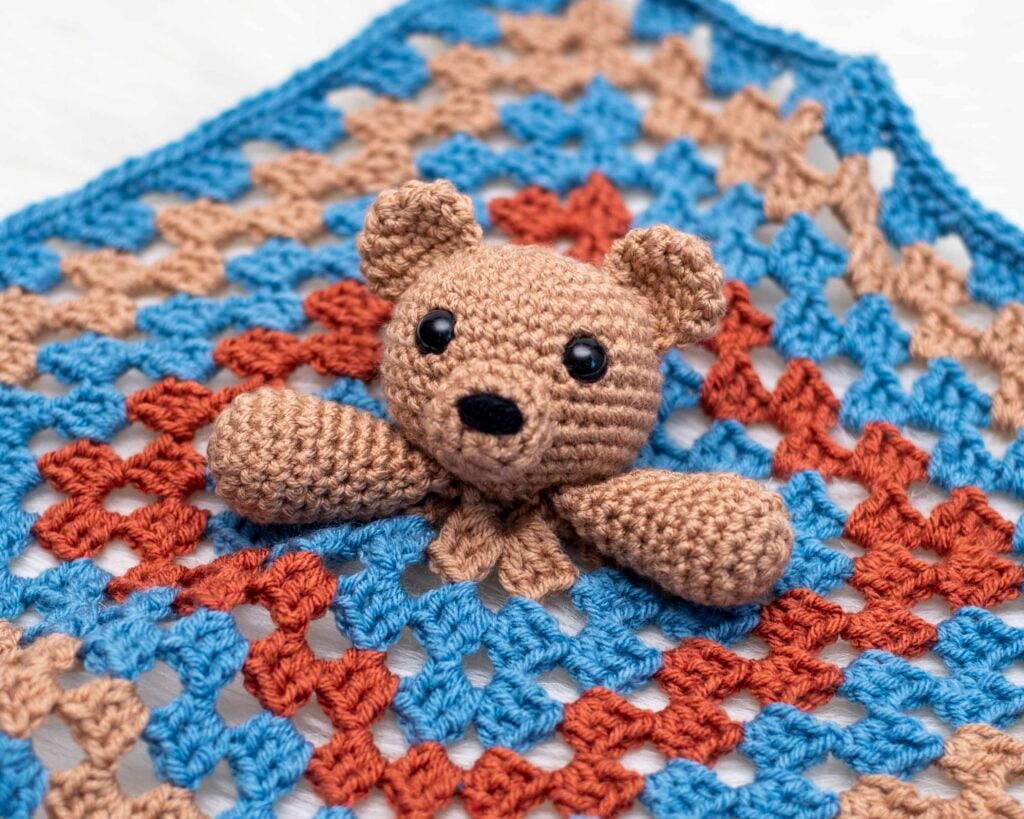
- The Hug Me Series: If you loved crocheting this lovey, check out my full collection of free lovey crochet patterns! You may especially enjoy my free bear lovey crochet pattern.
- Seasonal Favorites: Get ready for spring with my curated list of free Easter crochet patterns, featuring everything you need to fill those Easter baskets!
- Nursery Essentials: Beyond loveys, you might enjoy my other free baby crochet patterns!


First published May 2020.
I hope you enjoyed this pattern! If you make it, leave me a comment below.
Want to see more from me? Be sure to subscribe to my email newsletter so that you never miss a pattern!
Follow along with me on Instagram for daily updates and a behind the scenes look at my designs.
I’d love to see what you make with this tutorial! Don’t forget to share your finished work with me: on social media by tagging me @thenicolechase, in your Ravelry projects, or post over in my Facebook group!
Thanks for stopping by! Happy crafting!
Nicole
PATTERN COPYRIGHT © 2026 NICOLE CHASE. ALL RIGHTS RESERVED.
PATTERN MAY NOT BE ALTERED, COPIED, REDISTRIBUTED OR SOLD AS YOUR OWN PATTERN.
YOU MAY SELL THE FINISHED PRODUCT ON A SMALL SCALE. PATTERN/DESIGN CREDIT GIVEN TO WWW.THENICOLECHASE.COM IS APPRECIATED. PERMISSION TO SELL DOES NOT INCLUDE MASS PRODUCTION. LARGE SCALE PRODUCTION IS PROHIBITED.
PHOTOGRAPHY COPYRIGHT © 2026 NICOLE CHASE. ALL RIGHTS RESERVED.
PHOTOS MAY NOT BE ALTERED, COPIED, REDISTRIBUTED OR SOLD AS YOUR OWN.
This post may contain affiliate links. If you make a purchase through links on our site, we may earn a commission.
Can I use the blanket pattern from the bear pattern and just do the blanket part and then attach it to the bunny?
Of course!
Hi, do you have any pictures of making the blanket part? I have tried multiple times and feel I must be misunderstanding the instructions. I think pictures may help. Thanks!
Hello, no I do not have tutorial photos for the blanket; however, if you are a more visual learner, perhaps drawing it out would be helpful for you. Keep in mind that each SC stitch is worked into a ch space from the prior row, and that each corner is made of SC, ch 2, SC. Hope that helps!