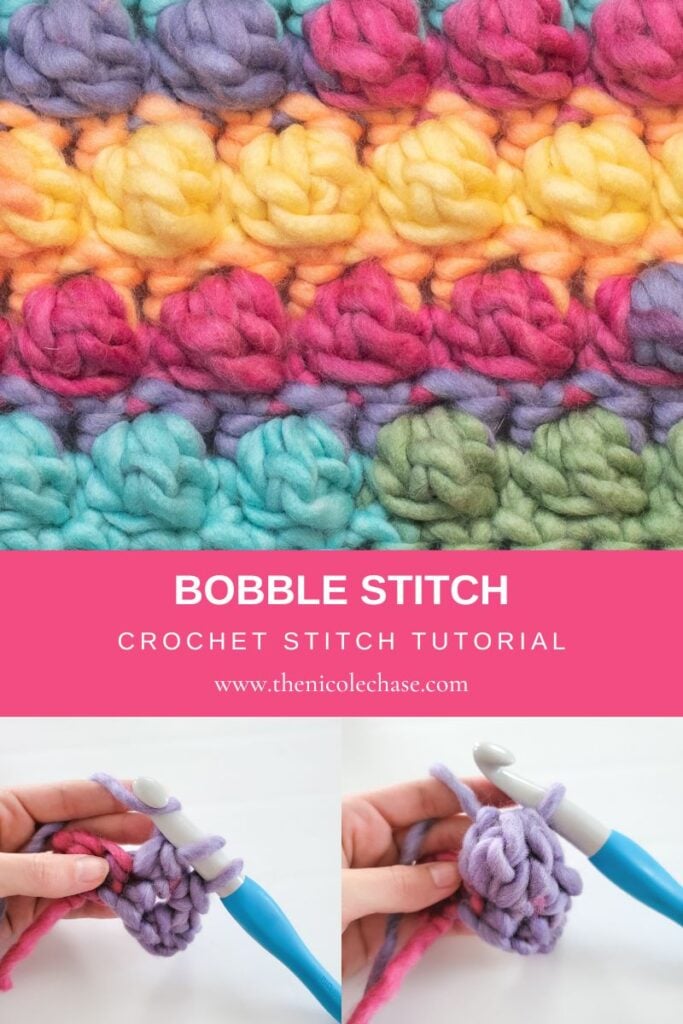
Bobble Stitch Crochet Tutorial
This post may contain affiliate links. If you make a purchase through links on our site, we may earn a commission.
Want to add amazing texture and dimension to your crochet projects? The crochet bobble stitch is a fun, textured technique that creates a beautiful, puffy pop right out of your fabric! While it looks intricate, mastering this stitch is incredibly simple.
In this complete crochet bobble stitch tutorial, I’ll walk you through exactly how to crochet a bobble stitch step-by-step with clear, close up photos. While a bobble can technically be made with any number of stitches, we will focus on a 4 loop bobble stitch (using 3 incomplete double crochet stitches) which gives a great definition without weighing down your projects.
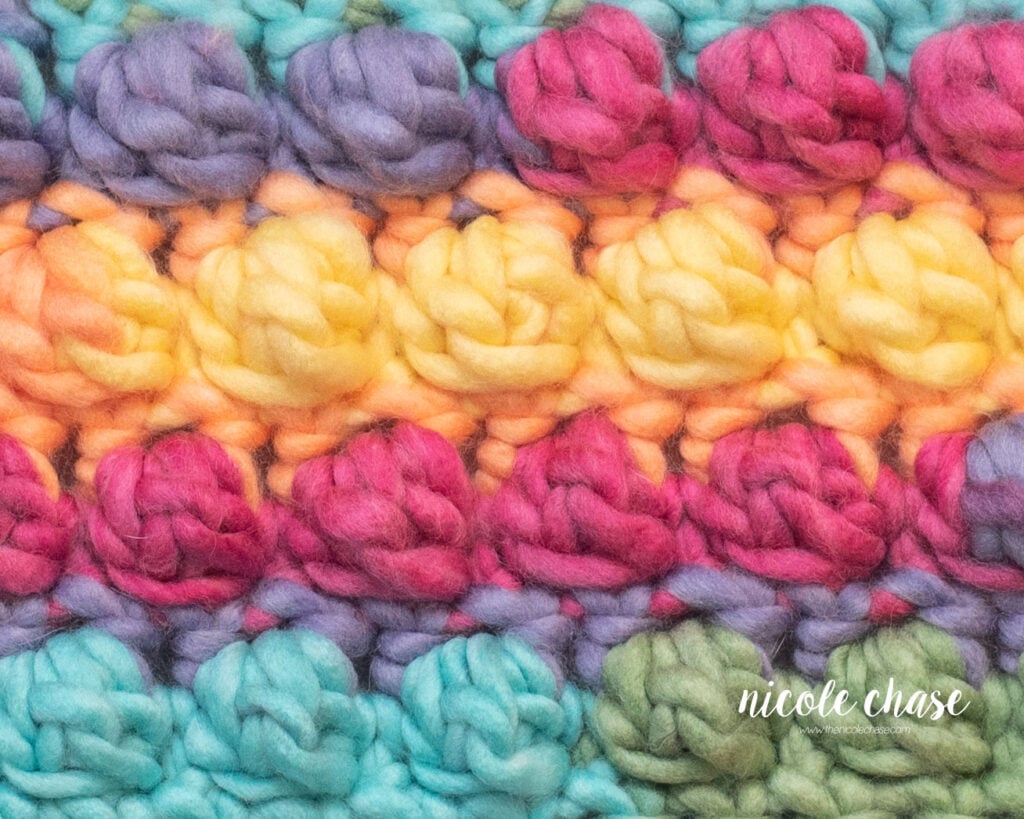
Table of Contents
About the Crochet Bobble Stitch
The bobble stitch is a popular technique used to create rich texture, dimension and volume into your crochet work. It is instantly recognizable by its rounded, puffy shape that stands out from a flat fabric, creating a 3D pop. The bobble stitch is incredibly versatile and is commonly used for creating decorative borders, adding texture to blankets, and in amigurumi for forming bumps like feet, snouts or decorative accents.
Types of Bobble Stitches
While the overall appearance is generally similar, the size and density of the bobble can be customized. The most common variation involves the number of partial double crochet (DC) stitches used to form the cluster.
- 3-DC Bobble Stitch: A smaller, subtler bump that works beautifully with bulky yarns or smaller accents (this is our focus for today!).
- 4-DC Bobble Stitch: A great middle-ground that provides clean, crisp definition without being overly bulky.
- 5-DC Bobble Stitch: A common maximum-volume option that offers a bold pop.
Designer Tip: The type of yarn you choose and your desired texture will determine which variation is ideal. Thinner yarns (such as sport weight yarn) often need a 5-DC bobble to really stand out, while thicker, chunky yarns might only need a 3 or 4-DC bobble to achieve the same look.
Bobble Stitch Abbreviations & Pattern Notations
Knowing the abbreviations is key to reading any written crochet pattern. The bobble stitch is most commonly abbreviated as:
- BO
- BOB
Most patterns will include a “Stitch Abbreviations” or “Special Stitches” section that defines exactly which type of bobble stitch they are using (e.g., 3-DC bobble, 5-DC bobble). If the pattern does not specify the bobble size, it is generally safest to assume it is a 5-DC bobble. This size offers a standard pop that is suitable for most projects.
Before You Start the Bobble Stitch
You won’t need any additional tools or materials to learn to crochet a bobble stitch. You’ll just need the yarn and hook that you are already using for your project.
Before starting this tutorial, you should be comfortable with these basics:
How to Crochet a Bobble Stitch (Step-by-Step)
The specific variation I will be demonstrating in this tutorial is the 3-DC bobble stitch, also known as a 4 loop bobble stitch because of the exact number of loops on your hook before you complete your final pull through.
I originally designed this tutorial specifically for my Rainbow Dreams Wall Hanging pattern! Because that particular design uses a very thick, bulky yarn, the 3-DC bobble was the ideal size to create a pronounced texture without making the fabric overly dense or rigid.
Note: This tutorial is for the 3-DC (4 loop) bobble stitch. If your pattern calls for a larger size (like a 5-DC bobble), the steps are exactly the same; you’ll just repeat the partial double crochets for the required amount before pulling through. You can see the stitch variation chart at the bottom of this post for a quick reference!
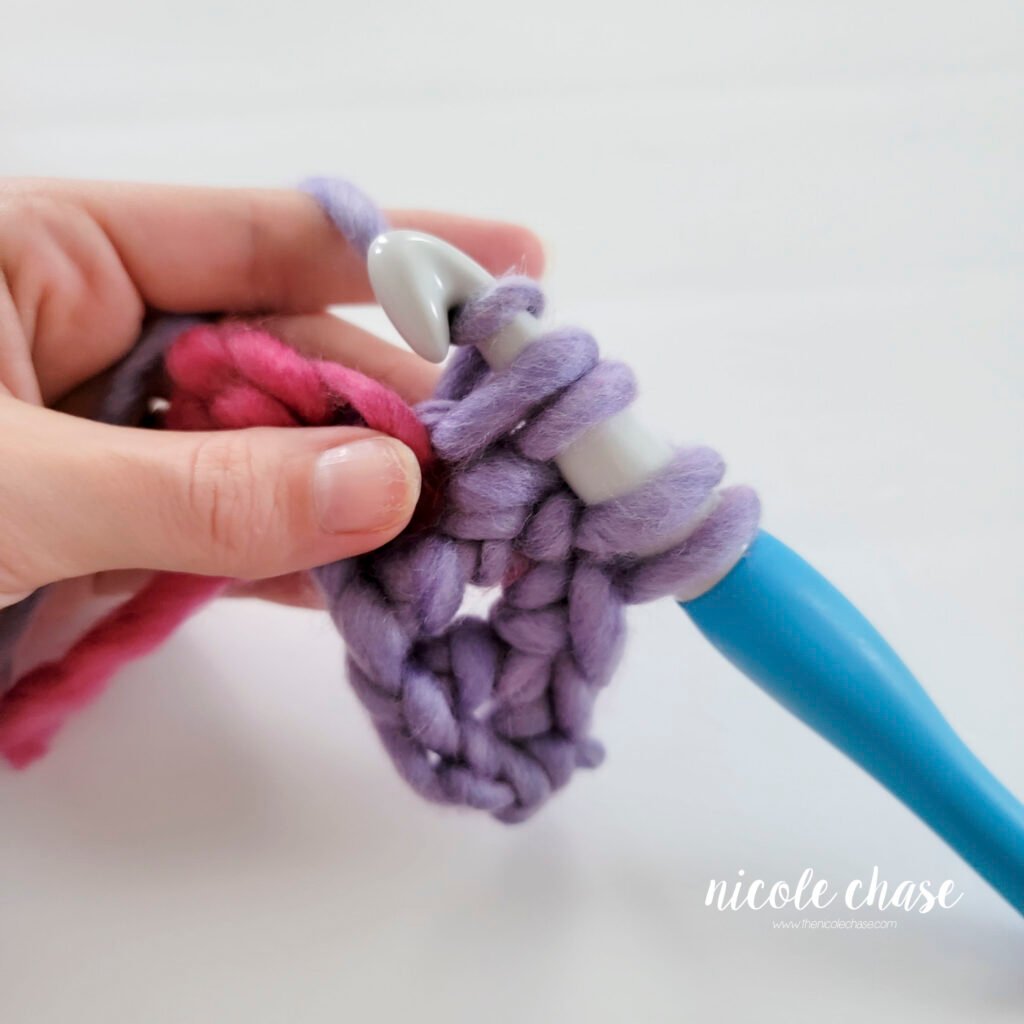
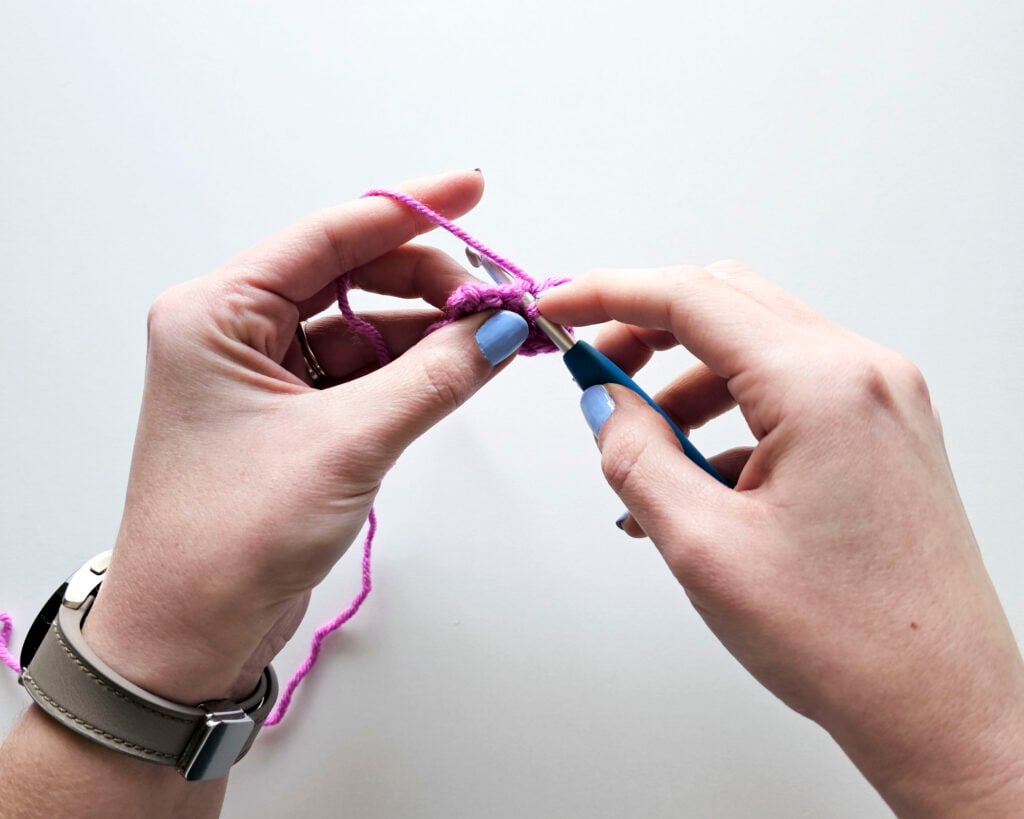
Step 1: Begin the Bobble (Partial DC #1)
Yarn over, insert your hook into the designated stitch. Yarn over and draw up a loop. You will have 3 loops on your hook.


Yarn over and pull through 2 loops on your hook. 2 loops remain on your hook.


Step 2: Repeat the Partial Stitch (Partial DC #2)
Yarn over, insert your hook into the same designated stitch. Yarn over and draw up a loop. You will have 4 loops on your hook.


Yarn over and pull through 2 loops on your hook. 3 loops remain on your hook.
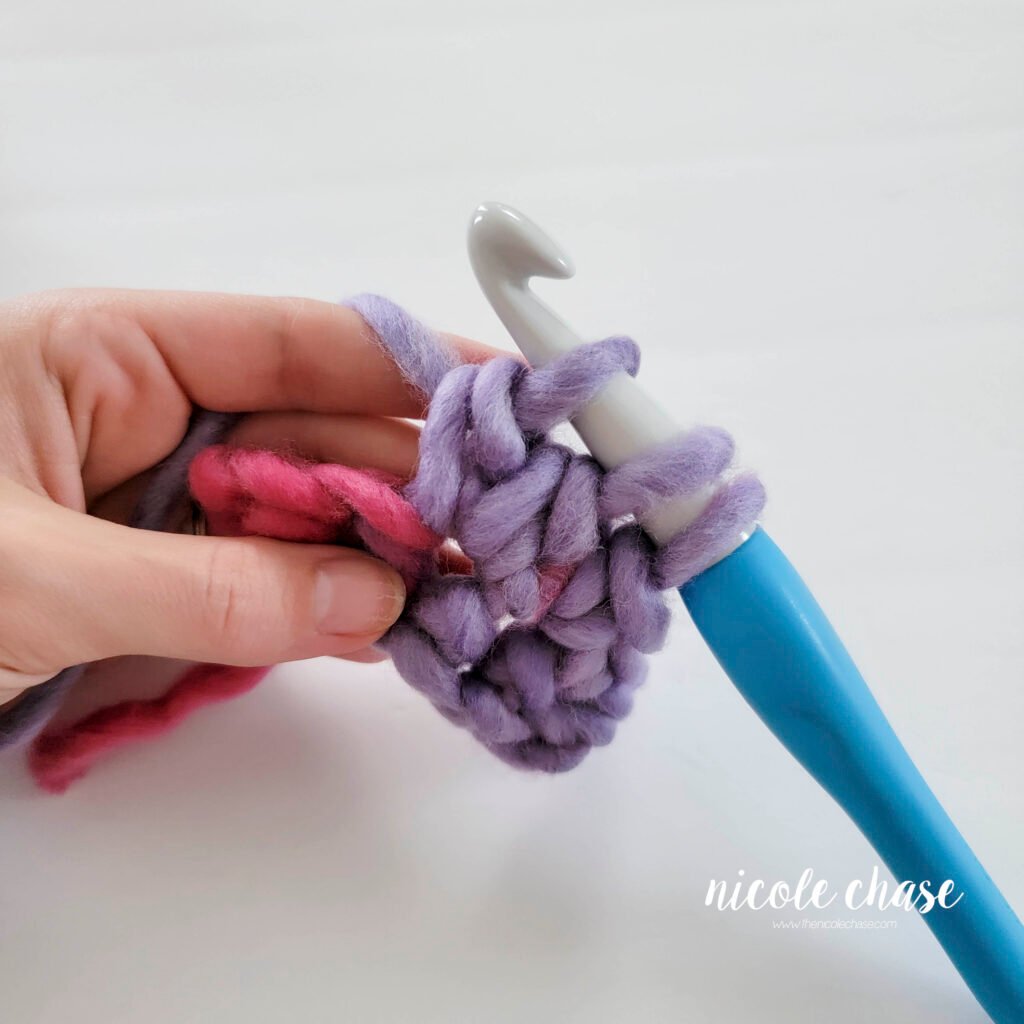
Step 3: Final Partial Stitch (Partial DC #3)
Yarn over, insert your hook into the same designated stitch. Yarn over and draw up a loop. You will have 5 loops on your hook. Yarn over and pull through 2 loops on your hook. 4 loops remain on your hook.

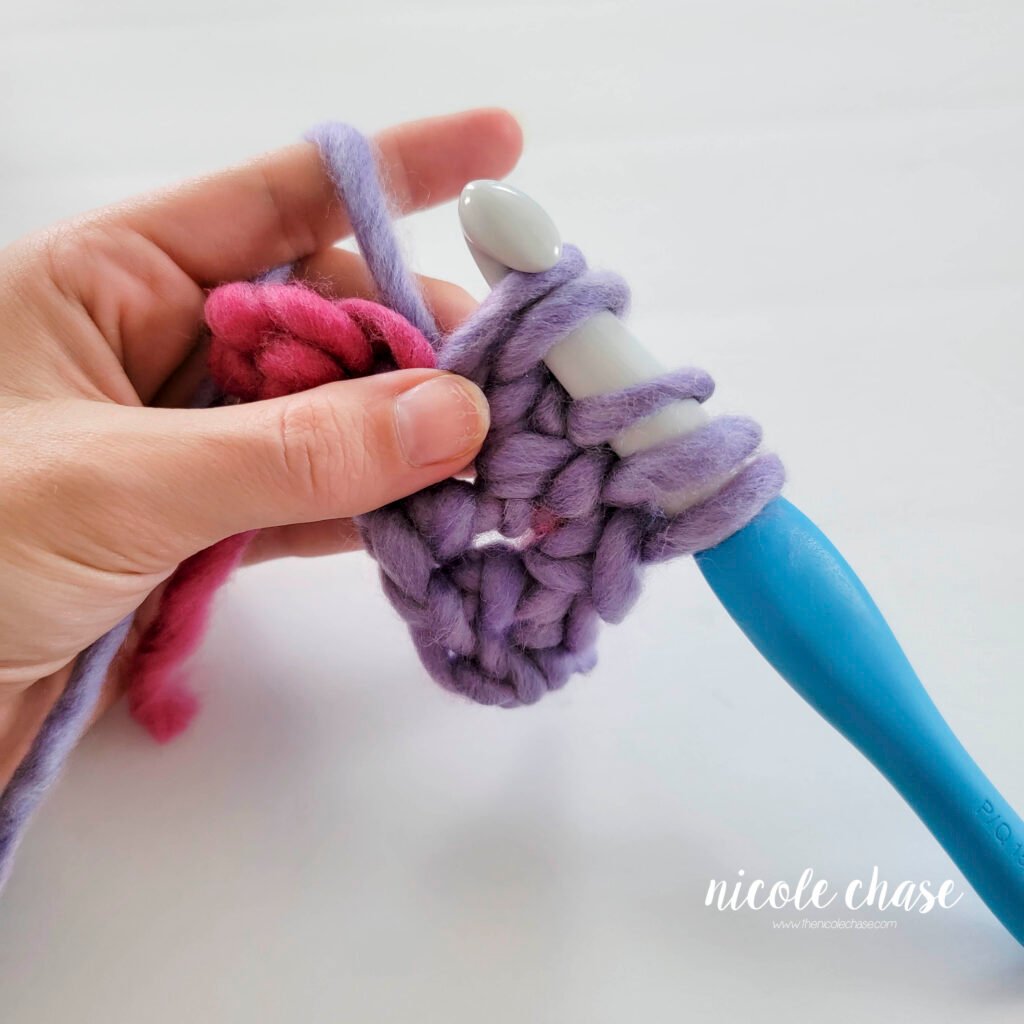

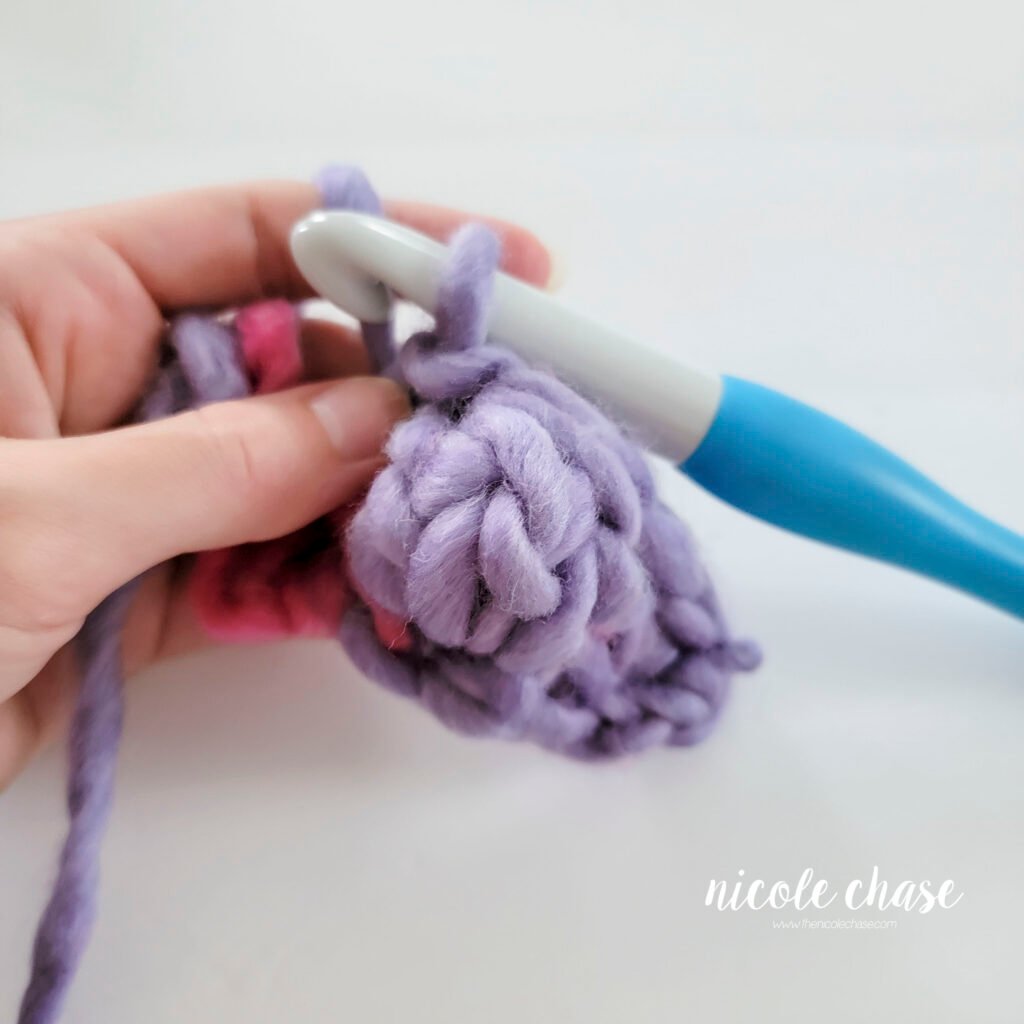
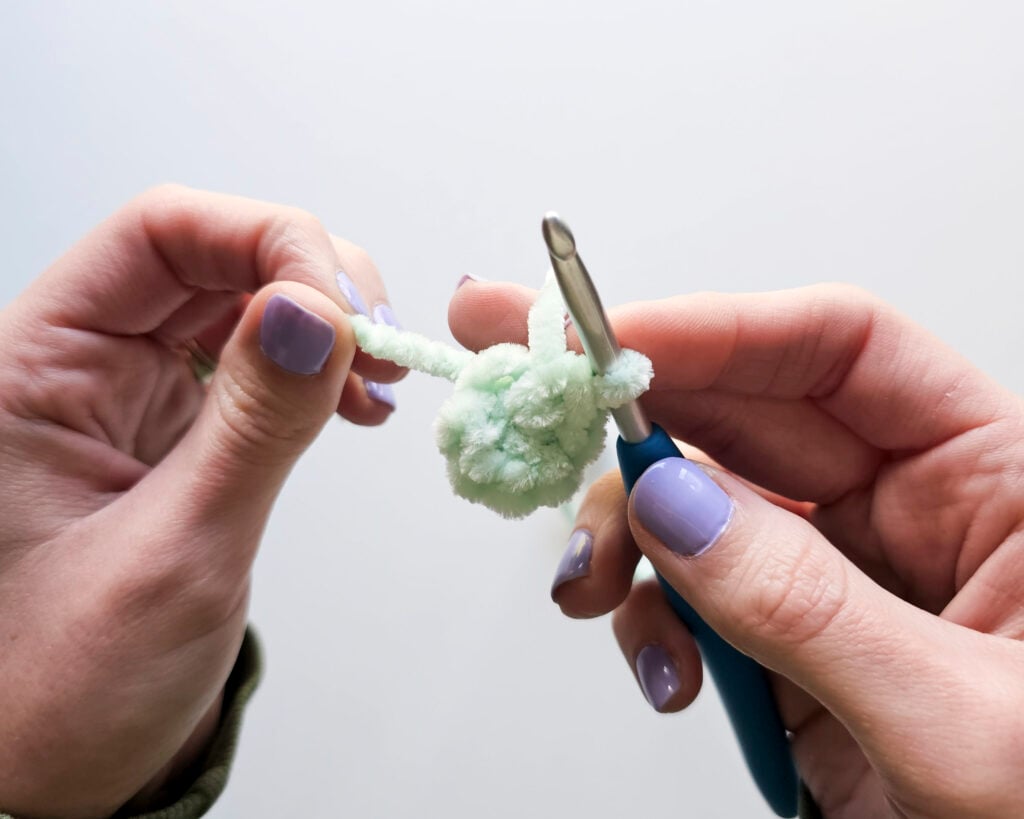
Step 4: Close the Bobble
Yarn over and pull through all 4 loops remaining on your hook. This closes the cluster and creates the puffed texture.


Step 5: Secure and Continue
Chain 1 (ch 1) to secure the bobble in place, then continue your regular stitch pattern in the remaining stitches across the row.
Adapting the Bobble Stitch
If you are creating a larger bobble (like a 5-DC or 7 DC bobble), the process is the same. You will simply repeat the partial double crochet step more times before finishing the stitch.
The secret to mastering any size is tracking the exact number of loops remaining on your hook before your final pull-through.
| BOBBLE SIZE | PARTIAL DCs TO MAKE | LOOPS REMAINING BEFORE CLOSING |
| 3-DC Bobble (Shown in Tutorial) | 3 partial DCs | 4 loops |
| 5-DC Bobble | 5 partial DCs | 6 loops |
| 7-DC Bobble | 7 partial DCs | 8 loops |
The formula is always: (number of partial DCs) + 1 starting loop = total loops to pull through.
By keeping this quick formula in mind, you can confidently adapt any pattern or customize your texture to be as subtle or puffy as you want!
Advanced Bobble Stitch Tips & Troubleshooting
How to Make Your Bobbles Pop
While the crochet bobble stitch naturally creates a fun 3-D effect, it sometimes needs some structural help to fully achieve the rounded look.
The Wrong Side Secret: Bobble stitches naturally push out on the opposite (wrong) side of the fabric while you are actively working them. Don’t worry if they look flat from your current working view!
To ensure your stitch firmly stands out from the fabric, use your finger to gently push the bobble forward from the backside after completing the stitch. This simple action perfectly defines the rounded shape on the right side of your work.
The Yarn Weight Factor
The weight of your yarn is a critical factor in deciding which bobble variation to use for your project.
- Thicker Yarns (Bulky/Super Bulky): These yarns create a very dense stitch, so a 3-DC bobble (like the one shown here) is typically enough to create a beautiful bobble without being overly bulky.
- Thinner Yarns(DK/Worsted): These yarns are much lighter, so a larger stitch like a 5-DC or 7-DC bobble may be needed to achieve the same pronounced pop and volume in the finished fabric.
Troubleshooting Common Bobble Stitch Issues
| PROBLEM | FIX |
| Bobble stitch is too loose/flat. | You may be using too large of a hook for your yarn weight, or the tension on the final pull-through was too loose. Try going down a hook size and pull the final loop through firmly to close the cluster. |
| Bobble row is wavy/tight. | The chain 1 you use to secure the bobble might be too tight, or the row itself has too many dense stitches. For a full row of bobble stitches, it can be helpful to have a single crochet stitch between each bobble stitch. |
I hope that you’ve enjoyed this bobble stitch crochet tutorial and feel confident adding this texture to your future projects!

More Crochet Tutorials to Practice
Now that you’ve mastered how to crochet a bobble stitch, here are a few more free tutorials to continue building your crochet skills!
- Practice the most important and fundament stitch with my single crochet stitch tutorial.
- Keep practicing your double crochets with my tutorial on the double crochet stitch.
- Ready to start a brand new amigurumi project? Skip the frustration with my ultimate guide to the magic ring.


I hope you enjoyed this post! Be sure to leave me a comment below to let me know what you think.
Want to see more from me? Be sure to subscribe to my email newsletter so that you never miss a post!
Follow along with me on Instagram for daily updates and a behind the scenes look at my designs.
I’d love to see what you make with this tutorial! Don’t forget to share your finished work with me: on social media by tagging me @thenicolechase, in your Ravelry projects, or post over in my Facebook group!
Thanks for stopping by! Happy crafting!
Nicole
PATTERN COPYRIGHT © 2026 NICOLE CHASE. ALL RIGHTS RESERVED.
PATTERN MAY NOT BE ALTERED, COPIED, REDISTRIBUTED OR SOLD AS YOUR OWN PATTERN.
YOU MAY SELL THE FINISHED PRODUCT ON A SMALL SCALE. PATTERN/DESIGN CREDIT GIVEN TO WWW.THENICOLECHASE.COM IS APPRECIATED. PERMISSION TO SELL DOES NOT INCLUDE MASS PRODUCTION. LARGE SCALE PRODUCTION IS PROHIBITED.
PHOTOGRAPHY COPYRIGHT © 2026 NICOLE CHASE. ALL RIGHTS RESERVED.
PHOTOS MAY NOT BE ALTERED, COPIED, REDISTRIBUTED OR SOLD AS YOUR OWN.
This post may contain affiliate links. If you make a purchase through links on our site, we may earn a commission.
This was perfect! Fortunately I already knew how to make a bobble but I wasn’t sure how many DC to work into my bobbles with the chunky yarn I was using. Your article is the only one that I came across that mentions using a different number of DC to make the bobble depending on the chunkiness of the yarn. As for the tutorial part of your article, I have a crochet book that I reference to teach me new stitches. After reading through your tutorial, I wish I would have saved my money on the book and come across your site instead! It was so easy and clear to follow. I’ll be adding your site to my list of reliable sources to guide me through my future projects. Thanks for keeping intimidating crochet easy!