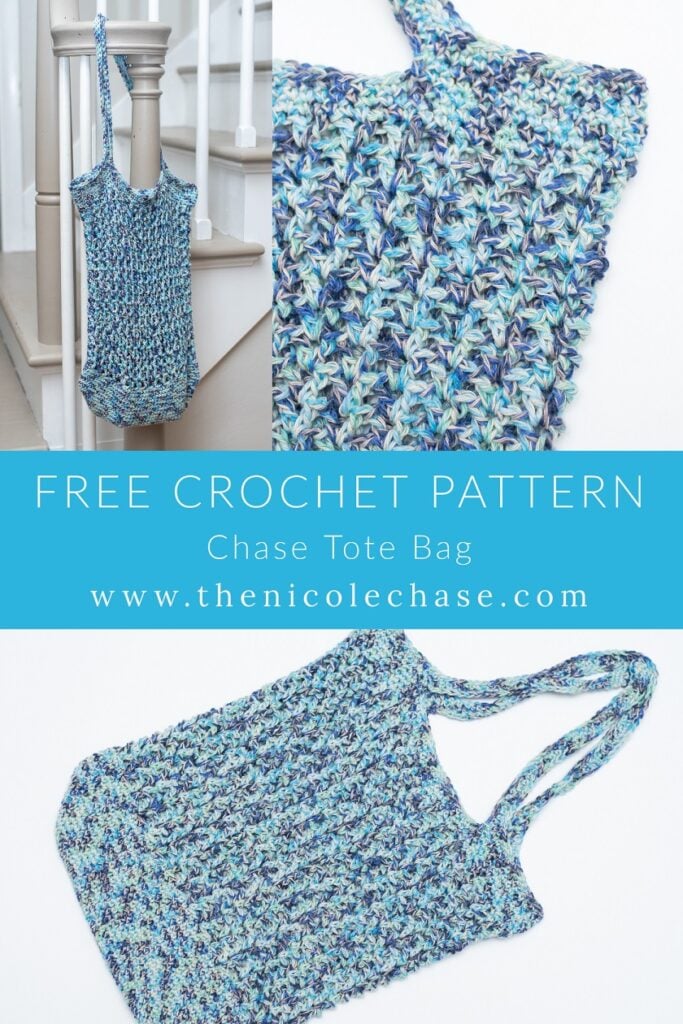
Chase Tote Bag – Free Crochet Pattern
This post may contain affiliate links. If you make a purchase through links on our site, we may earn a commission.
Looking for a free bag crochet pattern with a beautiful, airy texture? I designed the Chase Tote Bag with a classic V-stitch design that creates a lightweight, breathable mesh. This mesh crochet bag pattern is perfect for holding all of your farmers market finds when made with a durable cotton yarn. For a crochet market bag that feels like summer and works up quickly, this is the project for you!
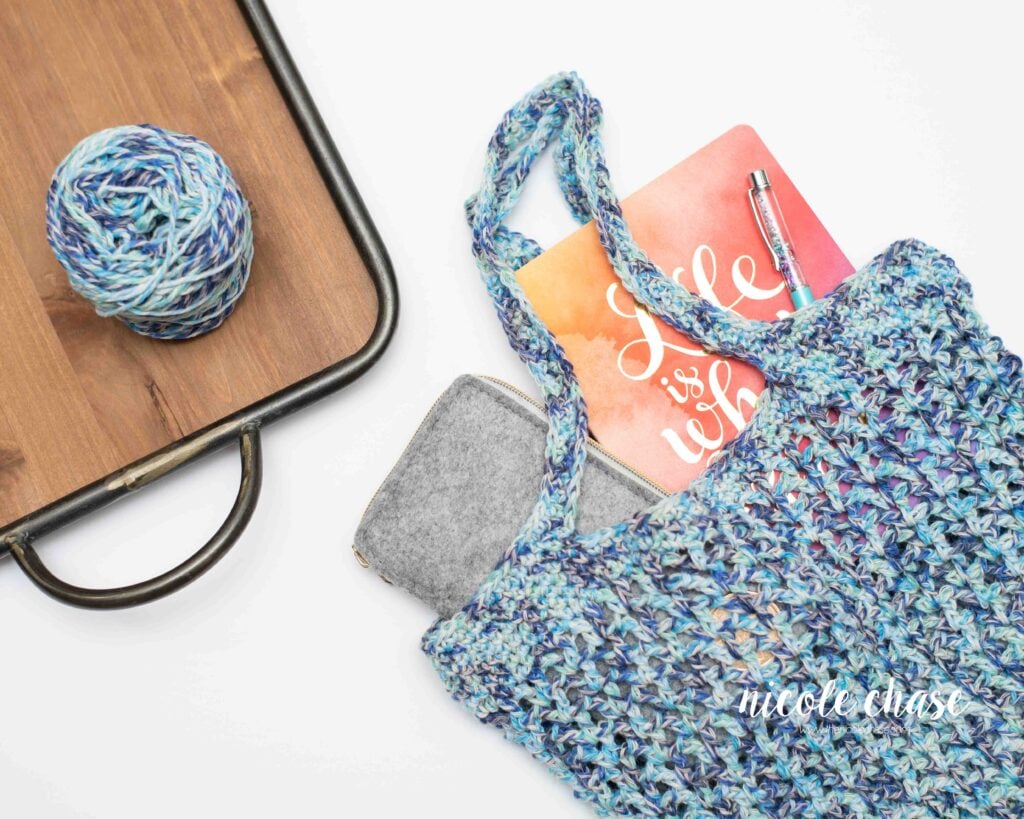
Table of Contents
I would classify this free bag crochet pattern as “advanced beginner”. It would be helpful to have had some experience with single crochet and double crochet before starting this pattern.
I hope you enjoy this free crochet pattern available here on my blog! An ad-free, formatted PDF version of this crochet pattern is also available for purchase here:
Pin it for later! Pin the Chase Tote Bag to your favorite crochet board on Pinterest.
Add to your Ravelry Queue! Add the Chase Tote Bag to your queue and favorites on Ravelry!
Free Crochet Pattern for Chase Tote Bag
Pattern Specifics
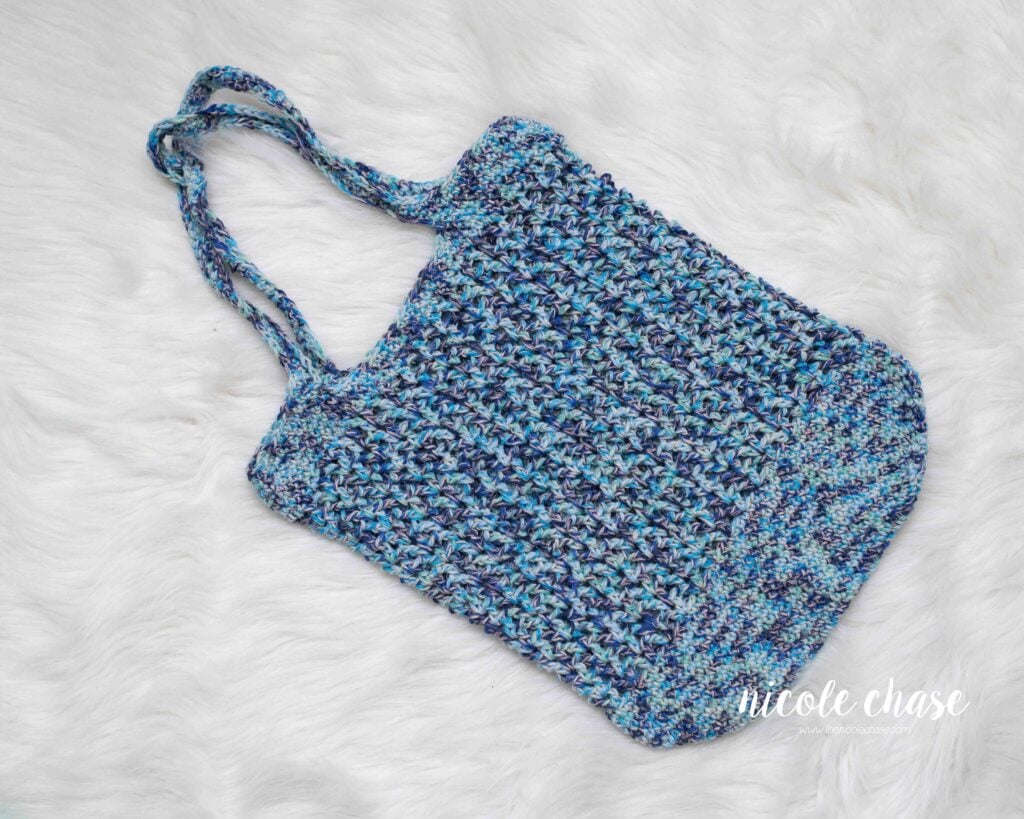
Measurements: laying flat, 12″ wide and 16″ tall (top to bottom)
Gauge: 2″ = 7 SC sts and 8 SC rows
Hook Size: 5.0mm (H) crochet hook
Other Tools: tapestry needle, scissors
Yarn Weight: Light (3)
Yarn Used: Lion Brand Yarn Comfy Cotton Blend
Yardage: 304 yds
Other Materials: n/a
Abbreviations
st = stitch
sl st = slip stitch
ch = chain
SC = single crochet
DC = double crochet
V = V stitch
Special Stitches
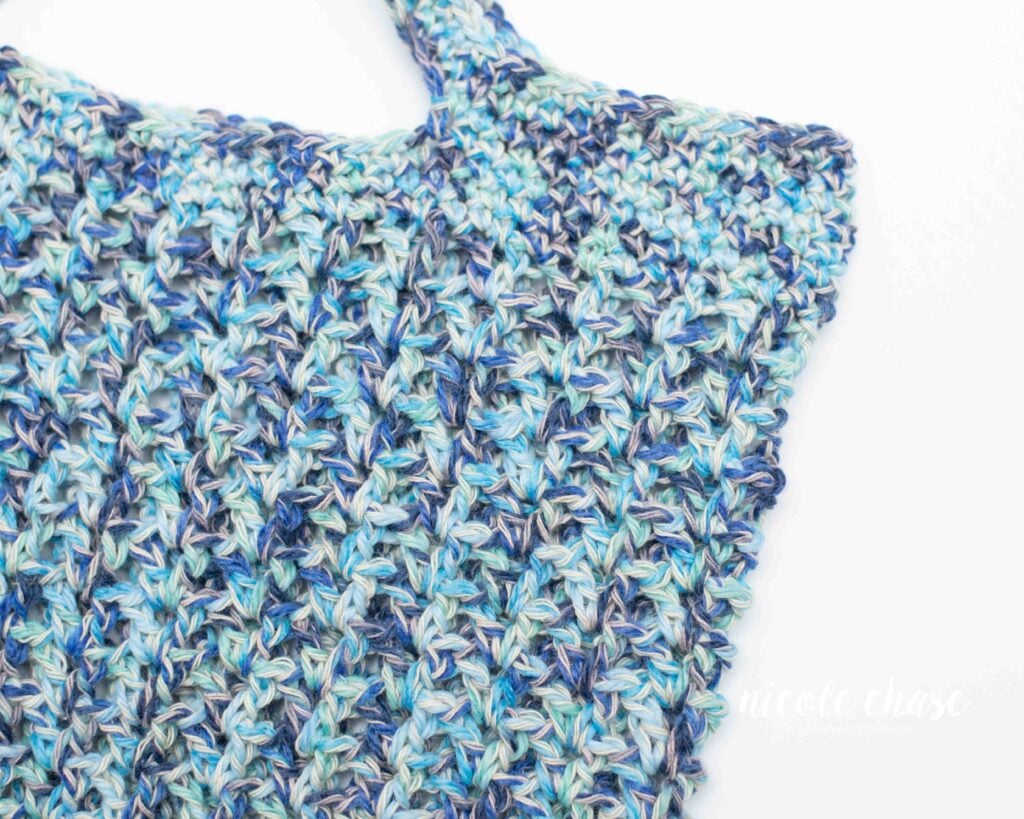
V stitch: 1 DC, ch 1, 1 DC, all worked together in the same stitch
Notes
- Note that your yarn choice, hook size, and tension will affect the sizing of this project. Please check your gauge prior to starting this pattern. If you do not compare your gauge to that of the design, it is possible that your sizing will be affected.
- Chain 1 at the beginning of each row does NOT count as a stitch (unless otherwise specified).
- Chain 3 at the beginning of each V stitch row counts as a DC and ch 1 (unless otherwise specified).
Pattern
Using 5.0mm (H) hook:
R1: Ch 31, SC in second ch from hook and each of the next 28 sts. Working around to the other side of the ch, 4 SC in final ch. Now working on the other side of the ch, 1 SC in each of the next 28 sts. 3 SC in the final ch. (64 sts)
R2: Ch 1, *1 SC in each of the next 30 sts, 2 SC in each of the next 2 sts. Repeat from * around. Join with a sl st to beginning. (68 sts)
R3: Ch 1, 1 SC in each of the next 31 sts, 2 SC in each of the next 2 sts, 1 SC in each of the next 32 sts, 2 SC in each of the next 2 sts, 1 SC in next st. Join with a sl st to beginning. (72 sts)
R4: Ch 1, 1 SC in each of the next 32 sts, 2 SC in each of the next 2 sts, 1 SC in each of the next 34 sts, 2 SC in each of the next 2 sts, 1 SC in each of the next 2 sts. Join with a sl st to beginning. (76 sts)
R5: Ch 1, 1 SC in each of the next 33 sts, 2 SC in each of the next 2 sts, 1 SC in each of the next 36 sts, 2 SC in each of the next 2 sts, 1 SC in each of the next 3 sts. Join with a sl st to beginning. (80 sts)
R6: Ch 1, 1 SC in each of the next 34 sts, 2 SC in each of the next 2 sts, 1 SC in each of the next 38 sts, 2 SC in each of the next 2 sts, 1 SC in each of the next 4 sts. Join with a sl st to beginning. (84 sts)
R7: Ch 1, 1 SC in each of the next 35 sts, 2 SC in each of the next 2 sts, 1 SC in each of the next 40 sts, 2 SC in each of the next 2 sts, 1 SC in each of the next 5 sts. Join with a sl st to beginning. (88 sts)
R8: Ch 1, 1 SC in each of the next 36 sts, 2 SC in each of the next 2 sts, 1 SC in each of the next 42 sts, 2 SC in each of the next 2 sts, 1 SC in each of the next 6 sts. Join with a sl st to beginning. (92 sts)
R9: Ch 1, 1 SC in each of the next 37 sts, 2 SC in each of the next 2 sts, 1 SC in each of the next 44 sts, 2 SC in each of the next 2 sts, 1 SC in each of the next 7 sts. Join with a sl st to beginning. (96 sts)
R10-15: Ch 1, 1 SC in each st around. Join with a sl st to beginning. (96 sts)

R16: Ch 4, DC in same st (first V made), *skip 2 sts, V in next st. Repeat from * around, leaving 2 unworked sts at the end of the round. Join with a sl st to the 3rd ch st at beginning. (32 V sts)
R17-33: Sl st into the ch 4 space from previous round, ch 4, DC in same st (first V made), *V in each ch 1 space of V from previous round to end. Join with a sl st to the 3rd ch st at beginning. (32 V sts)
R34: Ch 1, 1 SC in same ch st, 1 SC in next ch st, 1 SC in next DC st, *1 SC in each DC, ch, DC for each V. Repeat from * around. Join with a sl sto to beginning. (96 sts)
R35-36: Ch 1, 1 SC in each st around. Join with a sl st to beginning. (96 sts)
Note: In the next round you will be crocheting the straps of the bag. Due to differences in tension, yarn, etc., you may need to adjust the placement of the straps to ensure that they are properly positioned. When laying the bag down flat, the straps should have 14 sts from the strap to the side of the bag (totaling 28 sts between each strap).
For example, if you only need 5 sts at the start of the round to get to the appropriate placement for the first strap, you will then continue crocheting the round as written, but your last run of SC sts will be 23 sts instead of 20 sts; still completing the round with the same 176 sts.
R37: Ch 1, 1 SC in each of the next 8 sts, ch 60, skip the next 20 sts, 1 SC in each of the next 28 sts, ch 60, skip the next 20 sts, 1 SC in each of the next 20 sts. Join with a sl st to beginning. (176 sts)
R38-40: Ch 1, 1 SC in each st around. Join with a sl st to beginning. (176 sts)
Cut yarn and fasten off. Weave in ends.
I hope you enjoyed this free bag crochet pattern!

Ad-Free PDF Pattern for Chase Tote Bag
Tips for your Crochet Market Bag Tote
- Yarn Choice Matters: Using a cotton or cotton-blend yarn (like used in this free bag crochet pattern) is key. While the mesh is designed to expand, cotton has less give than acrylic, which prevents the bag from stretching down too far when you have something heavy in the bag.
- Keep Count: Check the count of your V-stitches at the end of each round with this crochet market bag pattern. It’s easy to accidentally skip a space or add an extra V at the seam.
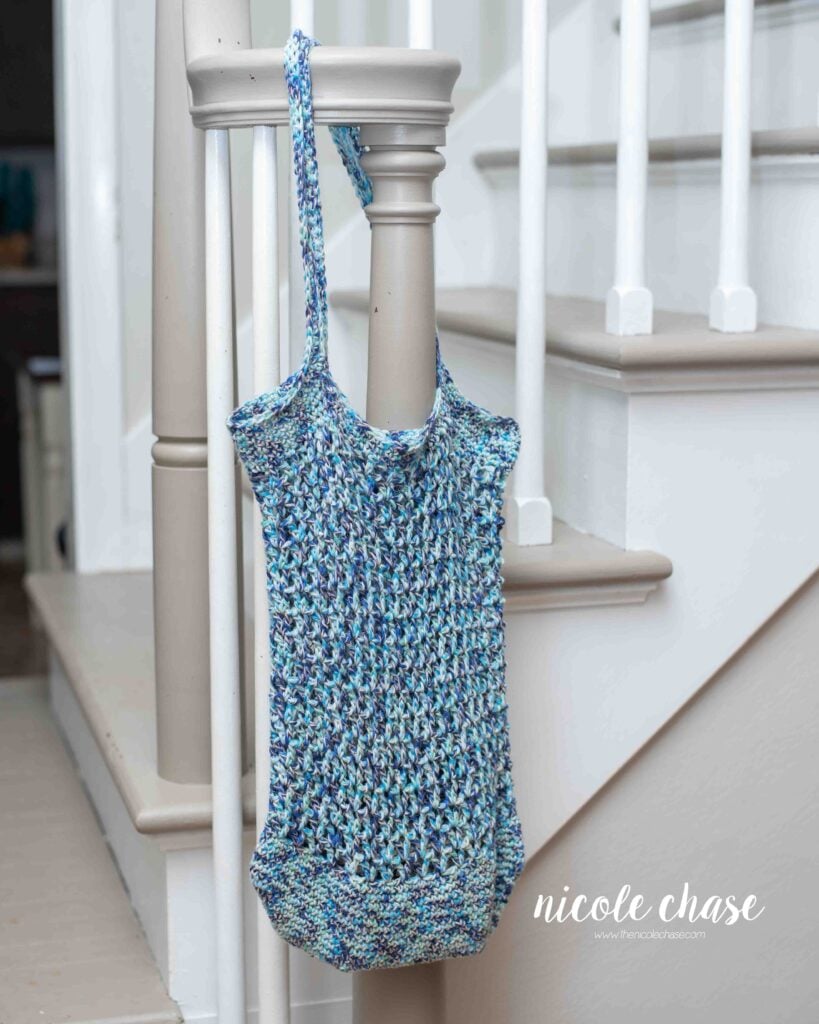
- Expansion: Don’t worry if your cotton crochet bag looks small when you finish. The V-stitch mesh is designed to stretch to accommodate your items once it’s filled.
How to Use Your Crochet Market Bag
The V-stitch design of this bag makes it so versatile. Here are a few of my favorite ways to use my own cotton crochet bag!
- Eco-Friendly Grocery Shopping: Perfect for produce that needs to breathe.
- Beach or Pool Tote: The mesh design allows sand and water to shake out easily.
- Farmers Market Essential: Lightweight and expandable to hold all of your spontaneous purchases.
Caring for your Cotton Crochet Bag
Using a cotton or cotton-blend yarn is best for this type of bag so that you can easily wash it. To keep your crochet tote bag looking its best, I recommend machine washing in cold water on a gentle cycle and laying it flat to dry. This helps the V-stitches snap back into their original shape after being stretched during use. Always check the label of the yarn you are using for the washing instructions for that specific yarn.
More Free Accessory Crochet Patterns
If you loved making this free bag crochet pattern, be sure to check out some of my other free patterns for accessories and more!
- My free velvet scrunchie pattern is great for gifting.
- The Seek Adventure Clutch crochet pattern is perfect for holding your essentials.
- Add beautiful texture to your wardrobe with this beautiful shawl crochet pattern.

I hope you enjoyed this pattern! If you make it, leave me a comment below.
Want to see more from me? Be sure to subscribe to my email newsletter so that you never miss a pattern!
Follow along with me on Instagram for daily updates and a behind the scenes look at my designs.
I’d love to see what you make with this tutorial! Don’t forget to share your finished work with me: on social media by tagging me @thenicolechase, in your Ravelry projects, or post over in my Facebook group!
Thanks for stopping by! Happy crafting!
Nicole
PATTERN COPYRIGHT © 2026 NICOLE CHASE. ALL RIGHTS RESERVED.
PATTERN MAY NOT BE ALTERED, COPIED, REDISTRIBUTED OR SOLD AS YOUR OWN PATTERN.
YOU MAY SELL THE FINISHED PRODUCT ON A SMALL SCALE. PATTERN/DESIGN CREDIT GIVEN TO WWW.THENICOLECHASE.COM IS APPRECIATED. PERMISSION TO SELL DOES NOT INCLUDE MASS PRODUCTION. LARGE SCALE PRODUCTION IS PROHIBITED.
PHOTOGRAPHY COPYRIGHT © 2026 NICOLE CHASE. ALL RIGHTS RESERVED.
PHOTOS MAY NOT BE ALTERED, COPIED, REDISTRIBUTED OR SOLD AS YOUR OWN.
This post may contain affiliate links. If you make a purchase through links on our site, we may earn a commission.