Seek Adventure Clutch – Free Crochet Pattern
This post may contain affiliate links. If you make a purchase through links on our site, we may earn a commission.
*** I hope you enjoy this free crochet pattern available here on my blog! An ad-free, formatted PDF version of this crochet pattern is also available for purchase here:
There is really nothing better than yarn, right? Whenever I get the opportunity, I love to create things with yarn to use in everyday life. The Seek Adventure Clutch is the perfect combination of beautiful AND practical. It is big enough to hold all of the essentials, and it is super cute!

Don’t forget to save this pattern in your favorites and add it to your project queue to save it for later! View this pattern on Ravelry here.
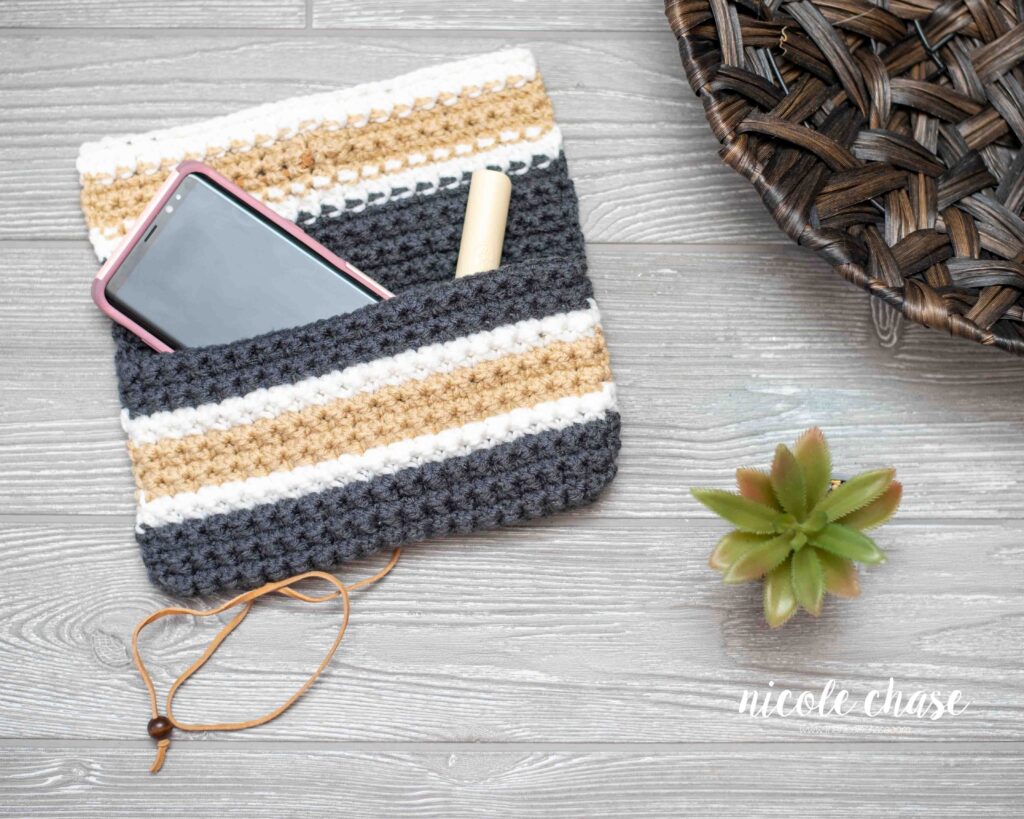
One of the best things about this pattern, is that the stitches are worked tightly, which means you don’t have to line it! Yay!
I’d love to see what you make with this tutorial! Don’t forget to share a photo of your finished work in your Ravelry projects and my Facebook group!
Seek Adventure Clutch

PATTERN SPECIFICS
Measurements: Approximately 9” long and 5” wide
Gauge: 4” = 9 SC3tog and 18 SC3tog
Hook Size: 4.0mm (G)
Other Tools: tapestry needle, stitch markers, scissors
Yarn Weight: Medium (4), Worsted
Yarn Used: Red Heart Super Saver
Other Materials: wooden buttons, leather cord
ABBREVIATIONS
st = stitch
sl st = slip stitch
ch = chain
SC = single crochet
SC2tog = single crochet 3 stitches together
SPECIAL STITCHES
SC3tog: Draw up a loop in each of the next 3 sts. Yarn over. Draw through all four loops on hook.
NOTES
See tutorial photos.
PATTERN
Base
Using color A (shown as charcoal):
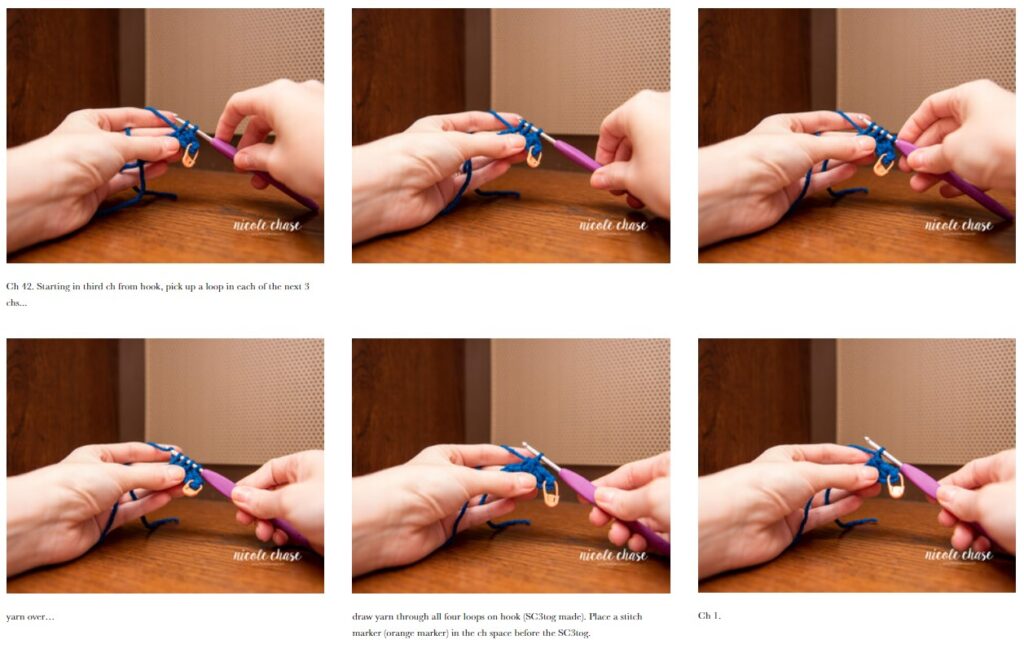
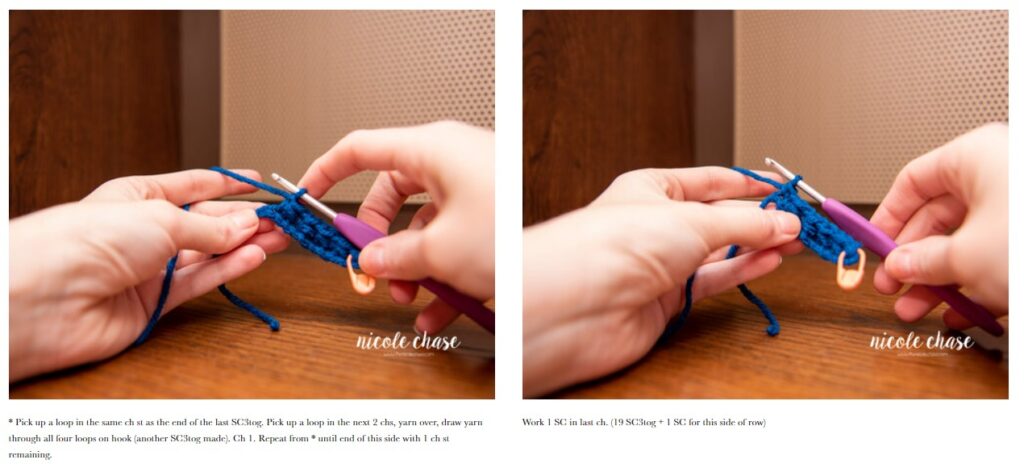
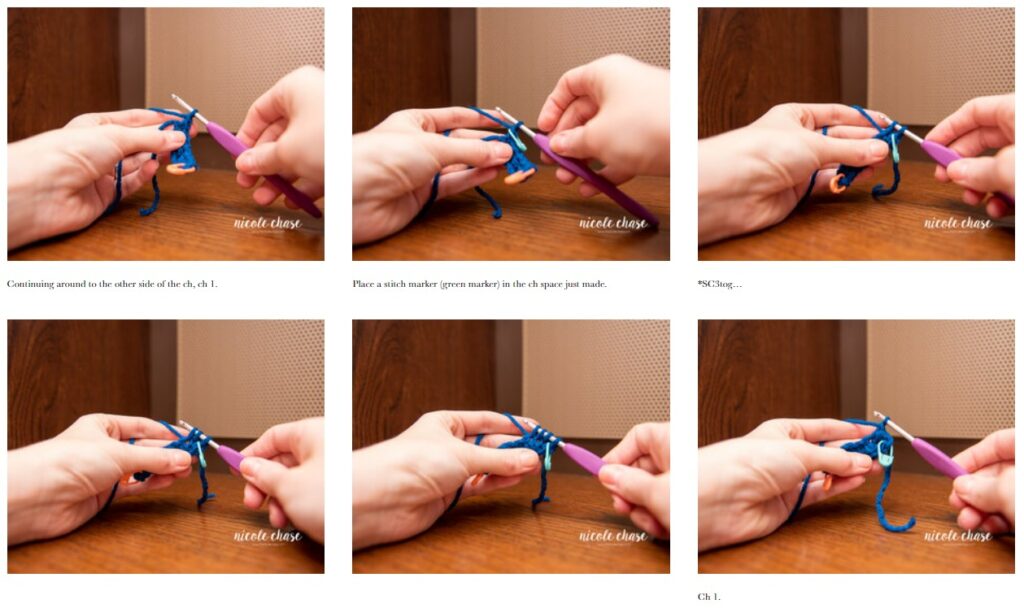
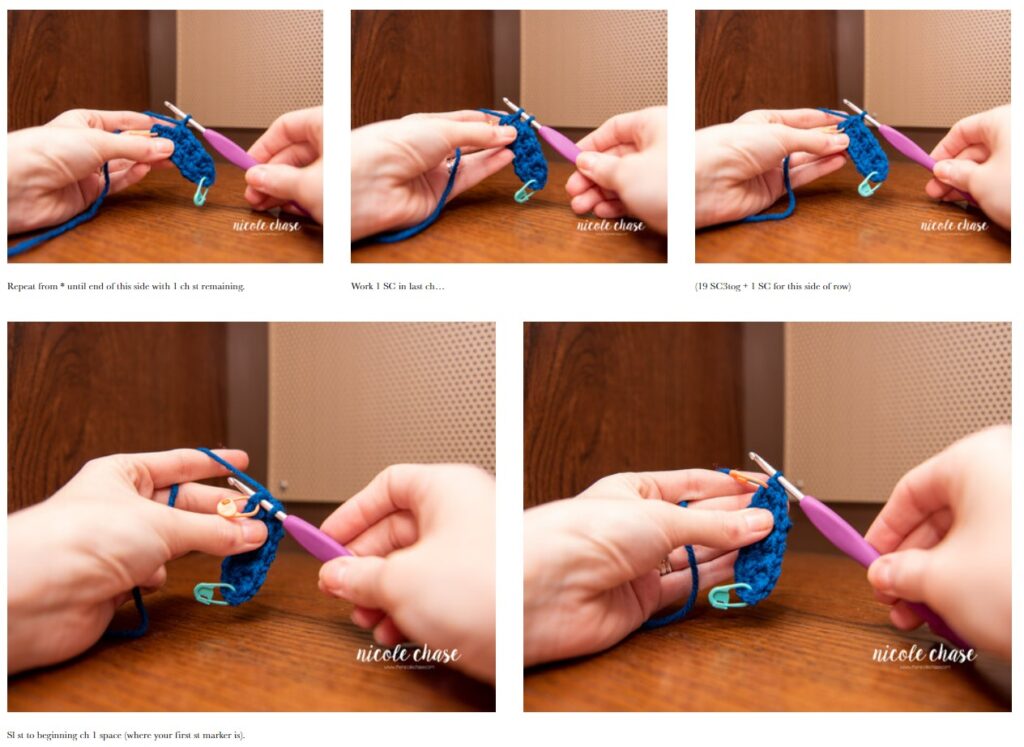
R1: Ch 42. Starting in third ch from hook, pick up a loop in each of the next 3 chs, yarn over, draw yarn through all four loops on hook (SC3tog made). Place a stitch marker in the ch space before the SC3tog. Ch 1. *Pick up a loop in the same ch st as the end of SC3tog. Pick up a loop in the next 2 chs, yarn over, draw yarn through all four loops on hook (another SC3tog made). Ch 1. Repeat from * until end of this side with 1 ch st remaining. Work 1 SC in last ch. (19 SC3tog + 1 SC for this side of row)
Continuing around to the other side of the ch, ch 1. Place a stitch marker in the ch space just made. *SC3tog, ch 1. Repeat from * until end of this side with 1 ch st remaining. Work 1 SC in last ch. (19 SC3tog + 1 SC for this side of row)
Sl st to beginning ch space (where your first stitch marker is).
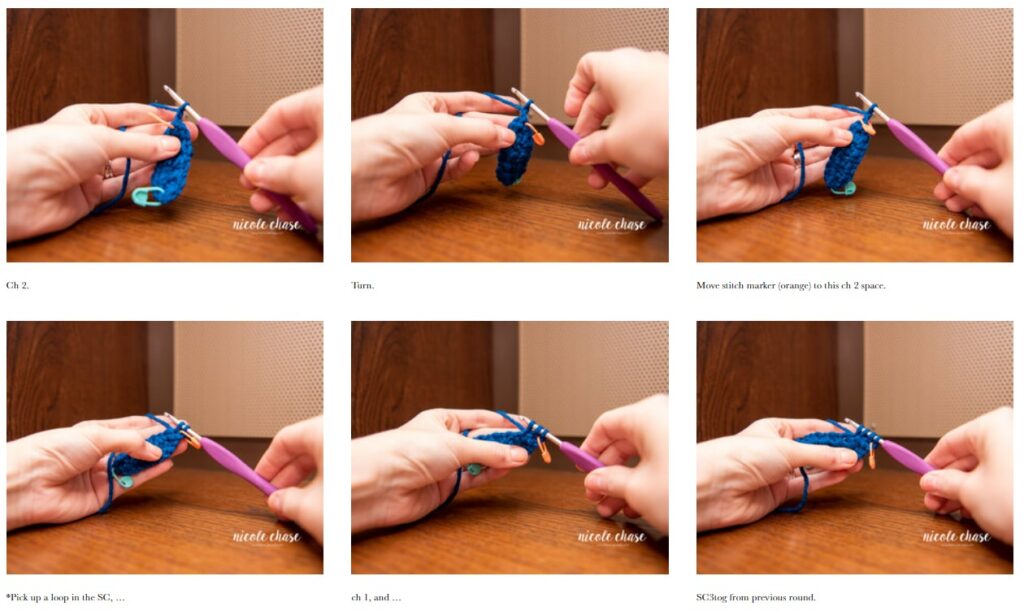
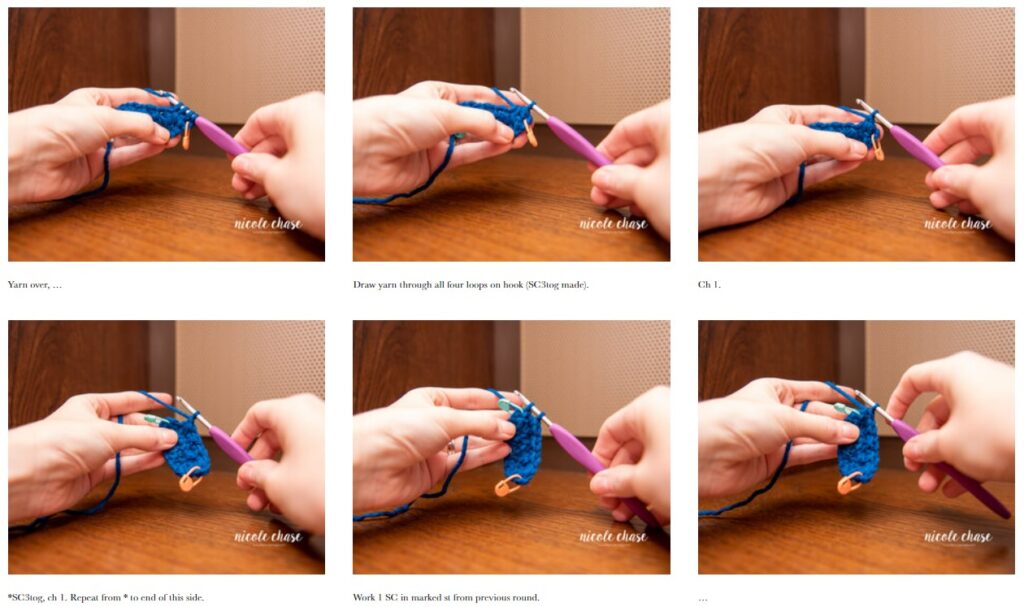
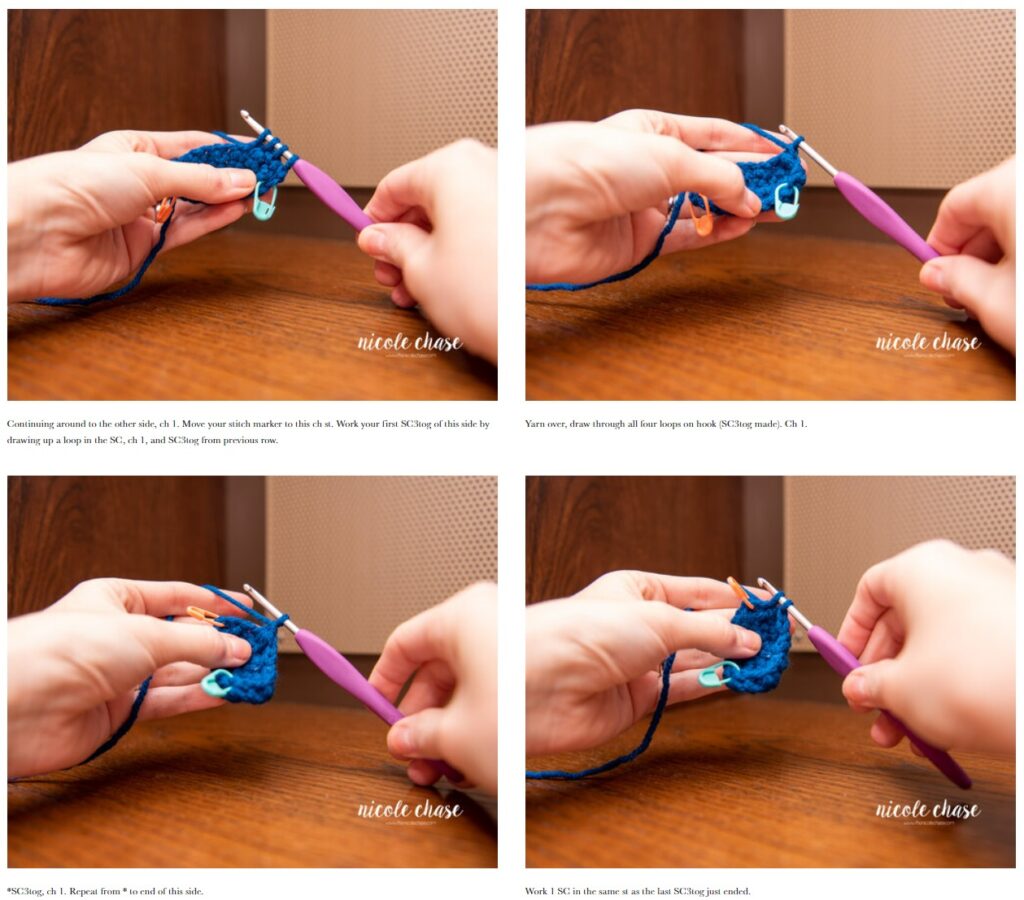
R2: Ch 2. Turn. Move stitch marker to this ch 2 space. Work your first SC3tog by drawing up a loop in the SC, ch 1, and SC3tog from previous row. Yarn over, draw through all four loops on hook (SC3tog made). Ch 1. *SC3tog, ch 1 (beginning your next SC3tog in the same st as the last SC3tog just ended). Repeat from * to end of this side. Work 1 SC in marked st from previous row. (19 SC3tog + 1 SC for this side of row)
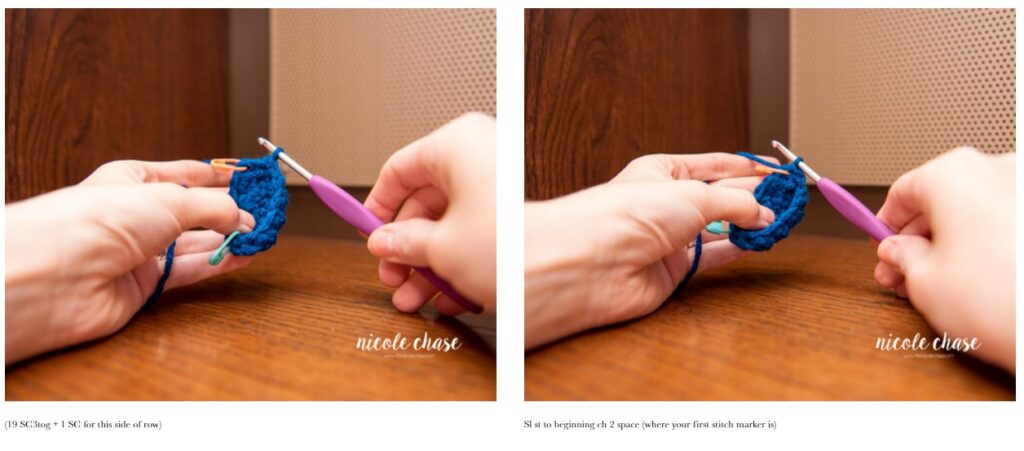
Continuing around to the other side, ch 1. Move your stitch marker to this ch st. Work your first SC3tog of this side by drawing up a loop in the SC, ch 1, and SC3tog from previous row. Yarn over, draw through all four loops on hook (SC3tog made). Ch 1. *SC3tog, ch 1 (beginning your next SC3tog in the same st as the last SC3tog just ended). Repeat from * to end of this side. Work 1 SC in the same st as the last SC3tog just ended). (19 SC3tog + 1 SC for this side of row)
Sl st to beginning ch space (where your first stitch marker is).
R3-6: Repeat R2. (19 SC3tog + 1 SC for each side of row)
Using color B (shown as white):
R7-8: Repeat R2. (19 SC3tog + 1 SC for each side of row)
Using color C (shown as tan):
R9-12: Repeat R2. (19 SC3tog + 1 SC for each side of row)
Using color B (shown as white):
R13-14: Repeat R2. (19 SC3tog + 1 SC for each side of row)
Using color A (shown as charcoal):
R15-18: Repeat R2. (19 SC3tog + 1 SC for each side of row)
Flap
R19: Ch 2. Turn. Move stitch marker to this ch 2 space. Work your first SC3tog by drawing up a loop in the SC, ch 1, and SC3tog from previous row. Yarn over, draw through all four loops on hook (SC3tog made). Ch 1. *SC3tog, ch 1 (beginning your next SC3tog in the same st as the last SC3tog just ended). Repeat from * to end of this side. Work 1 SC in marked st from previous row. (19 SC3tog + 1 SC for this side of row)
Do not continue around to the other side.
R20-26: Repeat R19. (19 SC3tog + 1 SC)
Using color B (shown as white):
R27-28: Repeat R19. (19 SC3tog + 1 SC)
Using color C (shown as tan):
R29-32: Repeat R19. (19 SC3tog + 1 SC)
Using color B (shown as white):
R33-34: Repeat R19. (19 SC3tog + 1 SC)
Fasten off.
Weave in ends.
FINISHING
Closure
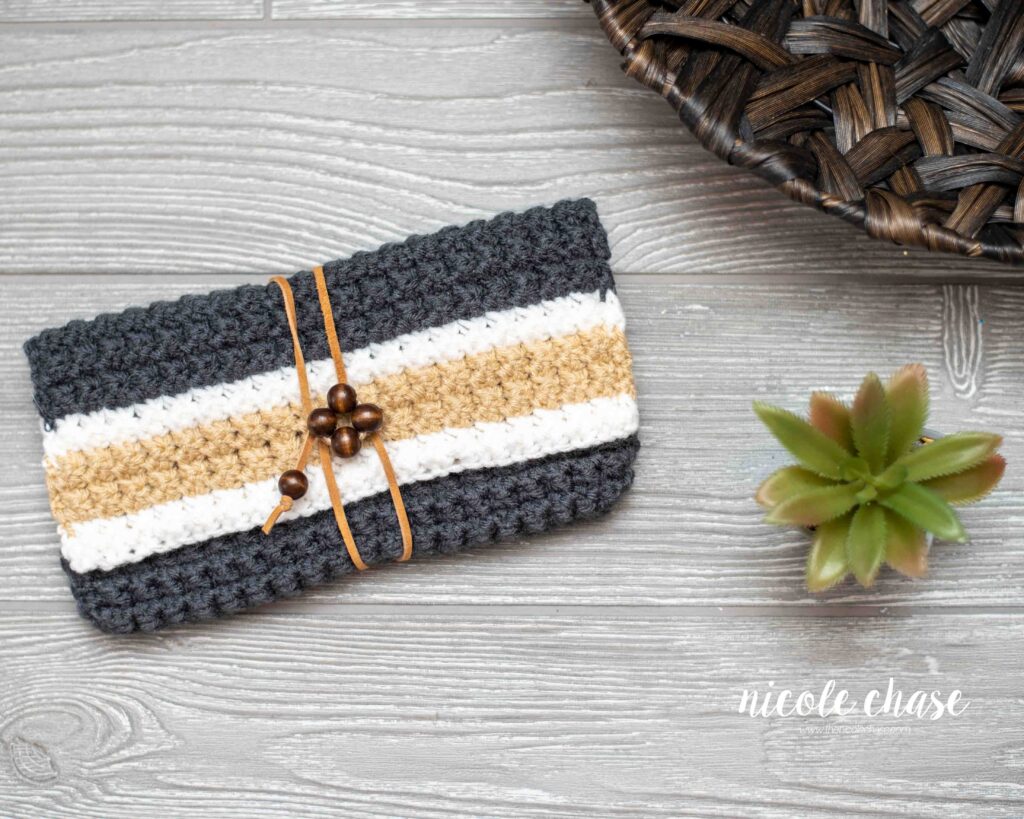
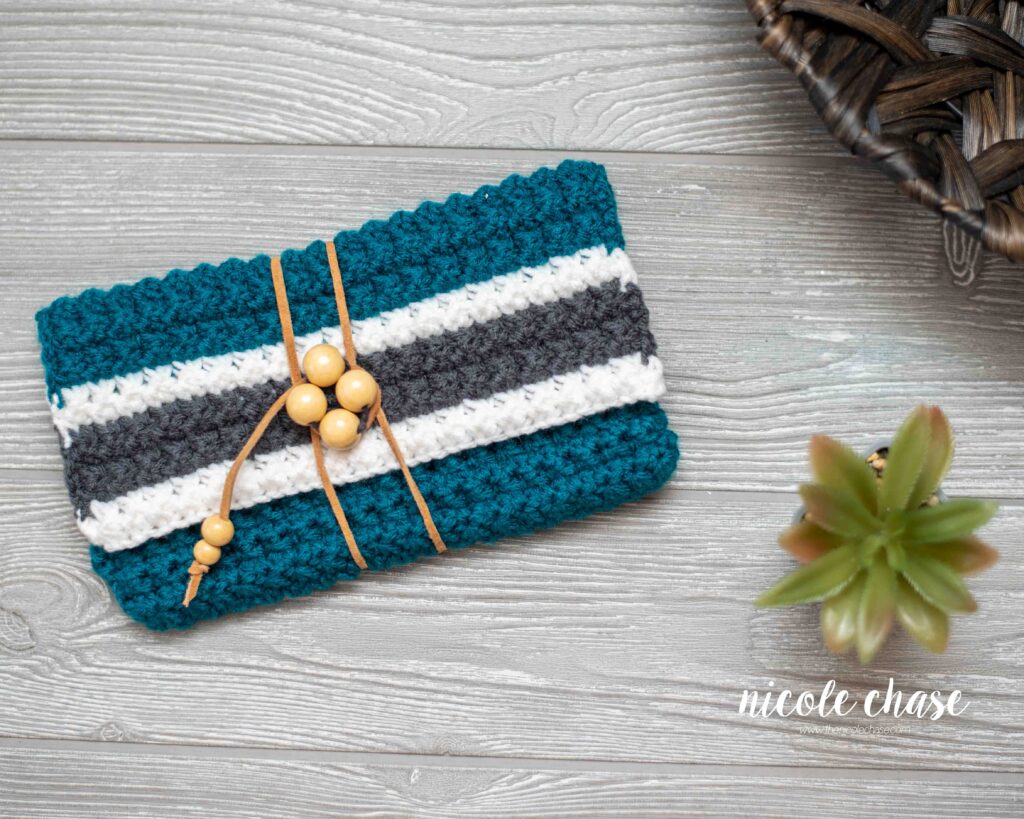
Thread four beads together (as pictured), or use a large button, to create the closure for your clutch. Sew the closure to the center of R30-31 of the flap.
Using leather cord (as pictured), or other material of your choosing, attach to your closure. Ensure that your cord is long enough to wrap around your clutch twice, and then around the beads/button to secure your clutch closed.
TUTORIAL PHOTOS
R1 (First Side)
R1 (Second Side)
R2 (First Side)
R2 (Second Side)
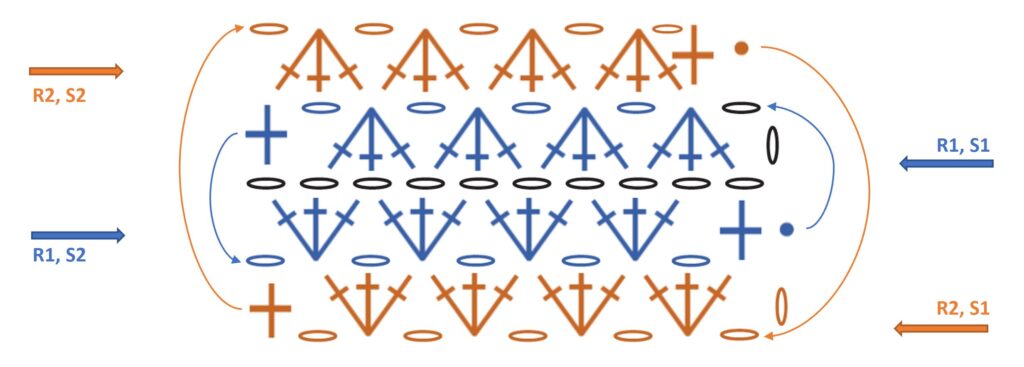
STITCH DIAGRAM
Starting with your beginning chains (black), below you will see a stitch diagram for both sides of R1 (blue), and both sides of R2 (orange).
If you’ve enjoyed this pattern, be sure to subscribe to my email newsletter so that you never miss a pattern release, and have subscriber only access to exclusive discount codes, offers, and freebies!
Thanks for stopping by! Happy crafting!
Nicole
PATTERN COPYRIGHT © 2026 NICOLE CHASE. ALL RIGHTS RESERVED.
PATTERN MAY NOT BE ALTERED, COPIED, REDISTRIBUTED OR SOLD AS YOUR OWN PATTERN.
YOU MAY SELL THE FINISHED PRODUCT ON A SMALL SCALE. PATTERN/DESIGN CREDIT GIVEN TO WWW.THENICOLECHASE.COM IS APPRECIATED. PERMISSION TO SELL DOES NOT INCLUDE MASS PRODUCTION. LARGE SCALE PRODUCTION IS PROHIBITED.
PHOTOGRAPHY COPYRIGHT © 2026 NICOLE CHASE. ALL RIGHTS RESERVED.
PHOTOS MAY NOT BE ALTERED, COPIED, REDISTRIBUTED OR SOLD AS YOUR OWN.
This post may contain affiliate links. If you make a purchase through links on our site, we may earn a commission.
Super cute clutch! Another great pattern! Blessings, light, and love to you and yours. Good health to us all!
Thanks so much Meghan! I hope you are well!