Sweet Cupcake Hat – Free Crochet Pattern
This post may contain affiliate links. If you make a purchase through links on our site, we may earn a commission.
*** I hope you enjoy this free crochet pattern (0-3 month size) available here on my blog! An ad-free, formatted PDF version of this crochet pattern is also available for purchase at the buttons below. The PDF includes the full range of sizes including 0-3 months, 3-6 months, 6-12 months, toddler, child, teen, and adult.
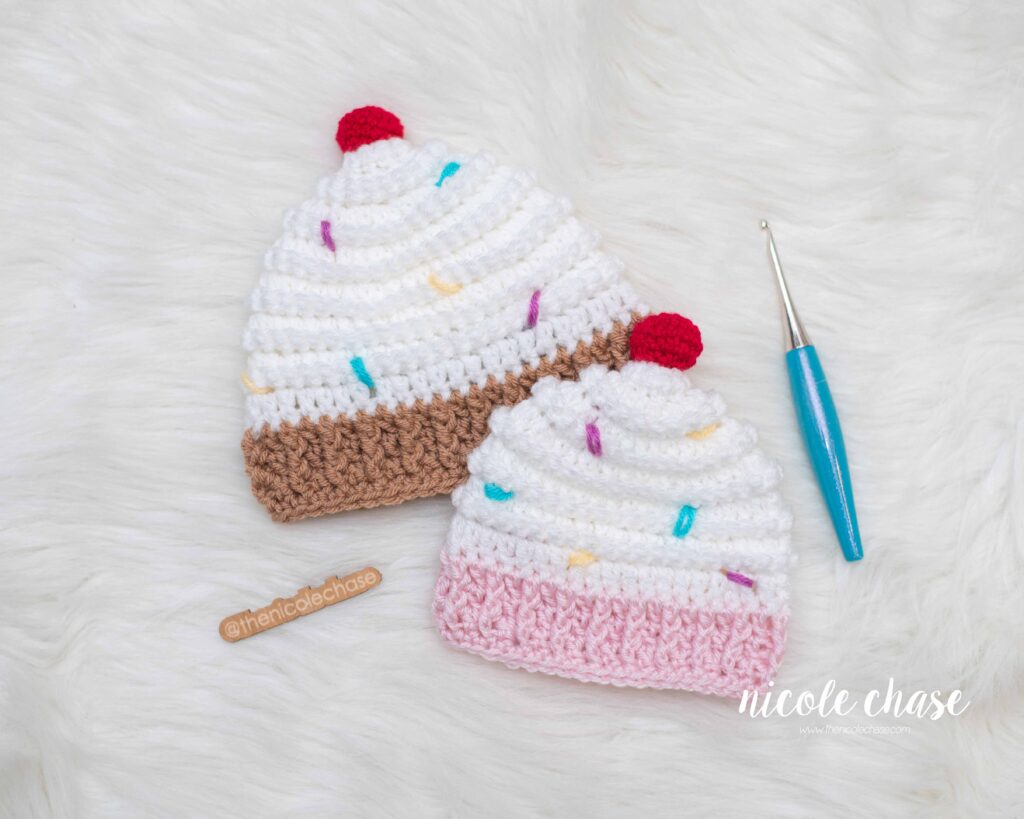
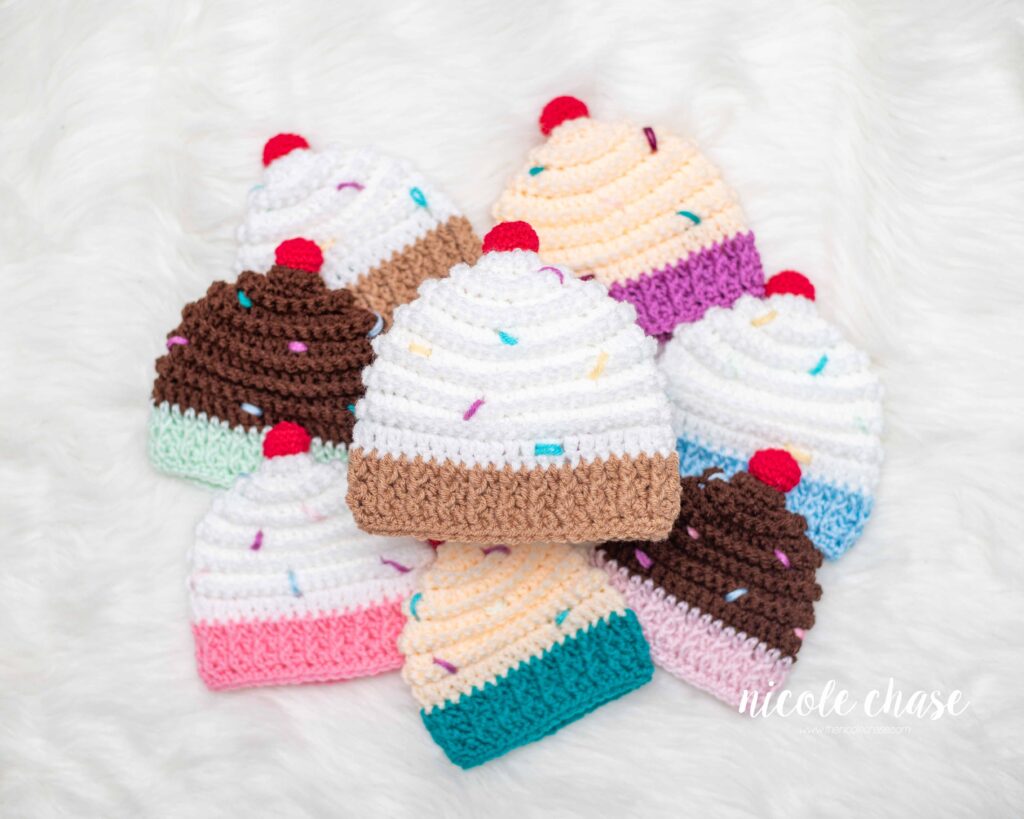
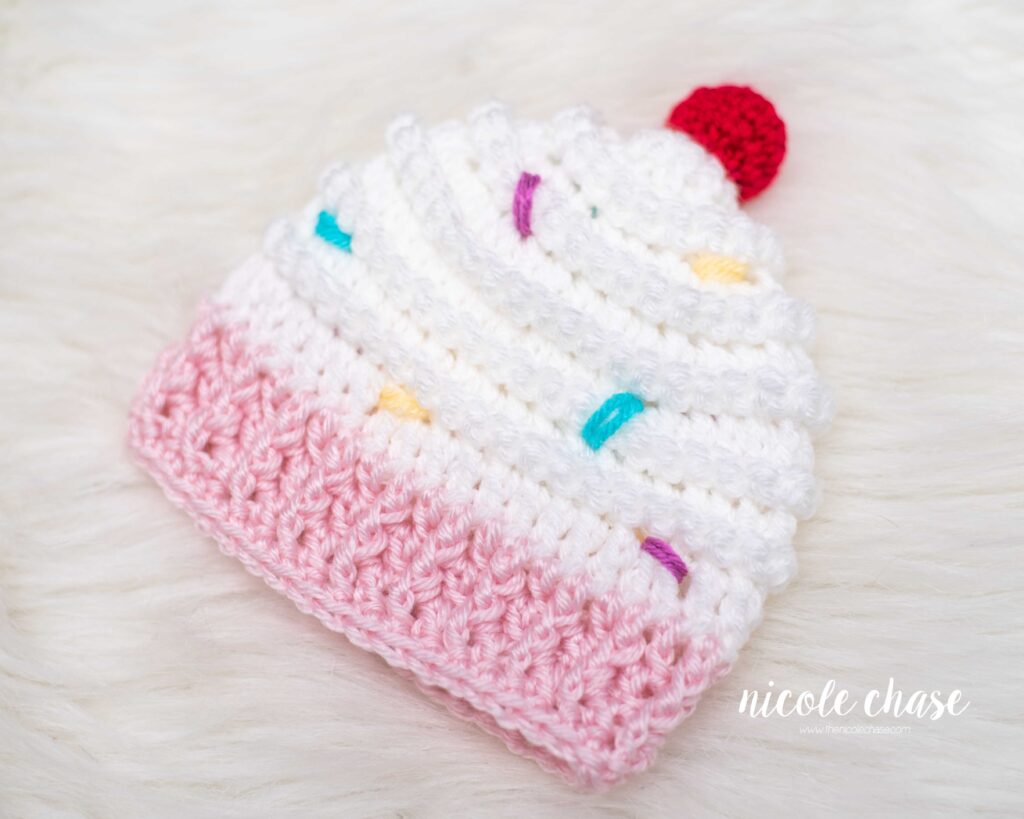
In my book, there are very few things that are better than yarn. There isn’t much that beats cupcakes either. So what could be better than a cute little crochet cupcake hat! Gluten free, sugar free, and no sacrifice in the sweetness!
You’ll find the 0-3 month size for free here on my blog, which is great for a newborn or baby shower gift. The larger sizes are also available in the PDF pattern, linked above.
I have used several different yarns when making this cupcake hat crochet pattern, including: Red Heart Super Saver, WeCrochet Brava Worsted and WeCrochet Mighty Stitch, but this crochet pattern works up great in nearly any worsted/medium weight yarn. You’ll need a few different colors of yarn: for the icing, wrapper (bottom of the cupcake), cherry, and sprinkles. You’ll also need a 5.5mm (I) crochet hook for the hat, 4.0mm (G) crochet hook for the cherry, tapestry needle/yarn needle, scissors, and a very small amount of poly-fil stuffing. You can find all of these over on my Amazon page here.

Don’t forget to save this pattern in your favorites and add it to your project queue to save it for later! View this pattern on Ravelry here.
I’d love to see what you make with this tutorial! Don’t forget to share a photo of your finished work in your Ravelry projects and my Facebook group!

Sweet Cupcake Hat

PATTERN SPECIFICS
Size: 0-3 Months (full range of sizes available in PDF download for purchase)
Gauge: 2” = 4 DC rows and 7 DC sts (See approximate circumference / length for each size)
Hook Size: 5.5mm (I), 4.0mm (G)
Other Tools: tapestry needle, stitch markers, scissors
Yarn Weight: Medium (4), Worsted
Yarn Used: WeCrochet / Knit Picks Brava Worsted
Other Materials: poly-fil stuffing
ABBREVIATIONS
st = stitch
sl st = slip stitch
ch = chain
DC = double crochet
SC = single crochet
FPDC = front post double crochet
SC2tog = single crochet 2 stitches together (invisible decrease is recommended)
SPECIAL STITCHES
SC2tog (using invisible decrease method): Insert hook into front loop of the first stitch. Insert hook into front loop of second stitch. Yarn over. Draw through the first two loops on hook. Yarn over. Draw through both loops on hook.
NOTES
- Chain 2 at the beginning of a round does NOT count as a stitch (unless otherwise specified).
- Each round of the hat base (white) is worked in two parts. See tutorial photos.
- Do not join at the end of each round (unless otherwise specified).
- Approximate circumference for each size is the measurement
that your band should comfortably stretch to (the actual length of your band will be shorter).
- Cherry is worked in the round. Use a stitch marker to indicate the beginning of each round. Stuff cherry as you work before closing.
PATTERN
Size: 0-3 Months
Approx. circumference: 13 inches / Approx. length: 5 inches
Using 5.5mm (I) hook:
Using color A (icing):
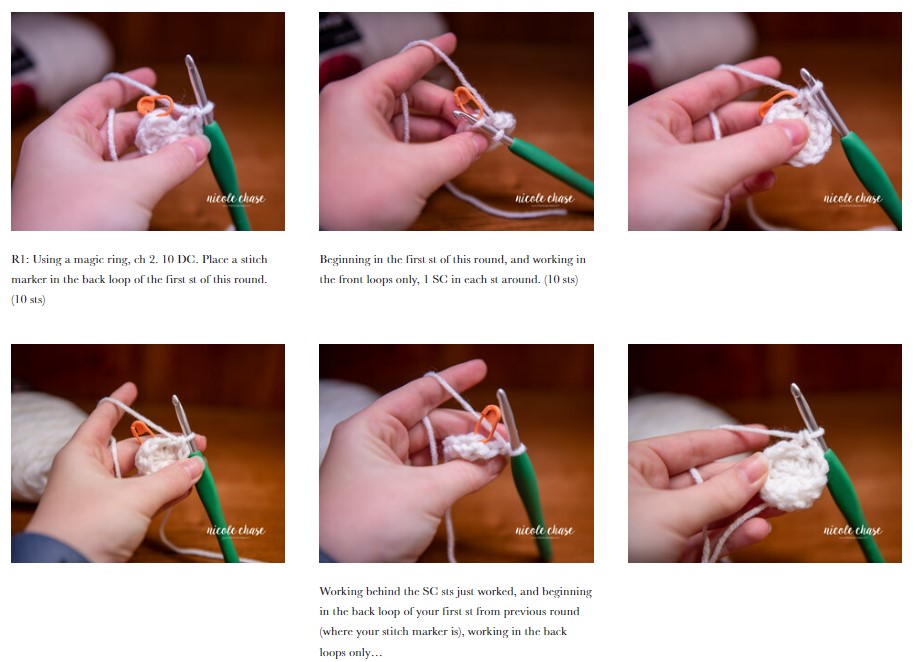
R1: Using a magic ring, ch 2. 10 DC. Place a stitch marker in back loop of the first st of this round. (10 sts)
Beginning in the first st of this round, and working in the front loops only, 1 SC in each st around. (10 sts)
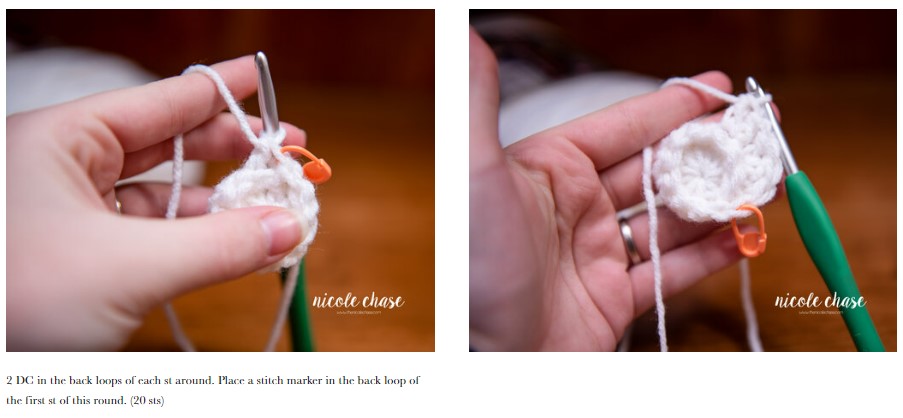
R2: Working behind the SC sts just worked, and beginning in the back loop of your first st from previous round (where your stitch marker is), working in the back loops only, 2 DC in the back loops of each st around. Place a stitch marker in the back loop of the first st of this round. (20 sts)
Beginning in the first st of this round, and working in the front loops only, 1 SC in each st around. (20 sts)
R3: Working behind the SC sts just worked, and beginning in the back loop of your first st from previous round (where your stitch marker is), working in the back loops only, 2 DC in next st, 1 DC in next st. Repeat around. Place a stitch marker in the back loop of the first st of this round. (30 sts)
Beginning in the first st of this round, and working in the front loops only, 1 SC in each st around. (30 sts)
R4: Working behind the SC sts just worked, and beginning in the back loops of your first st from previous round (where your stitch marker is), working in the back loops only, 2 DC in next st, 1 DC in each of the next 5 sts. Repeat around. Place a stitch marker in the back loop of the first st of this round. (35 sts)
Beginning in the first st of this round, and working in the front loops only, 1 SC in each st around (35 sts)
R5: Working behind the SC sts just worked, and beginning in the back loops of your first st from previous round (where your stitch marker is), working in the back loops only, 1 DC in each st around. Place a stitch marker in the back loop of the first st of this round. (35 sts)
Beginning in the first st of this round, and working in the front loops only, 1 SC in each st around. (35 sts)
R6: Working behind the SC sts just worked, and beginning in the back loop of your first st from previous round (where your stitch marker is), working in back loops only, 1 DC in each st around. Join with a sl st to beginning. (35 sts)
Using color B (wrapper):
R7: Ch 2. Working in both loops, 1 DC in each st around. Join with a sl st to beginning. (35 sts)
R8-9: Ch 2. 1 FPDC in next st, 1 DC in next st. Repeat around. Join with a sl st to beginning. (35 sts)
R10: Ch 1. SC in each st around. Join with a sl st to beginning. (35 sts)
Fasten off. Weave in ends.
Move to Cherry instructions.
Cherry (Small)
Using 4.0mm (G) hook:
R1: Begin with 6 SC sts in a magic ring. (6 sts)
R2: 2 SC in each st around. (12 sts)
R3: 2 SC in next st, 1 SC in next st. Repeat around. (18 sts)
R4: 1 SC in each st around. (18 sts)
R5: SC2tog, 1 SC in next st. Repeat around. (12 sts)
R6: SC2tog. Repeat around. (6 sts)
Weave in and out of remaining stitches and pull tight to close. Leave long tail for sewing. Fasten off.
Move to Finishing instructions.
FINISHING
Attach cherry to the top of the hat.
Sprinkles
Using various colors, embroider sprinkles through the cream base of the hat.
TUTORIAL PHOTOS
If you’ve enjoyed this pattern, be sure to subscribe to my email newsletter so that you never miss a pattern release, and have subscriber only access to exclusive discount codes, offers, and freebies!
Thanks for stopping by! Happy crafting!
Nicole
PATTERN COPYRIGHT © 2026 NICOLE CHASE. ALL RIGHTS RESERVED.
PATTERN MAY NOT BE ALTERED, COPIED, REDISTRIBUTED OR SOLD AS YOUR OWN PATTERN.
YOU MAY SELL THE FINISHED PRODUCT ON A SMALL SCALE. PATTERN/DESIGN CREDIT GIVEN TO WWW.THENICOLECHASE.COM IS APPRECIATED. PERMISSION TO SELL DOES NOT INCLUDE MASS PRODUCTION. LARGE SCALE PRODUCTION IS PROHIBITED.
PHOTOGRAPHY COPYRIGHT © 2026 NICOLE CHASE. ALL RIGHTS RESERVED.
PHOTOS MAY NOT BE ALTERED, COPIED, REDISTRIBUTED OR SOLD AS YOUR OWN.
This post may contain affiliate links. If you make a purchase through links on our site, we may earn a commission.